(Ubuntu: Lesson 14)
{ Installing and Testing PortSentry against NMAP }
| Section 0. Background Information |
- What is PortSentry
- PortSentry is part of the Abacus Project suite of security tools. It is a program designed to detect and respond to port scans against a target host in real-time.
- PortSentry will detect SYN/half-open, FIN, NULL, X-MAS and oddball packet stealth scans.
- PortSentry has an internal state engine to remember hosts that connected previously. This allows the setting of a trigger value to prevent false alarms and detect "random" port probing. PortSentry will report all violations to the local or remote syslog daemons indicating the system name, time of attack, attacking host IP and the TCP or UDP port a connection attempt was made to. Once a scan is detected your system will turn into a blackhole and disappear from the attacker.
- Prerequisite
- Ubuntu: Lesson 1: Installing Ubuntu Desktop 12.04 LTS
- BackTrack: Lesson 1: Installing BackTrack 5 R1
-
Lab Notes
- In this lab we will how to do the following:
- We will install PortSentry on Ubuntu.
- We will test NMAP on an un-configured PortSentry
- We will configure PortSentry.
- We will test NMAP on a configured PortSentry
- We will show you how to unblock an attacker.
- In this lab we will how to do the following:
- Legal Disclaimer
- As a condition of your use of this Web site, you warrant to computersecuritystudent.com that you will not use this Web site for any purpose that is unlawful or that is prohibited by these terms, conditions, and notices.
- In accordance with UCC § 2-316, this product is provided with "no warranties, either express or implied." The information contained is provided "as-is", with "no guarantee of merchantability."
- In addition, this is a teaching website that does not condone malicious behavior of any kind.
- You are on notice, that continuing and/or using this lab outside your "own" test environment is considered malicious and is against the law.
- © 2012 No content replication of any kind is allowed without express written permission.
| Section 1: Start Ubuntu 12.04 |
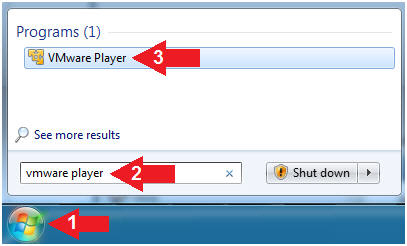
- Start VMware Player
- Instructions
- For Windows 7
- Click Start Button
- Search for "vmware player"
- Click VMware Player
- For Windows XP
- Starts --> Programs --> VMware Player
- For Windows 7
- Instructions
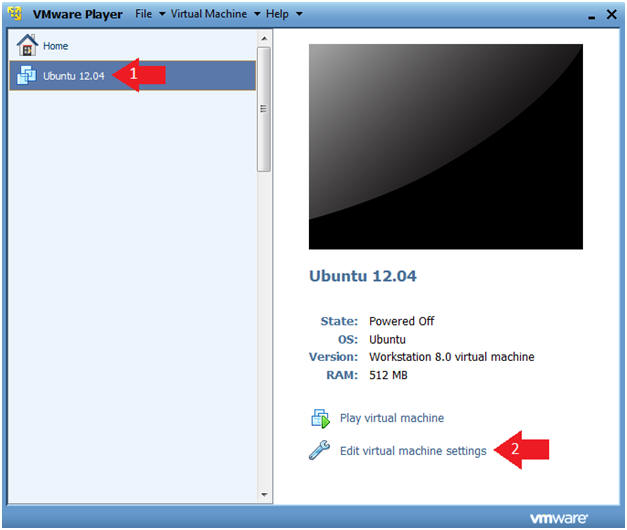
- Verify Virtual Machine Settings.
- Instructions
- Click on Ubuntu 12.04
- Click on Edit virtual machine settings
- Instructions
- Configure Network Adapter
- Instructions
- Click on Network Adapter
- Click on the Bridged Radio Button
- Click on the Close Button
- Instructions
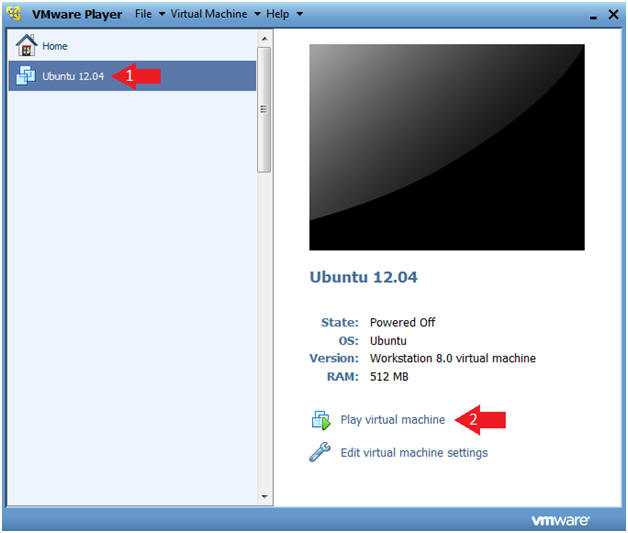
- Start the Ubuntu 12.04 VM
- Instructions
- Click on Ubuntu 12.04
- Click on Play virtual machine
- Instructions

| Section 2: Login to Ubuntu |
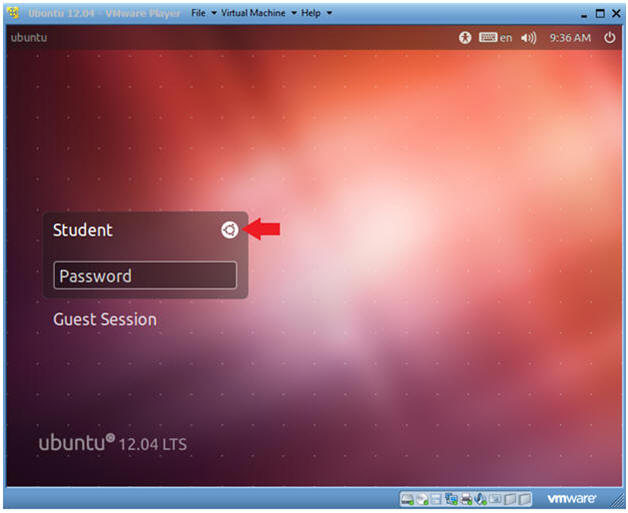
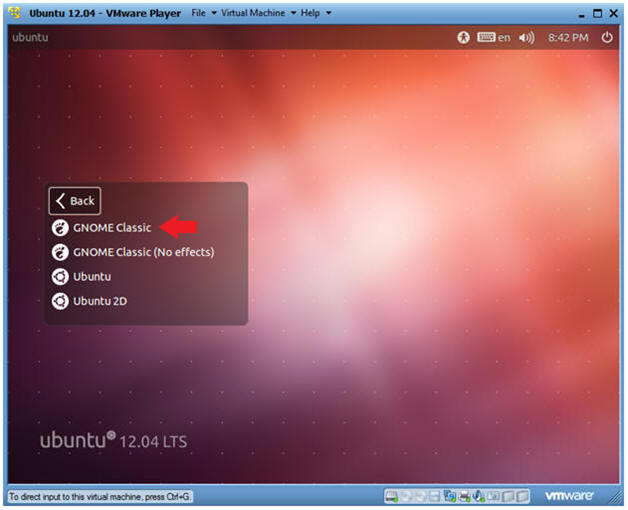
- Change to Gnome Classic
- Instructions:
- Click on the Circle
- Instructions:
- Select Gnome Classic
- Instructions:
- Double Click on GNOME Classic
- Instructions:
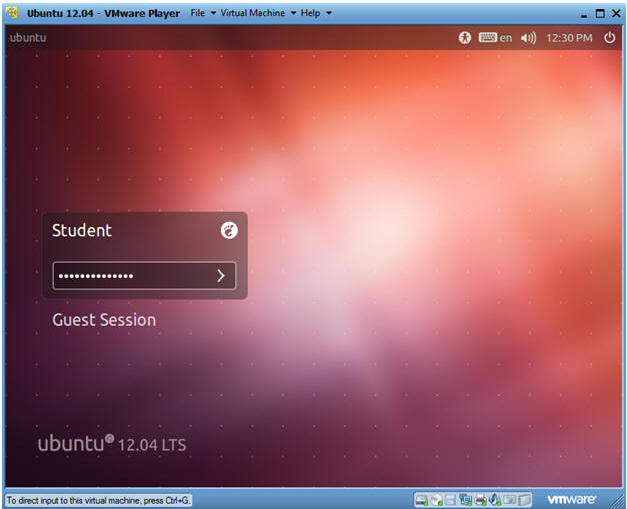
- Login to Server
- Instructions
- User: Student
- Password: Please supply the student password.
- Instructions
| Section 3: Become Root and Verify Network Connection |
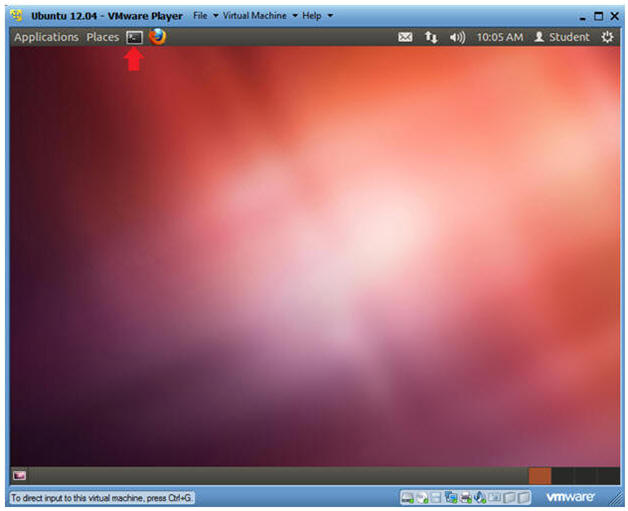
- Start up a Terminal
- Instructions
- Click on the Terminal
- Instructions
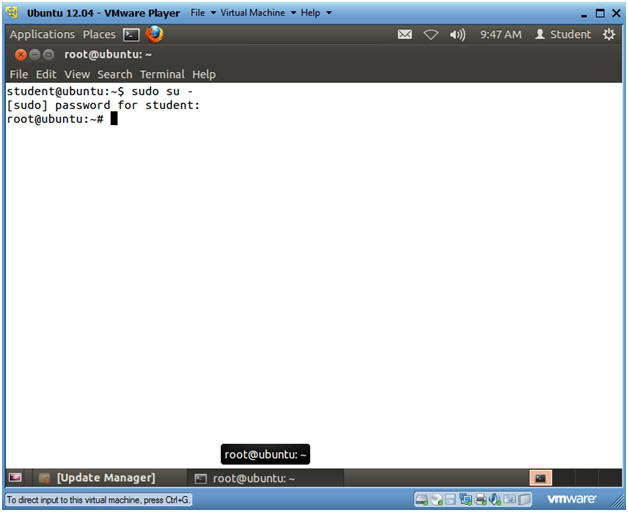
- Become Root
- Instructions
- sudo su -
- Supply the student password.
- Instructions
- Verify you have a network connection
- Instructions
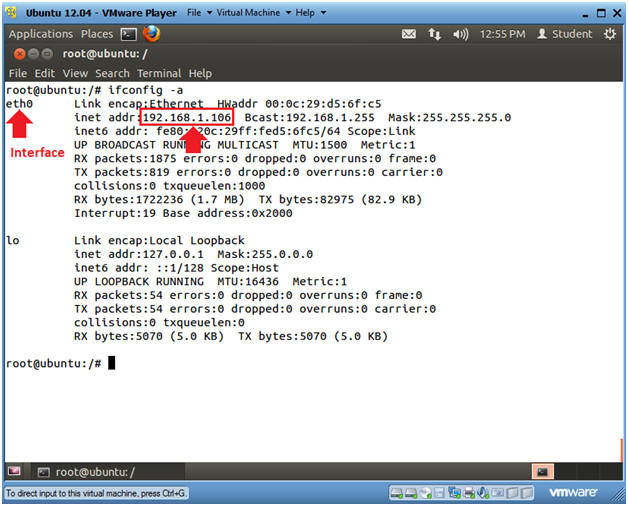
- ifconfig -a
- eth0 is the name of my interface.
- 192.168.1.104 is my network IP address.
- ifconfig -a
- Note(FYI):
- If you do not have an DHCP IP Address
try the following:
- dhclient
- OR
- /etc/init.d/networking restart
- dhclient
- If you do not have an DHCP IP Address
try the following:
- Instructions
| Section 3: Update apt-get's package index |
- Update apt-get's package index
- Instructions
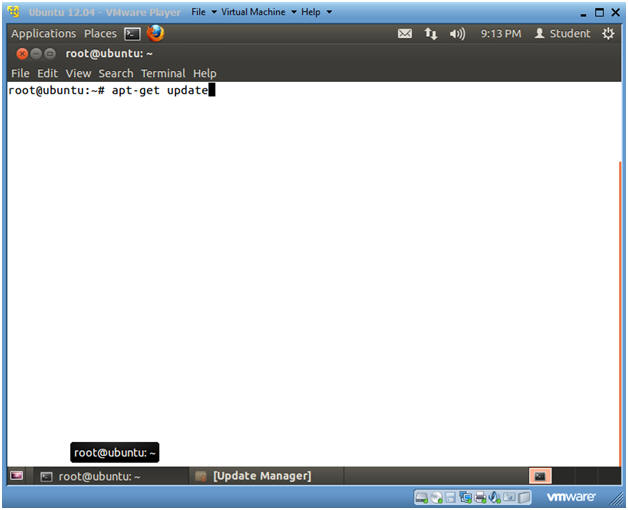
- apt-get update
- Note(FYI):
- update is used to resynchronize the package index files from their sources. I.e., The "update" flag updates apt-get's local database with debian server's pkglist files. The indexes of available packages are fetched from the location(s) specified in /etc/apt/sources.list.
- Instructions
| Section 4: Search for portsentry |
- Search for portsentry
- Instructions
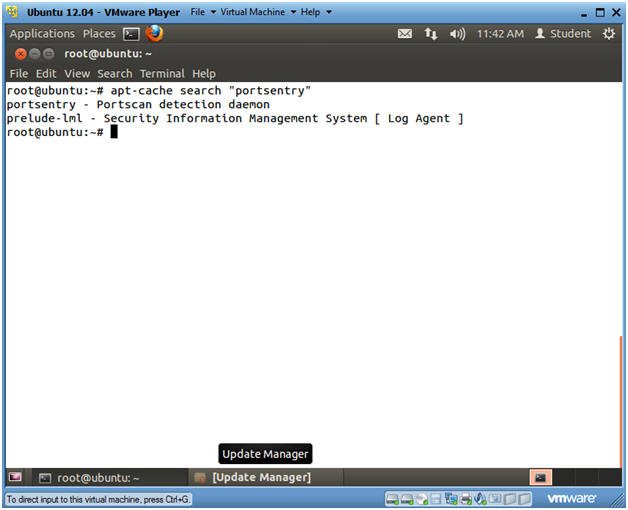
- apt-cache search portsentry
- Note(FYI):
- apt-cache is a command to manipulate and obtain information from the ubuntu packages.
- Instructions
| Section 5: Install portsentry |
- Install portsentry
- Instructions
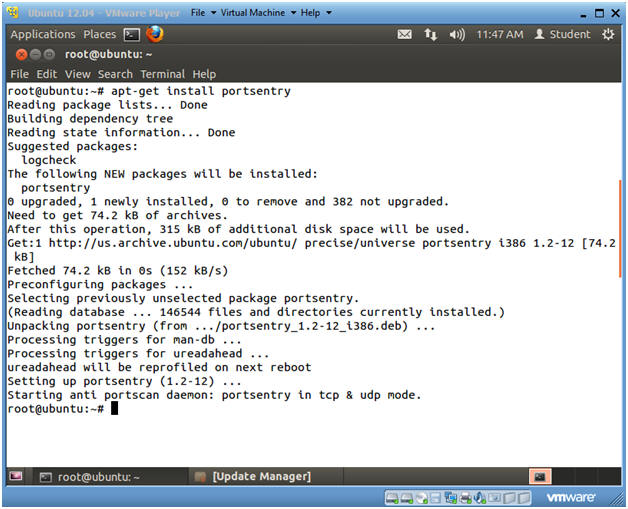
- apt-get install portsentry
- Instructions
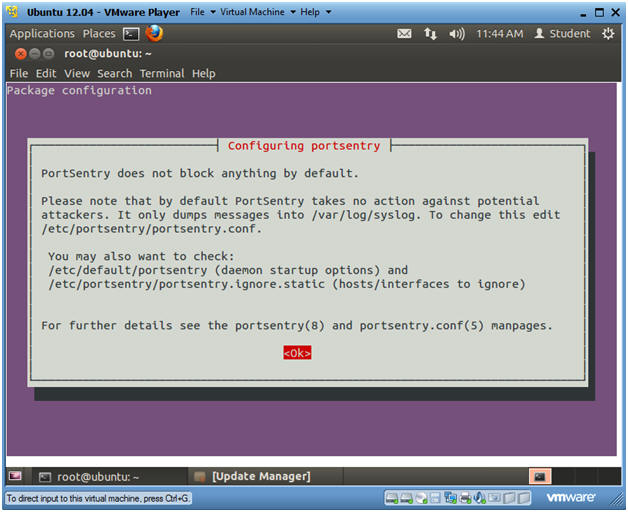
- PortSentry Informational
- Note(FYI):
- PortSentry does not block anything by default.
- Messages are dumped into /var/log/syslog.
- We will use the /etc/portsentry/portsentry.conf to configure PortSentry.
- Instructions
- Press <Enter>
- Note(FYI):
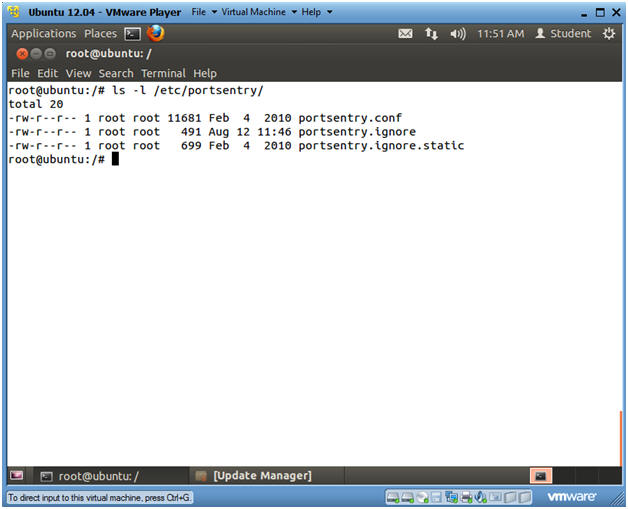
- View PortSentry configuration files
- Instructions
- ls -l /etc/portsentry/
- Note(FYI):
- portsentry.conf
- This is the PortSentry configuration file.
- portsentry.ignore
- This file contains a list of IP addresses that PortSentry should ignore if it connects to a monitored port.
- portsentry.ignore.static
- If you use the /etc/init.d/portsentry script to start the daemon, portsentry.ignore is rebuild on each start of the daemon using portsentry.ignore.static and all the IP addresses found on the machine via ifconfig.
- portsentry.conf
- Instructions
- View PortSentry Message in /var/log/syslog
- Instructions
- grep portsentry /var/log/syslog
- Note(FYI):
- Right after PortSentry is installed, notice starts listening (i.e., monitoring) on various TCP and UDP ports.
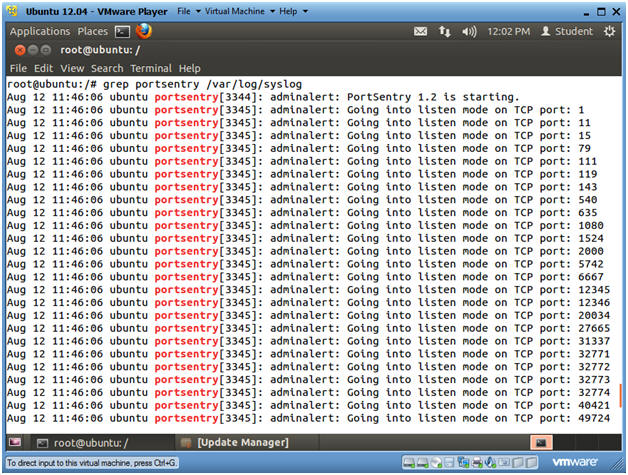
- Instructions
| Section 6: Startup Script for PortSentry |
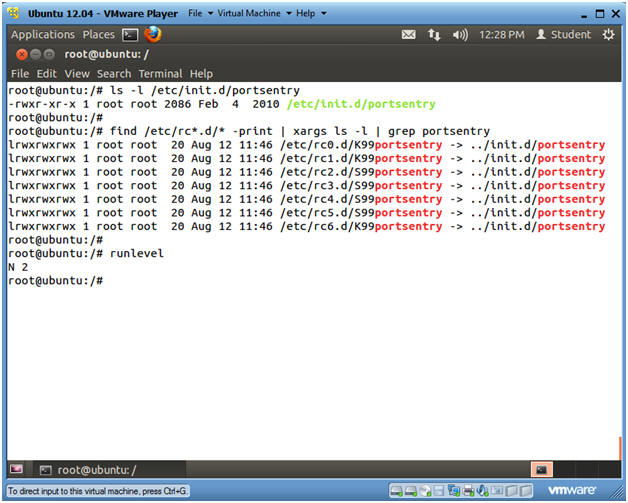
- Startup Script for PortSentry
- Instructions
- ls -l /etc/init.d/portsentry
- As part of the portsentry installation, the portsentry startup script is placed in /etc/init.d/portsentry.
- find /etc/rc*.d/* -print | xargs ls -l
| grep portsentry
- Identifies start up and kill scripts for portsentry.
- runlevel
- Identifies the current run level.
- 0 System Halt
- 1 Single user
- 2 Full multi-user mode (Default)
- 3-5 Same as 2
- 6 System Reboot
- Identifies the current run level.
- ls -l /etc/init.d/portsentry
- Instructions
- Stopping and Starting PortSentry with /etc/init.d/portsentry
- Instructions
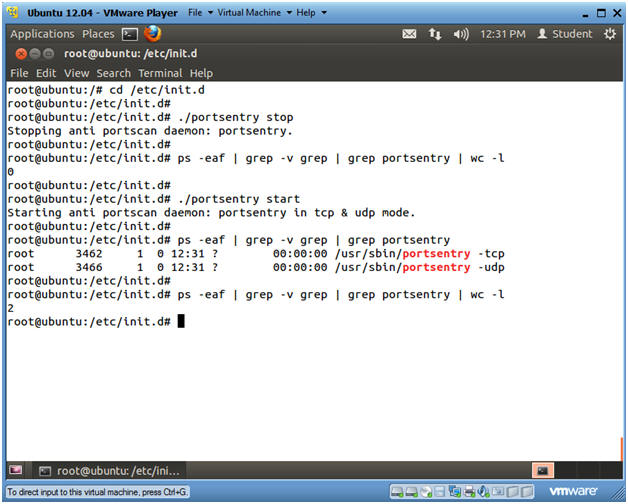
- cd /etc/init.d
- ./portsentry stop
- ps -eaf | grep -v grep | grep
portsentry | wc -l
- Notice, that 0 is returned, because portsentry is not running.
- ./portsentry start
- ps -eaf | grep -v grep | grep
portsentry
- Now two lines are returned, because portsentry is running.
- ps -eaf | grep -v grep | grep portsentry | wc -l
- Instructions
- Stopping and Starting PortSentry with the "service"
command
- Instructions
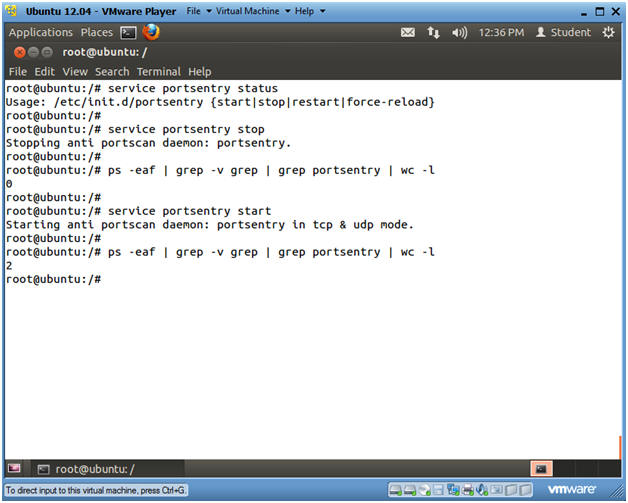
- service portsentry status
- Notice the PortSentry startup script does not have a status option.
- service portsentry stop
- This command will stop the portsentry daemon.
- ps -eaf | grep -v grep | grep
portsentry | wc -l
- wc -l, returns 0 for the number of portsentry processes returned.
- service portsentry start
- This will start the portsentry daemon/service.
- ps -eaf | grep -v grep | grep
portsentry | wc -l
- wc -l, returns 2 for the number of portsentry processes returned. (e.g., TCP and UDP).
- service portsentry status
- Instructions
| Section 7: Configure BackTrack Virtual Machine Settings |
- Open Your VMware Player
- Instructions:
- On Your Host Computer, Go To
- Start --> All Program --> VMWare --> VMWare Player
- Instructions:
- Edit BackTrack Virtual Machine Settings
- Instructions:
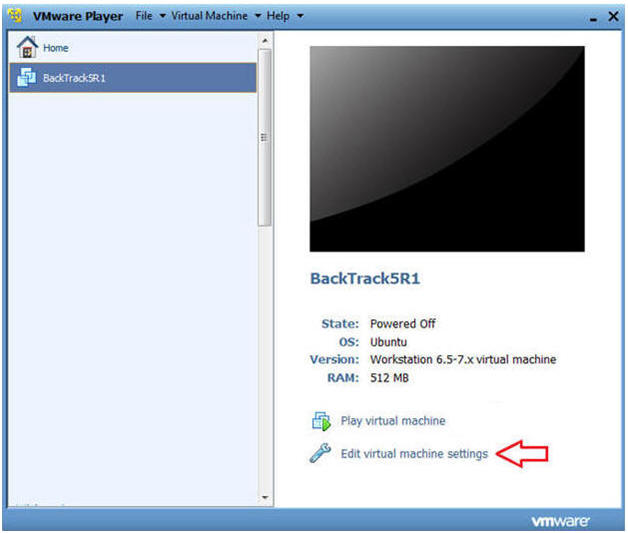
- Highlight BackTrack5R1
- Click Edit virtual machine settings
- Instructions:
- Edit Network Adapter
- Instructions:
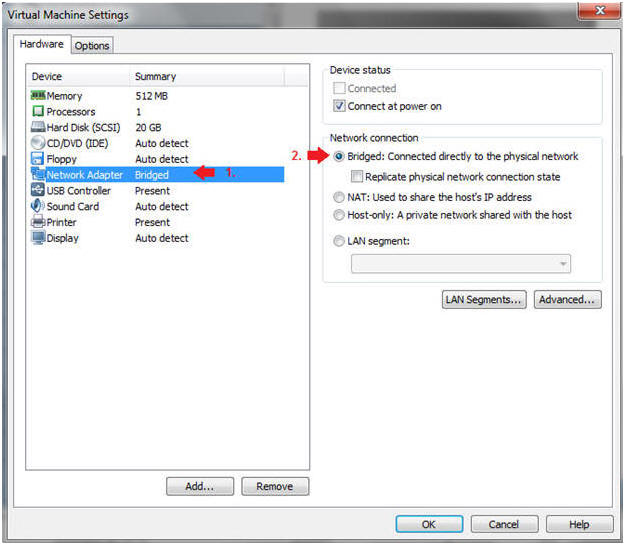
- Highlight Network Adapter
- Select Bridged
- Do not Click on the OK Button.
- Instructions:
| Section 8: Login to BackTrack |
- Start BackTrack VM Instance
- Instructions:
- Start Up VMWare Player
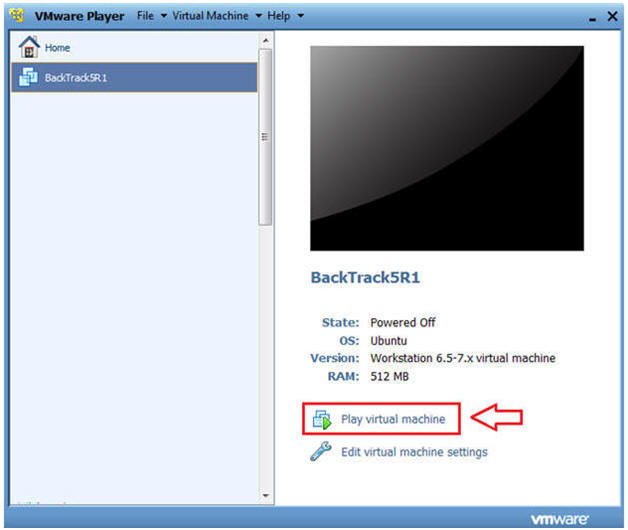
- Select BackTrack5R1
- Play virtual machine
- Instructions:
- Login to BackTrack
- Instructions:
- Login: root
- Password: toor or <whatever you changed it to>.
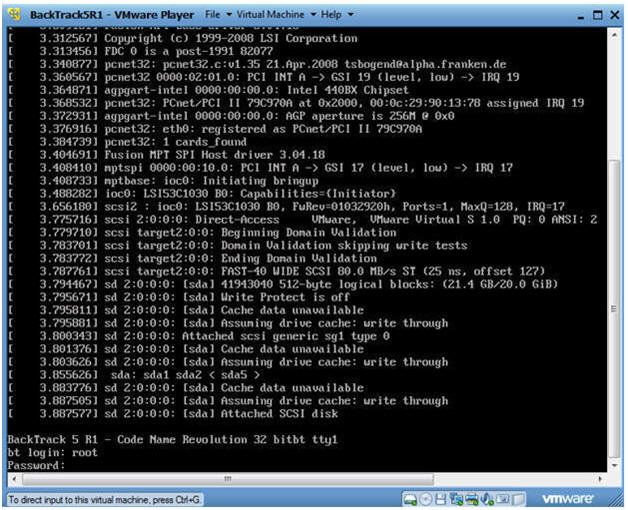
- Instructions:
- Bring up the GNOME
- Instructions:
- Type startx

- Instructions:
| Section 9: Open Console Terminal and Retrieve IP Address |
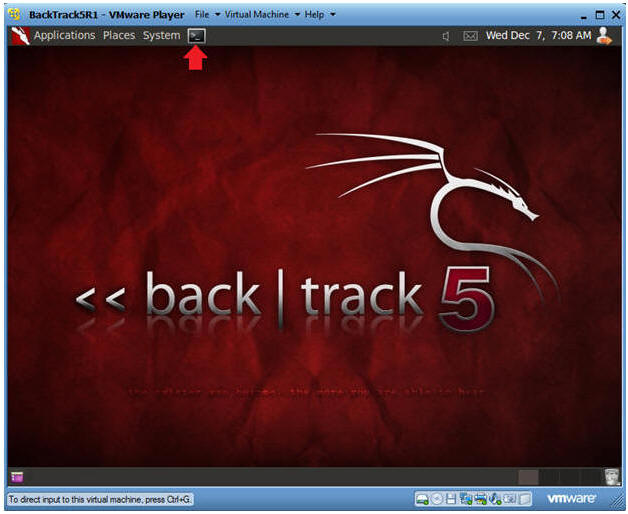
- Open a console terminal
- Instructions:
- Click on the console terminal
- Instructions:
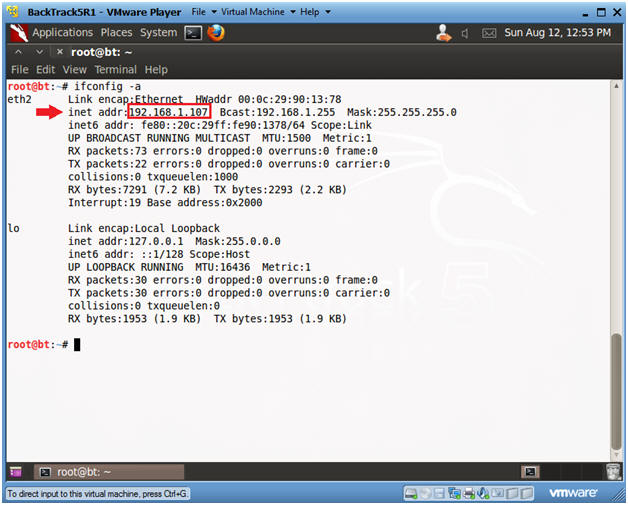
- Get IP Address
- Instructions:
- ifconfig -a
- Note(FYI):
- As indicated below, my IP address is 192.168.1.105.
- Please record your IP address.
- Instructions:
| Section 10: Test NMAP on unconfigured PortSentry |
- Test BackTrack's NMAP on Ubuntu's unconfigured
PortSentry
- Note(FYI):
- Issue the below commands from the BackTrack Terminal.
- Instructions:
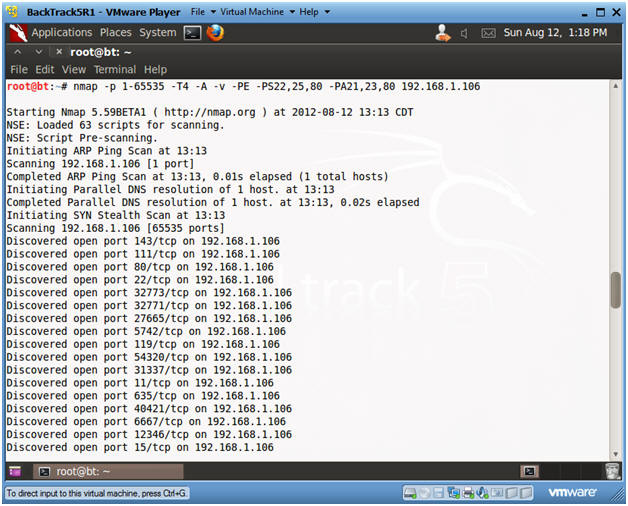
- nmap -p 1-65535 -T4 -A -v -PE
-PS22,25,80 -PA21,23,80
192.168.1.106
- Replace 192.168.1.106 with Ubuntu's IP address you obtained in (Section 3, Step 3).
- nmap -p 1-65535 -T4 -A -v -PE
-PS22,25,80 -PA21,23,80
192.168.1.106
- Note(FYI):
- Check Ubuntu's syslog
- Note(FYI):
- Issue the below commands from the Ubuntu Terminal.
- Instructions:
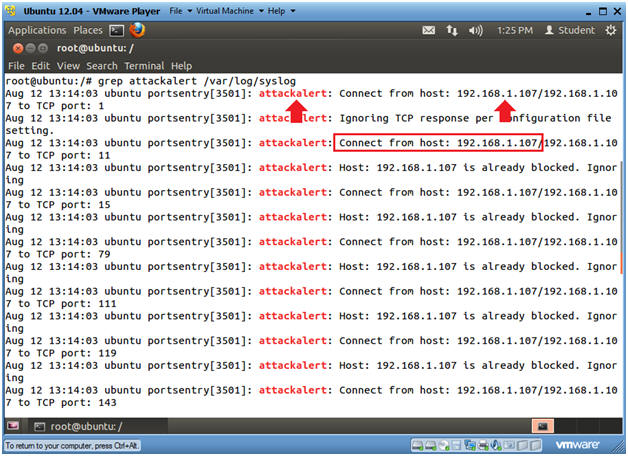
- grep "attackalert" /var/log/syslog
- Now you will see a lot of attackalert coming from BackTrack(192.168.1.107).
- In your case the IP address will be the IP Address Obtained in (Section 9, Step 2).
- grep "attackalert" /var/log/syslog
- Note(FYI):
- Check Ubuntu's syslog
- Note(FYI):
- Issue the below commands from the BackTrack Terminal.
- Instructions:
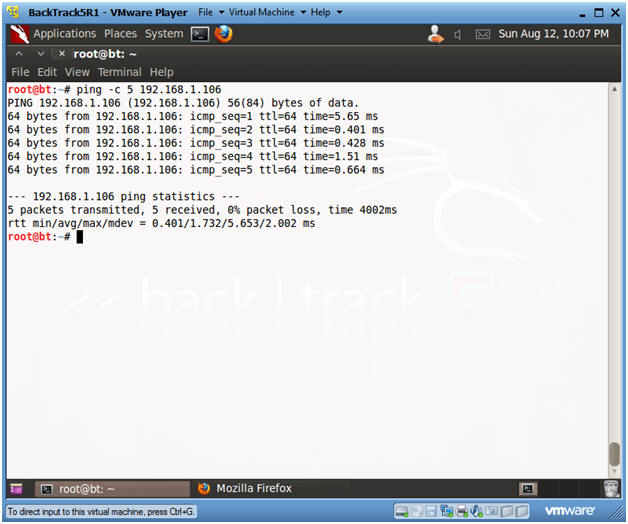
- ping -c 5 192.168.1.106
- Replace 192.168.1.106 with Ubuntu's IP address you obtained in (Section 3, Step 3).
- Notice BackTrack can ping Ubuntu and is not blocked by PortSentry yet.
- ping -c 5 192.168.1.106

- Note(FYI):
| Section 11: Configure PortSentry on Ubuntu |
- Configure PortSentry on Ubuntu
- Note(FYI):
- Issue the below commands from the Ubuntu Terminal.
- Instructions:
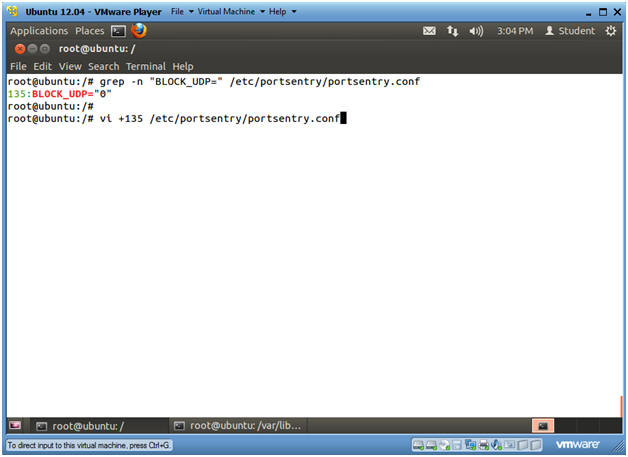
- grep -n "BLOCK_UDP=" /etc/portsentry/portsentry.conf
- This will show you the line number of where "BLOCK_UDP=" exists.
- In my case, the line number is 135.
- vi +135 /etc/portsentry/portsentry.conf
- grep -n "BLOCK_UDP=" /etc/portsentry/portsentry.conf
- Note(FYI):
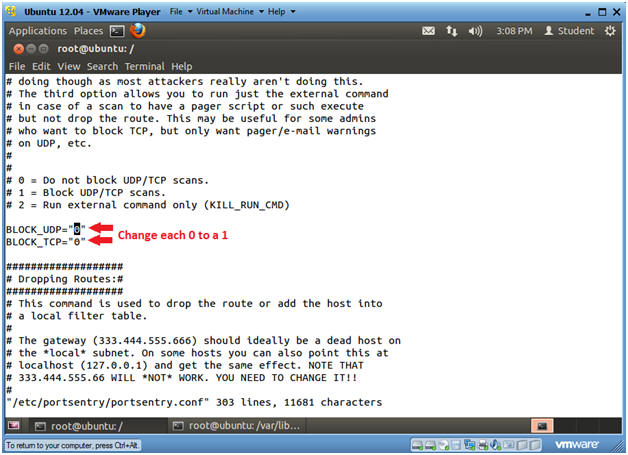
- Configure UDP/TCP Blocking
- Instructions:
- For line, BLOCK_UDP="0", arrow over to the 0 and press the "r" key to replace the 0 with a 1.
- For line, BLOCK_TCP="0", arrow down and over to the 0 and press the "r" key to replace the 0 with a 1.
- Press the <ESC> Key
- Type ":wq!"
- Press <Enter>
- Instructions:
- Restart PortSentry
- Instructions:
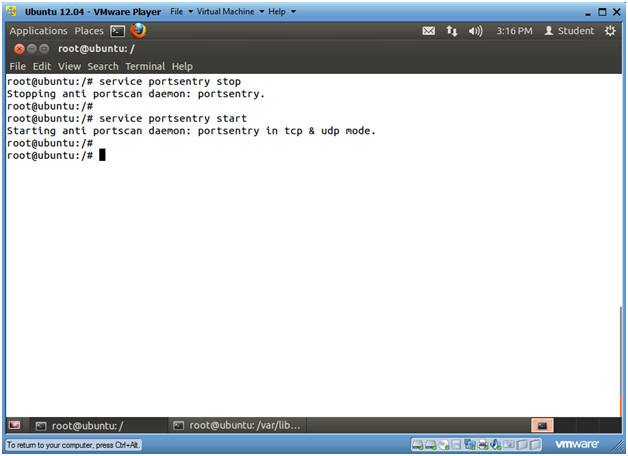
- service portsentry stop
- service portsentry start
- Instructions:
| Section 12: Test NMAP on a configured PortSentry |
- Test BackTrack's NMAP on Ubuntu's unconfigured
PortSentry
- Note(FYI):
- Issue the below commands from the BackTrack Terminal.
- Instructions:
- nmap -p 1-65535 -T4 -A -v -PE
-PS22,25,80 -PA21,23,80
192.168.1.106
- Replace 192.168.1.106 with Ubuntu's IP address you obtained in (Section 3, Step 3).
- nmap -p 1-65535 -T4 -A -v -PE
-PS22,25,80 -PA21,23,80
192.168.1.106
- Note(FYI):
- Tested Blocked Ubuntu Host from BackTrack
- Instructions:
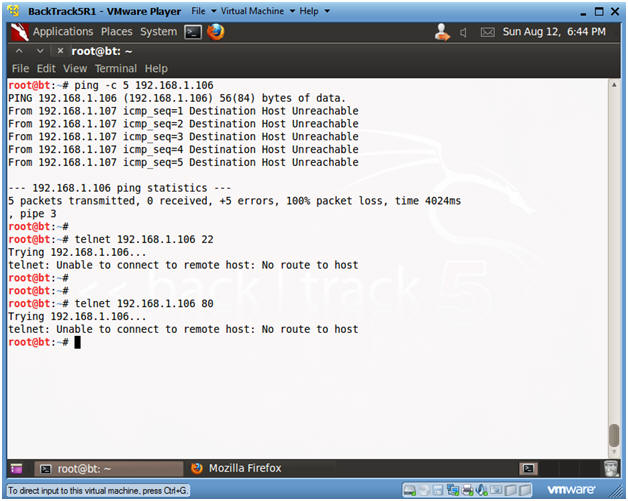
- ping -c 5 192.168.1.106
- Replace 192.168.1.106 with Ubuntu's IP address you obtained in (Section 3, Step 3).
- Notice the Ubuntu host is now unreachable using ICMP.
- telnet 192.168.1.106 22
- Port 22/SSH is blocked.
- telnet 192.168.1.106 80
- Port 80/HTTP is blocked.
- ping -c 5 192.168.1.106
- Instructions:
| Section 13: Analyzing Ubuntu Deny Host Logs |
- Analyzing Ubuntu Deny Host Logs
- Note(FYI):
- Make sure you are on the Ubuntu Server.
- Instructions:
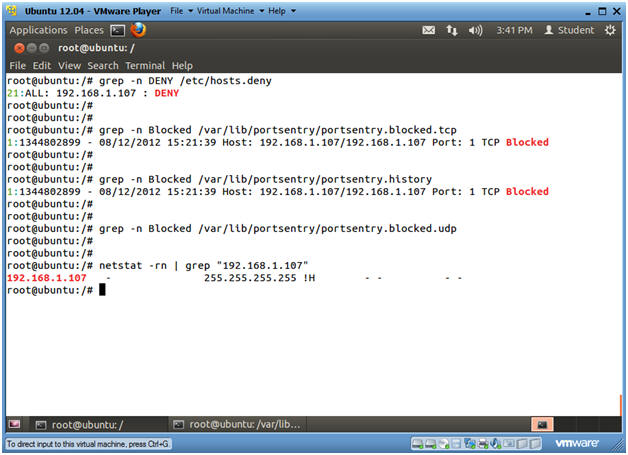
- grep -n DENY /etc/hosts.deny
- Notice that BackTrack's IP Address is blocked.
- This will block SSH connectivity.
- grep -n Blocked /var/lib/portsentry/portsentry.blocked.tcp
- This file shows IP address that have been blocked for TCP scans.
- grep -n Blocked /var/lib/portsentry/portsentry.history
- This file shows IP address that have been blocked for both UDP and TCP scans.
- grep -n Blocked /var/lib/portsentry/portsentry.blocked.udp
- This file shows IP address that have been blocked for UDP scans.
- netstat -rn | grep "192.168.1.107"
- Replace 192.168.1.107 with BackTrack's IP address you obtained in (Section 9, Step 2)
- grep -n DENY /etc/hosts.deny
- Note(FYI):
| Section 14: Unblock BackTrack |
- Stop PortSentry
- Note(FYI):
- Make sure you are on the Ubuntu Server.
- Instructions:
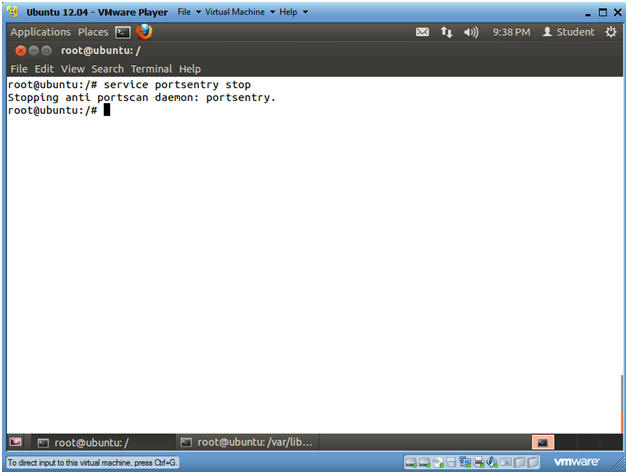
- service portsentry stop
- Note(FYI):
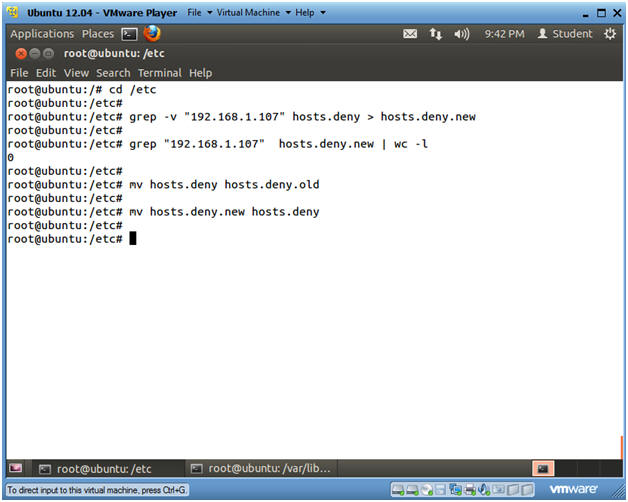
- Scrub the hosts.deny file
- Instructions:
- cd /etc
- grep -v "192.168.1.107"
hosts.deny > hosts.deny.new
- Replace 192.168.1.107 with BackTrack's IP Address obtained in (Section 9, Step 2).
- grep "192.168.1.107"
hosts.deny.new | wc -l
- Replace 192.168.1.107 with BackTrack's IP Address obtained in (Section 9, Step 2).
- mv hosts.deny hosts.deny.old
- mv hosts.deny.new hosts.deny
- Instructions:
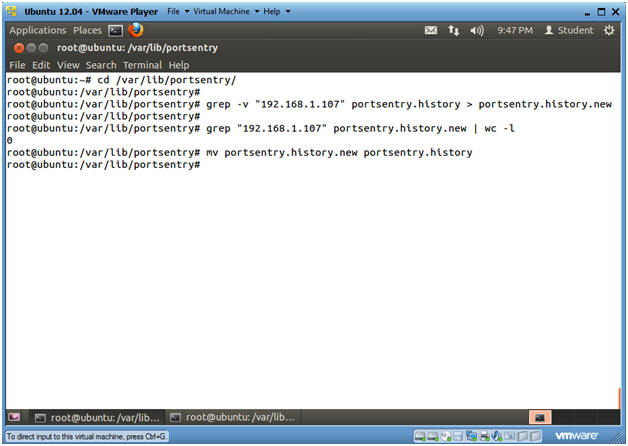
- Scrub the portsentry.history file
- Instructions:
- cd /var/lib/portsentry/
- grep -v "192.168.1.107"
portsentry.history > portsentry.history.new
- Replace 192.168.1.107 with BackTrack's IP Address obtained in (Section 9, Step 2).
- grep "192.168.1.107"
portsentry.history.new | wc -l
- Replace 192.168.1.107 with BackTrack's IP Address obtained in (Section 9, Step 2).
- mv portsentry.history.new portsentry.history
- Instructions:
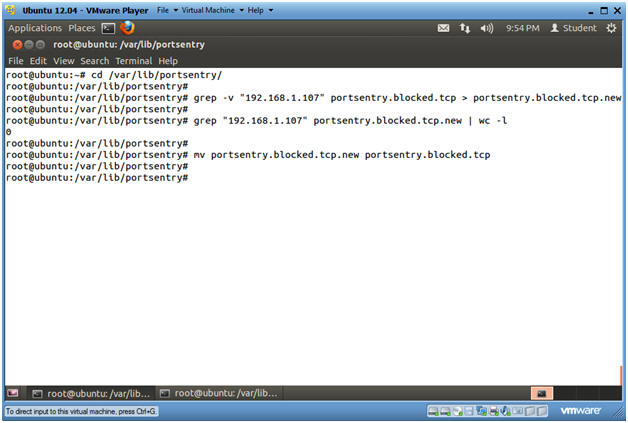
- Scrub the portsentry.blocked.tcp file
- Instructions:
- cd /var/lib/portsentry/
- grep -v "192.168.1.107"
portsentry.blocked.tcp > portsentry.blocked.tcp.new
- Replace 192.168.1.107 with BackTrack's IP Address obtained in (Section 9, Step 2).
- grep "192.168.1.107"
portsentry.blocked.tcp.new | wc -l
- Replace 192.168.1.107 with BackTrack's IP Address obtained in (Section 9, Step 2).
- mv portsentry.blocked.tcp.new portsentry.blocked.tcp
- Instructions:
- Remove Reject Route
- Instructions:
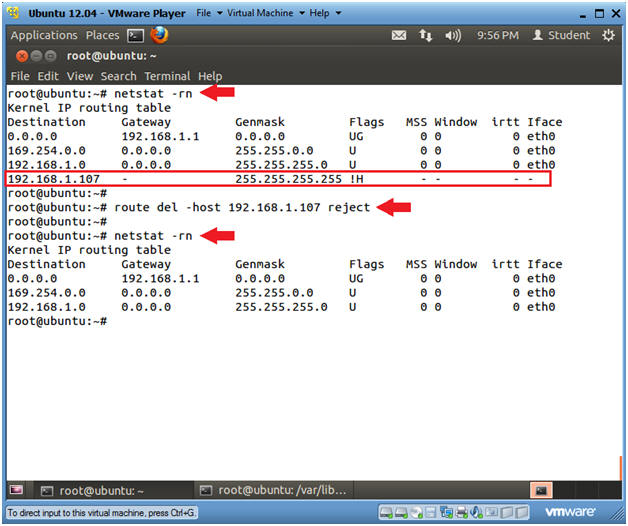
- netstat -rn
- Show routing table.
- Notice that BackTrack's IP Address is Rejected.
- route del -host 192.168.1.107 reject
- Replace 192.168.1.107 with BackTrack's IP Address obtained in (Section 9, Step 2).
- netstat -rn
- Notice that BackTrack's IP Address no longer exists.
- netstat -rn
- Instructions:
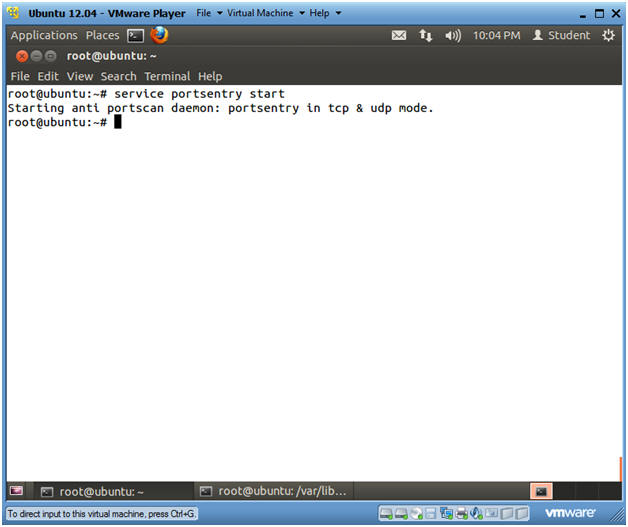
- Start up PortSentry
- Instructions:
- service portsentry start
- Instructions:
- Ping Ubuntu
- Note(FYI):
- Make sure you are on the BackTrack Server.
- Instructions:
- ping -c 5 192.168.1.106
- Replace 192.168.1.106 with Ubuntu's IP address you obtained in (Section 3, Step 3).
- ping -c 5 192.168.1.106
- Note(FYI):
| Section 15: Proof of Lab |
- Proof of Lab
- Note(FYI):
- Issue the below commands from the Ubuntu Terminal.
- Instructions:
- cd /var/log/
- grep portsentry syslog | awk '{print $6}' | sort | uniq -c
- date
- echo "Your Name"
- Replace the string "Your Name" with your actual name.
- e.g., echo "John Gray"
-
Proof of Lab Instructions
- Press both the <Ctrl> and <Alt> keys at the same time.
- Do a <PrtScn>
- Paste into a word document
- Upload to Moodle

- Note(FYI):