(Ubuntu: Lesson 1)
{ Installing Ubuntu Desktop 12.04 LTS }
| Section 0. Background Information |
- What is Ubuntu?
- Ubuntu is a computer operating system based on the Debian Linux distribution and distributed as free and open source software, using its own desktop environment. It is named after the Southern African philosophy of ubuntu ("humanity towards others")
- Most coverage of Ubuntu focuses on its use on desktop personal computers but it is also used on servers and for cloud computing.
- Ubuntu is sponsored by the UK-based company Canonical Ltd., owned by South African entrepreneur Mark Shuttleworth.
-
Lab Notes
- In this lab we will do the following:
- Download Ubuntu 12.04
- Install Ubuntu 12.04
- Install the Gnome Classic Interface
- Install and Test VMware Tools
- In this lab we will do the following:
- Legal Disclaimer
- As a condition of your use of this Web site, you warrant to computersecuritystudent.com that you will not use this Web site for any purpose that is unlawful or that is prohibited by these terms, conditions, and notices.
- In accordance with UCC § 2-316, this product is provided with "no warranties, either express or implied." The information contained is provided "as-is", with "no guarantee of merchantability."
- In addition, this is a teaching website that does not condone malicious behavior of any kind.
- You are on notice, that continuing and/or using this lab outside your "own" test environment is considered malicious and is against the law.
- © 2012 No content replication of any kind is allowed without express written permission.
| Section 1: Download Ubuntu 12.04 |
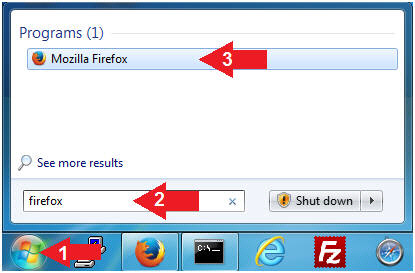
- Open Firefox
- Instructions:
- Click the Start Button
- Type firefox in the search box
- Click the firefox icon
- Instructions:
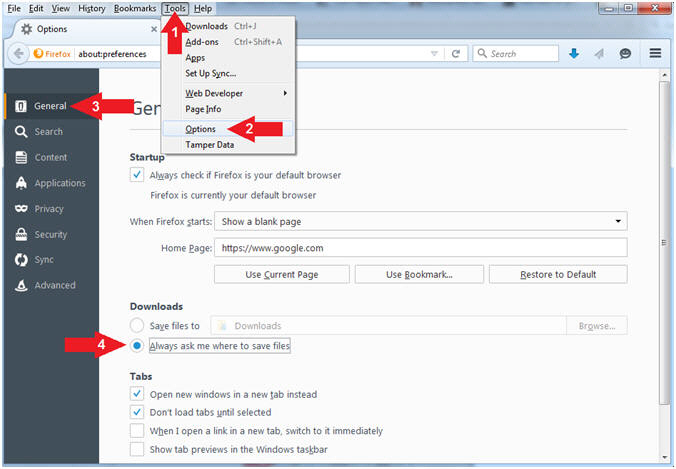
- Save Files Configuration Location
- Instructions:
- Click Tools
- Click Options
- Click the General Tab
- Click the radio button Always ask me where to save files
- Instructions:
- Start Kali 1.0.5 Download
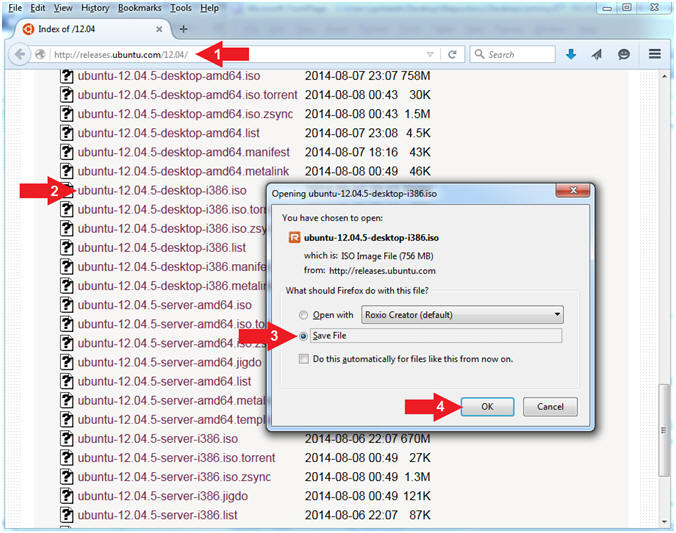
- Instructions:
- Navigate to one of the
following download locations
- http://releases.ubuntu.com/12.04/
- Click on ubuntu-12.04.5-desktop-i386.iso
- Note the version number (.5) is subject to change upon a new release.
- Select Save File Radio Button
- Click the OK Button
- Navigate to one of the
following download locations
-
- Instructions:
- Save ISO Location
- Instructions:
- Navigate to your desired
download directory
- In my case, G:\ISOs
- File Name: Accept the Default Name
- Save as type: ISO Image File(*.iso)
- Click the Save Button
- Navigate to your desired
download directory

- Instructions:
| Section 2: Create a New Virtual Machine |
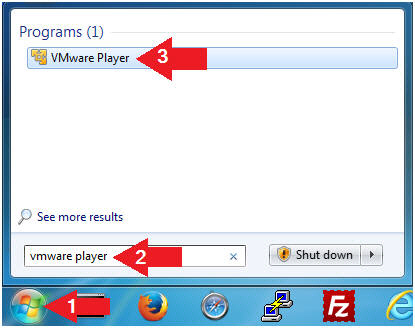
- Open VMware Player on your windows machine.
- Instructions:
- Click the Start Button
- Type "vmware player" in the search box
- Click on VMware Player
-
- Instructions:
- Create a New Virtual Machine. (See Below)
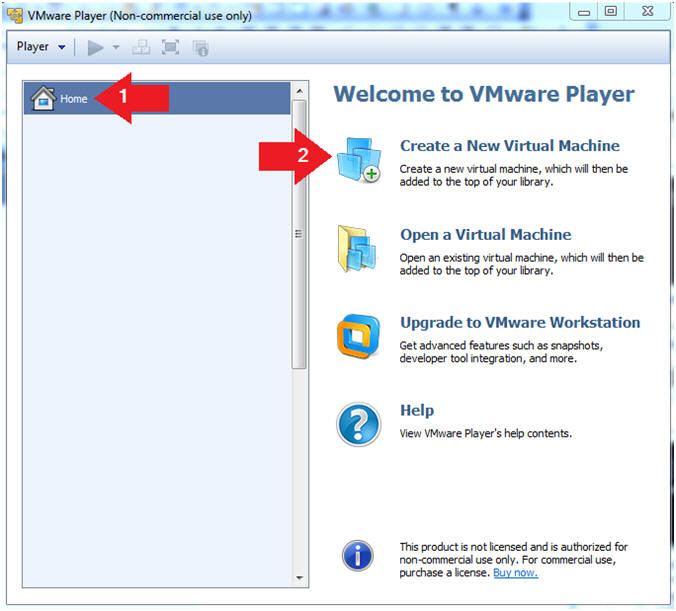
- Instructions:
- Click on Home
- Click on Create a New Virtual Machine
-
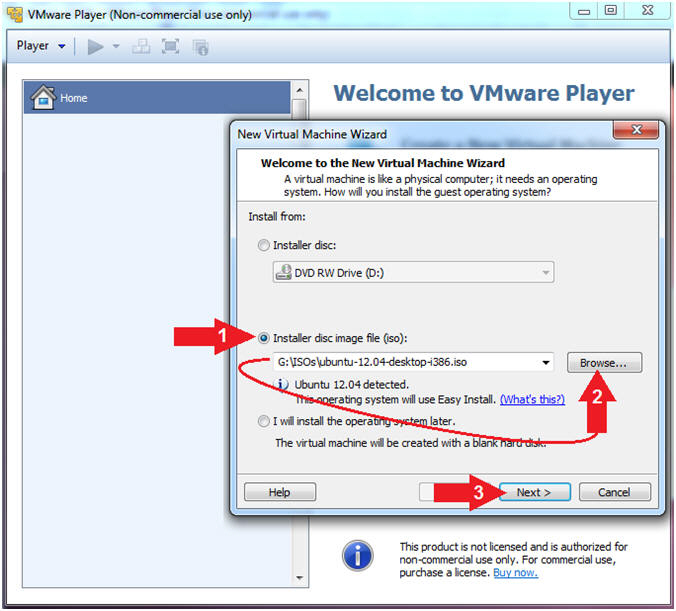
- Instructions:
- Virtual Machine Wizard (Install from:)
- Instructions
- Select Installer disc image file (iso):
- Browse to the location that you saved the ubuntu-12.04-desktop-i386.iso file.
- Click the Next Button
-
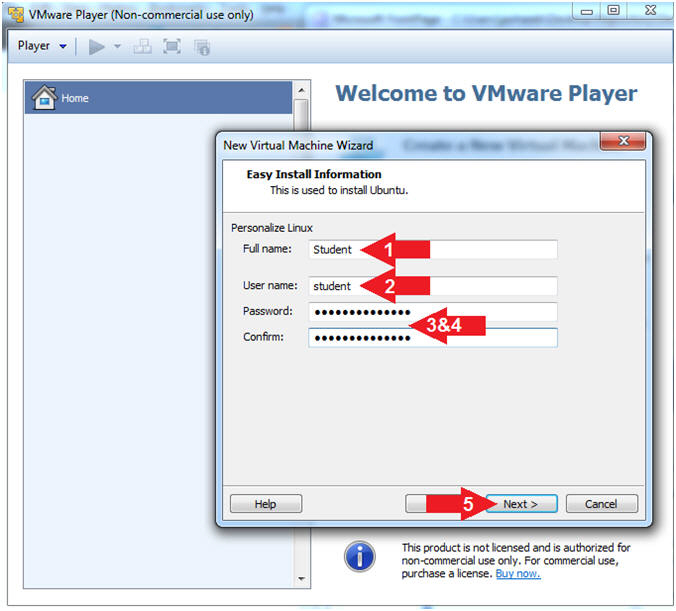
- Instructions
- Personalize Linux
- Instructions
- Full name: Student
- User name: student
- Password: <Whatever You Want>
- Confirm: <Same As Above>
- Click the Next Button
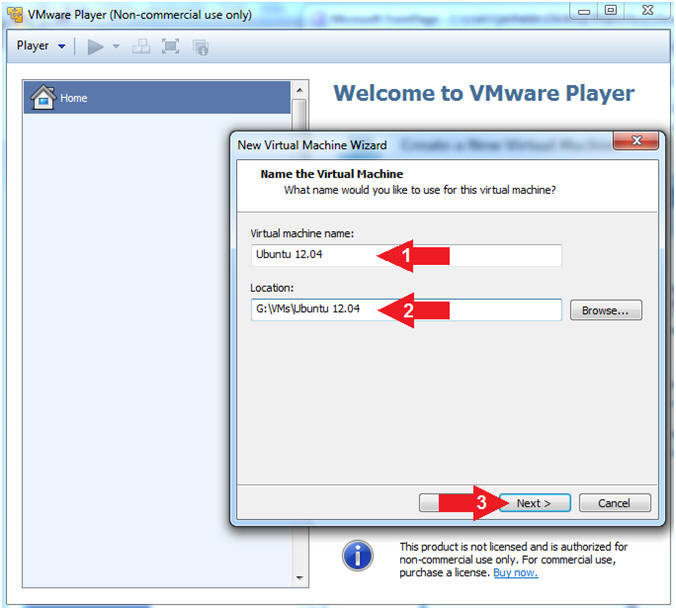
- Instructions
- Virtual Machine Name
- Instructions
- Virtual machine name: Ubuntu 12.04
- Location: Select your location.
- In my case, G:\VMs\Ubuntu 12.04
- Click the Next Button
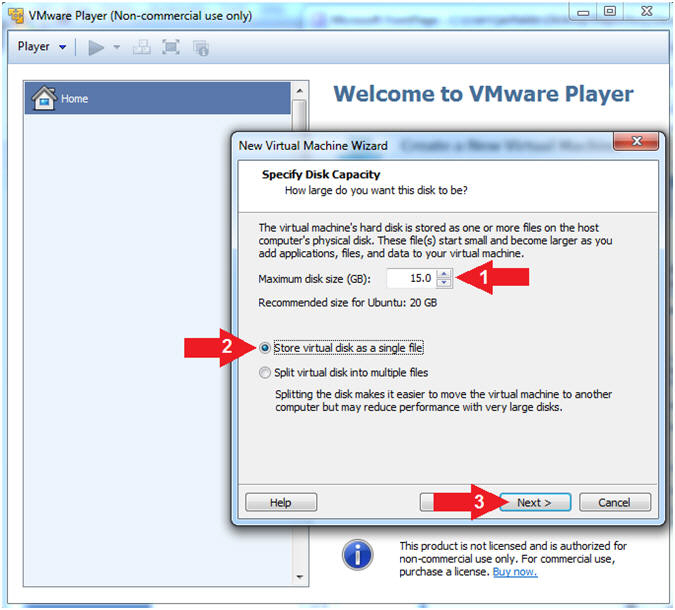
- Instructions
- Specify Disk Capacity
- Instructions
- Maximum disk size (GB): 15.0
- Select Store virtual disk as a single file
- Click the Next button
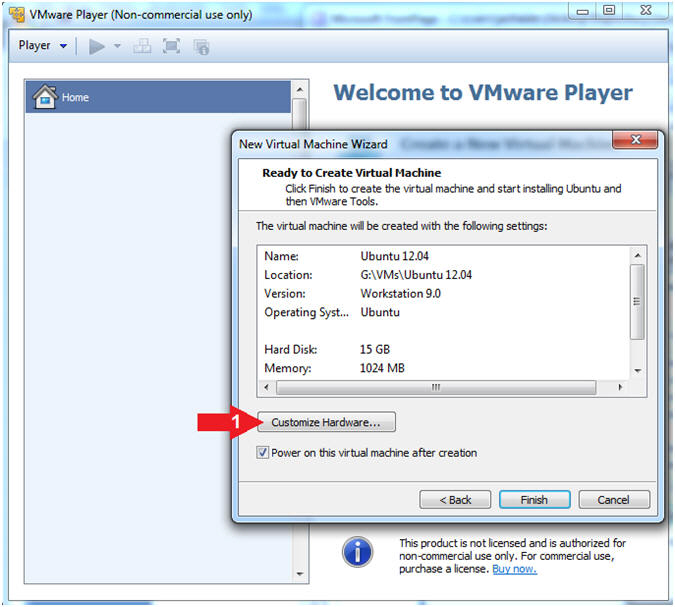
- Instructions
- Customize Hardware
- Instructions
- Click on the Customize Hardware button
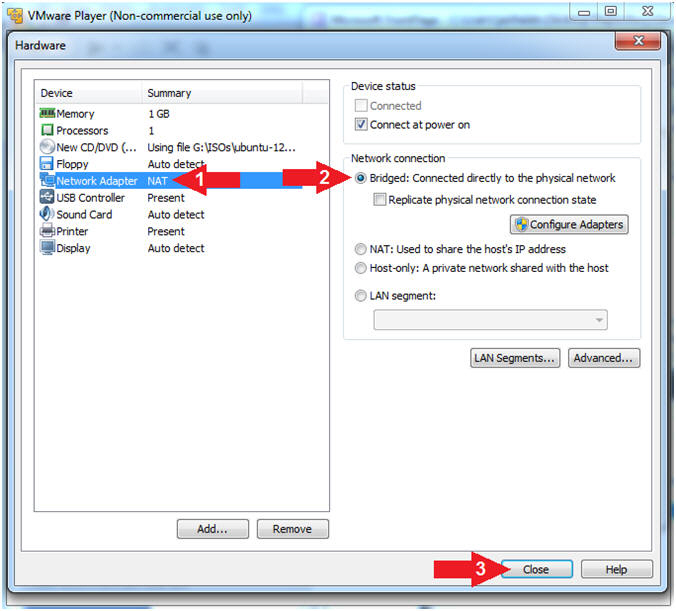
- Instructions
- Configure Network Adapter
- Instructions
- Click on Network Adapter
- Click on the Bridged Radio Button
- Click on the Close Button
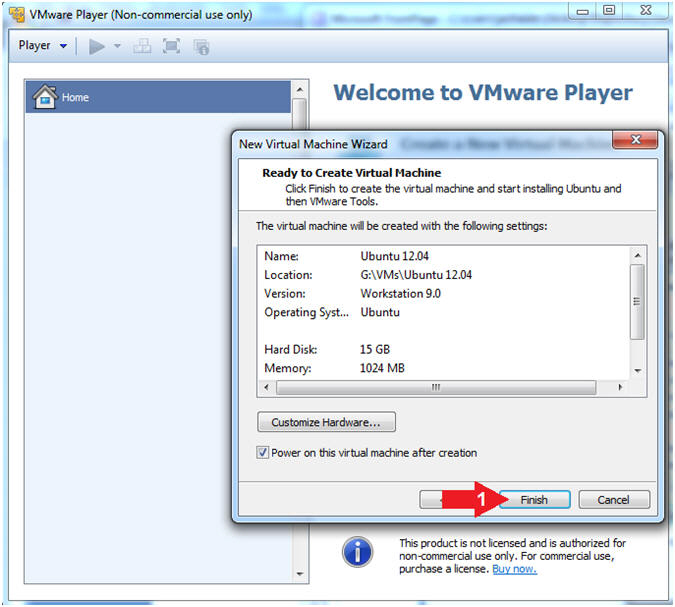
- Instructions
- Finish Customization
- Instructions
- Click the Finish Button
- Instructions
| Section 3: Ubuntu 12.04 Installation |
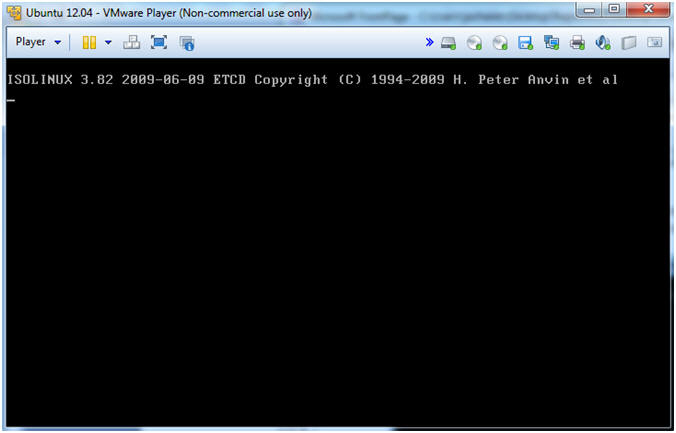
- ISOLINUX Screen
- Note(FYI):
- This is the first screen before the installation starts.
- Nothing is required from you.
- Continue to next step.
- Note(FYI):
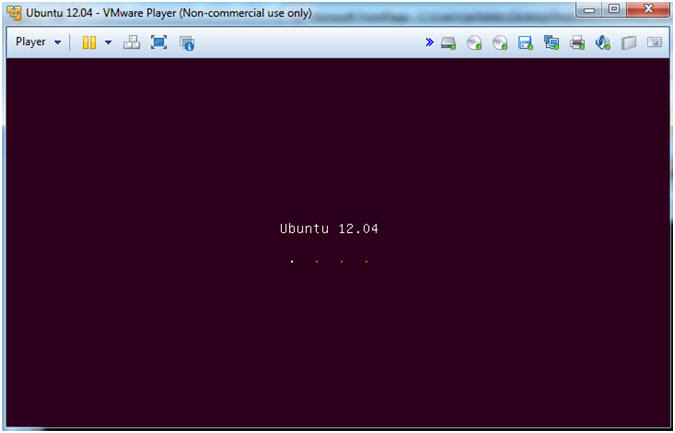
- Ubuntu 12.04 Screen
- Note(FYI):
- This is the second screen you will see.
- Nothing is required from you.
- Continue to next step.
- Note(FYI):
- Installation Screen
- Note(FYI):
- This is the third screen
you will see.
- Note: This will actually be a series of installation screens.
- This will take about 15 to 35 minutes depending on your system and network resources.
- Continue to the next step after installation completes.
- This is the third screen
you will see.
- Note(FYI):
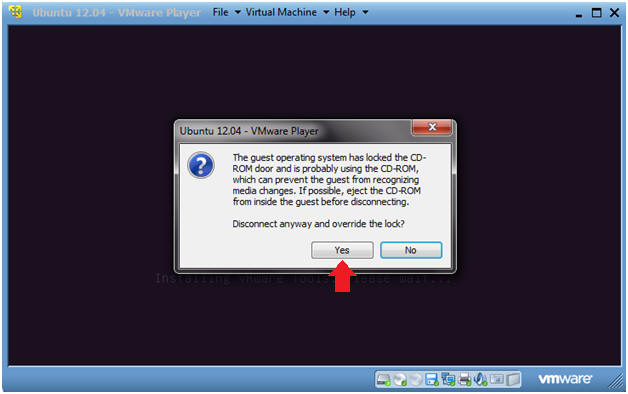
- CD-ROM Lock Message
- Instructions
- This is the forth screen you will see.
- Click on Yes.
- Continue to next step.
- Instructions
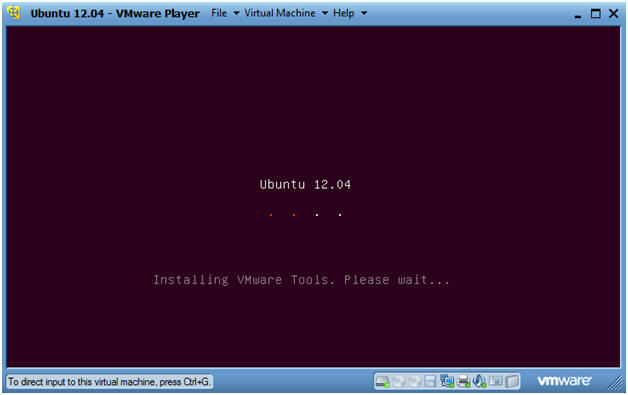
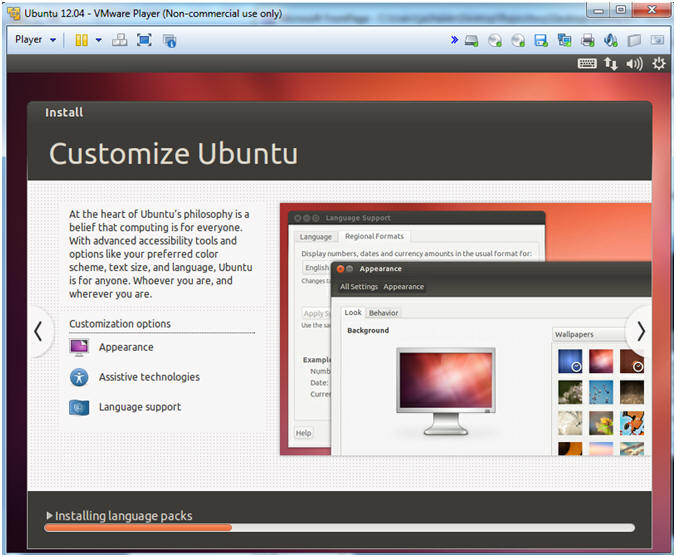
- VMware Tool Installation Screen
- Note(FYI):
- This is the fifth and final screen you will see.
- This will take about 5 to 10 minutes depending on your system and network resources.
- Continue to next step after installation completes.
- Note(FYI):
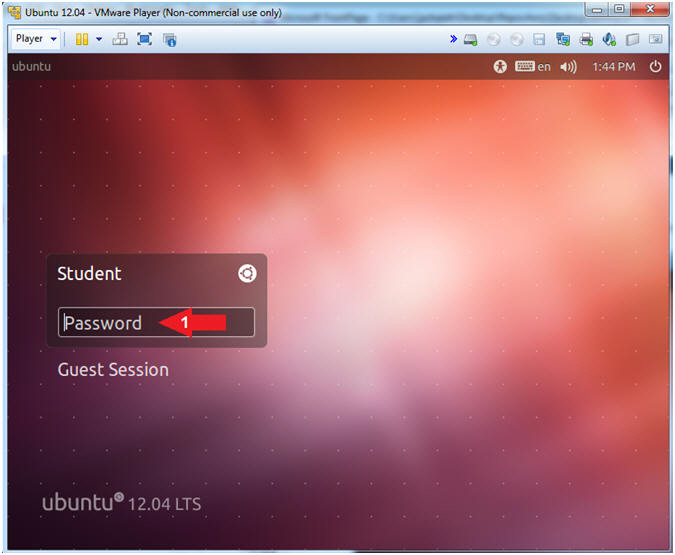
| Section 4: Initial Login |
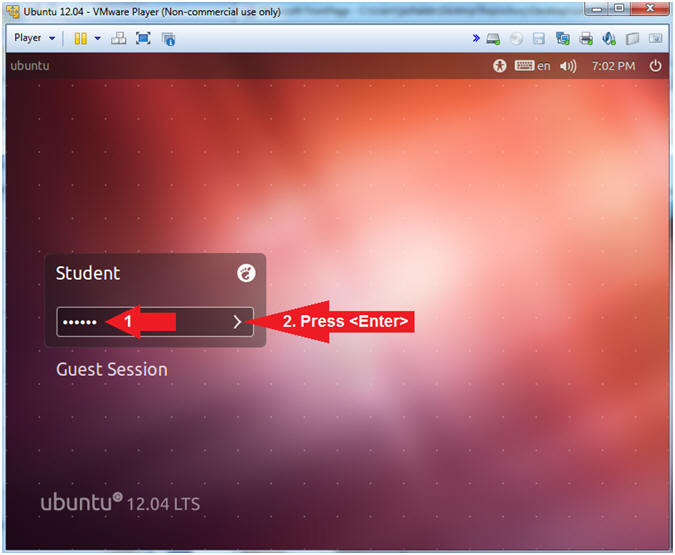
- Logging in for the first time
- Instructions
- Type in the password you created in (Section 2, Step 4)
- Press <Enter>
- Instructions
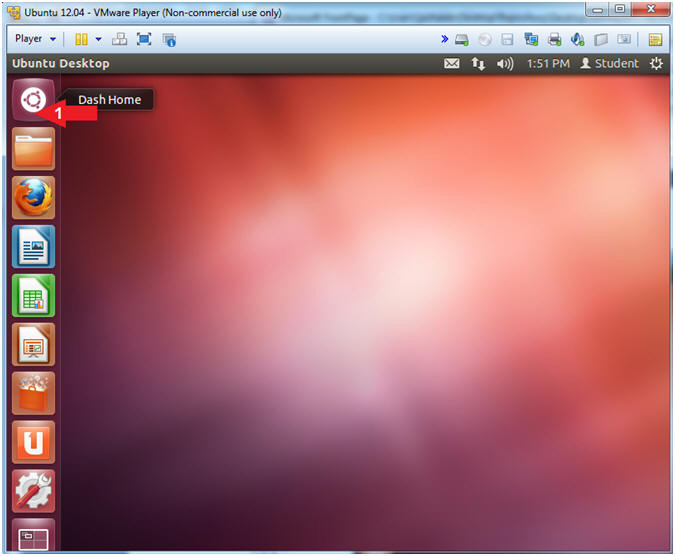
| Section 5: Start Up Terminal Window |
- Ubuntu Dash
- Instructions
- Click on the Ubuntu Dash
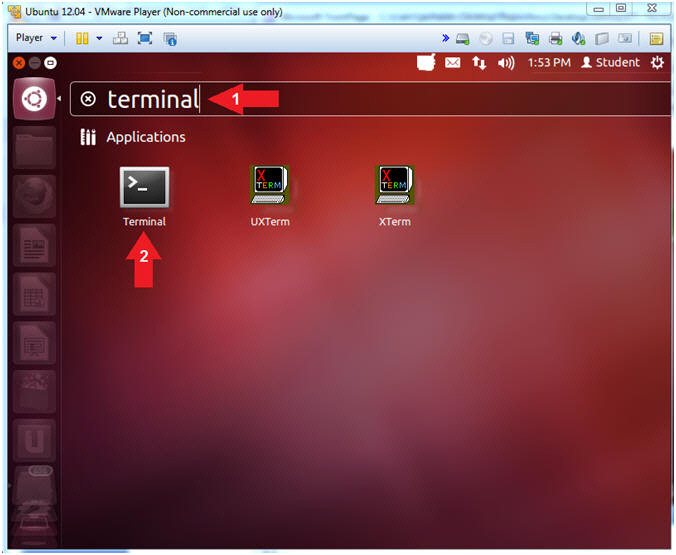
- Instructions
- Terminal Windows Search
- Instructions
- Type "terminal" in the search box.
- Click on the terminal.
- Instructions
| Section 6: Becoming the root user |
- Becoming Root
- Instructions
- sudo su -
- Supply the student password
- grep sudo /etc/group
- grep sudo /etc/sudoers | grep -i all
- Note(FYI):
- Command #1, sudo allows a permitted user to execute a command as the superuser or another user. In this case we are using sudo to switch user (su) to root.
- Command #3, Use grep to display the string sudo in the group file. By default, the initial user created will be added to the sudo group.
- Command #4, Use grep to display only lines that contain both the strings sudo and all in the group file. By default, the sudo group in the sudoers file can issue any command on the system. For this reason, the student user can become root

- Instructions
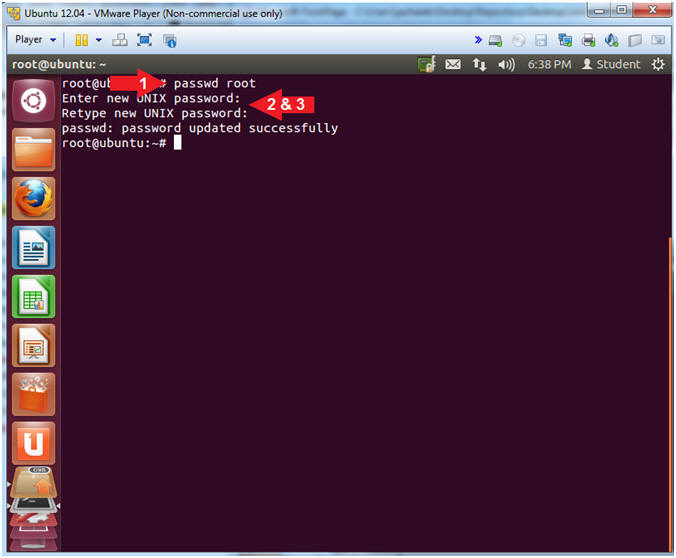
- Changing the Root Password
- Instructions
- passwd root
- Enter a new root password
- Re-Enter the new root password
- Note(FYI):
- Command #1, Use the passwd command to reset root's password.
- Instructions
| Section 7: Install Gnome Classic |
- Determine IP Address
- Instructions:
- ifconfig -a
- Note(FYI):
- Command #1, Use the ifconfig command to display the IP Address. Use the -a flag to display all the interfaces.
- My IP Address is 192.168.1.123 and its' interface is eth0.

- Instructions:
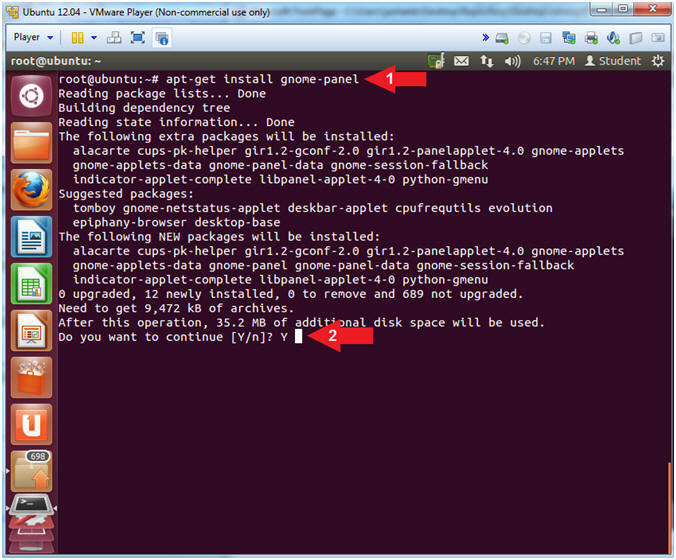
- Install the Gnome Classic Interface
- Instructions:
- apt-get install gnome-panel
- Do you want to continue [Y/n]? Y
- Note(FYI):
- Command #1, Use apt-get to install gnome-panel. GNOME Panel is a highly configurable launcher and taskbar for GNOME. Basically, we are installing the classic version of GNOME.
- Instructions:
- Reboot Machine
- Instructions:
- reboot
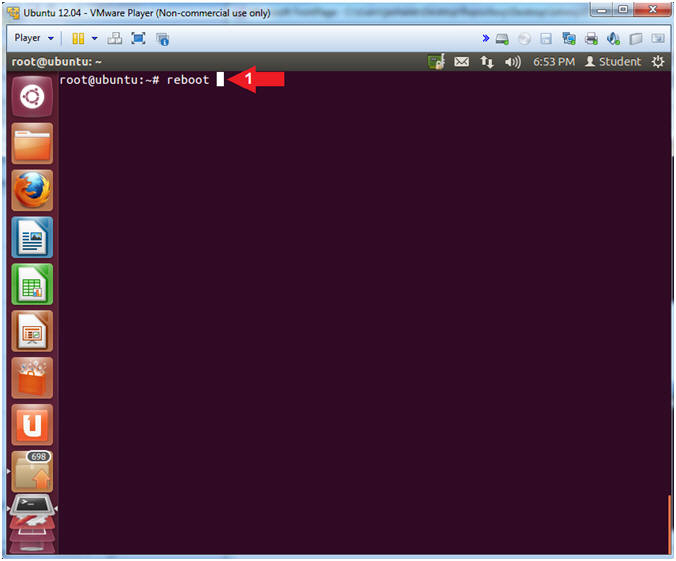
- Instructions:
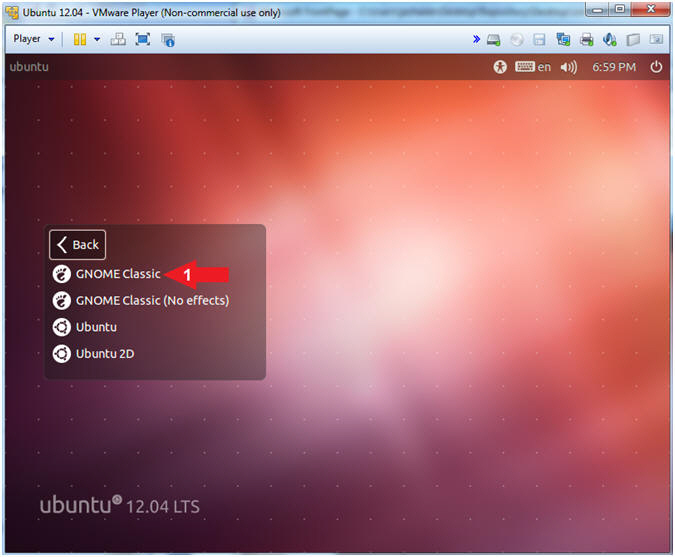
- Change to Gnome Classic
- Instructions:
- Click on the Circle

- Instructions:
- Select Gnome Classic
- Instructions:
- Double Click on GNOME Classic
- Instructions:
- Login to Gnome Classic
- Instructions:
- Provide the student password
- Press <Enter>
- Instructions:
| Section 8: Basic Gnome Classic Configuration |
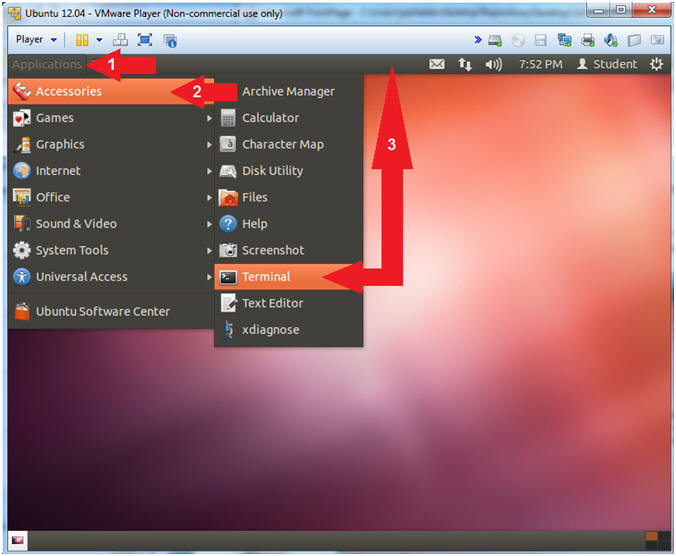
- Place Terminal on Top Panel
- Note(FYI):
- In this step, we are going to drag the terminal window to the top panel.
- Instructions:
- Click on Applications
- Click on Accessories
- Drag the Terminal to the Top Panel
- Note(FYI):
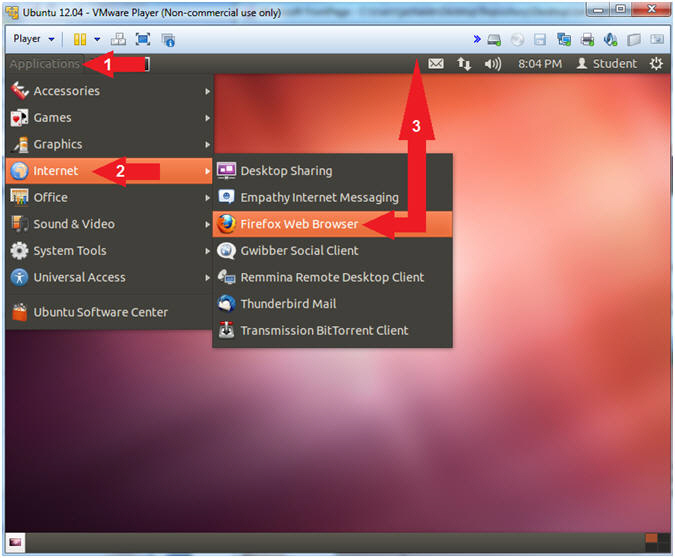
- Place Firefox on Top Panel
- Note(FYI):
- In this step, we are going to drag the Firefox to the top panel.
- Instructions:
- Click on Applications
- Click on Accessories
- Drag the Firefox to the Top Panel
- Note(FYI):
| Section 9: Configuring Date and Time |
- Go to System Settings
- Instructions:
- Applications --> System Tools --> System Settings
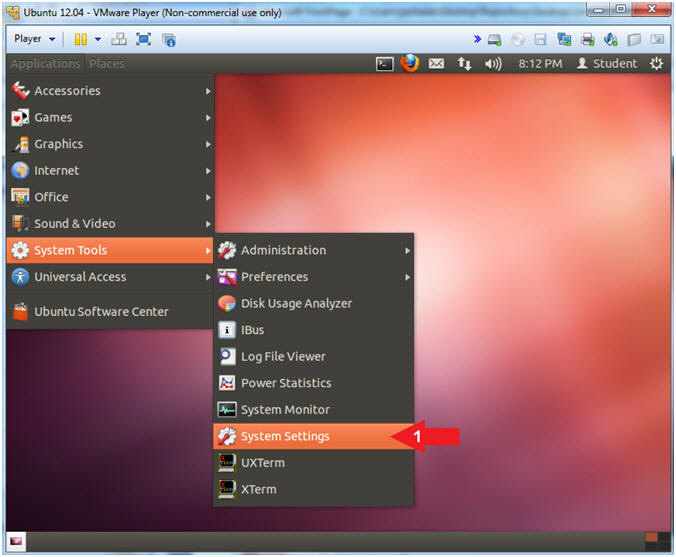
- Instructions:
- Date and Time
- Instructions:
- Click on Date and Time
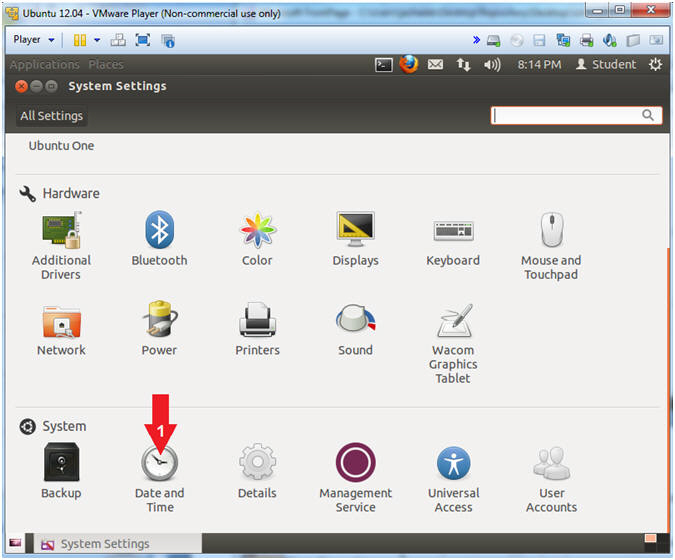
- Instructions:
- Change Date and Time
- Instructions:
- Region: Set to your Region, in my case, America.
- City: Set to a city in your Timezone, in my case, I am in the central time zone.
- Network Time: Make sure ON is selected.
- By selecting ON, both your time and date will automatically be sync'ed toward your timezone.
- Click on the X to close
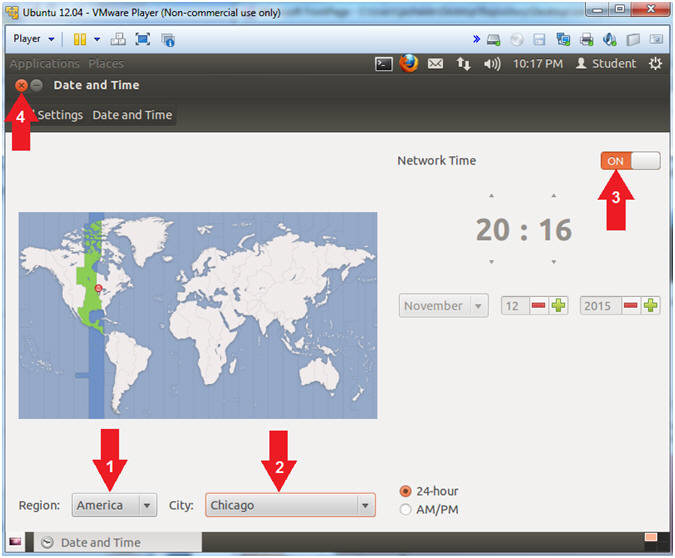
- Instructions:
| Section 10: Post VMware Configuration |
- Virtual Machine Settings
- Instructions:
- Player --> Virtual Machine --> Virtual Machine Settings...
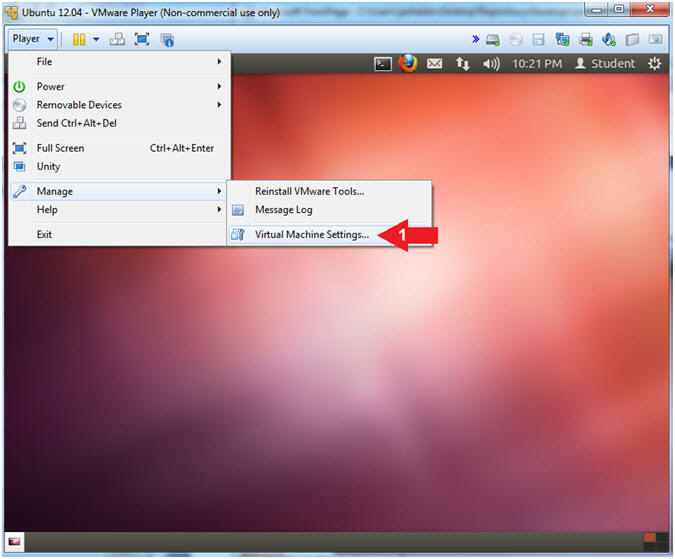
- Instructions:
- Edit CD/DVD (IDE)
- Instructions:
- Select CD/DVD (IDE)
- Select the radio button "Use physical drive:"
- Make sure Auto Detect is selected from the down drop box.
- Click the OK Button
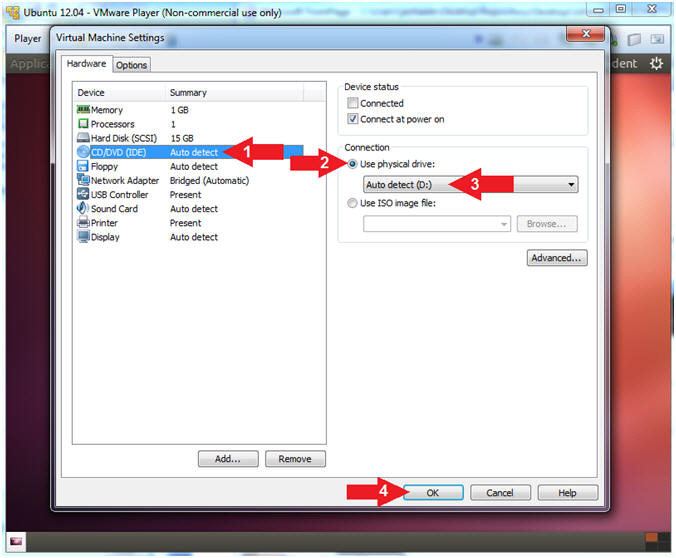
- Instructions:
| Section 11: Terminal Window Color Configuration |
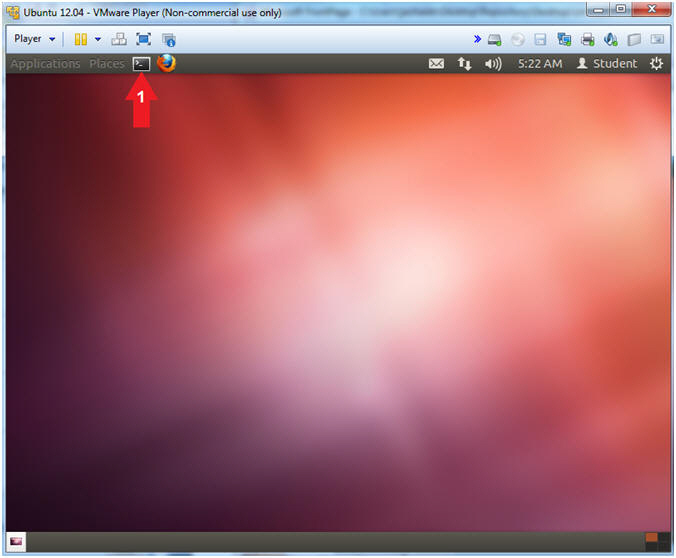
- Start up a Terminal Windows
- Instructions:
- Click on the Terminal Window
- OR
- Applications --> Accessories --> Terminal
- Click on the Terminal Window
- Instructions:
- Terminal Windows (Opening Profile Preferences)
- Instructions:
- Edit --> Profile Preferences
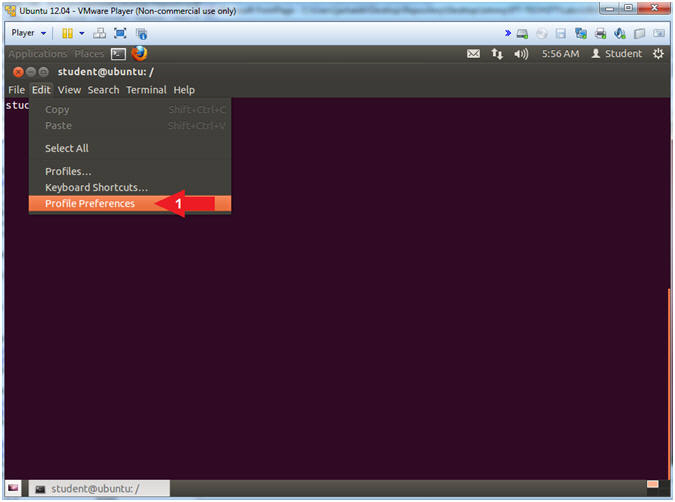
- Instructions:
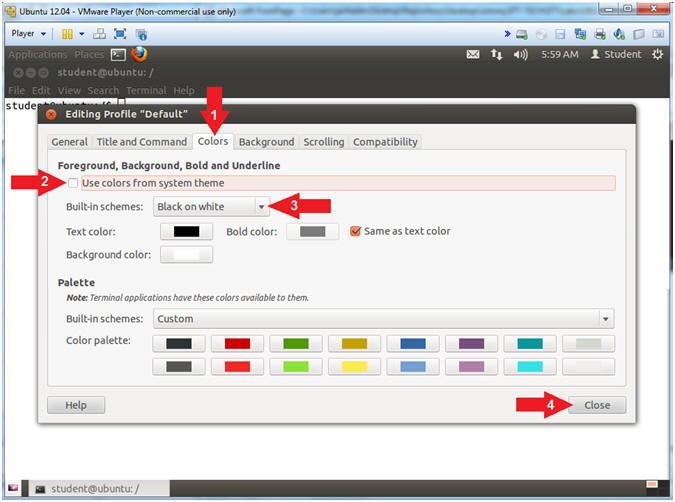
- Terminal Windows (Editing Profile)
- Instructions:
- Click the Colors Tab
- Uncheck Use colors from system theme
- Built-in schemes: Black on white
- Click the Close Button
-
- Instructions:
| Section 12: Proof of Lab |
- Start up a Terminal Windows
- Instructions:
- Click on the Terminal Window
- Note(FYI):
- Your can use your previous terminal window.
- Instructions:
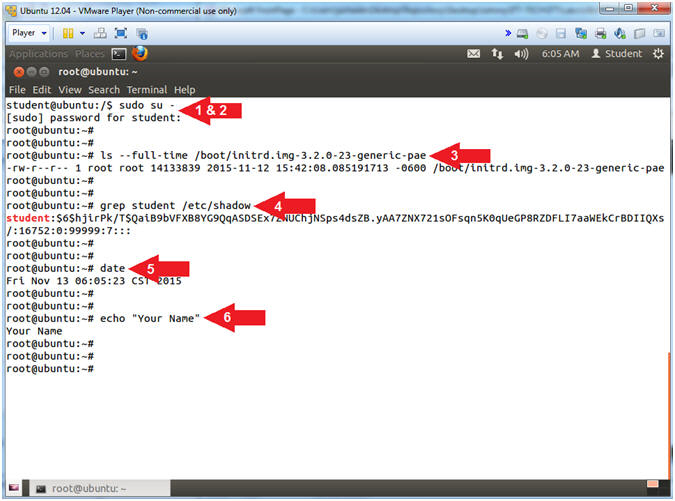
- Proof of Lab
- Instructions:
- sudo su -
- Supply the student password
- ls --full-time /boot/initrd.img-3.2.0-23-generic-pae
- grep student /etc/shadow
- date
- echo "Your Name"
- Replace the string "Your Name" with your actual name.
- e.g., echo "John Gray"
-
Proof of Lab Instructions
- Press both the <Ctrl> and <Alt> keys at the same time.
- Do a <PrtScn>
- Paste into a word document
- Upload to Moodle
-
- Instructions: