(BackTrack: Lesson 1)
{ Installing BackTrack 5 R1 }
| Section 0. Background Information |
- What is BackTrack5
- BackTrack is an operating system based on the Ubuntu GNU/Linux distribution aimed at digital forensics and penetration testing use. It is named after backtracking, a search algorithm. The current version is BackTrack 5, code name "Revolution."
- BackTrack provides users with easy access to a comprehensive and large collection of security-related tools ranging from port scanners to password crackers. Support for Live CD and Live USB functionality allows users to boot BackTrack directly from portable media without requiring installation, though permanent installation to hard disk is also an option
- BackTrack includes many well known security
tools including
- Metasploit integration
- RFMON Injection capable wireless drivers
- Aircrack-NG
- Kismet
- Nmap
- Ophcrack
- Ettercap
- Wireshark (formerly known as Ethereal)
- BeEF (Browser Exploitation Framework)
- Hydra
- Legal Disclaimer
- As a condition of your use of this Web site, you warrant to computersecuritystudent.com that you will not use this Web site for any purpose that is unlawful or that is prohibited by these terms, conditions, and notices.
- In accordance with UCC § 2-316, this product is provided with "no warranties, either express or implied." The information contained is provided "as-is", with "no guarantee of merchantability."
- In addition, this is a teaching website that does not condone malicious behavior of any kind.
- You are on notice, that continuing and/or using this lab outside your "own" test environment is considered malicious and is against the law.
- © 2012 No content replication of any kind is allowed without express written permission.
| Section 1: Download BackTrack 5R1 |
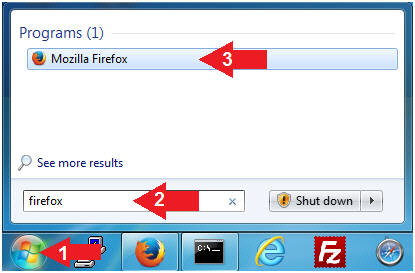
- Open Firefox (On
Local Host Machine)
- Instructions:
- Click the Start Button
- Type firefox in the search box
- Click the firefox icon
- Instructions:
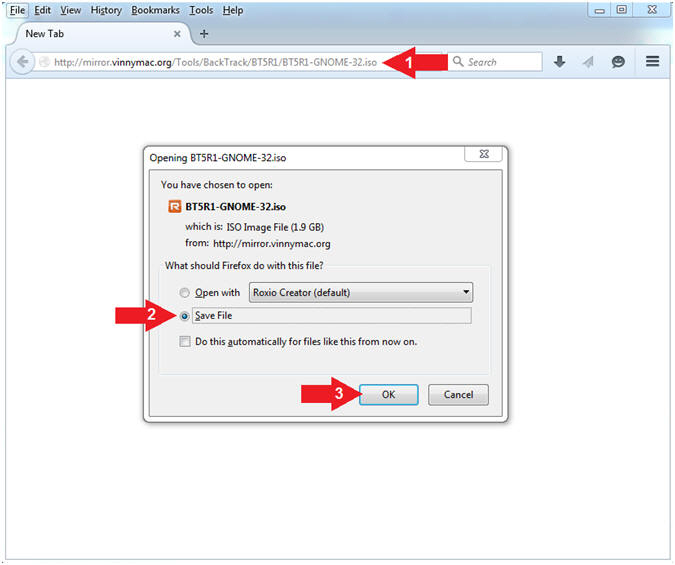
- Download BackTrack 5R1
- Instructions:
- Navigate to one of the following URLs
- http://old.kali.org/backtrack-images/backtrack-5/backtrack-5r1-gnome-i386/BT5R1-GNOME-32.iso
- Click the Save File Radio Button
- Click the OK Button
- Navigate to one of the following URLs
- Instructions:
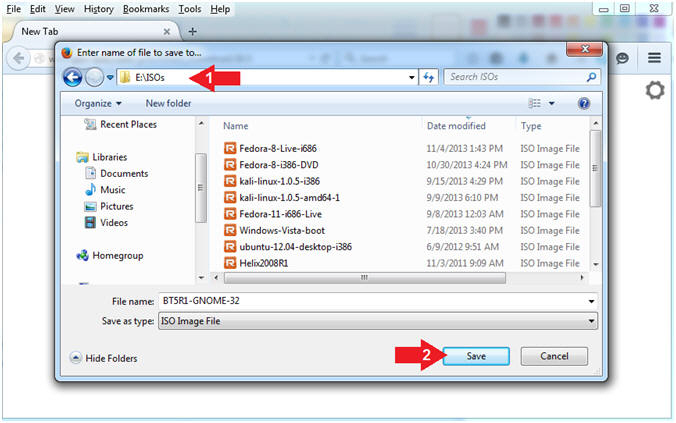
- Download Location
- Instructions:
- Navigate to a desired destination
location of your choosing.
- In my case, I will save BT5R1-GNOME-32.iso to E:\ISOs, which is my external usb drive.
- Click the OK Button
- Navigate to a desired destination
location of your choosing.
- Instructions:
| Section 2: Create a New Virtual Machine |
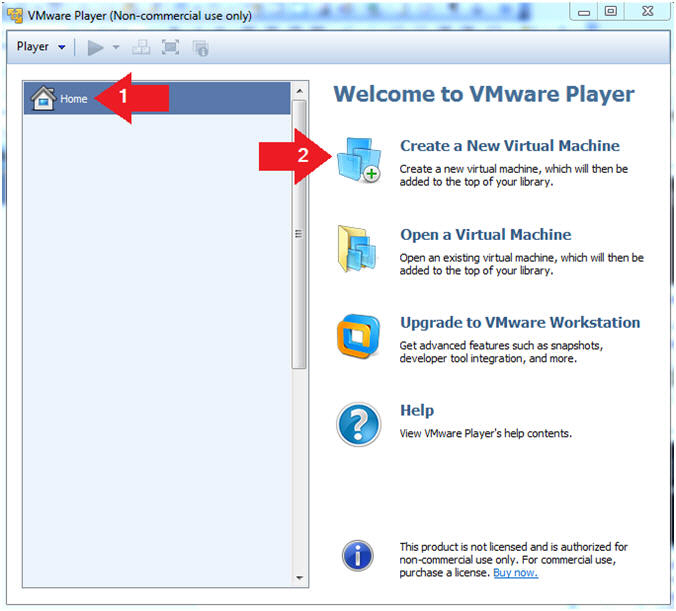
- Create a New Virtual Machine. (See Below)
- Instructions:
- Click on Home
- Click on Create a New Virtual Machine
- Instructions:
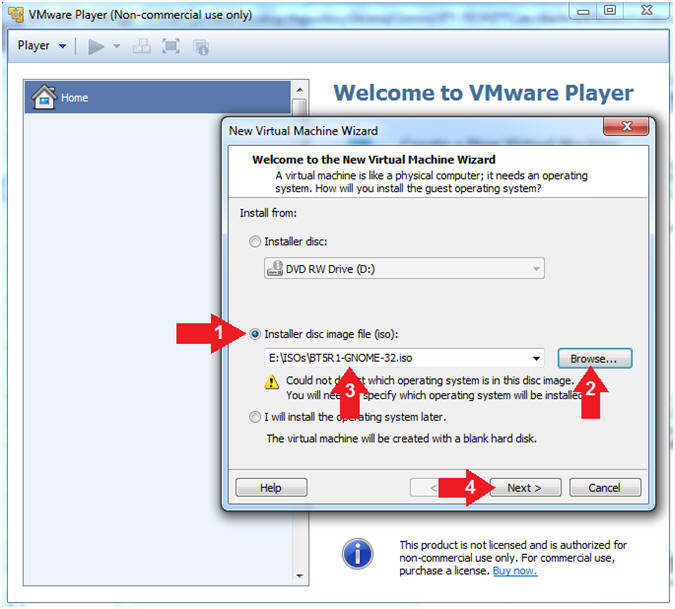
- Installation Media
- Instructions:
- Select the radio button "Installer disc image file (iso):"
- Click the Browse Button.
- Navigate to where your BT5R1-GNOME-32.iso is located and select it.
- Click Next
- Instructions:
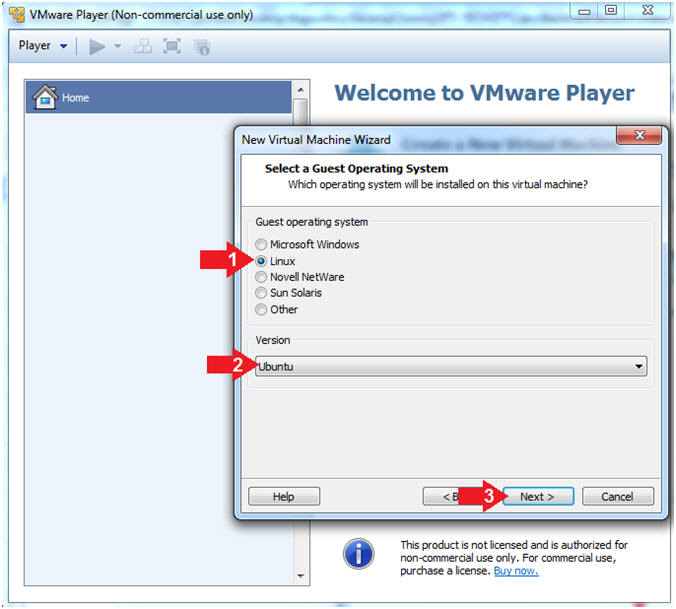
- Select a Guest Operating System
- Instructions:
- Guest operating system: Linux
- Version: Ubuntu
- Select Next
- Instructions:
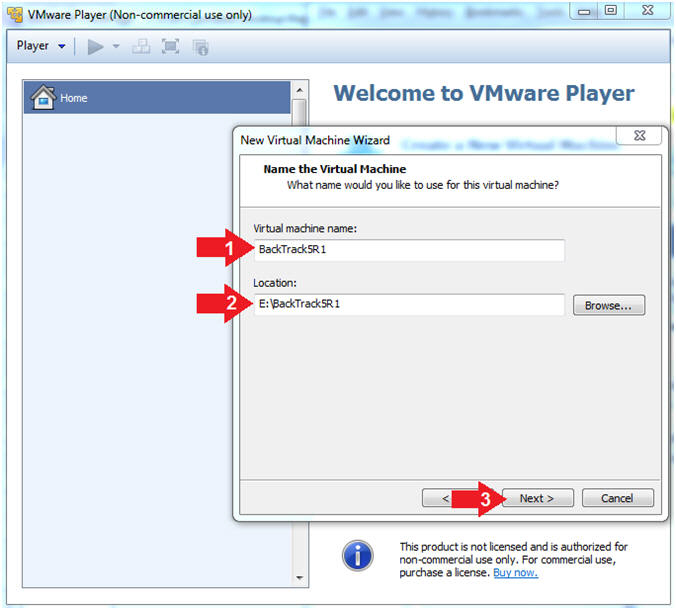
- New Virtual Machine Wizard
- Instructions:
- Virtual machine name: BackTrack5R1
- Location: In my case, I saved it to my USB drive, located in E:\BackTrack5R1\
- Select Next
- Instructions:
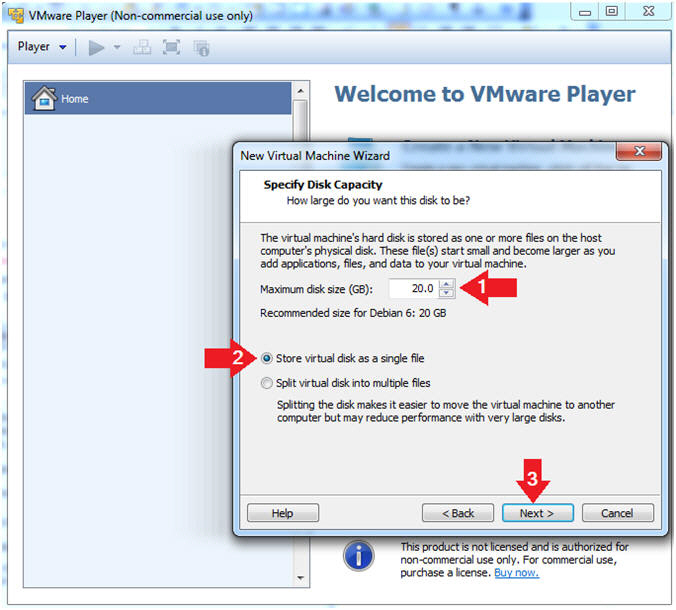
- New Virtual Machine Wizard
- Instructions:
- Maximum disk size (GB): For our purposes use 30GB.
- Radio Button: Store virtual disk as an single file
- Select Next
- Instructions:
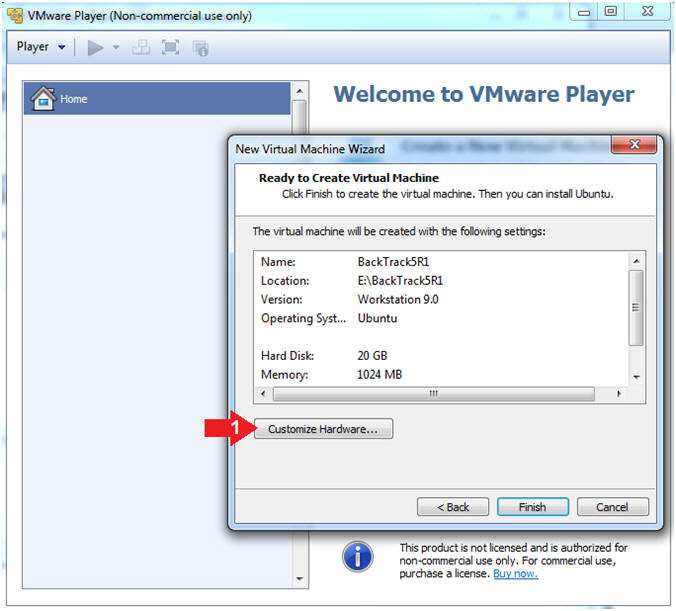
- New Virtual Machine Wizard
- Instructions:
- Click on the "Customize Hardware..." button
- Instructions:
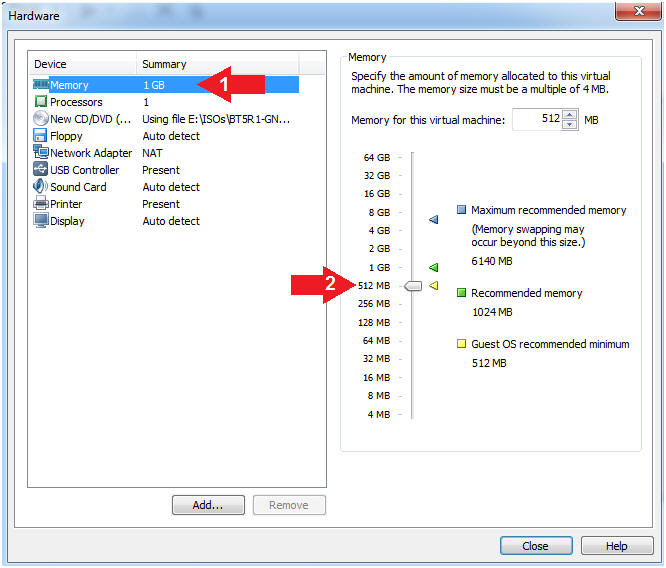
- Configure Memory
- Instructions:
- Click on Memory (which is highlighted in blue)
- Click on 512 MB. (Recommended is 1024 MB, but not really needed for lab purposes).
- Do not click on OK
- Instructions:
- Configure Network Adapter
- Instructions:
- Click on Network Adapter
- Click on "Bridged: Connected directly to the physical network"
- Click OK.

- Instructions:
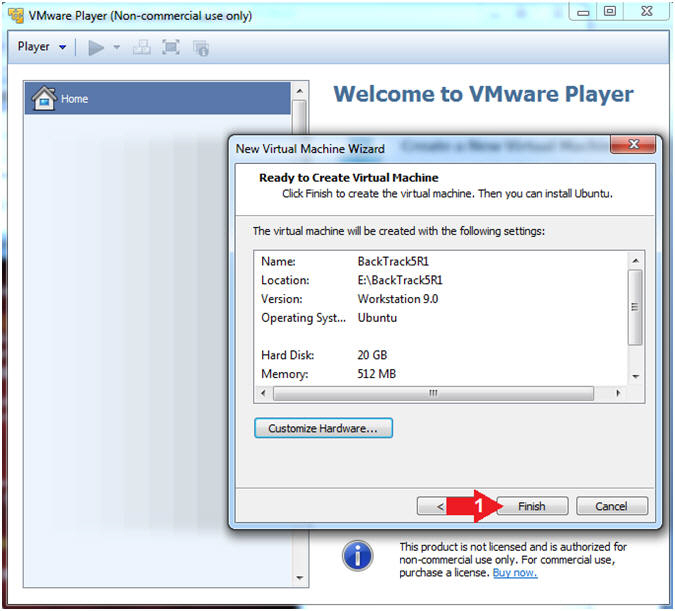
- Finish Configuration
- Instructions:
- Click the Finish button
- Instructions:
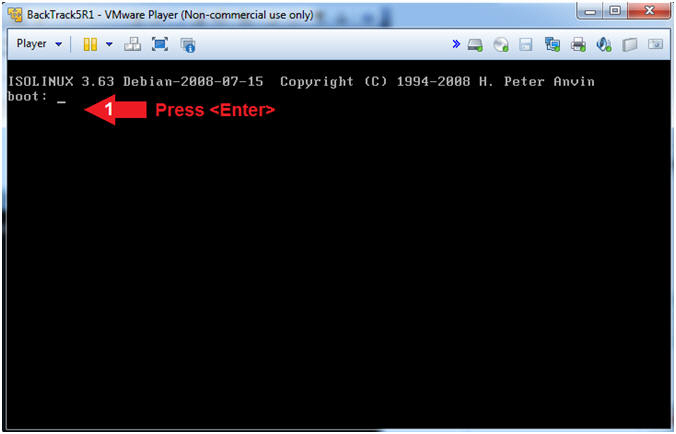
- Start the Boot Process
- Instructions:
- Press Enter
- Instructions:
- BackTrack Live CD
- Instructions:
- Select "BackTrack Text - Default Boot Text Mode"
- Press <Enter>
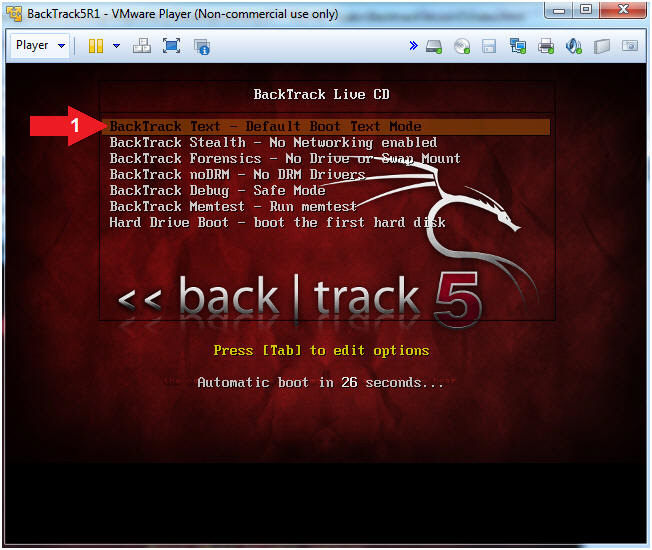
- Instructions:
- Bring up the GNOME
- Instructions:
- Type startx
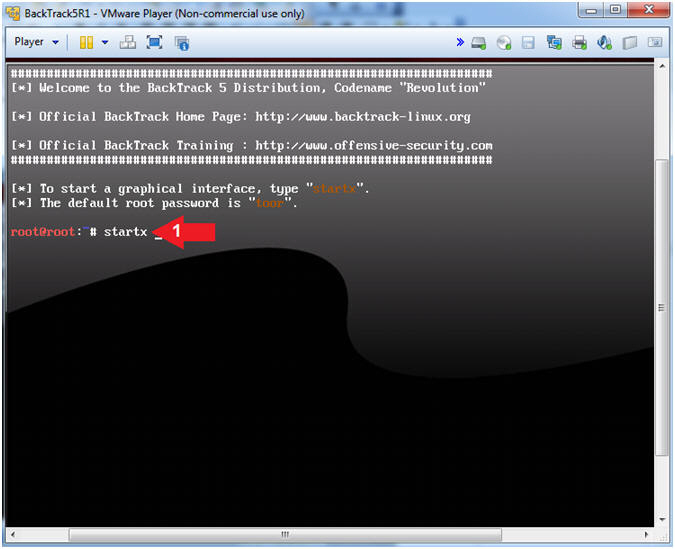
- Instructions:
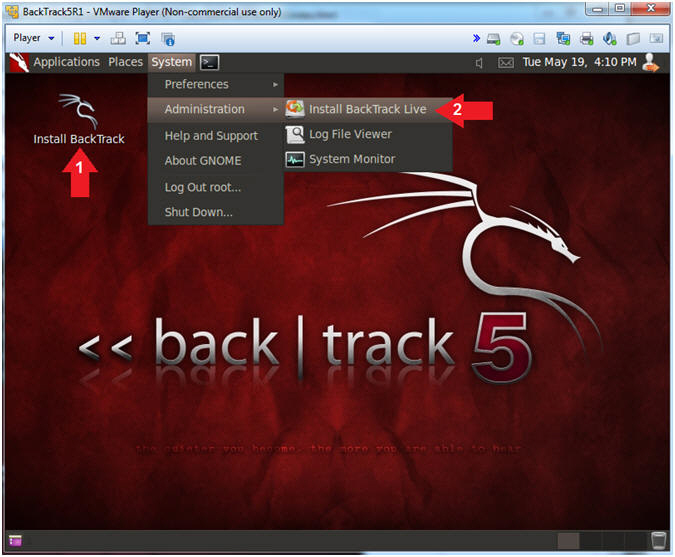
| Section 3: Install BackTrack to Hard drive |
- Install BackTrack to Hard drive
- Instructions:
- Option 1: Double Click on the icon
labeled "Install BackTrack"
- OR
- Option 2: System --> Administration --> Install BackTrack Live
- Option 1: Double Click on the icon
labeled "Install BackTrack"
- Instructions:
- Select Language
- Instructions:
- In my case: English.
- Click Forward

- Instructions:
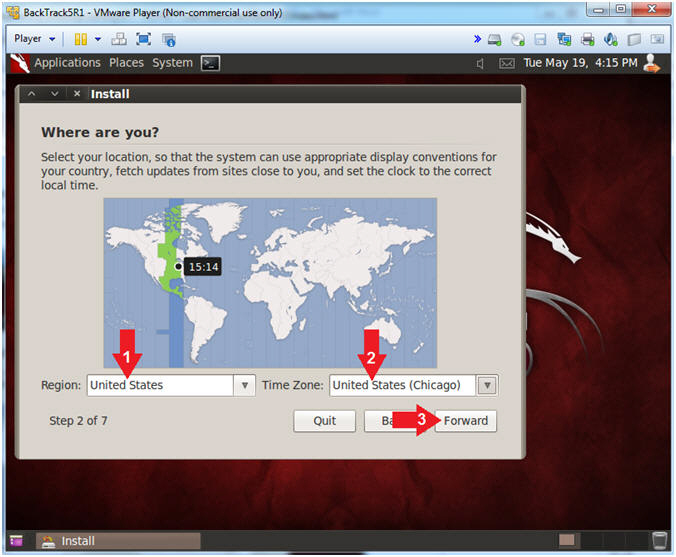
- Select Region and Time Zone
- Instructions: (In my case)
- Region: United States
- Time Zone: United States (Chicago)
- Click Forward
- Instructions: (In my case)
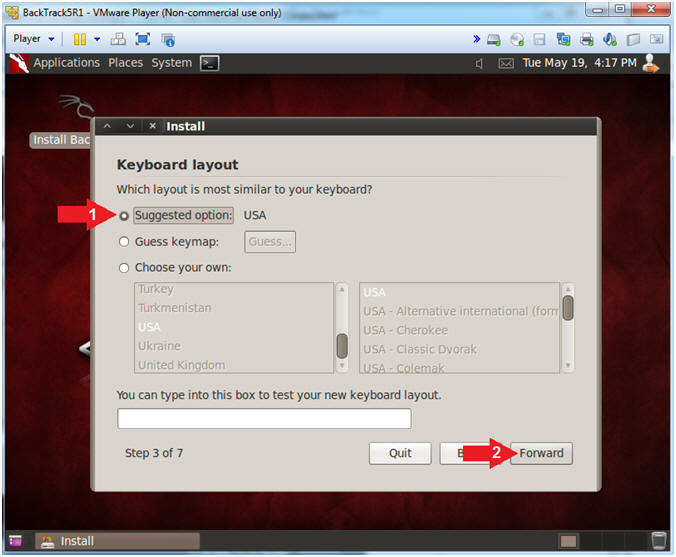
- Select Keyboard layout
- Instructions: (In my case)
- Suggested option: USA
- Click Forward
- Instructions: (In my case)
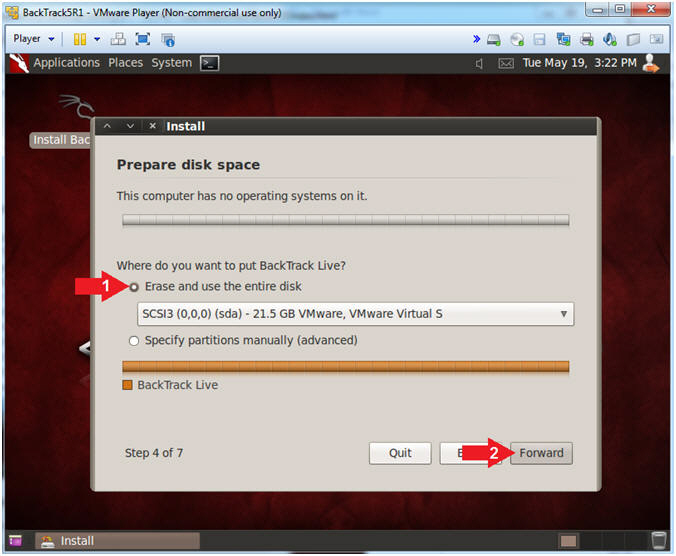
- Prepare disk space
- Instructions:
- Select "Erase and use the entire disk"
- Select Forward
- OR Note (This is optional)
- If you select "Specify partitions
manually", then you can create you own file systems layout.
- / - 2000 MB
- /boot - 500 MB
- swap - 1280 MB (Double Memory)
- /tmp - 1000 MB
- /home - 2000 MB
- /var - 2000 MB
- /usr - 3000 MB
- Then use the rest as needed using volume management.
- If you select "Specify partitions
manually", then you can create you own file systems layout.
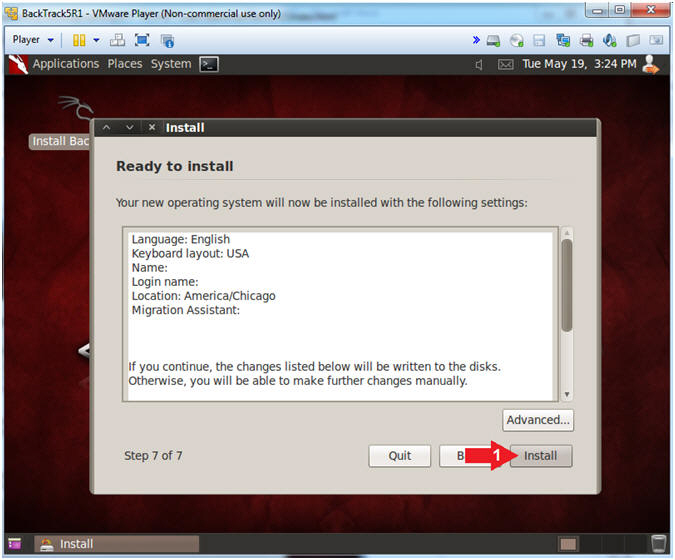
- Instructions:
- Ready to install
- Instructions:
- Click on Install
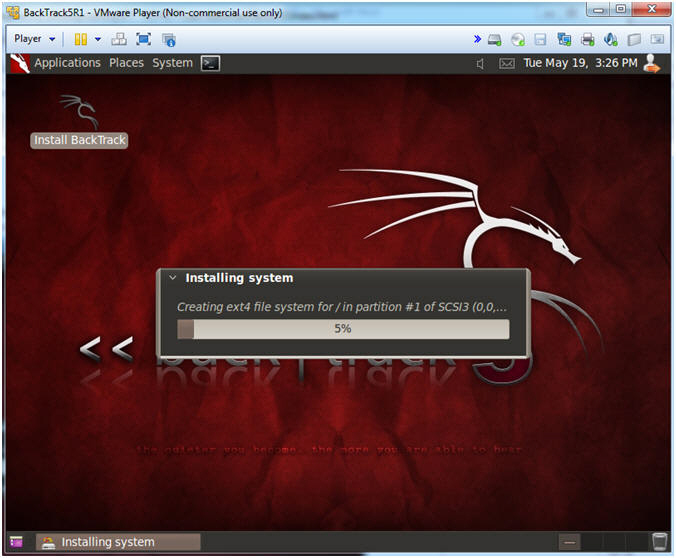
- Instructions:
- Informational
- Note(FYI):
- The installation process will take between 10 and 45 minutes depending on your systems resources.
- It will be stuck on "99% Almost finished copying files" for a good percentage of the installation.
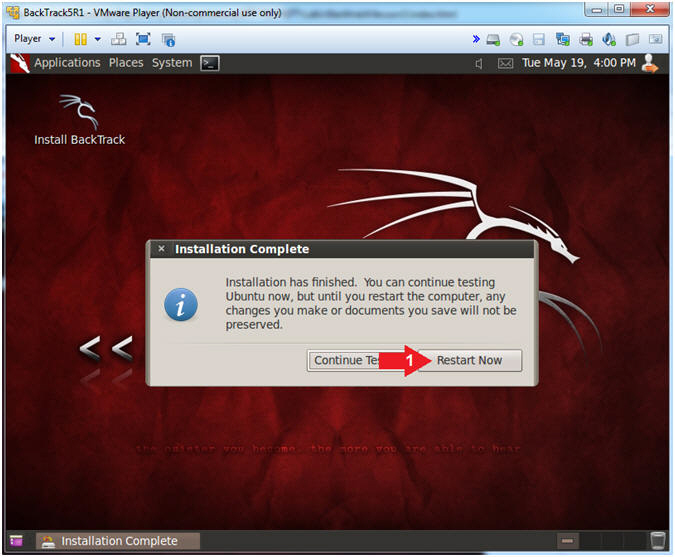
- Note(FYI):
- Consistency Reboot
- Instructions:
- Click on Restart Now
- Instructions:
- System is going down
- Instructions:
- Press <Enter>
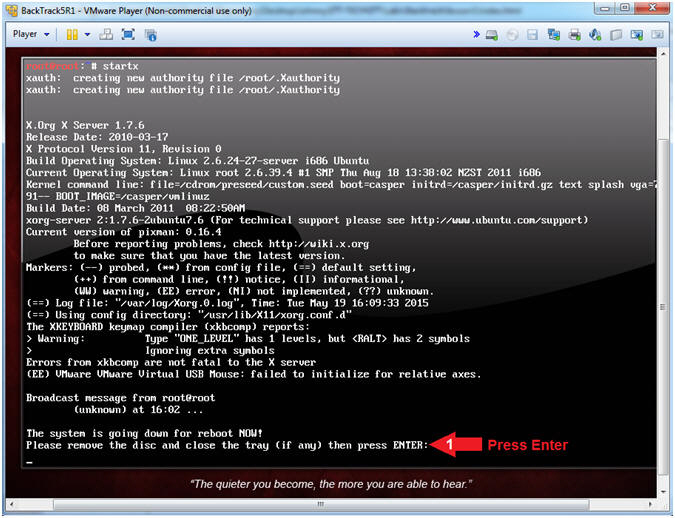
- Instructions:
| Section 4: Login to BackTrack |
- Edit Virtual Machine Settings
- Instructions:
- Player --> Manage --> Virtual Machine Settings...
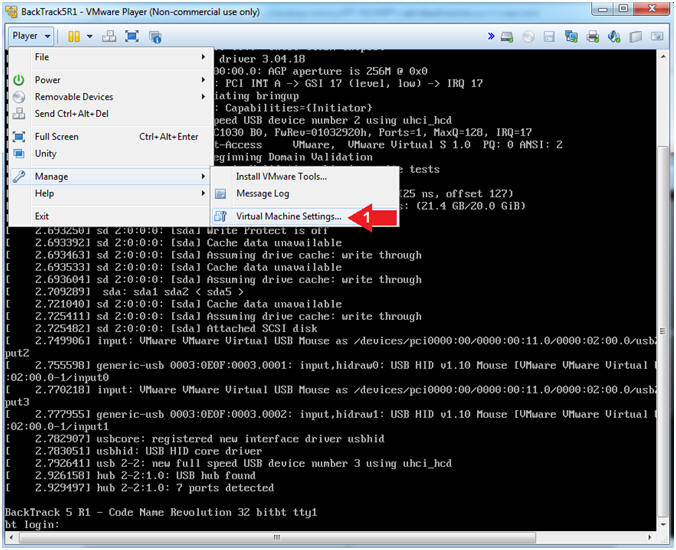
- Instructions:
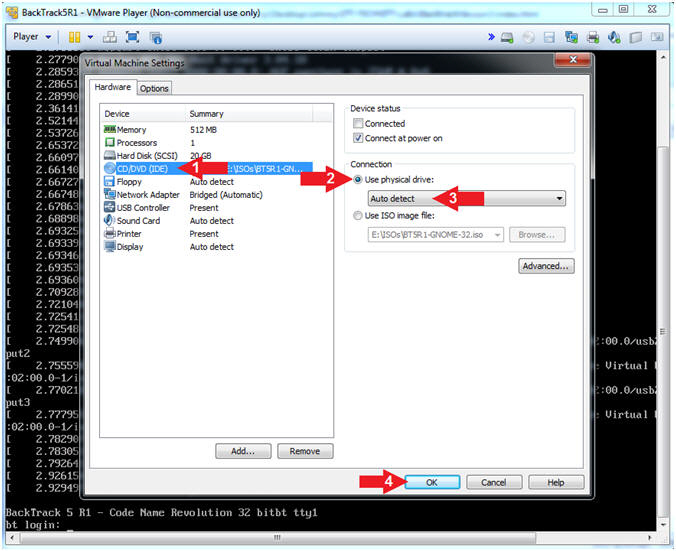
- Edit CD/DVD (IDE)
- Instructions:
- Select CD/DVD (IDE)
- Click on Use physical drive:
- Select Auto detect
- Click the OK Button
- Instructions:
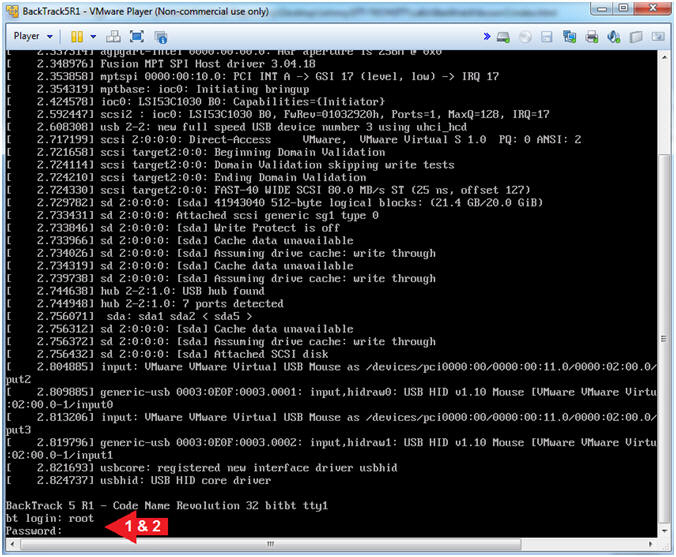
- Login to BackTrack
- Instructions:
- Login: root
- Password: toor
-
- Instructions:
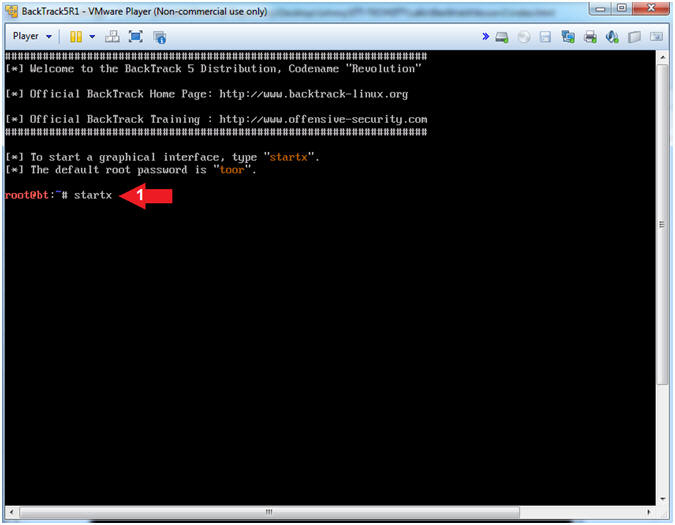
- Bring up the GNOME
- Instructions:
- Type startx
-
- Instructions:
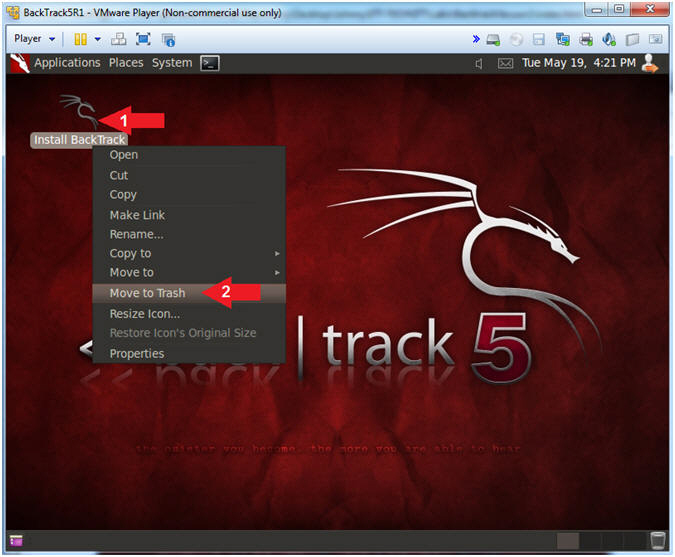
- Remove Install BackTrack Icon
- Note(FYI):
- We will remove the Install BackTrack Icon to prevent any future accidents.
- Instructions:
- Right Click on the Install BackTrack Icon
- Click Move to Trash
- Note(FYI):
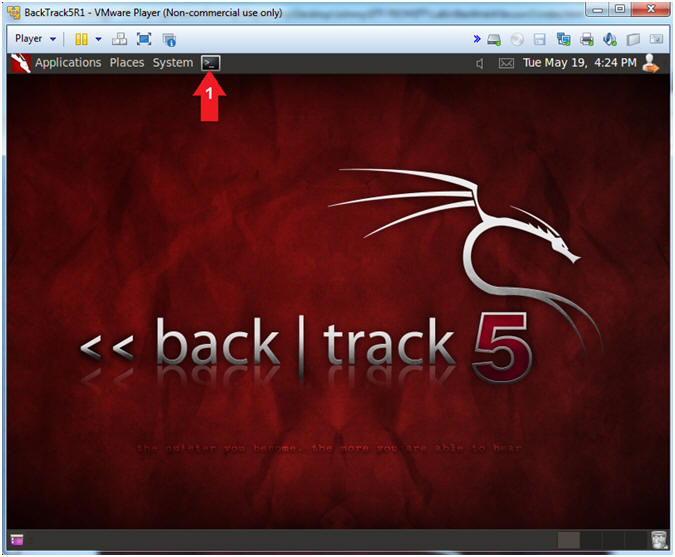
- Bring up a console terminal
- Instructions:
- Click on the Terminal Console Icon
- Instructions:
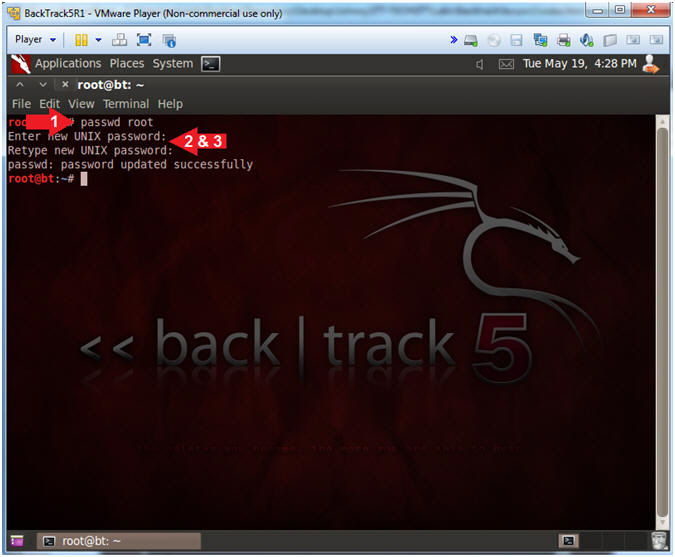
- Change root's password
- Note(FYI): General
Password Rules
- Password needs to be at least 8 characters in length
- Password needs to contain uppercase letters
- Password needs to contain lowercase letters
- Password needs to contain at least one number
- Password needs to contain at least special character (!@#$%^&*)
- Instructions:
- passwd root
- Enter new UNIX password: <See General Password Rules>
- Retype new UNIX password: <Re-Entered Same Password>
- Note(FYI): General
Password Rules
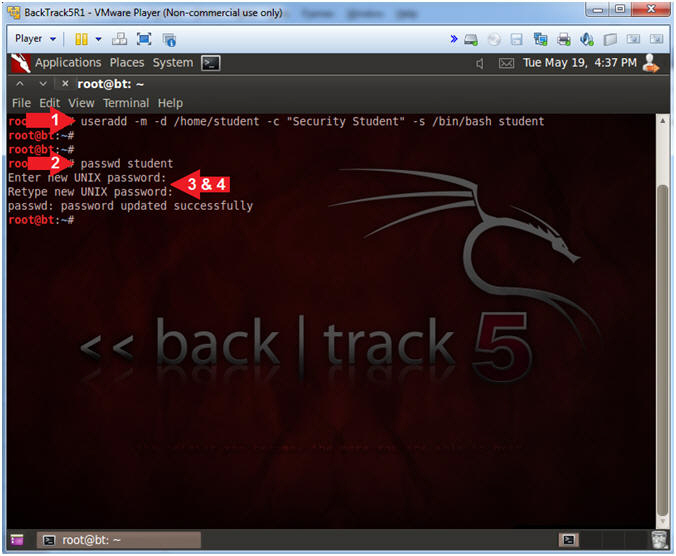
- Create a student account and set password
- Note(FYI): General
Password Rules
- Password needs to be at least 8 characters in length
- Password needs to contain uppercase letters
- Password needs to contain lowercase letters
- Password needs to contain at least one number
- Password needs to contain at least special character (!@#$%^&*)
- Instructions:
- useradd -m -d /home/student -c "Security Student" -s /bin/bash student
- passwd student
- Enter new UNIX password: <See General Password Rules>
- Retype new UNIX password: <Re-Entered Same Password>
- Note(FYI): General
Password Rules
| Section 5: Installing VMware Tools |
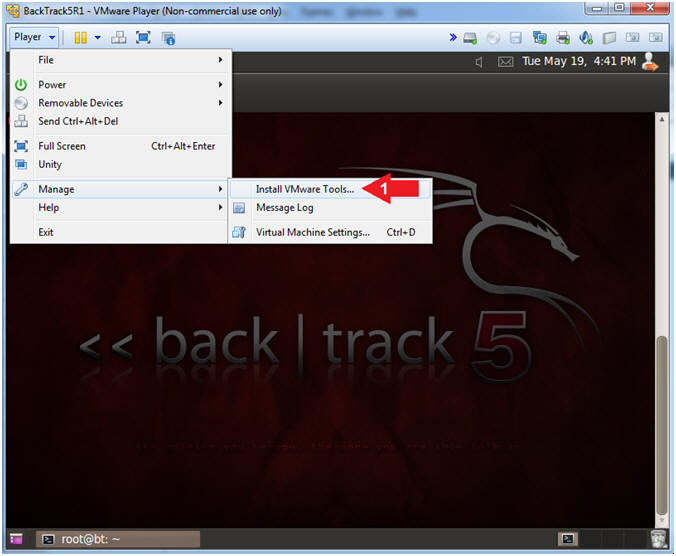
- Install VMware Tools
- Note(FYI):
- We are installing VMware Tools, because it gives you the ability to cut and paste from the host machine and other VMware instances into this VMware instance.
- Instructions:
- Player --> Manage --> Install VMware Tools...
- Note(FYI):
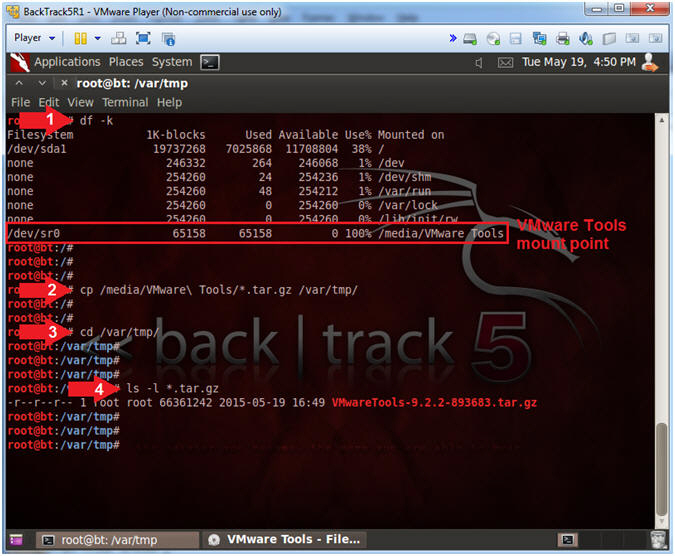
- Check if VMware Tools is mounted
- Instructions:
- df -k
- cp /media/VMware\ Tools/*.tar.gz /var/tmp/
- cd /var/tmp/
- ls -l *.tar.gz
- Note(FYI):
- Notice that VM Tools is mounted on /media/VMware Tools
- Instructions:
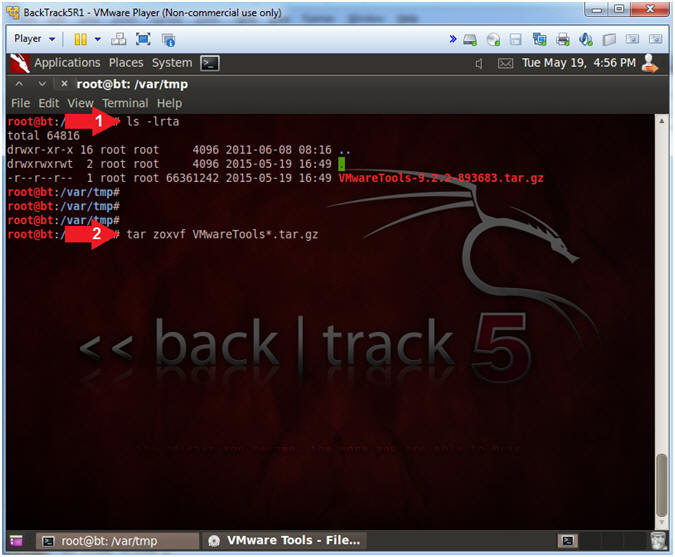
- Extract VMware Tools
- Instructions:
- ls -lrta
- tar zxovf VMwareTools*.tar.gz
- Note(FYI):
- tar, stores and extracts files.
- z - filter the archive through gzip
- x - Extract.
- o - it prevents tar from restoring ownership of files being extracted
- v - Verbose
- f - Supply File name (ie. VMwareTools*.tar.gz)
- tar, stores and extracts files.
- Instructions:
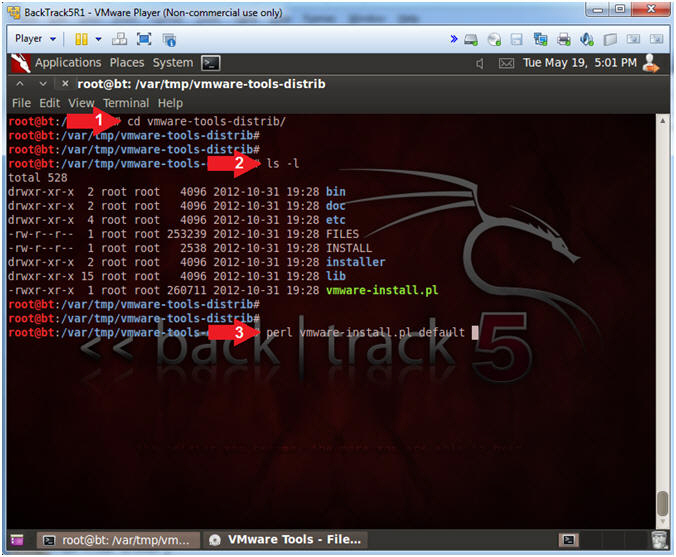
- Install VMware Tools
- Instructions:
- cd /var/tmp/vmware-tools-distrib
- ls -l
- perl vmware-install.pl default
- Note(FYI):
- The installation will take about 2 minutes and requires not manual input.
- Instructions:
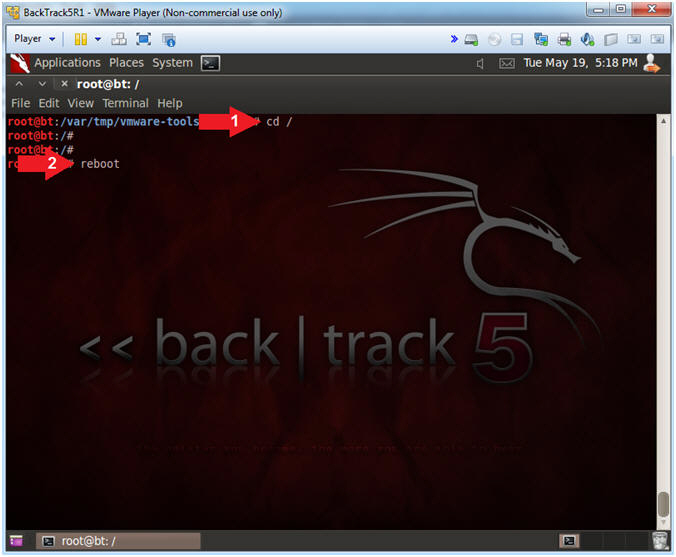
| Section 6: Consistency Reboot |
- Consistency Reboot
- Instructions:
- cd /
- reboot
- Note(FYI):
- A consistency reboot is necessary to ensure that VMware Tools is activated.
- Instructions:
- Login to BackTrack
- Instructions:
- Login: root
- Password: <Support the Root Password>
-
- Instructions:
- Bring up the GNOME
- Instructions:
- Type startx
-
- Instructions:
| Section 7: Update Repository Package List |
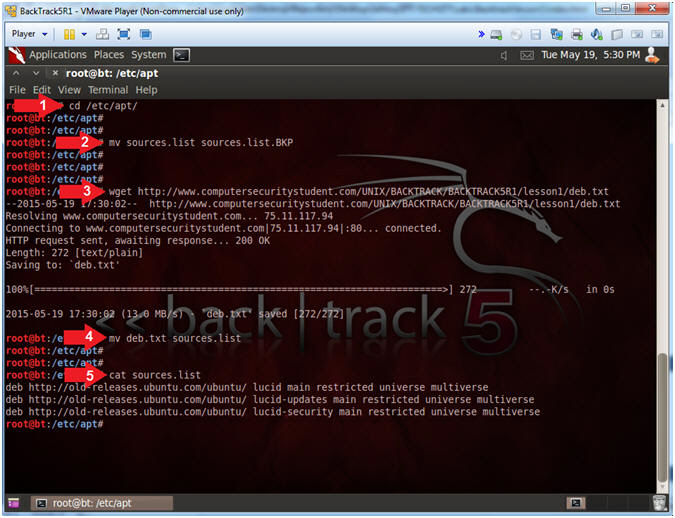
- Get Links to Old Patch Repository
- Instructions
- cd /etc/apt/
- mv sources.list sources.list.BKP
- wget http://www.computersecuritystudent.com/UNIX/BACKTRACK/BACKTRACK5R1/lesson1/deb.txt
- mv deb.txt sources.list
- cat sources.list
- Notes(FYI)
- The BackTrack5R1 repository is no longer supported, so it is necessary to use the Lucid 10.04 Ubuntu Patch Repository, just encase we need to download a package in the future.
- The deb.txt file contains links to the old Lucid 10.04 Ubuntu Patch Repository.
- Instructions
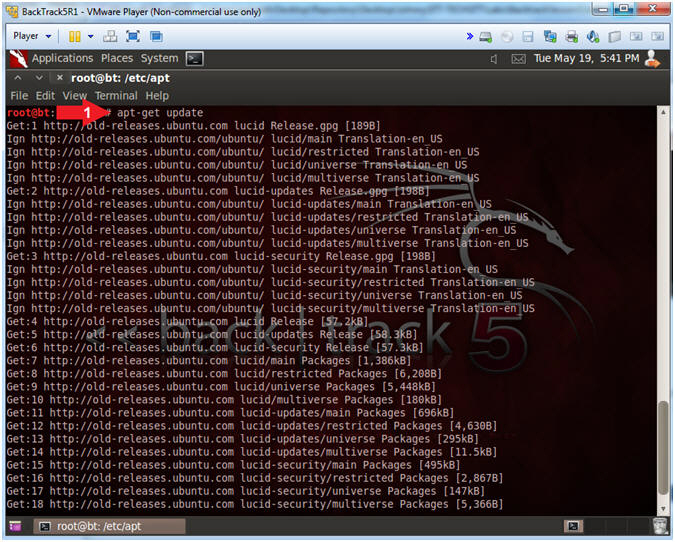
- Update the Apt Package Repository
- Instructions
- apt-get update
- Notes(FYI)
- apt-get update downloads the package lists from the repositories and "updates" them to get information on the newest versions of packages and their dependencies.
- Instructions
| Section 8: Terminal Window Color Preferences |
- Bring up a console terminal
- Instructions:
- Click on the Terminal Console Icon
- Instructions:
- Open Profile Preferences
- Instructions
- Edit --> Profile Preferences
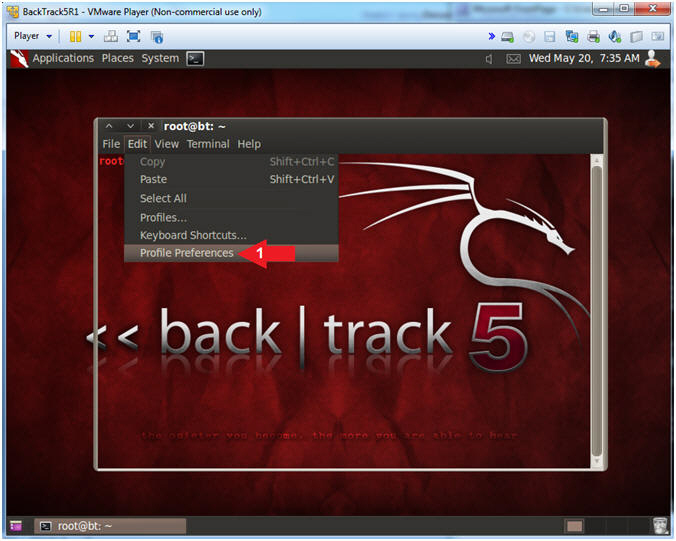
- Instructions
- Foreground, Background, and Bold
- Instructions
- Click on the Colors Tab
- Built-in scheme: Black on white

- Instructions
- Transparent Background
- Instructions
- Click on the Background Tab
- Click on the Transparent background radio button
- Move the Slider over to Maximum
- Click the Close Button
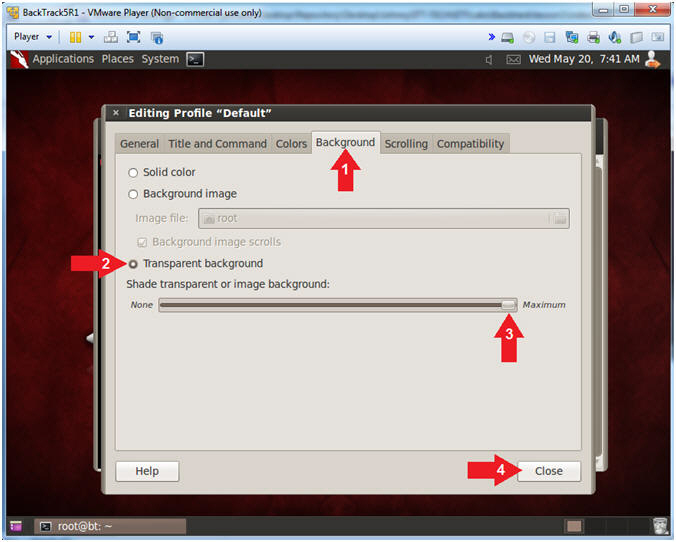
- Instructions
| Section 9: Proof of Lab |
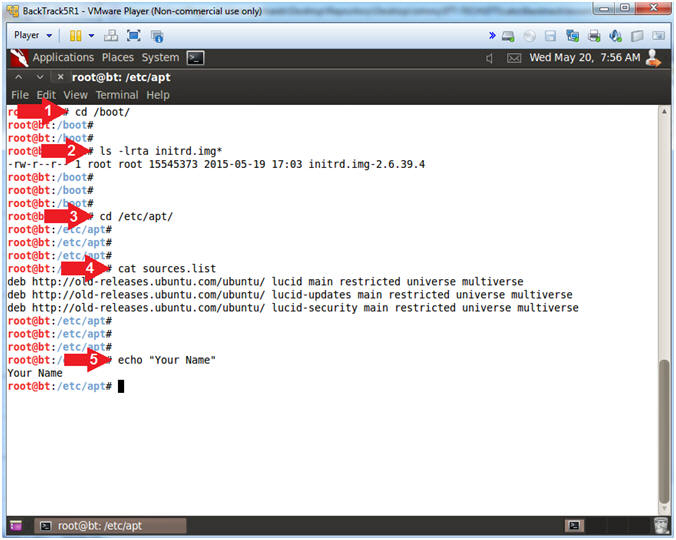
- Proof of Lab
- Note(FYI):
- initrd.img-2.6.39.4 is the "initial ramdisk". It stores necessary drivers required so that the kernel can mount / and kick off init.
- Instructions:
- cd /boot/
- ls -l initrd.img*
- cd /etc/apt/
- cat sources.list
- echo "Your Name"
- Replace the string "Your Name" with your actual name.
- e.g., echo "John Gray"
-
Proof of Lab Instructions
- Press both the <Ctrl> and <Alt> keys at the same time.
- Do a <PrtScn>
- Paste into a word document
- Upload to Moodle
- Note(FYI):
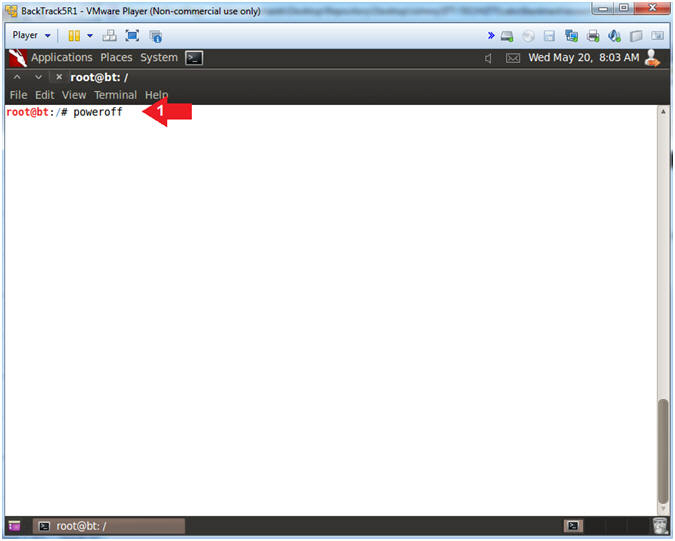
- Power Off Machine
- Note(FYI):
- When finished with any Linux machine, it is always a good idea to poweroff the machine.
- If you want to continue using BackTrack, then don't power off the machine.
- Instructions:
- poweroff
- Note(FYI):