(Windows 7: Lesson 9)
{ Install and Test ZoneAlarm Firewall Against BackTrack }
| Section 0. Background Information |
- ZoneAlarm Firewall
- In ZoneAlarm, program access is controlled by way of "zones", into which all network connections are divided. The "trusted zone" generally includes the user's local area network and can share resources such as files and printers, while the "Internet zone" includes everything not in the trusted zone.
- The user can specify which "permissions" (trusted zone client, trusted zone server, Internet zone client, Internet zone server) to give to a program before it attempts to access the Internet (e.g. before running it for the first time) or, alternatively, ZoneAlarm will ask the user to give the program permission on its first access attempt..
-
Lab Notes
- In this lab we will do the following:
- Download ZoneAlarm Firewall
- Test ZoneAlarm Firewall Against BackTrack (Ping)
- Test ZoneAlarm Firewall Against BackTrack (nmap basic scan)
- Test ZoneAlarm Firewall Against BackTrack (nmap half-open TCP scan)
- Test ZoneAlarm Firewall Against BackTrack (nmap SCTP INIT scan)
- Test ZoneAlarm Firewall Against BackTrack (nmap intense scan)
- In this lab we will do the following:
- Prerequisites
- Instructions:
- Legal Disclaimer
- As a condition of your use of this Web site, you warrant to computersecuritystudent.com that you will not use this Web site for any purpose that is unlawful or that is prohibited by these terms, conditions, and notices.
- In accordance with UCC § 2-316, this product is provided with "no warranties, either express or implied." The information contained is provided "as-is", with "no guarantee of merchantability."
- In addition, this is a teaching website that does not condone malicious behavior of any kind.
- Your are on notice, that continuing and/or using this lab outside your "own" test environment is considered malicious and is against the law.
- © 2012 No content replication of any kind is allowed without express written permission.
| Section 1. Start your Windows 7 VM |
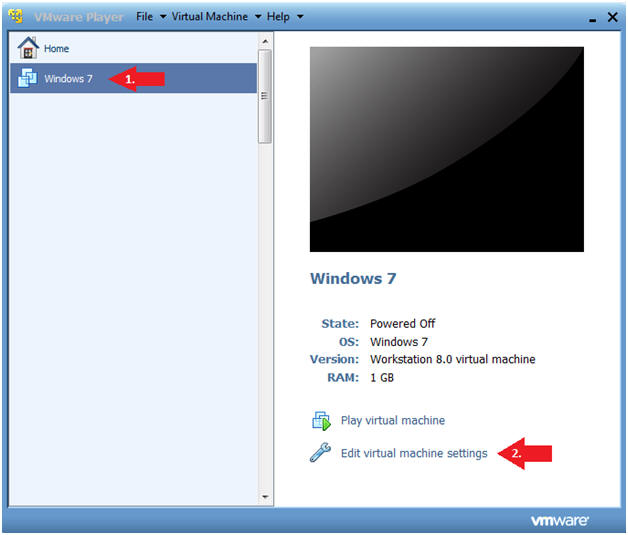
- Edit Virtual Machine Settings
- Instructions:
- Click on Windows 7
- Click on Edit virtual machine
- Instructions:
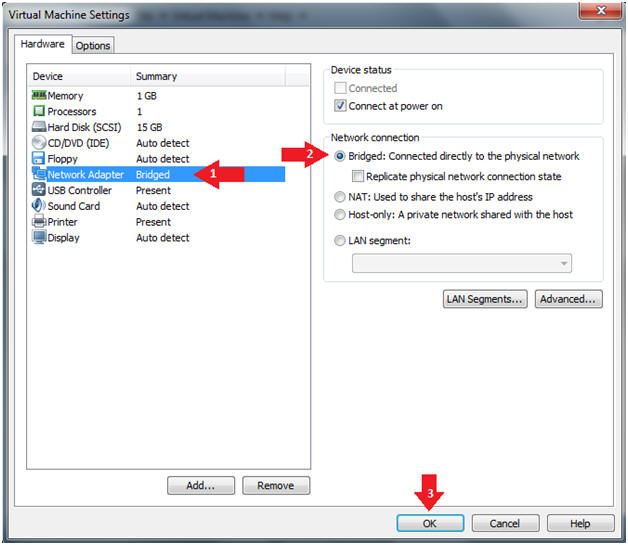
- Configure Network Adapter
- Instructions
- Select Network Adapter
- Click the radio button "Bridged: Connected directly to the physical network."
- Click the Okay button
- Instructions
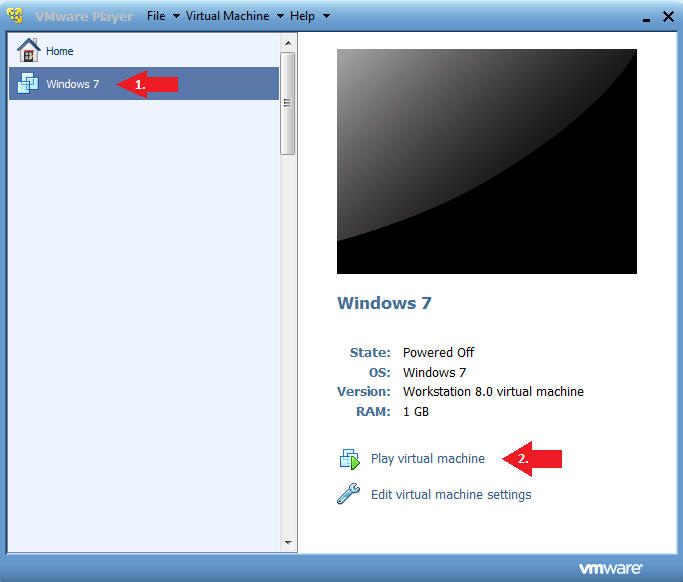
- Start Windows 7
- Instructions:
- Click on Windows 7
- Click on Play virtual machine
- Instructions:
| Section 2. Login to Windows 7 |
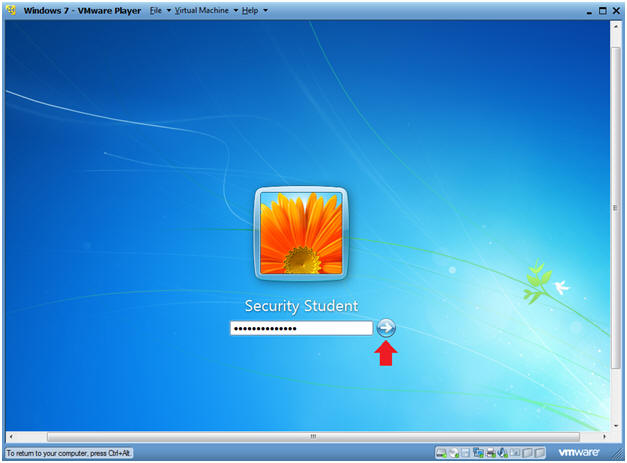
- Login
- Instructions:
- Enter Password
- Click the Blue Arrow
- Instructions:
| Section 3. Verify you have a Network IP Address |
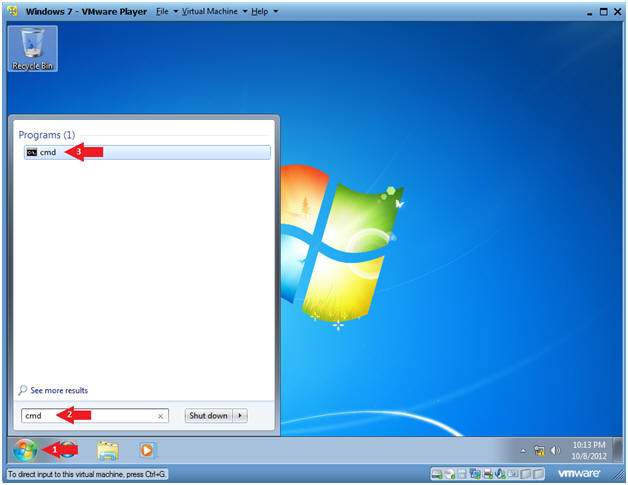
- Bring up Command Prompt
- Instructions:
- Start --> Command Prompt
-
- Instructions:
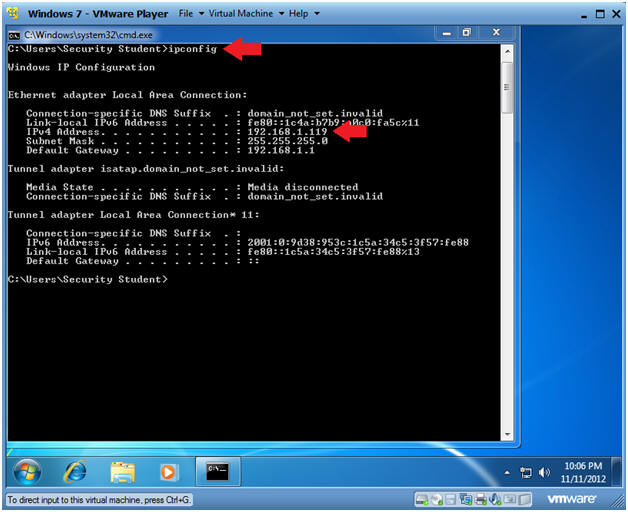
- Verify IP Address
- Instructions:
- ipconfig
- Notes:
- In my case, my IP Address is 192.168.1.119.
- In your case, your IP Address will probably be different.
- Instructions:
| Section 4. Install ZoneAlarm |
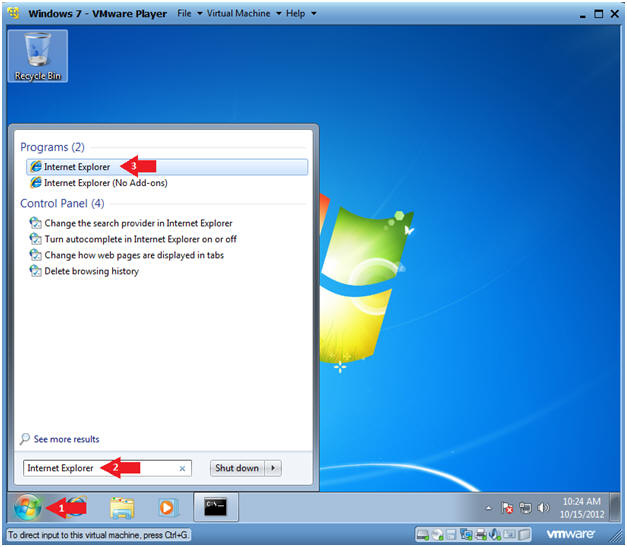
- Open Internet Explorer
- Instructions:
- Click the Start Button
- Type "Internet Explorer" in the search box
- Click on Internet Explorer
- Instructions:
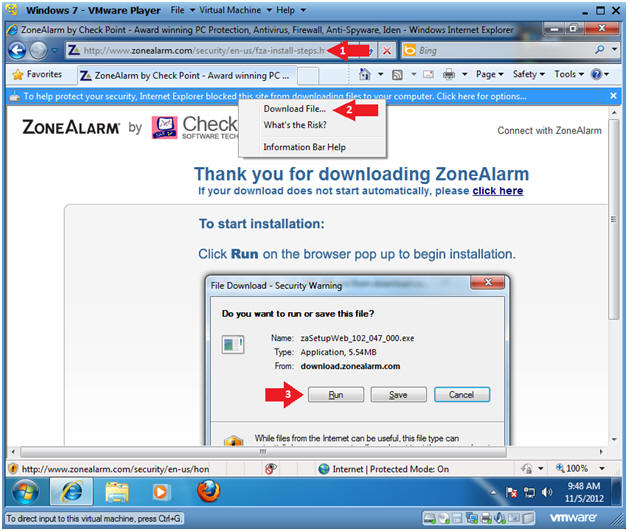
- Go to the ZoneAlarm Firewall Site
- Instructions:
- Paste the following website address in
the URI box.
- http://www.zonealarm.com/security/en-us/fza-install-steps.htm
- Click on the Blue Security Message, and Click on Download File...
- Click on the Run Button
- Paste the following website address in
the URI box.
- Instructions:
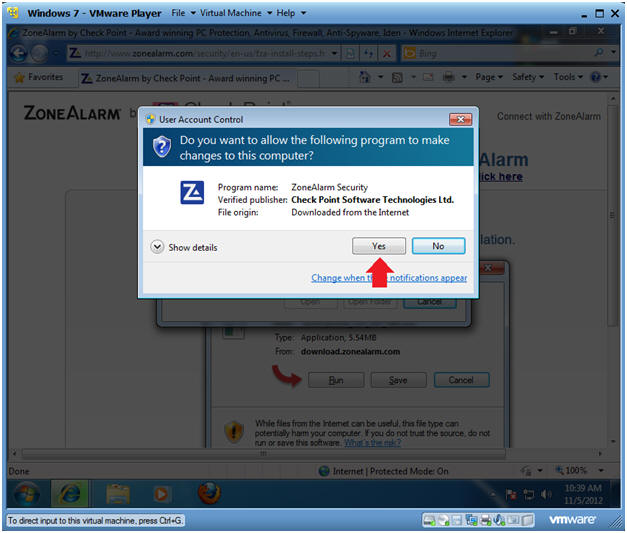
- User Account Control
- Instructions:
- Click Yes
- Instructions:
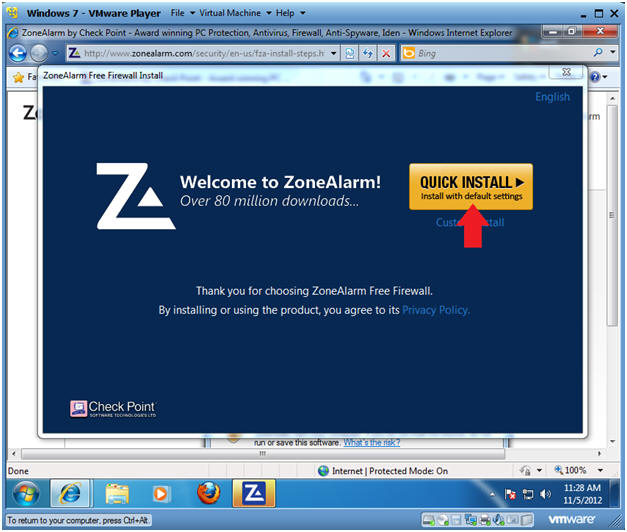
- ZoneAlarm Quick Install
- Instructions:
- Click the Quick Install Button
- Instructions:
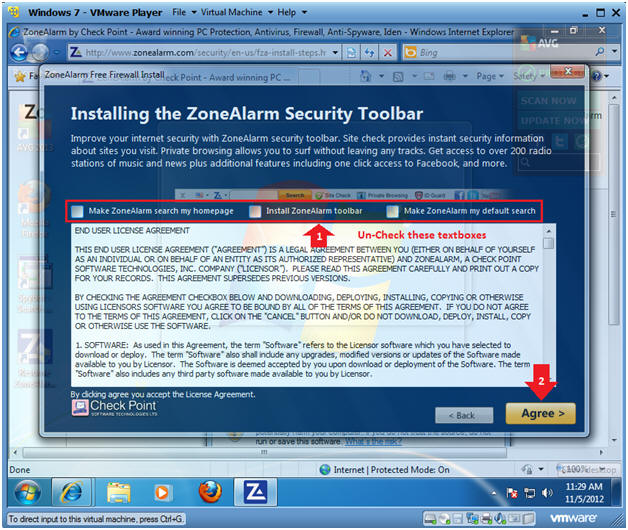
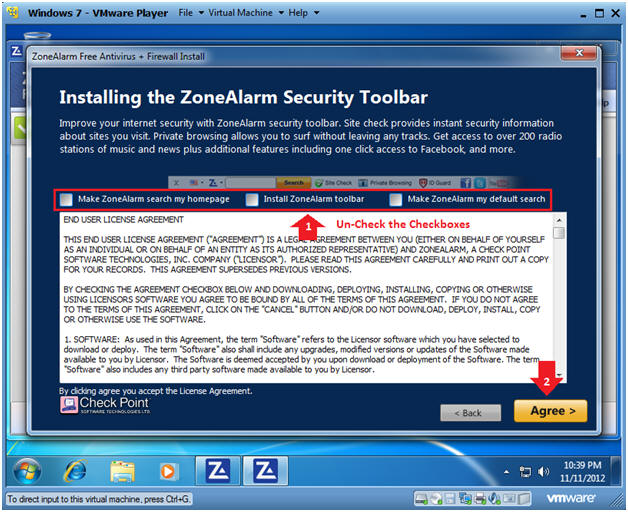
- Installing the ZoneAlarm Security Toolbar
- Instructions:
- Uncheck the three textboxes
- Click I Agree
- Instructions:
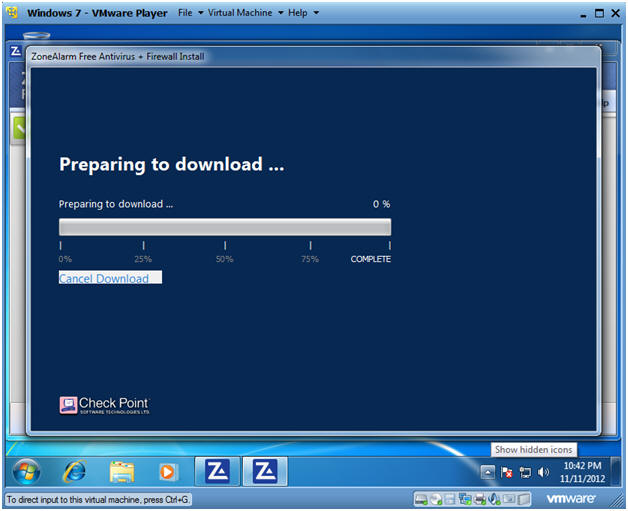
- Downloading
- Note(FYI):
- This will take between 5 to 20 minutes depending on your connection.

- Note(FYI):
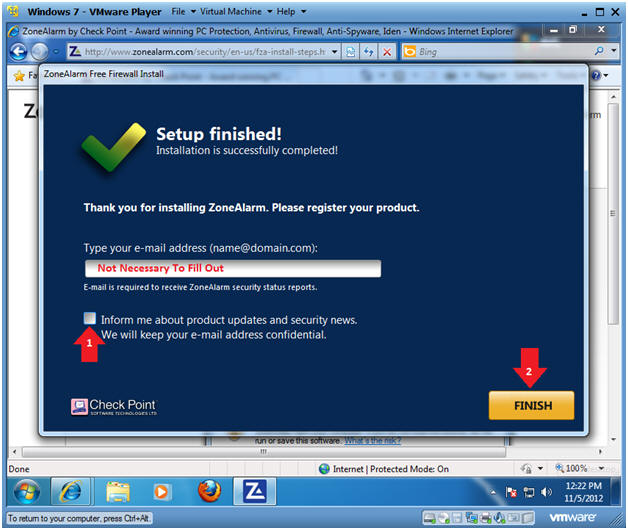
- Setup Finished
- Instructions:
- Uncheck the "Inform me" checkbox.
- Click the Finish button
- Instructions:
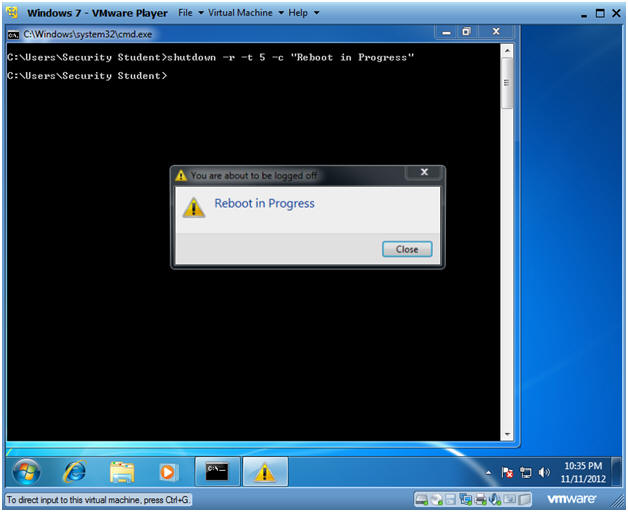
- Bring up Command Prompt
- Instructions:
- Start --> Command Prompt
-
- Instructions:
- Bring up Command Prompt
- Instructions:
- Start
- Instructions:
| Section 5. Install ZoneAlarm Anti-Virus |
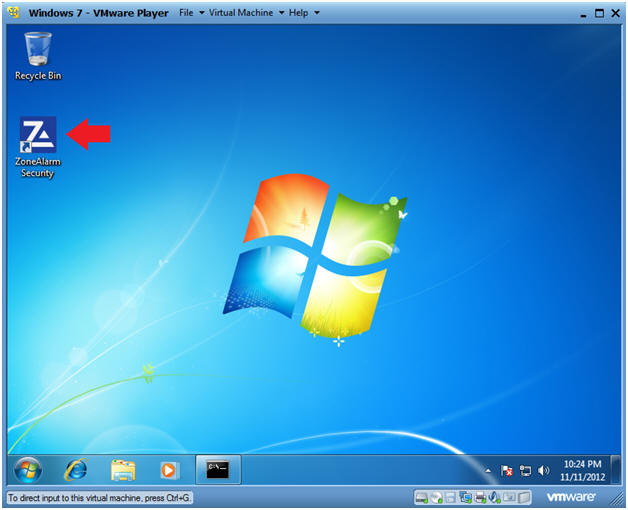
- Open ZoneAlarm Security
- Instructions:
- Double Click on the ZoneAlarm Security Desktop Icon
- Instructions:
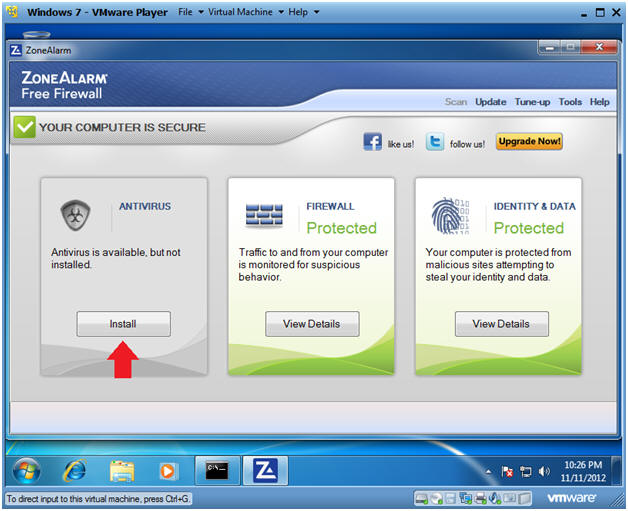
- Install ZoneAlarm Antivirus
- Instructions:
- Click on the Antivirus Install Button
- Instructions:
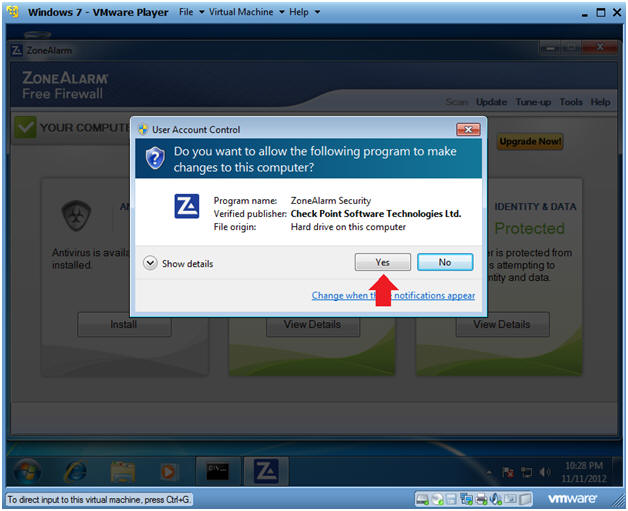
- User Account Control
- Instructions:
- Click Yes.
- Instructions:
- ZoneAlarm Free Antivirus
- Instructions:
- Un-Check the Checkboxes
- Click Agree
- Instructions:
- Downloading
- Note(FYI):
- This will take between 5 to 20 minutes depending on your connection.
- Note(FYI):
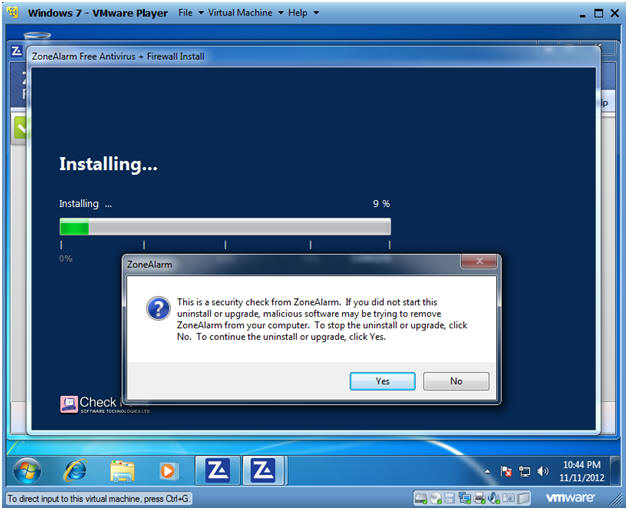
- ZoneAlarm Message
- Instructions:
- Click Yes
- Instructions:
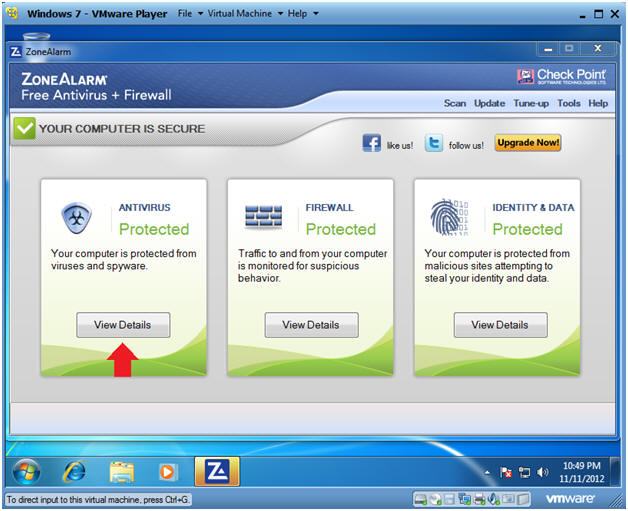
- View Details
- Instructions:
- Click Antivirus View Details Button
- Instructions:
- View Antivirus Dashboard
- Note(FYI):
- Verify the Antivirus is up to date and enabled.
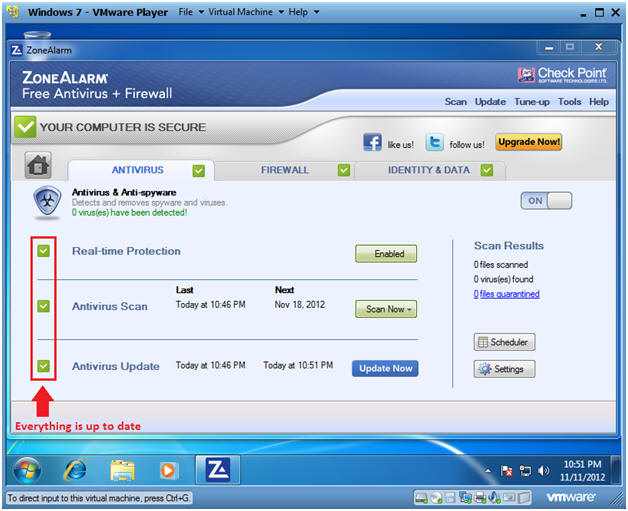
- Note(FYI):
| Section 6. Configure Windows Firewall Settings |
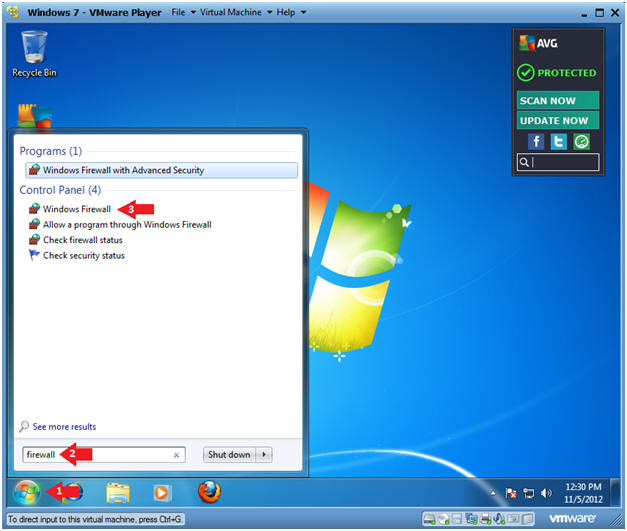
- Open Windows Firewall
- Instructions:
- Click the Start Button
- Type firewall in the search box
- Click on Windows Firewall
- Instructions:
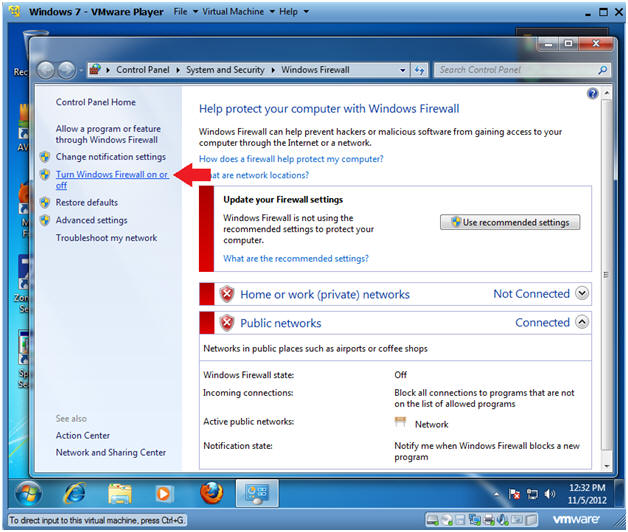
- Turn Windows Firewall on or off
- Instructions:
- Click on Turn Windows Firewall on or off
- Instructions:
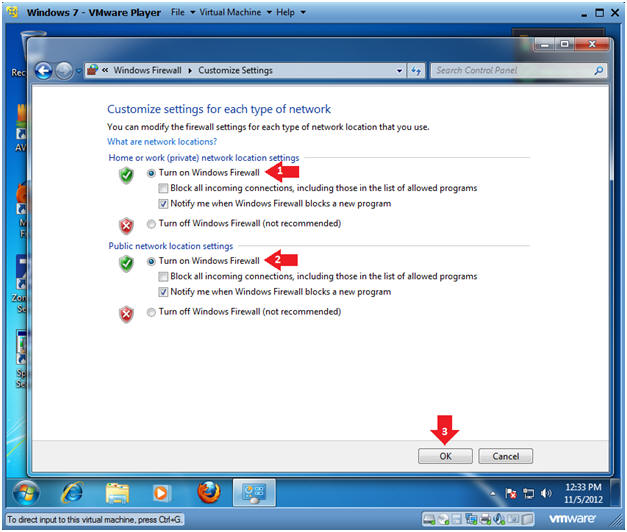
- Customize Windows Firewall Settings
- Instructions:
- Home or work (private) network: Click on Turn on Windows Firewall
- Public network location settings: Click on Turn on Windows Firewall
- Click on the OK Button
- Instructions:
- Advance Windows Firewall Settings
- Instructions:
- Click on Advanced settings

- Instructions:
- Windows Firewall Properties
- Instructions:
- Click on Windows Firewall Properties
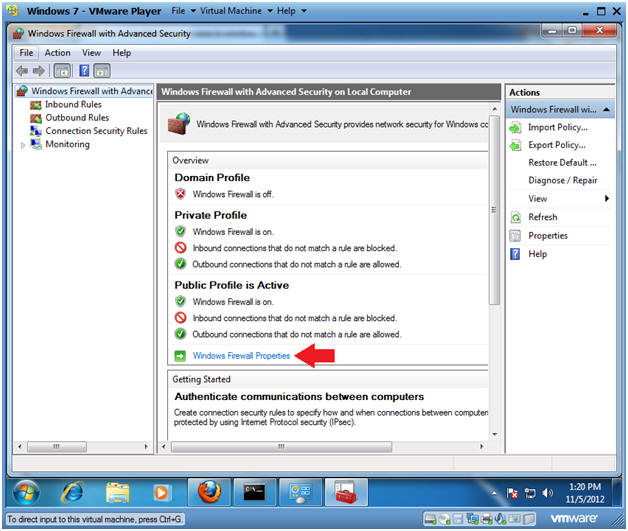
- Instructions:
- Configure Domain Profile
- Instructions:
- Click on Domain Profile
- Firewall state: On (recommended)
- Click on the OK Button.
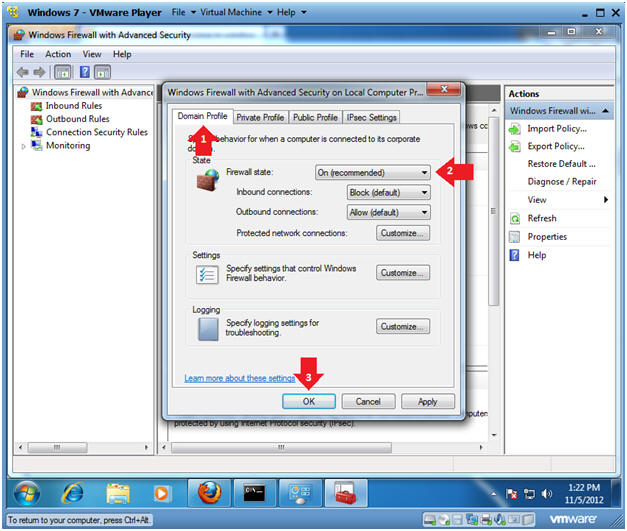
- Instructions:
| Section 7. Configure BackTrack Virtual Machine Settings |
- Open Your VMware Player
- Instructions:
- On Your Host Computer, Go To
- Start --> All Program --> VMWare --> VMWare Player
- Instructions:
- Edit BackTrack Virtual Machine Settings
- Instructions:
- Highlight BackTrack5R1
- Click Edit virtual machine settings
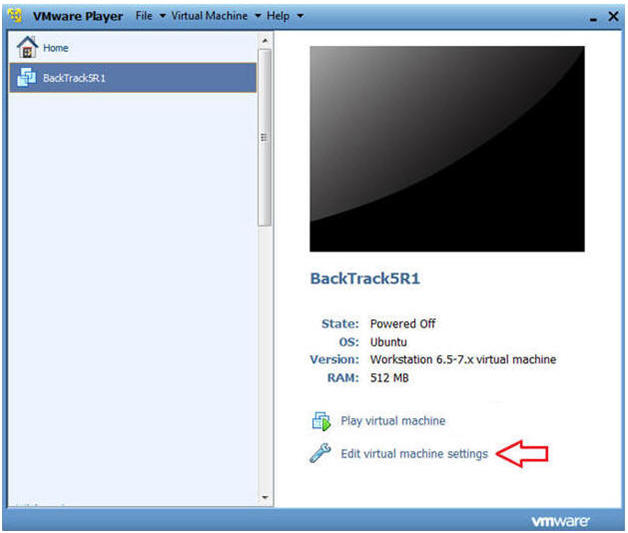
- Instructions:
- Edit Network Adapter
- Instructions:
- Highlight Network Adapter
- Select Bridged
- Do not Click on the OK Button.
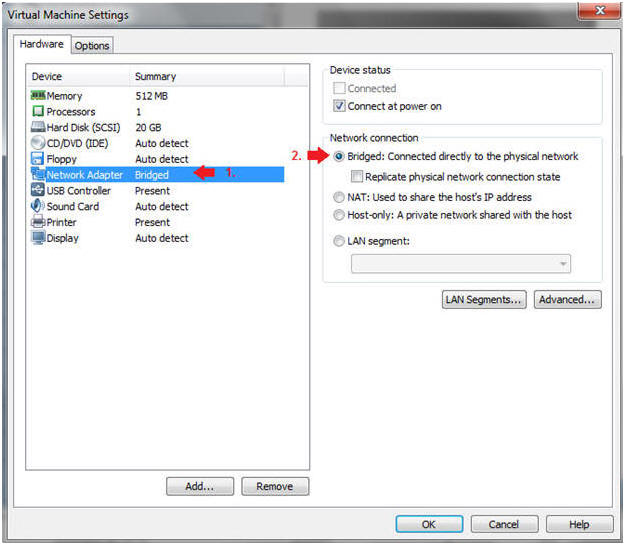
- Instructions:
| Section 8. Login to BackTrack |
- Start BackTrack VM Instance
- Instructions:
- Start Up VMWare Player
- Select BackTrack5R1
- Play virtual machine

- Instructions:
- Login to BackTrack
- Instructions:
- Login: root
- Password: toor or <whatever you changed it to>.
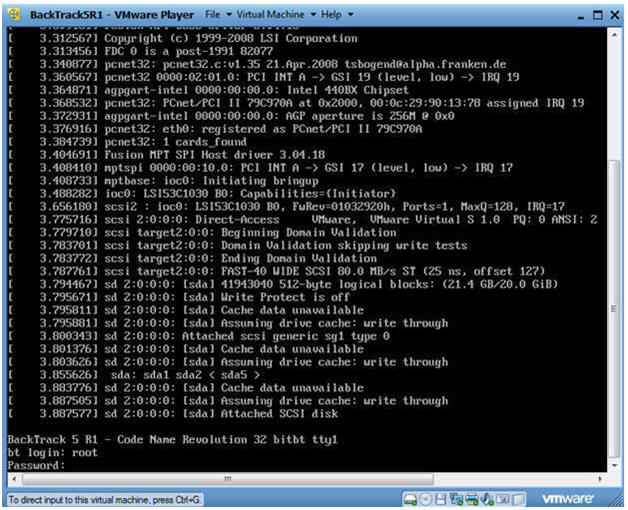
- Instructions:
- Bring up the GNOME
- Instructions:
- Type startx
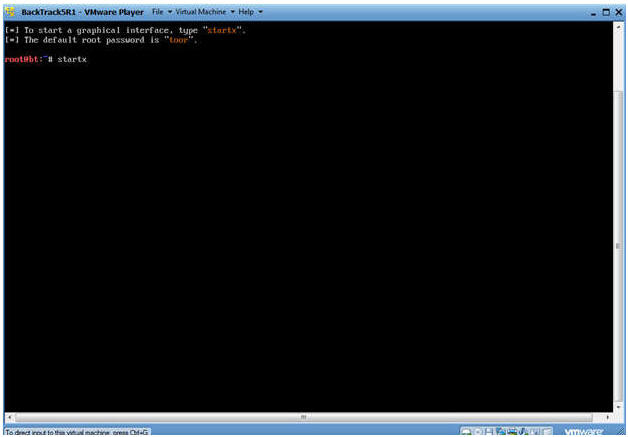
- Instructions:
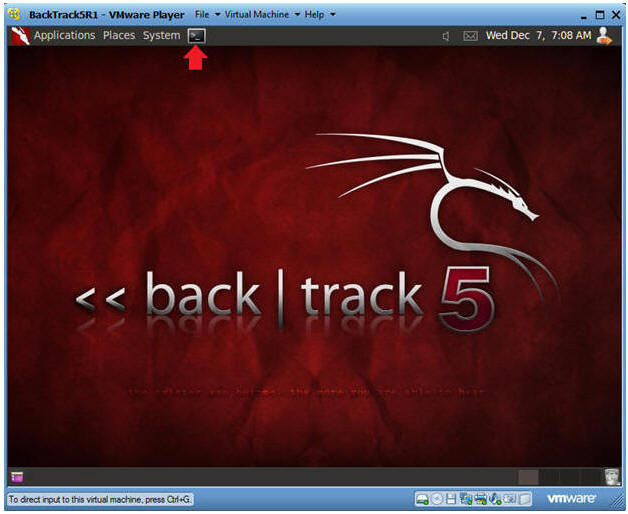
| Section 9. Open Console Terminal and Retrieve IP Address |
- Open a console terminal
- Instructions:
- Click on the console terminal
- Instructions:
- Get IP Address
- Instructions:
- ifconfig -a
- Notes:
- As indicated below, my IP address is 192.168.1.107.
- Please record your IP address.

- Instructions:
| Section 10. Test ZoneAlarm Firewall with BackTrack (Ping) |
- Ping Windows 7
- Notes:
- Obtain the IP Address of the Window 7 machine running ZoneAlarm from (Section 3, Step 2)
- Instructions:
- ping -c 5 192.168.1.119
- -c, this flag indicates the number of pings, which in this example is 5 pings.
- 192.168.1.119 is the IP Address for my Windows 7 machine.
- ping -c 5 192.168.1.119
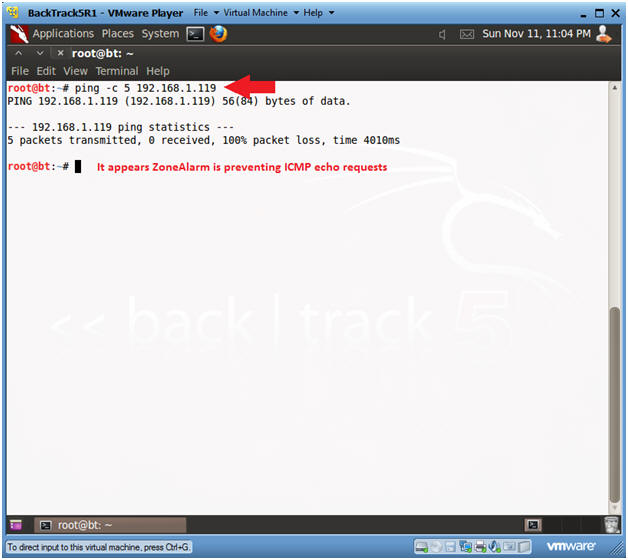
- Notes:
- Open ZoneAlarm Security
- Instructions:
- Click on the ZoneAlarm Security Icon
- Instructions:
- View Firewall Events
- Instructions:
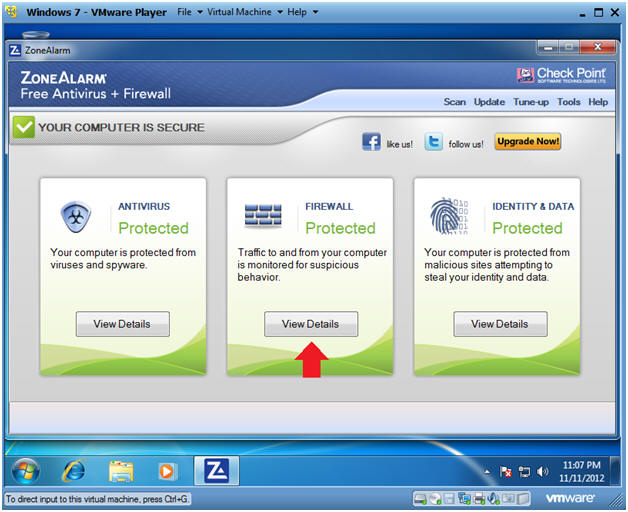
- Click on View Details button in the Firewall section
- Instructions:
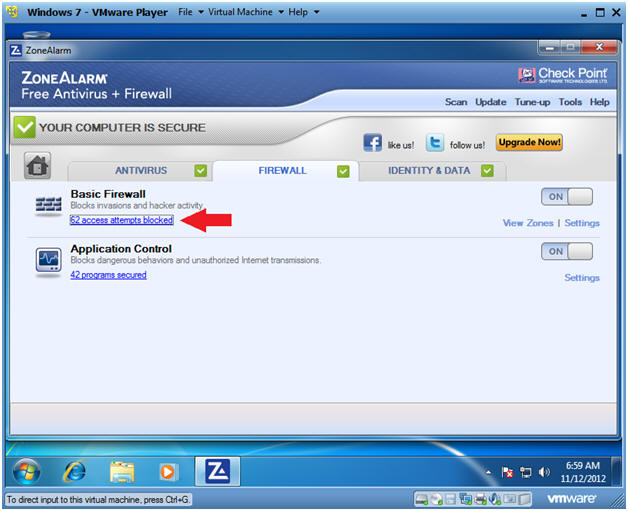
- Viewing ZoneAlarm Firewall Dashboard
- Instructions:
- Click on "access attempts blocked"
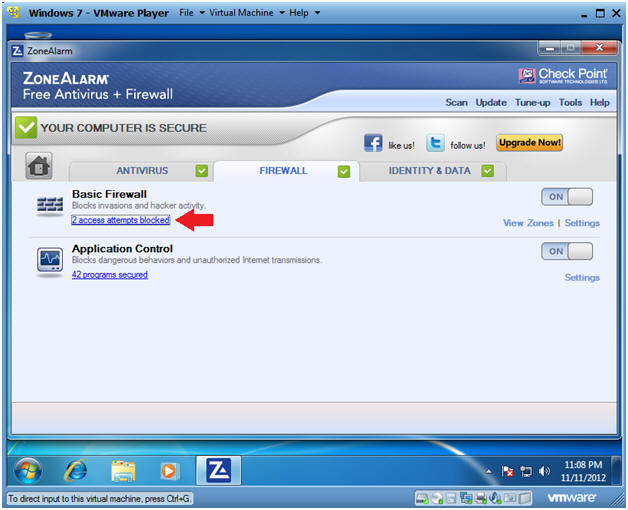
- Instructions:
- More Info
- Instructions:
- Click on BackTrack's IP Address
- Click the More Info Button

- Instructions:
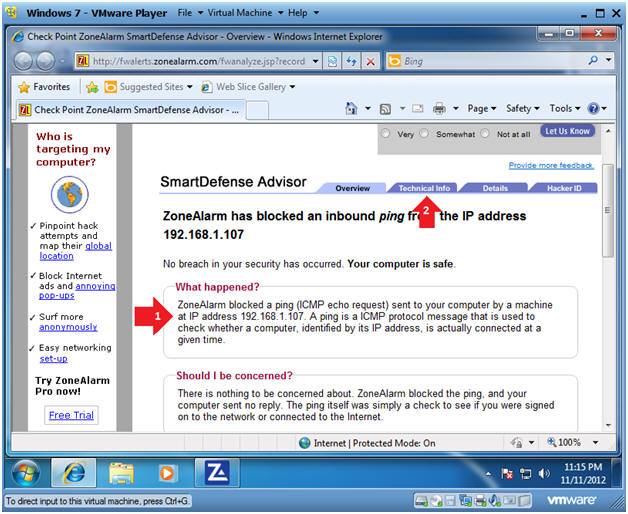
- SmartDefense Advisor
- Instructions:
- Read the "What happened?" section.
- Click the Technical Info Tab and view the details
- Instructions:
| Section 11. Test ZoneAlarm Firewall with BackTrack (nmap basic scan) |
- Conduct Basic nmap scan
- Instructions:
- nmap 192.168.1.119
- Notes:
- Obtain the IP Address of the Window 7 machine running ZoneAlarm from (Section 3, Step 2)
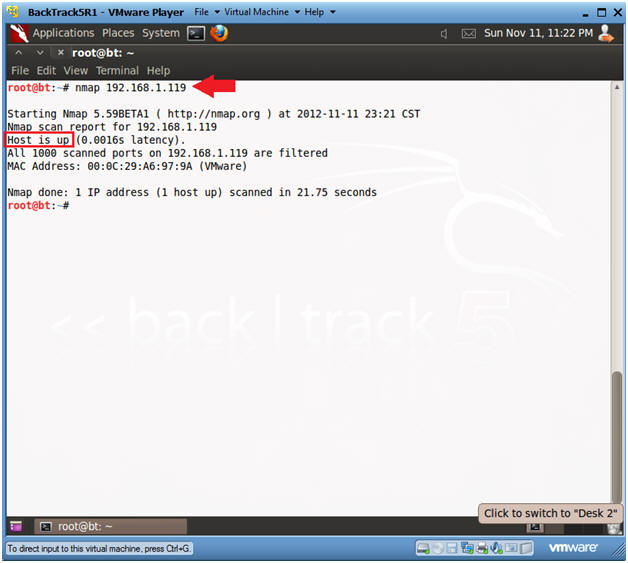
- Instructions:
- Open ZoneAlarm Security
- Instructions:
- Click on the ZoneAlarm Security Icon
- Instructions:
- View Firewall Events
- Instructions:
- Click on View Details button in the Firewall section
- Instructions:
- Viewing ZoneAlarm Firewall Dashboard
- Note(FYI):
- Notice how the attempted blocks exponentially grew.
- Instructions:
- Click on "access attempts blocked"
- Note(FYI):
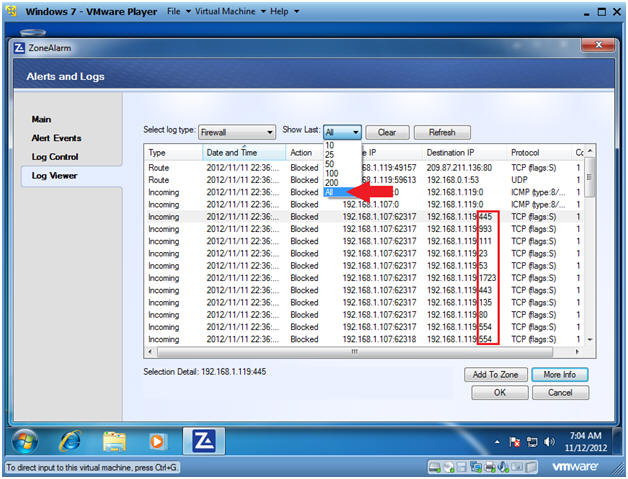
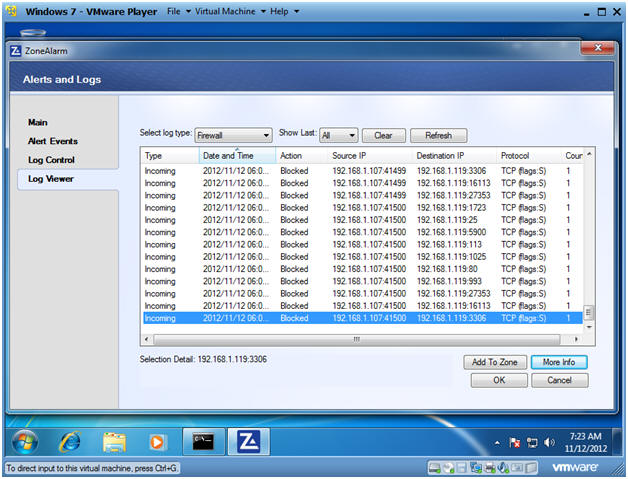
- Viewing Firewall Alerts
- Instructions:
- Show Last: Click All
- Highlight some alerts and click more info.
- When finished click the OK button.
- Note(FYI):
- Port 445 - Microsoft SMB
- Port 23 - telnetd
- Port 80 - Microsoft IIS
- Instructions:
| Section 12. Test ZoneAlarm Firewall with BackTrack (nmap TCP half-open stealth scan) |
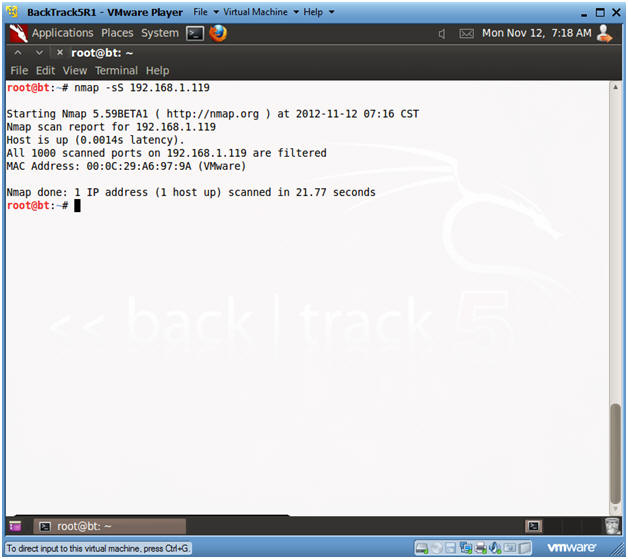
- Conduct nmap TCP half-open stealth scan
- Instructions:
- nmap -sS 192.168.1.119
- Notes:
- Obtain the IP Address of the Window 7 machine running ZoneAlarm from (Section 3, Step 2).
- -sS, This technique is often referred to as half-open scanning, because you don't open a full TCP connection. You send a SYN packet, as if you are going to open a real connection and then wait for a response. It is also relatively unobtrusive and stealthy since it never completes a TCP connections.
- Instructions:
- Open ZoneAlarm Security
- Instructions:
- Click on the ZoneAlarm Security Icon
- Instructions:
- View Firewall Events
- Instructions:
- Click on View Details button in the Firewall section
- Instructions:
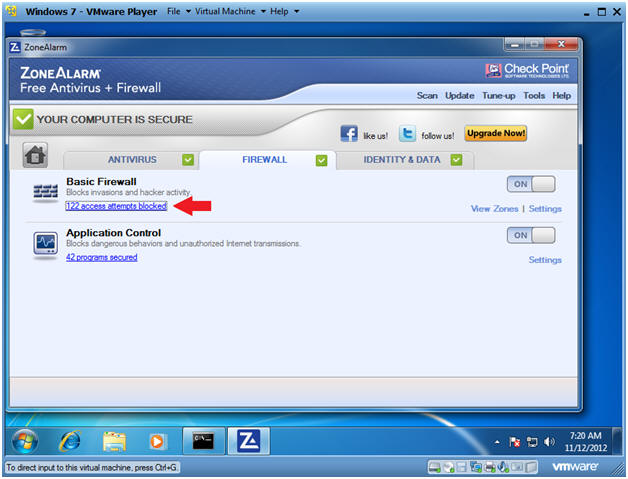
- Viewing ZoneAlarm Firewall Dashboard
- Note(FYI):
- Notice how the attempted blocks grew again.
- Instructions:
- Click on "access attempts blocked"
- Note(FYI):
- Viewing Firewall Results
- Instructions:
- Scroll all the way to the bottom.
- Notes:
- Notice there are some new ports that were scanned.
- Port 3306 - mysqld
- Port 5900 - VNC
- Instructions:
| Section 13. Test ZoneAlarm Firewall with BackTrack (nmap SCTP INIT scan) |
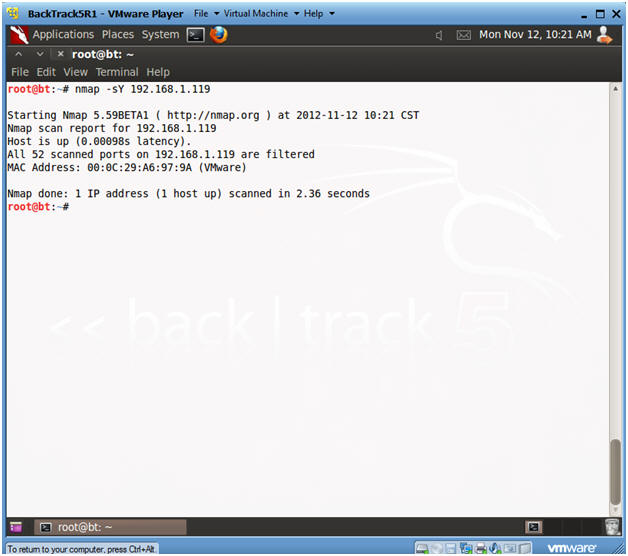
- Conduct nmap SCTP INIT scan
- Instructions:
- nmap -sY 192.168.1.119
- Replace 192.168.1.119 with the Windows 7 IP Address obtain from (Section 3, Step 2).
- nmap -sY 192.168.1.119
- Notes:
- This technique is often referred to as half-open scanning, because you don't open a full SCTP association. You send an INIT chunk, as if you are going to open a real association and then wait for a response.
- SCTP is a relatively new alternative to the TCP and UDP protocols, combining most characteristics of TCP and UDP, and also adding new features like multi-homing and multi-streaming. SCTP INIT scan is the SCTP equivalent of a TCP SYN scan. It can be performed quickly, scanning thousands of ports per second on a fast network not hampered by restrictive firewalls. Like SYN scan, INIT scan is relatively unobtrusive and stealthy, since it never completes SCTP associations.
- Instructions:
| Section 12. Test ZoneAlarm Firewall with BackTrack (nmap intense scan) |
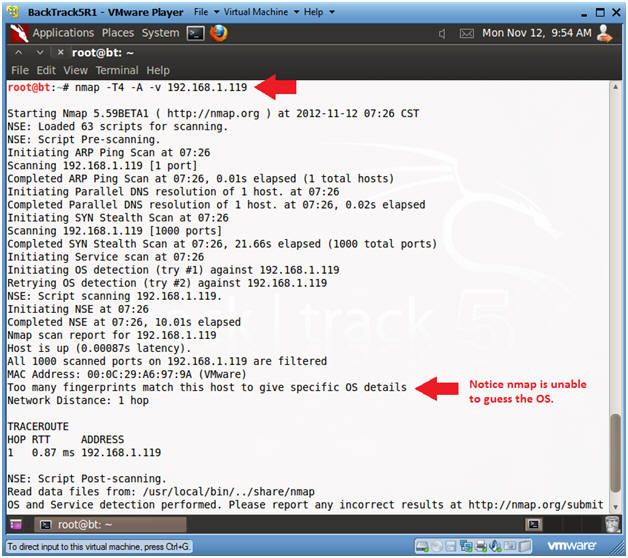
- Conduct nmap intense scan
- Instructions:
- nmap -T4 -A -v 192.168.1.119
- Replace 192.168.1.119 with the Windows 7 IP Address obtain from (Section 3, Step 2).
- nmap -T4 -A -v 192.168.1.119
- Notes(FYI):
- -T, is a timing template with the following settings: paranoid (0), sneaky (1), polite (2), normal (3), aggressive (4), and insane (5). The first two are for IDS evasion.
- -A, to enable OS and version detection, script scanning, and traceroute.
- -v, is verbose mode.
-
Findings:
- ZoneAlarm does a pretty good job of not disclosing Operating System details.
- Consequently, in the previous Comodo Lab, Comodo was not able to protect again many of the above nmap scans.
- Instructions:
| Section 13. Proof of Lab |
-
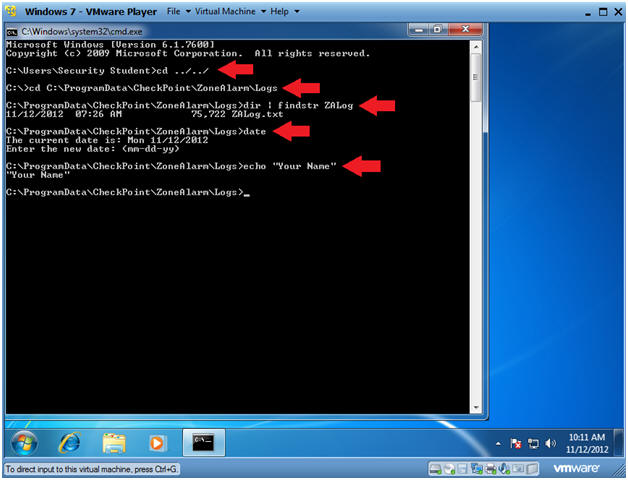
Proof of Lab Instructions
- Instructions:
- Bring up a Command Prompt
- cd ../../
- cd C:\ProgramData\CheckPoint\ZoneAlarm\Logs
- dir | findstr ZALog
- date
- Press <Enter>
- echo "Your Name"
- Replace the string "Your Name" with your actual name.
- e.g., echo "John Gray"
- Do a PrtScn
- Paste into a word document
- Upload to Moodle
-
- Instructions: