(Ubuntu: Lesson 9)
{ How to setup an ssh key infrastructure }
| Section 0. Background Information |
- What is SSH?
- Secure Shell (SSH) is a network protocol for secure data communication, remote shell services or command execution and other secure network services between two networked computers that it connects via a secure channel over an insecure network: a server and a client (running SSH server and SSH client programs, respectively)
- What is SSHD?
- sshd (OpenSSH Daemon) is the daemon program for ssh(1). Together these programs replace rlogin(1) and rsh(1), and provide secure encrypted communications between two untrusted hosts over an insecure network.
- What are SSH Keys?
- On Unix-like systems, the list of authorized keys are stored in the home folder of the user that is allowed to log in remotely, in the file ~/.ssh/authorized_keys. This file is only respected by ssh if it is not writable by anything apart from the owner and root.
- When the public key is present on one side and the matching private key is present on another side, typing in the password is no longer required.
- The private key can also be looked for in standard places, but its full path can also be specified as a command line setting (the switch -i for ssh). The ssh-keygen utility produces the public and private keys, always in pairs.
- Prerequisite
- Ubuntu: Lesson 1: Installing Ubuntu Desktop 12.04 LTS
- Ubuntu: Lesson 8: Installing and Securing openssh-server (a.k.a., sshd)
- Fedora: Lesson 1: Installing Fedora 14
- Fedora: Lesson 7: Installing, Configuring and Securing SSHD
-
Lab Notes
- In this lab we will how to do the following:
- We will create a SSH Key Infrastructure between Ubuntu and Fedora.
- We will use ssh-keygen to create a private/public key pair for the student user on Ubunut.
- We will place the public key on the Fedora server in the appropriate directory for the student user.
- We will use Ubuntu's private key to authenticate and log into the Fedora server as student without a password.
- We will use Ubuntu's private key to authenticate and run command against the Fedora server as student without a password.
- In this lab we will how to do the following:
- Legal Disclaimer
- As a condition of your use of this Web site, you warrant to computersecuritystudent.com that you will not use this Web site for any purpose that is unlawful or that is prohibited by these terms, conditions, and notices.
- In accordance with UCC § 2-316, this product is provided with "no warranties, either express or implied." The information contained is provided "as-is", with "no guarantee of merchantability."
- In addition, this is a teaching website that does not condone malicious behavior of any kind.
- You are on notice, that continuing and/or using this lab outside your "own" test environment is considered malicious and is against the law.
- © 2012 No content replication of any kind is allowed without express written permission.
| Section 1: Start Ubuntu 12.04 |
- Start VMware Player
- Instructions
- For Windows 7
- Click Start Button
- Search for "vmware player"
- Click VMware Player
- For Windows XP
- Starts --> Programs --> VMware Player
- For Windows 7

- Instructions
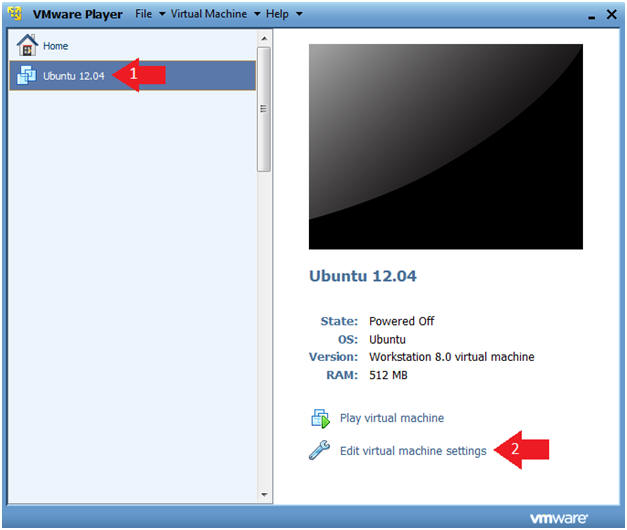
- Verify Virtual Machine Settings.
- Instructions
- Click on Ubuntu 12.04
- Click on Edit virtual machine settings
- Instructions
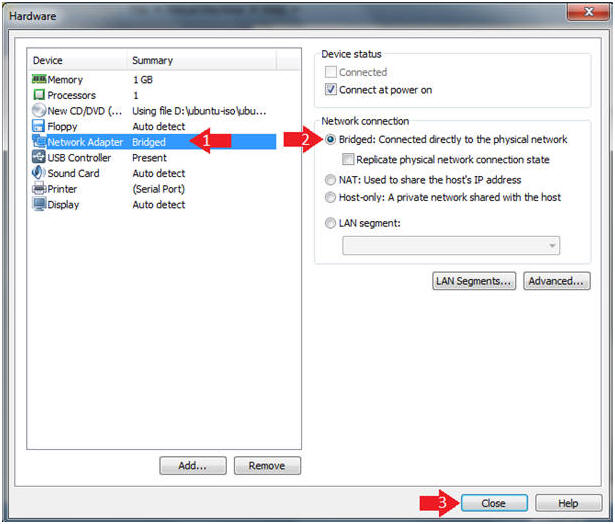
- Configure Network Adapter
- Instructions
- Click on Network Adapter
- Click on the Bridged Radio Button
- Click on the Close Button
- Instructions
- Start the Ubuntu 12.04 VM
- Instructions
- Click on Ubuntu 12.04
- Click on Play virtual machine
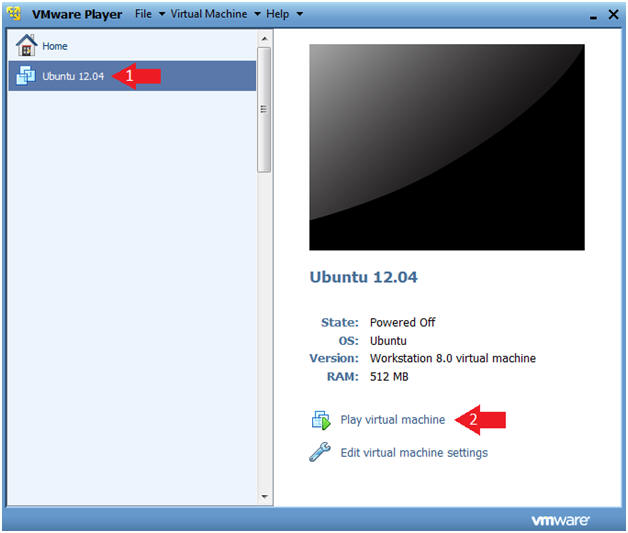
- Instructions
| Section 2: Login to Ubuntu |
- Change to Gnome Classic
- Instructions:
- Click on the Circle
- Instructions:
- Select Gnome Classic
- Instructions:
- Double Click on GNOME Classic
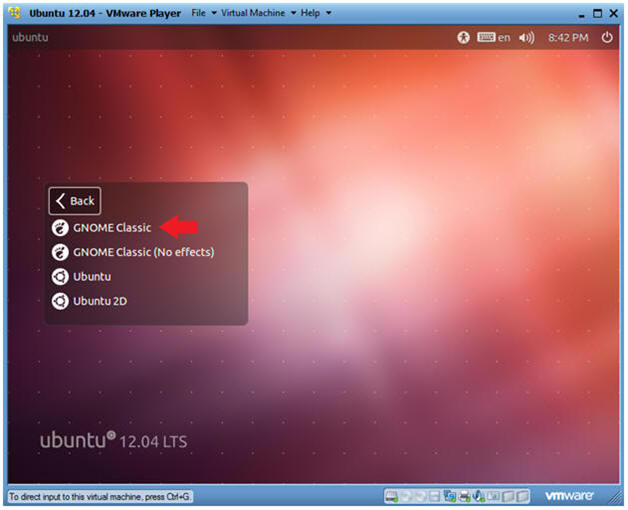
- Instructions:
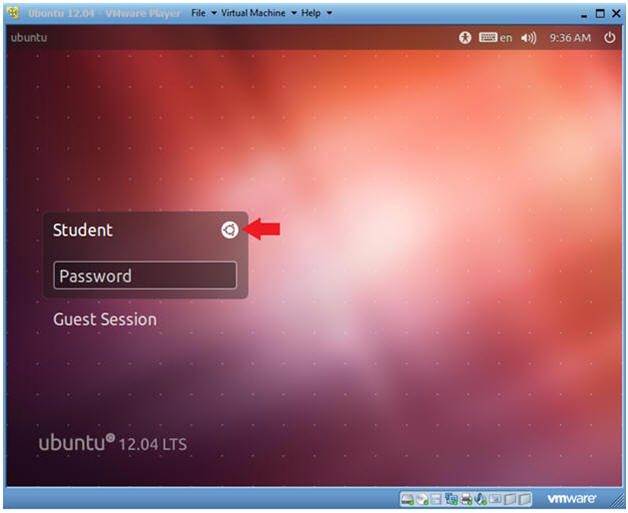
- Login to Server
- Instructions
- User: Student
- Password: Please supply the student password.
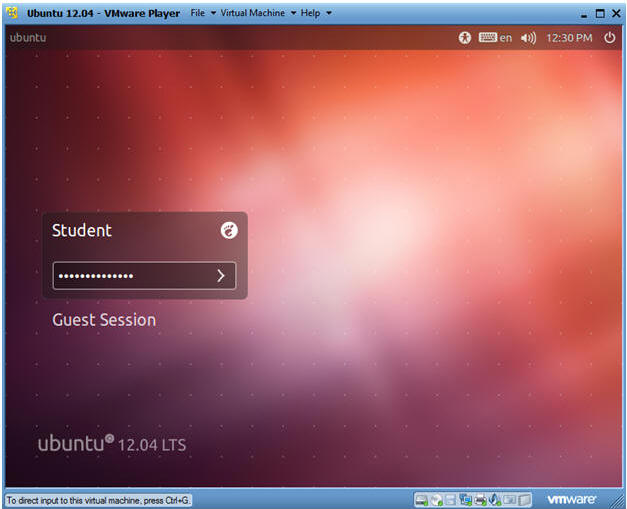
- Instructions
| Section 3: Become Root and Verify Network Connection |
- Start up a Terminal
- Instructions
- Click on the Terminal

- Instructions
- Become Root
- Instructions
- sudo su -
- Supply the student password.
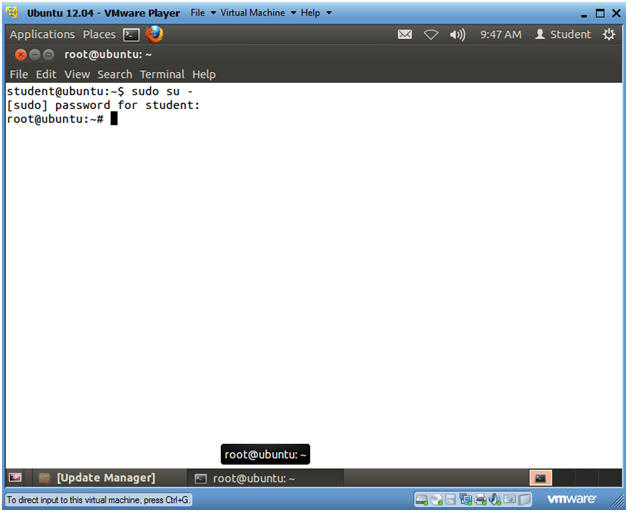
- Instructions
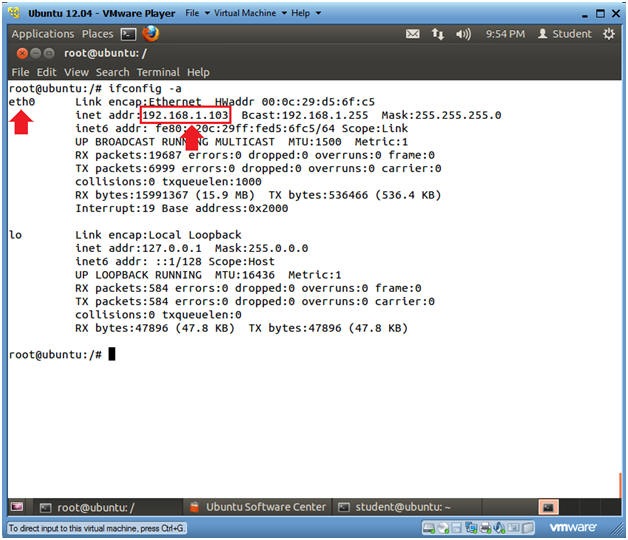
- Verify you have a network connection
- Instructions
- ifconfig -a
- eth0 is the name of my interface.
- 192.168.1.103 is my network IP address.
- ifconfig -a
- Note(FYI):
- If you do not have an DHCP IP Address
try the following:
- dhclient
- OR
- /etc/init.d/networking restart
- dhclient
- If you do not have an DHCP IP Address
try the following:
- Instructions
| Section 4: Create SSH Key Pair |
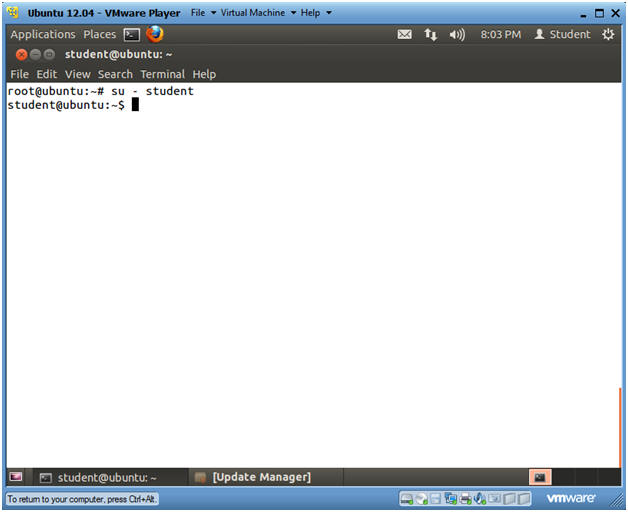
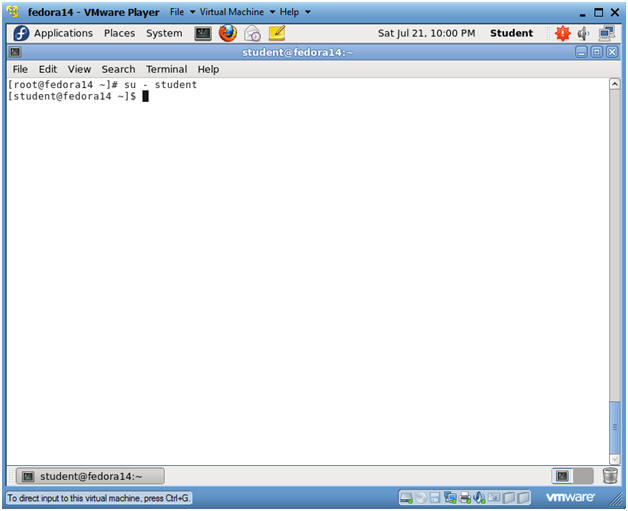
- Switch User Back to "student"
- Instructions
- su - student
- Note(FYI):
- Earlier, you became the root user just encase your network was down.
- We su'ed back to student, because we are going to set up a SSH Key infrastructure for the student user.
- Instructions
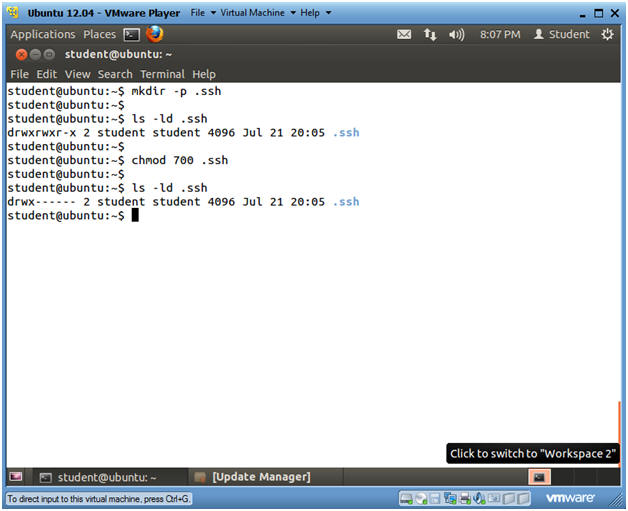
- Create the .ssh directory
- Instructions
- mkdir -p .ssh
- ls -ld .ssh
- In my case, the permissions are set to 775.
- This is a problem, because we don't want anybody to have access to our future ssh keys.
- chmod 700 .ssh
- Now only student has read, write and execute permissions to the .ssh directory.
- ls -ld .ssh
- Instructions
- Create ssh key pair
- Instructions
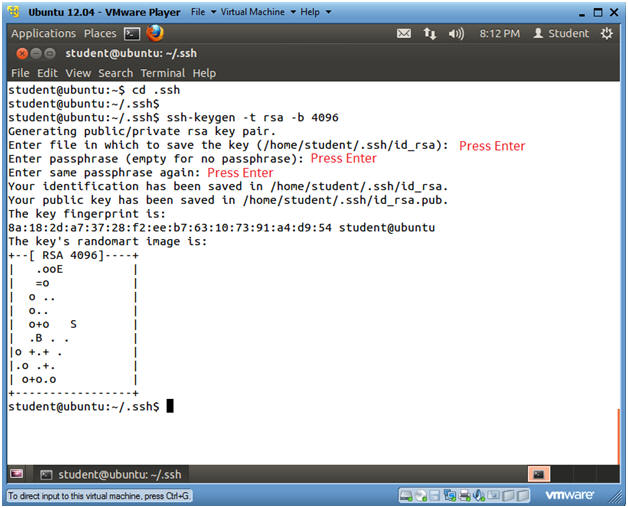
- cd .ssh
- ssh-keygen -t rsa -b 4096
- ssh-keygen is a tool that creates key pairs. (e.g., Private and Public keys).
- "-t" specific the type of encryption used.
- "-b" specific the length of the key. Default is 2048
- Press <Enter>
- Press <Enter>
- Press <Enter>
- Note(FYI):
- For the purposes of this lab, you are not required to name your key or to create a passphrase. It is an industry practice to do both, but lets just cover the basics to get you going.
- Instructions
- Set SSH Key Permissions
- Instructions
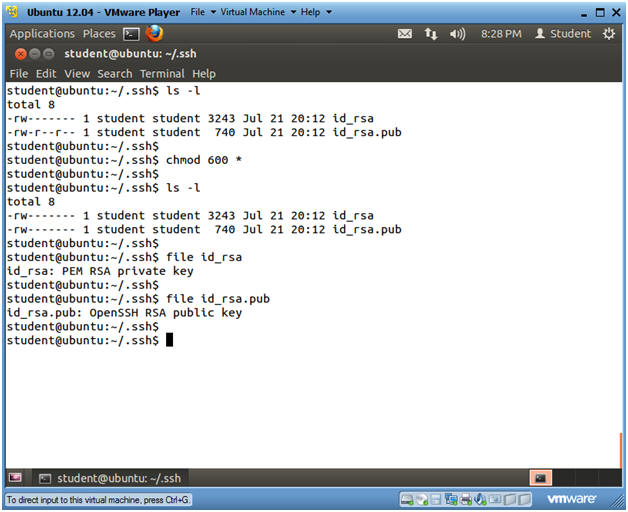
- ls -l
- chmod 600 *
- We want to make sure nobody beside the "student" user can access the keys.
- ls -l
- file id_rsa
- id_rsa, is the private key that is given out to nobody.
- file id_rsa.pub
- id_rsa.pub, is the public key that is placed on other servers used to set up the securely authenticated SSH infrastructure.
- Instructions
| Section 5: Start Up Fedora Server |
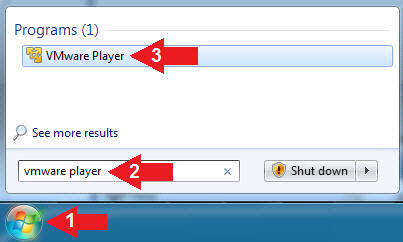
- Start VMware Player
- Instructions
- For Windows 7
- Click Start Button
- Search for "vmware player"
- Click VMware Player
- For Windows XP
- Starts --> Programs --> VMware Player
- For Windows 7
- Instructions
- Edit Fedora Virtual Machine Settings
- Instructions:
- Highlight fedora14
- Click Edit virtual machine settings
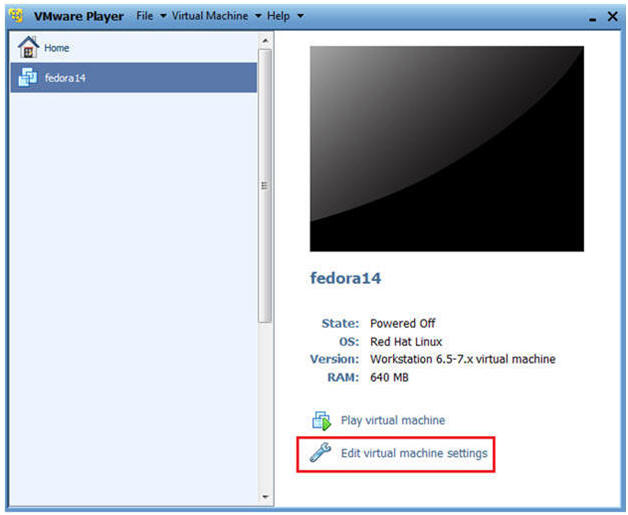
- Instructions:
- Edit Network Adapter
- Instructions:
- Highlight Network Adapter
- Select Bridged
- Click on the OK Button.
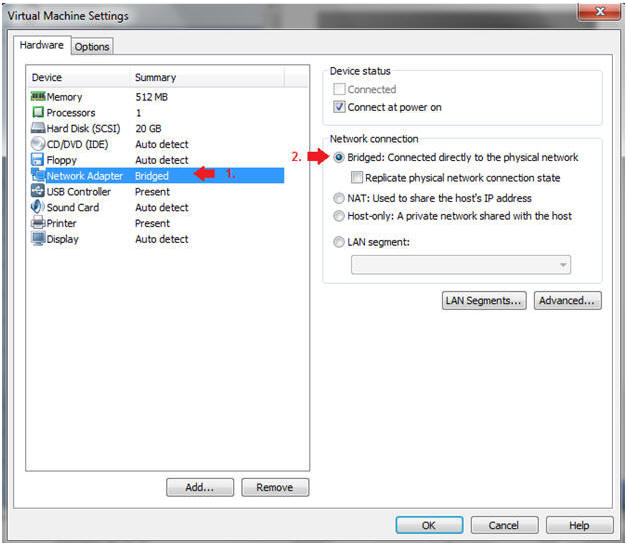
- Instructions:
- Start Fedora14 VM Instance
- Instructions:
- Start Up VMWare Player
- Select Fedora14
- Play virtual machine
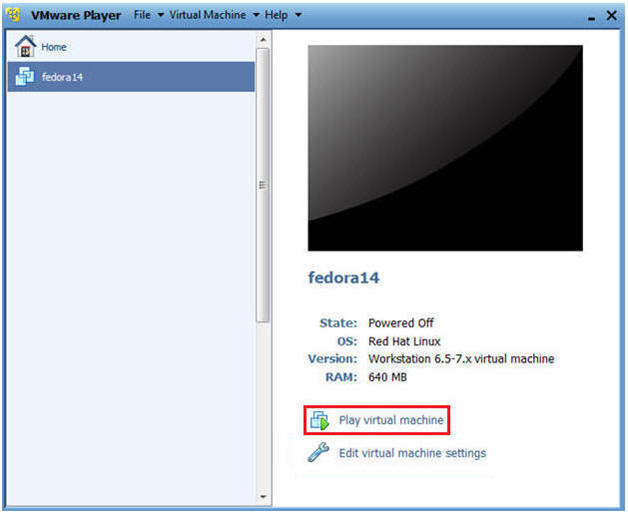
- Instructions:
| Section 6: Login to Fedora14 |
- Login to Fedora14
- Instructions:
- Login: student
- Password: <whatever you set it to>.

- Instructions:
| Section 7: Open Console Terminal and Retrieve IP Address |
- Start a Terminal Console
- Instructions:
- Applications --> Terminal
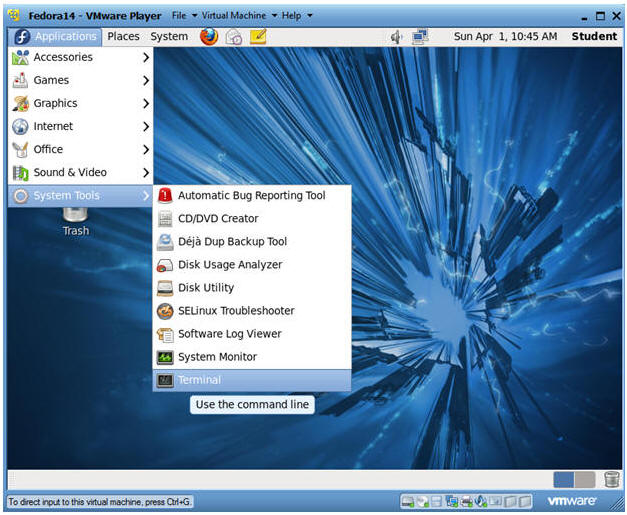
- Instructions:
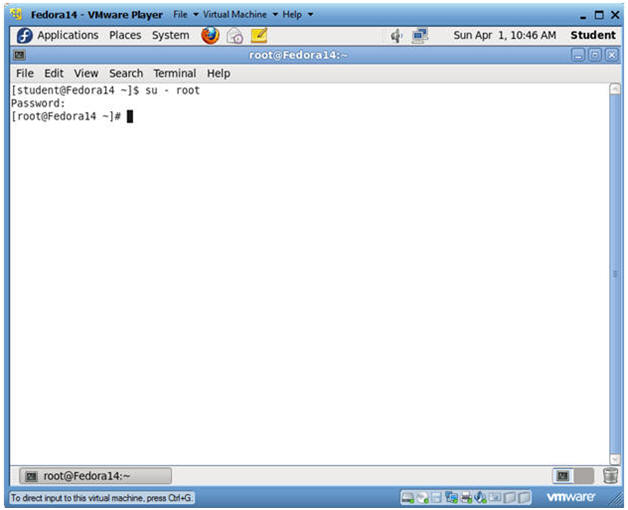
- Switch user to root
- Instructions:
- su - root
- <Whatever you set the root password to>
- Instructions:
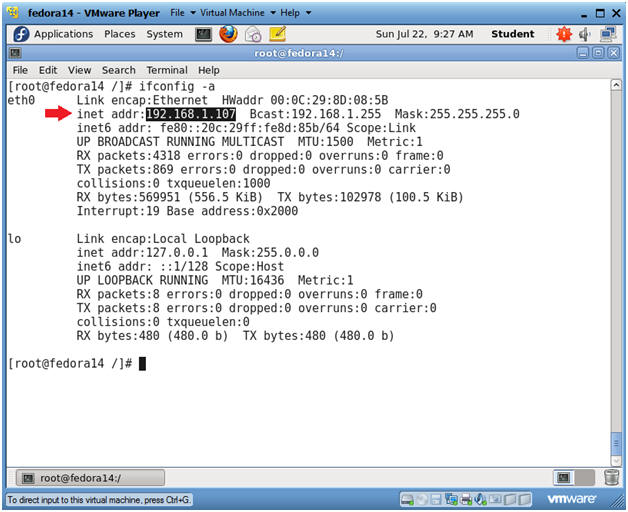
- Get IP Address
- Instructions:
- ifconfig -a
- As indicated below, my IP address is 192.168.1.107.
- Please record your IP address
- ifconfig -a
- Note(FYI):
- If you do not have an DHCP IP Address
try the following:
- dhclient -v
- OR
- /etc/init.d/network restart
- dhclient -v
- If you do not have an DHCP IP Address
try the following:
- Instructions:
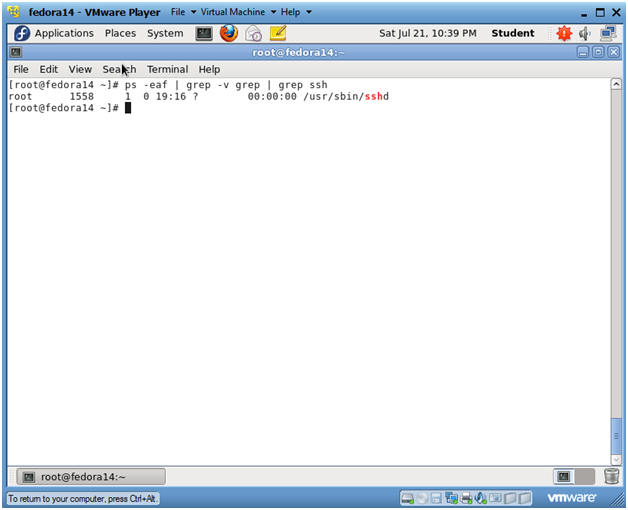
- Make sure sshd is running
- Instructions:
- ps -eaf | grep -v grep | grep ssh
- Note(FYI):
- If sshd is not running please see below lesson.
- Fedora: Lesson 7: Installing, Configuring and Securing SSHD
- Instructions:
| Section 8: Set Up SSH Director on Fedora |
- Switch User to "student"
- Instructions
- su - student
- Note(FYI):
- Earlier, you became the root user just encase your network was down.
- We su'ed back to student, because we are going to set up a SSH Key infrastructure for the student user.
- Instructions
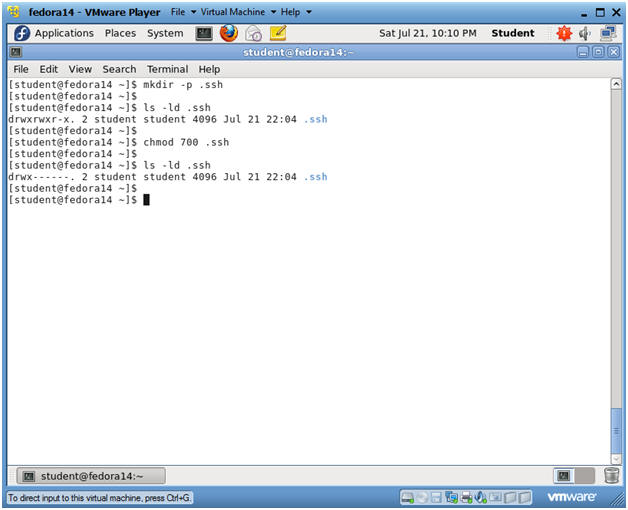
- Create the .ssh directory
- Instructions
- mkdir -p .ssh
- ls -ld .ssh
- In my case, the permissions are set to 775.
- This is a problem, because we don't want anybody to have access to our future ssh keys.
- chmod 700 .ssh
- ls -ld .ssh
- Instructions
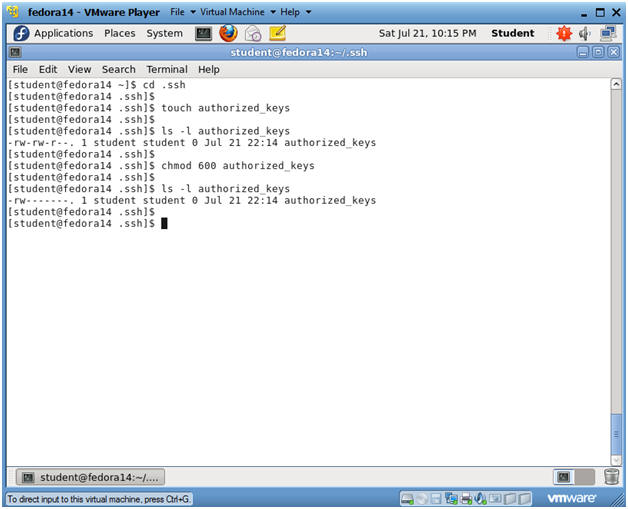
- Create authorized_keys file
- Instructions
- cd .ssh
- touch authorized_keys
- The authorized_keys file contains all the public keys from servers and/or users that are allowed to authenticate into this Fedora server.
- ls -l authorized_keys
- chmod 600 authorized_keys
- We only want the "student" use to have read and write permissions.
- ls -l authorized_keys
- Instructions
| Section 9: Copy Ubuntu's Public SSH key to Fedora |
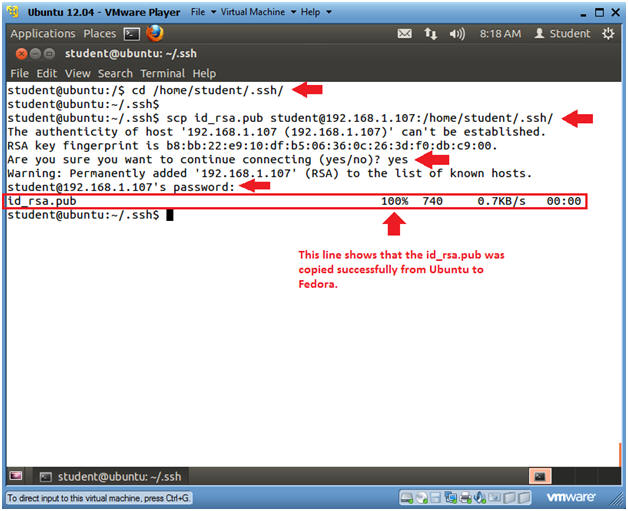
- Copy Ubuntu's Public ssh key to Fedora
- Note(FYI):
- Go Back to your Ubuntu Server
- Instructions
- cd /home/student/.ssh/
- scp id_rsa.pub
student@192.168.1.107:/home/student/.ssh/
- Replace 192.168.1.107 with the IP address obtained from (Section 7, Step 3).
- Answer "yes"
- RSA fingerprint will be added to the student's known_hosts file.
- The RSA finger print is stored in /home/student/.ssh/known_hosts
- When initiating subsequent ssh sessions, your ssh client will hash the hostname and look it up in the known_hosts file to find the previously-recorded ssh host key for the remote server.
- <Enter Student Password to Fedora>
- Note(FYI):
| Section 10: Populate the authorized_keys file on Fedora |
- Populate the authorized_keys file on Fedora
- Note(FYI):
- Go Back to your Fedora Server
- Instructions
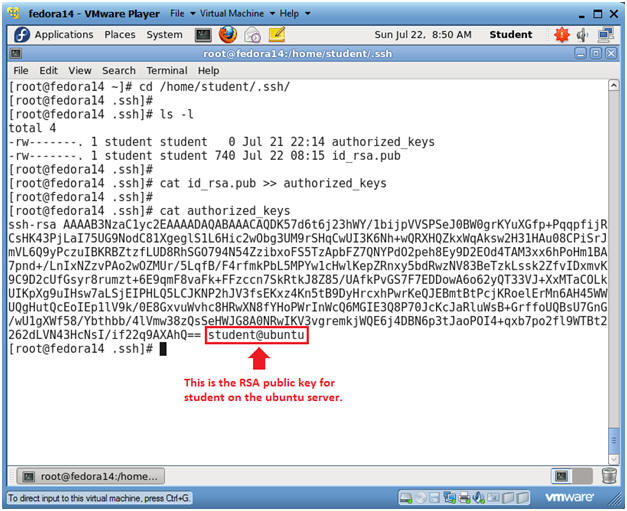
- cd /home/student/.ssh/
- ls -l
- cat id_rsa.pub >> authorized_keys
- cat authorized_keys
- Note(FYI):
| Section 11: Test SSH Key Infrastructure |
- Testing the SSH key Infrastructure through
Ubuntu
- Note(FYI):
- Go Back to your Ubuntu Server
- Instructions
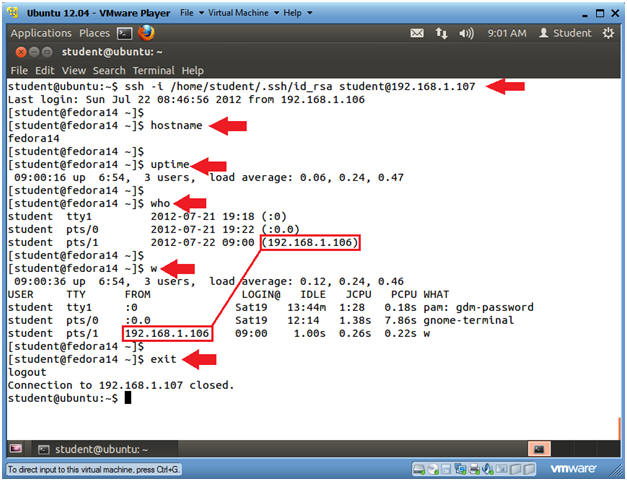
- ssh -i /home/student/.ssh/id_rsa
student@192.168.1.107
- Replace 192.168.1.107 with the IP address obtained from (Section 7, Step 3).
- Notice that since you supplied the student SSH public key, you are now logged on to the Fedora server without supplying a username and password.
- hostname
- uptime
- who
- w
- exit
- ssh -i /home/student/.ssh/id_rsa
student@192.168.1.107
- Note(FYI):
| Section 12: Proof of Lab |
- Issue commands through the SSH key
Infrastructure
- Note(FYI):
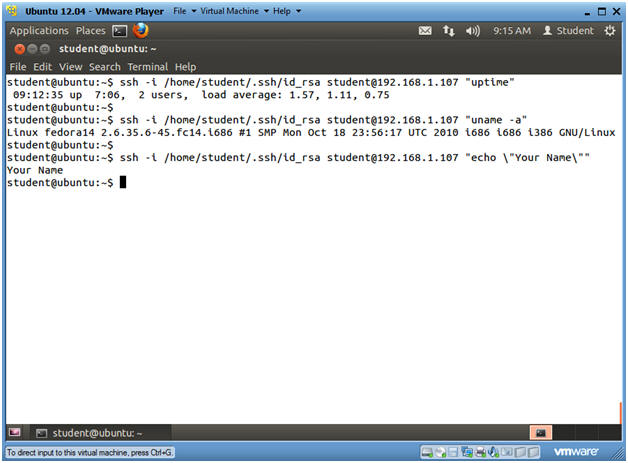
- On your Ubuntu Server
- For the below commands, replace 192.168.1.107 with the IP address obtained from (Section 7, Step 3).
- Notice you can issue commands to Fedora using Ubuntu's public key.
- Instructions
- ssh -i /home/student/.ssh/id_rsa student@192.168.1.107 "uptime"
- ssh -i /home/student/.ssh/id_rsa student@192.168.1.107 "uname -a"
- ssh -i /home/student/.ssh/id_rsa
student@192.168.1.107 "echo \"Your
Name\""
- Replace the string "Your Name" with your actual name.
- e.g., echo "John Gray"
-
Proof of Lab Instructions
- Press both the <Ctrl> and <Alt> keys at the same time.
- Do a <PrtScn>
- Paste into a word document
- Upload to Moodle
- Note(FYI):