(Ubuntu: Lesson 6)
{ Enforcing Strong Passwords using login.defs and common-password }
| Section 0. Background Information |
- Background information.
- The following lab will show you how to enforce strong passwords using /etc/login.defs, /etc/pam.d/common-password, pam_cracklib.so, and pam_unix.so.
- Prerequisite
-
Lab Notes
- In this lab we will how to do the following:
- We will set the password maximum age.
- We will set the maximum number of day a password may be used before the next password reset.
- We will set the minimum number of days allowed between password changes.
- We will force passwords to contain uppercase, lowercase, digits and special characters.
- We will keep track of password histories.
- In this lab we will how to do the following:
- Legal Disclaimer
- As a condition of your use of this Web site, you warrant to computersecuritystudent.com that you will not use this Web site for any purpose that is unlawful or that is prohibited by these terms, conditions, and notices.
- In accordance with UCC § 2-316, this product is provided with "no warranties, either express or implied." The information contained is provided "as-is", with "no guarantee of merchantability."
- In addition, this is a teaching website that does not condone malicious behavior of any kind.
- You are on notice, that continuing and/or using this lab outside your "own" test environment is considered malicious and is against the law.
- © 2012 No content replication of any kind is allowed without express written permission.
| Section 1: Start Ubuntu 12.04 |
- Start Ubuntu 12.04
- Instructions
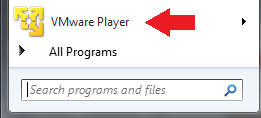
- For Windows 7
- Start --> All Programs --> VMware Player
- For Windows XP
- Starts --> Programs --> VMware Player
- For Windows 7
- Instructions
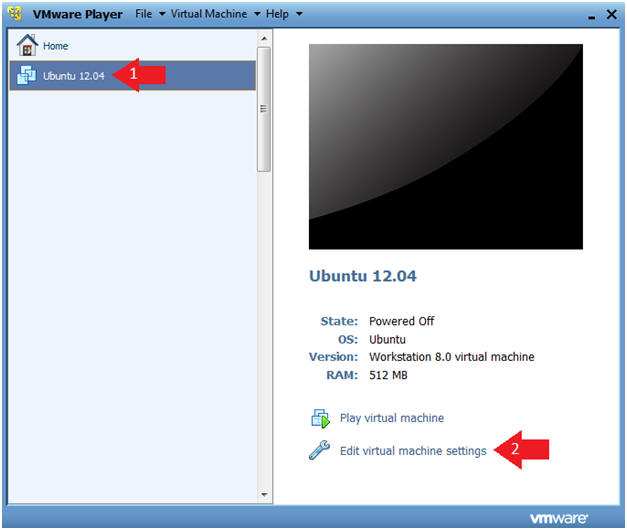
- Verify Virtual Machine Settings.
- Instructions
- Click on Ubuntu 12.04
- Click on Edit virtual machine settings
- Instructions
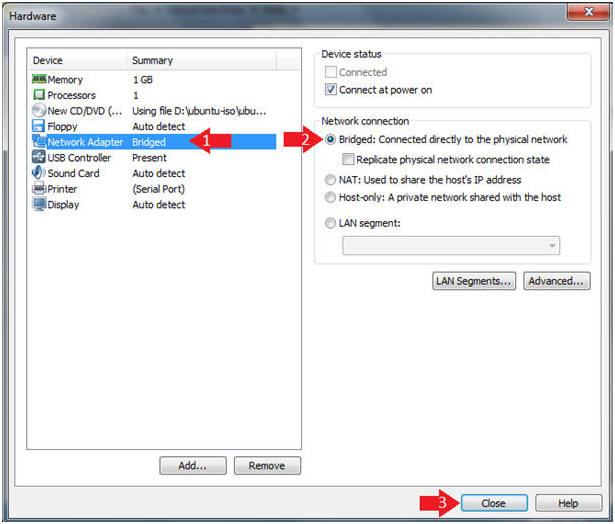
- Configure Network Adapter
- Instructions
- Click on Network Adapter
- Click on the Bridged Radio Button
- Click on the Close Button
- Instructions
- Start the Ubuntu 12.04 VM
- Instructions
- Click on Ubuntu 12.04
- Click on Play virtual machine
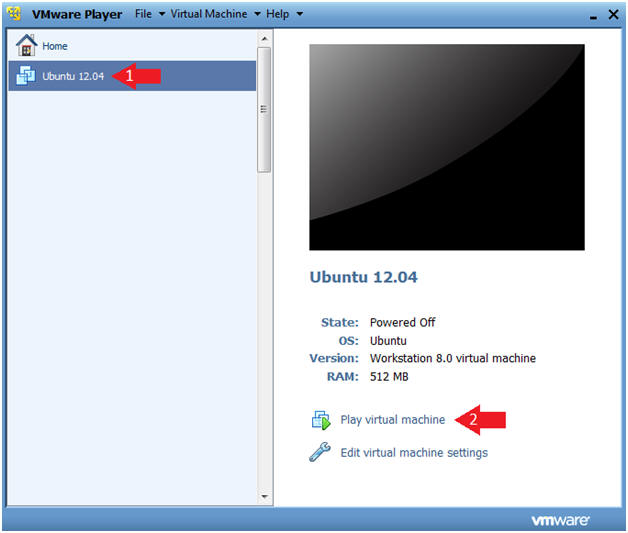
- Instructions
| Section 2: Login to Ubuntu |
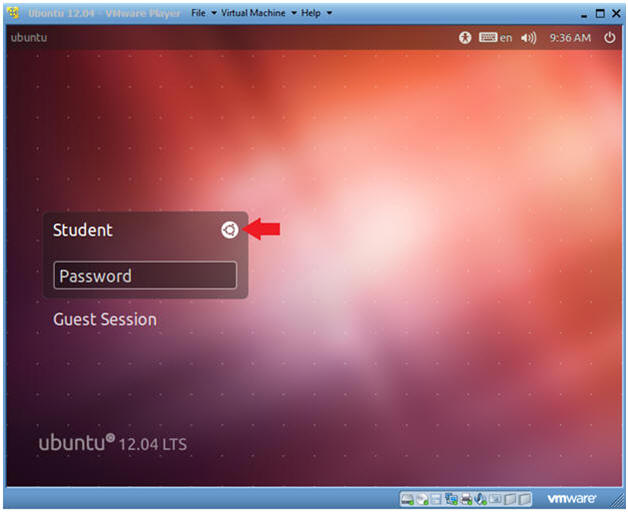
- Change to Gnome Classic
- Instructions:
- Click on the Circle
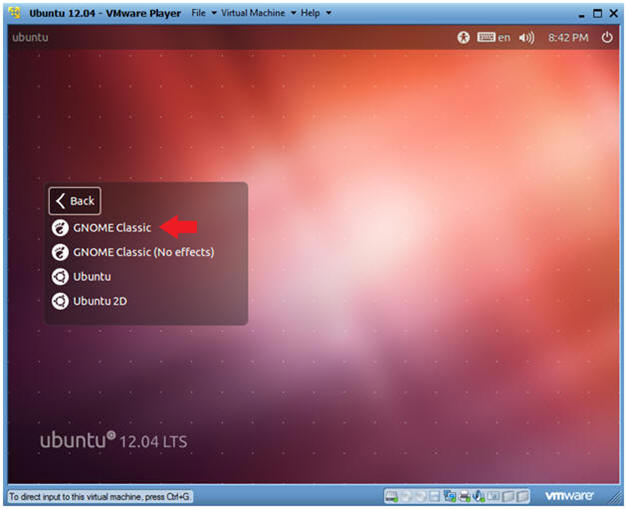
- Instructions:
- Select Gnome Classic
- Instructions:
- Double Click on GNOME Classic
- Instructions:
- Login to Server
- Instructions
- User: Student
- Password: Please supply the student password.

- Instructions
| Section 3: Become Root and Verify Network Connection |
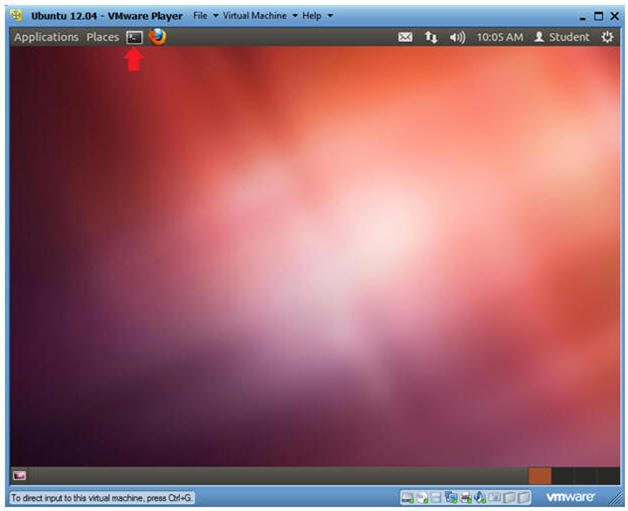
- Start up a Terminal
- Instructions
- Click on the Terminal
- Instructions
- Become Root
- Instructions
- sudo su -
- Supply the student password.
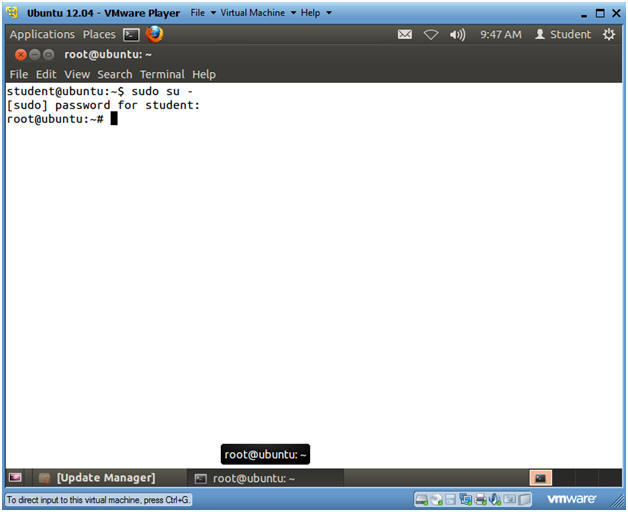
- Instructions
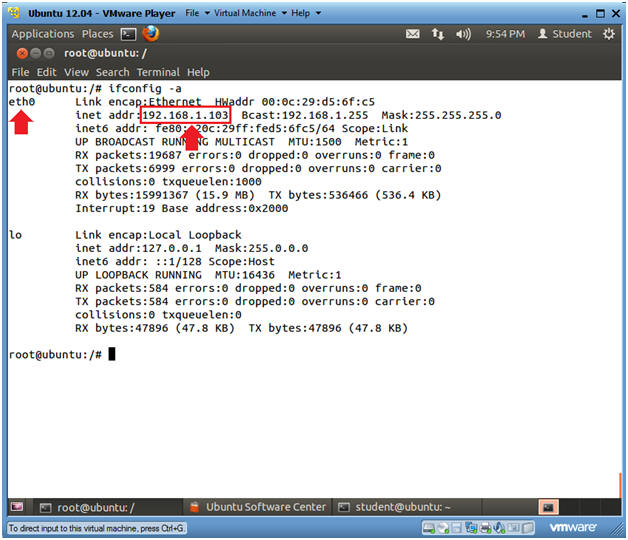
- Verify you have a network connection
- Instructions
- ifconfig -a
- eth0 is the name of my interface.
- 192.168.1.103 is my network IP address.
- ifconfig -a
- Note(FYI):
- If you do not have an DHCP IP Address
try the following:
- dhclient
- OR
- /etc/init.d/networking restart
- dhclient
- If you do not have an DHCP IP Address
try the following:
- Instructions
| Section 3: Backup /etc/login.defs |
- Backup /etc/login.defs
- Instructions
- cd /etc
- ls -l login.defs
- cp login.defs login.defs.BKP
- ls -l login.defs*
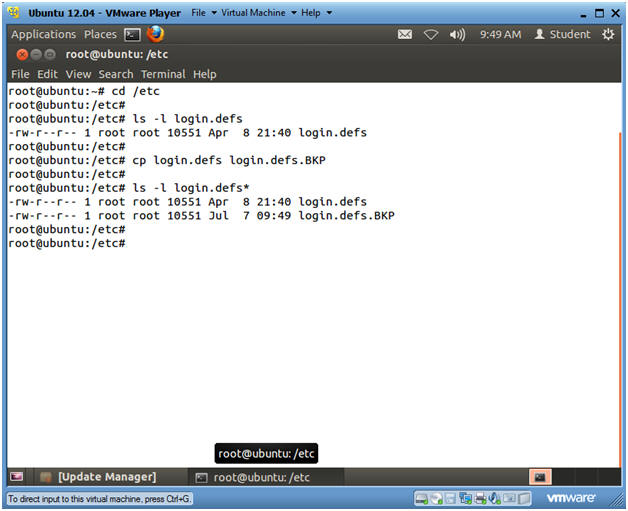
- Instructions
| Section 4: Configure Password Rules in /etc/login.defs |
- Open /etc/login.defs
- Instructions
- vi login.defs
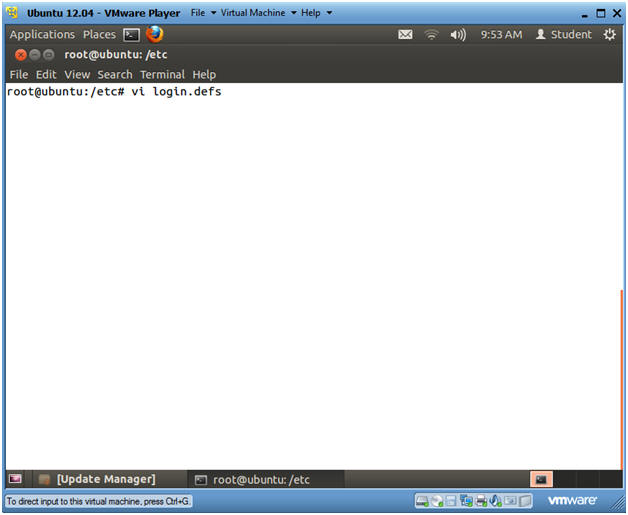
- Instructions
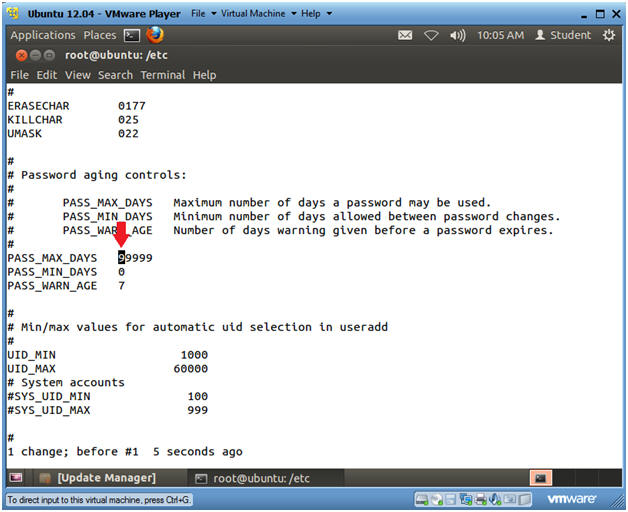
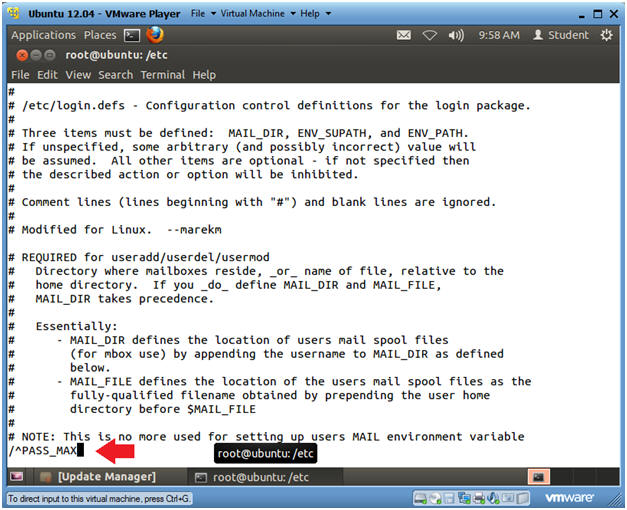
- Search for PASS_MAX_DAYS
- Instructions
- Press the "/"
- This will put you in search mode.
- Type "^PASS_MAX"
- The "^" character means "start with".
- So, in this case we are telling the vi editor to search for the first instance of the phrase that starts with PASS_MAX.
- Press the "/"
- Instructions
- Change PASS_MAX_DAYS
- Note(FYI):
- PASS_MAX_DAYS is the maximum number of day a password may be used before the next password reset.
- Instructions
- Arrow right to where your cursor is on the first 9 in the number 99999.
- Type cw to change word.
- Type
90
- Typically, company security policies will require you to reset your password every 3 months.
- Press the <Esc> key
- Note(FYI):
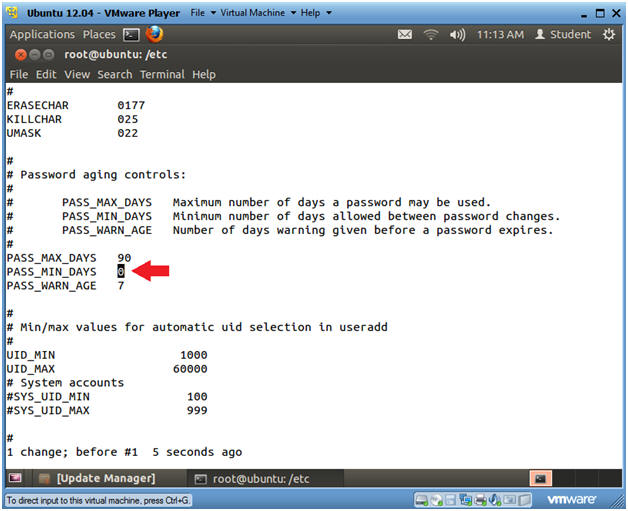
- Change PASS_MIN_DAYS
- Note(FYI):
- PASS_MIN_DAYS is the minimum number of days allowed between password changes.
- This help prevent password reuse over a certain period of times.
- Instructions
- Arrow down to the line that starts with PASS_MIN_DAYS.
- Arrow to the right to where your cursor is on the "0".
- Type cw to change word.
- Type 1
- Note(FYI):
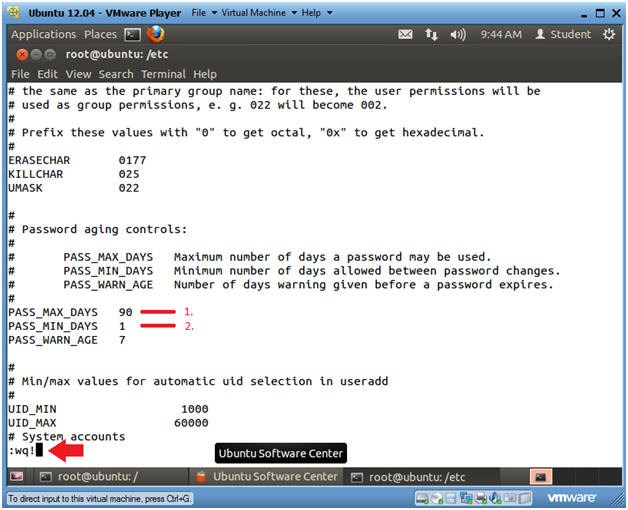
- Save login.defs
- Instructions
- Verify PASS_MAX_DAYS is set to 90
- Verify PASS_MIN_DAYS is set to 1
- Press the <Esc> key
- Type :wq! to save the file
- Instructions
| Section 5: Install libpam-cracklib |
- Install libpam-cracklib
- Instructions
- apt-get install libpam-cracklib
- Do you want to continue? Y
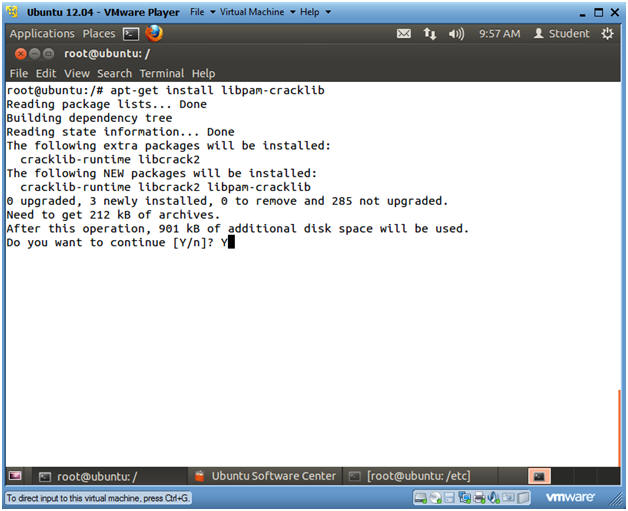
- Instructions
- Verify that libpam-cracklib is installed
- Instructions
- ls -ld /usr/share/pam-configs/cracklib

- Instructions
| Section 6: Configure Password Length and Strength |
- Backup the file common-password
- Instructions
- cd /etc/pam.d
- cp common-password common-password.BKP
- ls -l common-password*
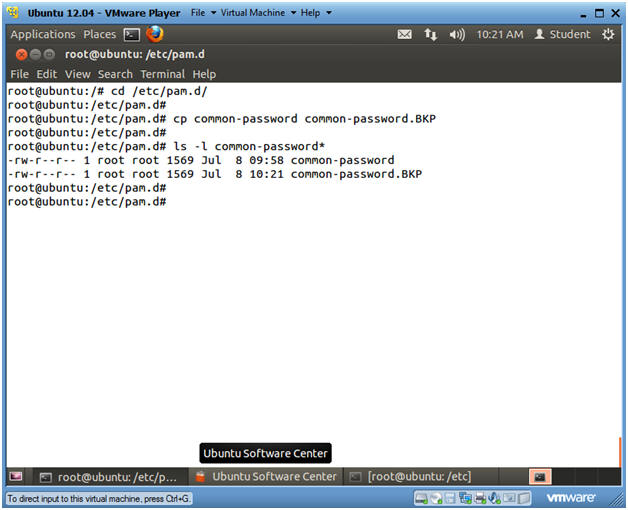
- Instructions
- Open common-password
- Instructions
- vi common-password
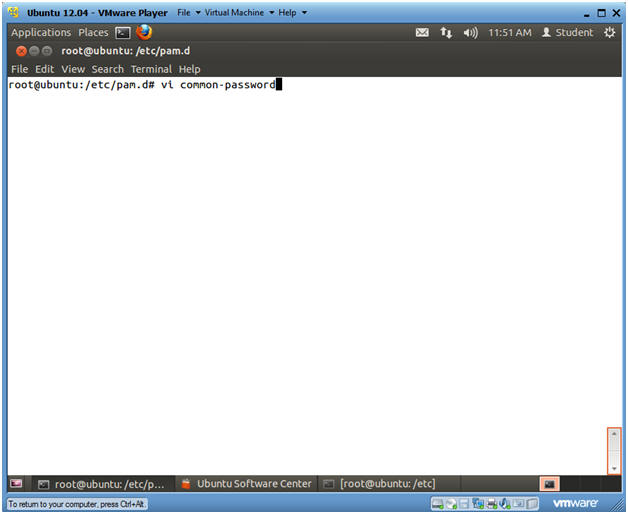
- Instructions
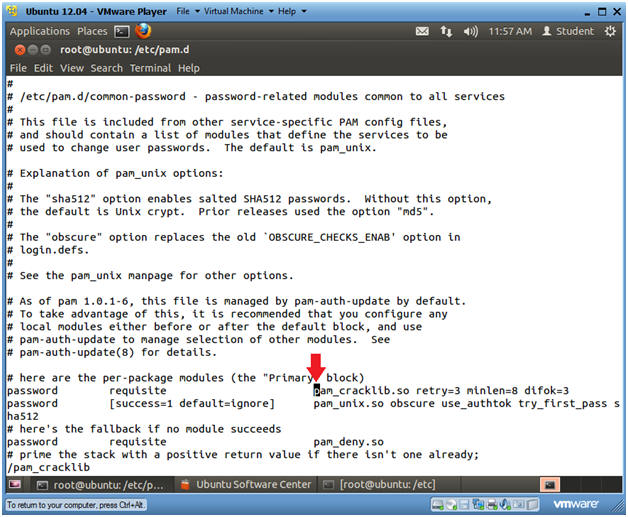
- Search for pam_cracklib
- Instructions
- Press the "/"
key
- This will put the vi editor into search mode.
- Type "pam_cracklib"
- Press the <Enter> key
- Press the "/"
key
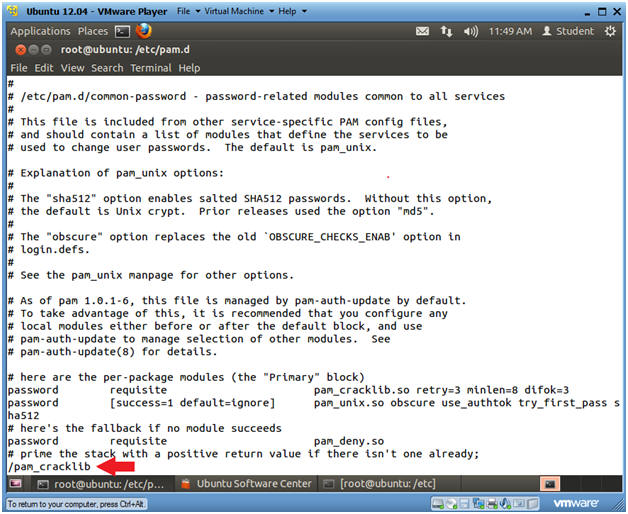
- Instructions
- View Search Results
- Instructions
- The cursor should now be on the "p" in the string pam_cracklib.so
- Press
<Shift>
and "a"
at the same time
- This will place vi in append mode with the cursor at the end of the current line.
- Press the <Space Bar> once
- Continue to next step
- Instructions
- Working in Append Mode
- Instructions
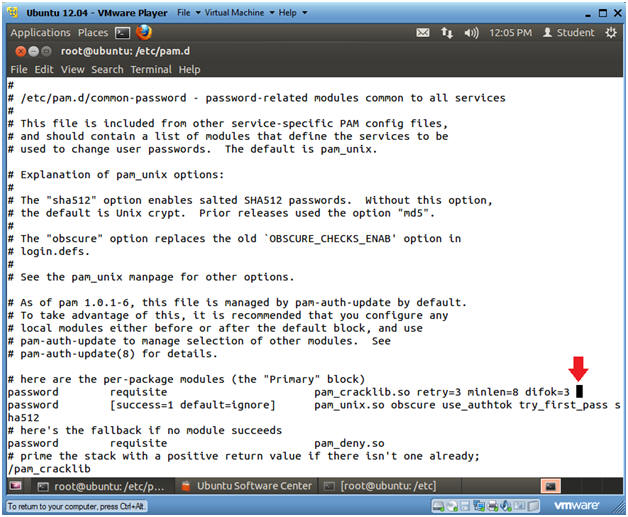
- Your cursor should be a space after the phrase difok=3. (See Below).
- Continue to Next Step
- Instructions
- Add Password Strength
- Instructions
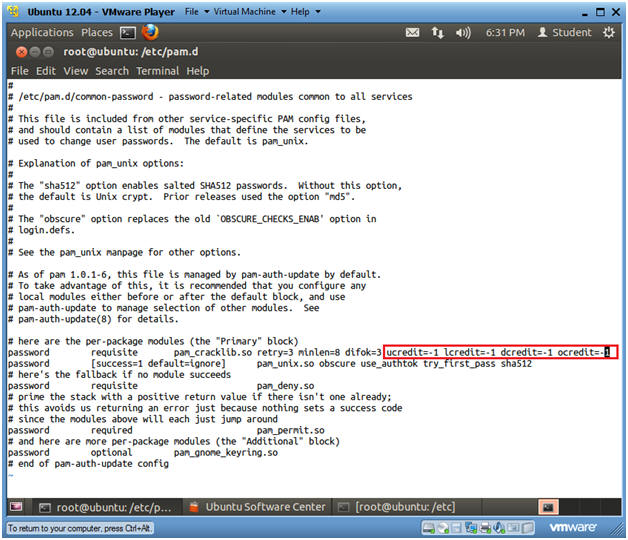
- After the string difok=3, add the
following variables:
- ucredit=-1 lcredit=-1 dcredit=-1 ocredit=-1
- Press the <Esc> key.
- Type :wq! to save file
- After the string difok=3, add the
following variables:
- Note(FYI):
- retry=3, the user will get three opportunities to enter the password before an error occurs.
- minlen=8, the minimum length of the password must be at least 8 characters.
- difok=3, there needs to be at least three differing characters between an old and new password for it to be accepted.
- ucredit=-1, the password requires at least 1 uppercase character.
- lcredit=-1, the password requires at least 1 lowercase character.
- dcredit=-1, the password requires at least 1 numerical character.
- ocredit=-1, the password requires at least 1 non-alpha numeric character.
- Instructions
| Section 7: Set Up Password History |
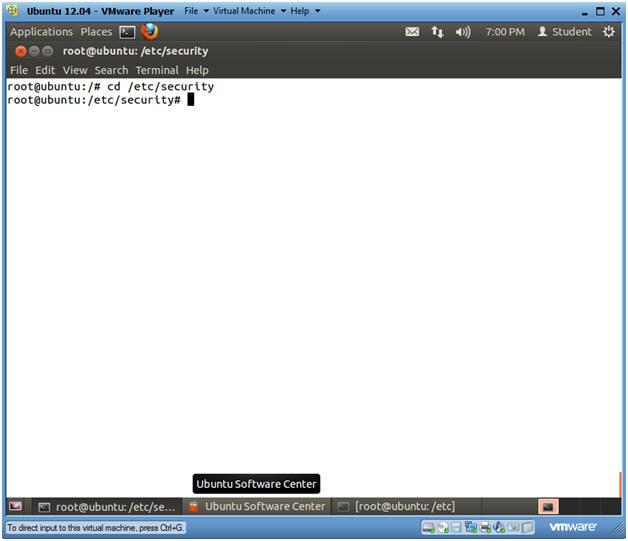
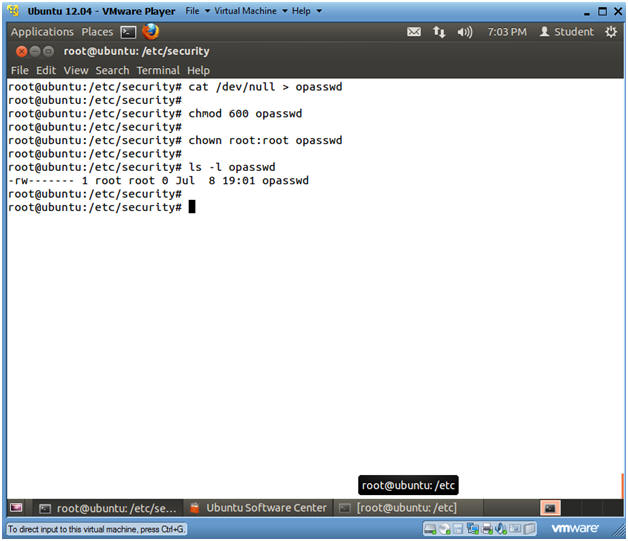
- Navigate to the /etc/security directory
- Instructions
- cd /etc/security
- Instructions
- Set up password history file
- Instructions
- cat /dev/null > opasswd
- This creates an empty file named opasswd.
- chmod 600 opasswd
- chown root:root opasswd
- ls -l opasswd*
- cat /dev/null > opasswd
- Instructions
- Open the common-password file
- Instructions
- cd /etc/pam.d/
- vi common-password
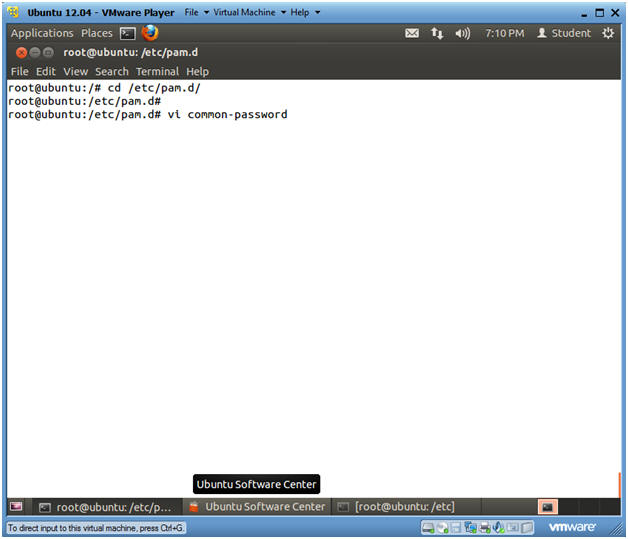
- Instructions
- Search for pam_unix.so
- Instructions
- Press the "/"
key
- This will place the VI editor into search mode
- Type "pam_unix.so"
- Press the <Enter> key
- Press the "/"
key
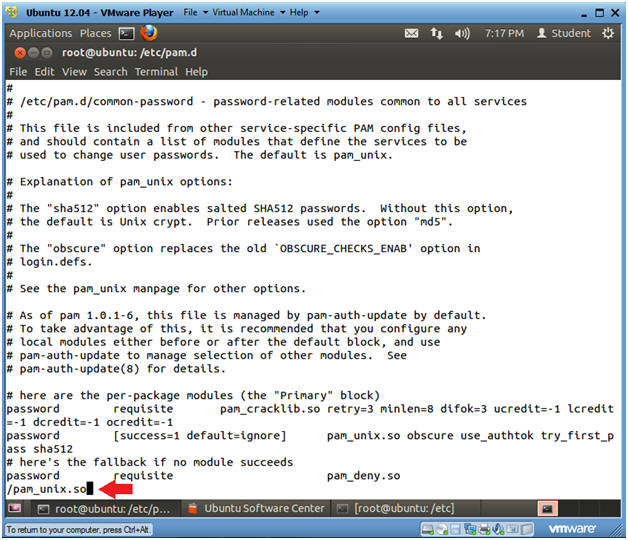
- Instructions
- View Search Results
- Instructions
- The cursor should be on the "p" for the string pam_unix.so
- Press
<Shift>
and "a"
at the same time
- This will place vi in append mode with the cursor at the end of the current line.
- Press the <Space Bar> once
- Continue to next step
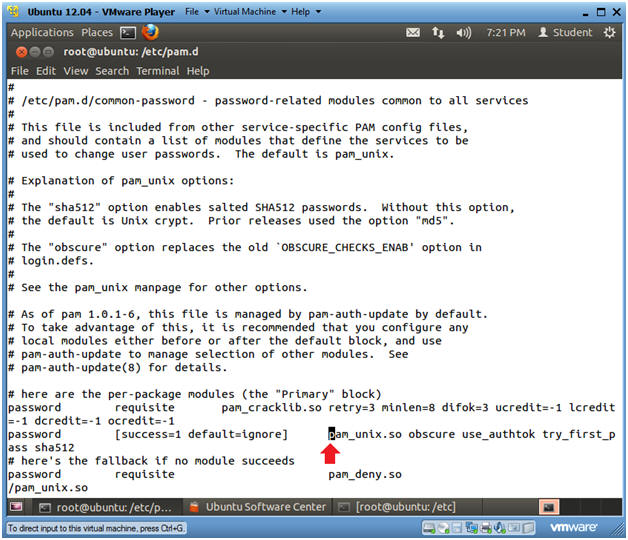
- Instructions
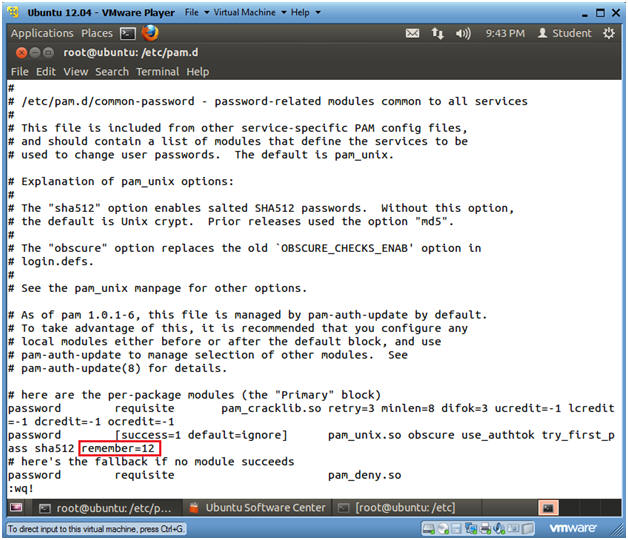
- View Search Results
- Instructions
- Place "remember=12",
after the string sha512. Make sure there is a space between
sha512 and remember=12.
- remember=12, will store the last 12 passwords for each user in the /etc/security/opasswd file.
- Press the <Esc> key.
- Type :wq! to save the file.
- Place "remember=12",
after the string sha512. Make sure there is a space between
sha512 and remember=12.
- Instructions
| Section 8: Proof of Lab |
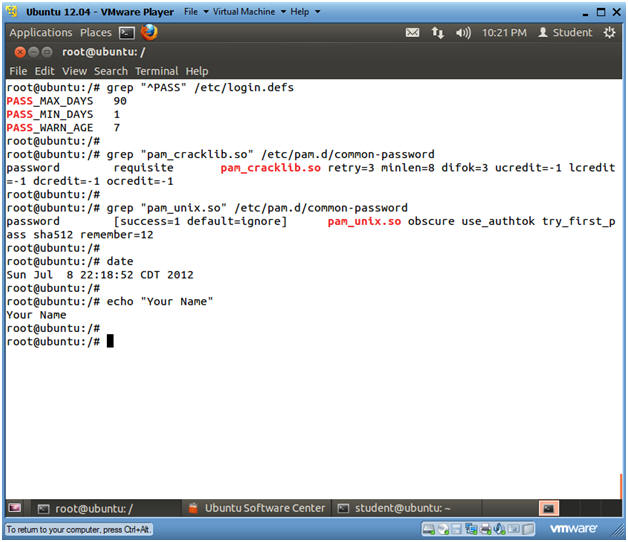
- Proof of Lab
- Instructions
- grep "^PASS" /etc/login.defs
- grep "pam_cracklib.so" /etc/pam.d/common-password
- grep "pam_unix.so" /etc/pam.d/common-password
- date
- echo "Your Name"
- Replace the string "Your Name" with your actual name.
- e.g., echo "John Gray"
-
Proof of Lab Instructions
- Press both the <Ctrl> and <Alt> keys at the same time.
- Do a <PrtScn>
- Paste into a word document
- Upload to Moodle
- Instructions