(Damn Vulnerable Web App (DVWA): Lesson 12)
{ Burp Suite, Spider Function }
| Section 0. Background Information |
- What is Damn Vulnerable Web App (DVWA)?
- Damn Vulnerable Web App (DVWA) is a PHP/MySQL web application that is damn vulnerable.
- Its main goals are to be an aid for security professionals to test their skills and tools in a legal environment, help web developers better understand the processes of securing web applications and aid teachers/students to teach/learn web application security in a class room environment.
- What is Burp Suite?
- Burp suite is a java application that can be used to secure or crack web applications. The suite consists of different tools, like a proxy server, a web spider an intruder and a so called repeater, with which requests can be automated.
- Pre-Requisite Labs
- Damn Vulnerable Web App (DVWA): Lesson 1: How to Install DVWA in Fedora 14
- BackTrack: Lesson 1: Installing BackTrack 5 R1
-
Lab
Notes
- In this lab we will do the following:
- We will configure Firefox to use Burp Suite as its Proxy
- We will configure Burp Suite to accept requests from Firefox.
- We will use Burp Suite to spider the DVWA web application.
- We will conduct a very simple forensics investigation on Fedora's Web Server, in which the DVWA web application resides.
- In this lab we will do the following:
- Legal Disclaimer
- As a condition of your use of this Web site, you warrant to computersecuritystudent.com that you will not use this Web site for any purpose that is unlawful or that is prohibited by these terms, conditions, and notices.
- In accordance with UCC § 2-316, this product is provided with "no warranties, either expressed or implied." The information contained is provided "as-is", with "no guarantee of merchantability."
- In addition, this is a teaching website that does not condone malicious behavior of any kind.
- Your are on notice, that continuing and/or using this lab outside your "own" test environment is considered malicious and is against the law.
- © 2012 No content replication of any kind is allowed without express written permission.
| Section 1: Configure Fedora14 Virtual Machine Settings |
- Open Your VMware Player
- Instructions:
- On Your Host Computer, Go To
- Start --> All Program --> VMWare --> VMWare Player
- Instructions:
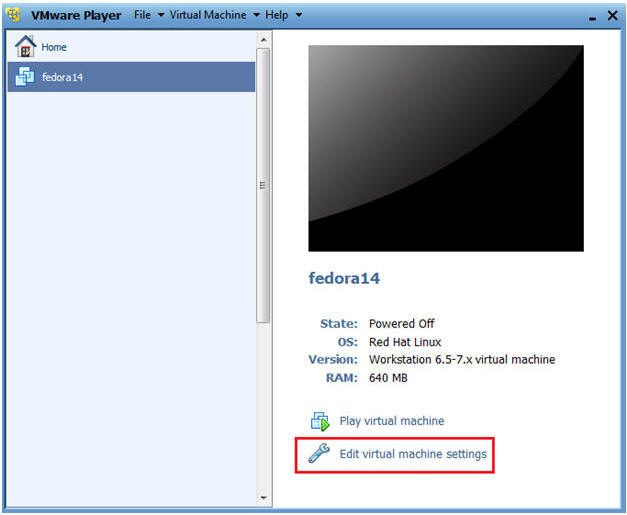
- Edit fedora14 Virtual Machine Settings
- Instructions:
- Highlight fedora14
- Click Edit virtual machine settings
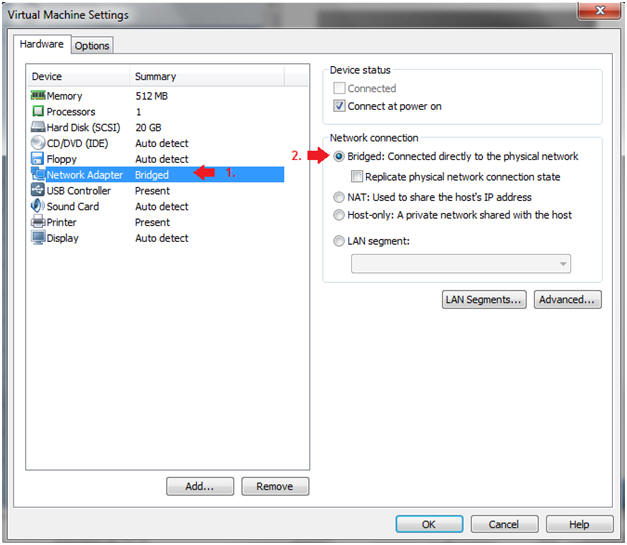
- Instructions:
- Edit Network Adapter
- Instructions:
- Highlight Network Adapter
- Select Bridged
- Click on the OK Button.
| Section 2: Login to Fedora14 |
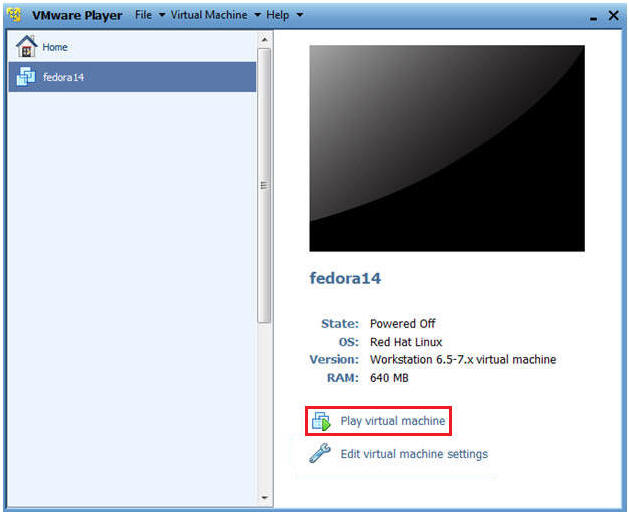
- Start Fedora14 VM Instance
- Instructions:
- Start Up VMWare Player
- Select Fedora14
- Play virtual machine
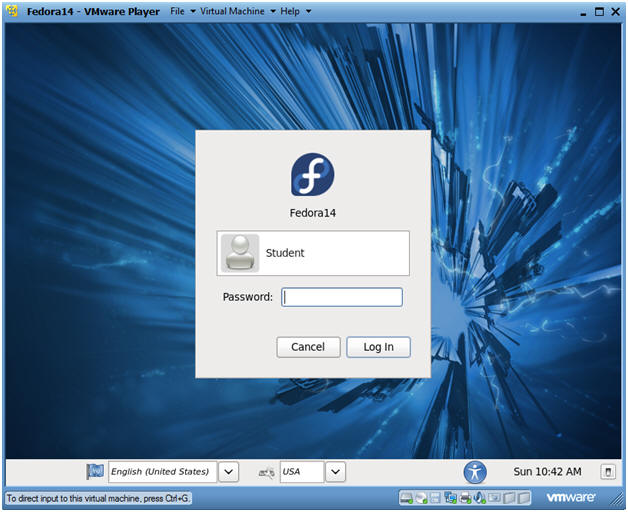
- Instructions:
- Login to Fedora14
- Instructions:
- Login: student
- Password: <whatever you set it to>.
-
- Instructions:
| Section 3: Open Console Terminal and Retrieve IP Address |
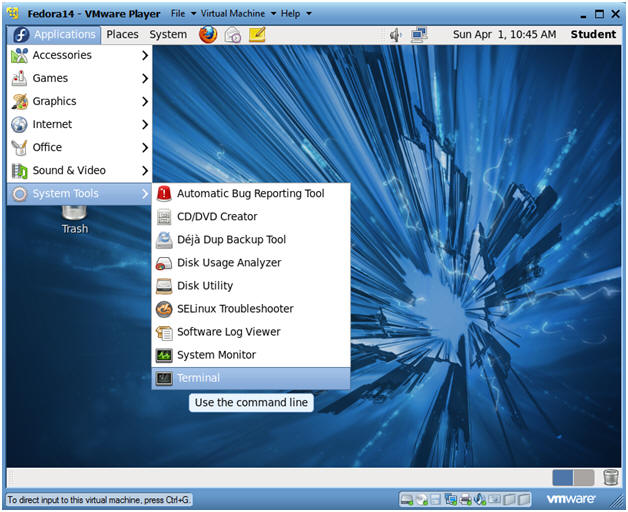
- Start a Terminal Console
- Instructions:
- Applications --> Terminal
- Instructions:
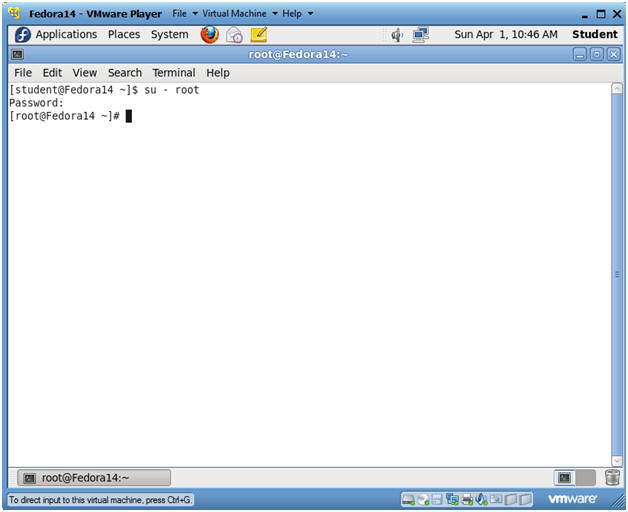
- Switch user to root
- Instructions:
- su - root
- <Whatever you set the root password to>
-
- Instructions:
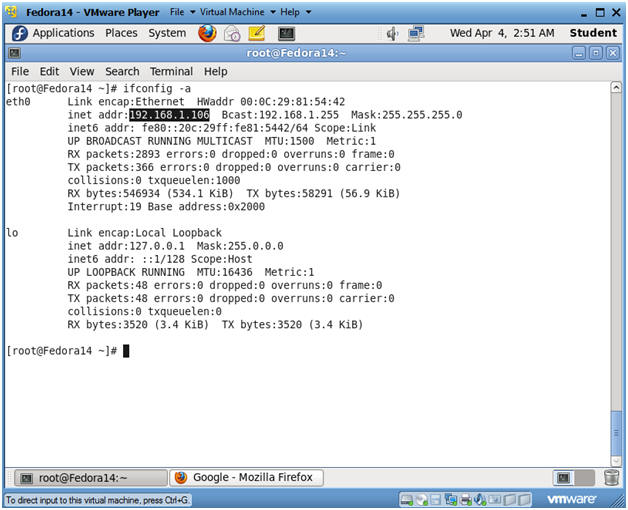
- Get IP Address
- Instructions:
- ifconfig -a
- Notes:
- As indicated below, my IP address is 192.168.1.106.
- Please record your IP address.
- Instructions:
| Section 4: Configure BackTrack Virtual Machine Settings |
- Open Your VMware Player
- Instructions:
- On Your Host Computer, Go To
- Start --> All Program --> VMWare --> VMWare Player
- Instructions:
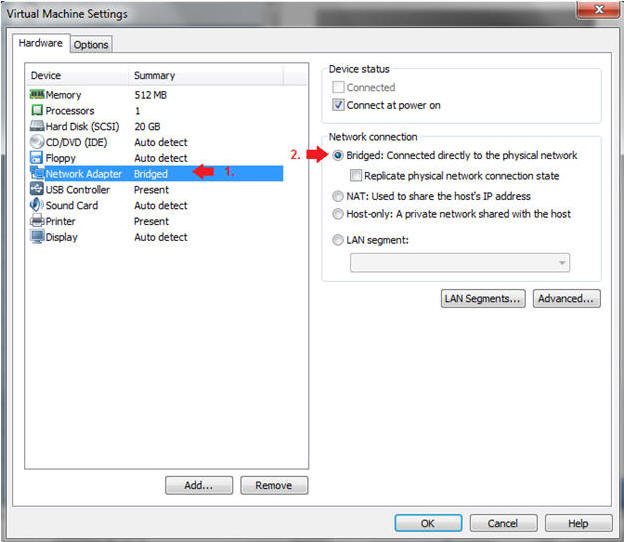
- Edit BackTrack Virtual Machine Settings
- Instructions:
- Highlight BackTrack5R1
- Click Edit virtual machine settings
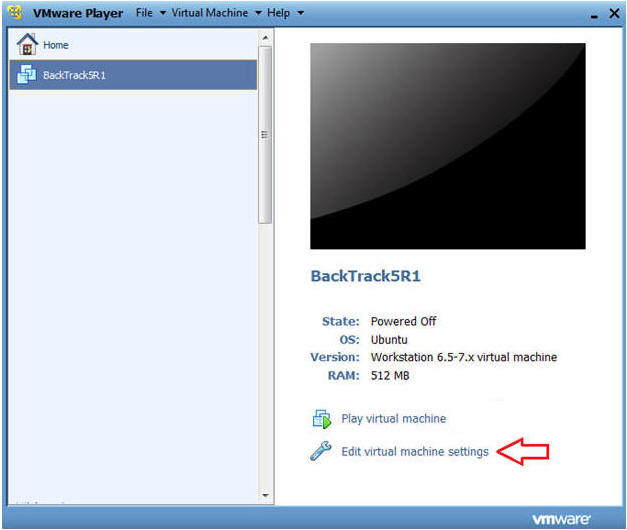
- Instructions:
- Edit Network Adapter
- Instructions:
- Highlight Network Adapter
- Select Bridged
- Do not Click on the OK Button.
- Instructions:
| Section 5: Login to BackTrack |
- Start BackTrack VM Instance
- Instructions:
- Start Up VMWare Player
- Select BackTrack5R1
- Play virtual machine
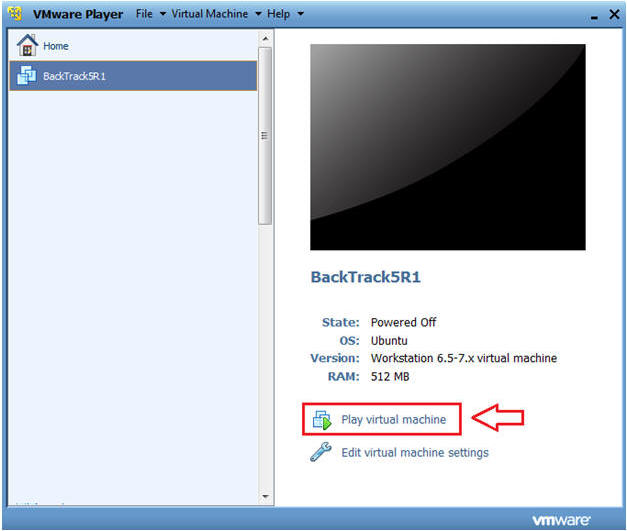
- Instructions:
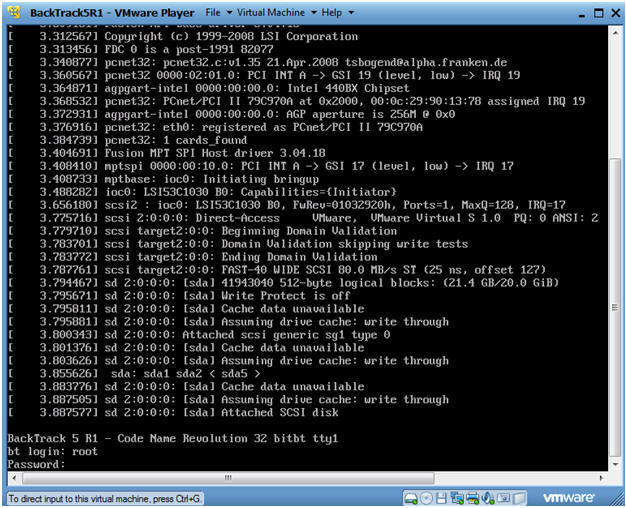
- Login to BackTrack
- Instructions:
- Login: root
- Password: toor or <whatever you changed it to>.
- Instructions:
- Bring up the GNOME
- Instructions:
- Type startx
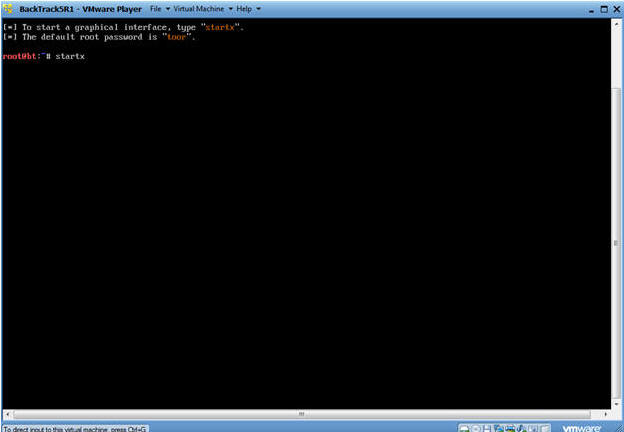
- Instructions:
| Section 6: Open Console Terminal and Retrieve IP Address |
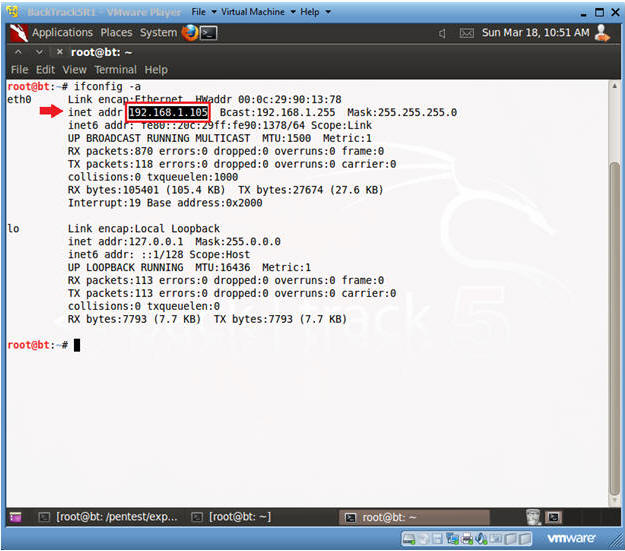
- Open a console terminal
- Instructions:
- Click on the console terminal
- Instructions:
- Get IP Address
- Instructions:
- ifconfig -a
- Notes:
- As indicated below, my IP address is 192.168.1.105.
- Please record your IP address.
- Instructions:
| Section 7: Configure Firefox Proxy Settings |
- Start Firefox
- Instructions:
- Click on Firefox
- Instructions:
- Preferences
- Instructions:
- Edit --> Preferences
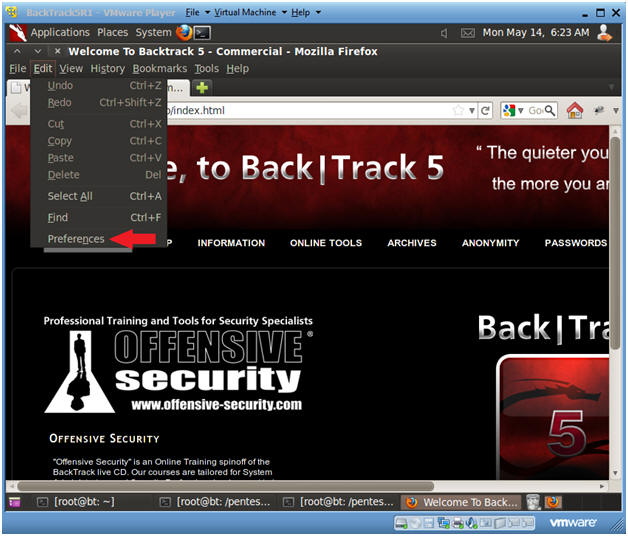
- Instructions:
- Preferences
- Instructions:
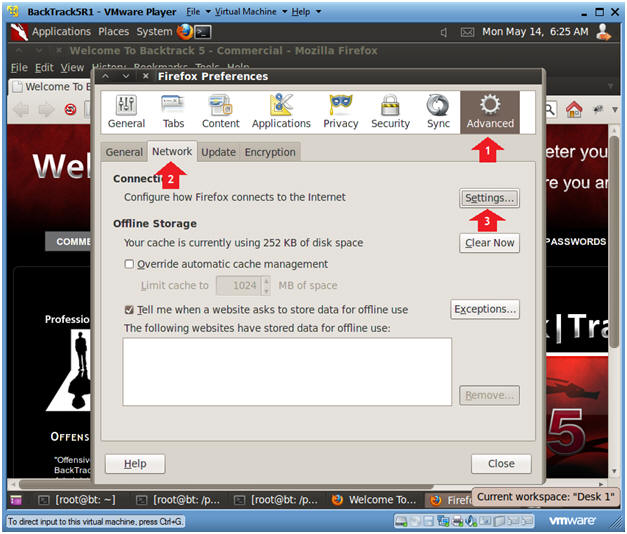
- Click on Advanced
- Click on the Network Tab
- Click on the Settings Button
- Instructions:
- Preferences
- Instructions:
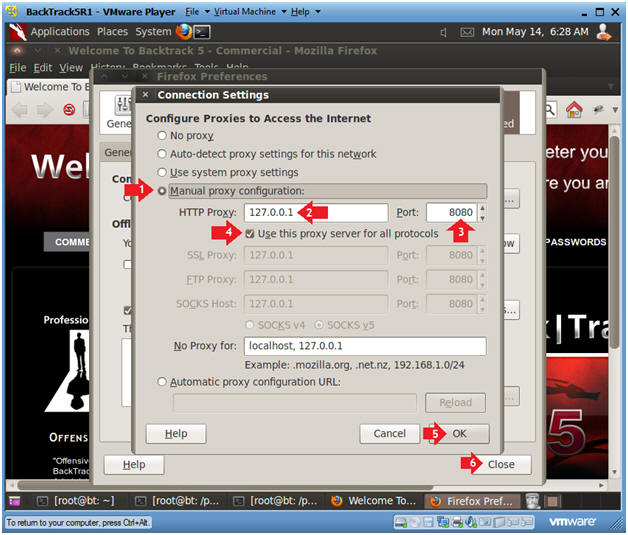
- Click on Manual proxy configurations
- Type "127.0.0.1" in the HTTP Proxy Text Box
- Type "8080" in the Port Text Box
- Check Use the proxy server for all protocols
- Click OK
- Click Close
- Instructions:
| Section 8: Configure Burp Suite |
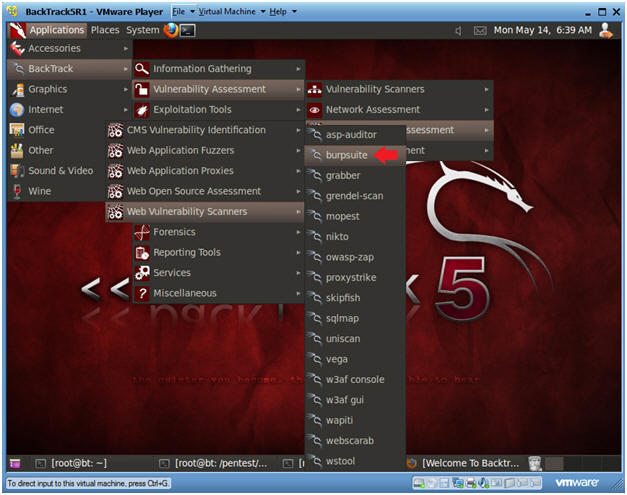
- Start Burp Suite
- Instructions:
- Applications --> Vulnerability Assessment --> Web Application Assessment ---> Web Vulnerability Scanner --> burpsuite
- Instructions:
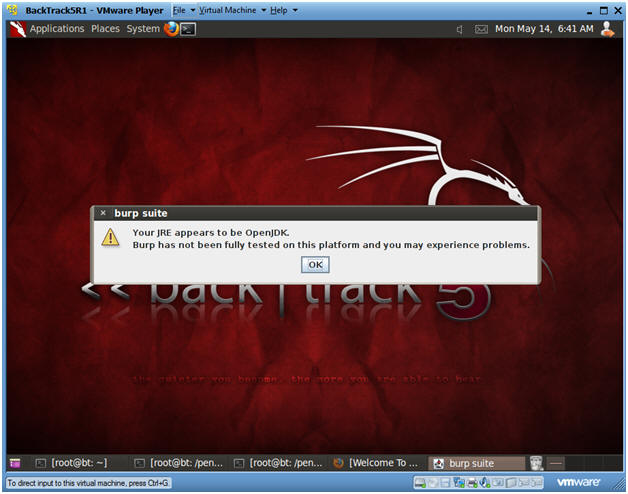
- JRE Message
- Instructions:
- Click OK
- Instructions:
- Configure proxy
- Instructions:
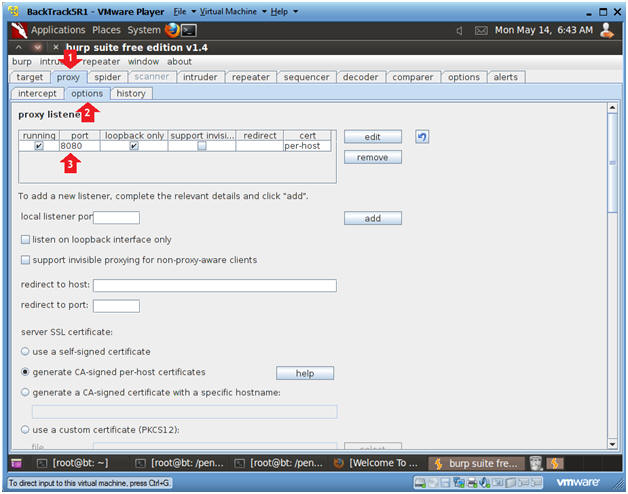
- Click on the proxy tab
- Click on the options tab
- Verify the port is set to 8080
- Instructions:
- Turn on intercept
- Instructions:
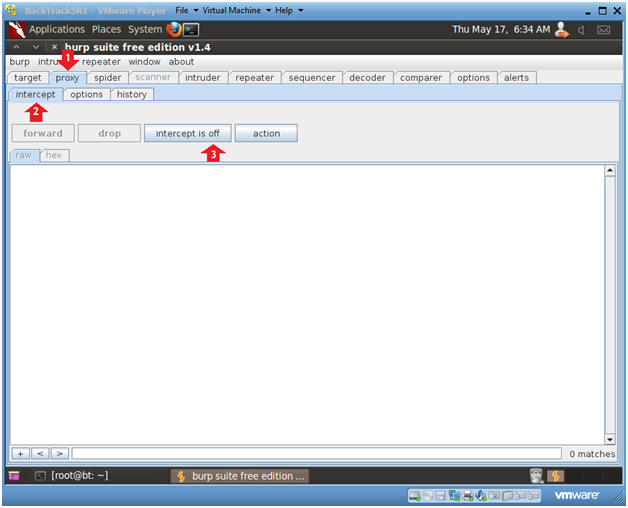
- Click on the proxy tab
- Click on the intercept tab
- Click on the "intercept is on" button to change it to "intercept is off"
- Instructions:
| Section 9: Spider with Burp Suite |
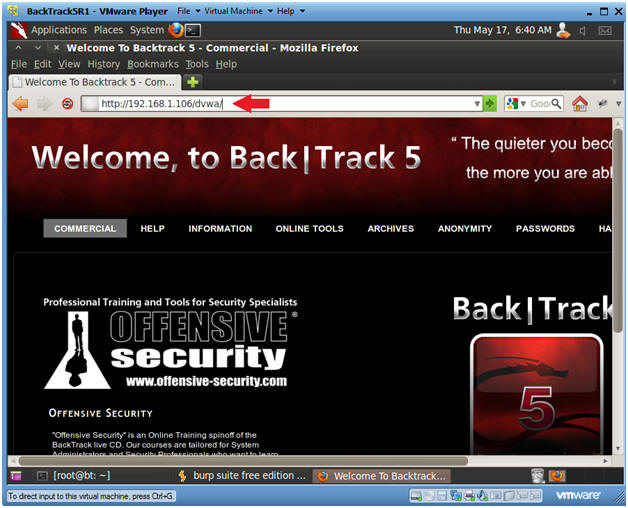
- Browse to DVWA's homepage
- Instructions:
- http://IPADDRESS/dvwa/
- Replace IPADDRESS with the Fedora's IP Address obtain in (Section 3, Step 3).
- Press <Enter>
- Continue to Next Step.
- http://IPADDRESS/dvwa/
- Instructions:
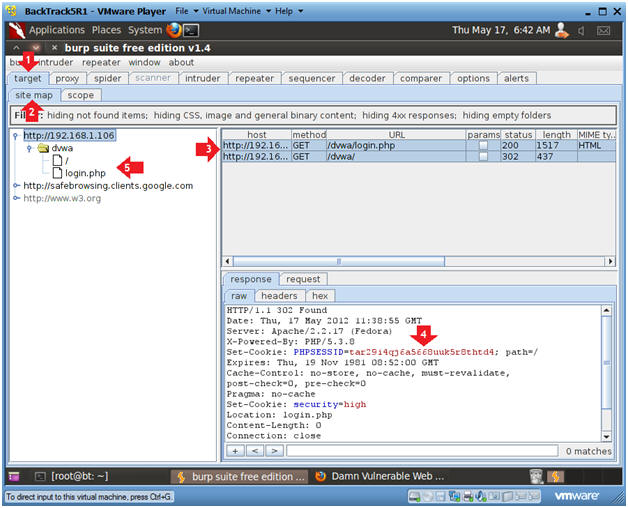
- Target Host
- Instructions:
- Click on the target tab
- Click on the site map tab
- Notes(FYI):
- Although the intercept is turned off you are still able to view get requests.
- In addition, you are able to see the contents of the get requests, including the PHPSESSID for /dvwa/login.php.
- Notice, how a directory structure of the DVWA has been created for the login page.
- Continue to Next Step.
- Instructions:
- Spider Configuration
- Instructions:
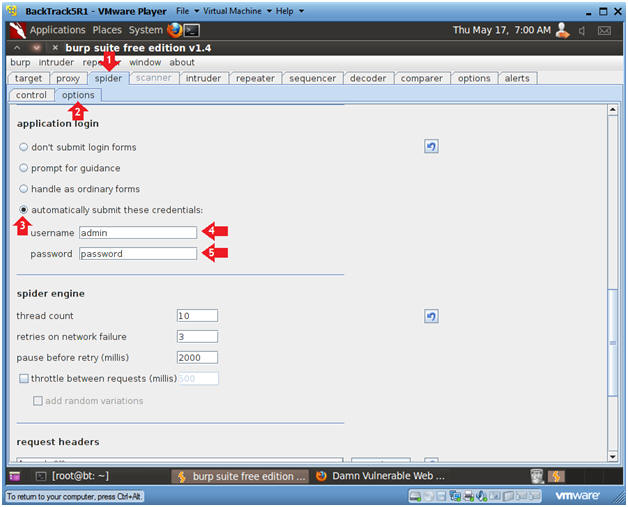
- Click on the spider tab
- Click on the options tab
- Click on radio button "automatically submit these credentials"
- Click on the request tab
- username: admin
- password: password
-
- Instructions:
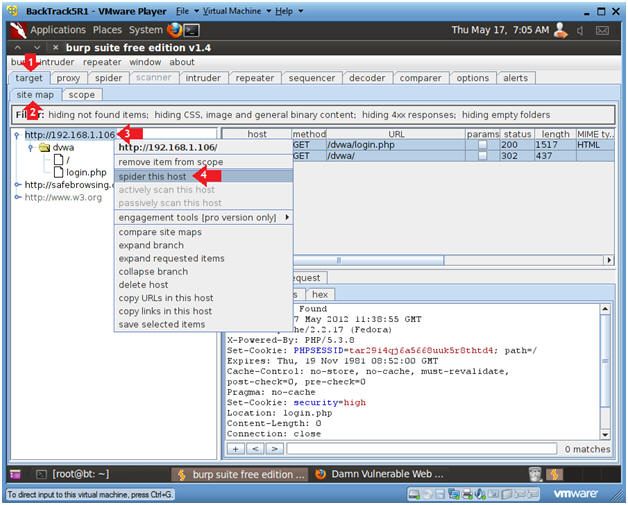
- Spider Host
- Instructions:
- Click on the target tab
- Click on the site map tab
- Click on the DVWA IP Address, then Right Click to display the utility menu.
- Click on spider this host.
- Continue to Next Step
- Instructions:
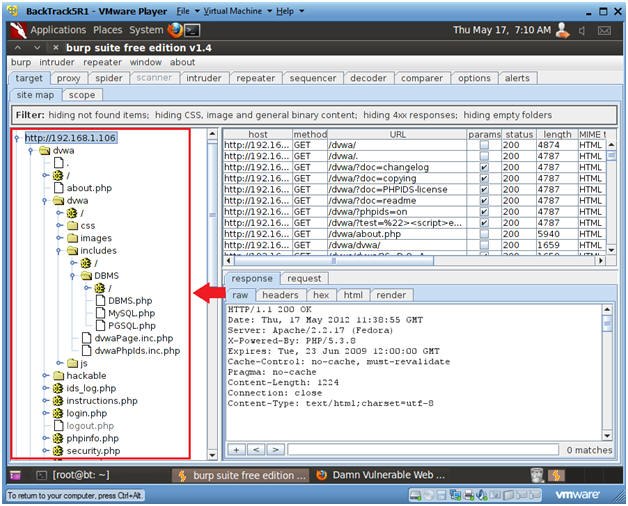
- Spider Directory True Results
- Notes:
- Notice that you now have a pretty accurate map of the DVWA website.
- Continue to next step.
- Notes:
- Spider Directory True Results
- Instructions:
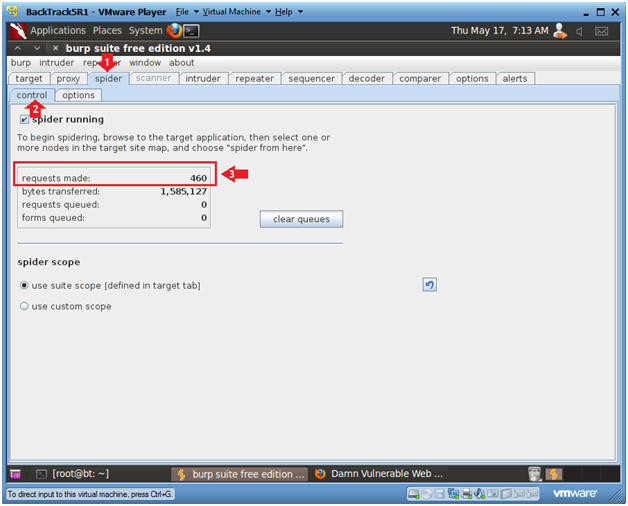
- Click on the spider tab
- Click on the control tab
- Notice that 460+/- requests were made to the DVWA website.
- Continue to Next Step
- Instructions:
| Section 10: View Scan Results on Fedora DVWA web server |
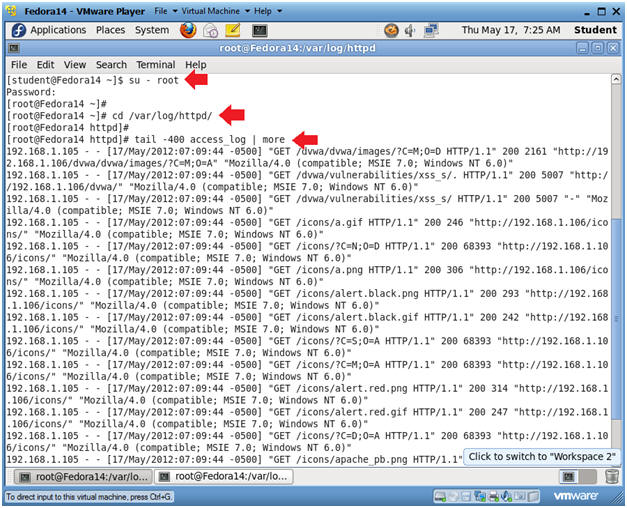
- Viewing Apache's Access Log
- Instructions:
- Go to the Fedora14 VM
- Bring up a Terminal Windows
- su - root
- cd /var/log/httpd
- tail -400 access_log | more
- tail -400, means display the last 400 lines of the apache's access_log. (I choose 400, because there 460 requests made to DVWA during the spider action)
- more, means give it to me one screenful at a time.
- Instructions:
- Viewing Apache's Error Log
- Instructions:
- cd /var/log/httpd
- grep `date '+%a %b %d'`
error_log | head
- grep, search and print lines matching a certain pattern.
- `date '+%a %b %d'`, display today's date where %a is the abbreviated weekday name, %b is the abbreviated month name, and %d is the abbreviated month name.
- error_log, is apache's error_log. Events go in this log when (1) people/spiders are searching for something that might not exists or (2) people/spiders are sending passive/malicious instructions to a form.
- head, show me the first 10 lines.
- Notice how the burpsuite spider is searching for fires that do not exist.
- Instructions:

| Section 11: Clean Up Notes |
- On BackTrack's Firefox
- Instructions:
- Edit --> Preferences
- Instructions:
- Edit Network Settings
- Instructions:
- Click on Advanced
- Click on Network Tab.
- Click on Settings Button.
-

- Instructions:
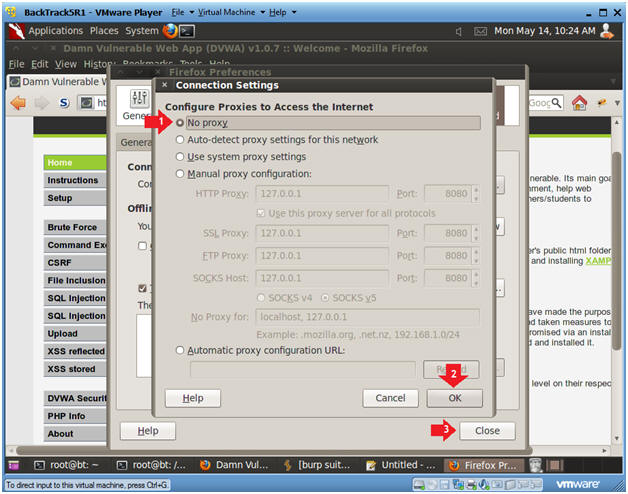
- Configure Connection Settings
- Instructions:
- Click on No proxy radio button
- Click on the OK Button
- Click on the Close button
- Instructions:

| Section 12: Proof of Lab |
- Proof of Lab
-
Proof of Lab Instructions:
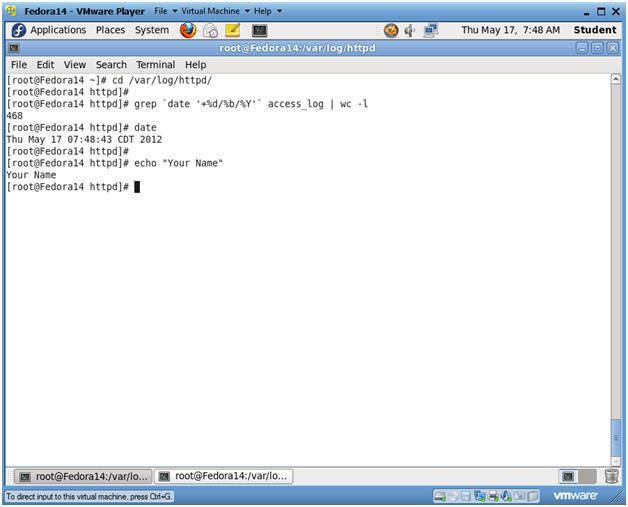
- On Fedora, pull up a terminal window.
- cd /var/log/httpd
- grep `date '+%d/%b/%Y'` access_log | wc
-l
- wc -l, count how man lines grep found for today's date in the access_log.
- date
- echo "Your Name"
- Replace the string "Your Name" with your actual name.
- e.g., echo "John Gray"
- Do a <PrtScn>
- Paste into a word document
- Upload to Moodle
-
-
Proof of Lab Instructions: