(Windows 2008 Server: Lesson 9)
{ Configuring Internet Explorer Group Policy }
| Section 0. Background Information |
- Why should we configure group policies for
Internet Explorer?
- As a security focal, you want to ensure that you have the ability to view a user's browsing history.
- Browsing history might contain forensic evidence for any possible attack that might occur in the future.
- In addition, by disabling the possibility of allowing a user to delete their own history, this option could serve as a deterrent to surfing prohibited material.
| Section 1. Login to your W2K8 server. |
- Start your Windows 2008 Server
- Instructions:
- Click on W2K8 Server
- Click on Play virtual machine

- Instructions:
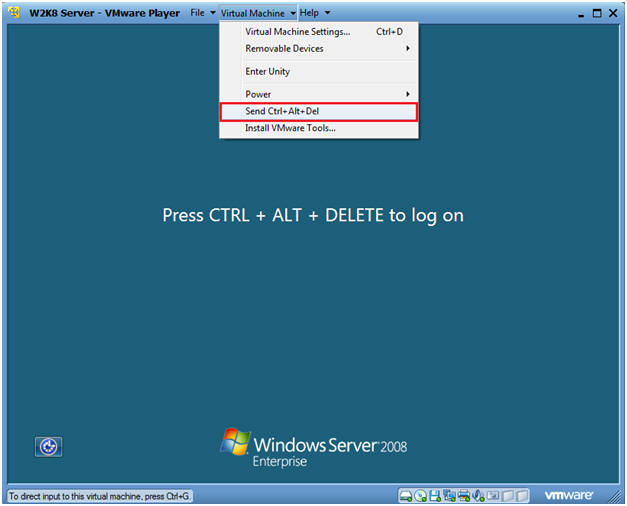
- CRTL + ALT + DELETE
- Instructions
- Virtual Machine
- Send Ctrl+Alt+Del

- Instructions
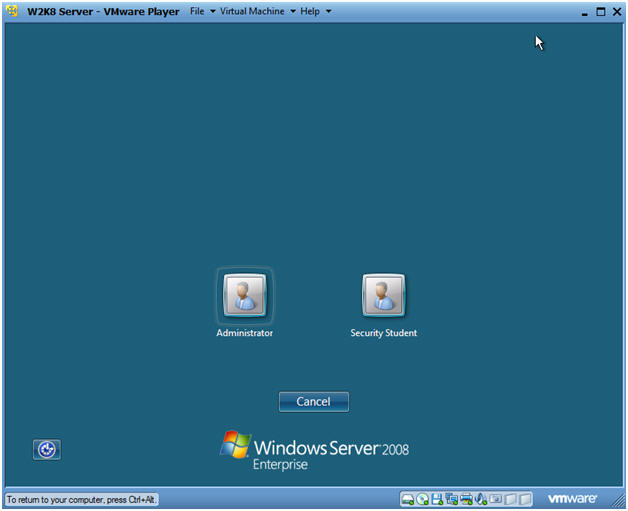
- Login as Administrator
- Click on the Administrator icon.

- Login
- Command: Provide the password for the Administrator account.

| Section 2. Launching Group Policy Editor |
- Launch Group Policy Editor
- Instructions:
- In the search box, type "gpedit.msc"
- Click on gpedit
-

- Instructions:
- Navigate to the Internet Explorer Policies
- Instructions:
- Computer Configuration --> Administrative Templates --> Windows Components --> Internet Explorer
-

- Instructions:
| Section 3. Prevent the deletion of temporary Internet files and cookies |
- Select "Prevent the deletion of temporary
Internet files and cookies"
- Instructions:
- Right click on "Prevent the deletion of temporary Internet files and cookies"
- Select Properties
- Note:
- If you enable this policy setting, users will not be able to delete temporary Internet files and cookies.

- Instructions:
- Edit "Prevent the deletion of temporary
Internet files and cookies"
- Instructions:
- Click on Enabled
- Click on Apply
- Click on OK
- Instructions:
- View your results
- Instructions:
- Select the Standard tab at the bottom of the right window.
- Notice that the state of "Prevent the deletion of temporary Internet files and cookies" is now Enabled.
- Instructions:
| Section 4. Turn off Delete Browsing History functionality |
- Select "Turn off Delete Browsing History
functionality"
- Instructions:
- Right Click on "Turn off Delete Browsing History functionality"
- Select Properties
- Note:
- If you enable this policy setting, users cannot perform the "Delete Browsing History" action in Internet Options for Internet Explorer 7.

- Instructions:
- Configure "Turn off Delete Browsing History
functionality"
- Instructions:
- Select Enabled
- Click on Apply
- Click on OK.
- Instructions:
| Section 5. Disable Configuration History |
- Select Disable "Configuration History"
- Instructions:
- Right Click on Disable "Configuration History"
- Note:
- If you enable this policy setting, a user cannot set the number of days that Internet Explorer keeps track of the pages viewed in the History List.
- You must specify the number of days that Internet Explorer keeps track of the pages viewed in the History List.
- Users will not be able to delete browsing history.
- Instructions:
- Configure Disable "Configuration History"
- Instructions:
- Select Enabled
- Type 90 in the Days to keep pages in History text box.
- Select Apply
- Select OK.
- Instructions:
| Section 6. Update Group Policies |
- Open the Command Prompt
- Instructions:
- Start --> Command Prompt
- Instructions:
- Update the Group Policies
- Instructions:
- gpupdate /force
- Instructions:
| Section 7. Verify results in Internet Explorer |
- Verify results in Internet Explorer
- Instructions:
- In the search box, type "explorer"
- Click on Internet Explorer
- Instructions:
- Open Internet Options
- Instructions:
- Tools --> Internet Options
- Instructions:
- Review Internet Options
- Instructions:
- Notice the Delete button is not in focus, as in it is not clickable.
- Click on the Settings button.
- Instructions:
- Review Temporary Internet Files and History
Settings
- Notes:
- Notice that "Days to keep pages in history:" cannot be changed.
- Also, the "Days to keep pages in history:" has been set to 90 days.
- Notes:
| Section 8. Proof of Lab |
- Open a Command Prompt
- Instructions:
- Start --> Command Prompt

- Instructions:
- View Group Policy Results
- Instructions:
- gpresult /V | more
- Before pressing the <Enter> key more than one continue to the next step.

- Instructions:
- Using the gpresult utility
- Instruction:
- Keep pressing the <Enter> key until you see "User Rights"
- Once you see "User Rights" press the <Ctrl>+c keys
- date
- Press Enter
- echo "Your Name"
- Replace the string "Your Name" with your actual name.
- E.g., echo "John Gray"
-
Proof of Lab Instruction:
- Do a PrtScn
- Paste into a word document
- Upload to Moodle.


