(Windows 2008 Server: Lesson 1)
{ Installing Windows 2008 Server }
| Section 0. Background Information |
- Windows 2008
- Windows Server 2008 (sometimes abbreviated as "Win2K8" or "W2K8") is one of Microsoft Windows' server line of operating systems. Released to manufacturing on February 4, 2008, and officially released on February 27, 2008, it is the successor to Windows Server 2003, released nearly five years earlier. A second release, named Windows Server 2008 R2, was released to manufacturing on July 22, 2009.
- Windows Server 2008 is built from the same code base as Windows Vista; therefore, it shares much of the same architecture and functionality. Since the code base is common, it automatically comes with most of the technical, security, management and administrative features new to Windows Vista such as the rewritten networking stack (native IPv6, native wireless, speed and security improvements); improved image-based installation, deployment and recovery; improved diagnostics, monitoring, event logging and reporting tools; new security features such as BitLocker and ASLR; improved Windows Firewall with secure default configuration; .NET Framework 3.0 technologies, specifically Windows Communication Foundation, Microsoft Message Queuing and Windows Workflow Foundation; and the core kernel, memory and file system improvements. Processors and memory devices are modeled as Plug and Play devices, to allow hot-plugging of these devices. This allows the system resources to be partitioned dynamically using Dynamic Hardware Partitioning; each partition has its own memory, processor and I/O host bridge devices independent of other partitions.
| Section 1. Create a New Virtual Machine |
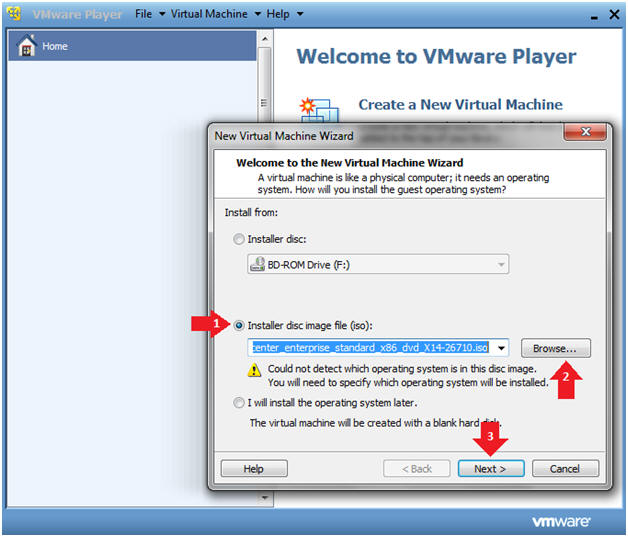
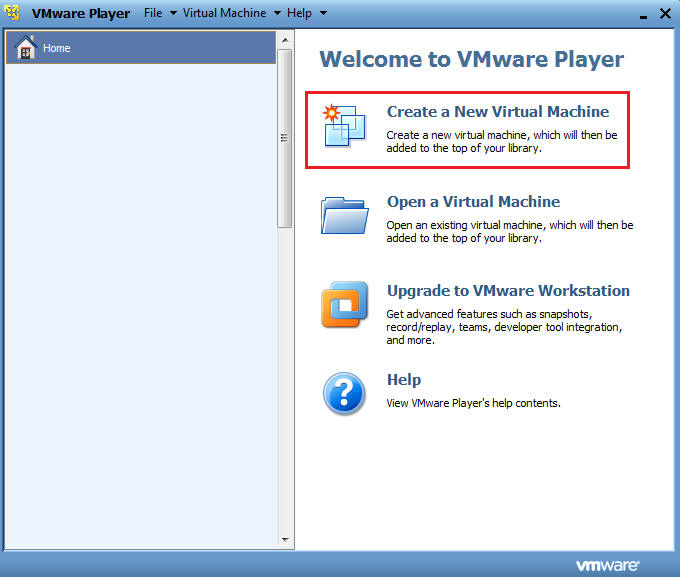
- Create a New Virtual Machine. (See Below)
- New Virtual Machine Wizard
- Instructions
- Select the radio button "Installer disc image file (iso):"
- Click the Browse Button
- Navigate to where you W2K8 iso is located.
- Select the W2K8 iso
- Click Next
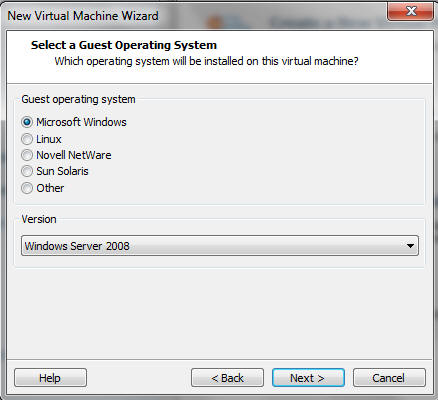
- Instructions
- New Virtual Machine Wizard
- Instructions:
- Guest operating system: Microsoft Windows
- Version: Windows Server 2008
- Select Next
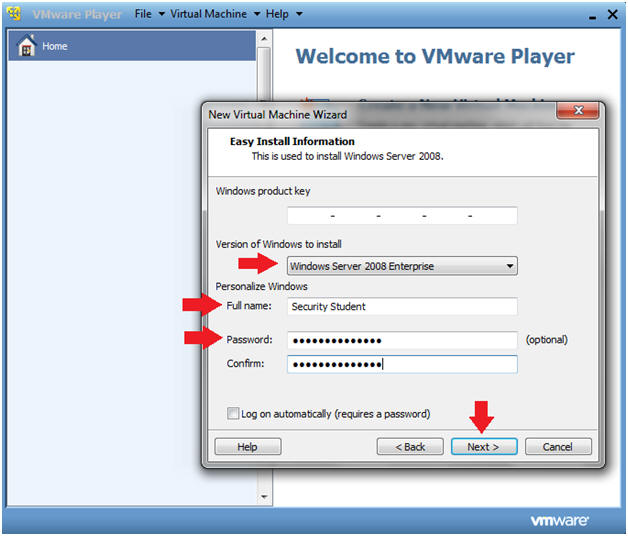
- Instructions:
- New Virtual Machine Wizard
- Instructions:
- Windows product key: Enter your key
that your purchased.
- Note: If you don't enter a key, then you have a 60 day evaluation.
- Version of Windows to install: Windows Server 2008 Enterprise
- Full name: Security Student
- Password: Make sure you passwords match.
- Select Next.
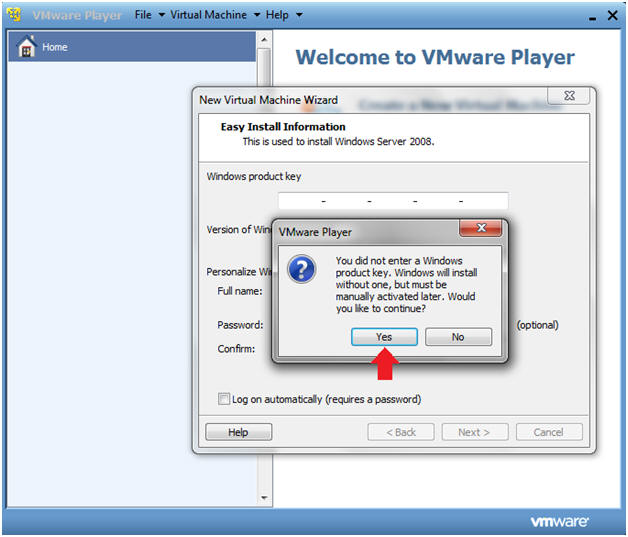
- Windows product key: Enter your key
that your purchased.
- Instructions:
- You did not enter Product Key
- Instructions:
- Click Yes
- Instructions:
- New Virtual Machine Wizard
- Instructions:
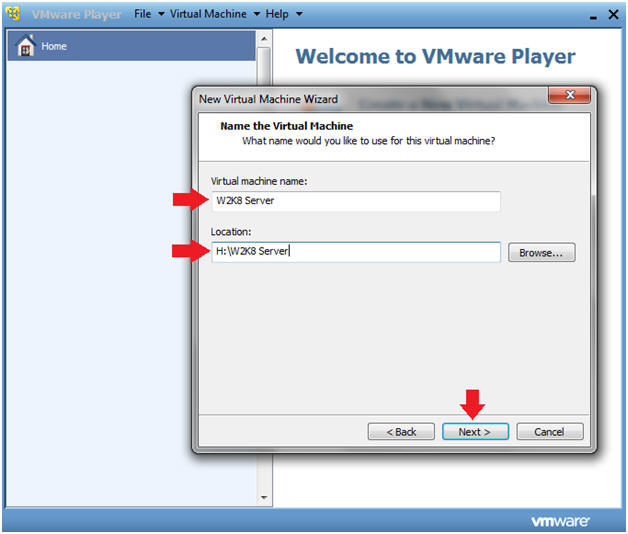
- Virtual machine name: W2K8 Server
- Location: In my case I saved it to my USB drive, located in H:\W2K8 Server\
- Select Next
- Instructions:
- New Virtual Machine Wizard
- Instructions:
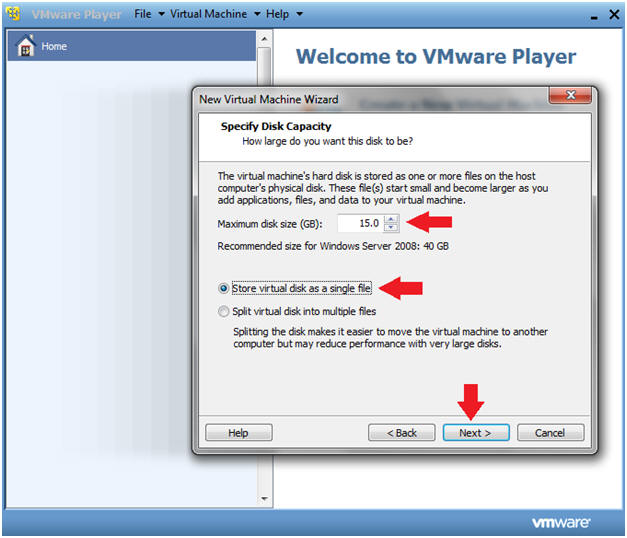
- Maximum disk size (GB): For lab purposes, all you really need is 15 GB.
- Radio Button: Store virtual disk as an single file
- Select Next
- Instructions:
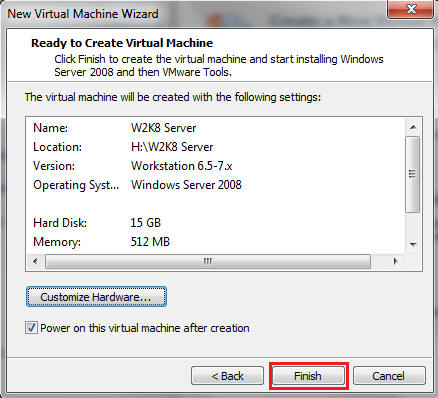
- New Virtual Machine Wizard
- Instructions
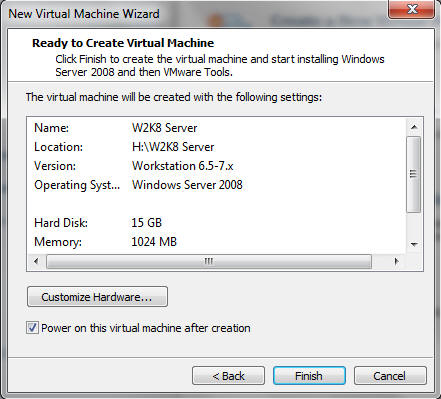
- Click on the "Customize Hardware..." button
- Instructions
- New Virtual Machine Wizard (Memory)
- Instructions:
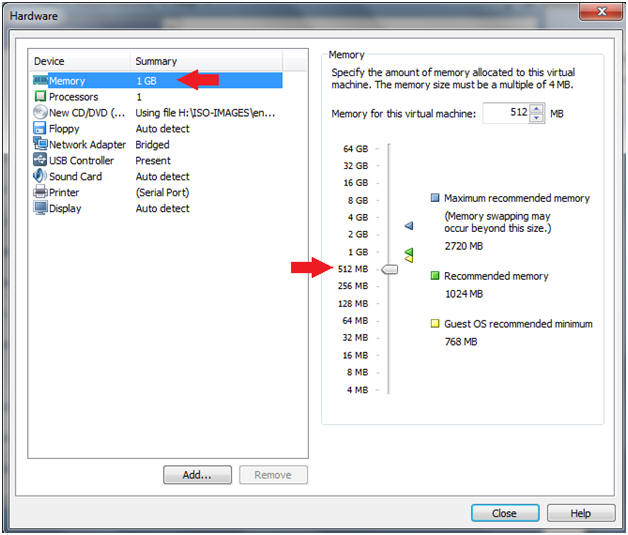
- Click on Memory (which is highlighted in blue)
- Click on 512 MB. (Recommended is 1024 MB, but we only need 512 MB for lab purposes).
- DO NOT Click the Close button
- Instructions:
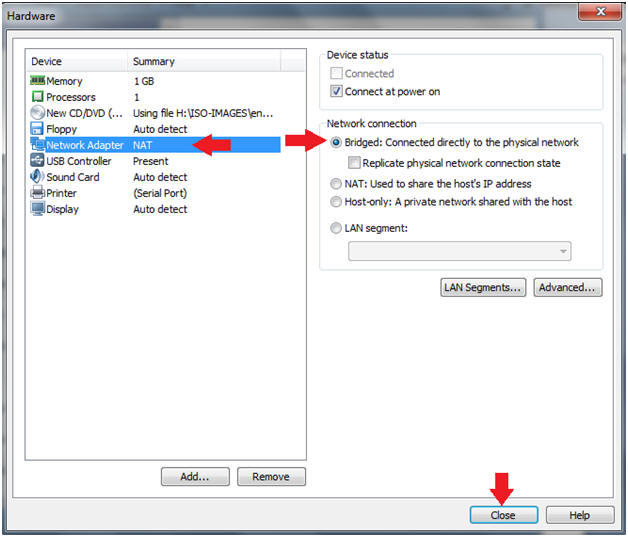
- New Virtual Machine Wizard (Network)
- Instructions:
- Click on Network Adapter
- Select the Bridged radio button
- Click the Close Button
- Instructions:
- Click on the Finish button.
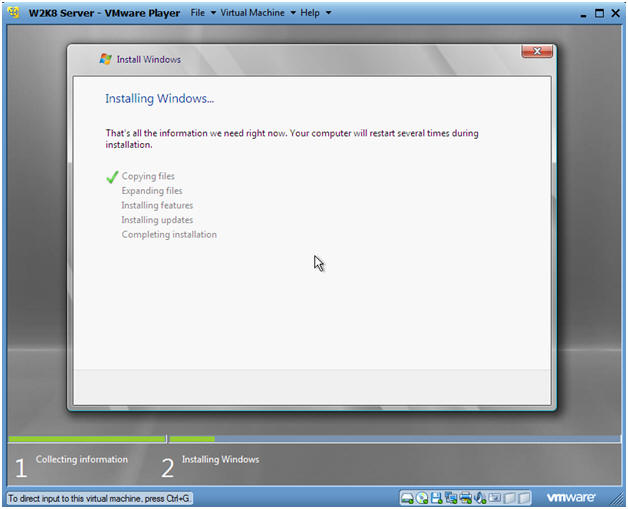
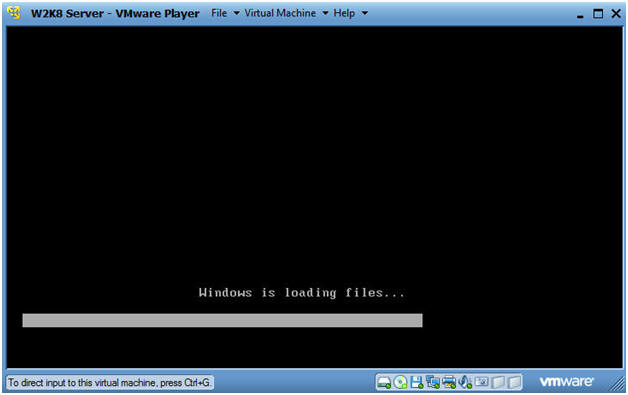
- Windows is loading files...
- Installing Windows
- Note: Depending on your system's resources this process could take between 15 and 45 minutes.
| Section 2. Login to your W2K8 server. |
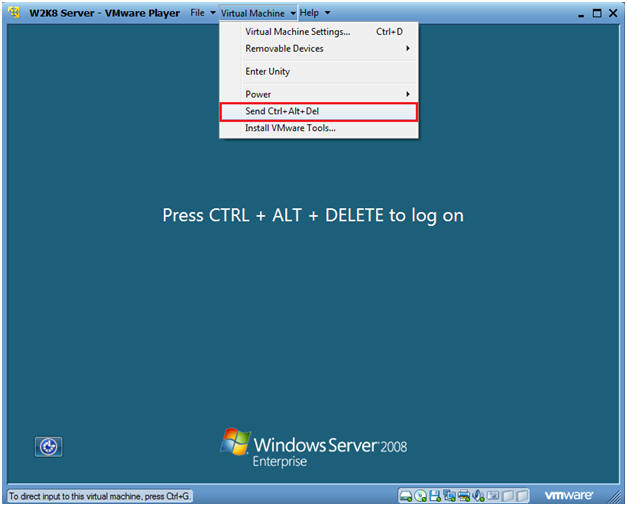
- CRTL + ALT + DELETE
- Instructions:
- Virtual Machine
- Send Ctrl+Alt+Del
- Instructions:
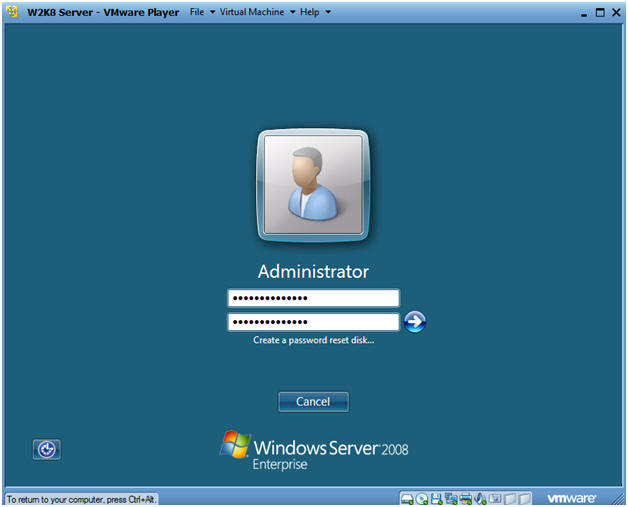
- Login as Administrator
- Instructions:
- Click on the Administrator icon.

- Instructions:
- User's password must be changed before logging
on the first time
- Instructions:
- Click OK

- Instructions:
- Create Password.
- Instructions:
- Use a Strong Password base on the
following rules
- At least 8 characters long
- At least 1 Uppercase Character
- At least 1 Digit
- At least 1 Special Character
- Use a Strong Password base on the
following rules
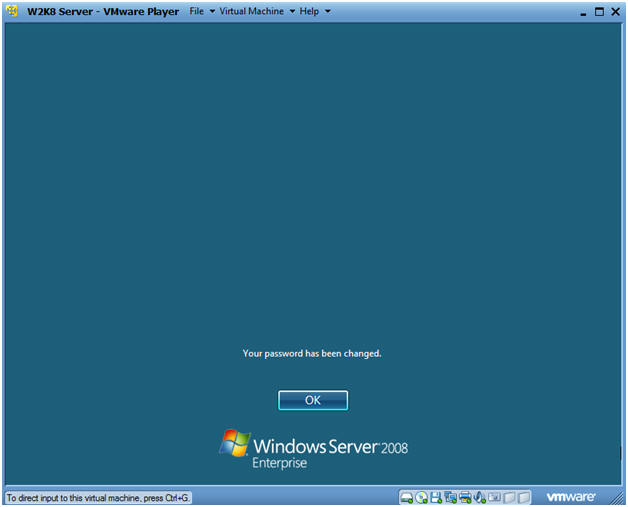
- Instructions:
- Your password has been changes
- Instructions:
- Click OK
- Instructions:
| Section 3. Proof of Lab |
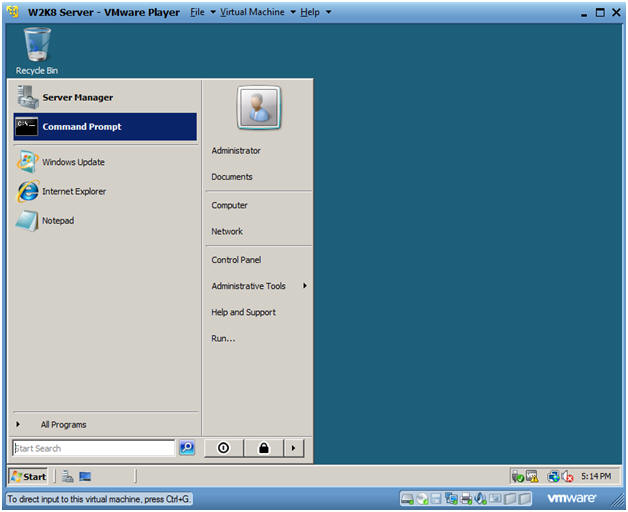
- Bring up Command Prompt
- Instructions:
- Start --> Command Prompt
-
- Instructions:
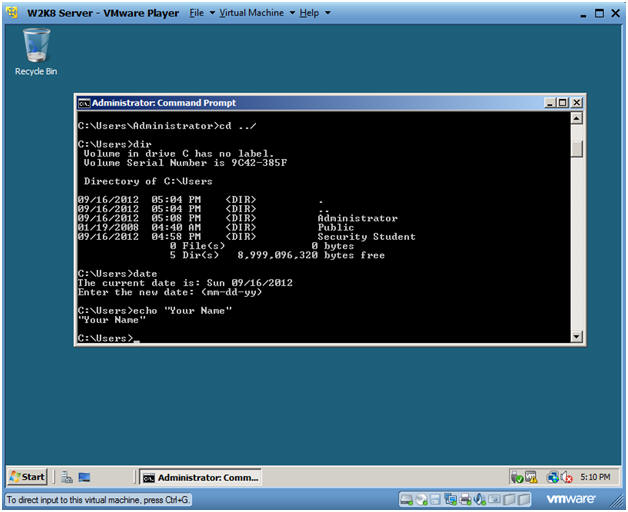
- Proof of Lab
-
Proof of Lab
Instructions
- cd ../
- dir
- date
- echo "Your Name"
- Replace the string "Your Name" with your actual name.
- e.g., echo "John Gray"
- Do a <PrtScn>
- Paste into a word document
- Upload to Moodle
-
Proof of Lab
Instructions