(Damn Vulnerable Windows XP: Lesson 7)
{ How to Increase the VMWare Boot Screen Delay }
| Section 0. Background Information |
- Why slow down the VMWare Boot Screen Delay?
- Sometimes a person might want to use a bootable CD or USB flash drive, that contains an ISO file, to clear a password with Hiren's or remove a Virus with Kaspersky.
- Unfortunately, you have to have Jedi Ninja reflexes to Left Click and press the <Esc> button once you see the VMWare Boot Screen to access the Boot Menu.
- Fortunately, the VMWare virtual machine configuration file (.vmx) allows you to delay the boot process by using the bios.bootdelay configuration parameter. E.g., bios.bootdelay = "20000".
- Pre-Requisite
- Post-Requisite
-
Lab Notes
- In this lab we will do the following:
- Discover the Path of the VMWare virtual machine configuration file (.vmx)
- Configure the bios.bootdelay configuration parameter to delay the VMWare Boot Screen by 20000 milliseconds (ie., 20 seconds).
- In this lab we will do the following:
- Legal Disclaimer
- As a condition of your use of this Web site, you warrant to computersecuritystudent.com that you will not use this Web site for any purpose that is unlawful or that is prohibited by these terms, conditions, and notices.
- In accordance with UCC § 2-316, this product is provided with "no warranties, either express or implied." The information contained is provided "as-is", with "no guarantee of merchantability."
- In addition, this is a teaching website that does not condone malicious behavior of any kind.
- You are on notice, that continuing and/or using this lab outside your "own" test environment is considered malicious and is against the law.
- © 2015 No content replication of any kind is allowed without express written permission.
| Section 1. Increase VMWare Boot Delay Screen |
- Open VMware Player on your windows machine. (On
Host Machine)
- Instructions:
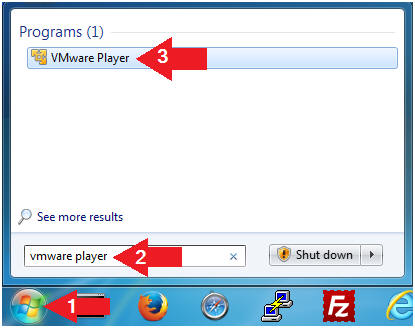
- Click the Start Button
- Type vmware player in the search box
- Click on VMware Player
- Instructions:
- Edit Virtual Machine Settings
- Instructions:
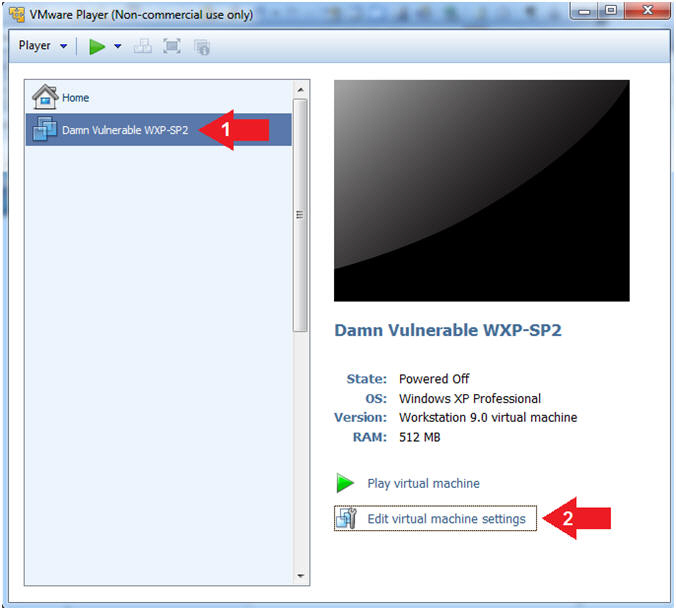
- Click on Damn Vulnerable WXP-SP2
- Edit Virtual Machine Settings
- Note:
- Before beginning a lesson it is necessary to check the following VM settings.
- Instructions:
- Copy Working Directory Path
- Instructions:
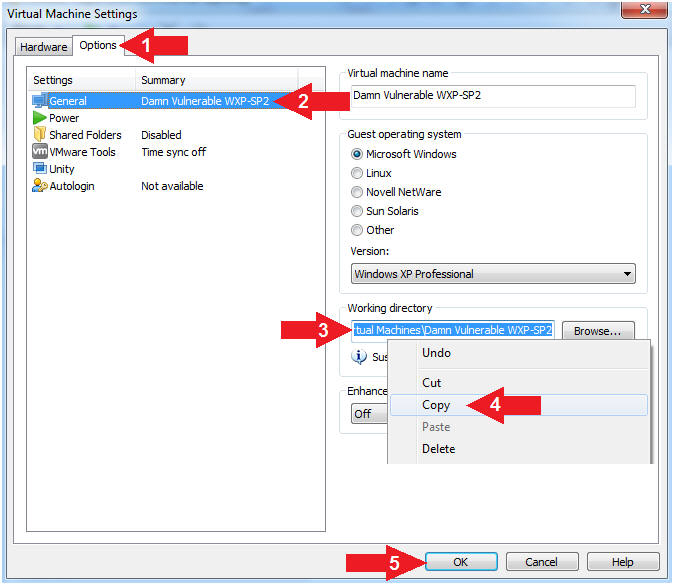
- Click the Options Tab
- Click on General Settings
- Highlight the Working directory
- Select Copy
- Click the OK Button
- Instructions:
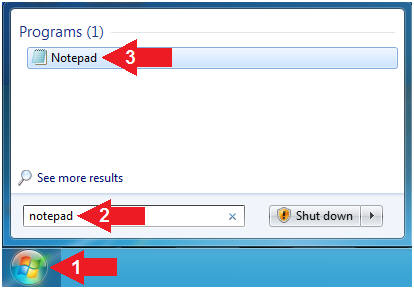
- Open Notepad on your windows machine. (On
Host Machine)
- Instructions:
- Click the Start Button
- Type notepad in the search box
- Click on Notepad
- Instructions:
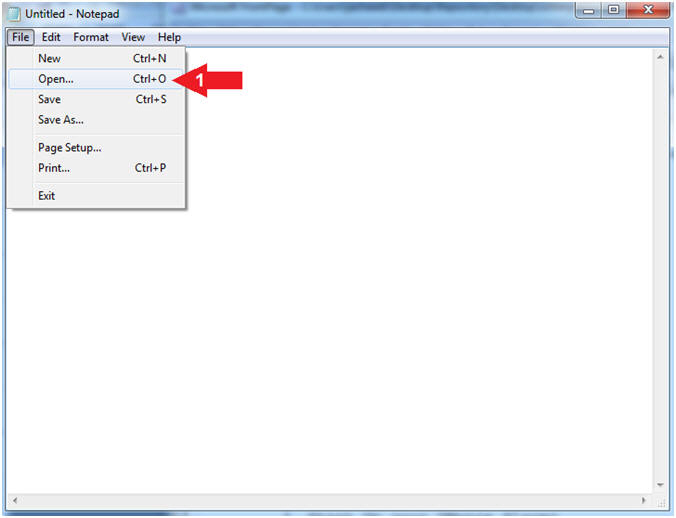
- Open File (Part 1)
- Instructions:
- File --> Open
- Instructions:
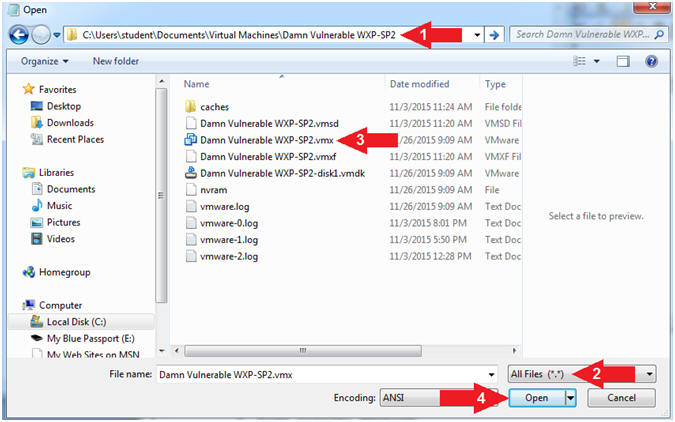
- Open File (Part 2)
- Instructions:
- Paste the Path that you copied from (Section 1, Step 3)
- Select All Files (*.*)
- Select Damn Vulnerable WXP-SP2.vmx
- Click the Open Button
- Instructions:
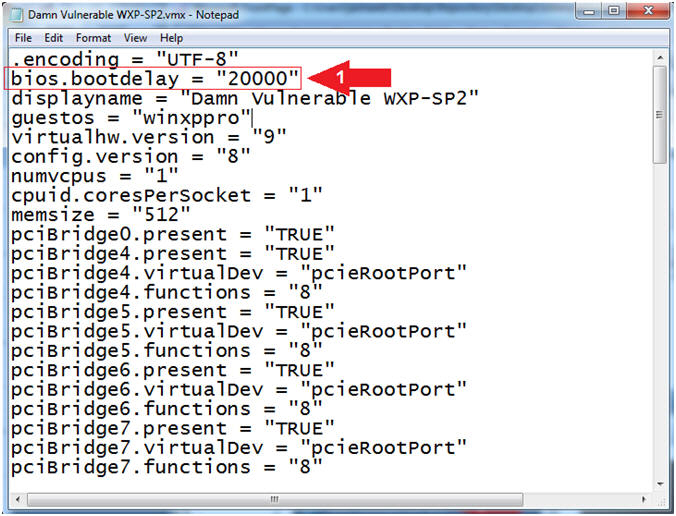
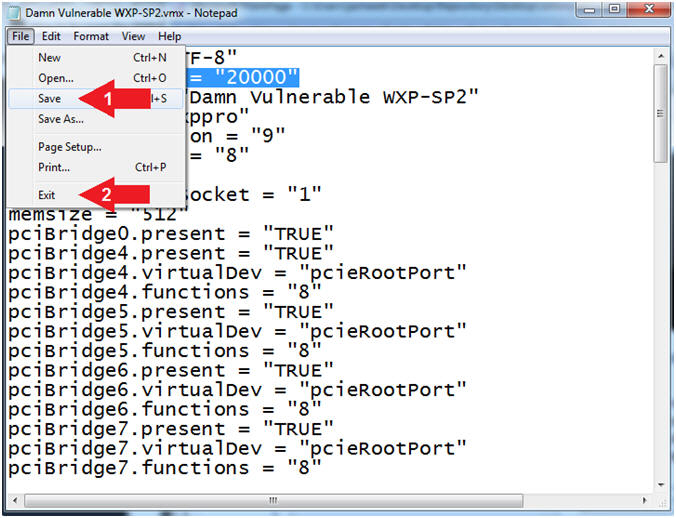
- Add Boot Delay
- Instructions:
- Add the following line directly
underneath .encoding = "UTF-8"
- bios.bootdelay = "20000"
- Add the following line directly
underneath .encoding = "UTF-8"
- Note(FYI):
- This will introduce a 20 second delay before the virtual machine loads up. The value of 20000 is represented in milliseconds. If you only wanted a 10 second delay you would change the 20000 to 10000.
- Instructions:
- Save File and Exit
- Instructions:
- File --> Save
- File --> Exit
- Instructions:
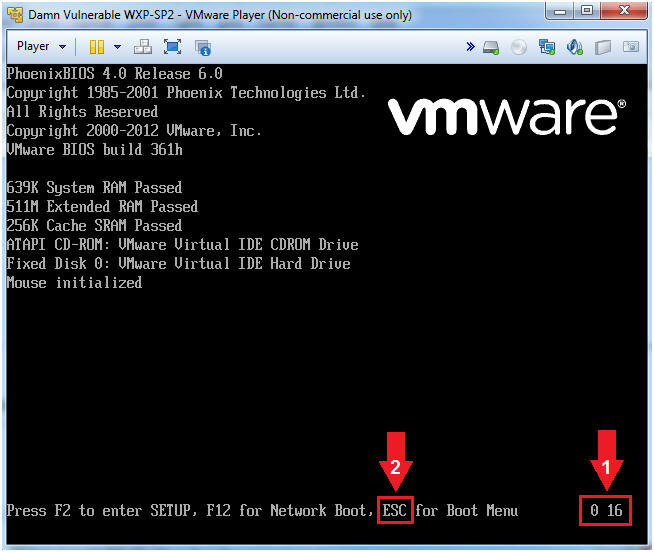
- Start Up Damn Vulnerable WXP-SP2.
- Instructions:
- Start Up your VMware Player
- Play virtual machine
- Instructions:
- Access the Boot Menu
- Instructions:
- Notice your time delay (See Picture)
- Left Click in the vmware screen and Press the <Esc> key
- Instructions:
- Boot Menu Navigation
- Instructions:
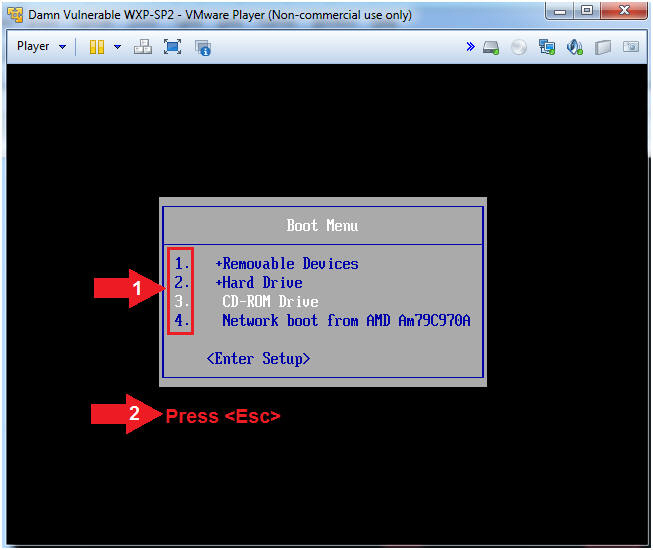
- The Boot Menu provides you options to boot from the (1) Removal Devices, (2) Hard Drive, (3) CD-ROM Drive or (4) Network.
- Press the <Esc> Key to exit the Boot Menu
- Note(FYI):
- We pressed <Esc> to exit the boot menu, since we did not previously load an ISO.
- If you would like to have practice booting from an ISO, I encourage you to do the following lesson.
- Instructions: