(Unix/Linux Lesson 2)
{ cp, mv, rm, rmdir, cat, more, head, tail, grep, wc }
Before you get started
-
Use TargetUbuntu01 or whatever Unix/Linux server you have access too.
-
Login as user account "student" or whatever Unix/Linux account you have access to on the particular server.
| 2.1 Copying Files |
cp (copy)
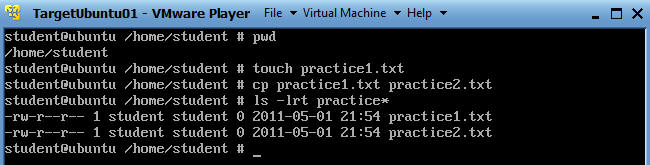
- pwd - Shows you your current working patch (Where you are right now).
- touch practice1.txt - This will create a zero-byte file for the purposes of testing.
- cp practice1.txt practice2.txt
- ls -lrt practice* - Show you the long listing of files sorted by ascending by time, all files starting with practice.
| 2.2 Moving Files |
mv (Move)
- mv practice1.txt practice3.txt
- ls -lrt practice*
- Show you the long listing of files sorted by ascending by time,
all files starting with practice.
- Notice practice1.txt is not displayed.

| 2.3 Removing Files |
rm (Remove)
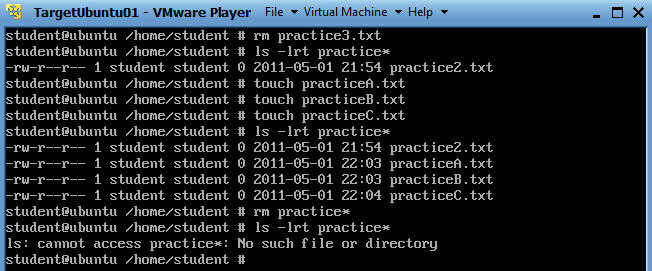
- rm practice3.txt
- ls -lrt practice* - Show you the long listing of files sorted by ascending by time, all files starting with practice.
- touch practiceA.txt - create another file
- touch practiceB.txt - create another file
- touch practiceC.txt - create another file
- ls -lrt practice* - Show you the long listing of files sorted by ascending by time, all files starting with practice.
- rm practice* - remove all files that start with the word practice, using the wild card "*".
- ls -lrt practice*
| 2.3 Removing directories |
rmdir (Remove Directory)
First, we will create some directories and files that we will later remove.
- mkdir folderA - mkdir folderA
- mkdir folderB - mkdir folderB
- touch folderA/fileA.txt - Create a practice file in folderA called fileA.txt
- touch folderB/fileB.txt - Create a practice file in folderB called fileB.txt

Option 1: rmdir (Remove Directory)
- rmdir folderA
- Notice you get a message saying the directory is not empty.
- You will have to empty the directory before you can remove it.
- cd folderA
- ls -l
- You will see fileA.txt that you will need to remove.
- rm fileA.txt
- This removes the file
- cd ../
- cd out of the directory
- rmdir folderA
- Now you can remove folderA, because it is empty.
- ls -l | grep folderA
- Do a long list of all file in the directory and search for anything called folderA

Option 2: rm -rf (Remove Directory)
- -f, mean to force
- -r, mean to recursive remove a directory
and its contents.
- rm -rf folderB
- Remove folderB and its' contents
- ls -l | grep folderB | wc -l
- Do a long listing, search for folderB, and count how times folderB is found.
- Notice "0" is returned, because folderB is now gone.
- Note
- rm -rf is a very dangerous command.
- Never, Never, Never issue rm -rf *, unless you absolutely need to issue this command.

| 2.4 How to display a file with "cat" |
Prep Work
- cd
- This will place you back in your home directory.
- cp /etc/passwd PASSWD.TXT
- You will see a file called PASSWD.txt

Option 1: cat
- cat PASSWD.TXT
- Notice that the entire file will be printed to the screen.

- clear
- This command will clear your screen
| 2.5 How to display a file with "more" |
Option 2: more

First, we will create some directories and files that we will later remove.
- more PASSWD.TXT
- Press the <Enter> key to scroll line by line.
- Press the <spacebar> to scroll page by page
- clear
- This command will clear your screen

This is what the output should look like


| 2.6 How to display a file with "less" |
Option 3: less
- less is the opposite of more.
- less is similar to more.
- less allows both backward and forward movement in a file.
- less does not have to read the entire file before starting. (This is really handy for large files).
- clear
- less PASSWD.TXT
- You will see output very similar to more.

- Now search for the username "snort" by using the forward "/"
- /snort

- Type "q" to escape the less editor
| 2.7 How to display a file with "head" |
Option 4: head
- Output the first part of the file first.
- head by default shows 10 lines at a time.
- clear
- head PASSWD.TXT
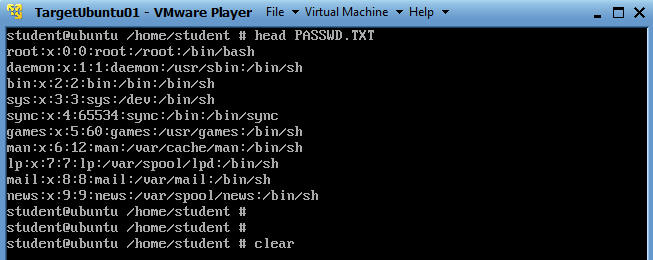
- clear
- head -5 PASSWD.TXT
- Show me the first 5 lines of the PASSWD.TXT file.

| 2.8 How to display a file with "tail" |
Option 5: tail
- Output the last part of the file first.
- last by default shows 10 lines at a time.
- clear
- tail PASSWD.TXT
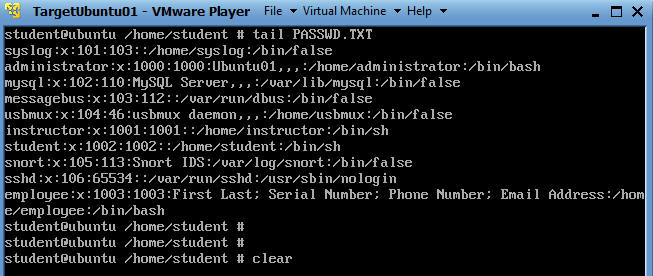
- clear
- tail -5 PASSWD.TXT
- Show me the last 5 lines of the PASSWD.TXT file.

| 2.9 How to search a file using "grep" |
Command: grep
- grep, prints lines matching a certain pattern.
- grep <pattern> filename
- clear
- grep snort PASSWD.TXT
- Search and display results for the pattern "snort" in the PASSWD.TXT file.

- grep false PASSWD.TXT
- Search and display results for the pattern "false" in the PASSWD.TXT file

- grep -c false PASSWD.TXT
- Count the number of results.

- grep false PASSWD.TXT | wc -l
- Count the number of results

| 2.9.1 How to search a file using "egrep" |
Command: egrep
- egrep, prints lines matching a certain pattern.
- egrep '(pattern1|pattern2|pattern3)' filename
- clear
- egrep
'(snort|student|instructor)'
PASSWD.TXT
- Search for snort, student and instructor

| 2.9.1 How to search a file using "egrep" |
| Command | Description |
cp file1 file2 |
copy file1 and call it file2 |
mv file1 file2 |
move or rename file1 to file2 |
rm file |
remove a file |
rmdir directory |
remove a directory |
cat file |
display a file |
more file |
display a file a page at a time |
head file |
display the first few lines of a file |
tail file |
display the last few lines of a file |
grep 'keyword' file |
search a file for keywords |
wc file |
count number of lines/words/characters in file |
| 2.9.2 Proof of Lab Assessment |
- cat .lesshst
- Capture the screen by the <Alt> button and <PrtScn> button at the same time.
- Paste the screen in a word document
- Upload to Moodle Lab 7 B.
