(Unix/Linux Lesson 1)
{ pwd, ls, man, PS1, mkdir, cd }
| 1.1 Listing files and directories |
Command: pwd
Login to your TargetUbuntu01 Server, or whatever server you can practice on. For the purposes of this lab, login as the student username or a username for which you have access too.
From the command prompt issue the pwd command. This is your home directory.

Command: ls (list)
To list your directory contents or to find out what is in your home directory, use the ls command.

In some cases when an account is first created, there will appear to be nothing located in the home directory. However, this is not necessarily true. Files that start with a "." will not display when issuing a basic ls command.
Command: ls -a
To see absolutely all files in the current working directory, issue the ls -a command.

Better right? But I bet you are wonder what these files are all about.
- "." is your current working directory. So, if you cd from the /home/student directory, you will remain in the /home/student directory.
- ".." is the parent directory. So, if you cd .. from the /home/student directory, then you will end up in the /home directory.
- .bash_logout is a logout script that clears the screen.
- .bashrc determines the behavior of interactive shells
- .cache - is used to speed up access to commonly used directories.
- .mysql_history - show the mysql command line history for a particular user.
- .profile - contains the commands that the system executes when you log in.
Command: ls -la
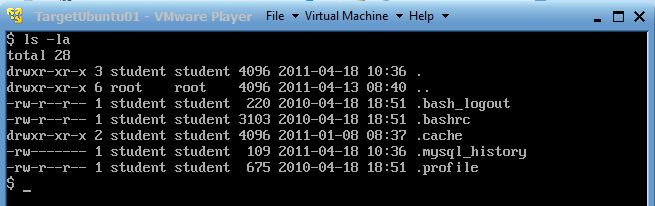
This next command ls -la gives the long listing of all files listed in the current working directory. Notice you can see the permissions notated by "drwx-r-xr-x", the user ID ownership of the first student column, and the group ID ownership followed by the second student column.
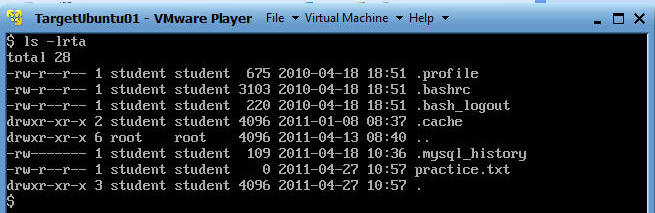
Command: ls -lrta
This command means, list the long list of all the files in reverse order by time. Basically, file listed last, is the most recent file.
Command: ls -lrta | tail -1
Show me the most recent non-hidden file. Notice that I did not include the "-a" option to see non-hidden files.

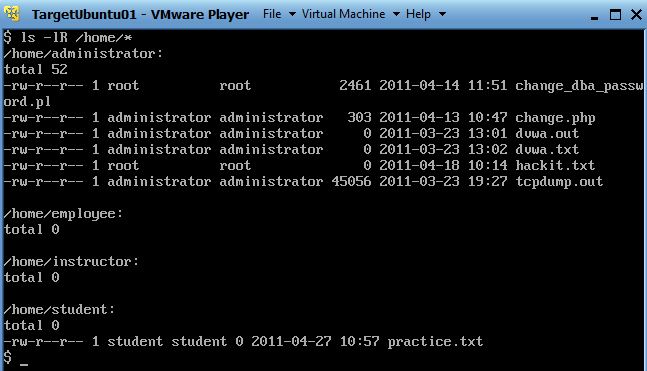
Command: ls -lR /home/*
Show me the contents of all the directories in everybody's home directory. I realize this output does not show the standard security umask setting of 077.
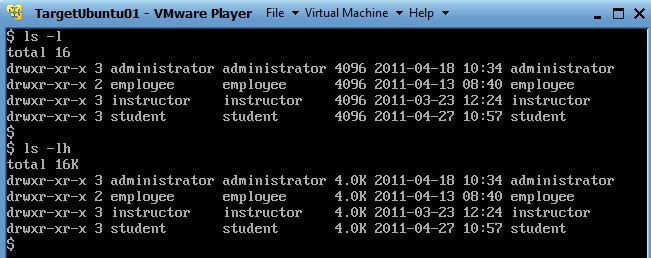
Command: ls -lh
Print sizes of each file in human readable format (e.g., 1K, 234M, 5G) instead of 1024 blocks.
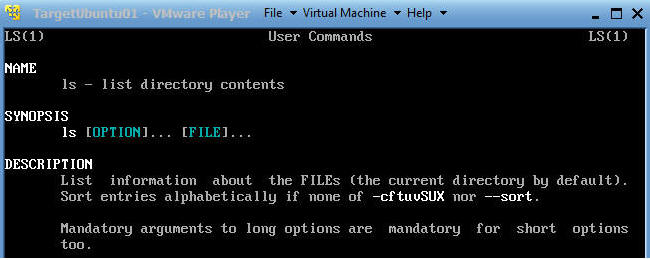
Command: man ls
Show me option the options for the ls command.
| 1.2 Fixing your PS1 command prompt |
Command: PS1="`logname`@`hostname` \$PWD # "
NOTE: The "`" is a back tic which is usually located next to the number 1 button
It is a really good practice to know where you are at all times, especially in the Unix/Linux word. "logname" print the user's login name. "hostname" prints the servers hostname. "$PWD" is an environment variable to print the current working directory.

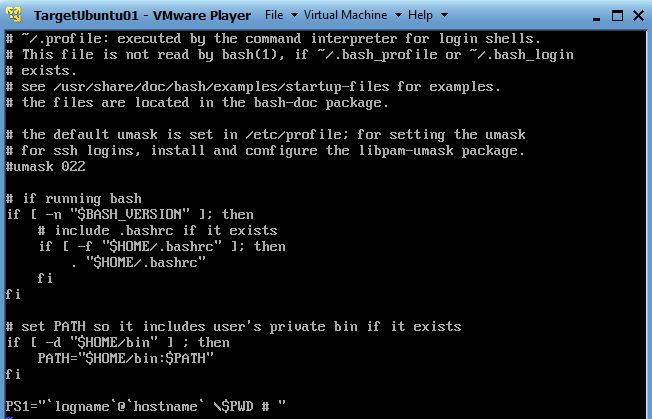
| 1.3 Add your PS1 prompt magic to your .profile |
PS1="`logname`@`hostname` \$PWD # "
NOTE: The "`" is a back tic which is usually located next to the number 1 button
It is a PITA to constantly type the above command. So, we will take this one step further and add it to the .profile. Remember, one of the major functions of a .profile file is execute commands when the user logs in. Here, the above command is issued to change his or her prompt.

- cd - Using the cd command, places you back in your home directory.
- vi .profile - vi your .profile, so you can edit it.
- <shift>-g - This takes you to the start of the version last line in vi.
- <shift>-a - This puts you at the end of the line in append mode.
- <hit enter>
- <hit enter>
- PS1="`logname`@`hostname` \$PWD # "
- <ESC>
- wq!
Next
- Exit until you see a login prompt
- Login as "student" or the username you just set up the .profile for.
- And Presto, you should see a great looking prompt.
| 1.4 Making Directories |
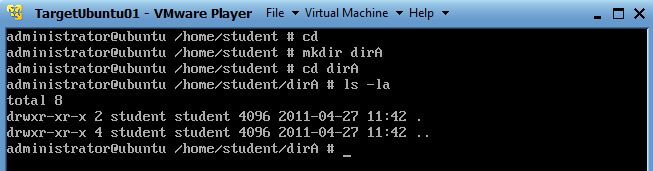
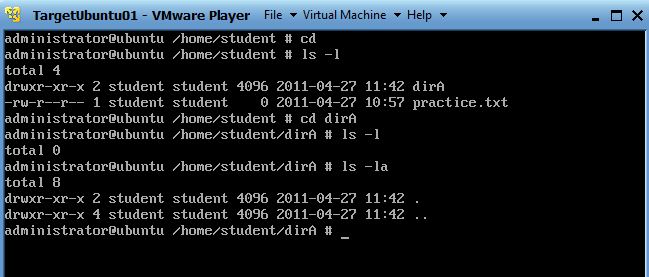
Command: mkdir dirA
Now, go we will make a directory with the mkdir command.
- cd
- mkdir dirA
- cd dirA
- ls -la
| 1.5 Changing to a different directory |
Command: cd (change directory)
The command cd directory means change the current working directory to another 'directory'. The current working directory may be thought of as the directory you are in, i.e. your current position in the file-system tree.
- cd
- ls -l
- cd dirA
- ls -la
| 1.6 The directories "." and ".." |
Notice that there is a "." and a ".." in the dirA directory you just created.

In UNIX, (.) means the current directory, so typing "cd ." means the current working directory of /home/student/dirA.
In UNIX, the (..) means the parent of the current directory, so typing "cd .." will take you one directory up the hierarchy (back to your home directory).
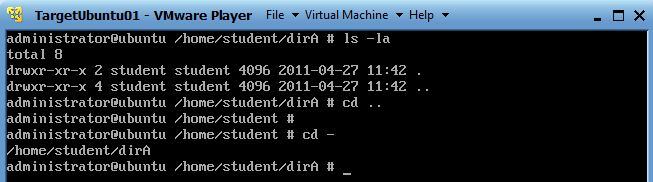
Command: cd -
Issuing "cd -" is a very helpful command. It takes you back to the directory you were previously. In the screen you were in /home/student/dirA, then you issued the "cd .." command, which took you to /home/student.
Now issue the "cd -" command to take you back to /home/student/dirA.
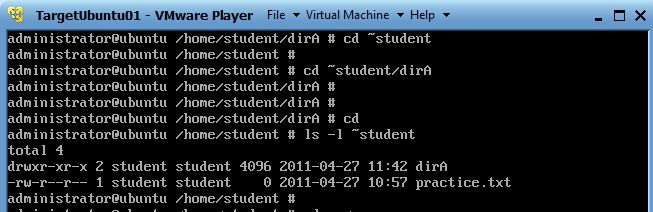
Command: cd ~student
Use can also use the tilde ~ character to get back to your home directory. In addition, It can be used to specify paths starting at your home directory.
- cd -gets you back to your home directory
- cd dirA - places you in the dirA directory
- cd ~student - places you back in the student home directory.
- ls -l ~student - prints a listing of all the files and directories in the student home directory.
| Summary |
| Command | Description |
ls |
list files and directories |
ls -a |
list all files and directories |
mkdir |
make a directory |
cd directory |
change to named directory |
cd |
change to home-directory |
cd ~ |
change to home-directory |
cd .. |
change to parent directory |
pwd |
display the path of the current directory |
| Proof of Lab Assessment |
- cd
- ls -l .profile
- cat .profile
- Capture the screen by pressing the <Alt> button and <PrtScn> button at the same time.
- Paste screen in a word document
- Upload to Moodle