(Fedora: Lesson 3)
{ Hardening the Boot Loader, /boot/grub/grub.conf }
| Section 0. Background Information |
- What is grub?
- The grub stands for Grand Unified Boot Loader.
- The grub loader can recognize various types of filesystems and kernel executable formats, allowing it to load an arbitrary operating system.
- When you boot the system, the grub displays a menu of choices that is generated by the /boot/grub/grub.conf if the timeout directive is not equal to 0.
- The /boot/grub/grub.conf file is the default configuration file.
- To prevent the grub menu from being displayed the timeout directive should be set to 0.
- To prevent an unauthorized user from physically gaining root single user access to the server by editing the kernel, you must add the password --md5 directive to the grub.conf file.
-
Lab
Notes
- In this lab we will do the following:
- We will enter the grub menu
- We will create a md5 password
- We will add the md5 password to the grub.conf file
- We will test the grub menu to make sure it is password protected.
- In this lab we will do the following:
- Legal Disclaimer
- As a condition of your use of this Web site, you warrant to computersecuritystudent.com that you will not use this Web site for any purpose that is unlawful or that is prohibited by these terms, conditions, and notices.
- In accordance with UCC § 2-316, this product is provided with "no warranties, either express or implied." The information contained is provided "as-is", with "no guarantee of merchantability."
- In addition, this is a teaching website that does not condone malicious behavior of any kind.
- Your are on notice, that continuing and/or using this lab outside your "own" test environment is considered malicious and is against the law.
- © 2013 No content replication of any kind is allowed without express written permission.
| Section 1: Configure Fedora14 Virtual Machine Settings |
- Open Your VMware Player
- Instructions:
- On Your Host Computer, Go To
- Start --> All Program --> VMWare --> VMWare Player
- Instructions:
- Edit Fedora 14 Virtual Machine Settings
- Instructions:
- Highlight Fedora14
- Click Edit virtual machine settings

- Instructions:
- Edit Network Adapter
- Instructions:
- Highlight Network Adapter
- Select Bridged
- Click the OK Button
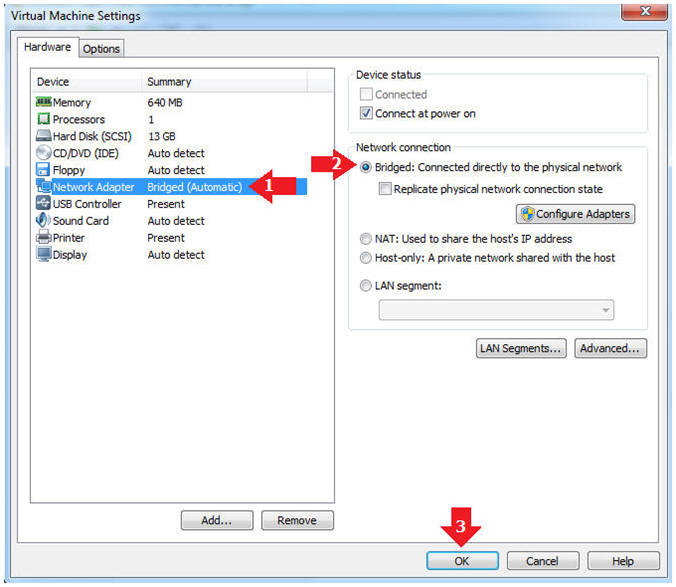
- Instructions:
| Section 2: Login to Fedora14 |
- Start the Fedora14 VM
- Instructions:
- Click on the Fedora14 VM
- Click on Play virtual machine
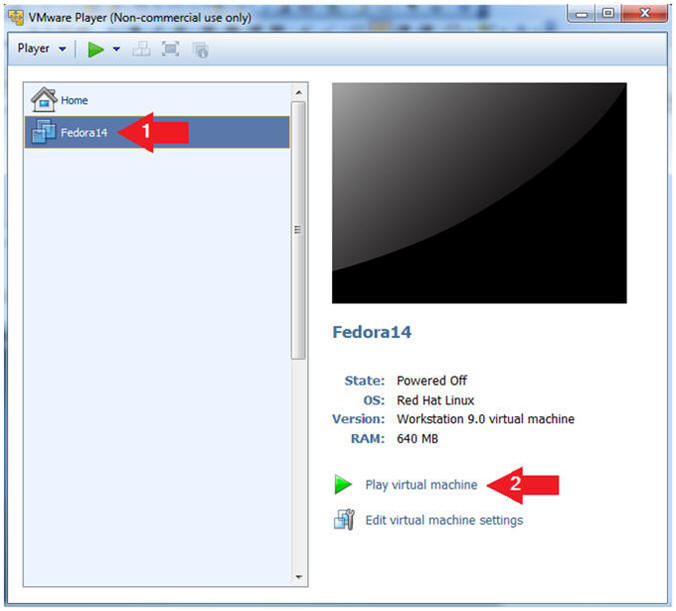
- Instructions:
- Login to Fedora14
- Instructions:
- Login: student
- Password: <Provide Your Password>
- Click the Log In Button
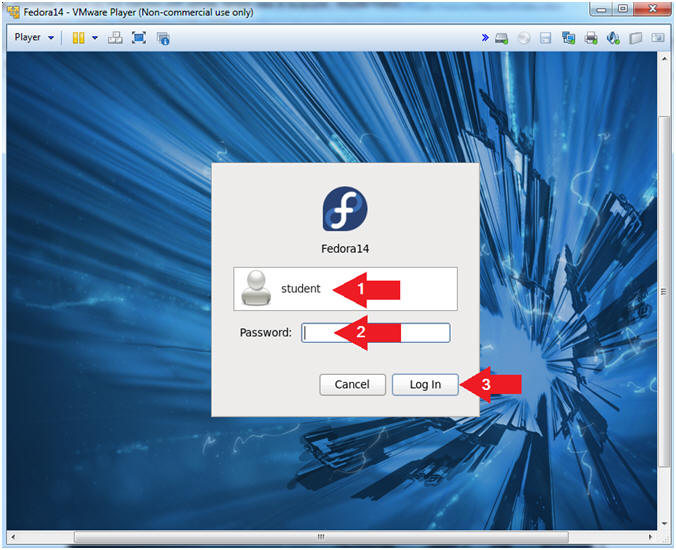
- Instructions:
| Section 3: Open Console Terminal and Retrieve IP Address |
- Start a Terminal Console
- Instructions:
- Applications --> Terminal
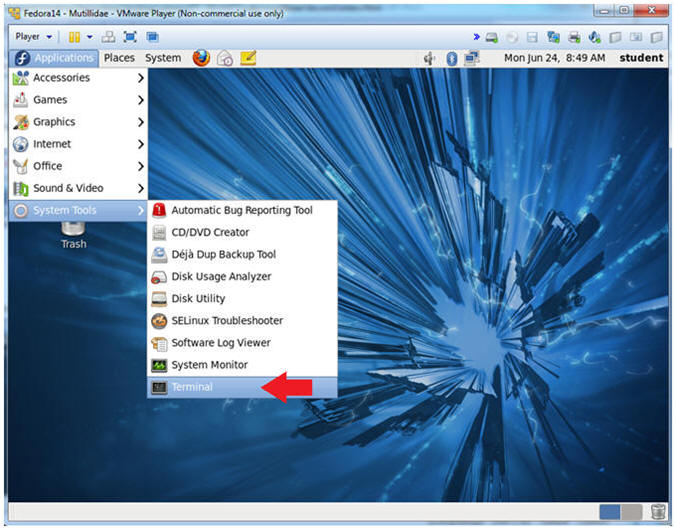
- Instructions:
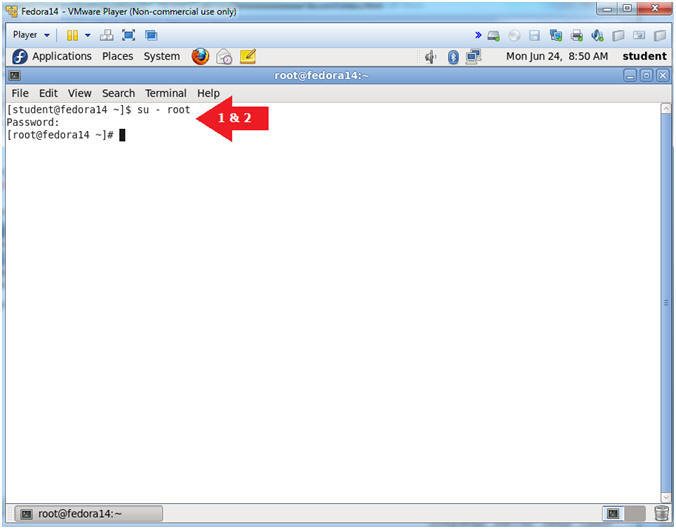
- Switch user to root
- Instructions:
- su - root
- <Whatever you set the root password to>
- Instructions:
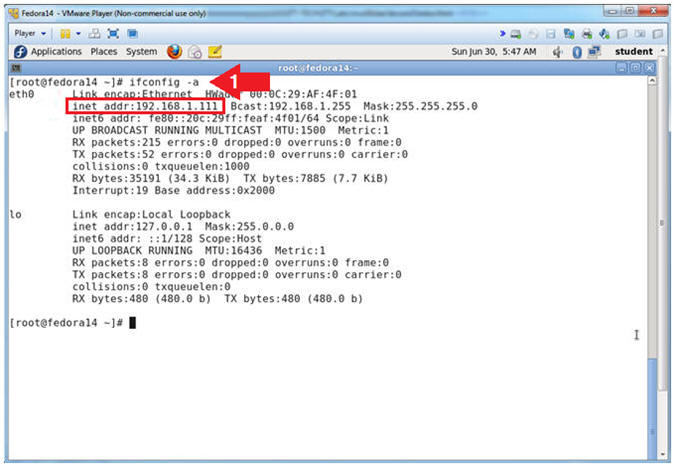
- Get IP Address
- Instructions:
- ifconfig -a
- Notes (FYI):
- As indicated below, my IP address is 192.168.1.111.
- Please record your IP address.
- Instructions:
| Section 4: Configure grub to provide single user root prompt |
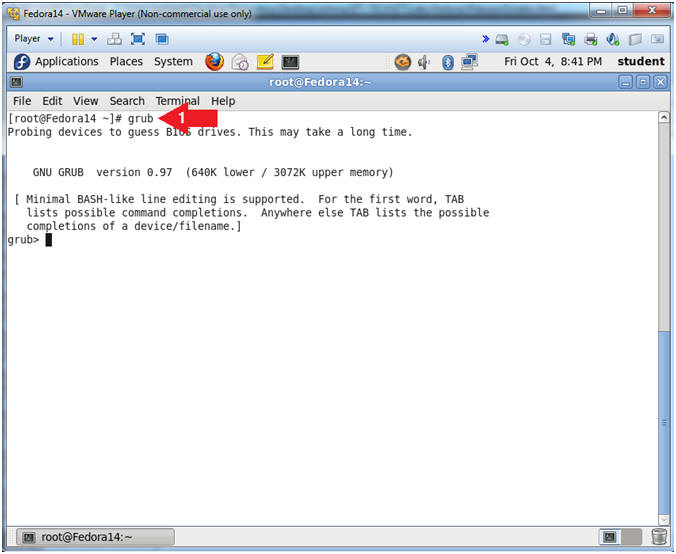
- Enter the Grub Shell
- Instructions:
- grub
- Instructions:
- Create a Grub Password
- Instructions:
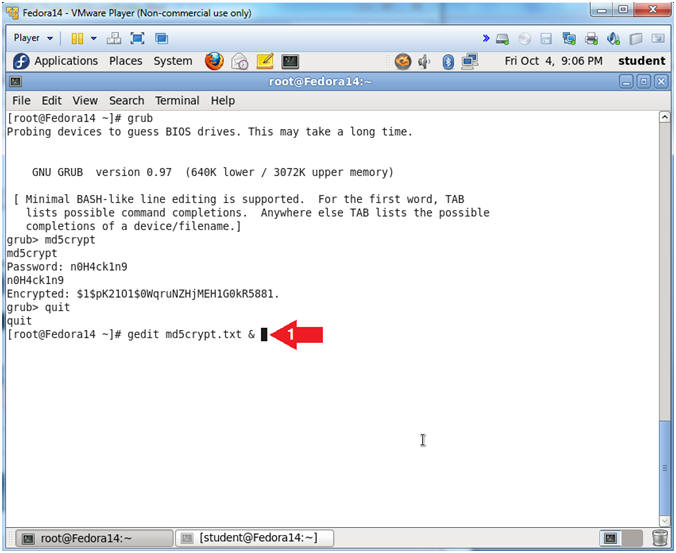
- md5crypt
- Password: n0H4ck1n9
- quit
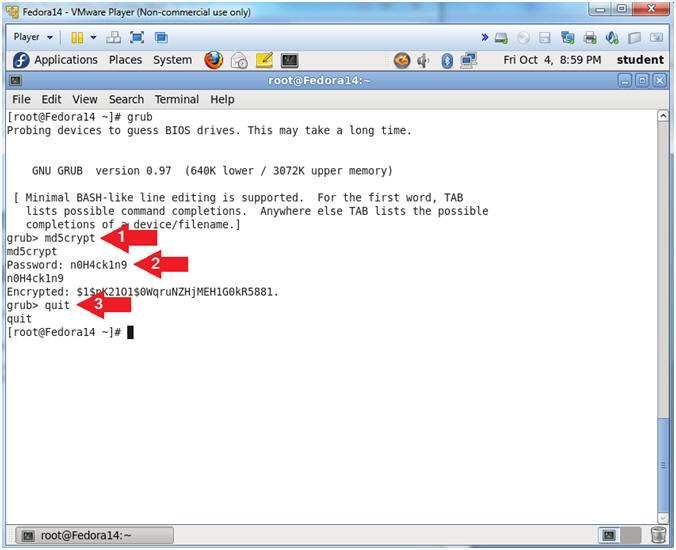
- Instructions:
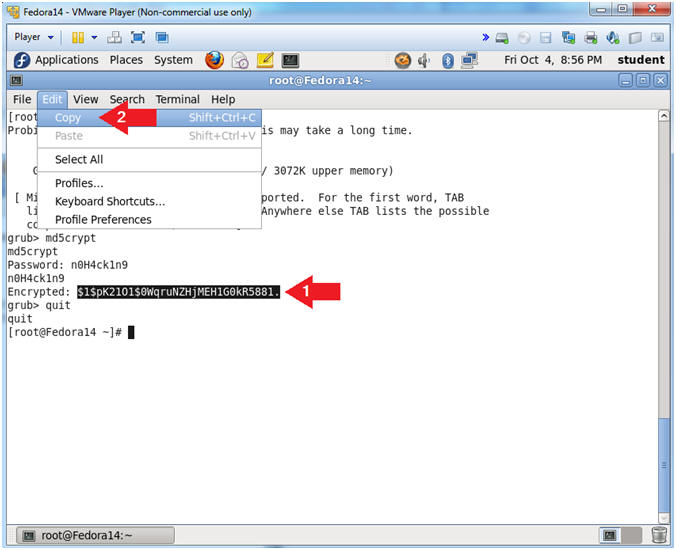
- Copy Grub Password
- Instructions:
- Highlight the encrypted string.
- Edit --> Copy
- Instructions:
- Create file md5crypt.txt with gedit
- Instructions:
- gedit md5crypt.txt &
- Instructions:
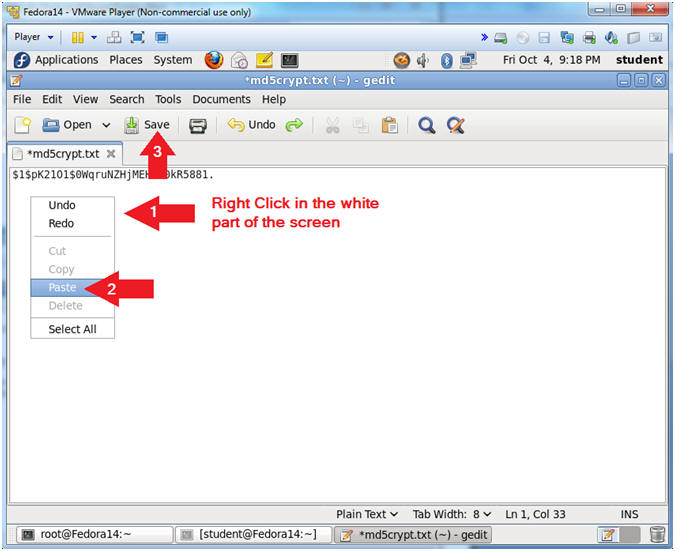
- Save file md5crypt.txt
- Instructions:
- Right click in the white part of the screen
- Click Paste
- Click the Save Button
- Instructions:
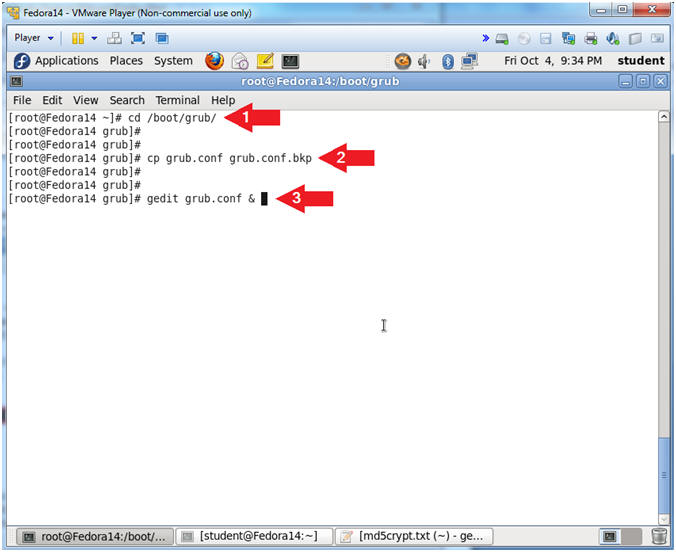
- Open the grub.conf file
- Instructions:
- cd /boot/grub/
- cp grub.conf grub.conf.bkp
- gedit grub.conf &
- Instructions:
- Add Password Directive to the grub.conf file
- Instructions:
- Place your cursor at the end of the line that contains the string default=0 and Press <Enter>
- Add the following password phrase after
the
default=0 directive
- password --md5 $1$pK21O1$0WqruNZHjMEH1G0kR5881.
- Click the Save Button
- Note(FYI):
- The password($1$pK21O1$0WqruNZHjMEH1G0kR5881.) string is located in your md5crypt.txt file.

- Instructions:
| Section 5: Verifying the boot loader is password protected |
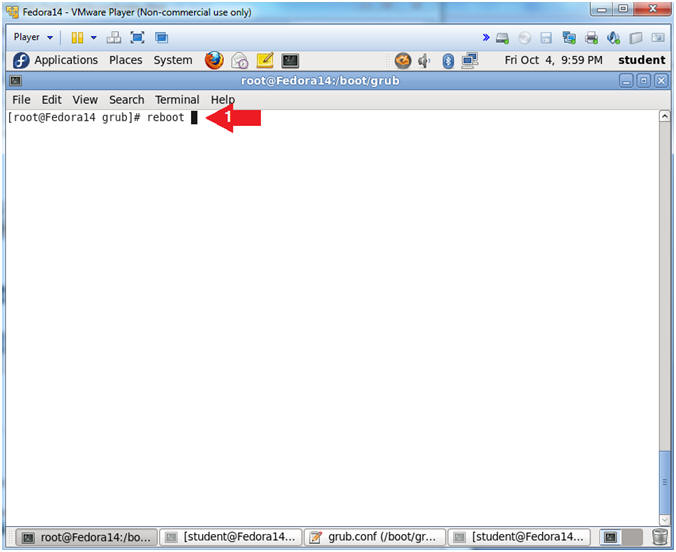
- Reboot the Machine
- Instructions:
- reboot
- Instructions:
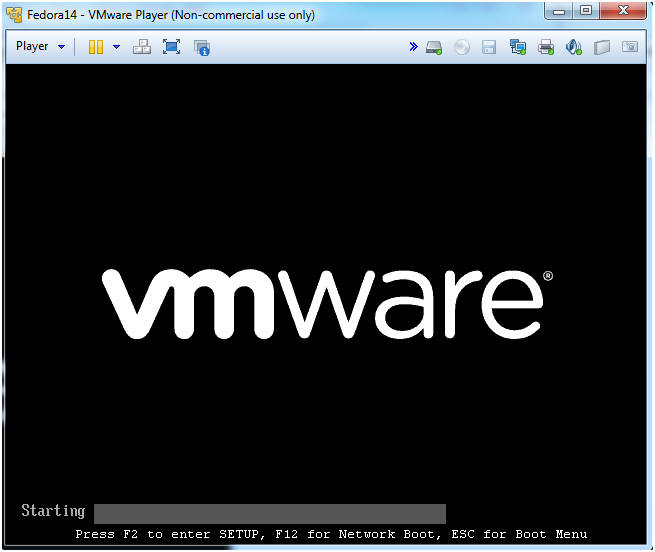
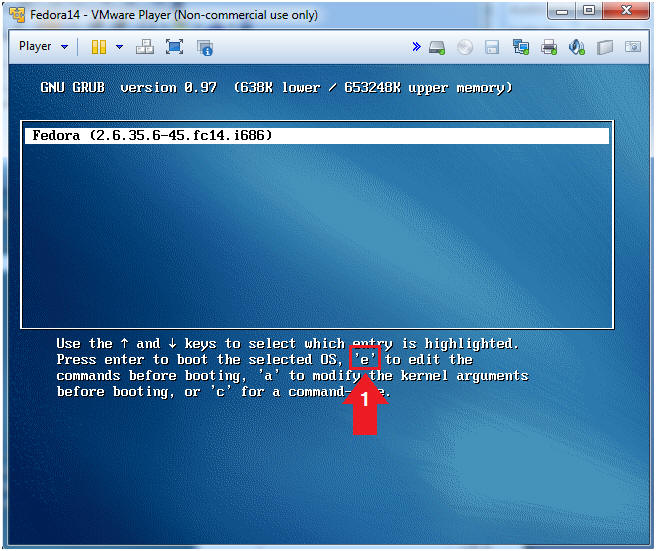
- Boot to Grub 2 Menu
- Instructions
- Once you see the below vmware screen, (1) Left Click in the screen and (2) press the "e" key
- Note(FYI):
- This might take you a few times so be patient!!!
- Instructions
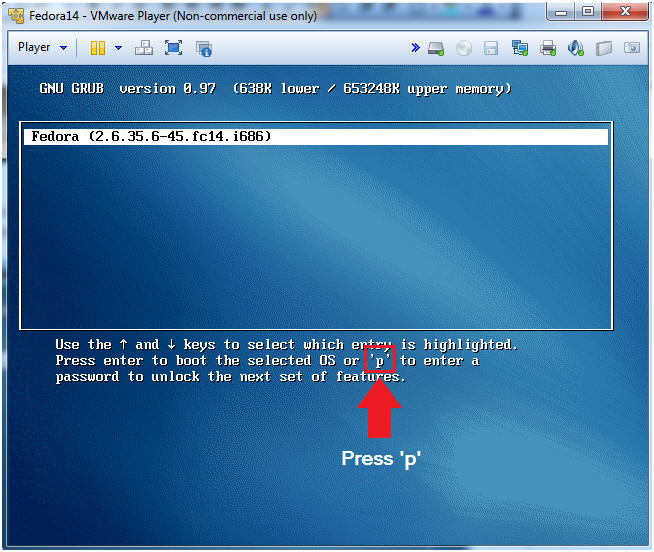
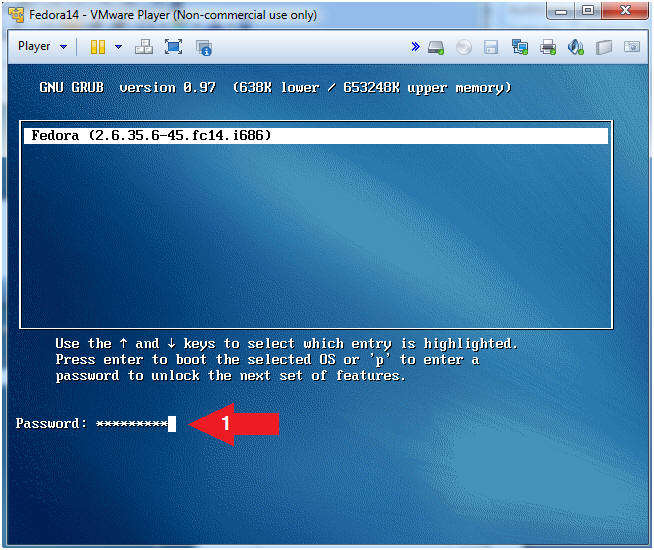
- Unlock Grub Menu
- Instructions
- Press "p" key.
- Note(FYI):
- Notice that there is no "e" option to edit the boot loader. In order to edit the boot loader, you will have to press "p" to enter a password.
- Instructions
- Enter the Password
- Instructions
- Password: n0H4ck1n9
- Instructions
- Enter the Grub Menu
- Instructions
- Press "e" key
- Instructions
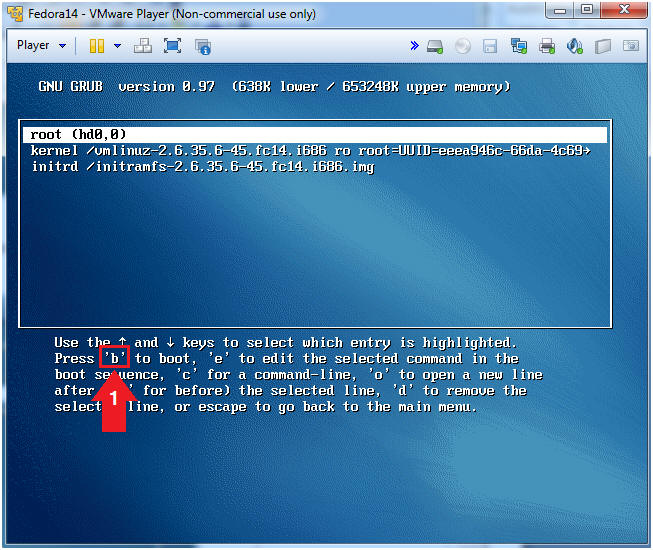
- Boot the System
- Instructions
- Press "b" key
- Note(FYI):
- Since we do not need edit the kernel, go a head and press the "b" key to boot up the system.
- Instructions
| Section 6: Proof of Lab |
- Login to Fedora14
- Instructions:
- Login: student
- Password: <Provide Your Password>
- Click the Log In Button
- Instructions:
- Start a Terminal Console
- Instructions:
- Applications --> Terminal
- Instructions:
- Switch user to root
- Instructions:
- su - root
- <Whatever you set the root password to>
- Instructions:
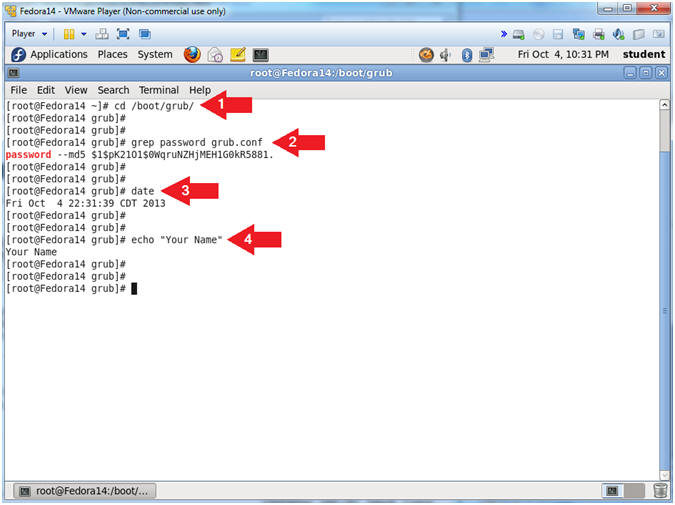
- Proof of Lab
- Instructions:
- cd /boot/grub/
- grep password /boot/grub/grub.conf
- date
- echo "Your Name"
- Put in your actual name in place of "Your Name"
- e.g., echo "John Gray"
-
Proof of Lab
Instructions
- Press the <Ctrl> and <Alt> key at the same time.
- Press the <PrtScn> key.
- Paste into a word document
- Upload to Moodle
- Instructions: