(Fedora: Lesson 1)
{ Installing Fedora 14 }
| Section 0. Background Information |
- What is Fedora?
- Fedora is an RPM-based, general purpose
collection of software, including an operating system based on the Linux
kernel, developed by the community-supported Fedora Project and
sponsored by Red Hat. The Fedora Project's mission is to lead the
advancement of free and open source software and content as a
collaborative community.
One of Fedora's main objectives is not only to contain software distributed under a free and open source license, but also to be on the leading edge of such technologies. Fedora developers prefer to make upstream changes instead of applying fixes specifically for Fedora—this ensures that their updates are available to all Linux distributions.
- Fedora is an RPM-based, general purpose
collection of software, including an operating system based on the Linux
kernel, developed by the community-supported Fedora Project and
sponsored by Red Hat. The Fedora Project's mission is to lead the
advancement of free and open source software and content as a
collaborative community.
- Legal Disclaimer
- As a condition of your use of this Web site, you warrant to computersecuritystudent.com that you will not use this Web site for any purpose that is unlawful or that is prohibited by these terms, conditions, and notices.
- In accordance with UCC § 2-316, this product is provided with "no warranties, either express or implied." The information contained is provided "as-is", with "no guarantee of merchantability."
- In addition, this is a teaching website that does not condone malicious behavior of any kind.
- You are on notice, that continuing and/or using this lab outside your "own" test environment is considered malicious and is against the law.
- © 2012 No content replication of any kind is allowed without express written permission.
| Section 1: Prerequisite |
- Download Fedora14 (On Host Computer)
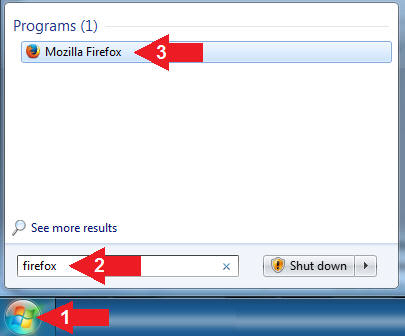
- Instructions:
- Click the Start Button
- Type "firefox" in the Search Box
- Click on Mozilla FireFox
- Note(FYI):
- The Host Computer is the computer in which VMware Player is installed.
- Instructions:
- Download Fedora14
- Instructions:
- Navigate to the following URL
- Click the Save File radio button
- Click the OK Button

- Instructions:
- When Saving the ISO File
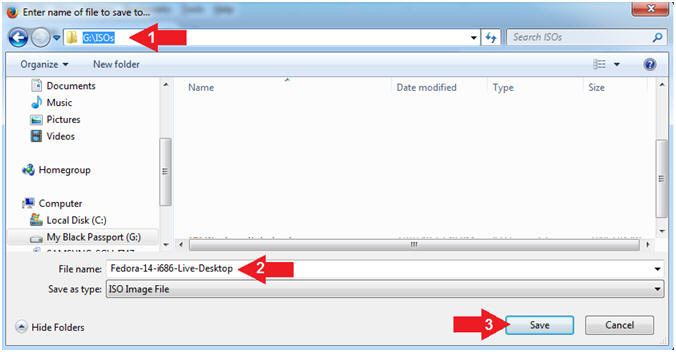
- Instructions:
- Save To C:\ISOs\ or USB:\ISOs\
- Accept the default iso name (e.g., Fedora-14-i686-Live-Desktop)
- Click the Save Button
- Note(FYI):
- In my case, I am saving the iso to an external hard-drive, hence the (G:)
- Instructions:
| Section 2: Create a New Virtual Machine |
- Open VMware Player on your windows machine.
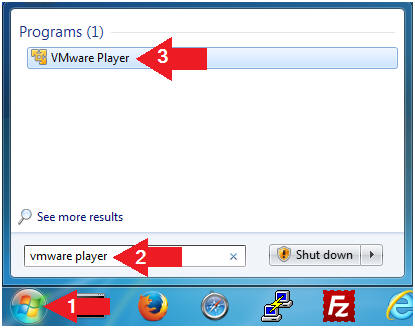
- Instructions:
- Click the Start Button
- Type "vmware player" in the search box
- Click on VMware Player
- Instructions:
- Create a New Virtual Machine. (See Below)
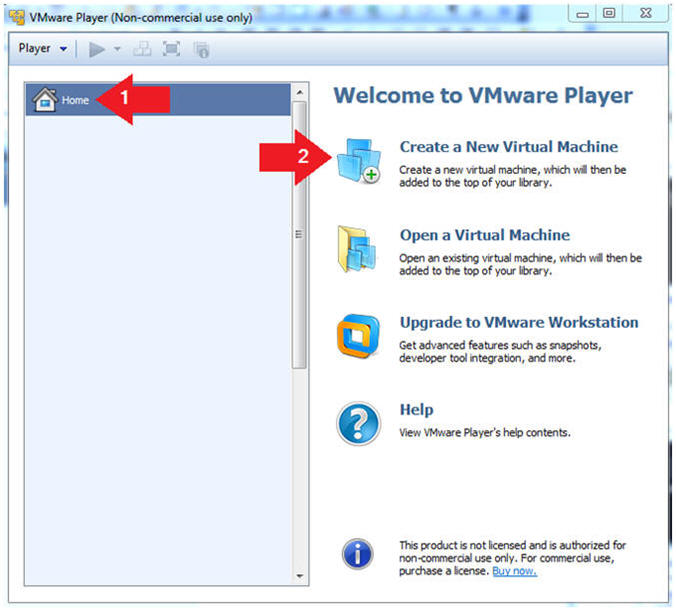
- Instructions:
- Click on Home
- Click on Create a New Virtual Machine
- Instructions:
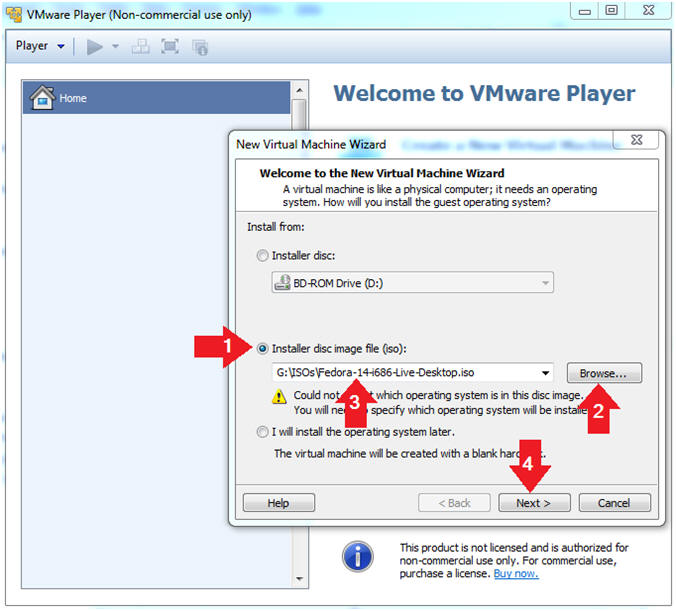
- Installation Media
- Instructions:
- Select the radio button "Installer disc image file (iso):"
- Click the Browse Button.
- Navigate to where your Fedora14 iso is located and select it.
- Click Next
- Instructions:
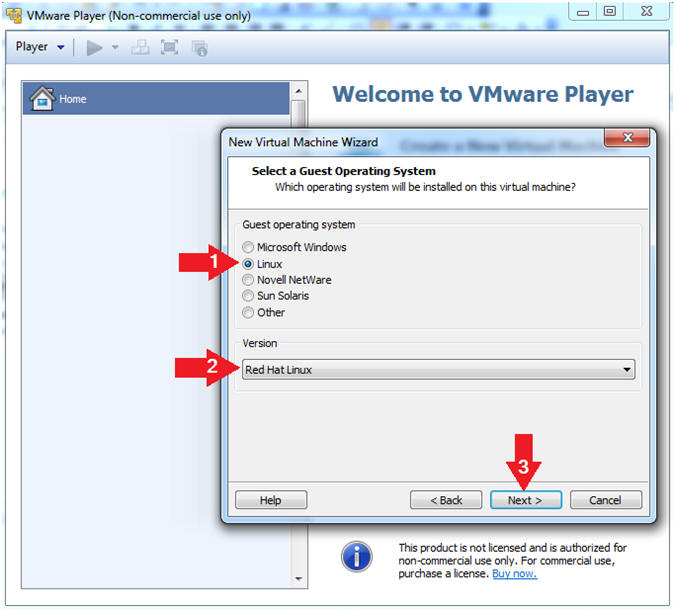
- Select a Guest Operating System
- Instructions:
- Guest operating system: Linux
- Version: Red Hat Linux
- Select Next
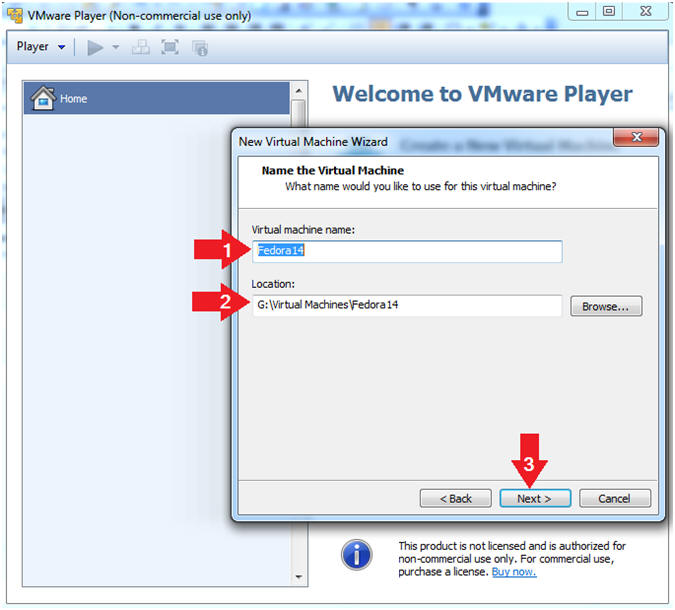
- Instructions:
- Name the Virtual Machine
- Instructions:
- Virtual machine name: Fedora14
- Location: G:\Virtual Machines\Fedora14
- In my case, I saved it to my USB drive.
- Click the Next Button
- Instructions:
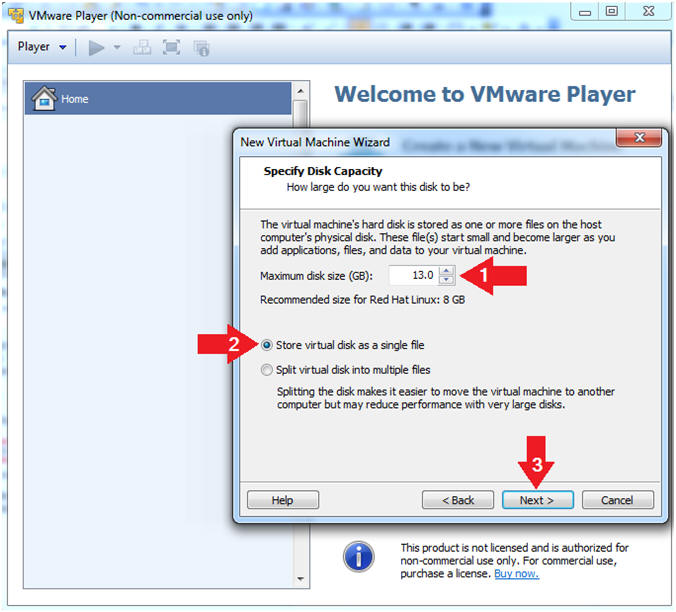
- Specify Disk Capacity.
- Instructions:
- Make the disk size to 13 GB.
- Select the radio button name Store virtual disk as a single file.
- Select Next.
- Instructions:
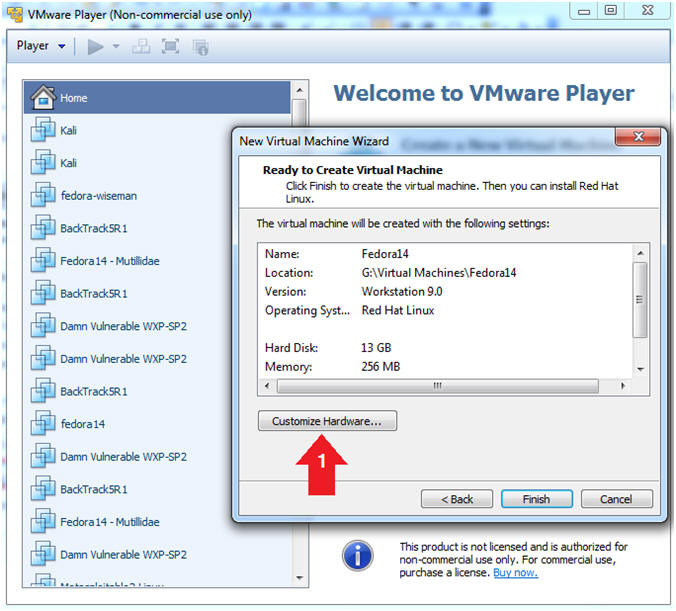
- Customize the Hardware.
- Instructions:
- Select the Customize Hardware Button.
- Instructions:
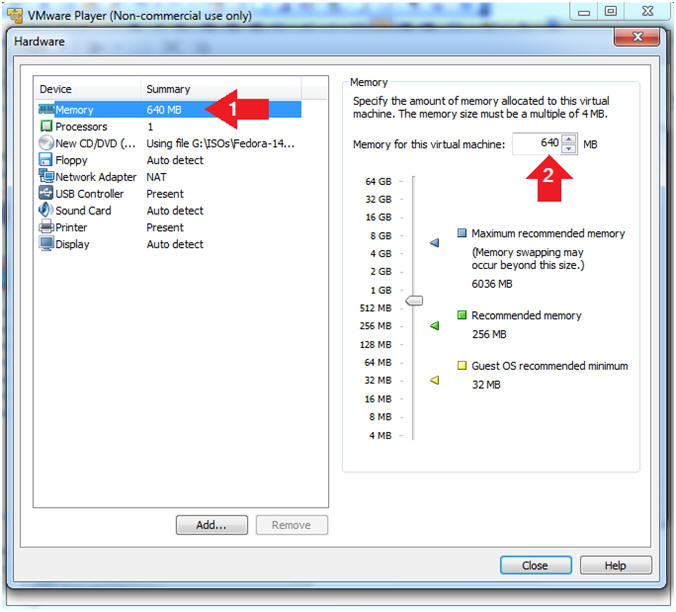
- Configure Memory
- Instructions:
- Click on Memory.
- Up the memory to 640 MB
- Do NOT Click the Close Button, we still have more to configure.
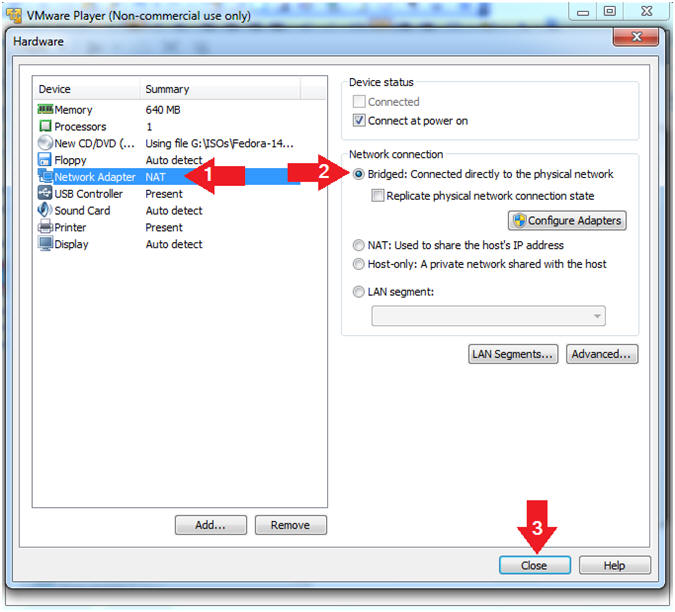
- Instructions:
- Configure the Network Adapter
- Instructions:
- Click on Network Adapter
- Selected the Bridged radio button.
- Now, select OK.
- Instructions:
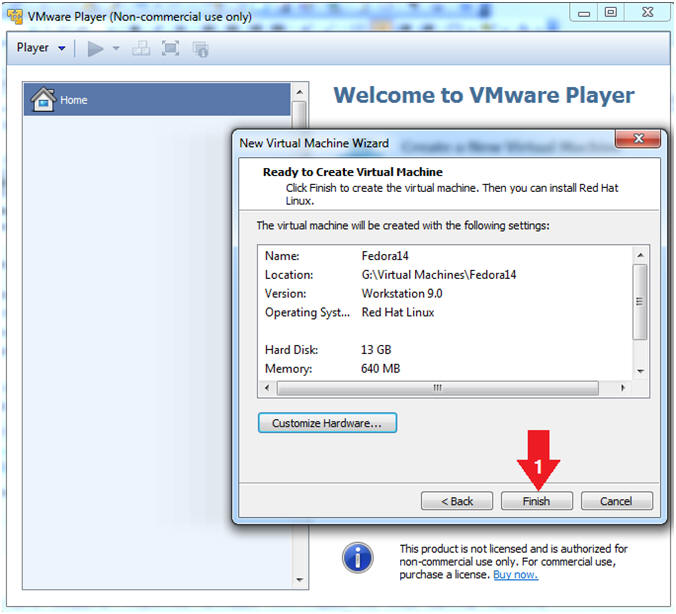
- Click Finish (See Below)
- Instructions:
- Click the Finish Button
- Instructions:
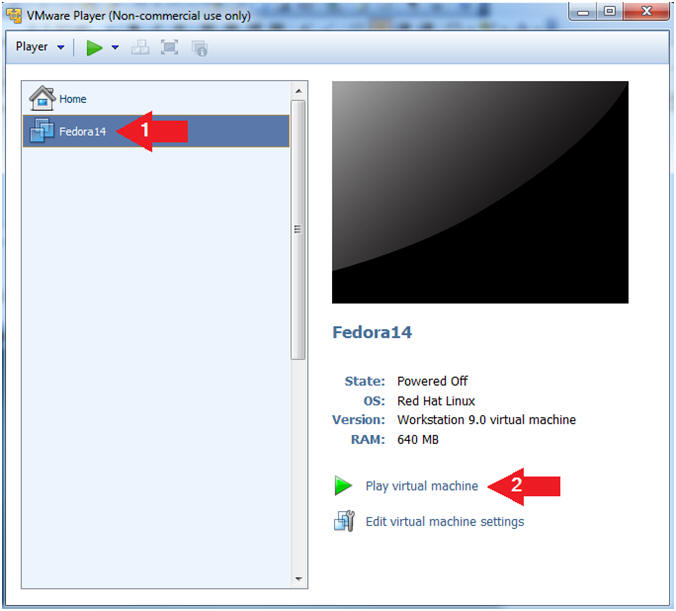
| Section 3: Install Fedora to Hard Drive |
- Start the Fedora14 VM
- Instructions:
- Click on the Fedora14 VM
- Click on Play virtual machine
- Instructions:
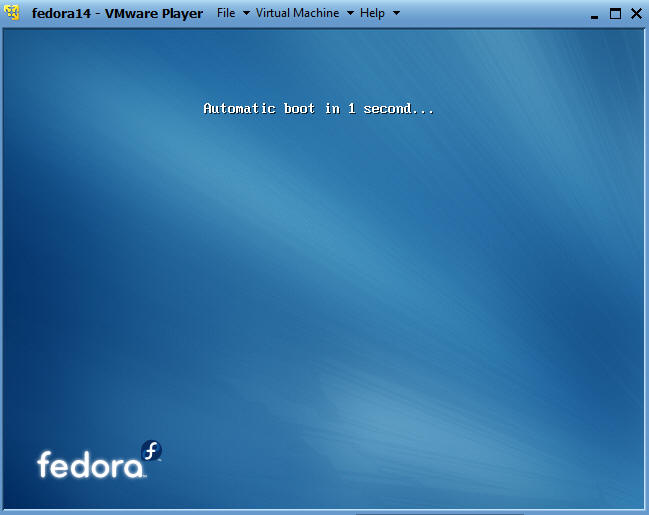
- You will see the black VMware loading screen
followed by the below Fedora loading screen.
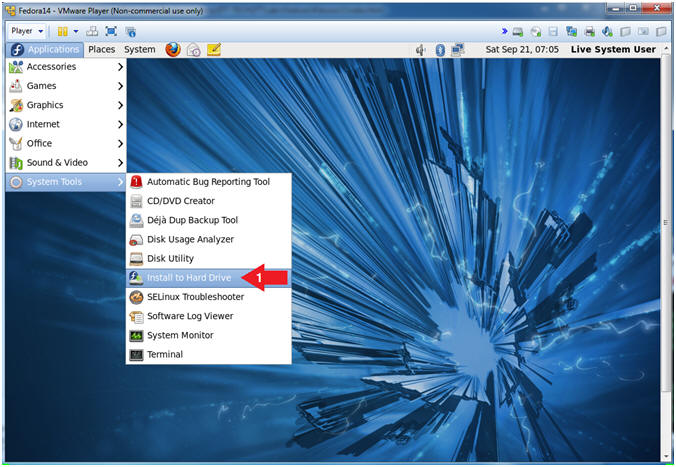
- Install Fedora to Hard Drive
- Instructions:
- Select Application --> System Tools --> Install to Hard Drive.
- Instructions:
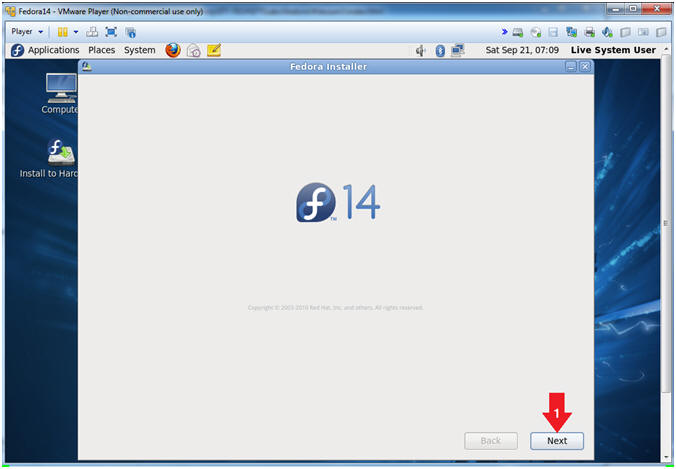
- Select Next
- Instructions:
- Click the Next Button
- Instructions:
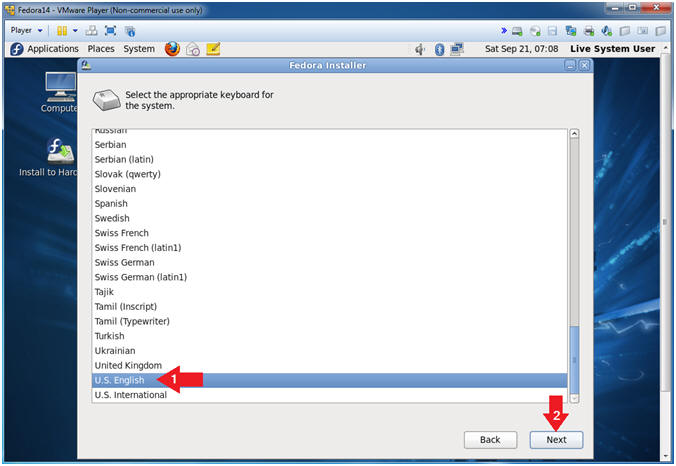
- Select Language
- Instructions:
- Select English.
- Click Next
- Instructions:
- Select Storage Device
- Instructions:
- Select Basic Storage Devices
- Select Next

- Instructions:
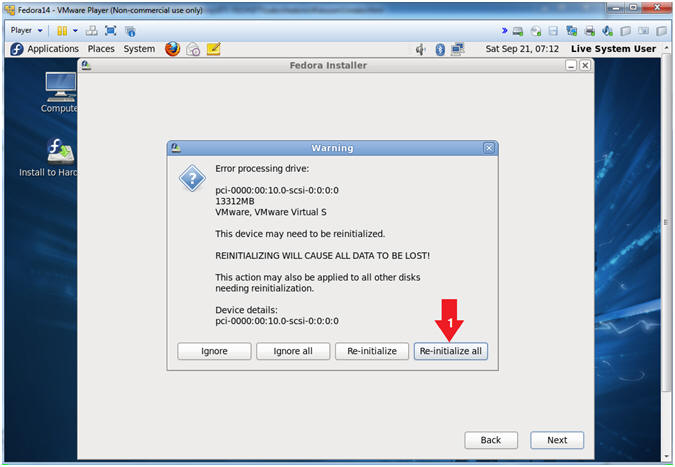
- Re-initialize all
- Instructions:
- Click the Re-initialize all Button
- Instructions:
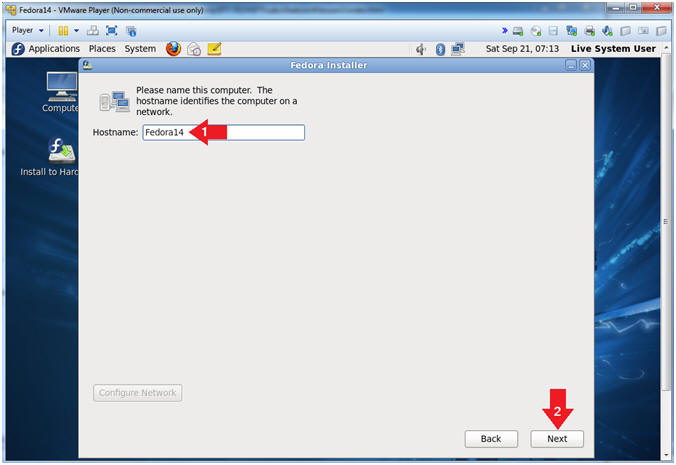
- Name the server
- Instructions:
- Name the host to fedora14 or whatever you want.
- Select Next.
- Instructions:
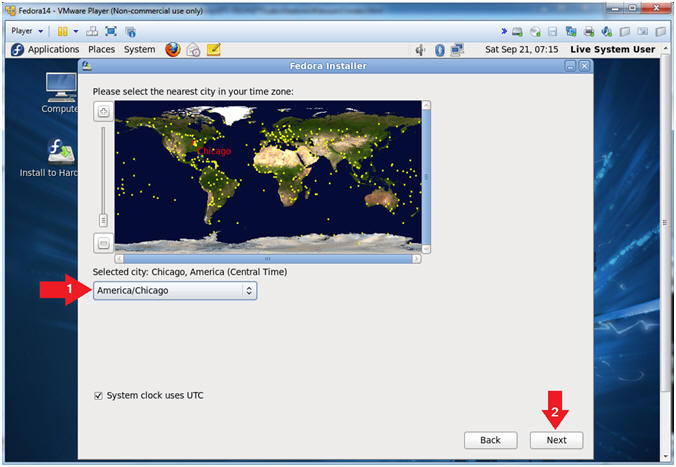
- Select Time Zone
- Instructions:
- Select the time zone of your choice.
- Select Next.
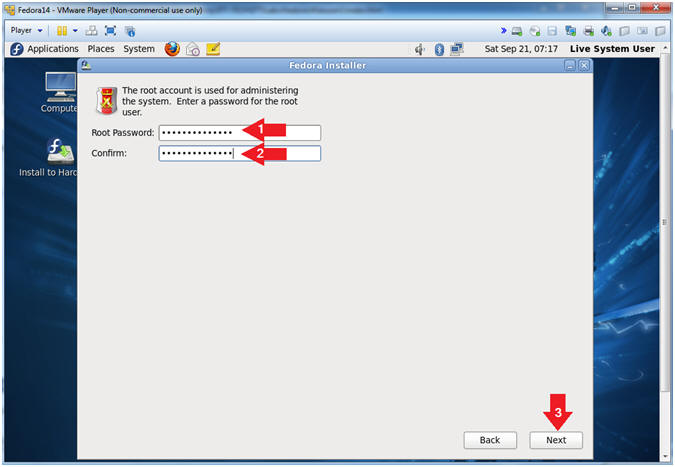
- Instructions:
- Select a root password.
- Instructions:
- Root Password: <Supply A Strong Root Password>
- Confirm: <Re-Enter the previous Root Password>
- Note(FYI):
- At least 8 characters
- Alpha-Numeric
- Uppercase and Lowercase
- Symbols (!@#$%^&*, etc)
- Instructions:
| Section 4: Creation Partitions |
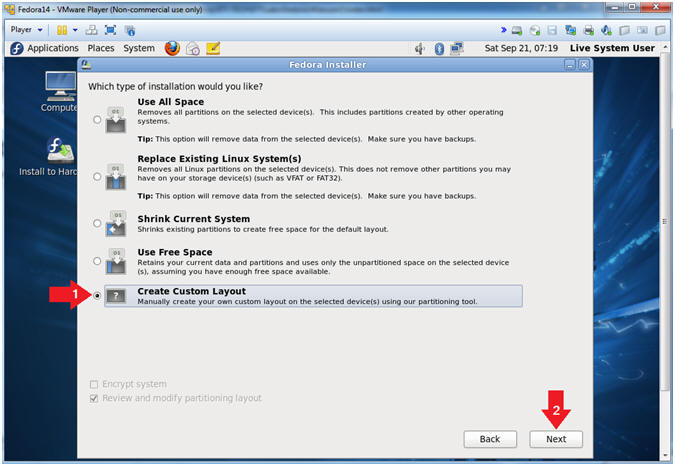
- Create Custom Layout.
- Instructions:
- Select Create Custom Layout
- Click the Next Button
- Instructions:
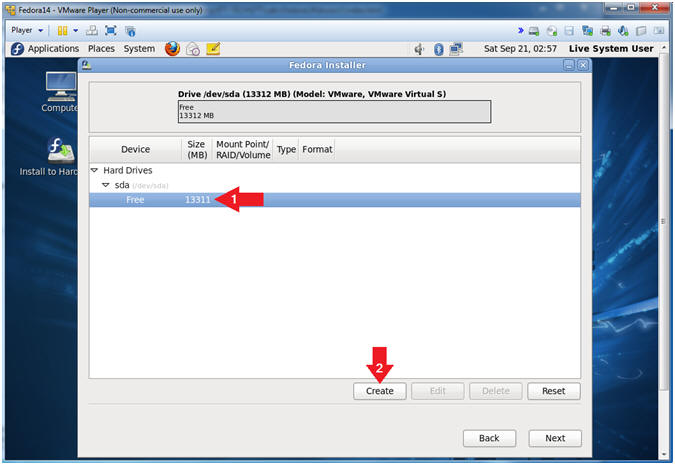
- Select the drive.
- Instructions:
- Click on SDA
- Click the Create Button
- Note(FYI):
- In my case, the drive type is sda.
- Notice, that there is 13311 MB free, which is the 13 GB we allocated earlier.
-
- Instructions:
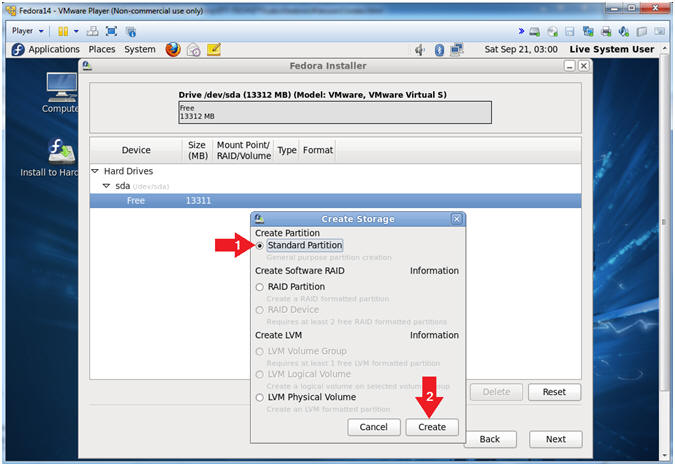
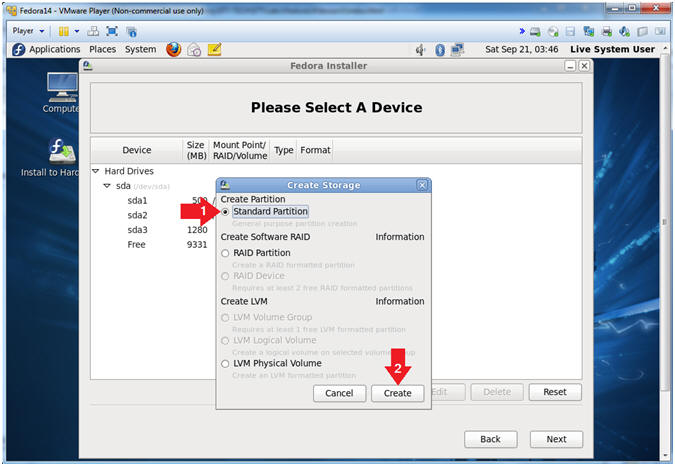
- Create Partition
-
Instructions:
- Select Standard Partition
- Click Create
-
-
Instructions:
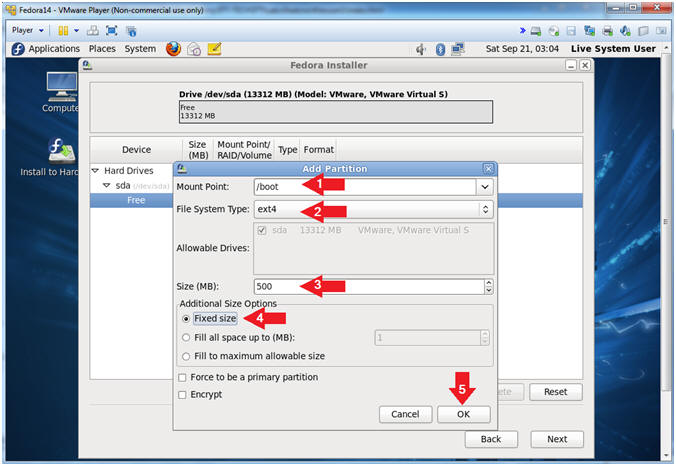
- Create /boot
- Instructions:
- Mount: /boot
- File System Type: ext4 or ext2
- ext2 is sufficient if you do not think your /boot file system will change. For class purposes use ext4.
- Size: 500 (300 MB minimum)
- Addition Size Options: Select the Fixed size radio button
- Click OK
- Note(FYI):
- The /boot partition holds the kernel and other data the system needs when it boots; it cannot be under the control of LVM.
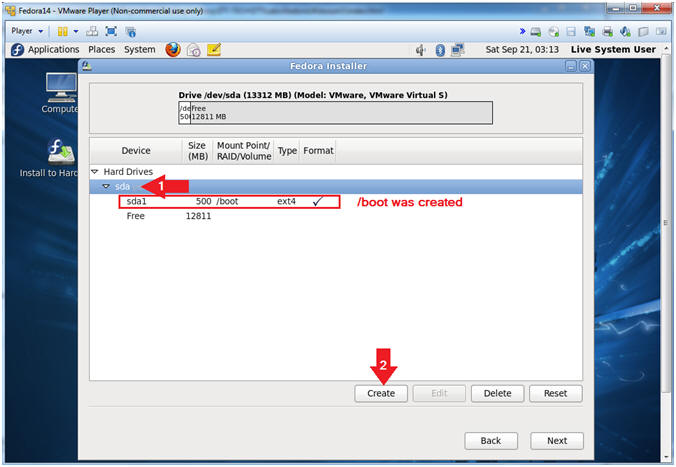
- Instructions:
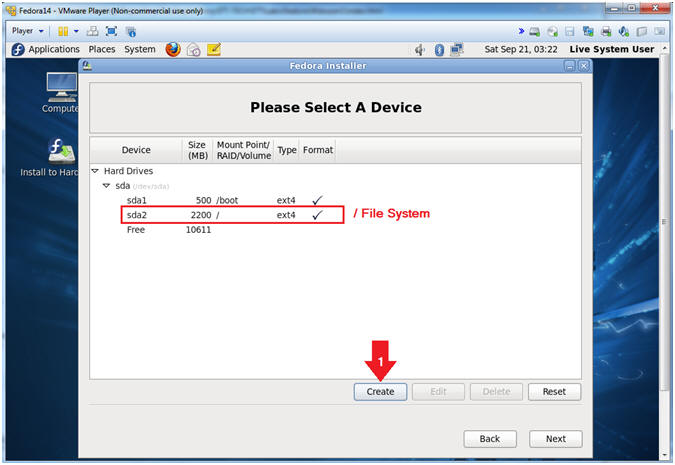
- Verify /boot was created, then click the create
button.
- Instructions:
- Click on the sda drive
- Click the Create Button
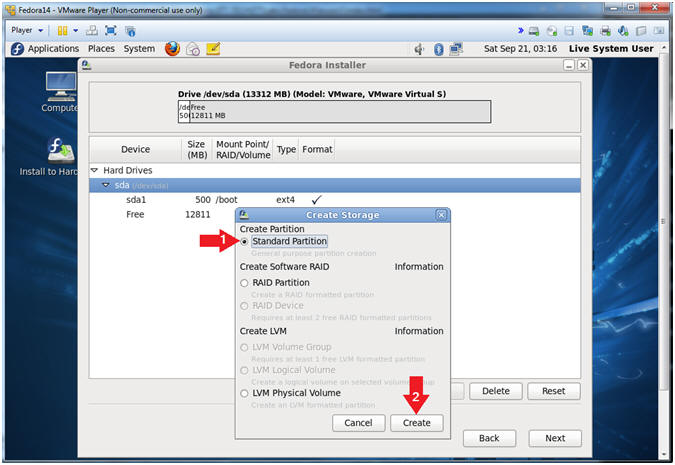
- Instructions:
- Create Partition
-
Instructions:
- Select Standard Partition
- Click Create
-
-
Instructions:
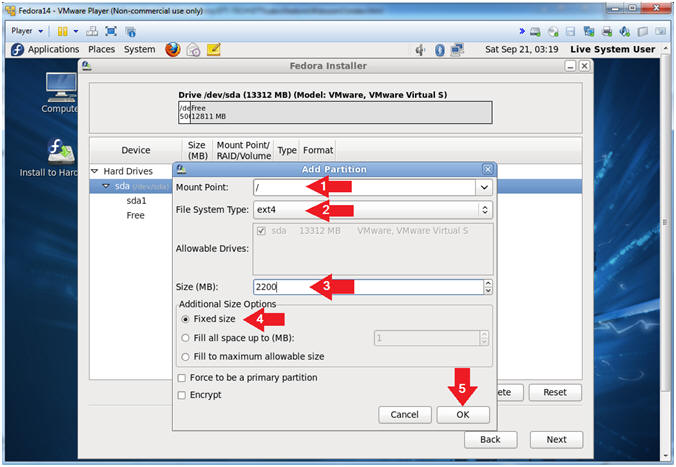
- Create /
- Instructions:
- Mount: /
- File System Type: ext4
- Size: 2200 (Fedora recommended is 2111)
- Additional Size Options: Select the Fixed size radio button
- Click OK
- Note(FYI):
- Any file systems that are not created as a separate partition will become automatically part of the root(/) filesystem.
- Instructions:
- Verify the / file system was created, Click the
Create Button
- Instructions:
- Click the Create Button
- Instructions:
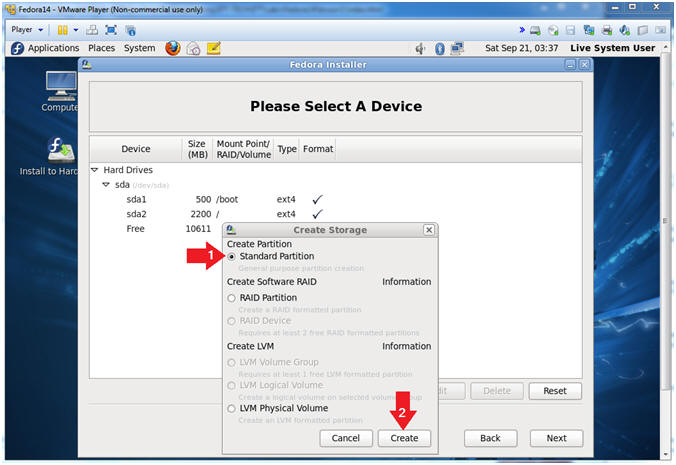
- Create Partition
-
Instructions:
- Select Standard Partition
- Click Create
-
-
Instructions:
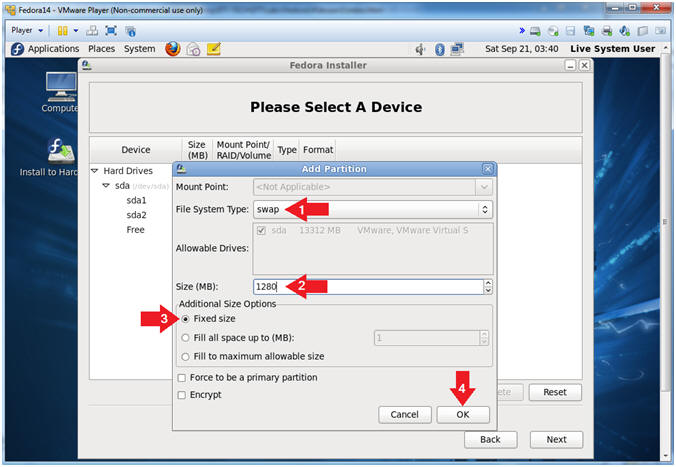
- Create swap
- Instructions:
- File System Type: swap
- Size: 1280 (Swap should double memory).
- Additional Size Options: Select the Fixed size radio button
- Click OK.
- Note(FYI):
- Linux temporarily stores programs and data on a swap partition when it does not have enough RAM to hold all the information during processing. Also, swap is used when your hibernate the system.
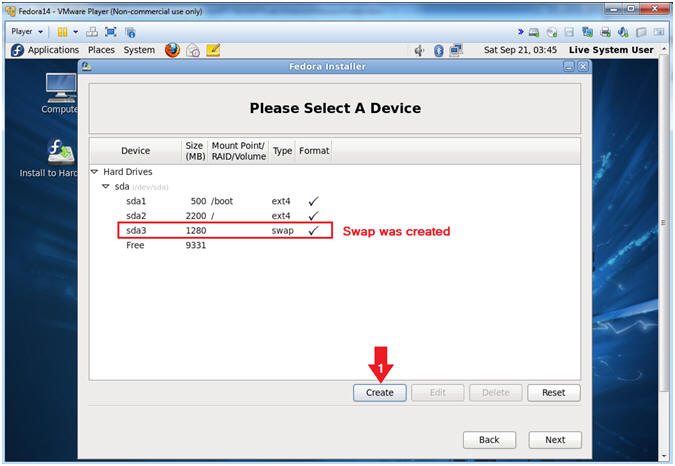
- Instructions:
- Verify swap was created, Click Create
- Instructions:
- Click the Create Button
-
- Instructions:
- Create Partition
-
Instructions:
- Select Standard Partition
- Click Create
-
-
Instructions:
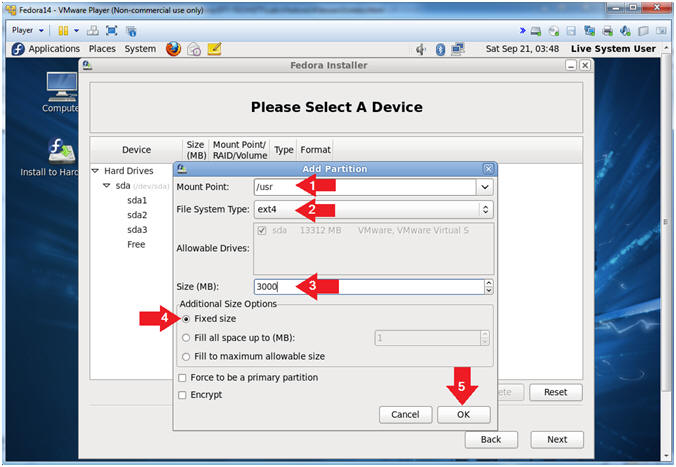
- Create /usr
- Instructions:
- Mount: /usr
- File System Type: ext4
- Size: 3000 (2 to 16 GB)
- Additional Size Options: Select the Fixed size radio button
- Click OK
- Note(FYI):
- The size of /usr depends on the number of software packages you install.
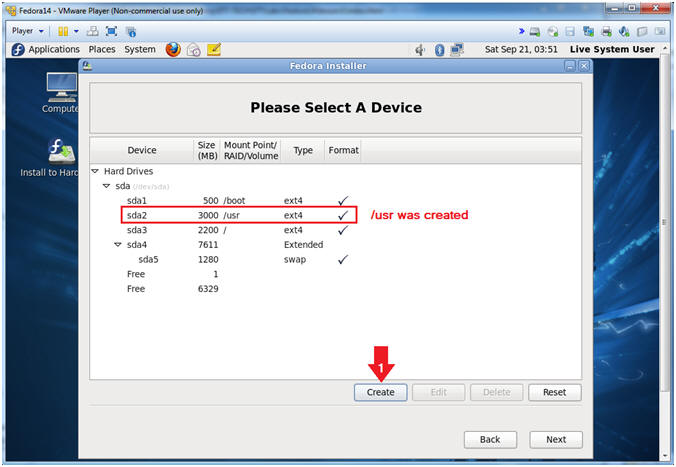
- Instructions:
- Verify the /usr filesystem, Click Create.
- Instructions:
- Click the Create Button
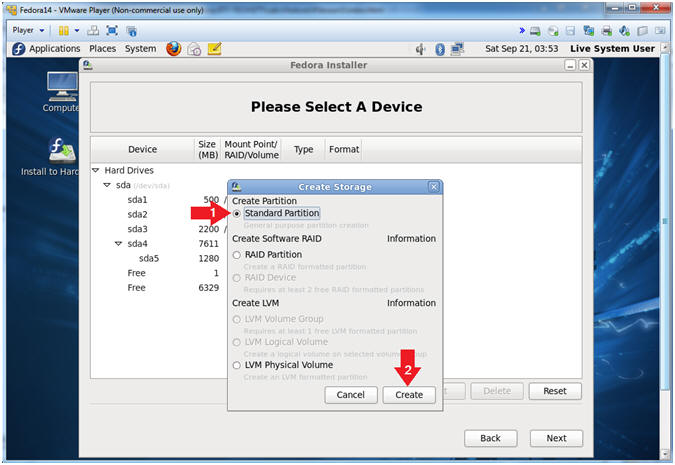
- Instructions:
- Create Partition
-
Instructions:
- Select Standard Partition
- Click Create
-
-
Instructions:
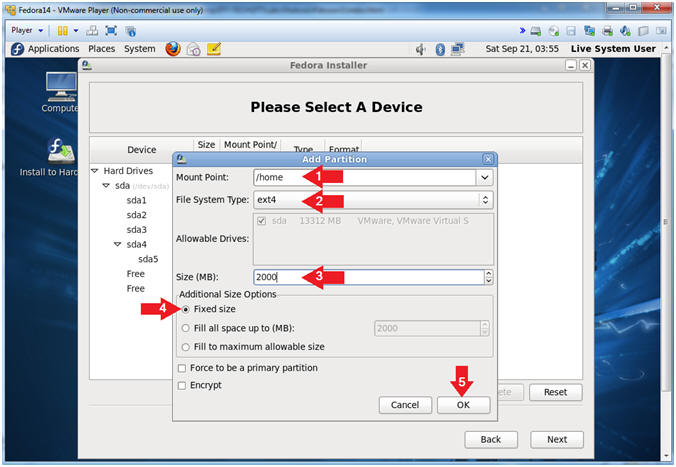
- Create /home
- Instructions:
- Mount: /home
- File System Type: ext4
- Size: 2000
- Additional Size Options: Select the Fixed size radio button
- Click OK
- Note(FYI):
- Size depends on the number of users on the machine and the type of work they do.
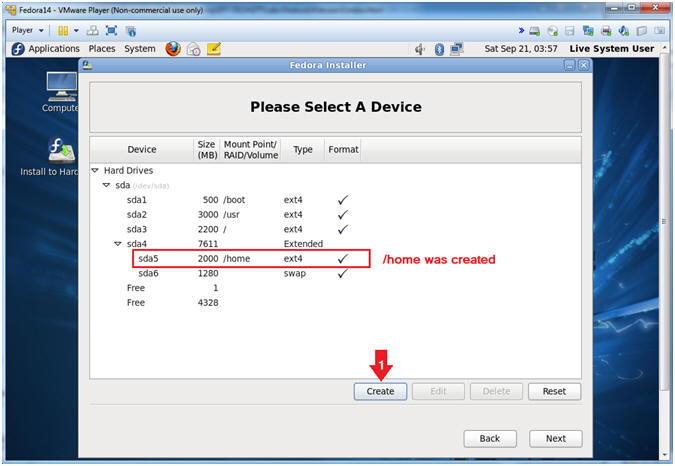
- Instructions:
- Verify the /home filesystem, Click Create
- Instructions:
- Click the Create Button
- Instructions:
- Create Partition
-
Instructions:
- Select Standard Partition
- Click Create
-

-
Instructions:
- Create the /tmp filesystem.
- Instructions:
- Mount: /tmp
- File System Type: ext4
- Size: 1000 (Minimum 500 MB)
- Additional Size Options: Select the Fixed size radio button
- Click OK
- Note(FYI):
- Temporary files such as *.pid files reside here. For most Linux and Unix operating systems, data is not preserved between reboots.

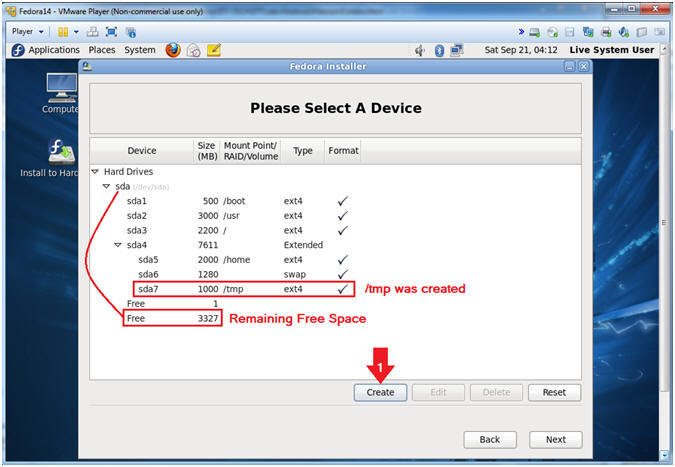
- Instructions:
- Verify the /tmp filesystem, Click Create
- Instructions:
- Click the Create Button
- Note(FYI):
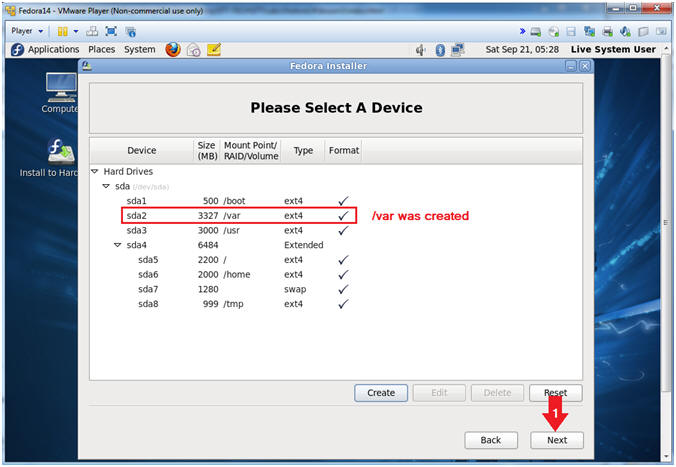
- Notice that the remaining space is 3327 MB
- Instructions:
- Create Partition
-
Instructions:
- Select Standard Partition
- Click Create
-

-
Instructions:
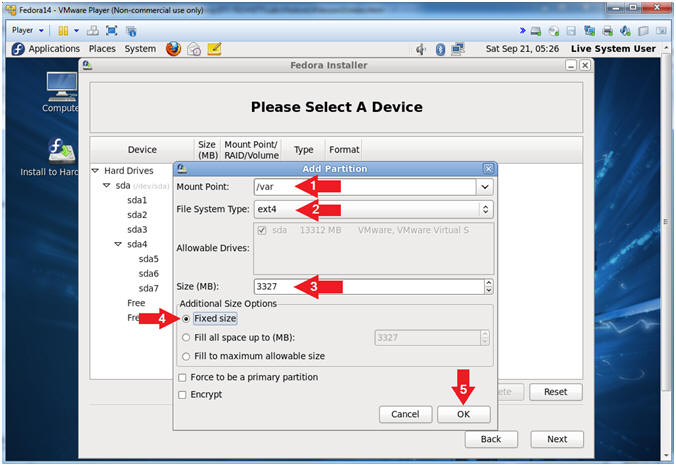
- Create the /var filesystem
- Instructions:
- Mount: /var
- File System Type: ext4
- Size: 3327 (Required minimim is 500 MB; however, we are putting the remaining free space on the drive identified in step 20).
- Additional Size Options: Select the Fixed size radio button
- Click OK
- Note(FYI):
- /var
is short for variable. Data in this partition changes frequently.
- /var/log - Where the system log messages are stored.
- /var/mail - Where mail is stored.
- /var
is short for variable. Data in this partition changes frequently.
- Instructions:
- Verify the /var filesystem, and click
NEXT.
- Instructions:
- Click the Next Button
- Instructions:
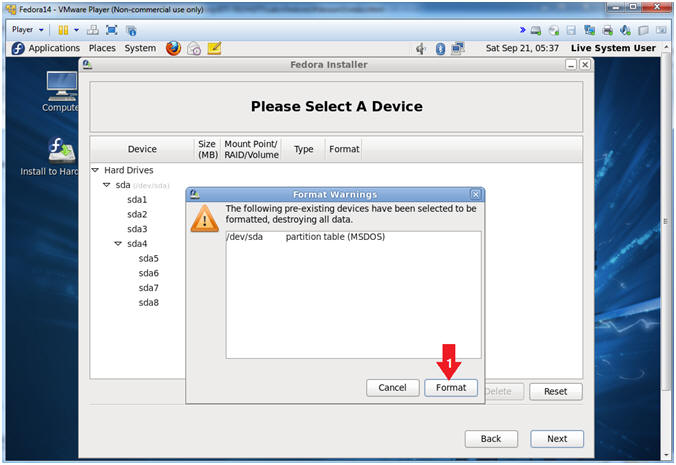
- Format Warning
- Instructions:
- Click the Format Button
- Instructions:
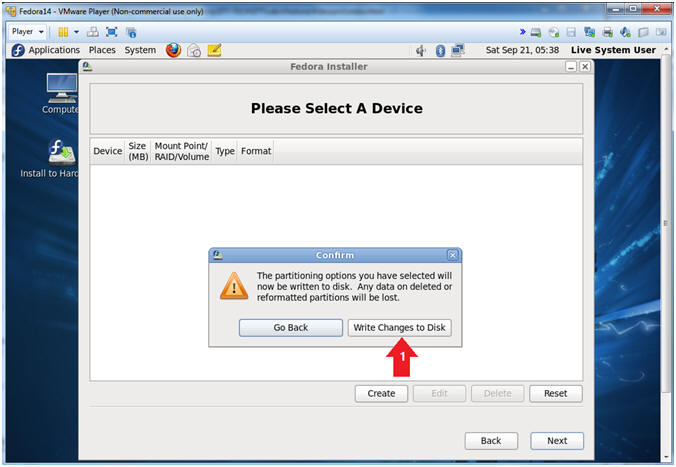
- Confirm
- Instructions:
- Write Changes to Disk.
- Note(FYI):
- Once you click the write button, you will see formatting and creation messages for each file system.
- Instructions:
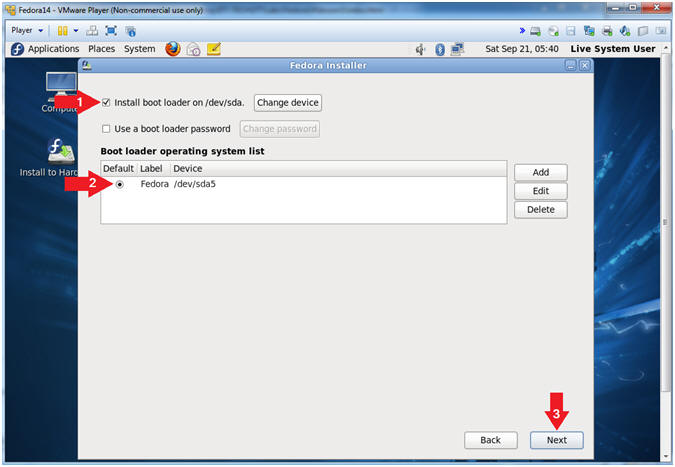
- Fedora Installer
- Instructions:
- Check the Install boot loader checkbox.
- Click the Radio Button associated with /dev/sda (See Picture)
- Click Next
- Note(FYI):
- If you check the "Use a boot loader password", then "E" cannot be used to clear out root's password if you loose it.
- In the following labs, we will learn how to exploit the grub boot loader.
- Instructions:
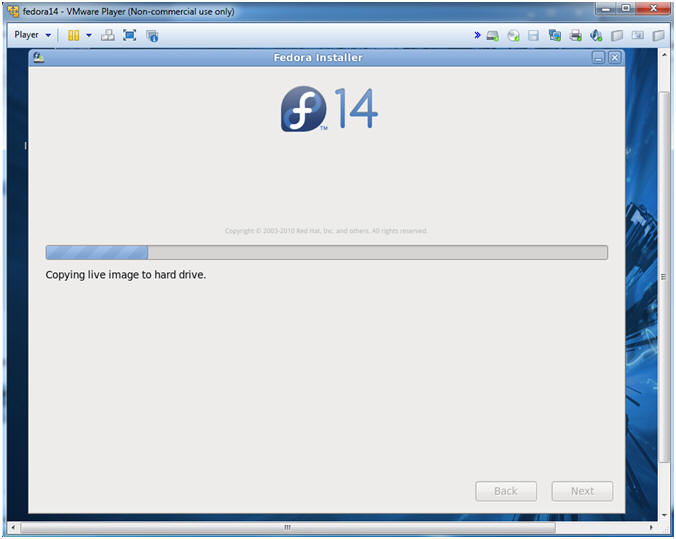
- Copying the image, Post Installation Process
- Note(FYI):
- Wait for about 10 to 20 minutes depending on your machines resources.
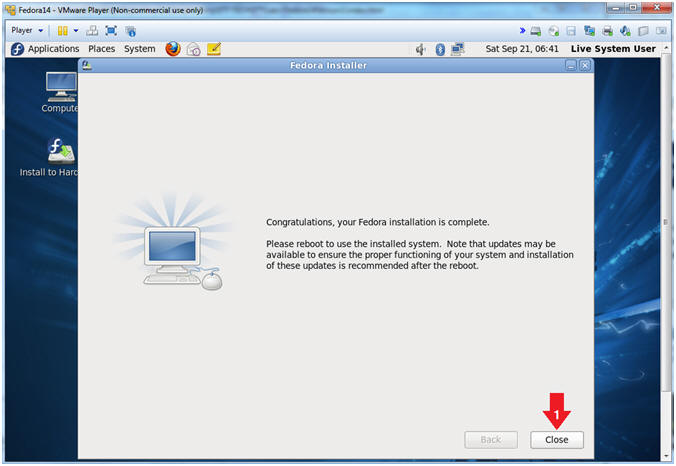
- Note(FYI):
- Congratulations
- Instructions:
- Click Close
- Instructions:
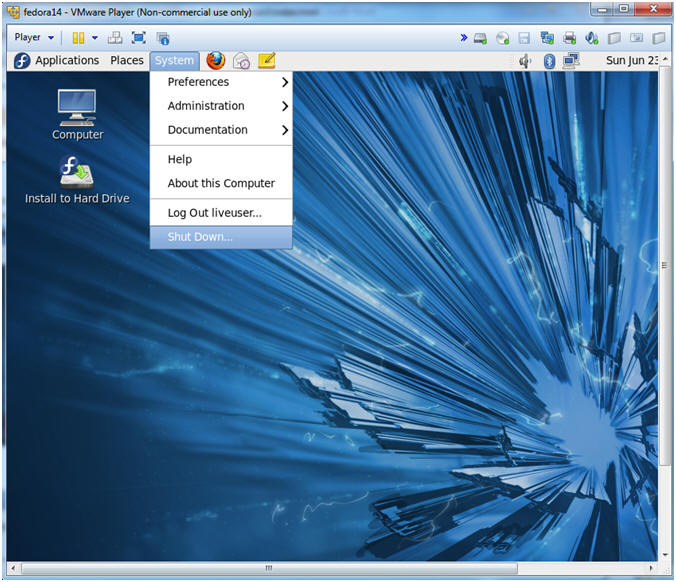
- Let's Shutdown the system
- Instructions:
- System --> Shutdown
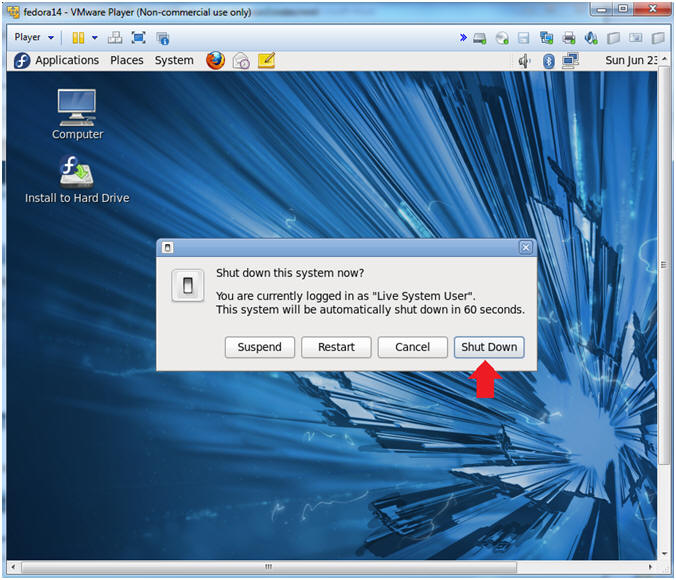
- Instructions:
- Click Shutdown
- Instructions:
- Click Shut Down
- Instructions:
| Section 5: Post VMware Configuration |
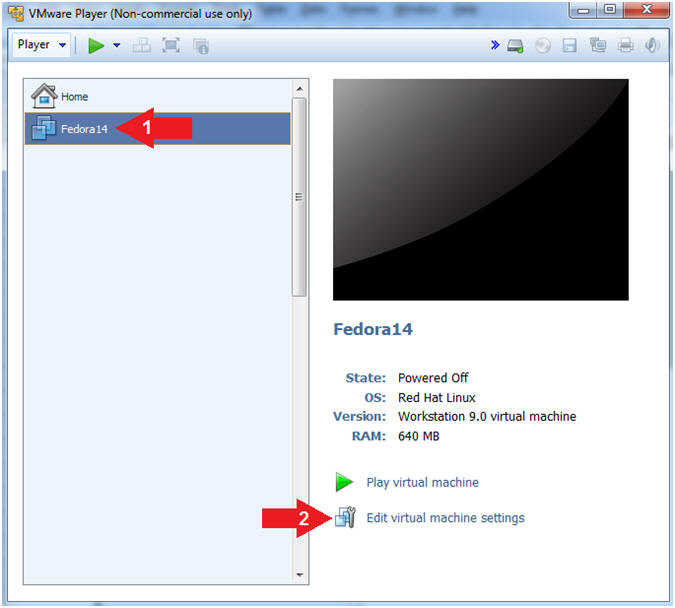
- Edit the virtual machine settings
- Instructions:
- Highlight the fedora14 VM
- Click on Edit virtual machine settings.
- Instructions:
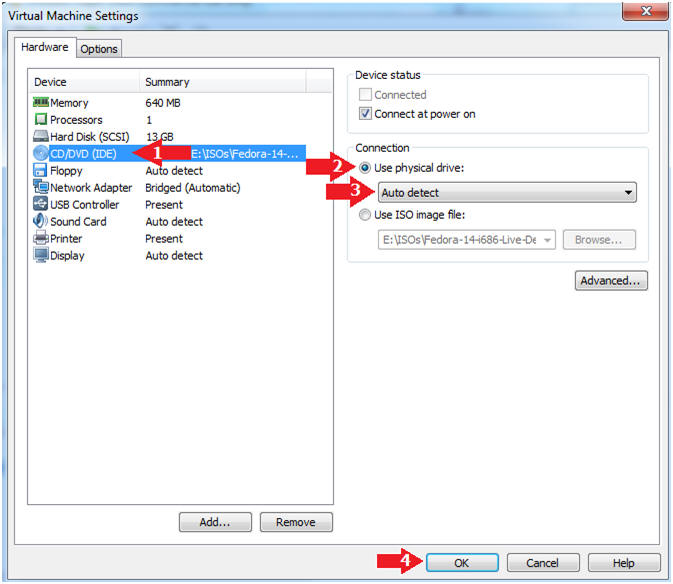
- Set Physical Device Type (See Below)
-
Instructions:
- Click on CD/DVD (IDE)
- Click on the "Use physical drive:" radio button
- Select Auto Detect
- Click OK.
-
-
Instructions:
| Section 6: Post Fedora14 Configuration |
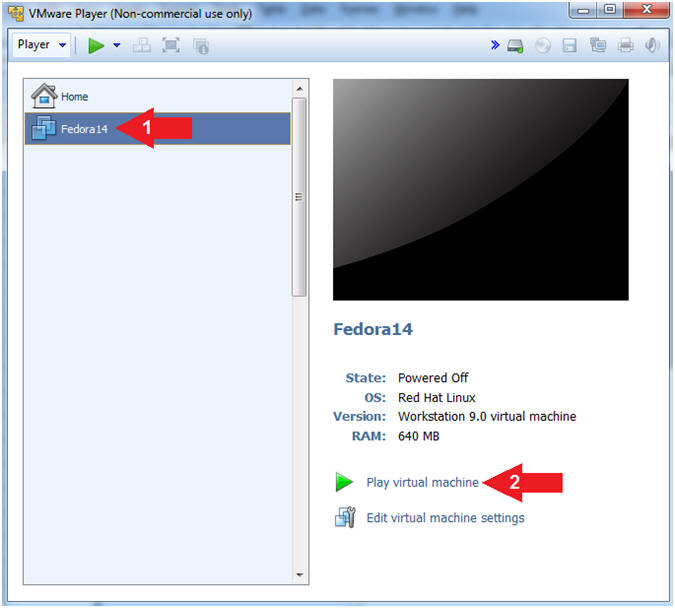
- Play the fedora14 VMware Instance
- Instructions:
- Select fedora14
- Click on Play virtual machine
- Instructions:
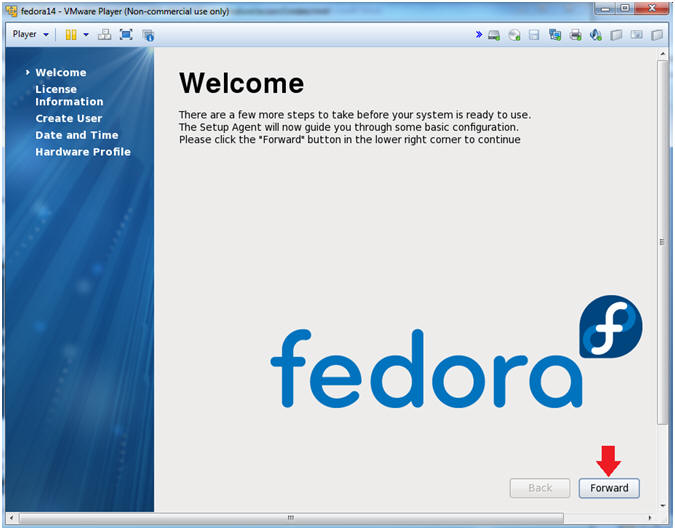
- Welcome Screen
- Instructions:
- Click Forward
- Instructions:
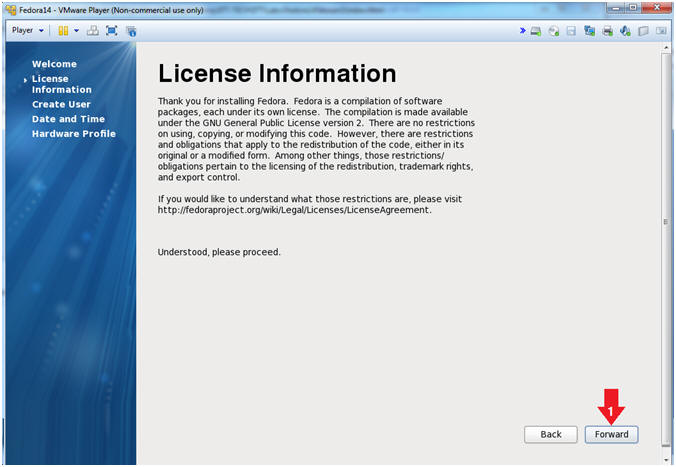
- License Information.
- Instructions:
- Click Forward
- Instructions:
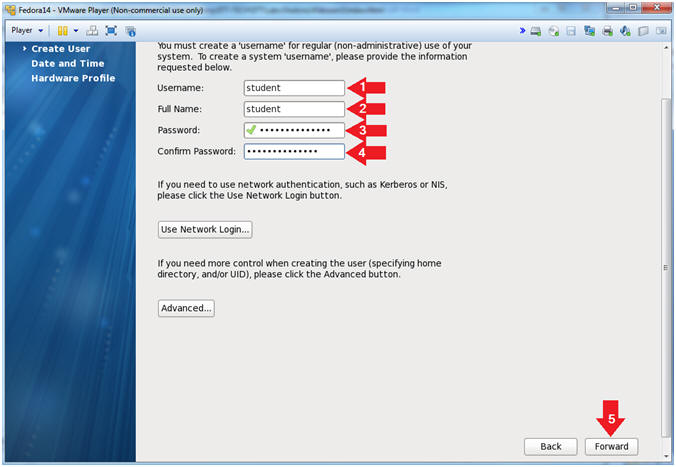
- Create User
- Instructions:
- Create the user account called "student".
- Remember to use a strong password.
- Click Forward
- Instructions:
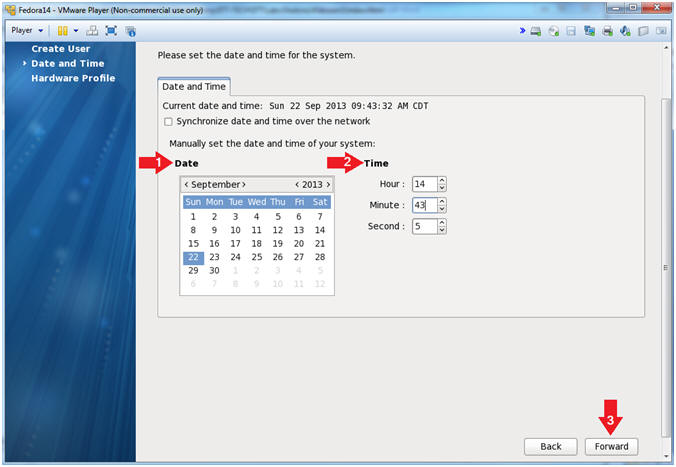
- Set Date and Time information
- Instructions:
- Set Date
- Set Time
- Click Forward
- Instructions:
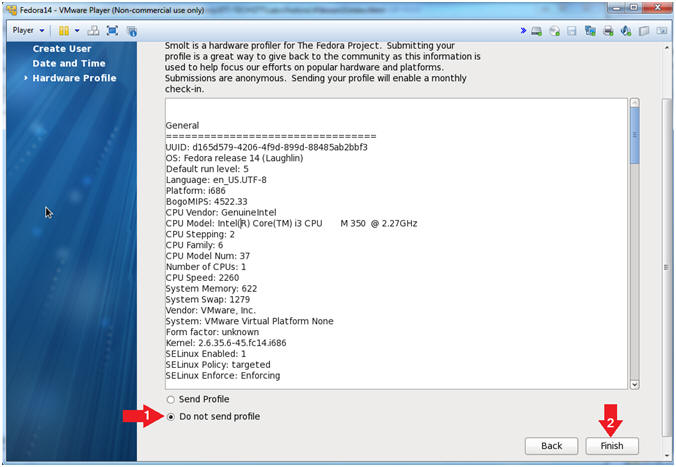
- Hardware Profile
- Instructions:
- Click the Do not send profile radio button
- Click Finished
- Instructions:
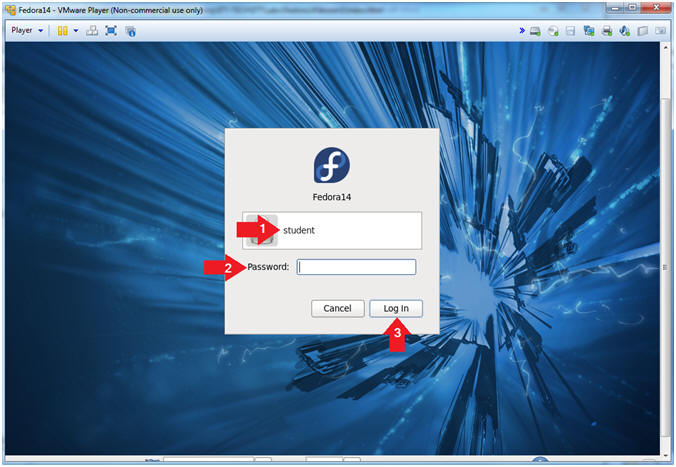
- Login as student
- Instructions:
- Login as student
- Instructions:
| Section 7: Update Yum Repository Archive Files |
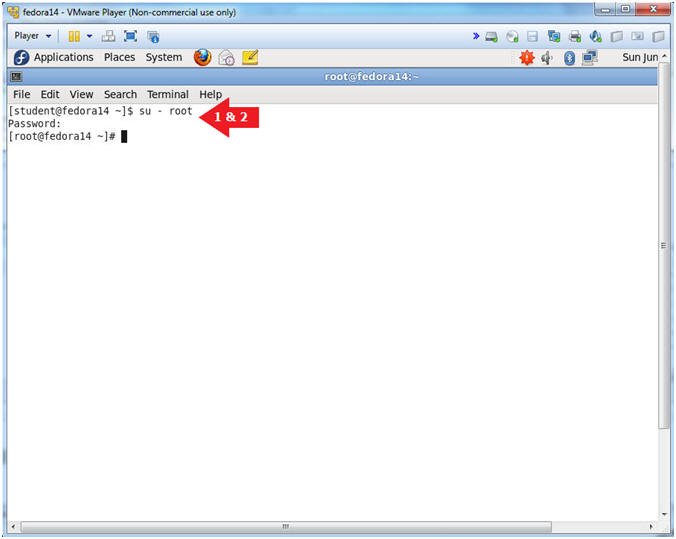
- Switch User to Root
- Instructions:
- su - root
- Provide the Root Password
- Instructions:
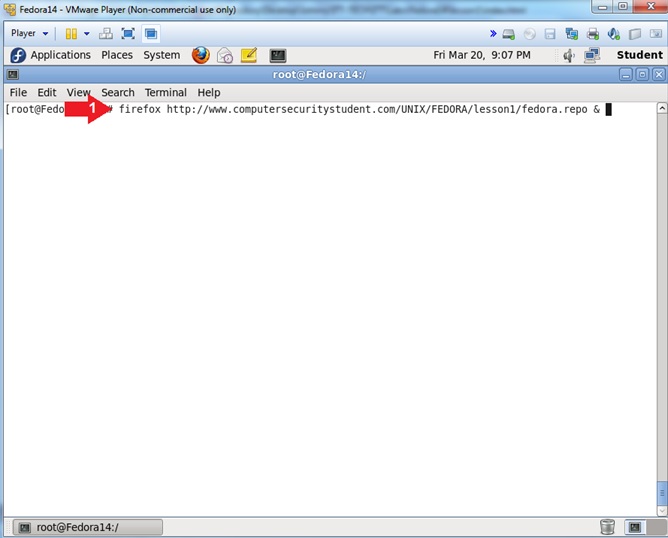
- Download Yum Fedora Repository File
- Instructions:
- firefox http://www.computersecuritystudent.com/UNIX/FEDORA/lesson1/fedora.repo &
- Instructions:
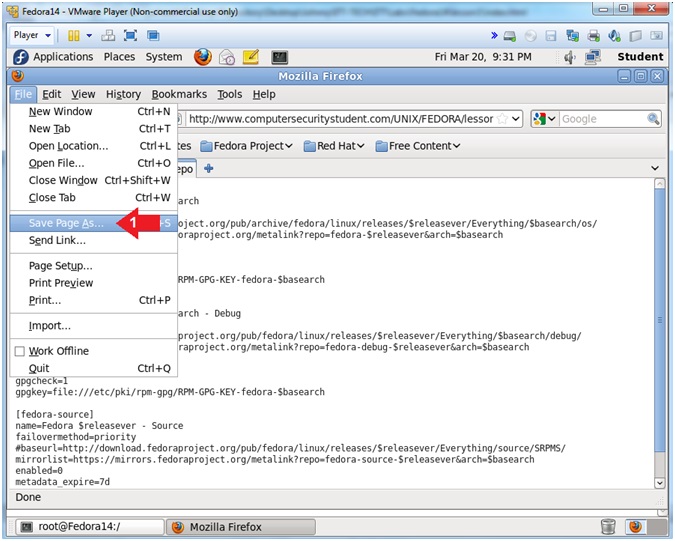
- Save Yum Fedora Repository File (Part 1)
- Instructions:
- File --> Save Page As...
- Instructions:
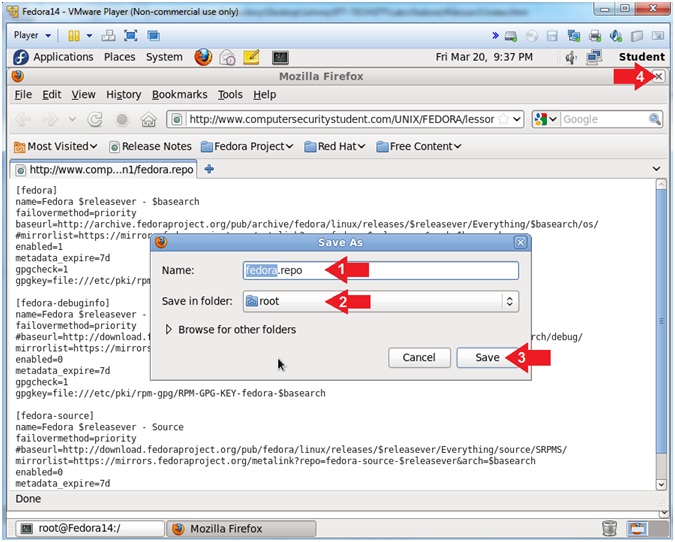
- Save Yum Fedora Repository File (Part 2)
- Instructions:
- Name: fedora.repo
- Save in folder: root
- Click the Save Button
- Click X to Close Firefox
- Instructions:
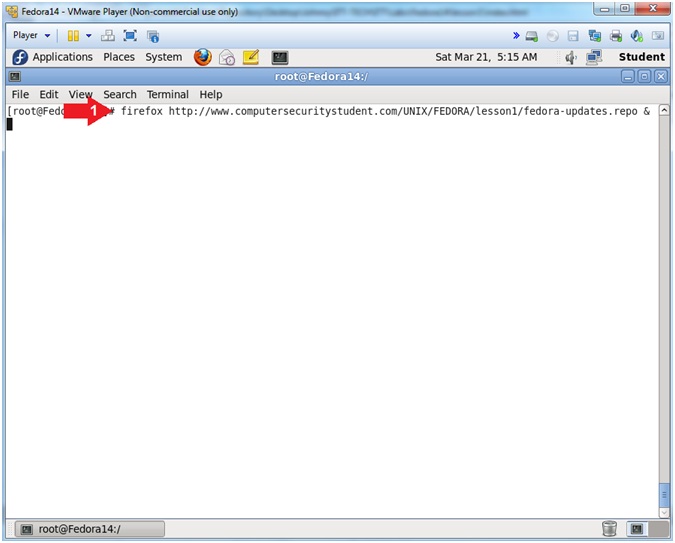
- Download Yum Fedora
Updates Repository File
- Instructions:
- firefox http://www.computersecuritystudent.com/UNIX/FEDORA/lesson1/fedora-updates.repo &
- Instructions:
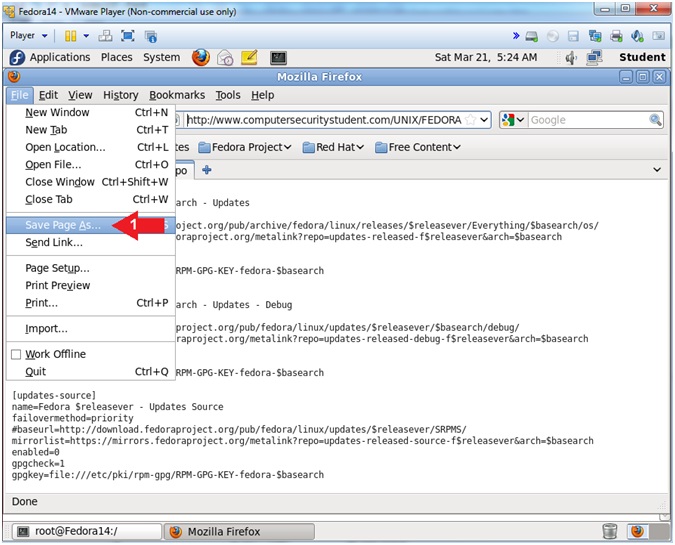
- Save Yum Fedora
Updates Repository File (Part 1)
- Instructions:
- File --> Save Page As...
- Instructions:
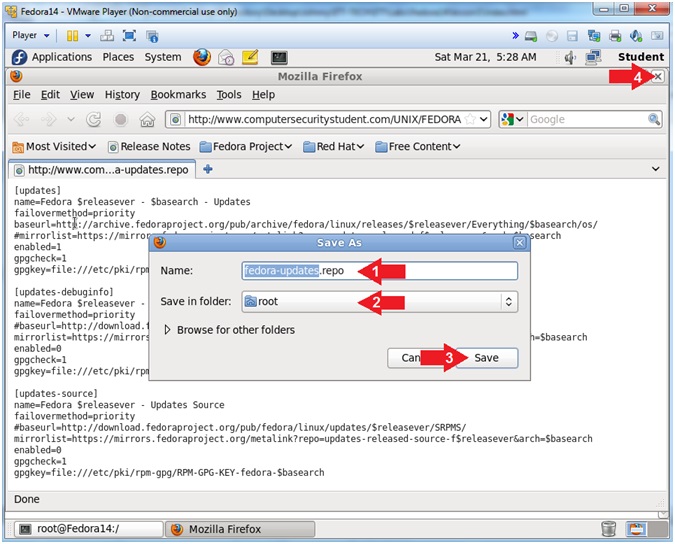
- Save Yum Fedora
Updates Repository File (Part 2)
- Instructions:
- Name: fedora-updates.repo
- Save in folder: root
- Click the Save Button
- Click X to Close Firefox
- Instructions:
- Update Yum Repository Files
- Instructions:
- ls -l /etc/yum.repos.d/*
- cd /root/
- ls -l *.repo
- yes | cp -ruv *.repo /etc/yum.repos.d/
- grep -i archive /etc/yum.repos.d/*

- Instructions:
| Section 8: Install Perl, GCC, and WGET |
- Switch User to Root
- Instructions:
- su - root
- Provide the Root Password
- Instructions:
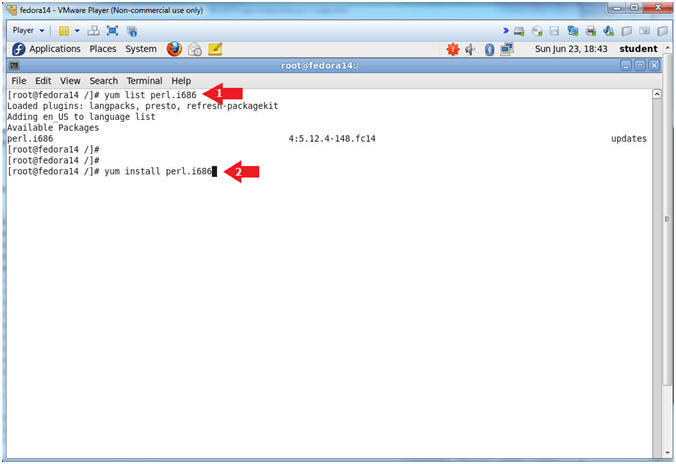
- Install Perl
- Instructions:
- yum list perl.i686
- yum install perl.i686
- Is this ok [y/N]: y
- Instructions:
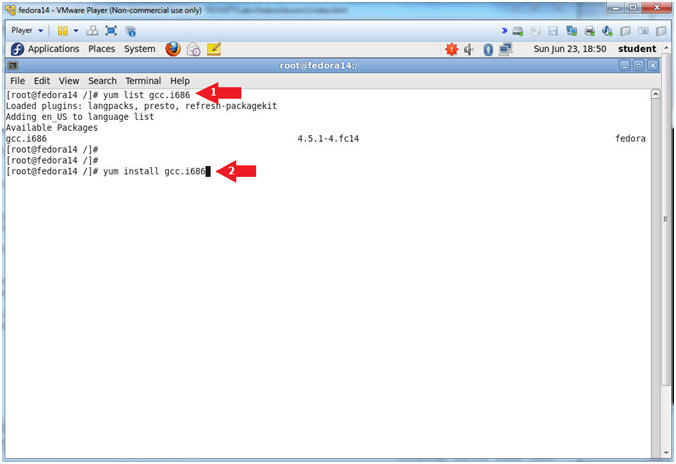
- Install GCC
- Instructions:
- yum list gcc.i686
- yum install gcc.i686
- Is this ok [y/N]: y
- Instructions:
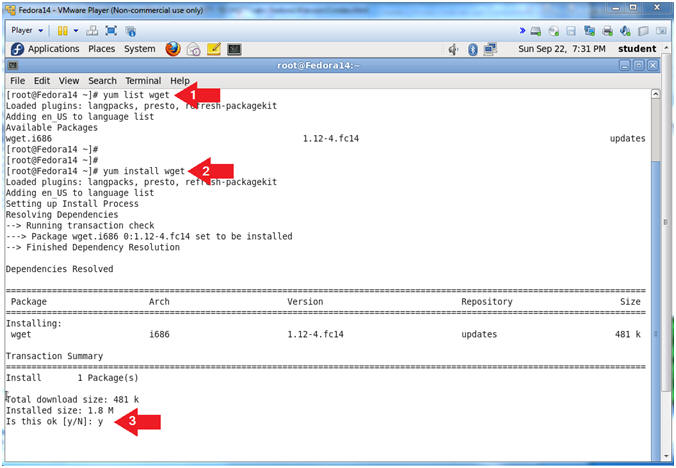
- Install WGET
- Instructions:
- yum list wget
- yum install wget
- Is this ok [y/N]: y
- Instructions:
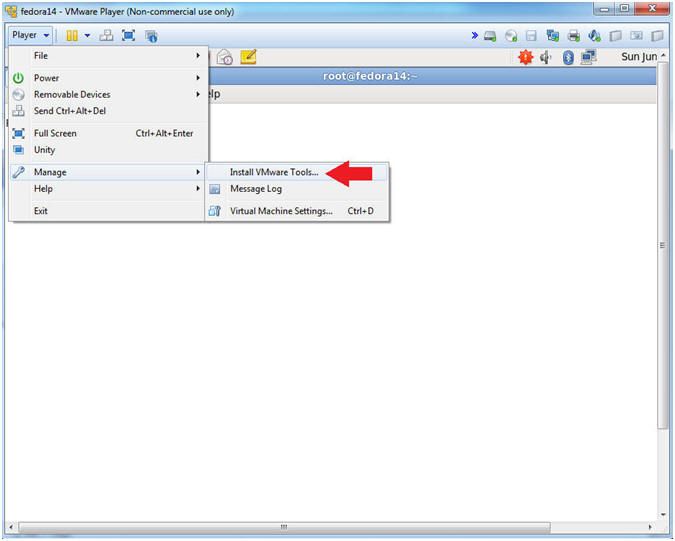
| Section 9: Install VMware Tools |
- Start VMware Tools Download
- Instructions:
- Player --> Manage --> Install VMware Tools...
- Instructions:
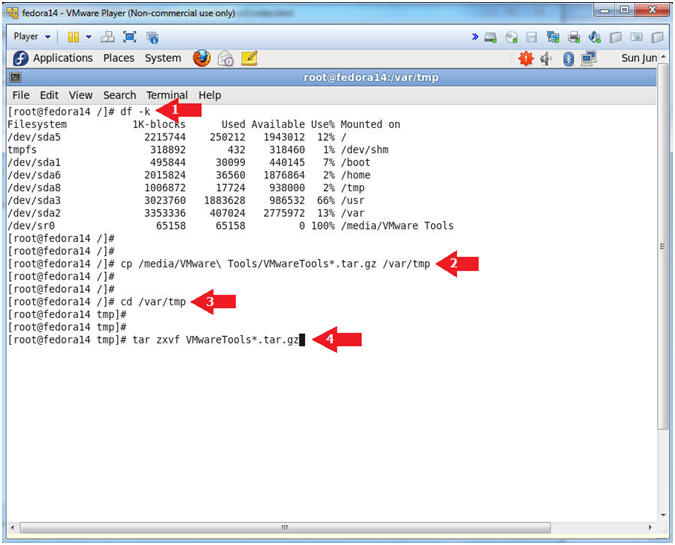
- Untar VMware Tools tarball
- Instructions:
- df -k
- cp /media/VMware\ Tools/VMwareTools*.tar.gz /var/tmp
- cd /var/tmp
- tar zxvf VMwareTools*.tar.gz
- Instructions:
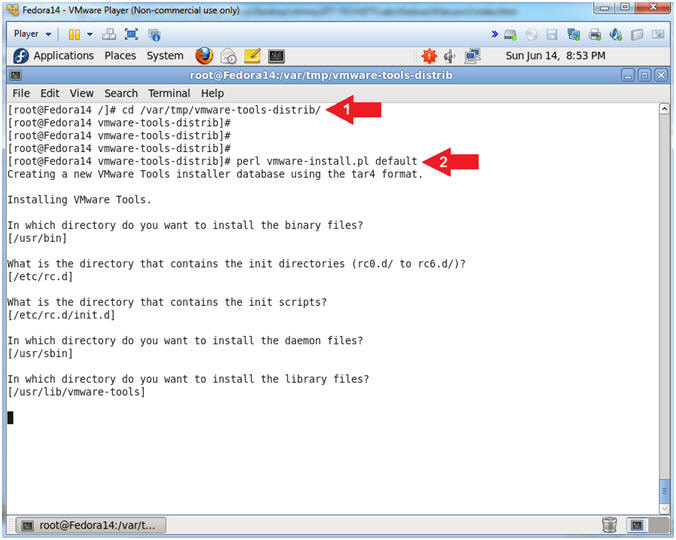
- Install VMware Tools
- Instructions:
- cd /var/tmp/vmware-tools-distrib
- perl vmware-install.pl default
- Note(FYI):
- The default install mode will take 45 to 90 seconds.
- Instructions:
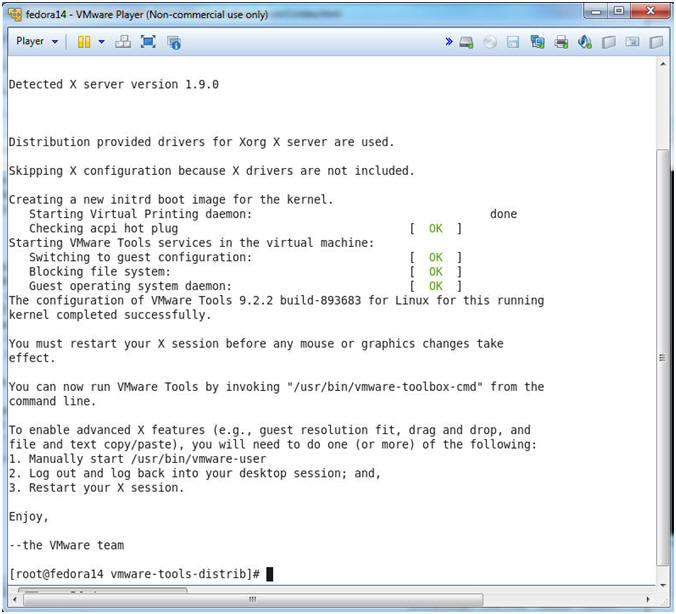
- Install VMware Tools (Cont...)
- Note(FYI):
- Upon successful complete, you will see a screen similar to the below.
- A reboot might be necessary for some of the VMware tools to take effected (Mouse and Graphics).
- Note(FYI):
| Section 10: Proof of Lab |
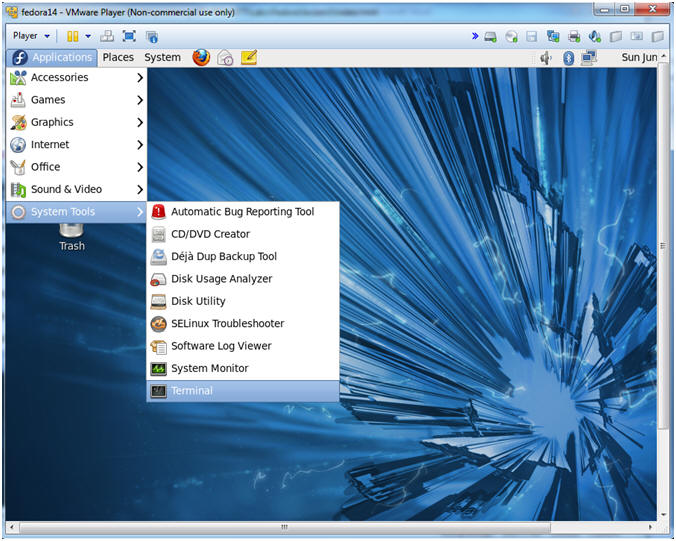
- Start Up a Terminal Window
- Instructions:
- Applications --> Terminal
- Instructions:
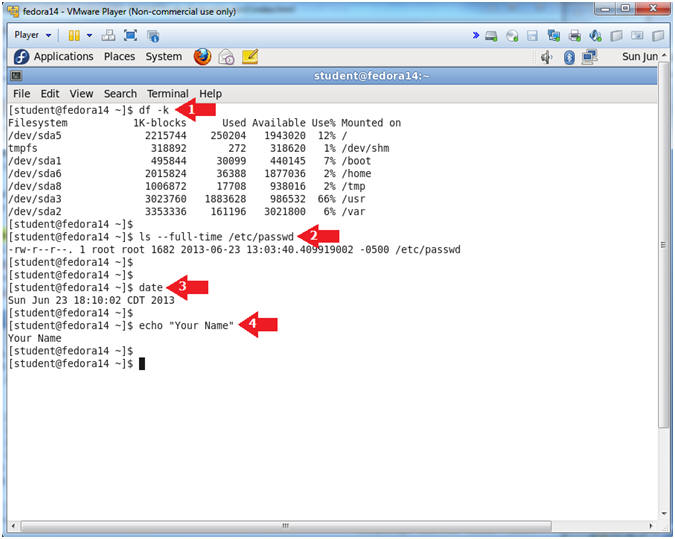
- Proof of Lab
- Instructions:
- df -k
- ls --full-time /etc/passwd
- date
- echo "Your Name"
- Put in your actual name in place of "Your Name"
- e.g., echo "John Gray"
-
Proof of Lab
Instructions
- Press the <Ctrl> and <Alt> key at the same time.
- Press the <PrtScn> key.
- Paste into a word document
- Upload to Moodle
- Instructions:
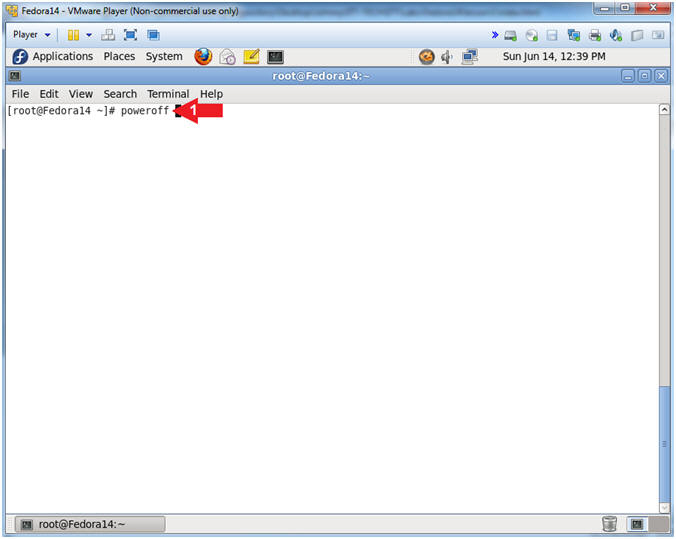
- Consistency Reboot
- Instructions:
- poweroff
- Note(FYI):
- Please continue to the next step to make backup copies of them Virtual Machine for future lessons.
- Instructions:
| Section 11: Prepare Backup Virtual Machines |
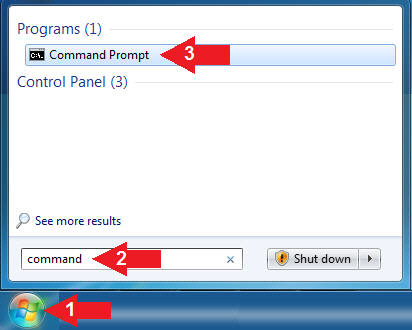
- Open a Command Prompt (On
Your Host Machine)
- Instructions:
- Click the Start Button
- Type "command" in the search box
- Click on the Command Prompt
- Instructions:
- Start Up a Terminal Window
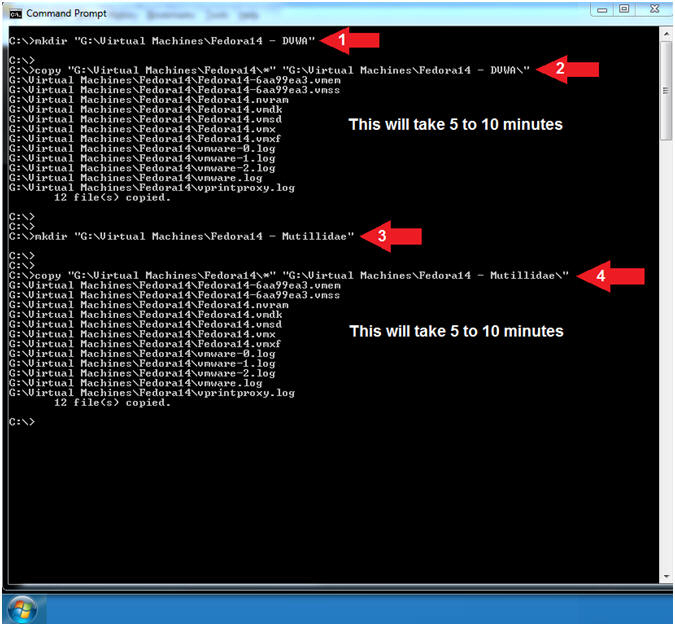
- Note(FYI):
- This is only necessary if you intend on completing the following Web Security Lessons: DVWA and Mutillidae
- Instructions:
- C:\> mkdir "G:\Virtual Machines\Fedora14 - DVWA"
- C:\> copy "G:\Virtual Machines\Fedora14\*" "G:\Virtual Machines\Fedora14 - DVWA\"
- C:\> mkdir "G:\Virtual Machines\Fedora14 - Mutillidae"
- C:\> copy "G:\Virtual Machines\Fedora14\*" "G:\Virtual Machines\Fedora14 - Mutillidae\"
- Note(FYI):