(BackTrack: Lesson 2)
{ BackTrack Reset Root Password }
| Section 0. Background Information |
- Overview
- This labs shows you a quick and easy way reset the root password on a VMware BackTrack5R1 instance using a live CD.
- It's embarrassing enough to forget, lose, or simply not know the root password to your machine. It's even more embarrassing to forget, lose, or mistake the root password to your penetration testing machine. :)
- Prerequisite
-
Lab Notes
- In this lab we will do the following:
- Use a BackTrack Live CD/iso to mount up disk partition that contains /etc/shadow
- We will clear out the root password
- We will reset the root password
- In this lab we will do the following:
- Legal Disclaimer
- As a condition of your use of this Web site, you warrant to computersecuritystudent.com that you will not use this Web site for any purpose that is unlawful or that is prohibited by these terms, conditions, and notices.
- In accordance with UCC § 2-316, this product is provided with "no warranties, either express or implied." The information contained is provided "as-is", with "no guarantee of merchantability."
- In addition, this is a teaching website that does not condone malicious behavior of any kind.
- Your are on notice, that continuing and/or using this lab outside your "own" test environment is considered malicious and is against the law.
- © 2012 No content replication of any kind is allowed without express written permission.
- YouTube Video
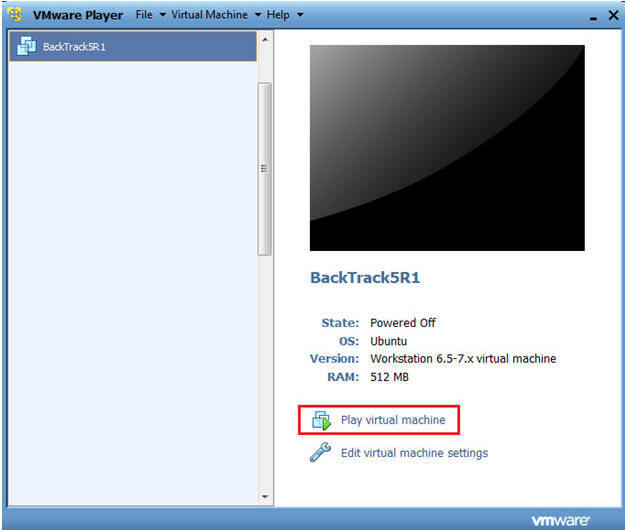
| Section 1: Startup the BackTrack Virtual Machine |
- Start Up BackTrack.
- Instructions:
- Start Up your VMware Player
- Play virtual machine
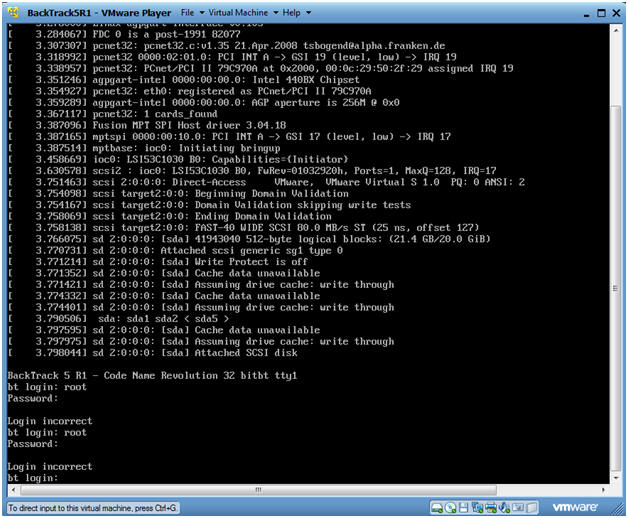
- Instructions:
- Use the
WRONG password to Login to BackTrack
- Instructions:
- Login: root
- Password: Type in the wrong password on purpose!!!
- Instructions:
| Section 2: Edit Virtual Machine Settings |
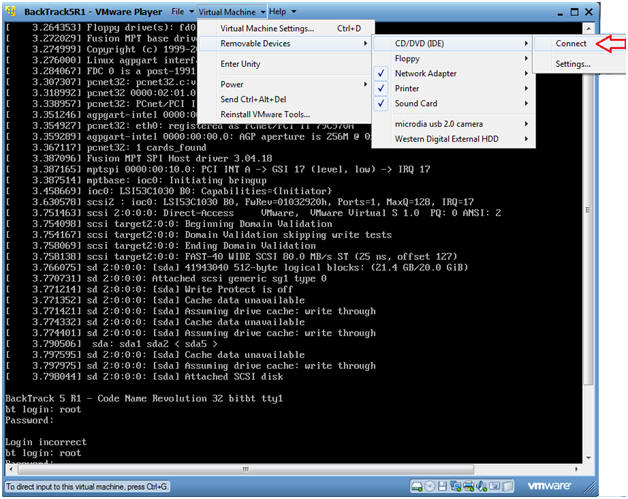
- Make sure your CD/DVD Drive is connected.
- Instructions:
- Virtual Machine --> Removable Devices --> Connect
- Instructions:
- Make sure your CD/DVD Drive is connected.
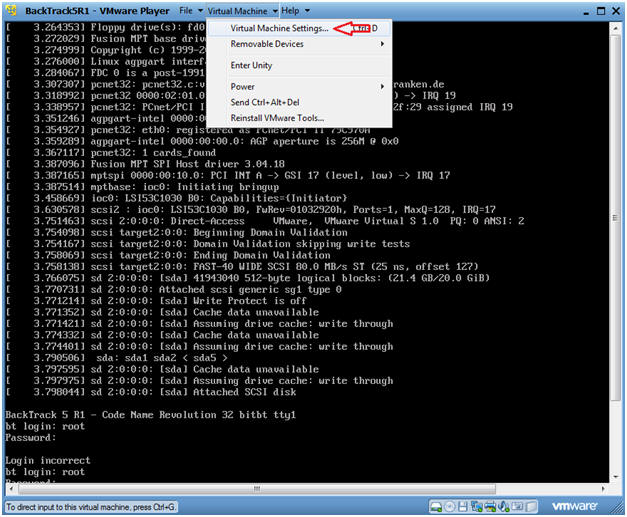
- Instructions:
- Virtual Machine --> Virtual Machine Settings...
- Instructions:
- Set Machine to Boot From CD/DVD
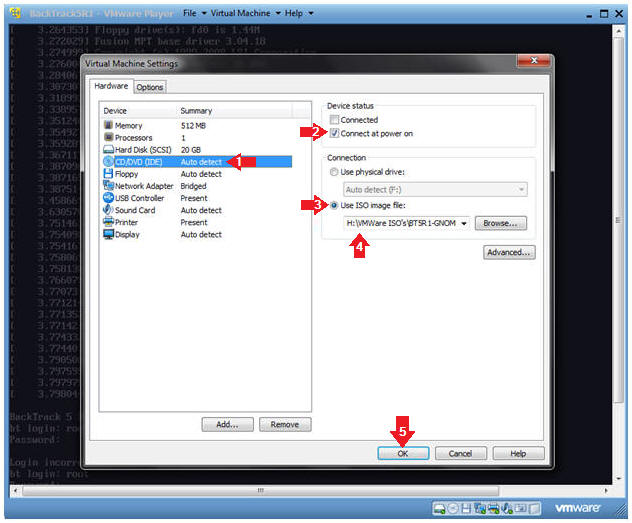
- Instructions:
- Select CD/DVD (IDE)
- Device status: Click the Checkbox "Connect at power on"
- Select the "Use ISO image file" radio button.
- Browse to the location of your BT5R1-GNOME.iso or other Live CD.
- Select OK.
- Instructions:
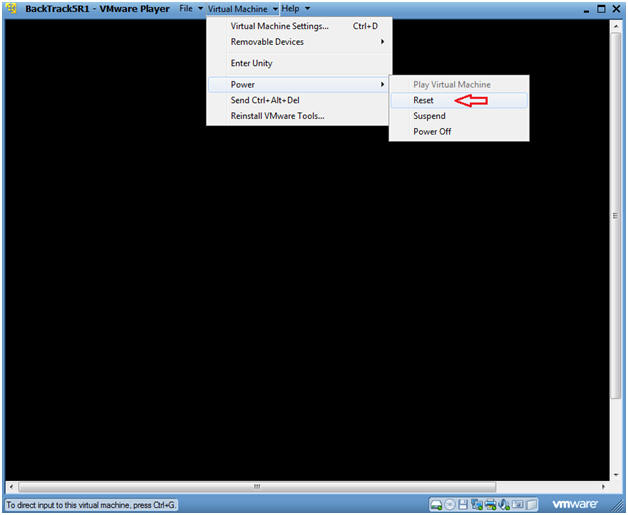
- Reset BackTrack
- Instructions:
- Virtual Machine --> Power --> Reset
- Instructions:
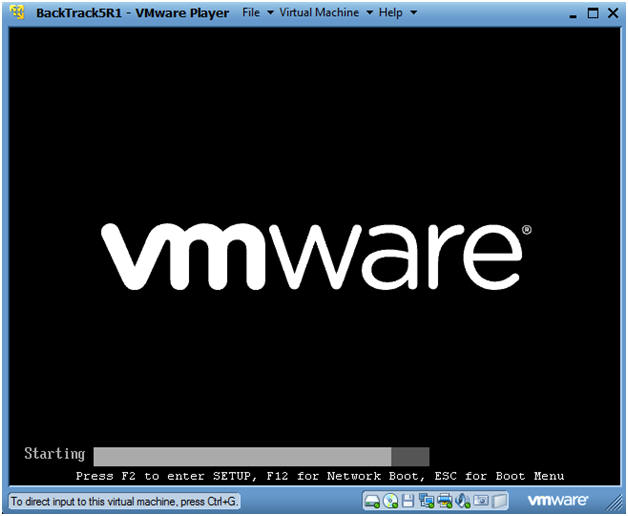
- Booting from the ISO (Step 1)
- Instructions:
- At the same time, Click the right mouse key and the press the ESC button, when the screen starts to change to the VMware screen below.
- Note(FYI):
- This might take you a few times so be patient!!!
- Instructions:
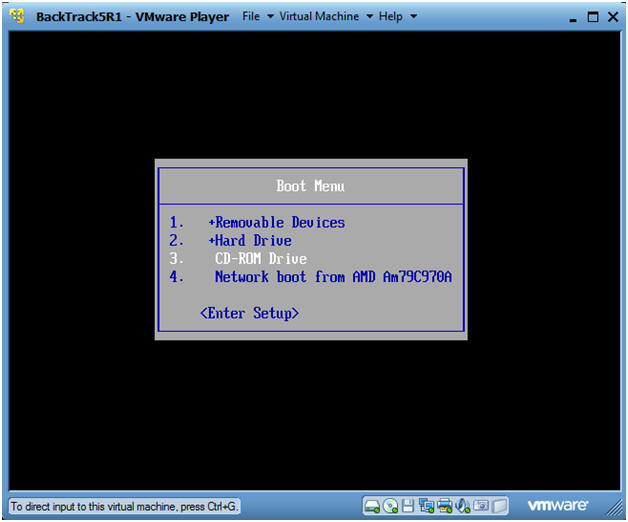
- Booting from the ISO (Step 2)
- Instructions:
- Arrow Down to "CD-ROM Drive"
- Press Enter
- Instructions:
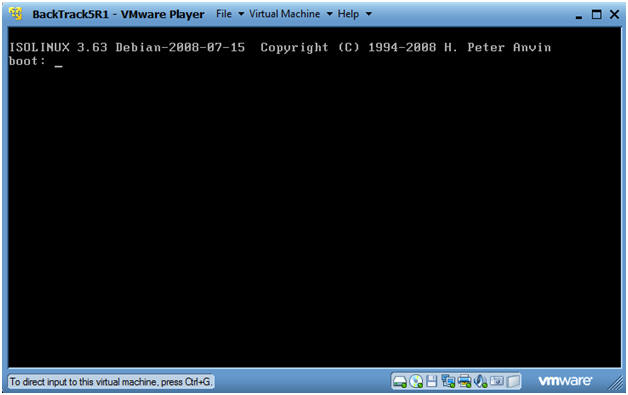
- Boot
- Instructions:
- Press Enter
- Instructions:
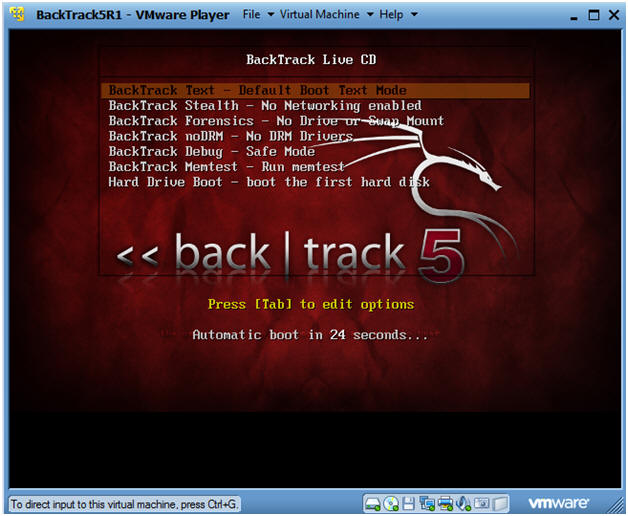
- Boot BackTrack Live CD
- Instructions:
- Select "BackTrack Text - Default Boot Text Mode"
- Press Enter
- Instructions:
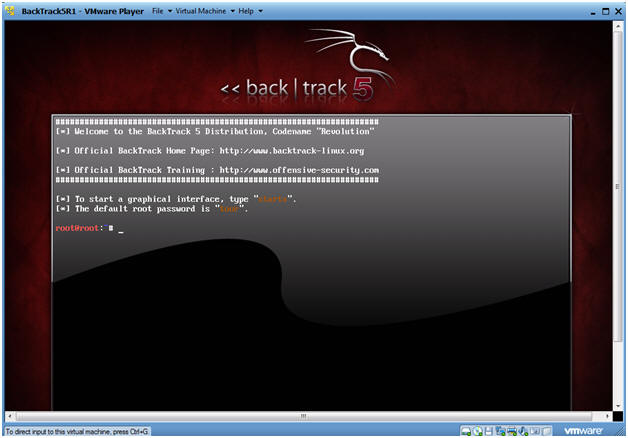
- BackTrack5 Command Line
- Note:
- This is the screen you will see to begin the reset process.
- Note:
| Section 3: Mounting the Boot Disk |
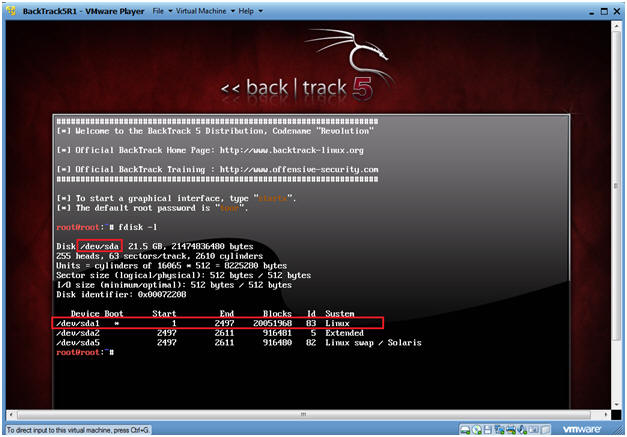
- Discover the Boot Disk
- Instruction:
- fdisk -l
- Note(FYI):
- This server was built with all the directories under the same partition.
- Typically, productions servers will have a partition per file system. In our case, this server was built with all the directory and filesystems under one partition.
- In the next step, we will mount up the /dev/sda1 partition.
- Instruction:
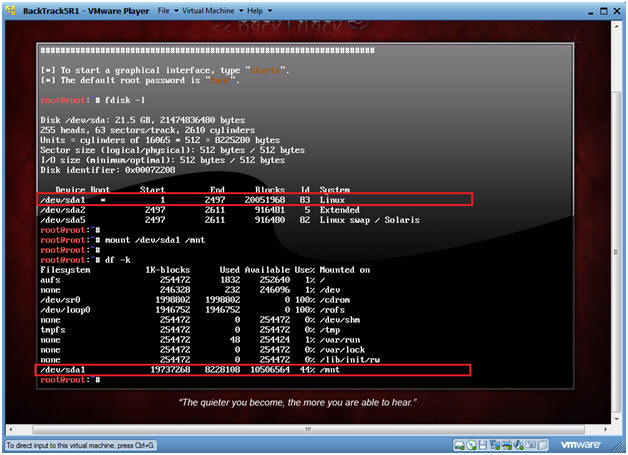
- Mount the Boot Partition
- Instruction:
- mount /dev/sda1 /mnt
- df -k
- Note(FYI):
- Since, all filesystems and directories are located under /dev/sda1 we will be able to access any file.
- Instruction:
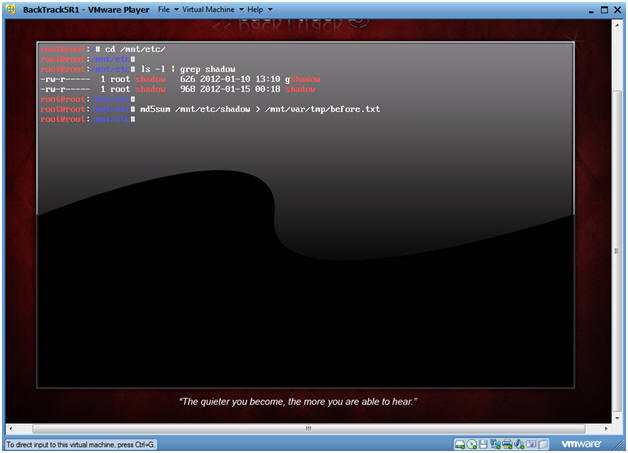
- Navigate to the etc directory
- Instruction:
- cd /mnt/etc
- ls -l | grep shadow
- md5sum /mnt/etc/shadow > /mnt/var/tmp/before.txt
- This is part of the proof of lab.
- Note(FYI):
- By mounting /dev/sda1 to the /mnt directory, we now have access to the shadow file.
- Instruction:
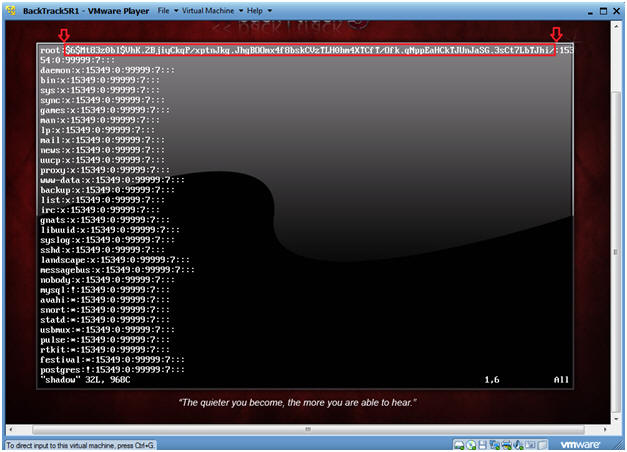
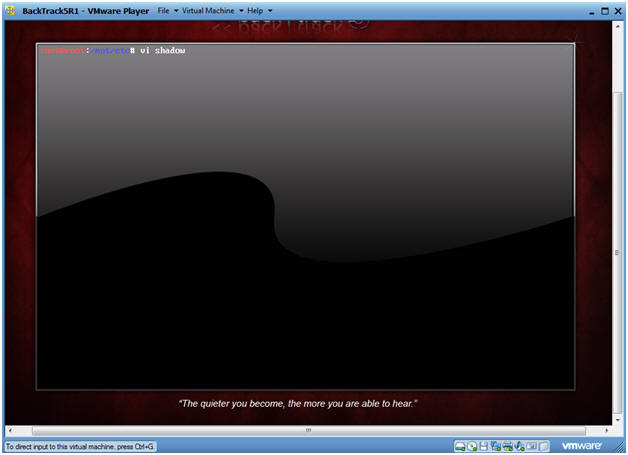
- Edit the shadow file
- Instruction:
- vi shadow
- Instruction:
- Edit the shadow file
- Instruction:
- Right arrow over to the immediate next right position of the first colon.
- Press the "x" to delete all the characters, until you get to the second colon. Note, do not delete the colons.
- Instruction:
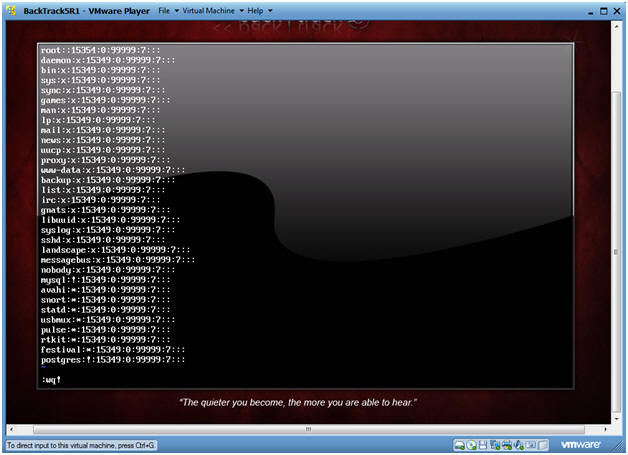
- Saving the shadow file
- Instruction:
- Press the "Esc" key
- Press <Shift> and the ":" key.
- Type wq!
- Press enter
- Note(FYI):
- Congratulations, You effectively cleared out the root password.
- Instruction:
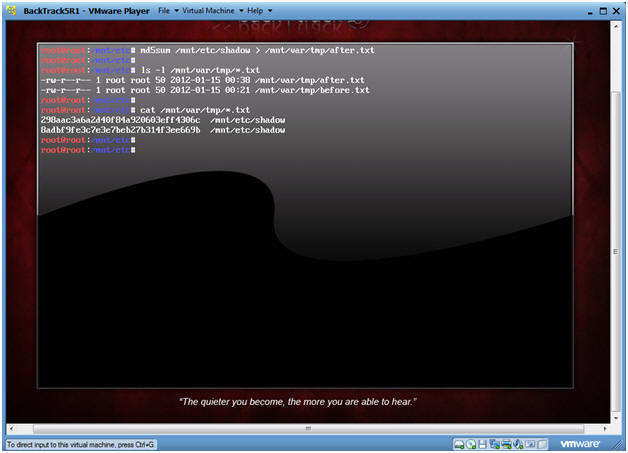
- Post Lab Verification
- Instruction:
- md5sum /mnt/etc/shadow > /mnt/var/tmp/after.txt
- ls -l /mnt/var/tmp/*.txt
- cat /mnt/var/tmp/*.txt
- Note(FYI):
- The above command are not required to reset/clear the root password.
- This is only part of our pre-proof of lab instructions.
- Instruction:
| Section 4: Reboot BackTrack |
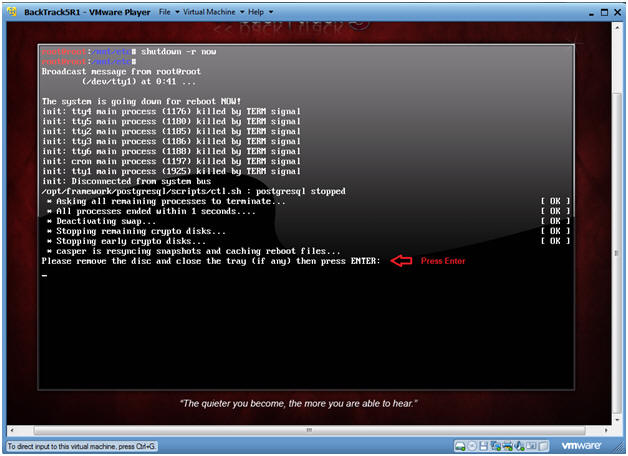
- Reboot the server
- Instruction:
- shutdown -r now
- Press <Enter> when you see the line that says "Please remove the disc and close ..."
- Instruction:
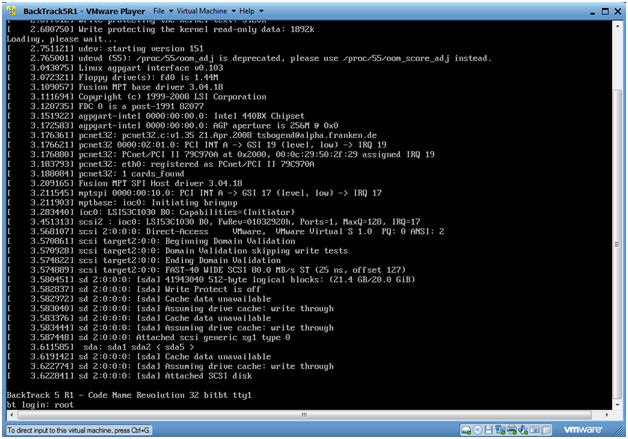
- Login as root
- Instruction:
- Type "root" at the bt login: prompt.
- Note:
- After you press enter, you will not be prompted for the root password.
- Instruction:
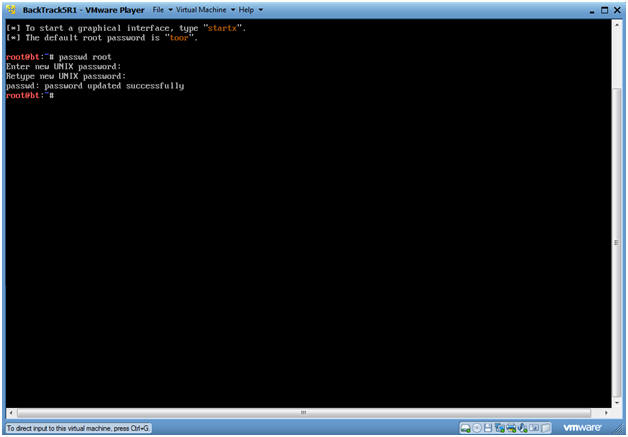
- Change Root Password
- Instruction:
- passwd root
- Set the root password to our standard classroom password.
- passwd root
- Instruction:
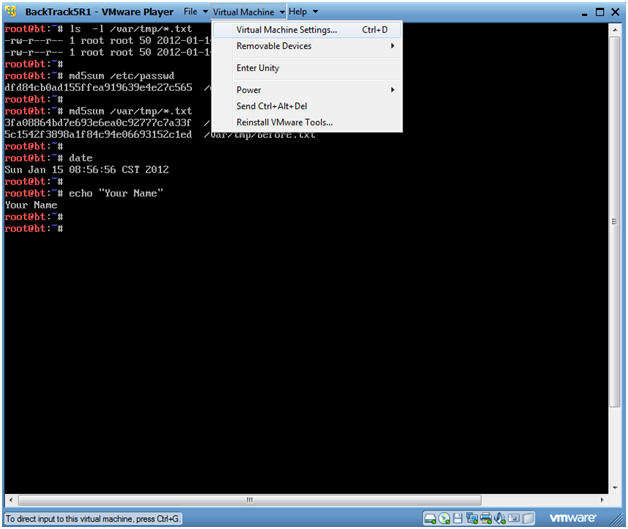
| Section 5: Proof of Lab |
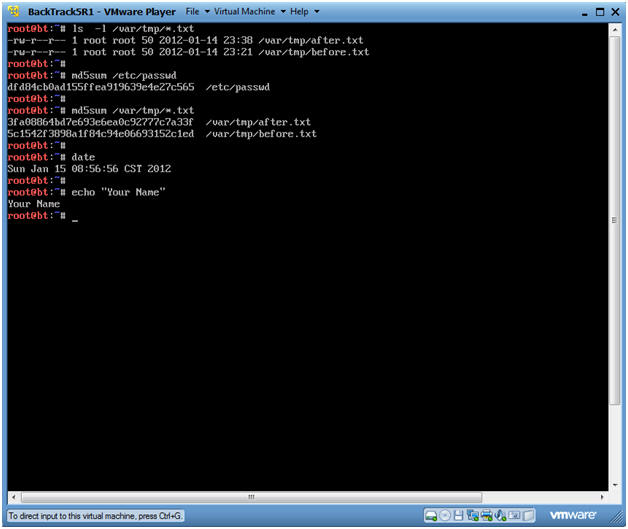
- Proof of Lab
- Instruction:
- ls -l /var/tmp/*.txt
- md5sum /etc/passwd
- md5sum /var/tmp/*.txt
- date
- echo "Your Name"
- Replace "Your Name" with your actual name.
- e.g., echo "John Gray"
-
Proof of Lab Instructions
- Press both the <Ctrl> and <Alt> keys at the same time.
- Do a <PrtScn>
- Paste into a word document
- Upload to Moodle
- Instruction:
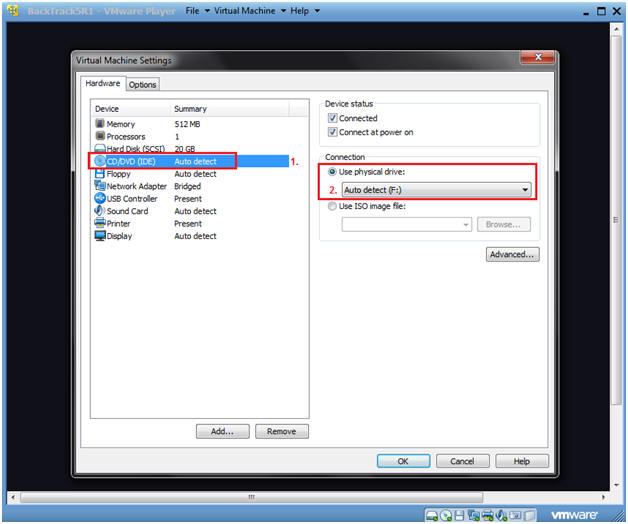
| Section 6: Post Lab Clean Up |
- Change Back the Virtual Machine Settings
- Instruction:
- Virtual Machine --> Virtual Machine Settings...
- Instruction:
- Change CD/DVD Settings
- Instruction:
- Select CD/DVD (IDE)
- Select radio button "Use physical drive:" and make sure "Auto detect" is selected.
- Instruction: