(Metasploitable Project: Lesson 1)
{ Downloading, Configuring & Make Forensics Ready }
| Section 0. Background Information |
- Metasploitable
- Metasploitable is an intentionally vulnerable Linux virtual machine.
- This VM can be used to conduct security training, test security tools, and practice common penetration testing techniques.
- Lime Forensics
- LiME is a Loadable Kernel Module (LKM), which allows the acquisition of volatile memory from Linux and Linux-based devices, such as those powered by Android. The tool supports acquiring memory either to the file system of the device or over the network.
- Dwarfdump
- Dwarfdump is an application using libdwarf to print dwarf information in a human readable format.
- Volatility Framework
- The Volatility Framework is a completely open collection of tools, implemented in Python under the GNU General Public License, for the extraction of digital artifacts from volatile memory (RAM) samples.
- Reference Link
-
Lab Notes
- In this lab we will do the following:
- Download Metasploitable
- Configure the Metasploitable Network VM
- Change the msfadmin and root password
- Install Lime Forensics
- Install Dwarfdump
- Install Volatility
- Create a Volatility Metaploitable Profile
- In this lab we will do the following:
- Legal Disclaimer
- As a condition of your use of this Web site, you warrant to computersecuritystudent.com that you will not use this Web site for any purpose that is unlawful or that is prohibited by these terms, conditions, and notices.
- In accordance with UCC § 2-316, this product is provided with "no warranties, either express or implied." The information contained is provided "as-is", with "no guarantee of merchantability."
- In addition, this is a teaching website that does not condone malicious behavior of any kind.
- Your are on notice, that continuing and/or using this lab outside your "own" test environment is considered malicious and is against the law.
- © 2013 No content replication of any kind is allowed without express written permission.
| Section 1: Create a New Virtual Machine |
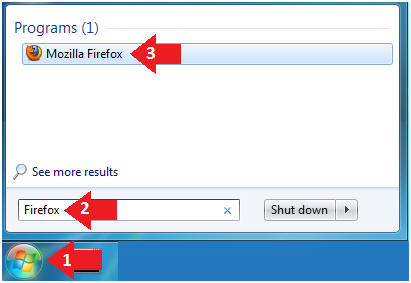
- Open Firefox
- Instructions
- Click on the Start Button
- Type "Firefox" in the search box
- Click on Mozilla Firefox
- Instructions
- New Virtual Machine Wizard
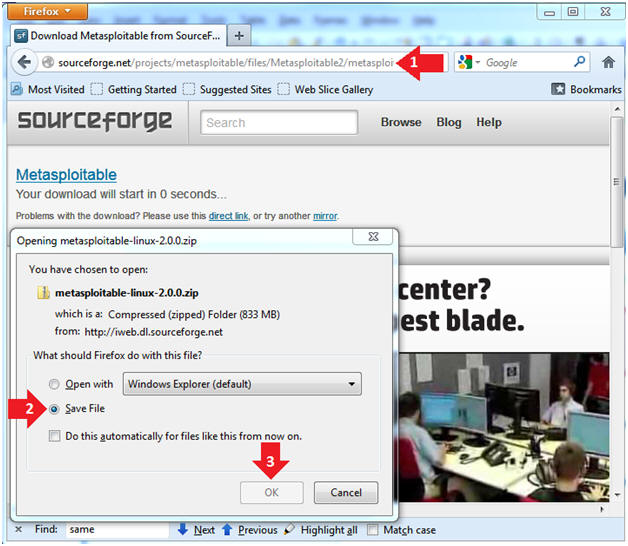
- Instructions
- Place the following link in the address bar.
- Click on the Save File radio button
- Click on the OK Button
- Instructions
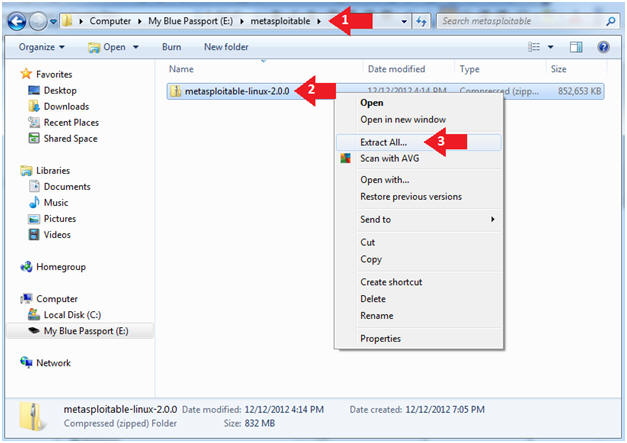
- Uncompress the metasploitable VM
- Instructions
- Navigate to where you downloaded the
metasploitable VM
- In my case, I saved it to an external USB hard drive.
- Right Click on metasploitable
- Click on Extract All...
- Navigate to where you downloaded the
metasploitable VM
- Instructions
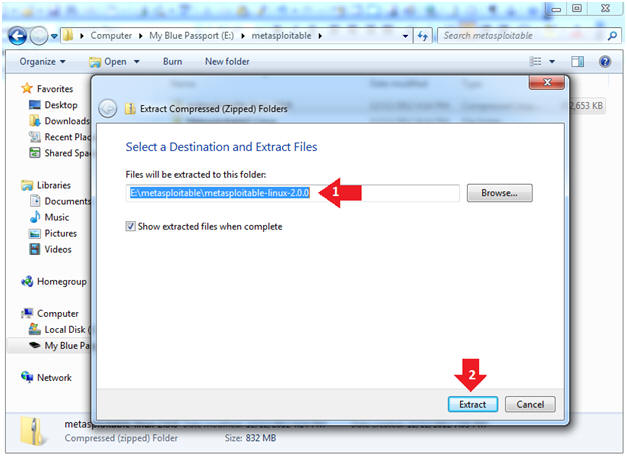
- Extract the metasploitable VM
- Instructions
- Extract the metasploitable VM to your
desired location
- In my case, I extracted it to an external USB hard drive.
- Click the Extract Button
- Extract the metasploitable VM to your
desired location
- Instructions
| Section 2: Start VMware Player |
- Start Up VMWare Player
- Instructions:
- Click the Start Button
- Type Vmplayer in the search box
- Click on Vmplayer

- Instructions:
- Open a Virtual Machine
- Instructions:
- Click on Open a Virtual Machine
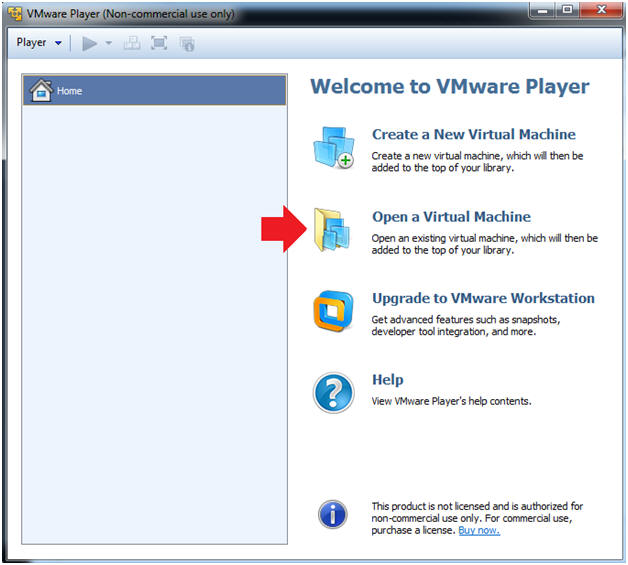
- Instructions:
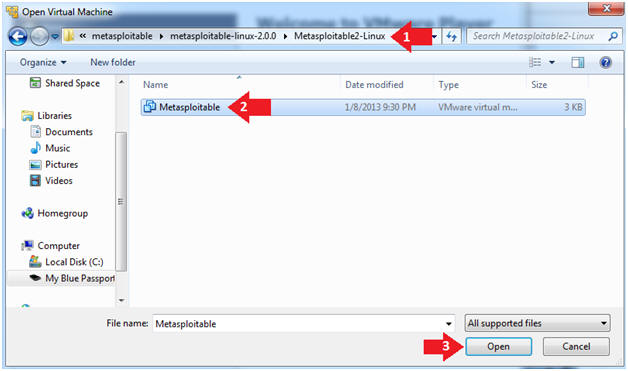
- Open the Metasploitable VM
- Instructions:
- Navigate to where the Metasploitable VM is located
- Click on on the Metasploitable VM
- Click on the Open Button
- Instructions:
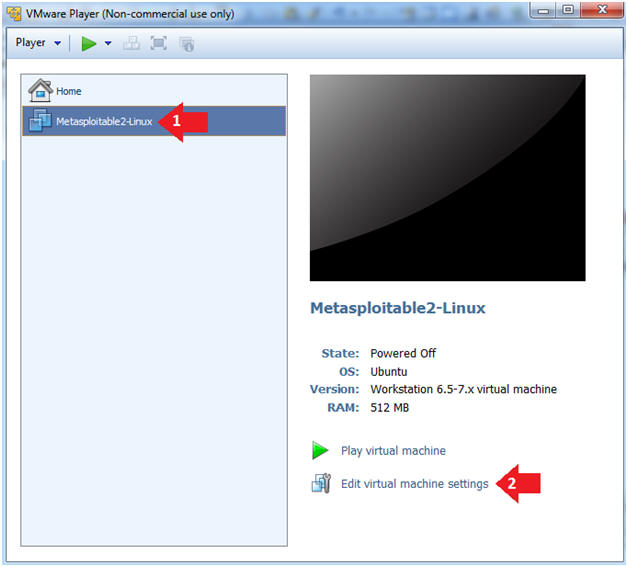
- Edit the Metasploitable VM
- Instructions:
- Select Metasploitable2-Linux VM
- Click Edit virtual machine settings
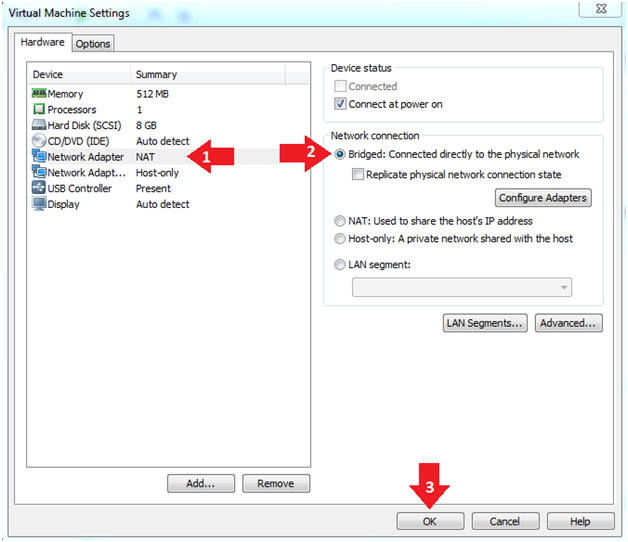
- Instructions:
- Edit the Metasploitable VM
- Instructions:
- Click on "Network Adapter NAT"
- Select the radio button "Bridged: Connected directly to the physical network"
- Click on the OK button
- Warning:
- By changing from NAT to Bridged opens the VM and network up to potential attacks.
- To maintain a safe network, you could (1) skip this section and only use the host-only network, (2) unplug your router from the internet, (3) use an ACL to not allow traffic into your network, etc.
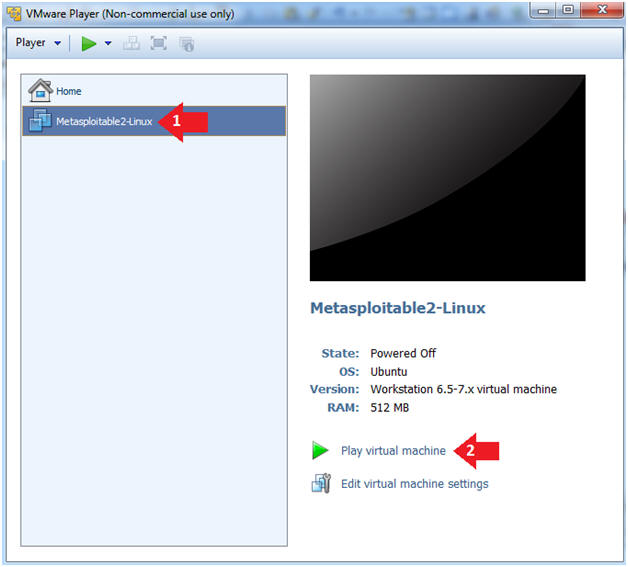
- Instructions:
- Play the Metasploitable VM
- Instructions:
- Click on the Metasploitable VM
- Click on Play virtual machine
- Instructions:
| Section 3: Changing Metasploitable Passwords |
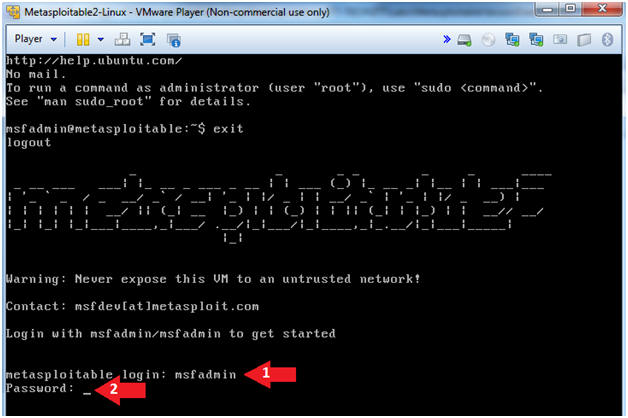
- Logging into Metasploitable
- Instructions
- Username: msfadmin
- Password: msfadmin
- Instructions
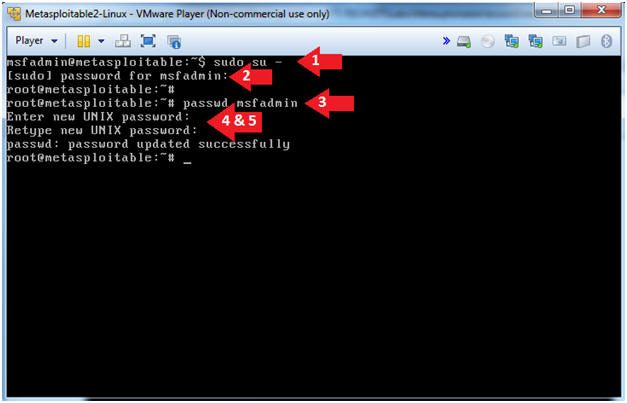
- Change the msfadmin password
- Instructions:
- sudo su -
- password for msfadmin: msfadmin
- passwd msfadmin
- Enter new UNIX password: <Supply New Password>
- Retype new UNIX password: <Supply Same Password>
- Instructions:
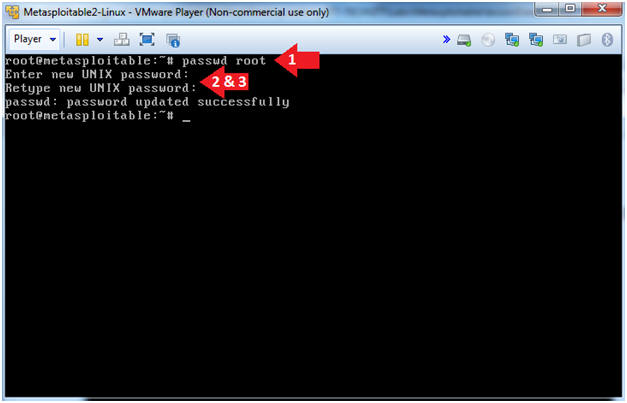
- Change the root password
- Instructions:
- passwd root
- Enter new UNIX password: Supply a new password
- Retype new UNIX password: Supply the same new password
- Instructions:
| Section 4: Update Repository Package List |
- Logging into Metasploitable
- Instructions
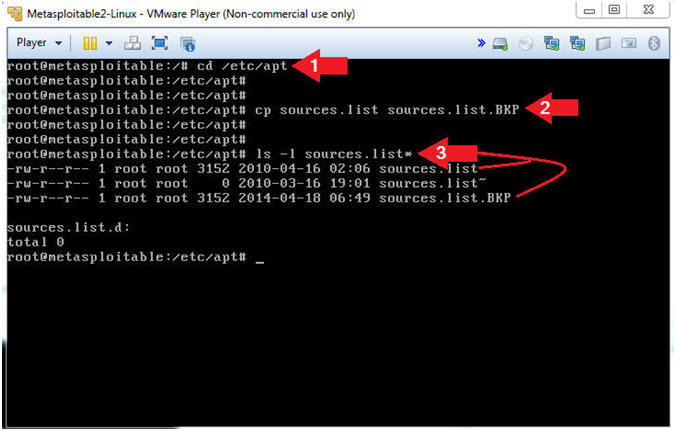
- cd /etc/apt
- cp sources.list sources.list.BKP
- ls -l sources.list*
- Notes(FYI)
- The /etc/apt directory contains Ubuntu Package Management configuration files.
- It's always good to make a backup of an important file, before modifying them.
- The sources.list file lists the 'sources' from which packages can be obtained.
- Instructions
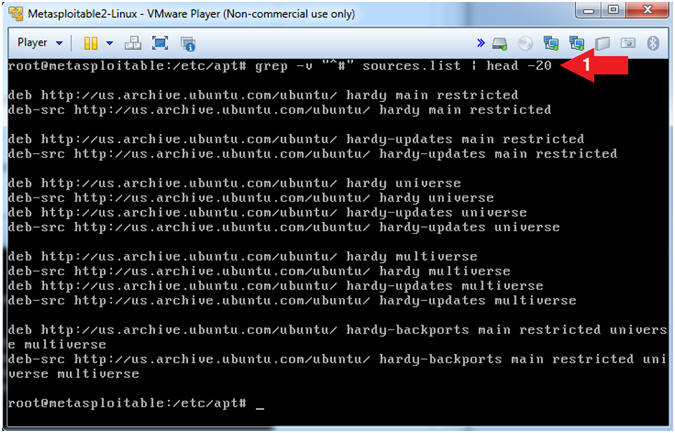
- View the Repositories
- Instructions
- grep -v "^#" sources.list | head -20
- Notes(FYI)
- grep is a utility that allows you to search for strings (and much more) in a file.
- In (grep -v "^#"), the (-v) is used to ignore lines that start with (^) the number sign (#).
- sources.list is the file that I am searching.
- The pipe (|) is used to add on an additional command.
- head -20, displays the first 20 lines.
- Instructions
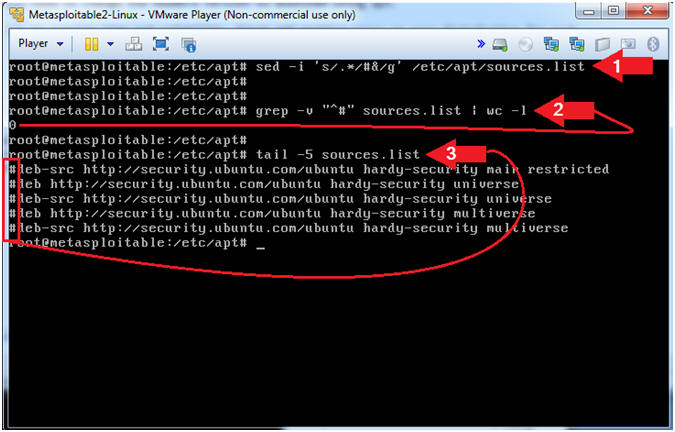
- Comment Out the Repositories
- Instructions
- sed -i 's/.*/#&/g' /etc/apt/sources.list
- grep -v "^#" sources.list | wc -l
- Where there "-l" is a lower case L.
- tail -5 sources.list
- Notes(FYI)
- sed, is a stream editor for filtering
and transforming text.
- sed -i, is an in-place update to the file (sources.list).
- In ('s/.*/#&/g'), the (s) is a substitution operator.
- In ('s/.*/#&/g'), the (.) matches one character, but not a newline.
- In ('s/.*/#&/g'), the (*) matches zero or more characters.
- In ('s/.*/#&/g'), the (#) is the character that I want to place in front of every line that starts with a character.
- In ('s/.*/#&/g'), the (&) saves the search string so it can be remembered in the replacement string.
- In ('s/.*/#&/g'), the (g) is as global substitution operator.
- In summary, place a "#" sign in the starting position of each line.
- wc, means to print a newline, word,
and/or byte counts for each file.
- wc -l, means to count the number of lines.
- In (grep -v "^#"), the (-v) is used to ignore lines that start with (^) the number sign (#).
- In summary, count the number of lines that do NOT start with a (#) character,,, and the result is 0,,, which was the goal.
- sed, is a stream editor for filtering
and transforming text.
- Instructions
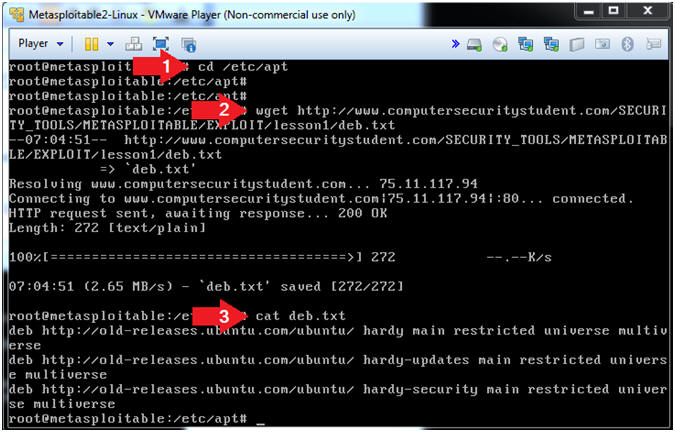
- Get Links to Old Patch Repository
- Instructions
- cd /etc/apt
- wget http://www.computersecuritystudent.com/SECURITY_TOOLS/METASPLOITABLE/EXPLOIT/lesson1/deb.txt
- cat deb.txt
- Notes(FYI)
- The deb.txt file contains links to the old Ubuntu Patch Repository.
- Instructions
- Append Old Patch Repository to sources.list
- Instructions
- ls -l sources.list
- ls -l deb.txt
- cat deb.txt >> sources.list
- tail -5 sources.list
- Notes(FYI)
- We are using (cat) and the append operator (>>) to add the contents of the deb.txt file onto the end of the sources.list file.

- Instructions
- Update the Apt Package Repository
- Instructions
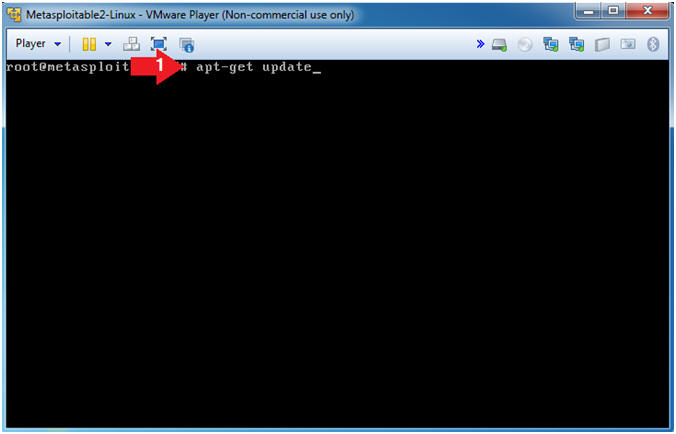
- apt-get update
- Notes(FYI)
- apt-get update downloads the package lists from the repositories and "updates" them to get information on the newest versions of packages and their dependencies.
- Instructions
- Install Linux Headers
- Instructions
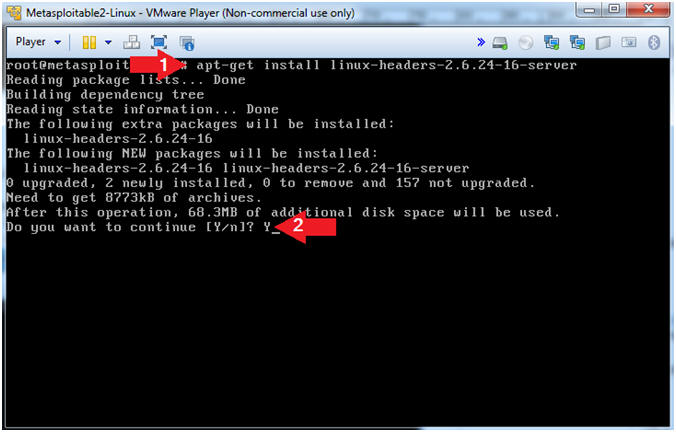
- apt-get install linux-headers-2.6.24-16-server
- Do you want to continue [Y/n]? Y
- Notes(FYI)
- Header files in the Linux kernel are used for two purposes: (1) to define interfaces between components of the kernel, and (2) to define interfaces between the kernel and user space.
- Instructions
- Install Zip
- Instructions
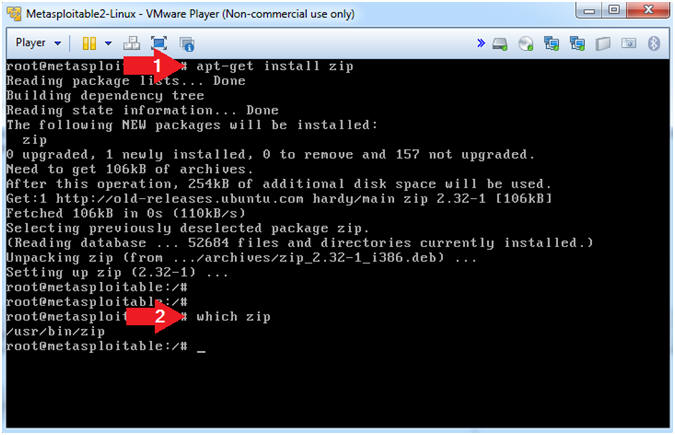
- apt-get install zip
- Notes(FYI)
- zip is a compression and file packaging utility.
- Instructions
| Section 5: Install Lime Forensics |
- Download Lime Forensics
- Instructions
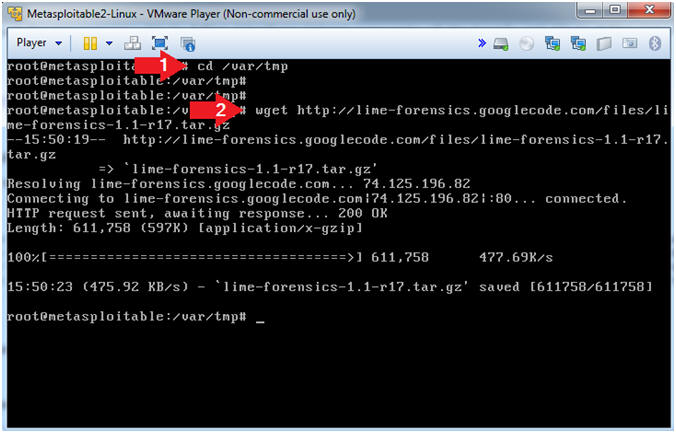
- cd /var/tmp
- wget http://www.computersecuritystudent.com/DOWNLOADS/lime-forensics-1.1-r17.tar.gz
- Instructions
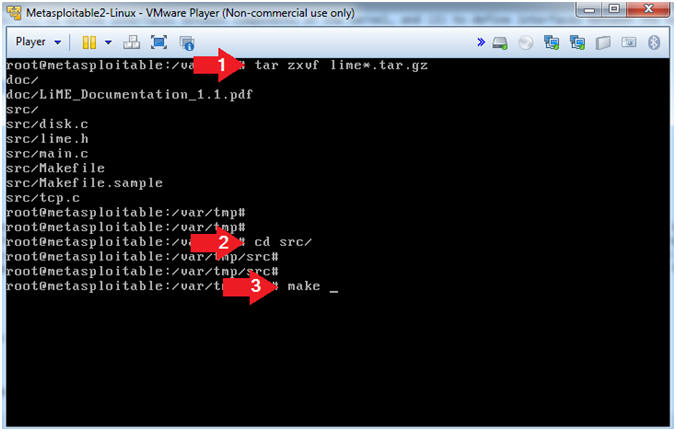
- Untar and Make Lime
- Instructions
- tar zxvf lime*.tar.gz
- cd src/
- make
- Notes(FYI)
- In this case, the tar program is used to unzip(z), and verbosely(v)extract(x) the file(f) lime*.tar.gz.
- make is a utility for building and maintaining groups of programs (and other types of files) from source code. The purpose of the make utility is to determine automatically which pieces of a large program need to be re-compiled, and issue the commands necessary to recompile them.
- Instructions
| Section 6: Install dwarfdump |
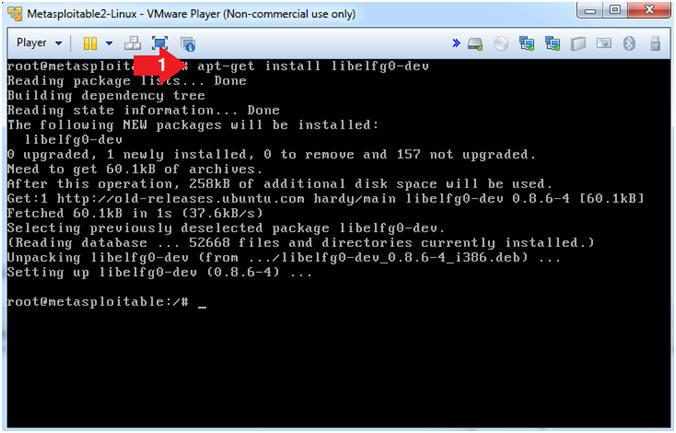
- Download libelf
- Instructions
- apt-get install libelfg0-dev
- Note(FYI)
- libelf provides routines to access and manipulate ELF object files. This development library is needed because we will compile dwarfdump.
- Instructions
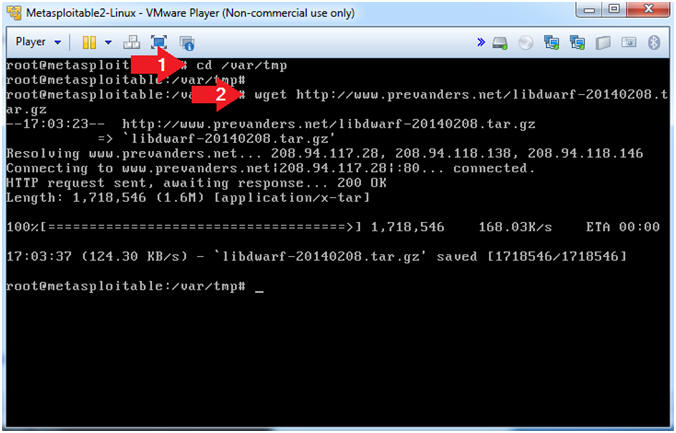
- Download libdwarf
- Instructions
- cd /var/tmp
- wget http://www.computersecuritystudent.com/SECURITY_TOOLS/METASPLOITABLE/EXPLOIT/lesson1/libdwarf-20140208.tar.gz
- Note(FYI)
- Libdwarf is a C library intended to simplify reading (and writing) applications using DWARF2, DWARF3.
- Dwarfdump is an application using libdwarf to print dwarf information in a human readable format.
- DWARF is a widely used, standardized debugging data format. DWARF was originally designed along with Executable and Linkable Format (ELF), although it is independent of object file formats.
- Instructions
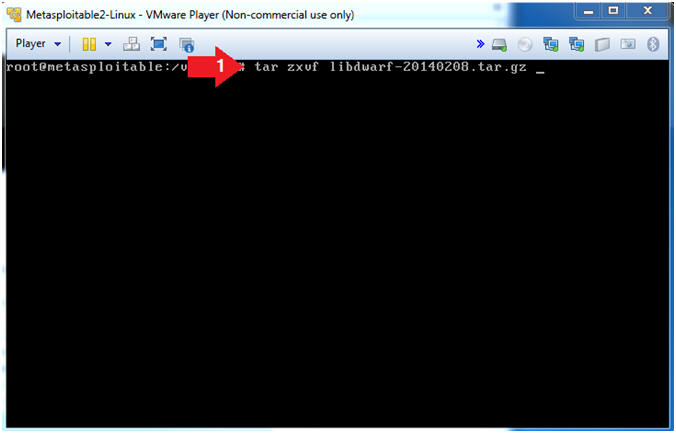
- Install libdwarf
- Instructions
- tar zxvf libdwarf-20140208.tar.gz
- Note(FYI)
- The tar program is used to create,
modify, and access files archived in the tar format.
- -z, This option tells tar to read or write archives through gzip, allowing tar to directly operate on several kinds of compressed archives transparently.
- -x, Exact.
- -v, Operate verbosely.
- -f, Specify the file.
- The tar program is used to create,
modify, and access files archived in the tar format.
- Instructions
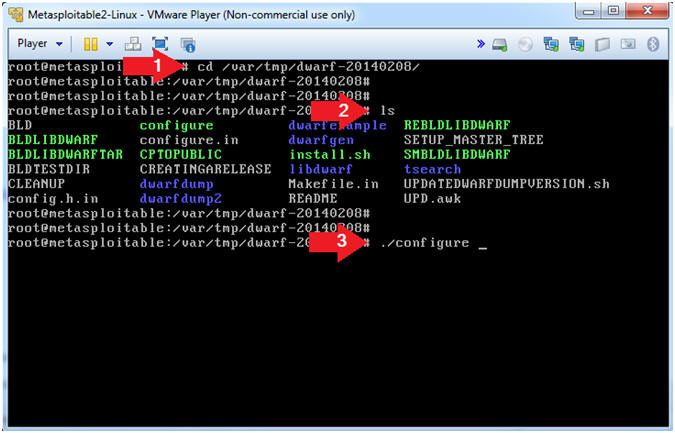
- Configure libdwarf
- Instructions
- cd /var/tmp/dwarf-20140208
- ls
- ./configure
- Note(FYI)
- Change directory to the /var/tmp/dwarf-20140208 directory.
- List Directory Contents
- The configure script basically consists of many lines which are used to check some details about the machine on which the software is going to be installed. This script checks for lots of dependencies on your system. The main job of the configure script is to create a 'Makefile'.
- Instructions
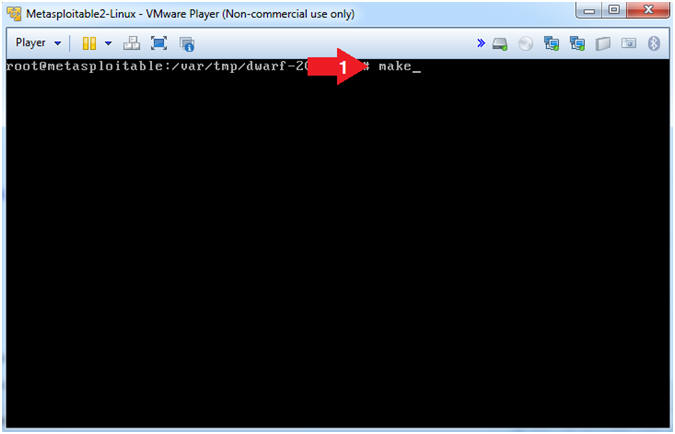
- Make libdwarf
- Instructions
- make
- Note(FYI)
- Make is a utility that automatically builds executable programs and libraries from source code by reading files called makefiles which specify how to derive the target program. make would use the directions present in the Makefile and proceed with the installation. The Makefile indicates the sequence, that Linux must follow to build various components / sub-programs of your software. The sequence depends on the way the software is designed as well as many other factors.
- Instructions
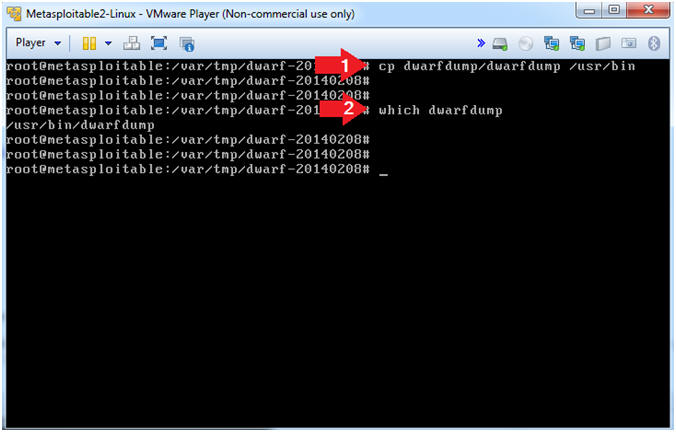
- Place dwarfdump
- Instructions
- cp dwarfdump/dwarfdump /usr/bin
- which dwarfdump
- Note(FYI)
- Copy dwarfdump to the /usr/bin directory
- which, displays the command location.
- Instructions
| Section 7: Download, Install, and Configure Volatility Profile |
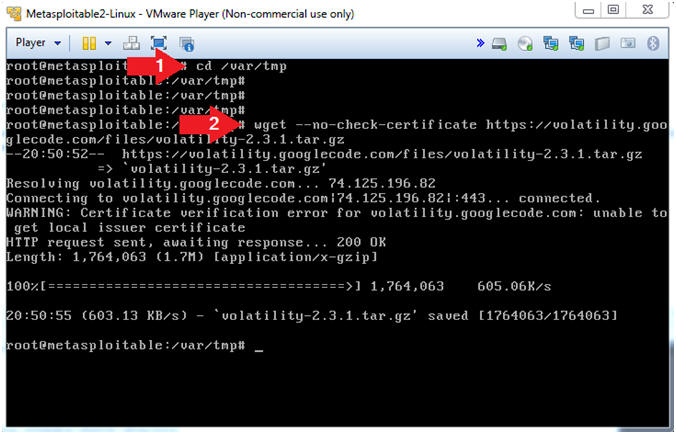
- Download Volatility
- Instructions
- cd /var/tmp
- wget --no-check-certificate http://www.computersecuritystudent.com/SECURITY_TOOLS/METASPLOITABLE/EXPLOIT/lesson1/volatility-2.3.1.tar.gz
- Instructions
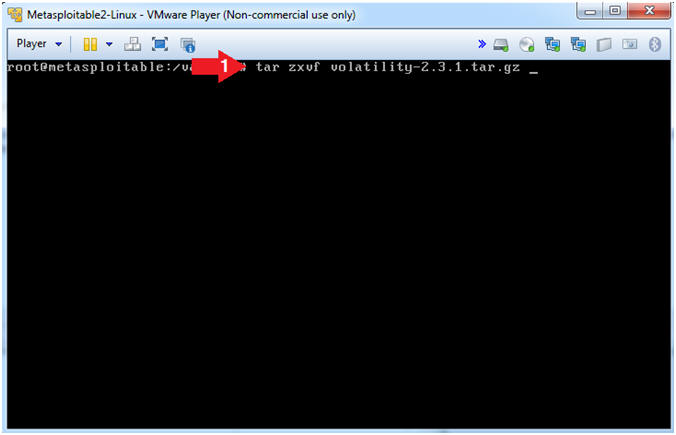
- Un-tar Volatility
- Instructions
- tar zxvf volatility-2.3.1.tar.gz
- Instructions
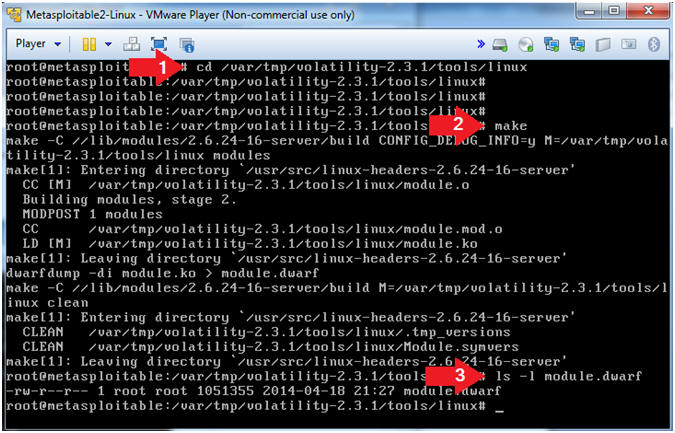
- Create module.dwarf
- Instructions
- cd /var/tmp/volatility-2.3.1/tools/linux
- make
- ls -l module.dwarf
- Instructions
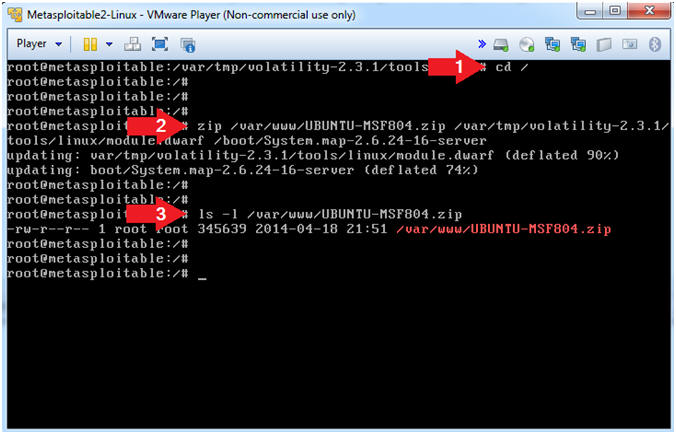
- Create Volatility Metasploitable Profile
- Instructions
- cd /
- zip
/var/www/UBUNTU-MSF804.zip
/var/tmp/volatility-2.3.1/tools/linux/module.dwarf
/boot/System.map-2.6.24-16-server
- The represents a space.
- ls -l /var/www/UBUNTU-MSF804.zip
- Instructions
| Section 8: Proof of Lab |
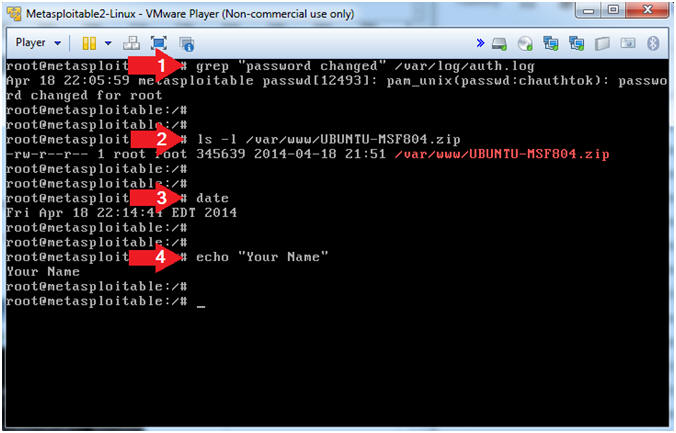
- Proof of Lab
-
Instructions
- grep "password changed" /var/log/auth.log
- ls -l /var/www/UBUNTU-MSF804.zip
- date
- echo "Your Name"
- Replace the string "Your Name" with your actual name.
- e.g., echo "John Gray"
-
Proof of Lab
Instructions
- Press the <Ctrl> and <Alt> key at the same time.
- Press the <PrtScn> key.
- Paste into a word document
- Upload to Moodle
-
Instructions