(Steganography:
Lesson 1)
{ Using Quick Stego to
Embed Secret
Messages Into Pictures }
|
Section 0: Background
Information |
- What is the story?
- Have you ever heard those sci-fi stories
where spies or whomever hide secret messages inside of pictures?
Well, this lesson actually illustrates how easy it is to actually hide
secret messages inside of a picture.
- What is Steganography
- Steganography is the science of writing hidden
messages in such a way that no one apart from the sender and intended
recipient even realizes there is a hidden message.
- What is QuickStego
- QuickStego lets you hide text in pictures so
that only other users of QuickStego can retrieve and read the hidden secret
messages. Once text is hidden in an image the saved picture is still a
'picture', it will load just like any other image and appear as it did
before. The image can be saved, emailed, uploaded to the web (, the only
difference will be that it contains hidden text.
-
http://quickcrypto.com/free-steganography-software.html
- What is MD5SUMS?
- MD5sums calculates the MD5 message digest for one or more files
(includes a percent done display for large files). By comparing the MD5
digest of a file to a value supplied by the original sender, you can
make sure that files you download are free from damage and tampering.
-
http://www.pc-tools.net/win32/md5sums/
- Pre-Requisite
-
Lab Notes
- In this lab we will do the following:
- Power on Damn Vulnerable WXP-SP2
- Install Quick Stego
- Install MD5SUMS
- Hide Message
- View Byte Size of files
- View MD5 checksum of the files
- Legal Disclaimer
- As a condition of your use of this Web
site, you warrant to computersecuritystudent.com that you will not use
this Web site for any purpose that is unlawful or
that is prohibited by these terms, conditions, and notices.
- In accordance with UCC § 2-316, this
product is provided with "no warranties, either express or implied." The
information contained is provided "as-is", with "no guarantee of
merchantability."
- In addition, this is a teaching website
that does not condone malicious behavior of
any kind.
- You are on notice, that continuing
and/or using this lab outside your "own" test environment
is considered malicious and is against the law.
- © 2013 No content replication of any
kind is allowed without express written permission.
|
Section 1: Log into Damn Vulnerable WXP-SP2 |
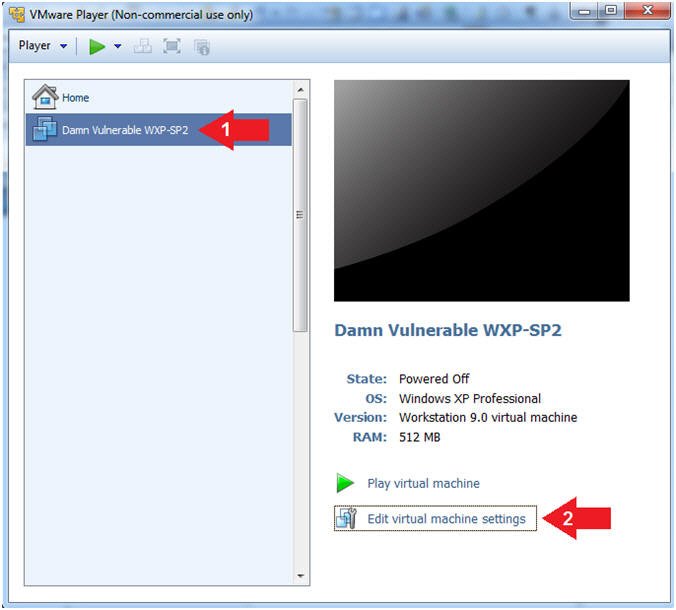
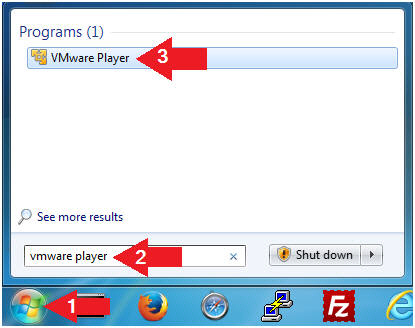
- Open VMware Player on your windows machine.
- Instructions:
- Click the Start Button
- Type "vmware player" in the search box
- Click on VMware Player
- Edit Virtual Machine Settings
- Instructions:
- Click on Damn Vulnerable WXP-SP2
- Edit Virtual Machine Settings
- Note:
- Before beginning a lesson it is
necessary to check the following VM settings.
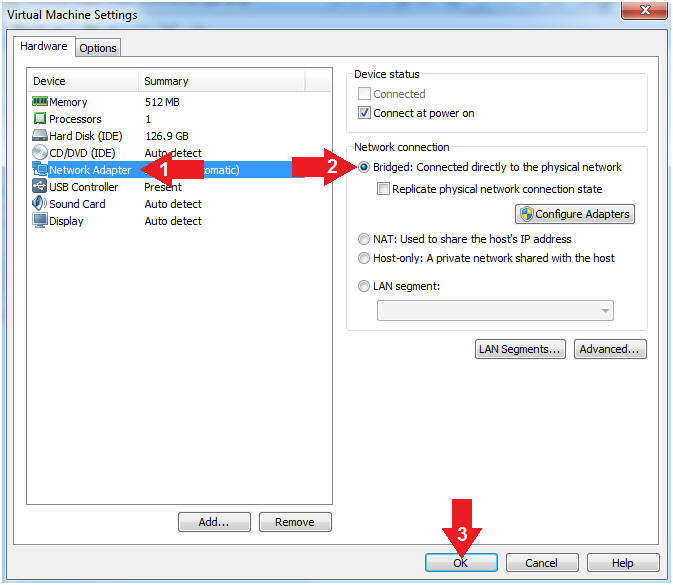
- Set Network Adapter
- Instructions:
- Click on Network Adapter
- Click on the radio button "Bridged:
Connected directly to the physical network".
- Click the OK Button
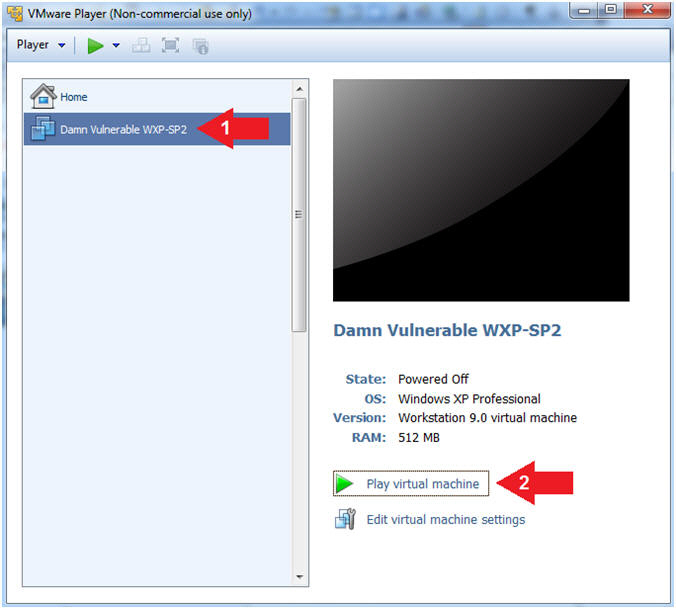
- Start Up Damn Vulnerable WXP-SP2.
- Instructions:
- Start Up your VMware Player
- Play virtual machine
- Logging into Damn Vulnerable WXP-SP2.
- Instructions:
- Click on Administrator
- Password: Supply Password
- Press <Enter> or Click the Arrow
- Note(FYI):
- Password was created in (Lab
1, Section 1, Step 8)
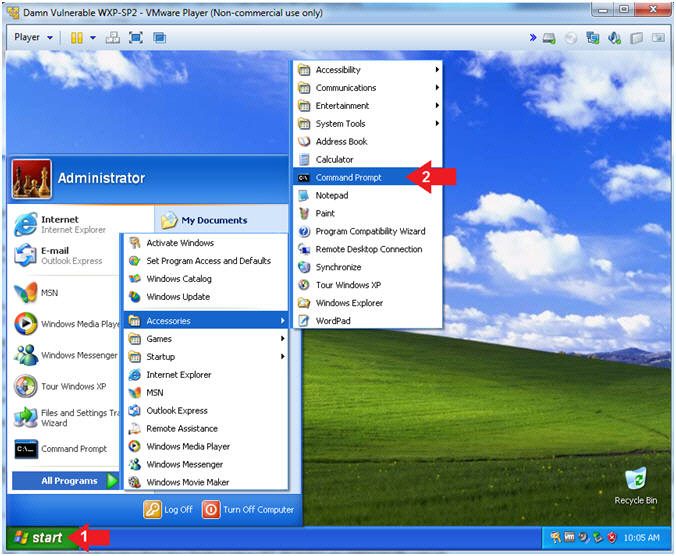
- Open the Command Prompt
- Instructions:
- Click the Start Button
- All Programs --> Accessories -->
Command Prompt
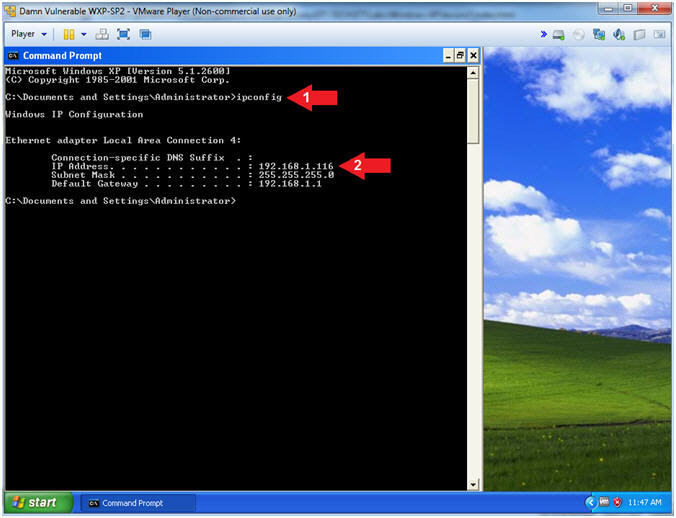
- Obtain Damn Vulnerable WXP-SP2's IP Address
- Instructions:
- ipconfig
- Record Your IP Address
- Note(FYI):
- In my case, Damn Vulnerable WXP-SP2's
IP Address 192.168.1.116.
|
Section 2: Download Quick Stego |
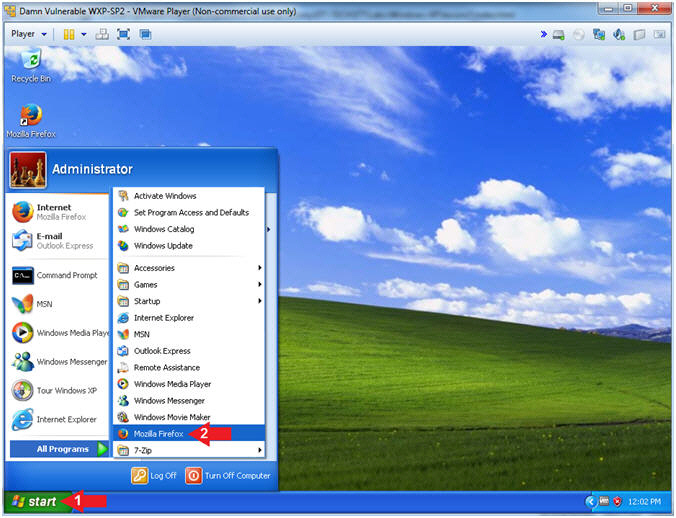
- Open Firefox
- Instructions:
- Click the Start Button
- All Programs --> Mozilla Firefox
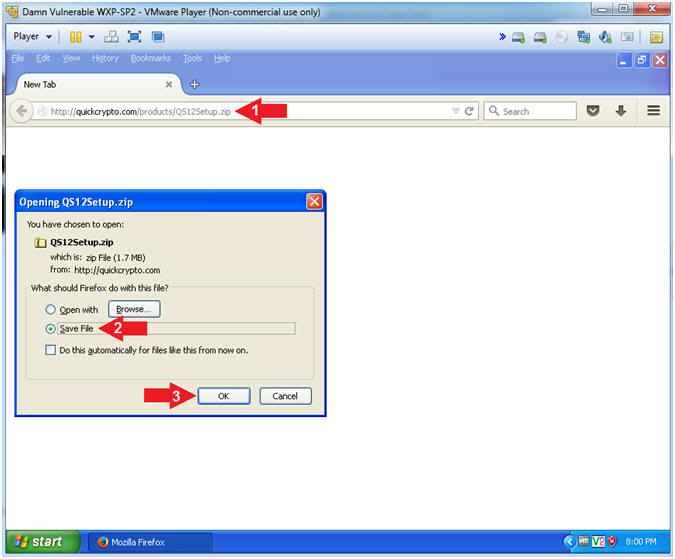
- Download Stego
- Instructions:
- Place the following address in your
Firefox browser.
- Select the Save File radio button
- Click the OK button
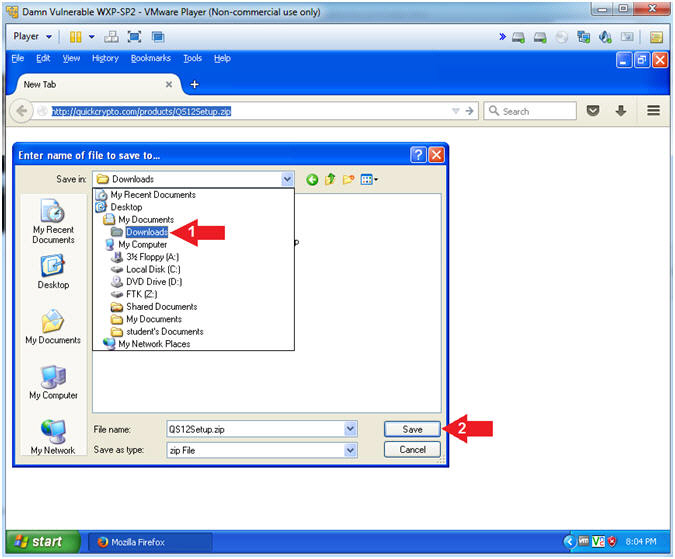
- Select Download Directory
- Instructions:
- Navigate to the below directory
- Desktop --> My Documents -->
Downloads
- Click
here if link is dead.
- Click the Save button
|
Section 3: Install
Quick Stego |
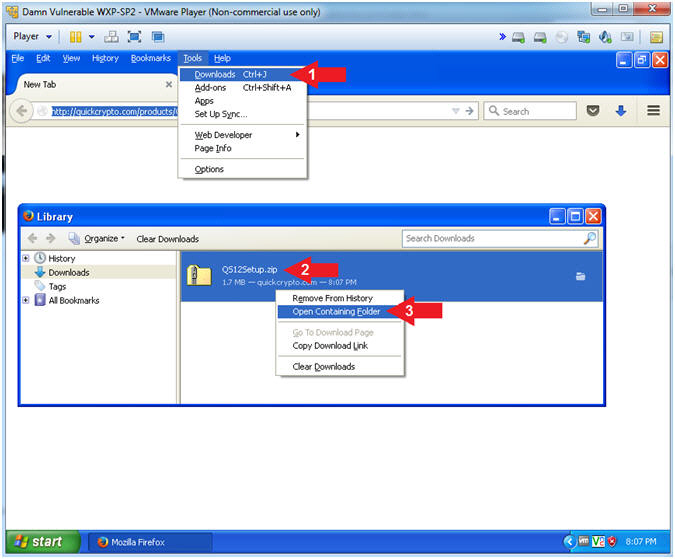
- Open Containing Folder
- Instructions:
- Tools --> Downloads
- Right Click on QS12Setup.zip
- Click on Open Containing Folder
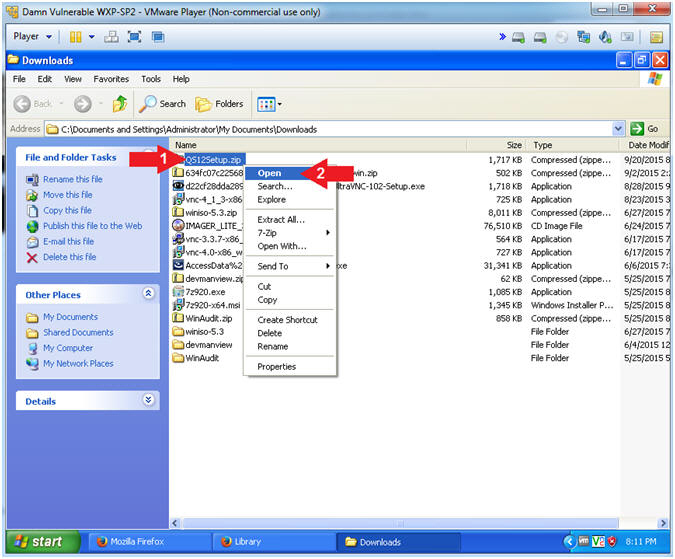
- Open Stego Zip File
- Instructions:
- Right Click on QS12Setup.zip
- Click on Open
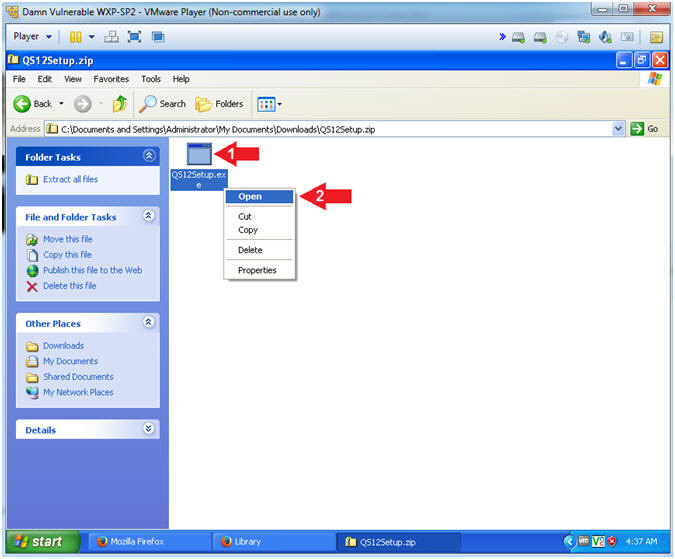
- Open Stego Executable
- Instructions:
- Right Click on QS12Setup.exe
- Click on Open
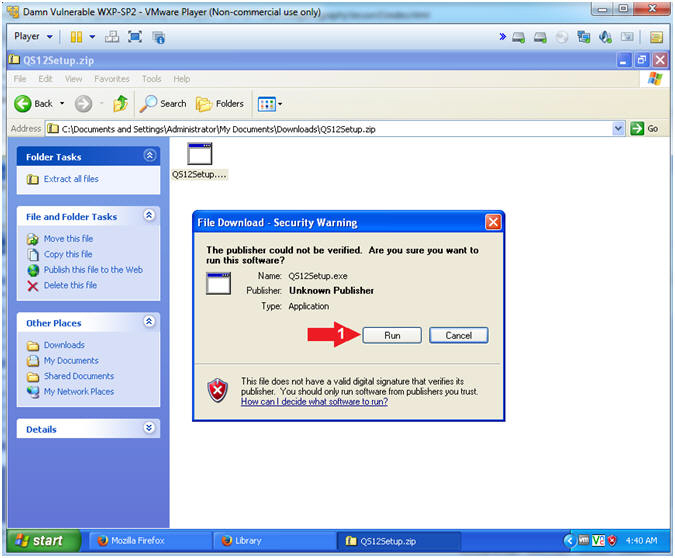
- File Download - Security Warning
- Instructions:
- Click the Run Button
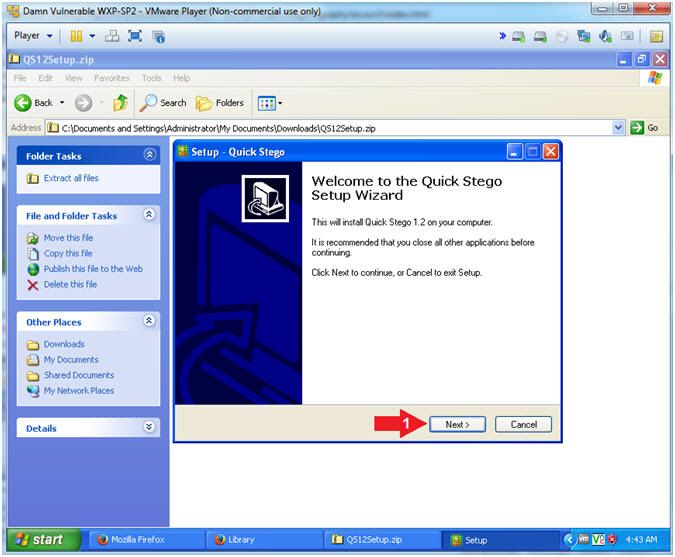
- Setup - Quick Stego
- Instructions:
- Click on the Next button
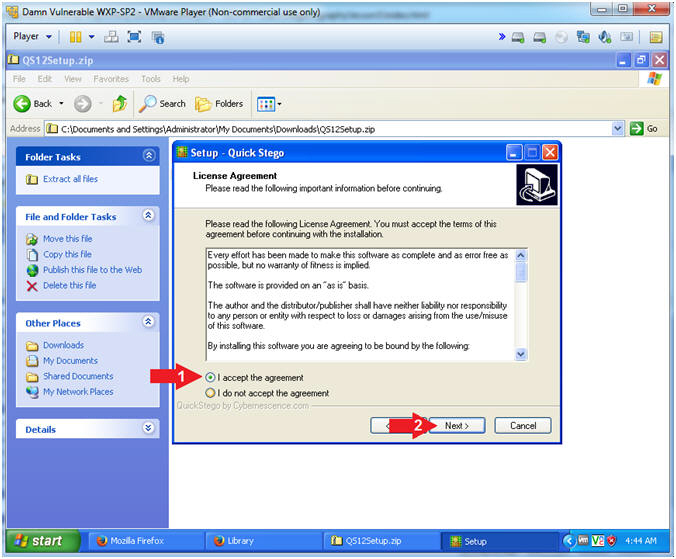
- License Agreement
- Instructions:
- Select I accept the agreement
radio button
- Click on the Next button
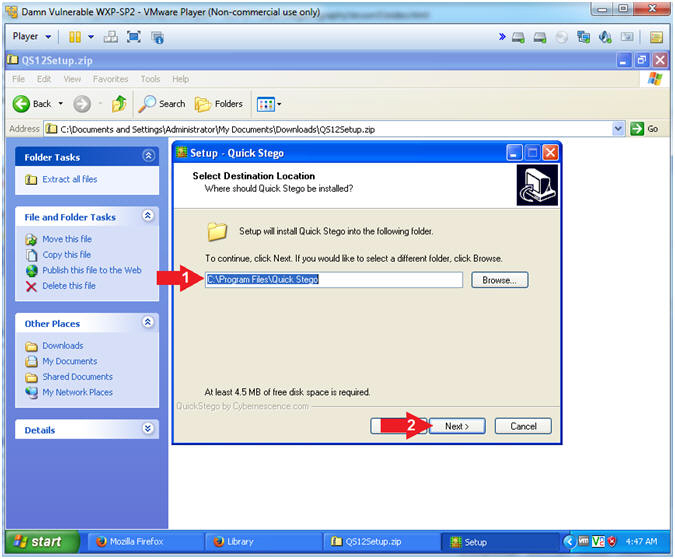
- Select a Destination
- Instructions:
- Accept the Default Destination Location
- Click on the Next button
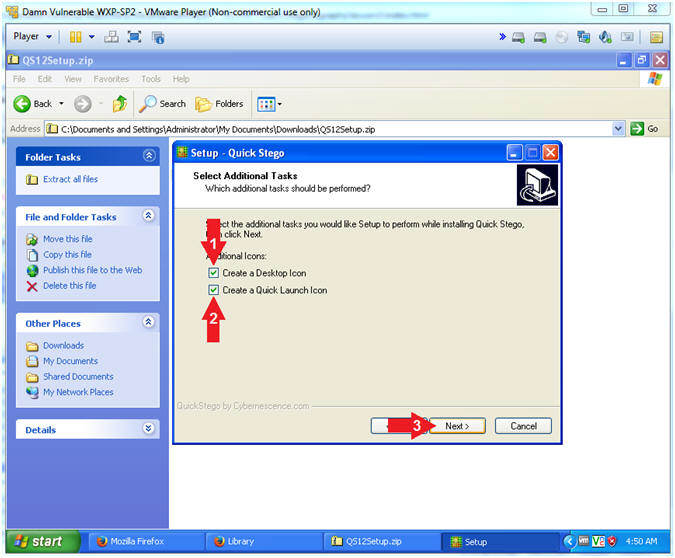
- Select Additional Tasks
- Instructions:
- Check the Create a Desktop Icon
checkbox
- Check the Create a Quick Launch Icon
checkbox
- Click on the Next Button
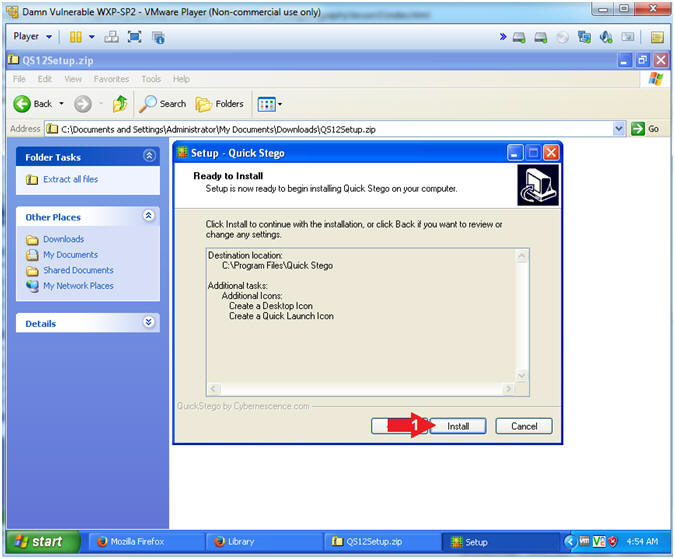
- Ready to Install
- Instructions:
- Click the Install Button
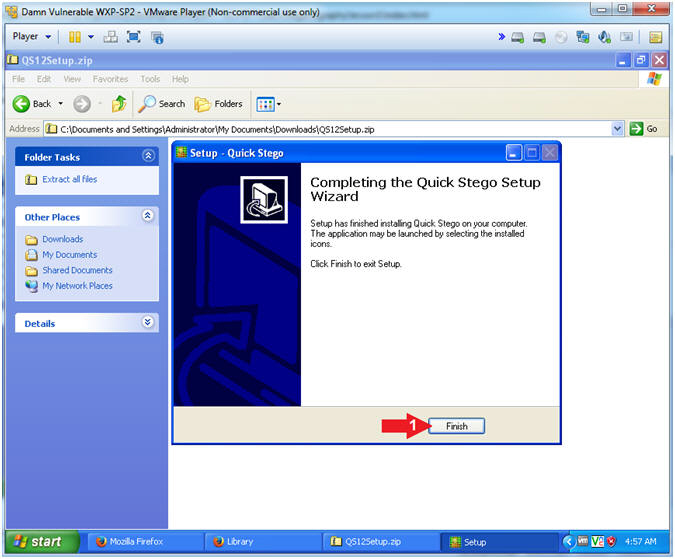
- Complete Installation
- Instructions:
- Click the Finish Button
|
Section 4: Create
STEGO Directory |
- Open the Command Prompt
- Instructions:
- Click the Start Button
- All Programs --> Accessories -->
Command Prompt
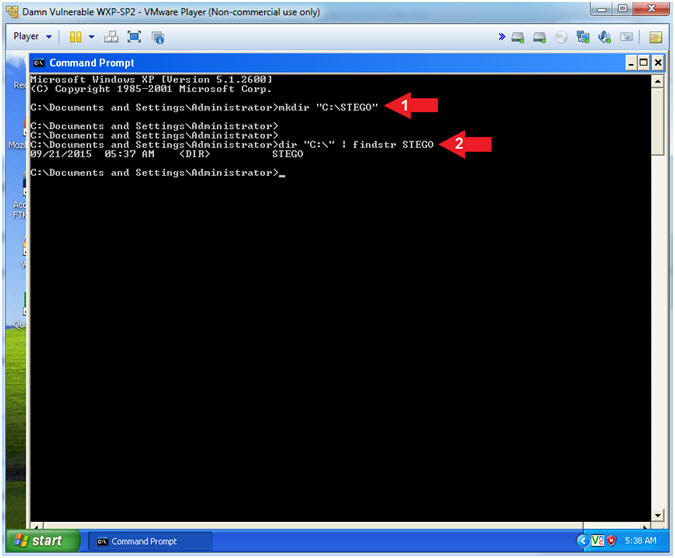
- Create STEGO Directory
- Instructions:
- mkdir "C:\STEGO"
- dir "C:\" | findstr STEGO
- Note(FYI):
- mkdir, make a directory. In this
case, create a STEGO directory directly under the C Drive.
- dir "C:\", list all the directories and
files directly under the C Drive. Then use findstr to list
only files and/or directories that contain the string STEGO.
|
Section 5: Download
MD5SUMS-1.2 |
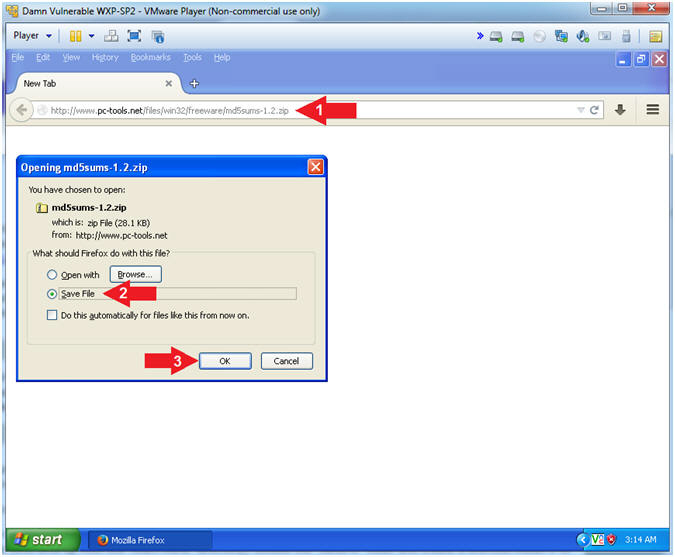
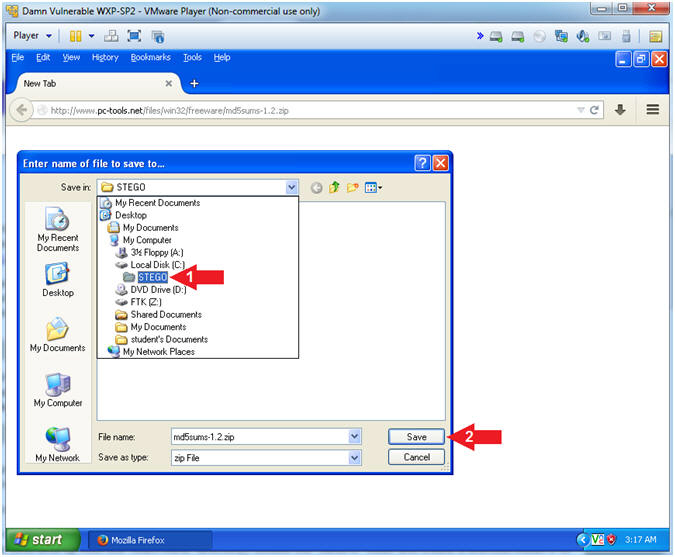
- Download md5sums-1.2
- Instructions:
- Navigate to the following URL.
- http://www.pc-tools.net/files/win32/freeware/md5sums-1.2.zip
- Click the Save File Radio Button
- Click the OK Button
- Choose Destination Location
- Instructions:
- Navigate to the the following
destination directory
- Click the Save Button
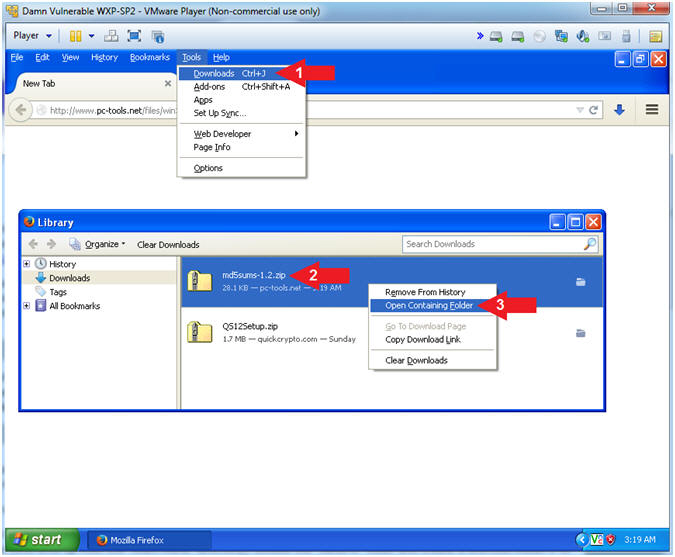
- Open Containing Folder
- Instructions:
- Tools --> Download
- Right Click on md5sums-1.2.zip
- Click on Open Containing Folder
- Extract md5sums-1.2.zip
- Instructions:
- Right Click on md5sums-1.2.zip
- Select 7-Zip --> Extract Here
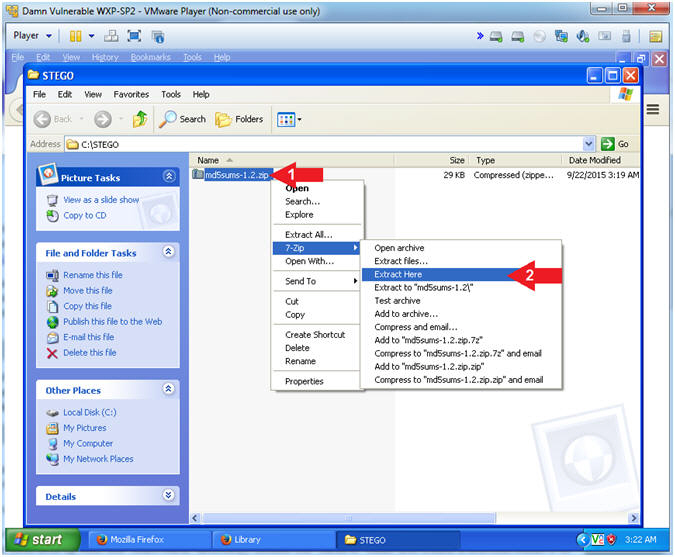
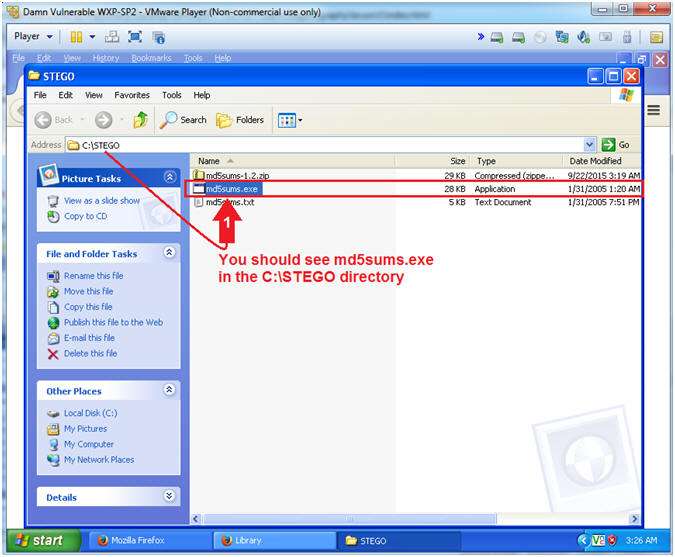
- View Results
- Instructions:
- You should see md5sums.exe in the
C:\STEGO directory
- Note(FYI):
- We will use md5sums.exe later on in the
lesson to compare two images that are exactly alike, except one of
the images will have a hidden message.
|
Section 6: Download
Picture |
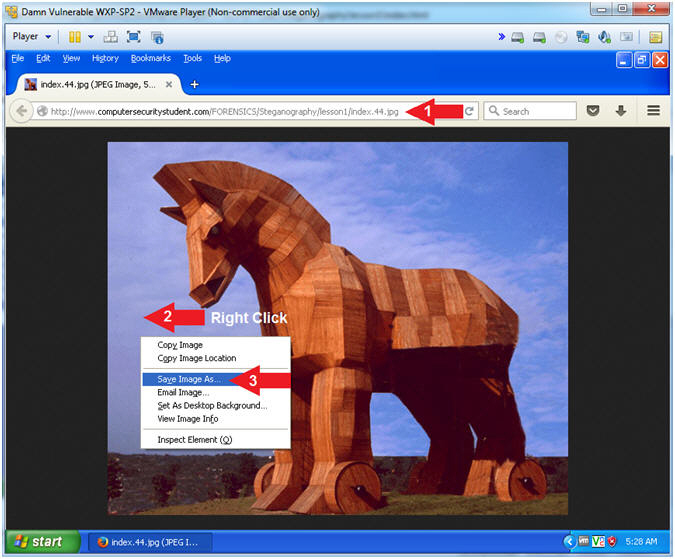
- Download Trojan Horse Picture
- Instructions:
- Place the following address in your
Firefox browser
-
http://www.computersecuritystudent.com/FORENSICS/Steganography/lesson1/index.44.jpg
- Right Click on the picture
- Select Save
Image As...
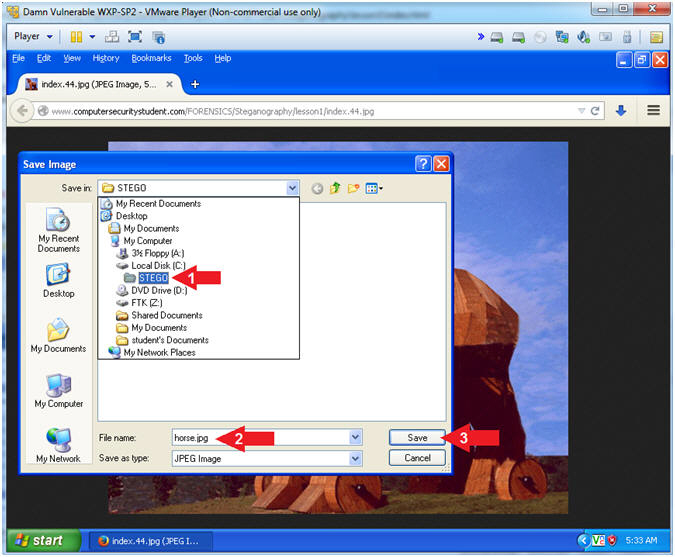
- Save As horse.jpg
- Instructions:
- Navigate to the following directory
- Name the file "horse.jpg"
- Make sure you add the
.jpg
extension.
- Click the Save button.
|
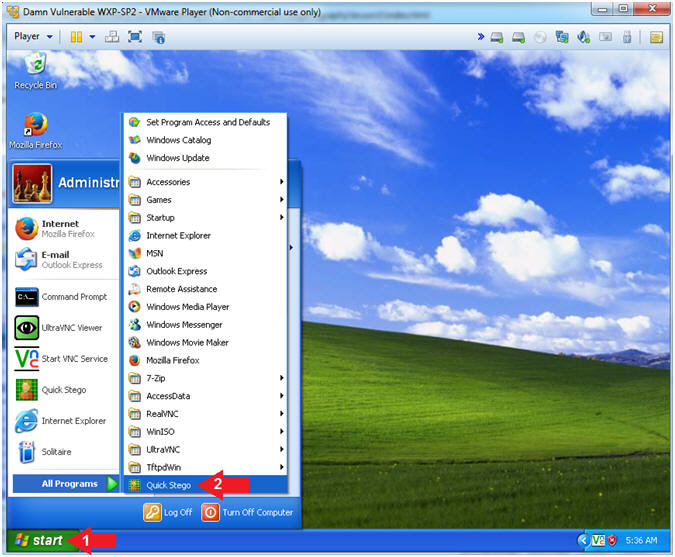
Section 7: Run Quick Stego |
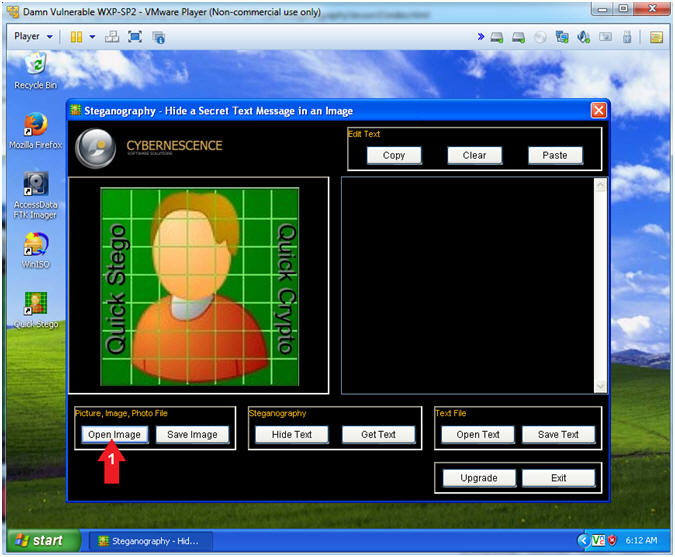
- Run Quick Stego
- Instructions:
- Click the Start Button
- All Programs --> Quick Stego
- Open Image
- Instructions:
- Click on the Open Image button
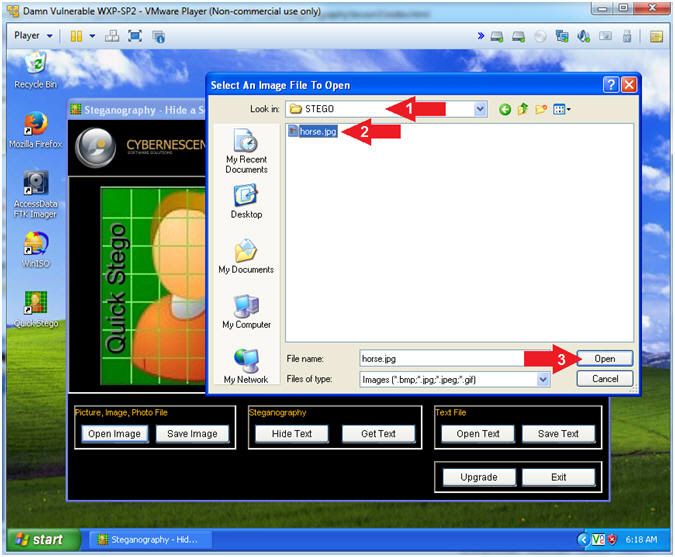
- Open Horse Image
- Instructions:
- Navigate to the
C:\STEGO Directory
- Select the horse.jpg image
- Click the Open button
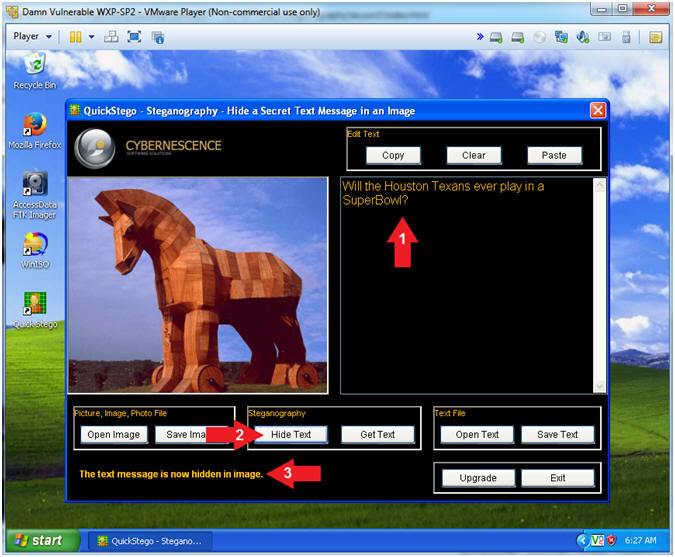
- Hide Text
- Instructions:
- Supply your Hidden Message. My
hidden message is below. (See Picture)
-
Will the Houston Texans
ever play in a SuperBowl?
- Click the Hide Text Button
- Notice the message stating "The
text message is now hidden in the image".
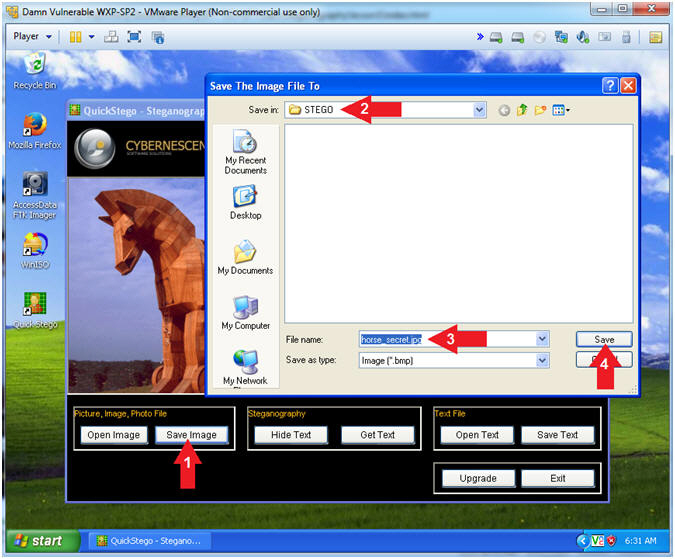
- Save Image
- Instructions:
- Click the Save Image button
- Navigate to the
C:\STEGO
directory
- File name: horse_secret.jpg
- Make sure you include the
.jpg
extension.
- Click the Save button
- Open the Command Prompt
- Instructions:
- Click the Start Button
- All Programs --> Accessories -->
Command Prompt
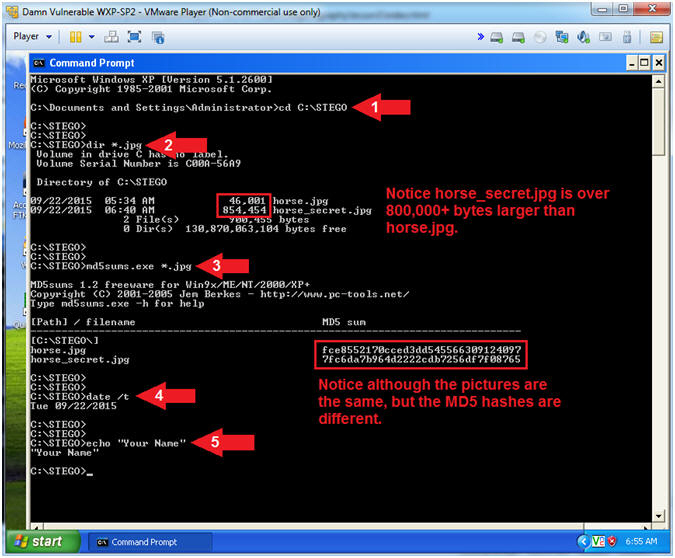
- Proof of Lab
- Instructions:
- cd C:\STEGO
- dir *.jpg
- Notice that horse_secret.jpg is
800,000+ bytes larger than horse.jpg.
- md5sums.exe *.jpg
- Notice that the picture look the
exact same, their MD5 hashes are different.
- date /t
- echo "Your Name"
- Replace the string "Your Name" with
your actual name.
- e.g., echo "John Gray"
-
Proof of Lab
Instructions
- Press the <Ctrl> and <Alt> key at the
same time.
- Press the <PrtScn> key.
- Paste into a word document
- Upload to Moodle
|
 
|