(Autopsy:
Lesson 1)
{ Analyzing Deleted JPEGs }
|
Section 0. Background
Information |
- What is Autopsy?
- The Autopsy Forensic Browser is a graphical
interface to the command line digital investigation tools in The Sleuth Kit.
Together, they allow you to investigate the file system and volumes of a
computer.
- For more detailed information go to
http://www.sleuthkit.org/autopsy/
- Pre-Requisite Lab
-
BackTrack: Lesson 1: Installing BackTrack 5 R1
- Note:
This is not absolutely necessary, but if you are a computer security
student or a professional, you should have a BackTrack VM.
- What is the dftt website?
- Location:
http://dftt.sourceforge.net/
- dftt stands for Digital Forensics Tool
Testing Images.
- This website contains file systems and disk
images for testing digital (computer) forensic analysis and acquisition
tools.
- JPEG Search Test #1
- This test image is an NTFS file system with 10
JPEG pictures in it. The pictures include files with incorrect extensions,
pictures embedded in zip and Word files, and alternate data streams. The
goal of this test image is to test the capabilities of automated tools that
search for JPEG images.
-
Lab
Notes
- In this lab we will do the following:
- Download a test image
- Conduct an initial checksum on the test
image
- Configure Autopsy
- Start a New Case
- Recovered Deleted Files
- Conduct an post checksum on the test
image
- Legal Disclaimer
- As a condition of your use of this Web
site, you warrant to computersecuritystudent.com that you will not use
this Web site for any purpose that is unlawful or
that is prohibited by these terms, conditions, and notices.
- In accordance with UCC § 2-316, this
product is provided with "no warranties, either express or implied." The
information contained is provided "as-is", with "no guarantee of
merchantability."
- In addition, this is a teaching website
that does not condone malicious behavior of
any kind.
- You are on notice, that continuing
and/or using this lab outside your "own" test environment
is considered
malicious and is against the law.
- © 2013 No content replication of any
kind is allowed without express written permission.
|
Section 1: Configure
BackTrack Virtual Machine Settings |
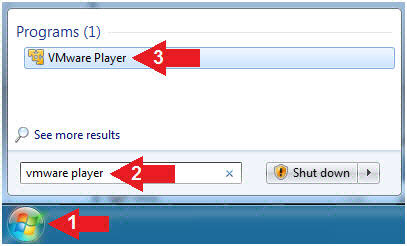
- Start VMware Player
- Instructions
- For Windows 7
- Click Start Button
- Search for "vmware player"
- Click VMware Player
- For Windows XP
- Starts --> Programs --> VMware
Player
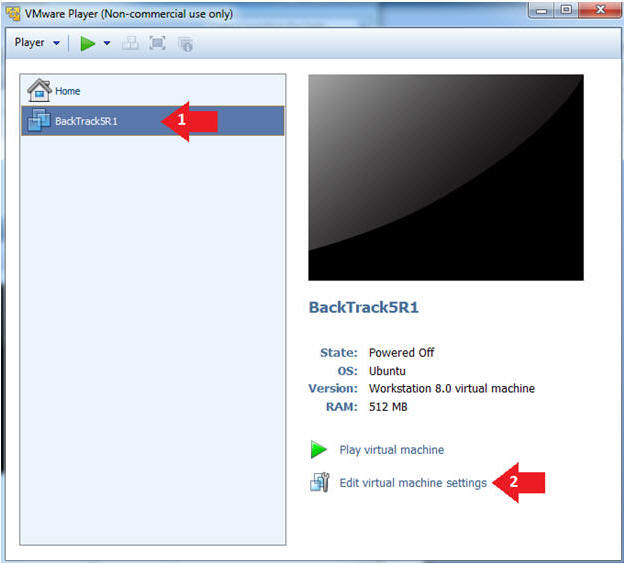
- Edit the BackTrack5R1 VM
- Instructions:
- Select BackTrack5R1 VM
- Click Edit virtual machine settings
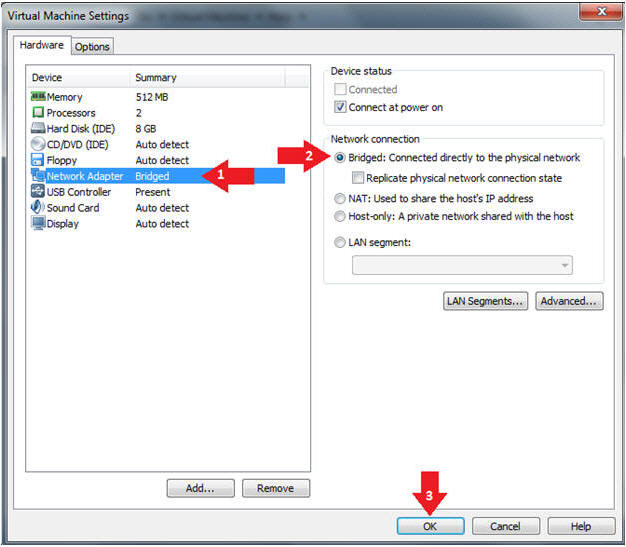
- Edit Virtual Machine Settings
- Instructions:
- Click on Network Adapter
- Click on the Bridged Radio button
- Click on the OK Button
|
Section 2: Play and Login to BackTrack |
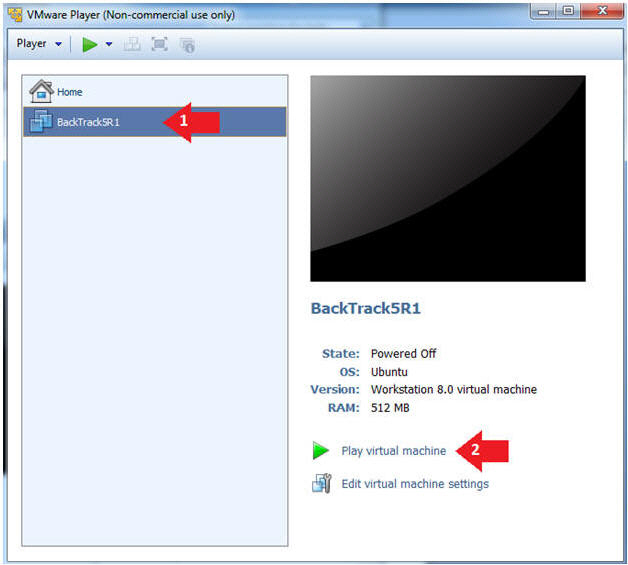
- Play the BackTrack5R1 VM
- Instructions:
- Click on the BackTrack5R1 VM
- Click on Play virtual machine
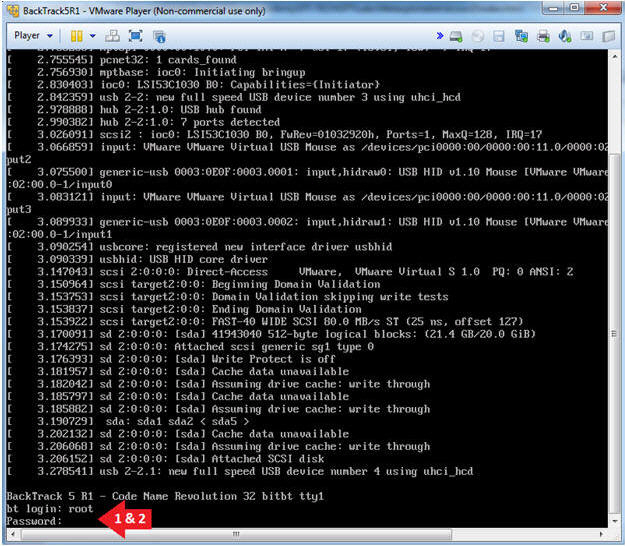
- Login to BackTrack
- Instructions:
- Login: root
- Password: toor or <whatever you changed
it to>.
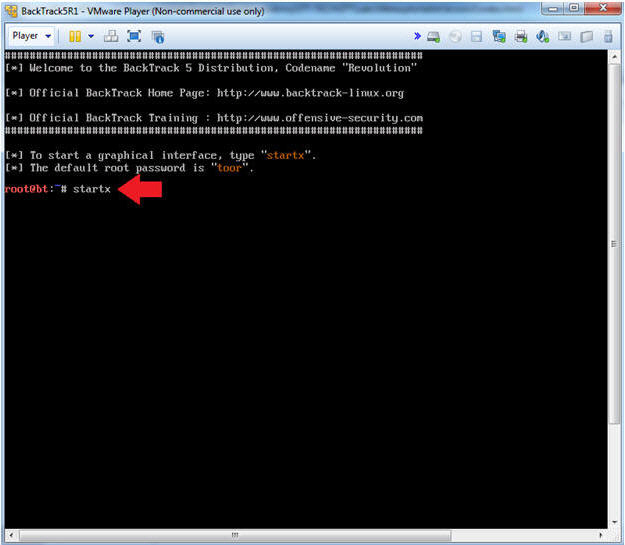
- Bring up the GNOME
- Instructions
- Type startx
|
Section 3: Preparing
your image directory |
- Start up a terminal window (On
BackTrack)
- Instructions:
- Click on the Terminal Window
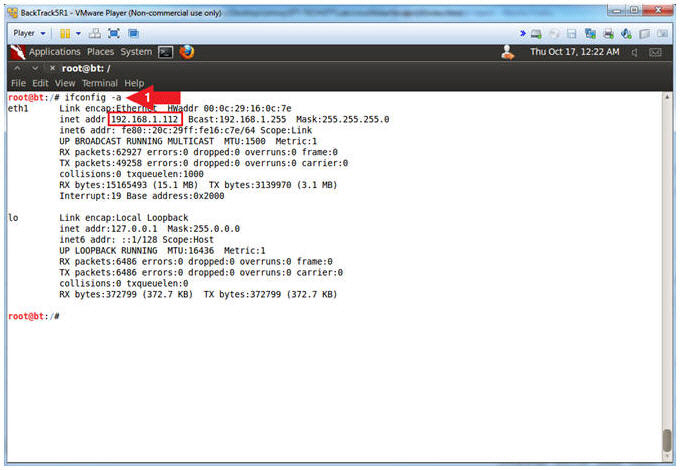
- Obtain the IP Address
- Instructions:
- ifconfig -a
- Note(FYI):
- My IP address 192.168.1.112.
- In your case, it will probably be
different.
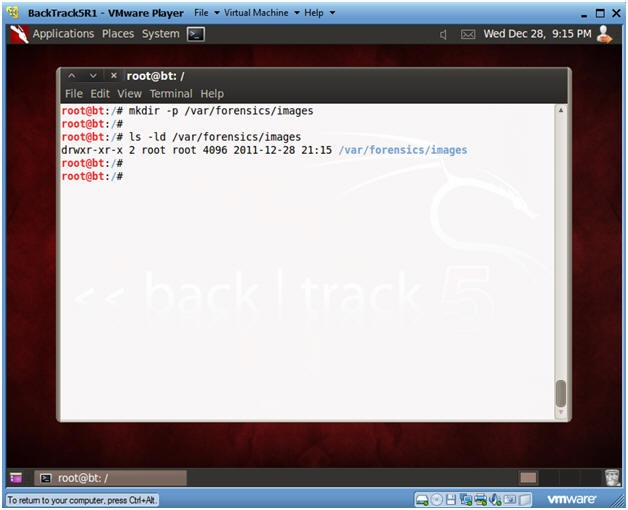
- Directory Preparation
- Instructions
- mkdir -p /var/forensics/images
- This command creates your
directory.
- ls -ld /var/forensics/images
- This command verifies the directory
was created.
|
Section 4:
Obtaining the JPEG Image |
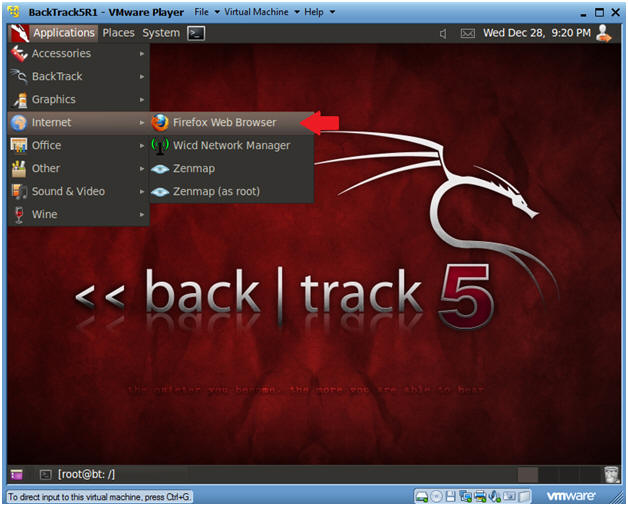
- Bring up your Firefox Web Browser
- Instructions
- Applications --> Internet --> Firefox
Web Browser
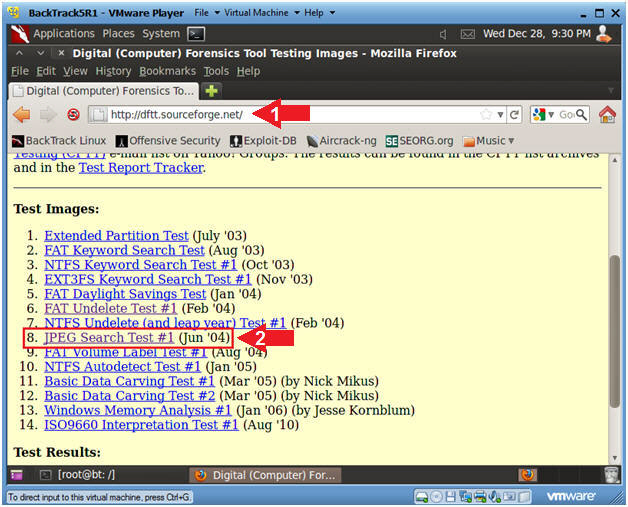
-
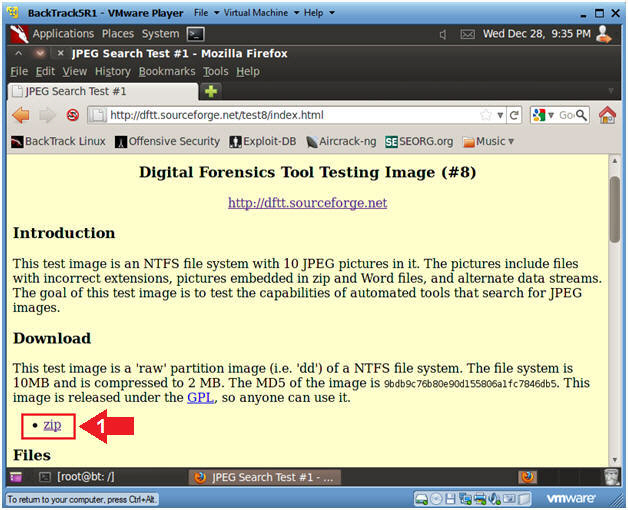
- Go to the "Digital Forensics Tool Testing
Images" Website.
- Download the Image File
- Instructions
- Under Download, click on the "zip"
link.
- If the dftt website or zip link is
down, click on the alternative link provided -->
here.
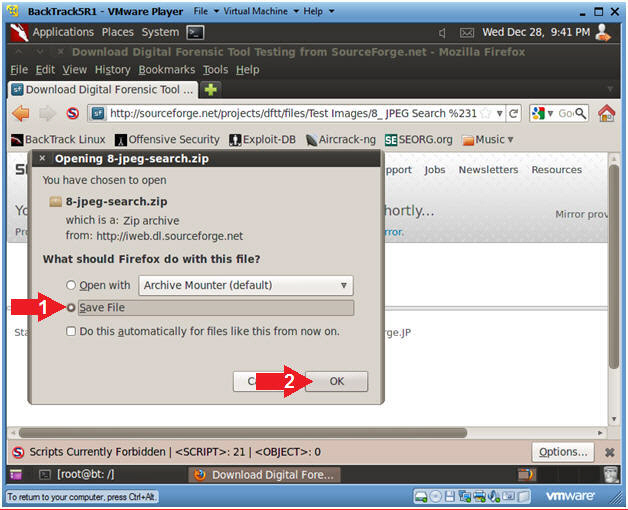
- Saving the Image (Part 1)
- Instructions
- Click on the Save File Radio Button
- Click on the OK button
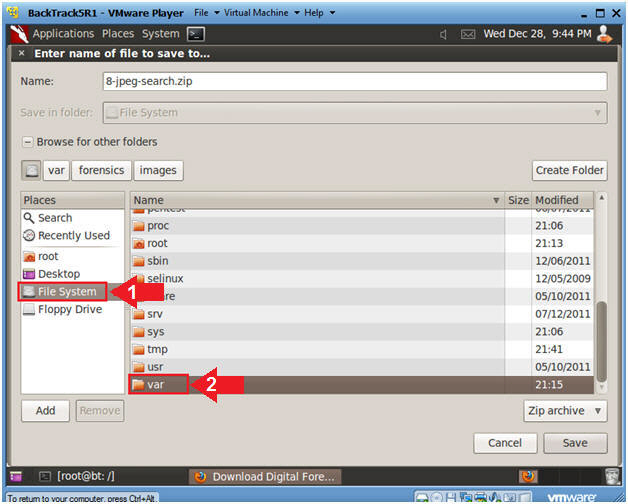
- Saving the Image (Part 2)
- Instructions
- Single Click on File System
- Double Click on var
- Saving the Image (Part 3)
- Instructions
- Double Click on forensics
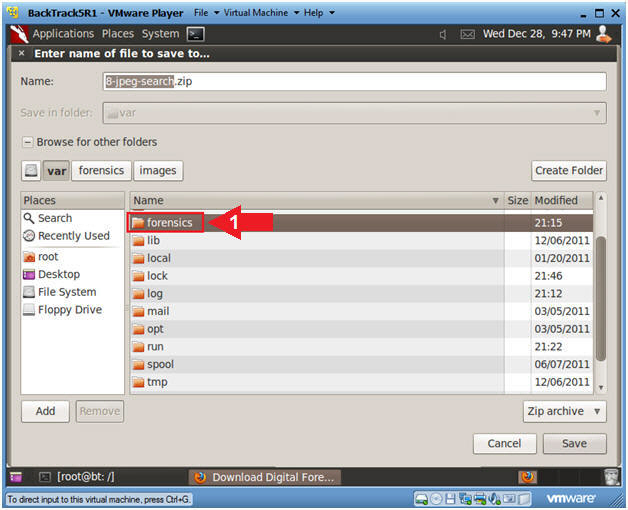
- Saving the Image (Part 4)
- Instructions
- Double Click on images
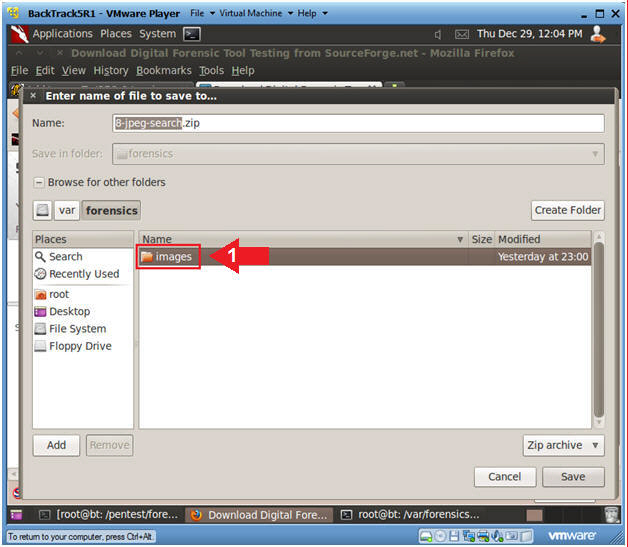
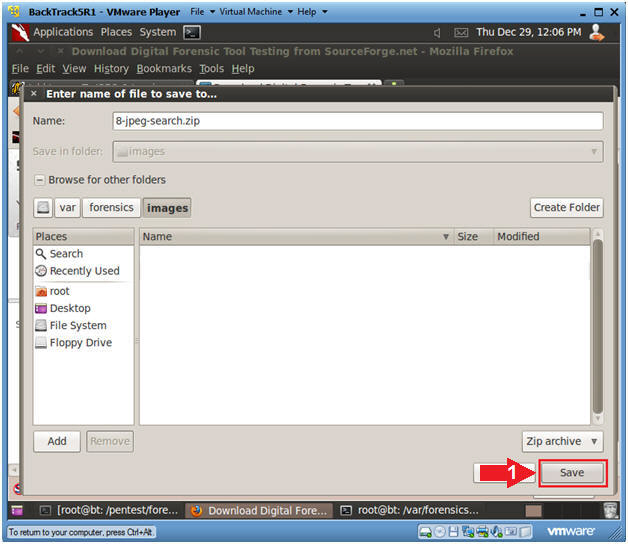
- Saving the Image (Part 5)
- Instructions
- Click on the Save Button
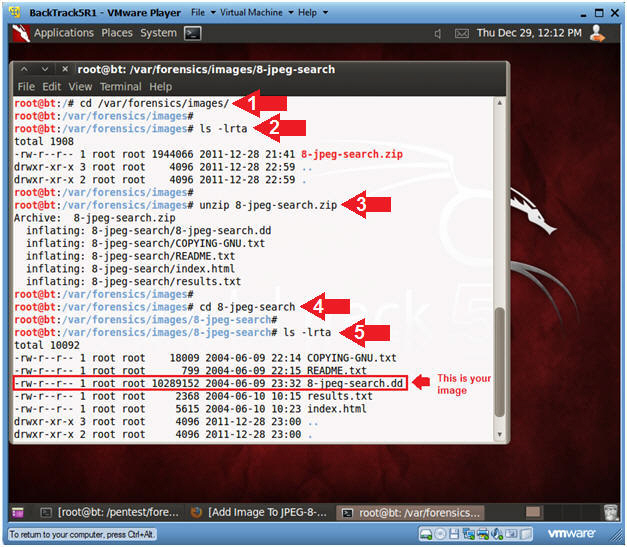
- Unzipping the Image
- Instructions
- cd /var/forensics/images
- ls -lrta
- unzip 8-jpeg-search.zip
- cd 8-jpeg-search
- ls -lrta
- Your image file ends in a ".dd"
|
Section 5: Image
Integrity Check |
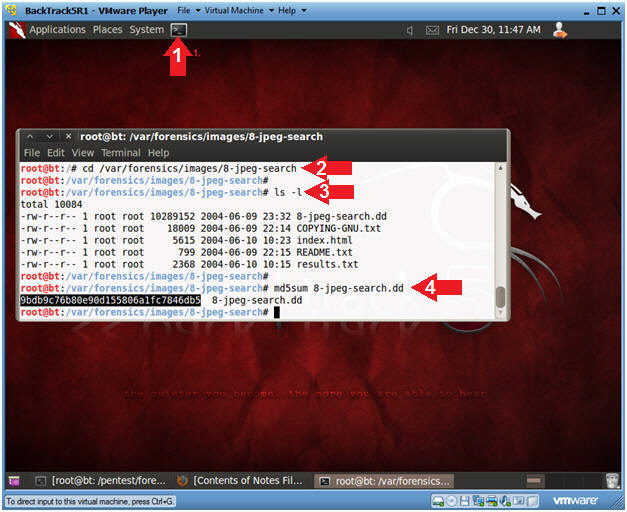
- Conduct an initial image integrity check
- Instructions
- Click on the terminal window
- cd /var/forensics/images/8-jpeg-search
- ls -l
- md5sum 8-jpeg-search.dd
- Note(FYI):
- Before using any tool to do an analysis
on image, we need to have a way of showing the initial state of an
unaltered image.
- md5sum does a mathematical calculation
of the jpeg image.
- If Autopsy alters the image, this
md5sum will change with our post Image Integrity Check.
|
Section 6: Start Up
Autopsy |
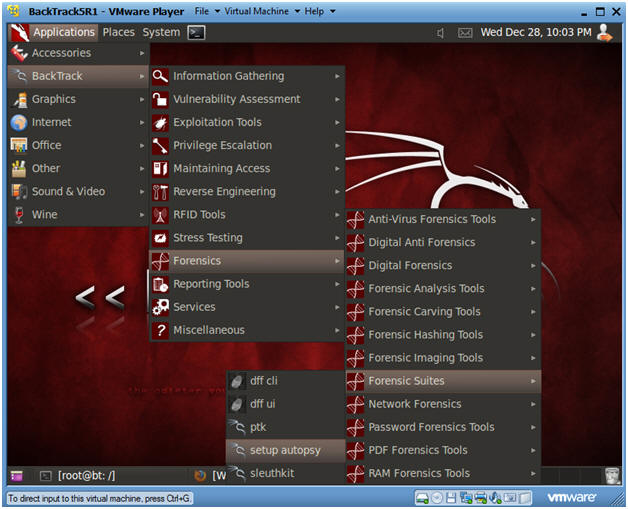
- Start Up Autopsy
- Instructions
- Applications --> BackTrack -->
Forensics --> Forensic Suites --> setup Autopsy
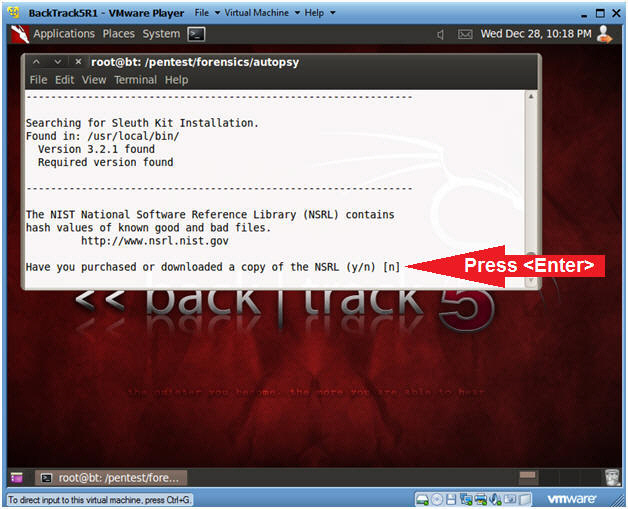
- License Question
- Have you purchased or downloaded a copy of
the NSRL (y/n) [n]
- Instructions
- Press Enter
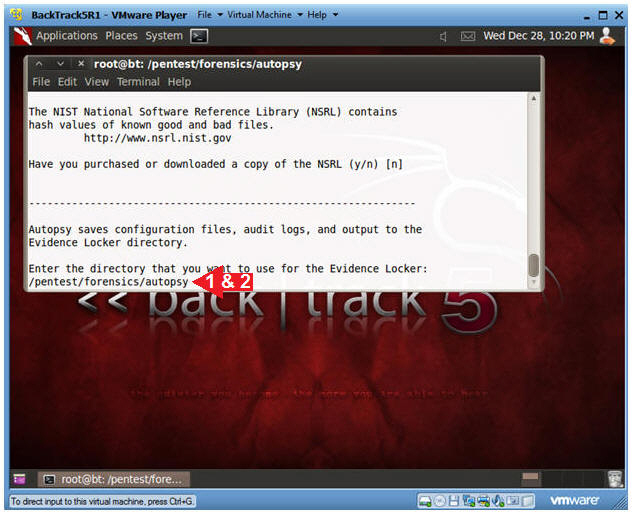
- Evidence Locker Question
- Instructions
- Enter the directory that you want to use
for the Evidence Locker:
-
/pentest/forensics/autopsy
- Press Enter
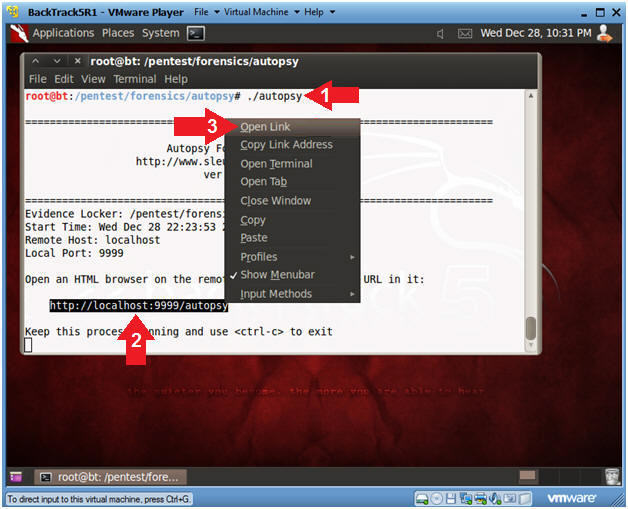
- Start Up Autopsy (Part 1)
- Instructions
- ./autopsy
- Highlight and Right click on the web address
-
http://localhost:9999/autopsy
- Select Open Link
|
Section 7: Creating
a New Case in Autopsy |
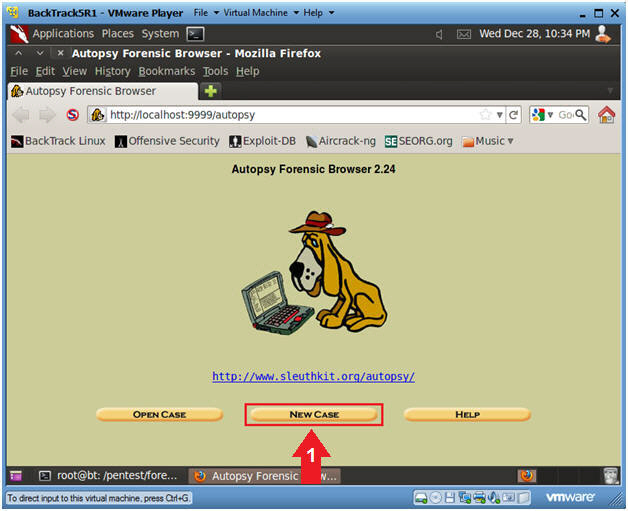
- Create a New Case (Part 1)
- Instructions
- Click on the New Case Button.
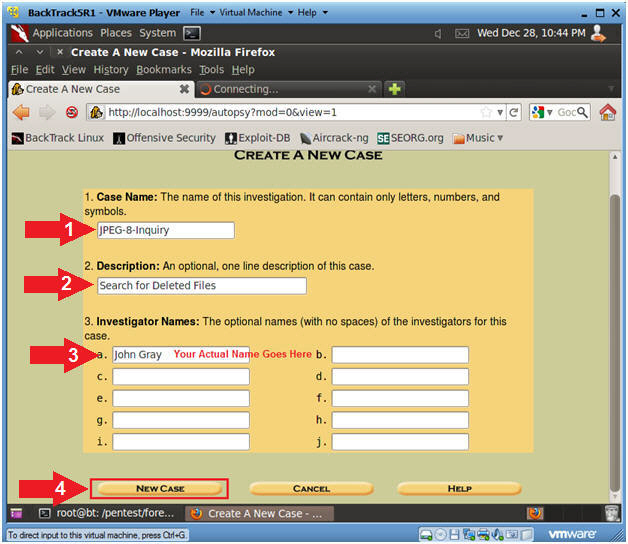
- Create a New Case (Part 2)
- Instructions
- Case Name: JPEG-8-Inquiry
- Description: Search for Deleted Files
- Investigator Names:
Your Actual Name
Goes Here
- Click on the New Case Button
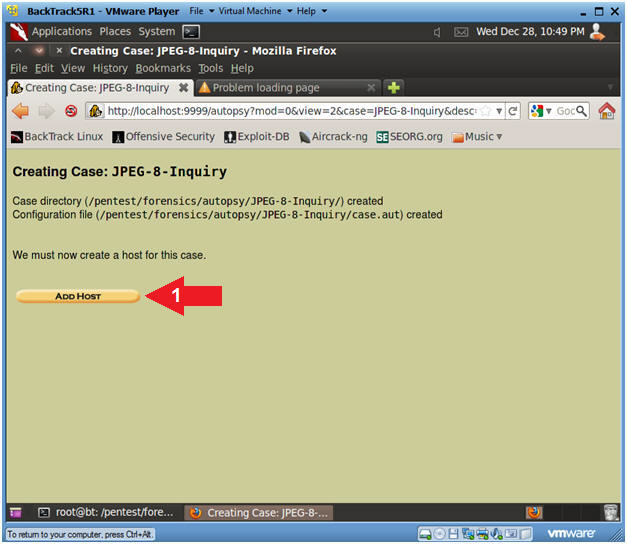
- Add Host (Part 1)
- Instructions
- Click on the Add Host Button
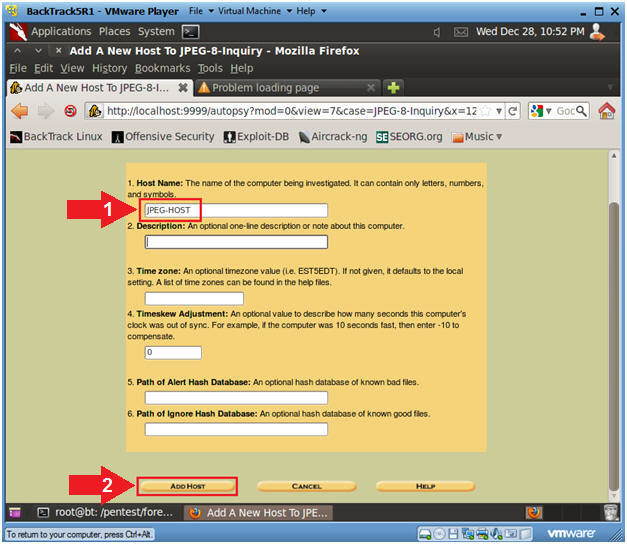
- Add Host (Part 2)
- Instructions
- Host Name: JPEG-HOST
- Click on the Add Host Button.
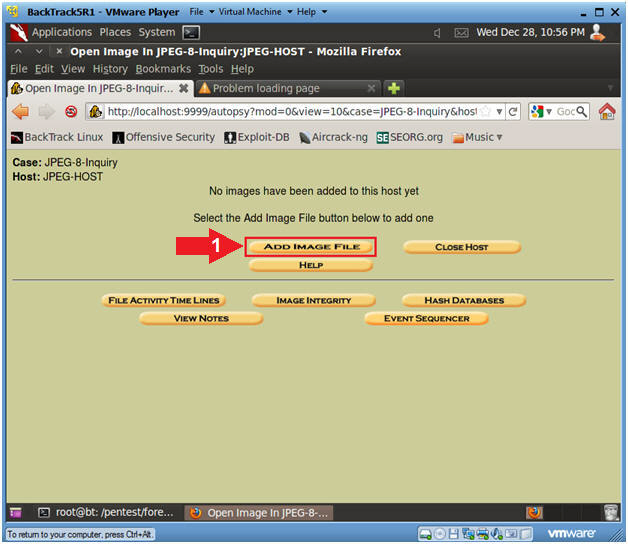
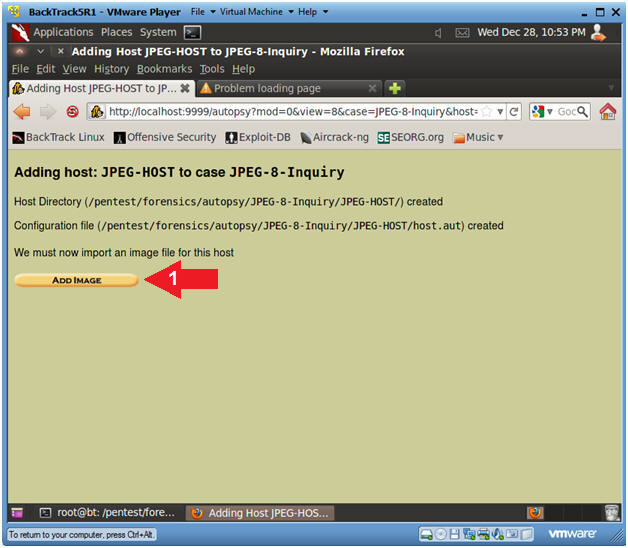
- Add Image (Part 1)
- Instructions
- Click on the Add Image Button
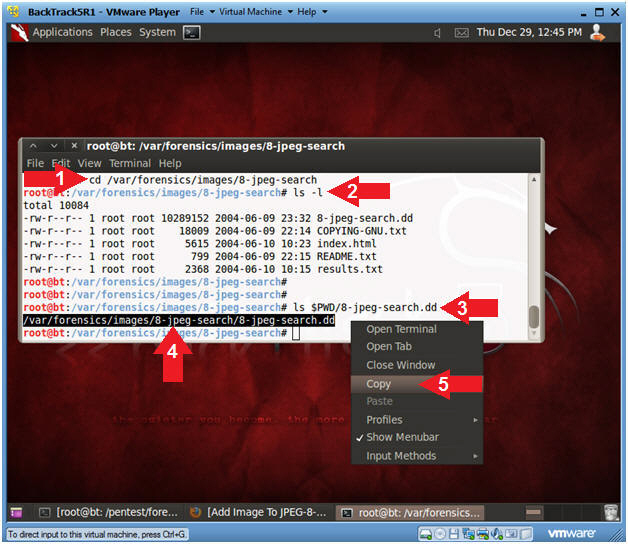
- Add Image (Part 2)
- Instructions
- Bring Up a Terminal Window
- cd /var/forensics/images/8-jpeg-search
- ls -l
- ls $PWD/8-jpeg-search.dd
- Highlight and Right click on following
string:
- /var/forensics/images/8-jpeg-search/8-jpeg-search.dd
- Select Copy
- Add Image (Part 3)
- Instructions
- Click on the Add Image File
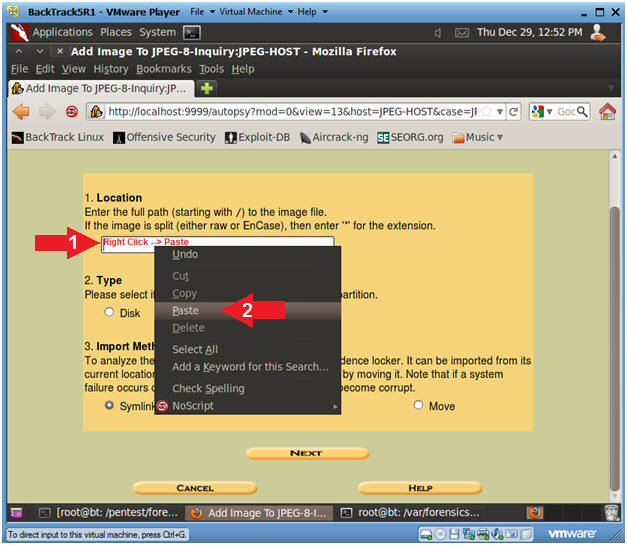
- Add Image (Part 4)
- Instructions
- Right Click in the Location Text Box.
- Select Paste
- Note(FYI)
- The following string should now appear in
location text box.
- /var/forensics/images/8-jpeg-search/8-jpeg-search.dd
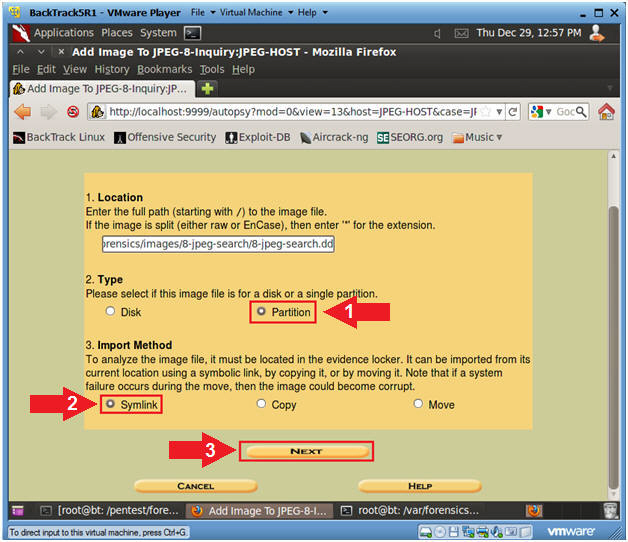
- Add Image (Part 5)
- Instructions
- Type: Select the Partition Radio
Button.
- Import Method: Select the Symlink
Radio Button.
- Select the Next Button
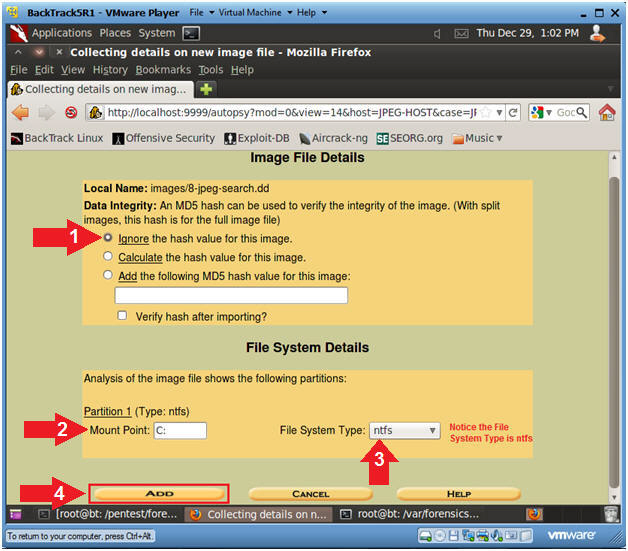
- Add Image (Part 6)
- Instructions
- Data Integrity: Select the
"Ignore the hash value for this image" Radio Button.
- Mount Point:
C:
- File System Type:
ntfs
- Click on the Add Button
- Note(FYI):
- Notice that Autopsy identified the File
system type of the image as NTFS.
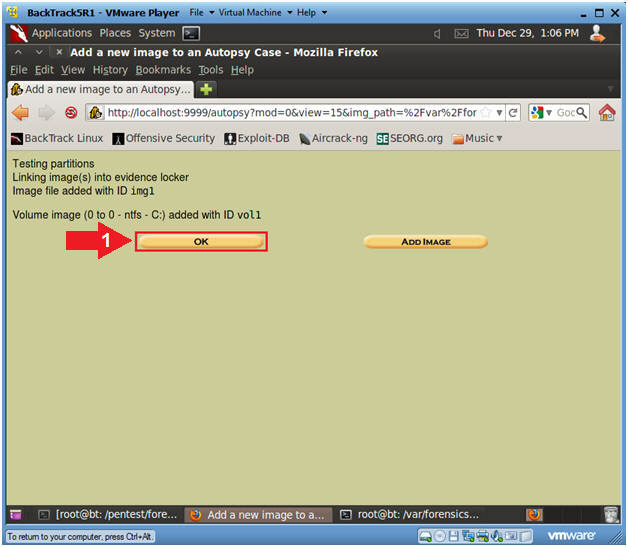
- Add Image (Part 7)
- Instructions
- Select the OK Button.
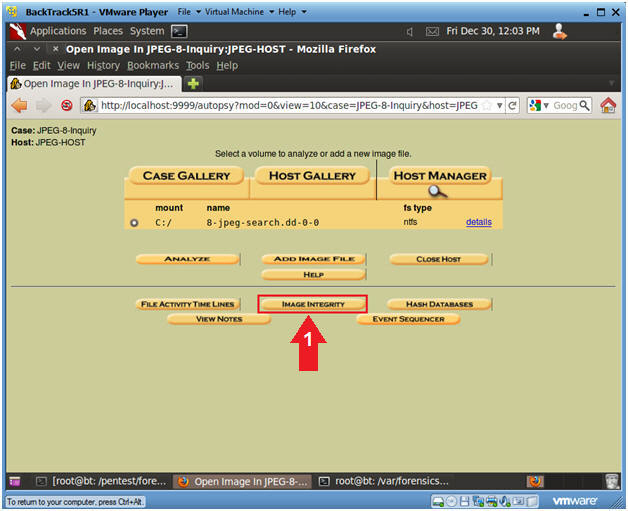
- Conduct an Image Integrity Check
- Instruction
- Click the Image Integrity Button
- Calculate the MD5 Check Sum.
- Instruction
- Click the Calculate Button
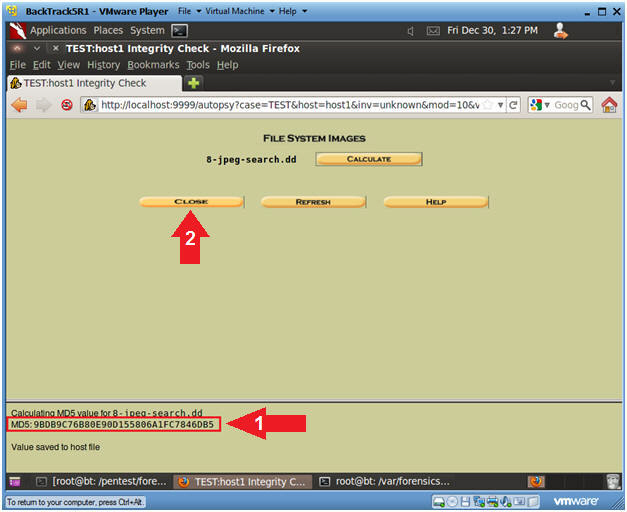
- Viewing the MD5 Check Sum.
- Note(FYI):
- Notice the MD5 Check sum of the
8-jpeg-search.dd image is displayed below.
- Instruction
- Verify the below check sum is the same
as Section 5, Step 1.
- Click the Close Button
|
Section 8: Analyze
Image with Autopsy |
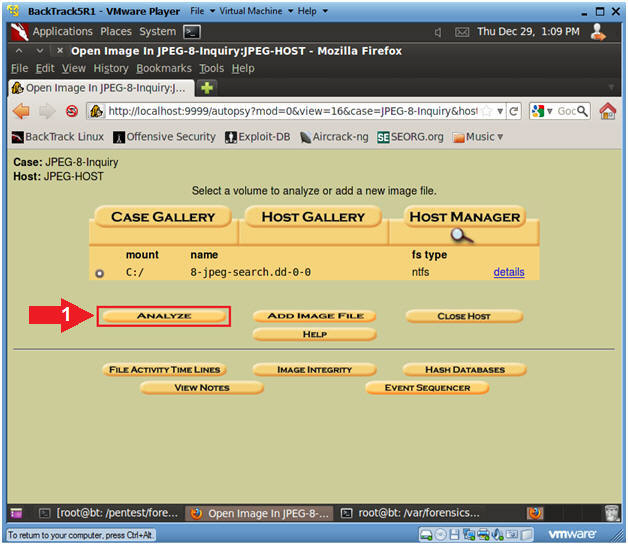
- Analyze JPEG Image with Autopsy
- Instructions
- Select the Analyze Button
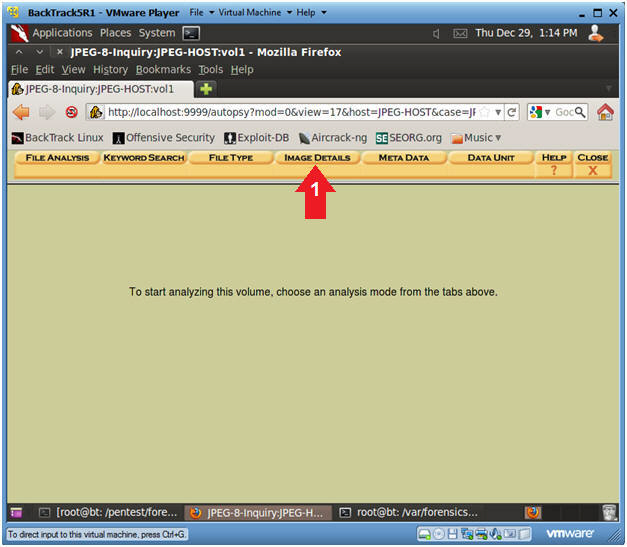
- Viewing Image Details with Autopsy
- Instructions
- Select the Image Details Button
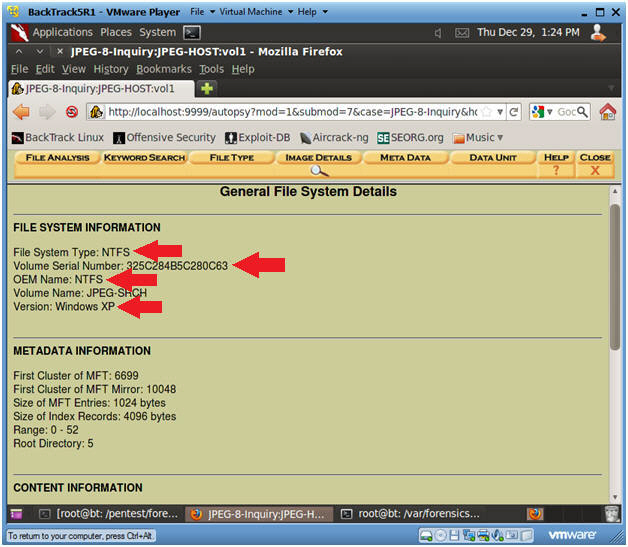
- Viewing General File System Details with
Autopsy
- Note(FYI):
- Your Image File System Type is NTFS
- If you made a backup of the original
image, your Volume Serial Number should remain the same.
- This
is important in a court of law, to demonstrate that the volume
serial number of the image you analyzed is the same as the original
copy.
- The Operating System Version of the
Image is Windows XP.
- Viewing File Analysis Details with Autopsy
- Instructions
- Click the File Analysis Button
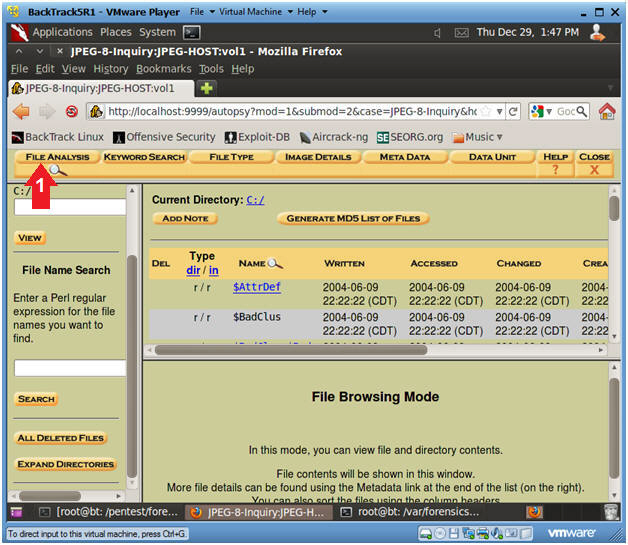
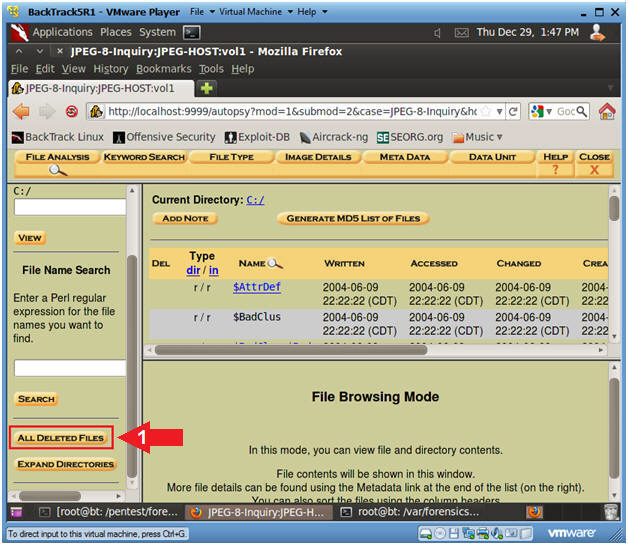
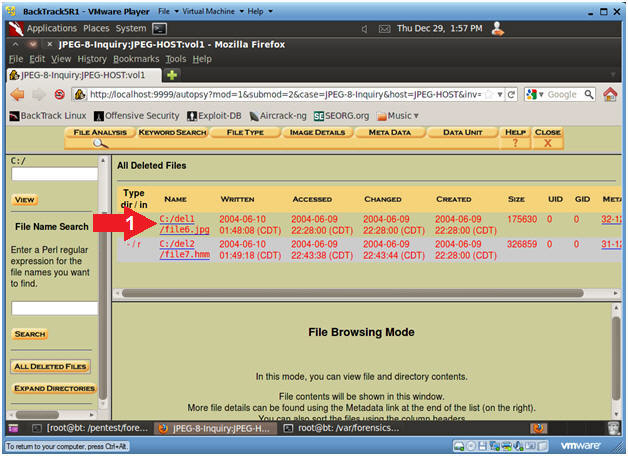
- Viewing deleted files with Autopsy (Part 1)
- Instructions
- Click the All Deleted Files Button in the
bottom of the left frame.
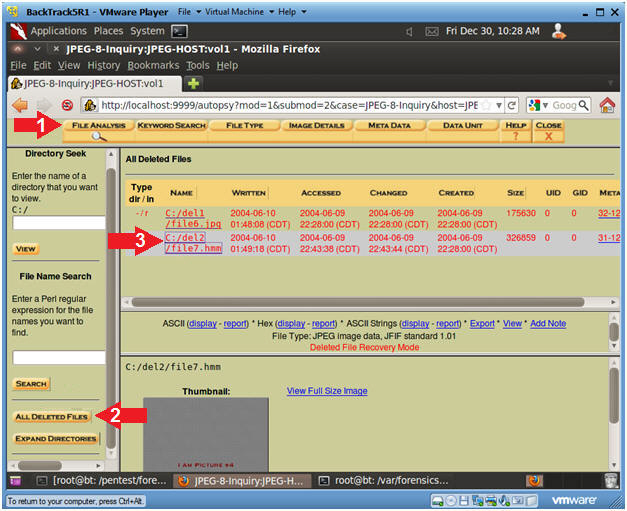
- Viewing deleted files with Autopsy (Part 2)
- Note(FYI)
- Notice Autopsy found two files in our
image that has been deleted.
- The file named file6.jpg is obviously a
JPEG, but what is file7.hmm.
- Instructions
- Click on the file named file6.jpg
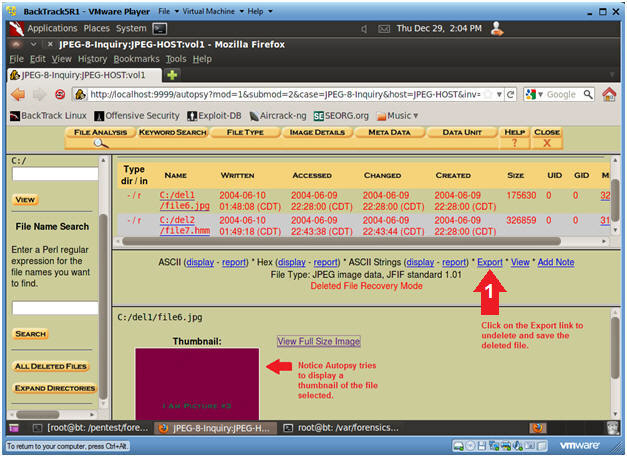
- Viewing deleted files with Autopsy (Part 3)
- Note(FYI):
- Once you click on file6.jpg, the bottom
frame displays a thumbnail of the JPEG.
- Instructions
- Click on the Export link to save a copy
of the deleted file named file6.jpg.
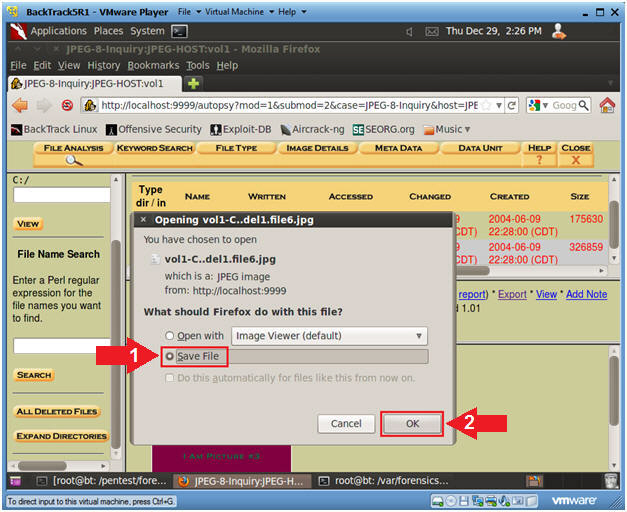
- Saving the deleted files with Autopsy (Part 1)
- Instructions
- Click the Save File radio button
- Click the OK button.
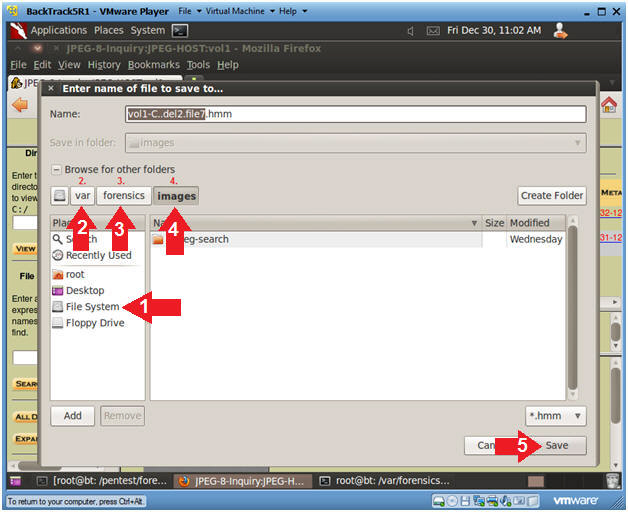
- Saving the deleted files with Autopsy (Part 2)
- Instructions
- Single Click on File System
- Double Click on the var
directory
- Double Click on the forensics
directory
- Double Click on the images
directory
- Click the Save Button
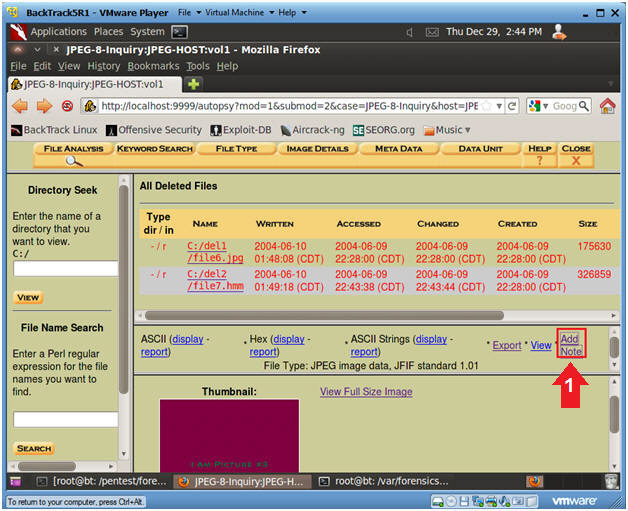
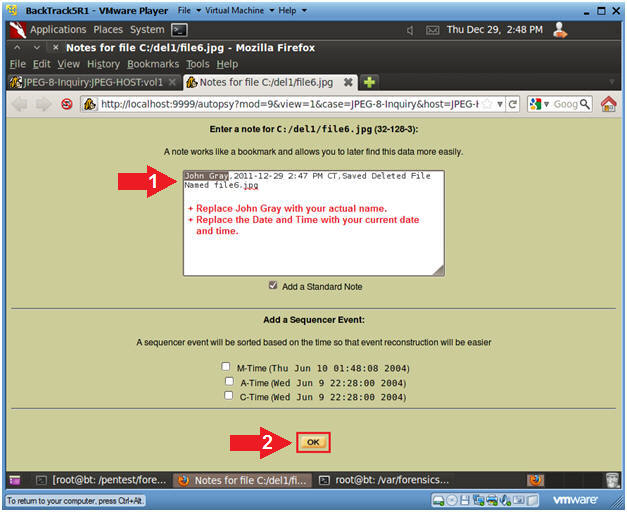
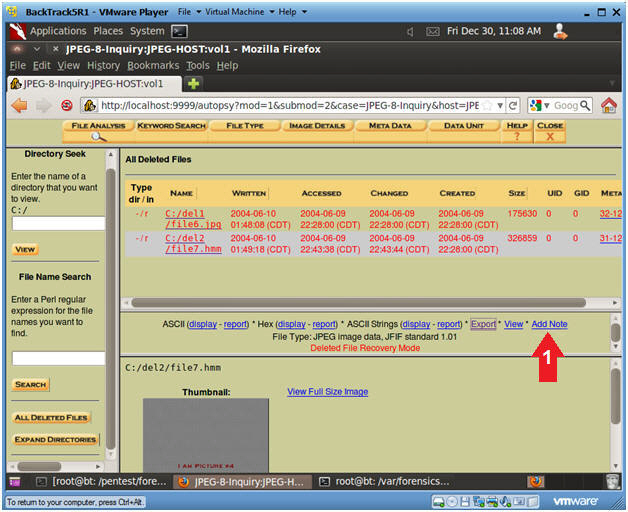
- Add Note to file6.jpg (Part 1)
- Instructions
- Click on Add Note
- Add Note to file6.jpg (Part 2)
- Instructions
- Add the following information inside
the Note Text Box
- Your Actual Name, Current Date and
Time, and a Comment
- Click the OK button.
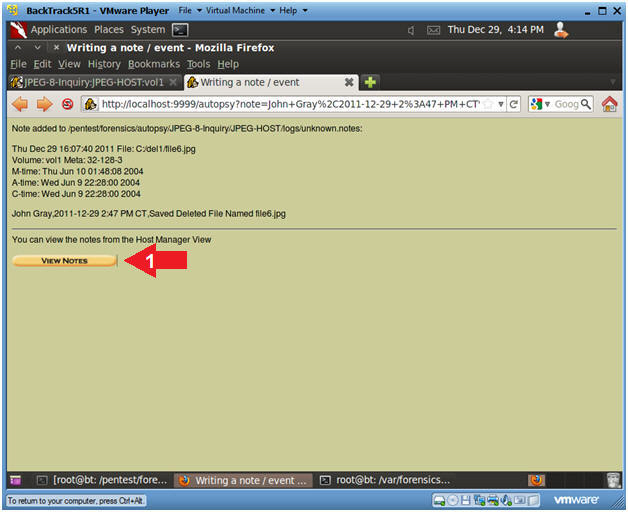
- Verify Notes
- Instructions
- Click the View Notes Button.
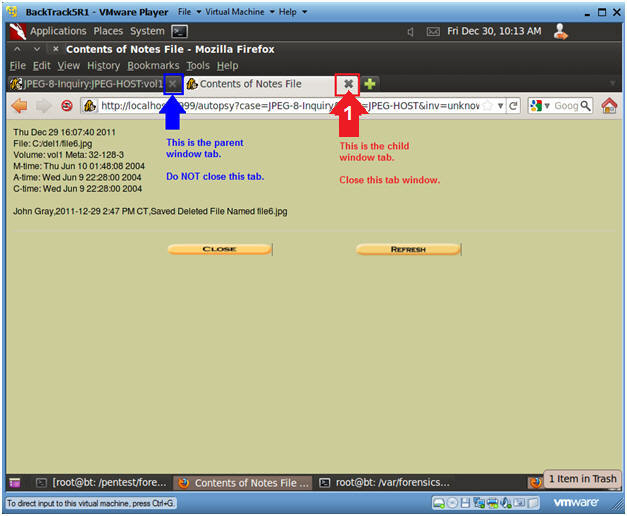
- Close the Child Window.
- Instructions
- Click the "X" on the child window. (See
Below)
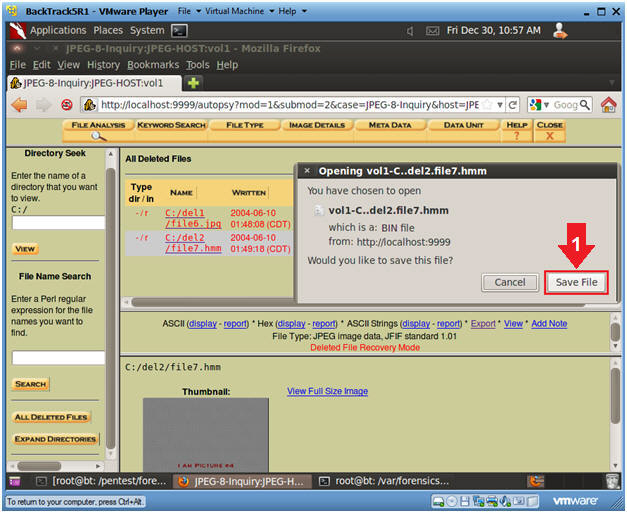
- View Deleted File named file7.hmm
- Instructions
- Click on the File Analysis Button
- Click on the All Deleted Files Button
- Click on file7.hmm
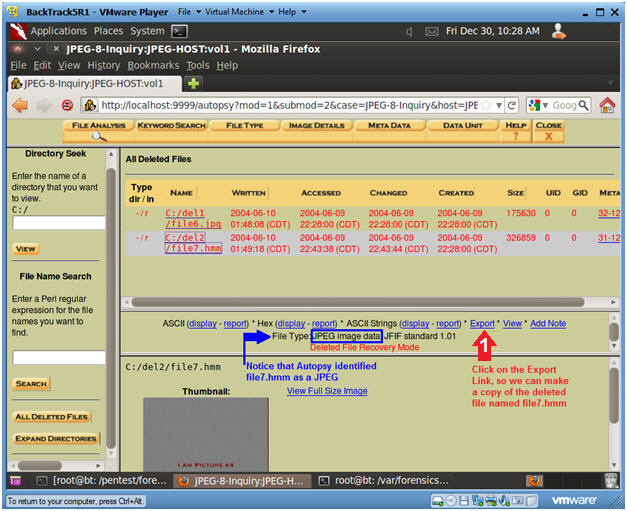
- Save Deleted File named file7.hmm (Part 1)
- Note(FYI):
- Notice the Blue Arrow.
- Autopsy
identified the file type of file file7.hmm as a JPEG, even though
the extension is ".hmm" instead of ".jpg".
- Also, you can view the thumbnail.
- Instructions
- Click on the Export Link to save the
filename file7.hmm.
- Save Deleted File named file7.hmm (Part 2)
- Instruction
- Click the Save File.
- Save Deleted File named file7.hmm (Part 3)
- Instruction
- Click on File System.
- Navigate to the var directory.
- Navigate to the forensics
directory.
- Navigate to the images
directory.
- Click on the Save Button
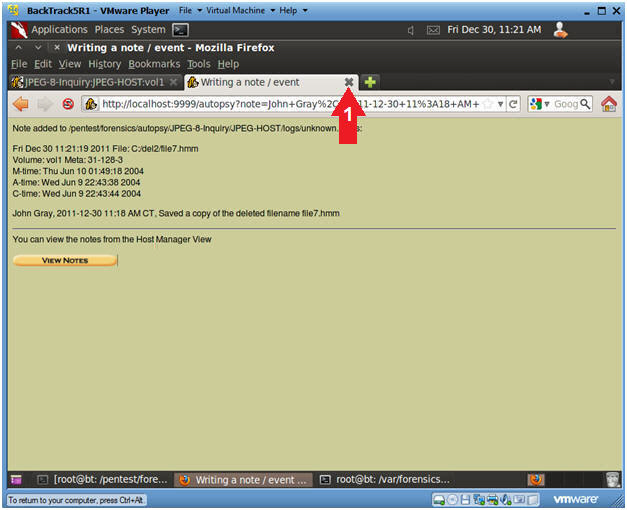
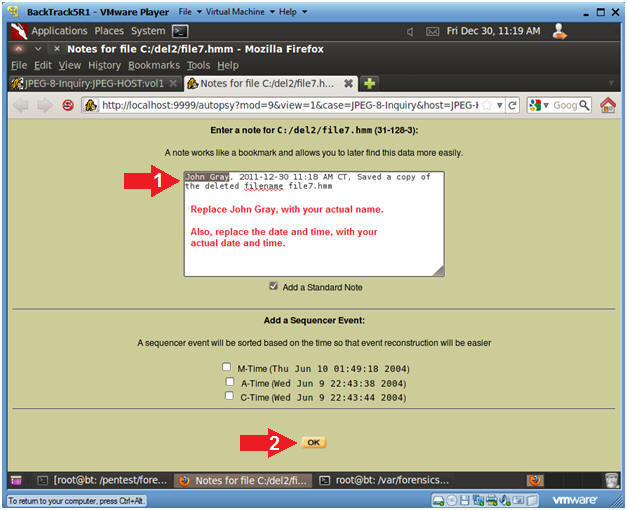
- Add Note to file7.hmm (Part 1)
- Instruction
- Click on the Add Note link.
- Add Note to file6.jpg (Part 2)
- Instructions
- Add the following information inside
the Note Text Box
- Your Actual Name, Current Date and
Time, and a Comment
- Click the OK button.
- Close Window
- Instructions
- Click the
X to close the
Window.
|
Section 9: Conduct
a Post-Image Integrity Check with Autopsy |
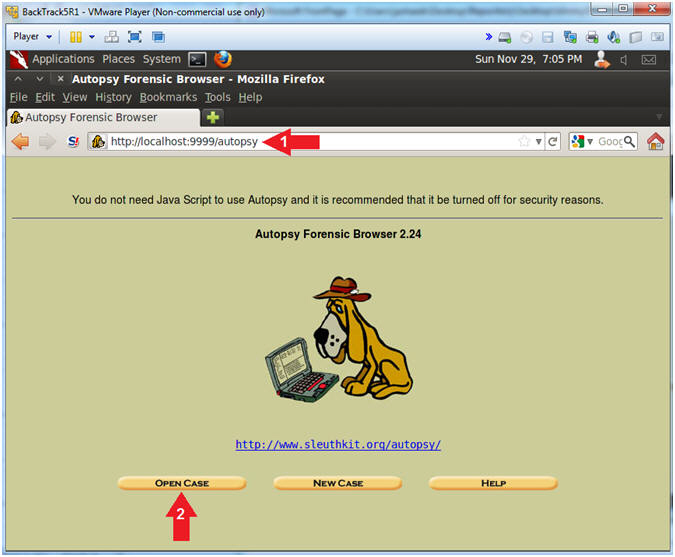
- Analyze JPEG a Post-Image Integrity Check with Autopsy
- Instructions
- Go to http://localhost:9999/autopsy in
your BackTrack Firefox web browser.
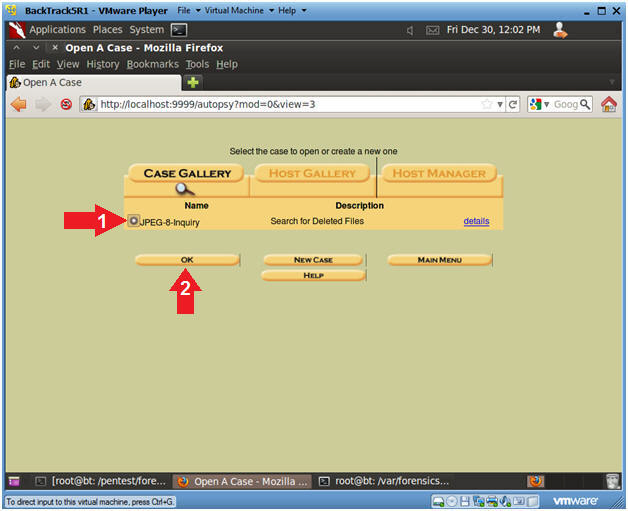
- Click on the Open Case Button.
- Open Case
- Instructions
- Make sure the JPEG-8-Inquiry radio
button is selected.
- Click on the OK button.
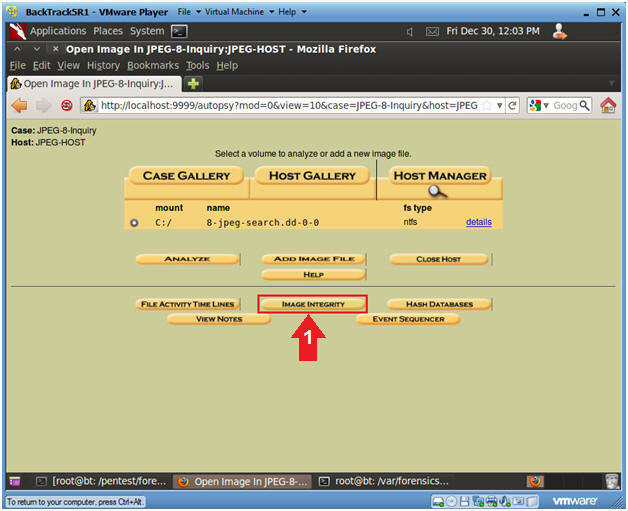
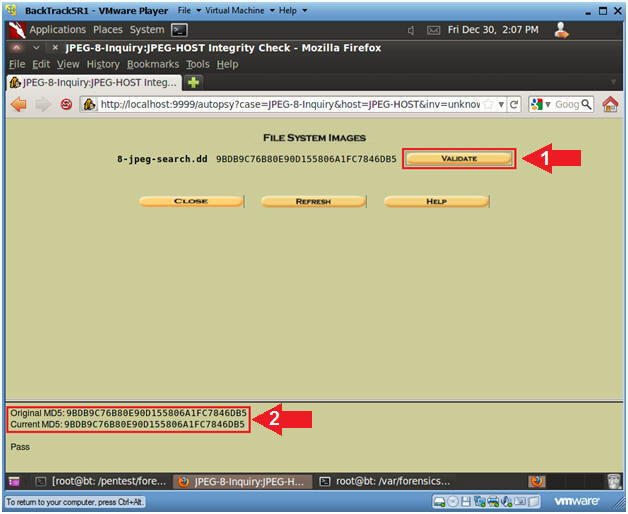
- Image Integrity Check
- Instructions
- Click on the Image Integrity Button.
- Image Integrity Check
- Note(FYI):
- Notice the "original" MD5 Check Sum immediately
follows the 8-jpeg-search.dd image.
- Instructions
- Click on the Validate Button.
- Below Autopsy compares the original MD5
Check Sum with the current MD5 Check Sum.
- Note(Why are we doing this?)
- In general, you want to make sure that
your work did not compromise the image.
- This is particularly important in a
court of law, especially evidence law, when the both integrity and chain of custody is
interrogated and scrutinized.
- Close File System Images
- Instructions
- Click on the Close Button.

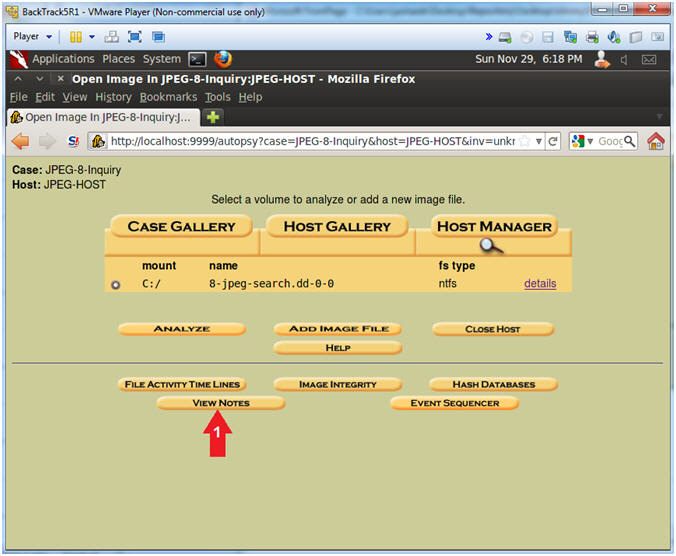
- View Notes (Part 1)
- Instructions
- Click on the View Notes Button.
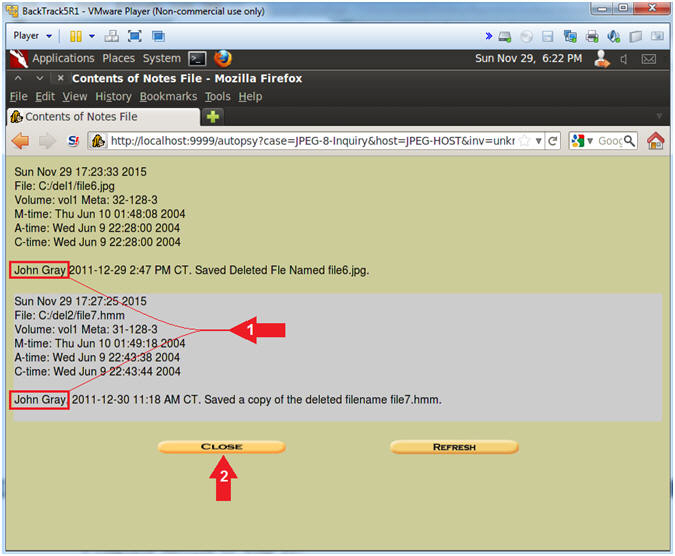
- View Notes (Part 2)
- Instructions
-
John Gray should
appear to have saved the files.
- John Gray should be your name.
- Click the Close Button
- Open a Terminal Window
- Instructions
- Click on the Terminal Window Icon

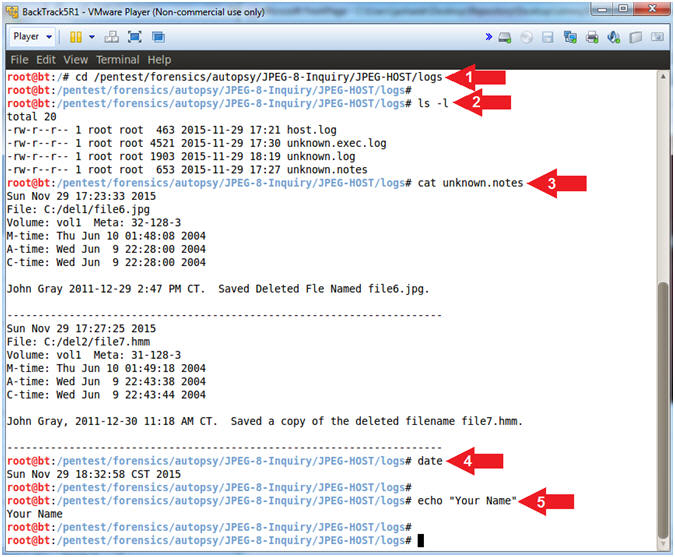
- Proof of Lab
- Instructions:
- cd /pentest/forensics/autopsy/JPEG-8-Inquiry/JPEG-HOST/logs
- ls -l
- cat unknown.notes
- date
- echo "Your Name"
- Replace the string "Your Name" with
your actual name.
- e.g., echo "John Gray"
-
Proof of Lab Instructions:
- Do a PrtScn
- Paste into a word document
- Upload to Moodle
|
 
|