(Windows 7: Lesson 1)
{ Installing Windows 7 }
| Section 0. Background Information |
- Windows 7
- Windows 7 was released to manufacturing on July 22, 2009, and reached general retail availability worldwide on October 22, 2009, less than three years after the release of its predecessor, Windows Vista.
- Windows 7's server counterpart, Windows Server 2008 R2, was released at the same time. Unlike Windows Vista, which introduced a large number of new features, Windows 7 was intended to be a more focused, incremental upgrade to the Windows line, with the goal of being compatible with applications and hardware with which Windows Vista was already compatible.
| Section 1. Create a New Virtual Machine |
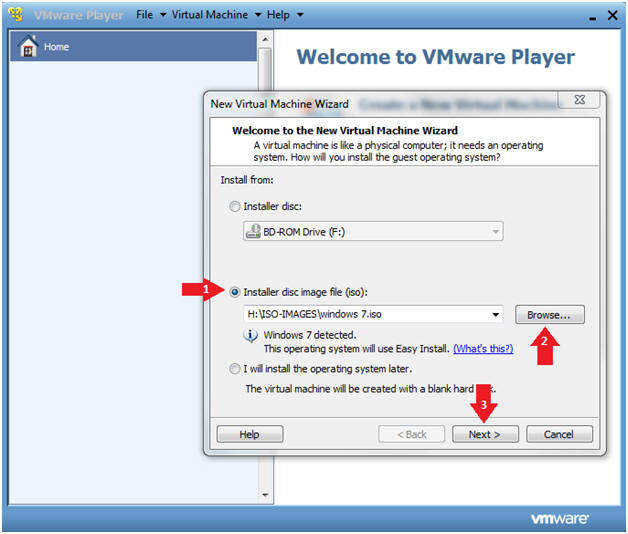
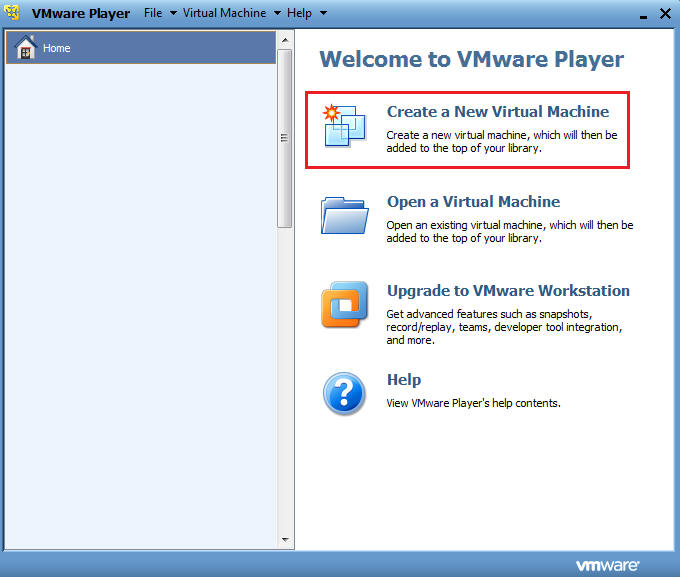
- Create a New Virtual Machine. (See Below)
- New Virtual Machine Wizard
- Instructions
- Select the radio button "Installer disc image file (iso):"
- Click the Browse Button
- Navigate to where your Windows 7 iso is located.
- Select the Windows 7 iso
- Click Next
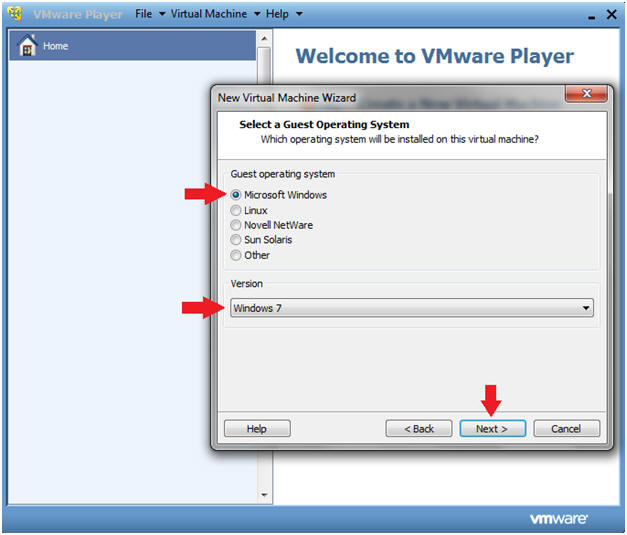
- Instructions
- New Virtual Machine Wizard
- Instructions:
- Guest operating system: Microsoft Windows
- Version: Windows 7
- Select Next
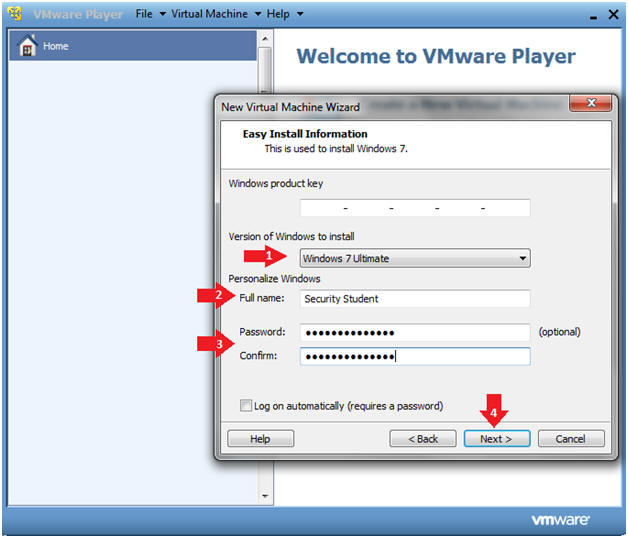
- Instructions:
- New Virtual Machine Wizard
- Instructions:
- Windows product key: Enter your key
that your purchased.
- Note: If you don't enter a key, then you have a 30 day evaluation.
- Full name: Security Student
- Password: Make sure you passwords match.
- Select Next.
- Windows product key: Enter your key
that your purchased.
- Instructions:
- You did not enter Product Key
- Instructions:
- Click Yes

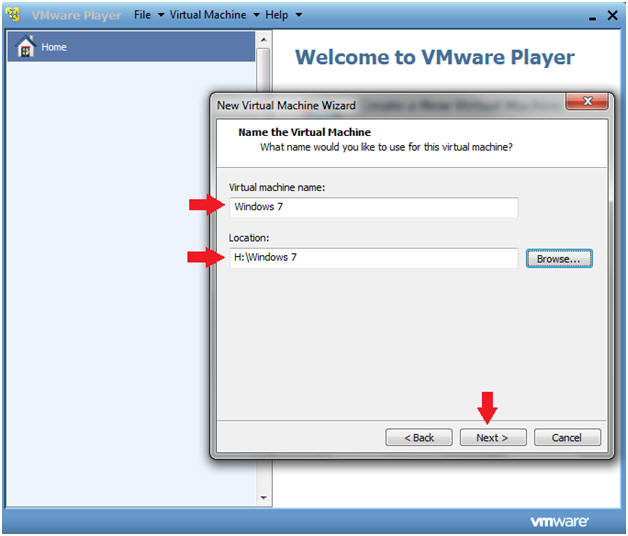
- Instructions:
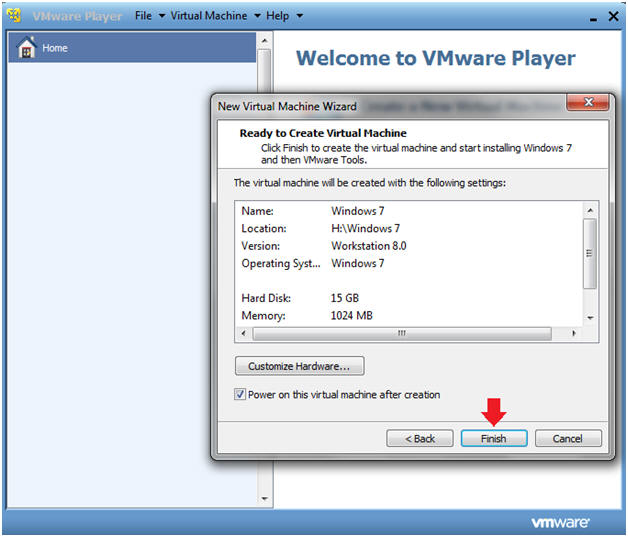
- New Virtual Machine Wizard
- Instructions:
- Virtual machine name: Windows 7
- Location: In my case I saved it to my USB drive, located in H:\Windows 7
- Select Next
- Instructions:
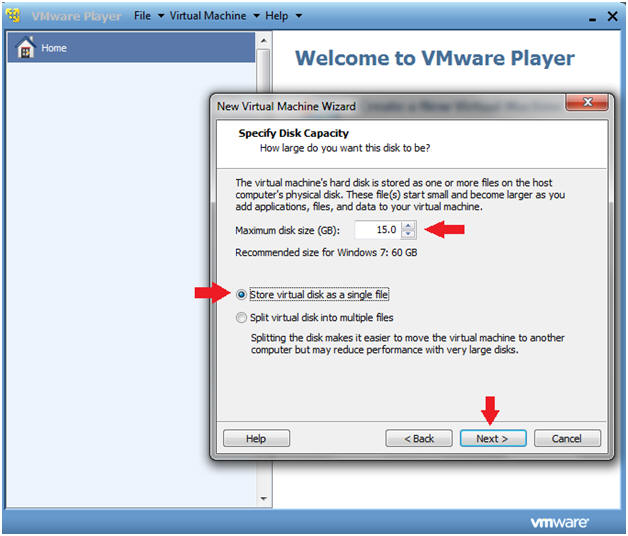
- New Virtual Machine Wizard
- Instructions:
- Maximum disk size (GB): For lab purposes, all you really need is 15 GB.
- Radio Button: Store virtual disk as an single file
- Select Next
- Instructions:
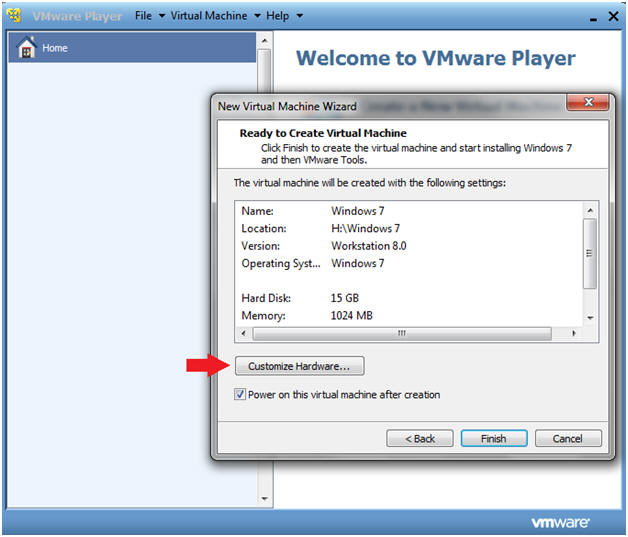
- New Virtual Machine Wizard
- Instructions:
- Click on the "Customize Hardware..." button
- Instructions:
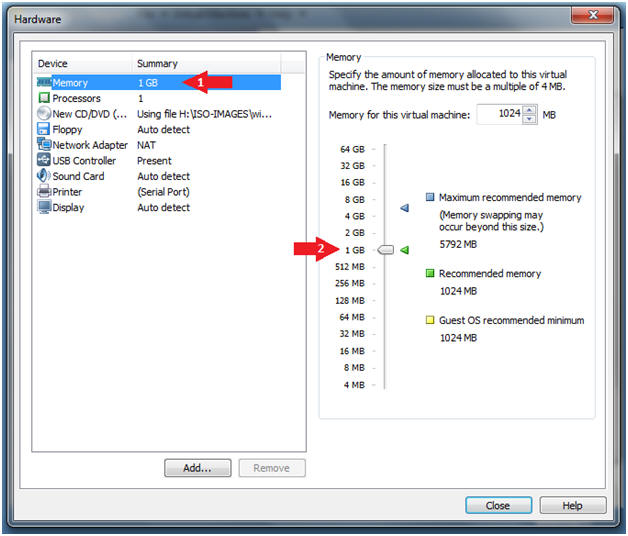
- New Virtual Machine Wizard (Memory)
- Instructions:
- Click on Memory (which is highlighted in blue)
- Recommended is 1024 MB.
- DO NOT Click the Close button
- Instructions:
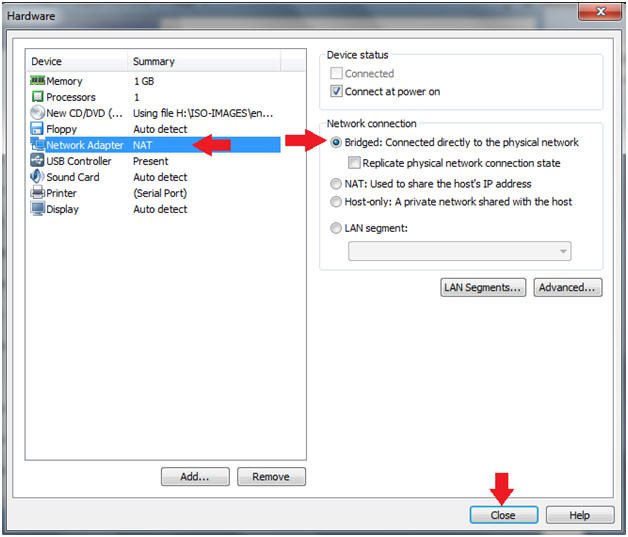
- New Virtual Machine Wizard (Network)
- Instructions:
- Click on Network Adapter
- Select the Bridged radio button
- Click the Close Button
- Instructions:
- Finish Customizing Hardware
- Instructions:
- Click on the Finish button
- Instructions:
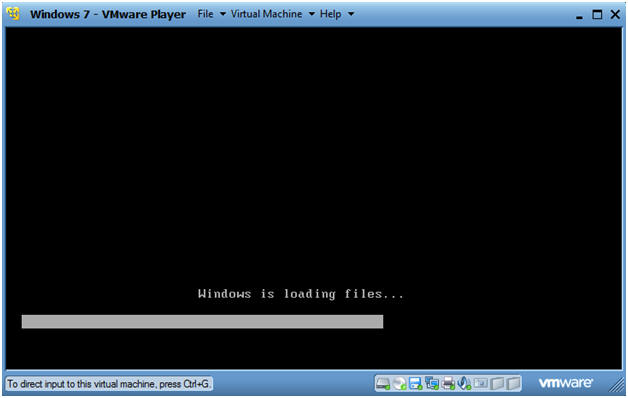
- Windows is loading files...
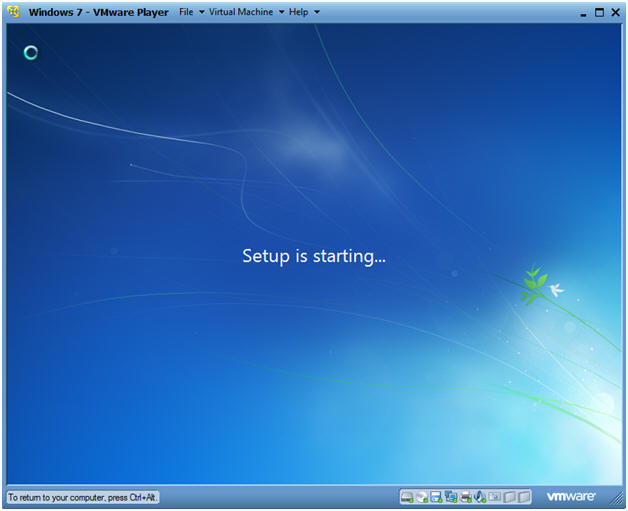
- Setup is starting...
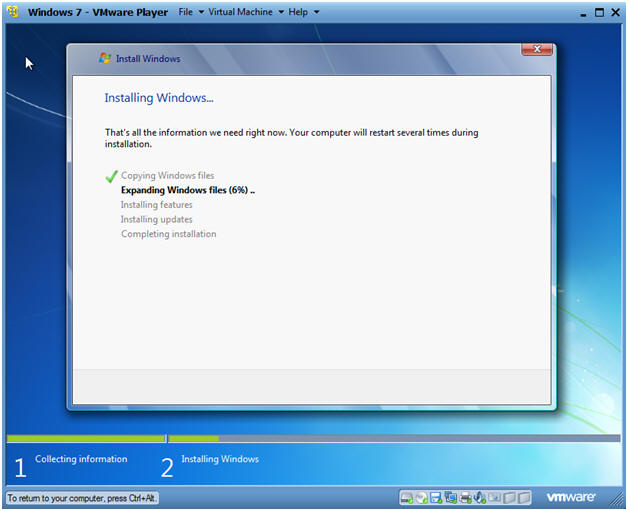
- Installing Windows
- Note: Depending on your system's resources this process could take between 15 and 45 minutes.
- Installing VMware Tools
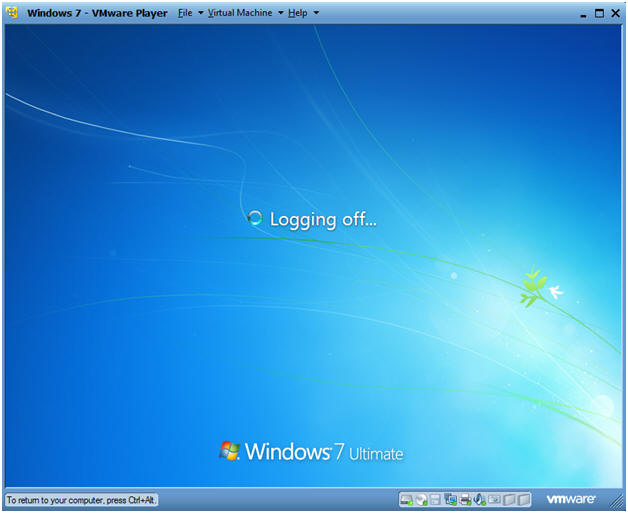
- Logging off...

| Section 2. Login to Windows 7 |
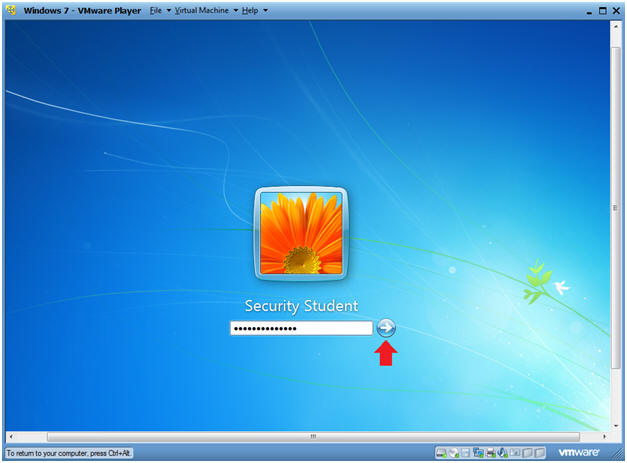
- Login
- Instructions:
- Enter Password
- Click the Blue Arrow
- Instructions:
| Section 3. Proof of Lab |
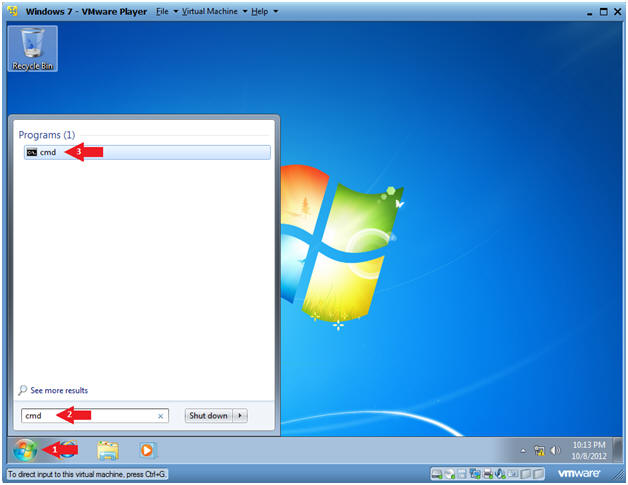
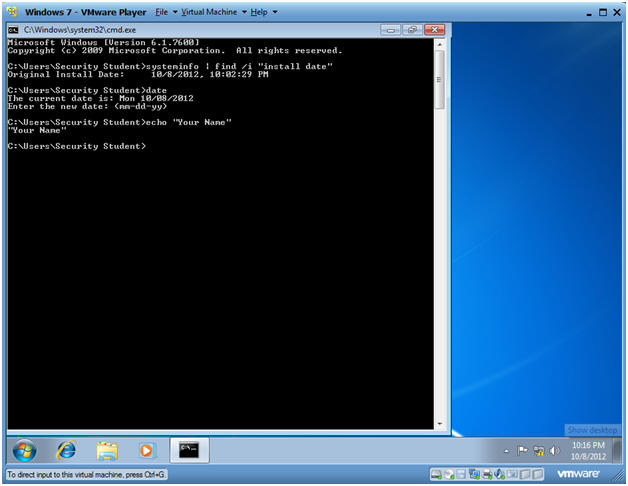
- Bring up Command Prompt
- Instructions:
- Start --> Command Prompt
-
- Instructions:
- Proof of Lab
-
Proof of Lab
Instructions
- systeminfo | find /i "install date"
- date
- echo "Your Name"
- Replace the string "Your Name" with your actual name.
- e.g., echo "John Gray"
- Do a <PrtScn>
- Paste into a word document
- Upload to Moodle
-
Proof of Lab
Instructions