(Windows 2008 Server: Lesson 15)
{ How to set up roaming profiles }
| Section 0. Background Information |
- Overview
- In this lab, we will show you how to create a Roaming Profile for the Windows 2008 Server Domain.
- This lab is useful, because it allows a user to access their saved files and favorites on any machine within the domain.
- Prerequisite
- Windows 2008 Server: Lesson 1: Installing Windows 2008 Server
- Windows 2008 Server: Lesson 2: Configuring dcpromo
- Windows 2008 Server: Lesson 4: Creating Users and using dsquery
- Windows 2008 Server: Lesson 12: How to add a computer to your domain
- Legal Disclaimer
- As a condition of your use of this Web site, you warrant to computersecuritystudent.com that you will not use this Web site for any purpose that is unlawful or that is prohibited by these terms, conditions, and notices.
- In accordance with UCC § 2-316, this product is provided with "no warranties, either express or implied." The information contained is provided "as-is", with "no guarantee of merchantability."
- In addition, this is a teaching website that does not condone malicious behavior of any kind.
- Your are on notice, that continuing and/or using this lab outside your "own" test environment is considered malicious and is against the law.
- © 2012 No content replication of any kind is allowed without express written permission.
| Section 1. Login to your W2K8 server. |
- Edit Virtual Machine Settings
- Instructions:
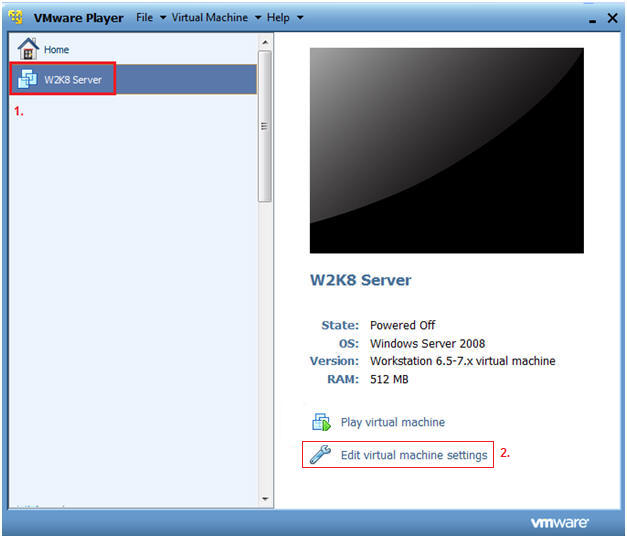
- Click on W2K8
- Click on Edit virtual machine settings
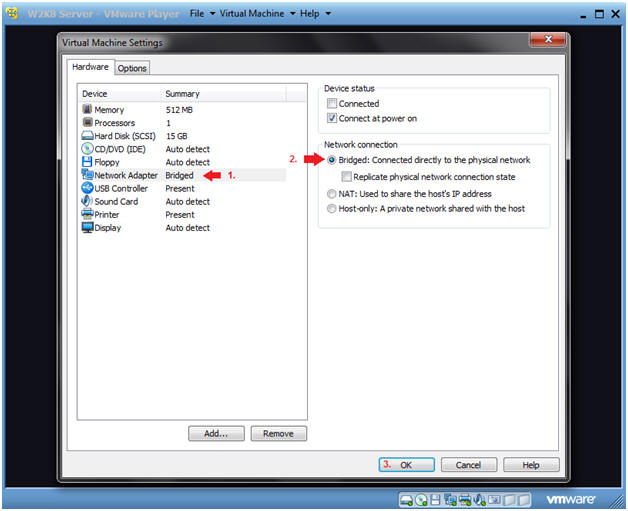
- Instructions:
- Edit Network Adapter Settings
- Instructions:
- Click on Network Adapter
- Click on Bridged: Connected directly to the physical network.
- Click OK.
- Instructions:
- Start your Windows 2008 Server
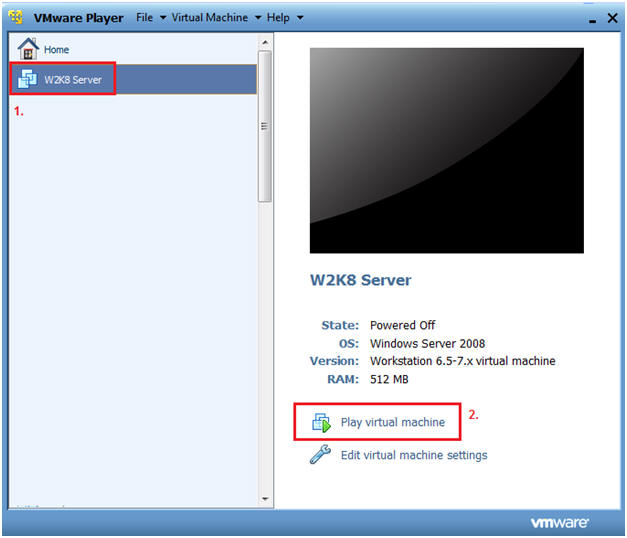
- Instructions:
- Click on W2K8 Server
- Click on Play virtual machine
- Instructions:
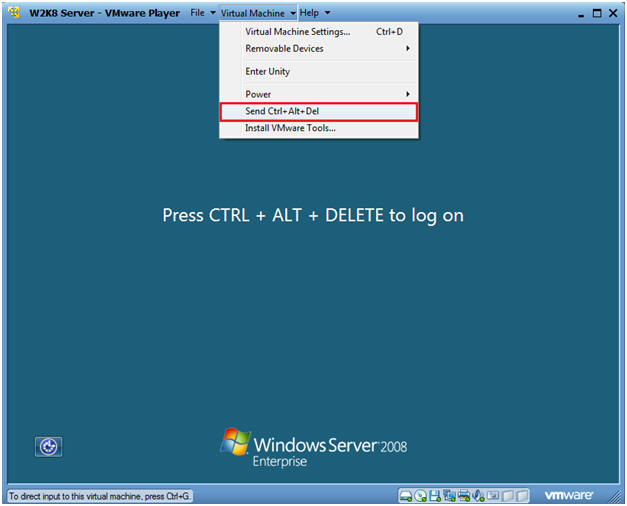
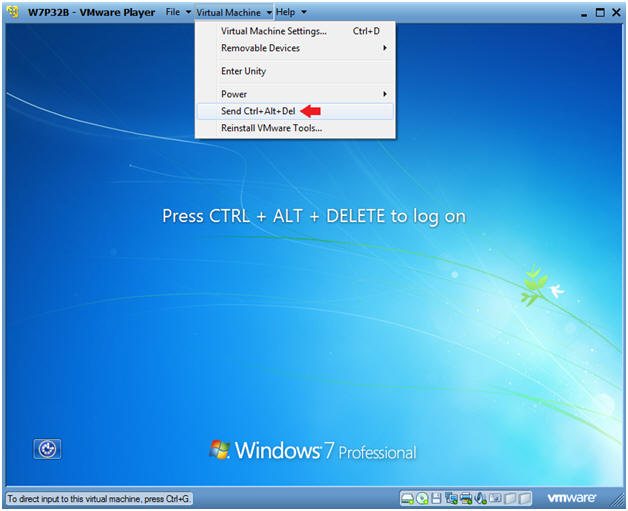
- CRTL + ALT + DELETE
- Instructions:
- Virtual Machine
- Send Ctrl+Alt+Del
- Instructions:
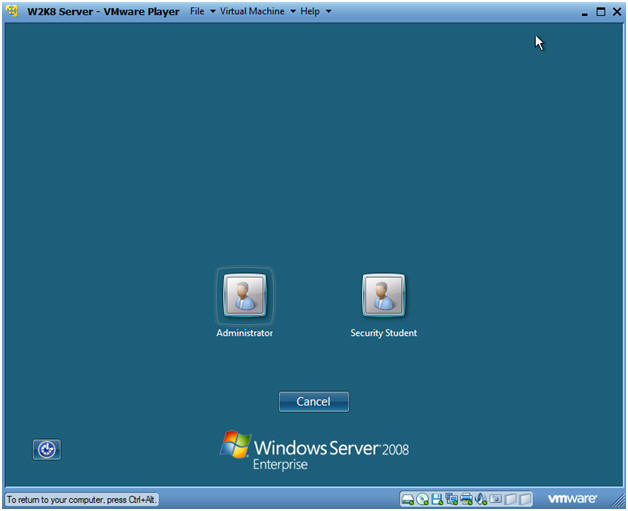
- Login as Administrator
- Instructions:
- Click on the Administrator icon.
- Instructions:
- Login
- Instructions:
- Provide the password for the Administrator account.

- Instructions:
| Section 2. Determine the IP Address for the W2K8 server. |
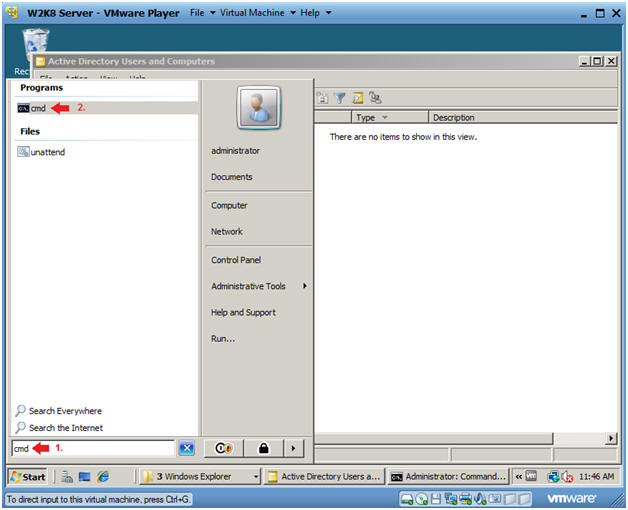
- Open a Command Prompt
- Instructions:
- Type "cmd" in the search box.
- Click on "cmd" under Programs.
- Instructions:
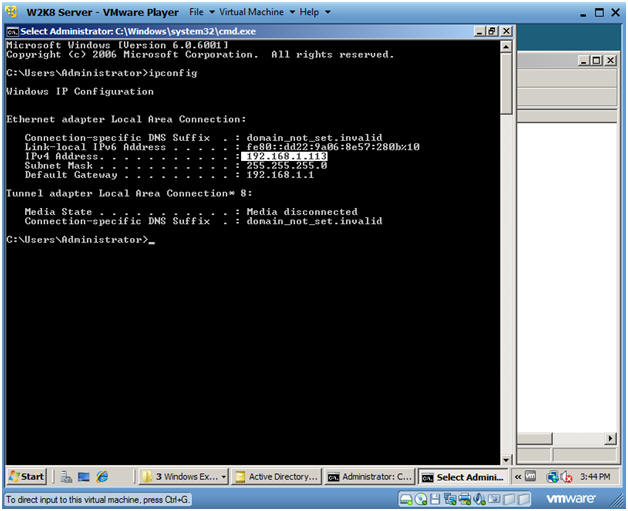
- Determine the IP Address for your W2K8 Server
- Instructions:
- ipconfig
- In my case, the IP Address is 192.168.1.113.
- In your case, it will probably be different.
- ipconfig
- Note:
- In a later step, this will be the IP address of the DNS server for the Windows 7 machine.
- Instructions:
| Section 3. Start up the Windows 7 machine. |
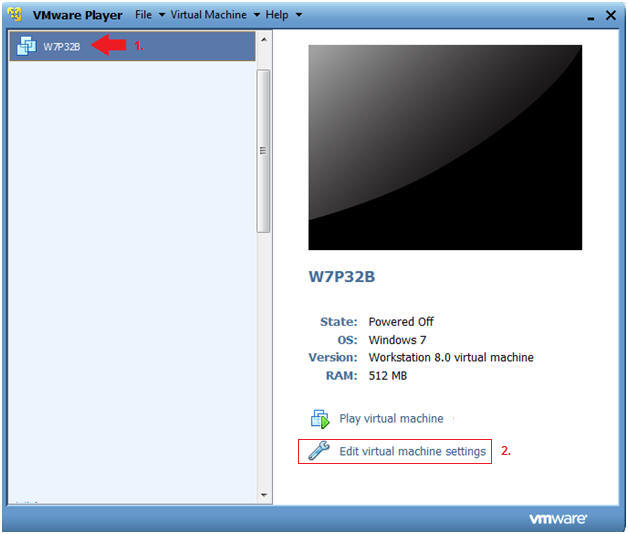
- Edit Virtual Machine Settings
-
Instructions:
- Select W7P32B
- Click on Edit virtual machine settings.
-
Instructions:
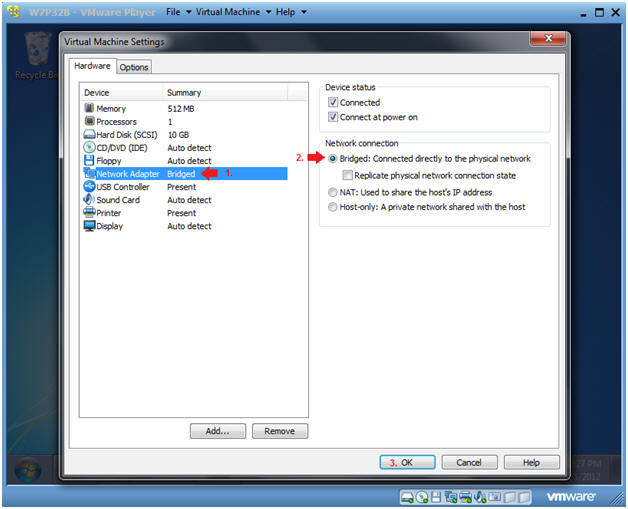
- Edit Network Adapter Settings
- Instructions:
- Click on Network Adapter
- Click on Bridged: Connected directly to the physical network.
- Click OK.
- Instructions:
- Booting up W7P32B
-
Instructions:
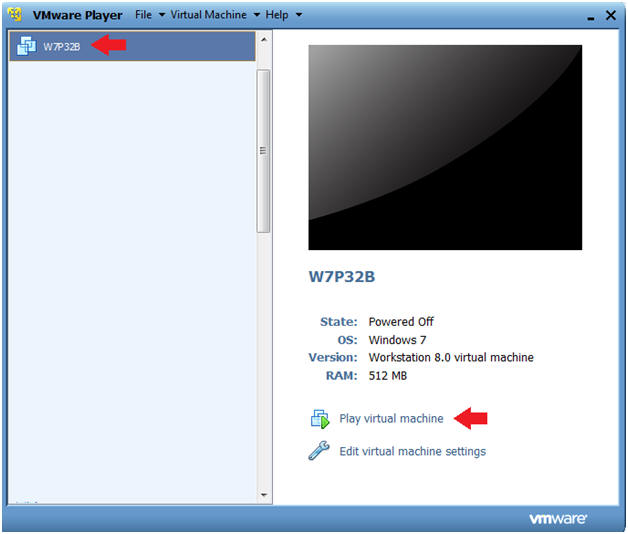
- Start up VMware Player
- Select W7P32B
- Play Virtual Machine
- Note:
- For those of you that are not part of my class, W7P32B is a Windows 7 32 Bit Operating System.
- Any version of Windows can be used.
- But you must have first completed the pre-requisite labs listed in the overview section
-
Instructions:
- W7P32B Authentication
-
Instructions:
- Login as administrator
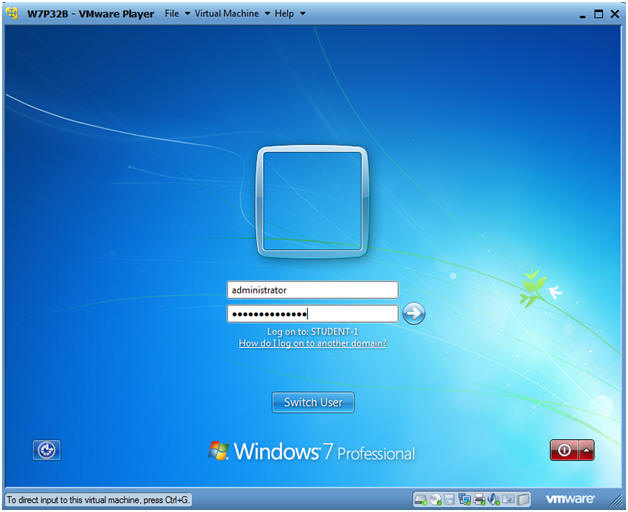
-
Instructions:
| Section 4. Set DNS Server on Windows Client |
-
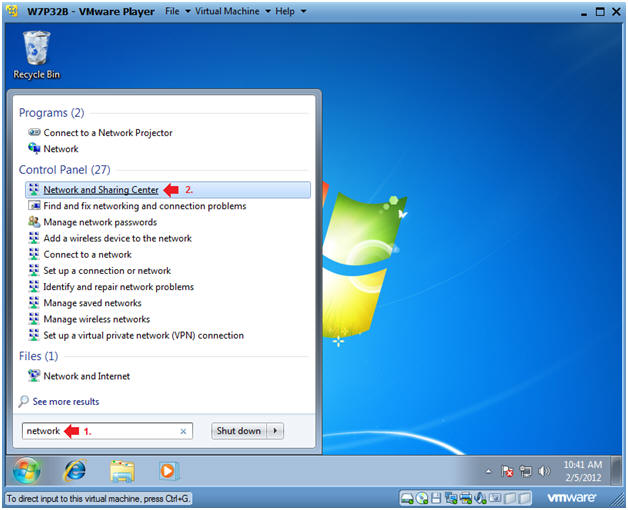
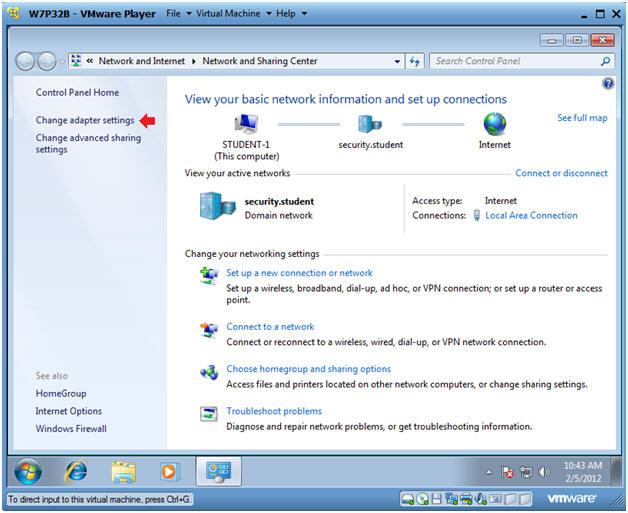
On W7P32B, Launch Network and Sharing Center
- Instructions:
- In the search box, type "network", and press enter
- Next click on "Network and Sharing Center"
-
- Instructions:
- Change adapter settings
- Instructions:
- Click on "Change adapter settings"
-
- Instructions:
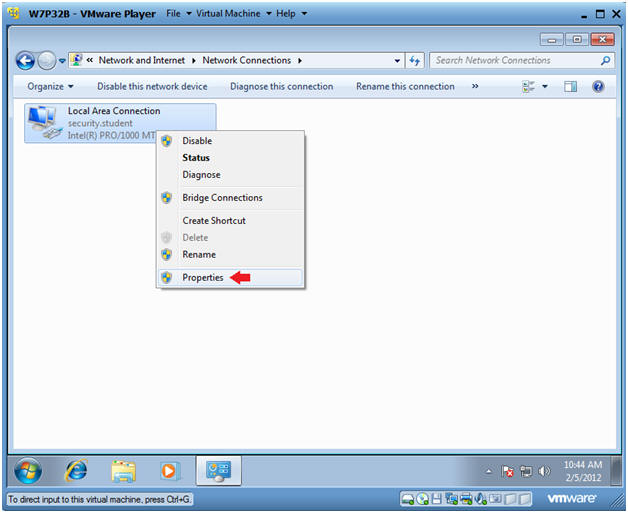
- Configure Local Area Connections
- Instructions:
- Right Click on Local Area Connection
- Click on Properties
- Instructions:
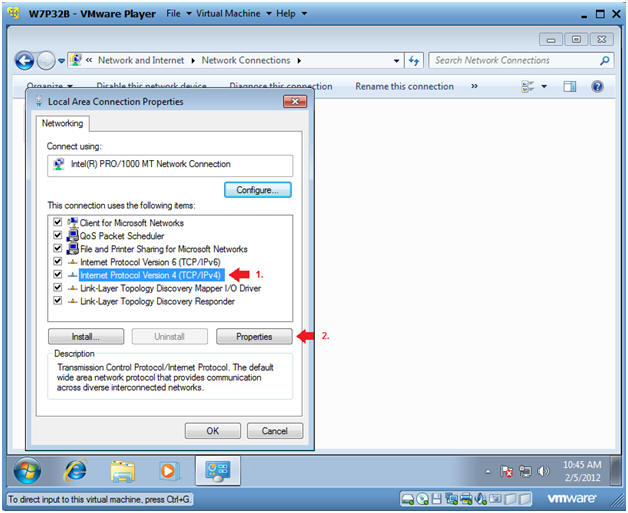
- Configure Internet Protocol Version 4(TCP/IPv4)
- Instructions:
- Click on Internet Protocol Version 4(TCP/IPv4)
- Click on Properties
- Instructions:
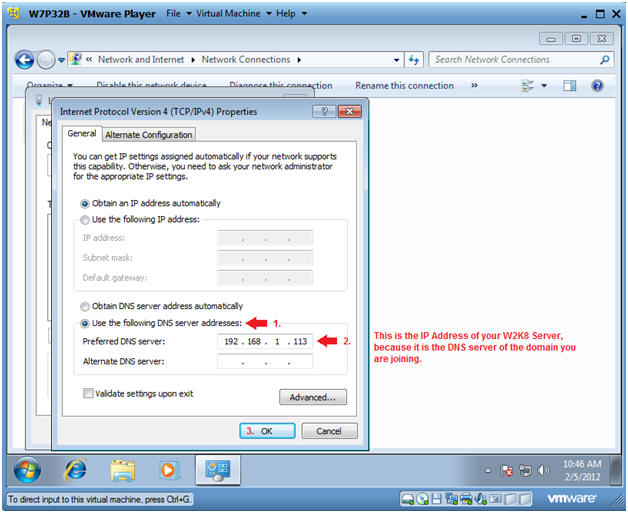
- Set DNS Server Address
- Instructions:
- Click on "Use the following DNS server addresses:" radio button.
- Preferred DNS server:
Provide the W2K8
Server IP Address obtained in (Section 2, Step 2).
- Mine is 192.168.1.113
- Yours will be different
- Click OK.
- Instructions:
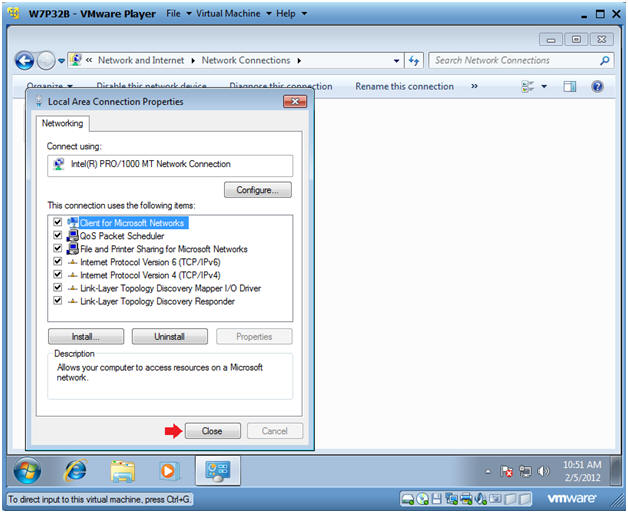
- Close Local Area Connection Properties
- Instructions:
- Click Close
- Instructions:
| Section 5. Create a Shared Roaming Profile Directory on W2K8 Server Domain |
-
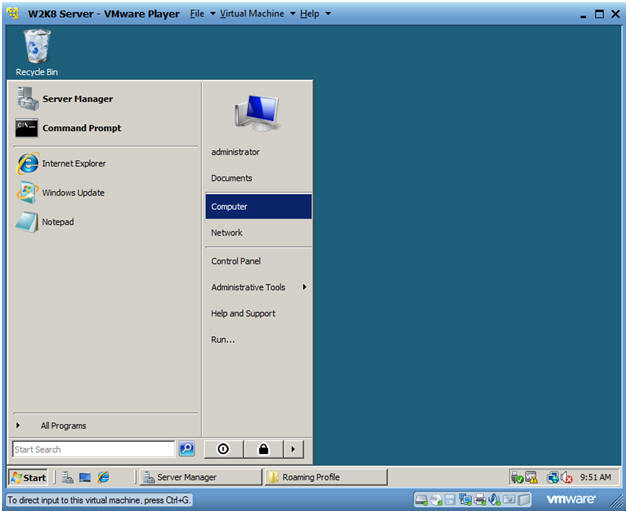
On W2K8 Server, Navigate to Computer
- Instructions:
- Start --> Computer
- Instructions:
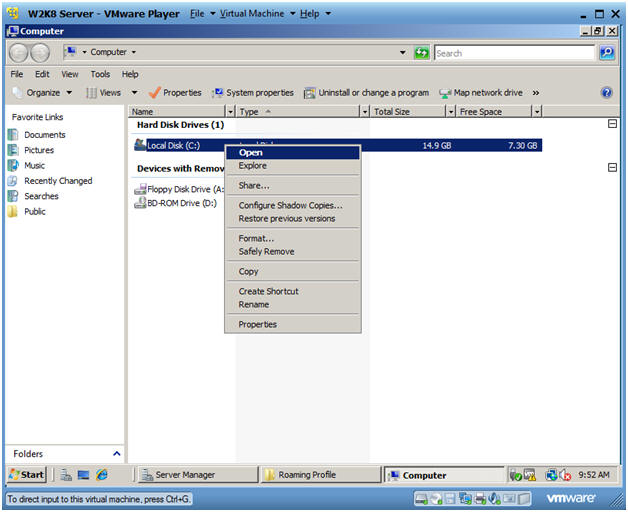
- Navigate to C: Drive
- Instructions:
- Right Click on Local Disk (C:)
- Click on Open
- Instructions:
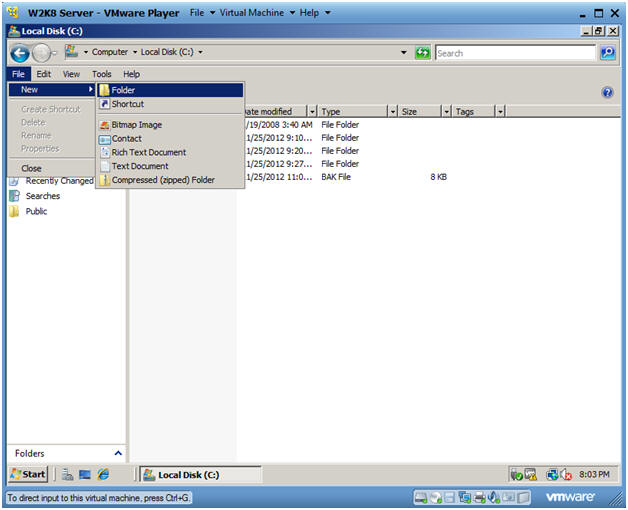
- Create New Folder
- Instructions:
- File --> New --> Folder
- Instructions:
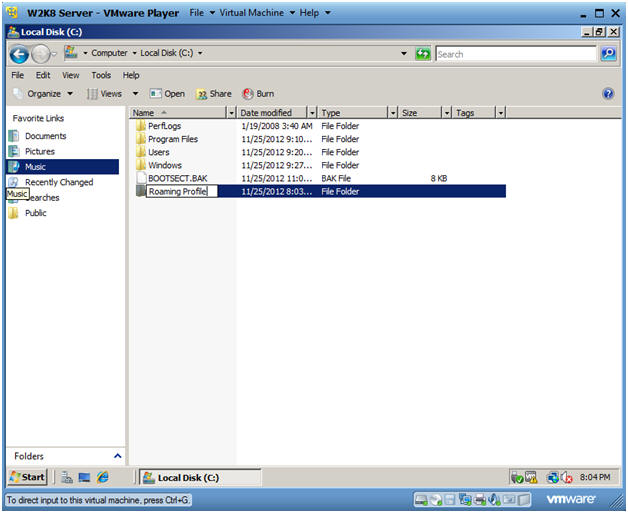
- Name Folder
- Instructions:
- Name the Folder "Roaming Profile"
- Instructions:
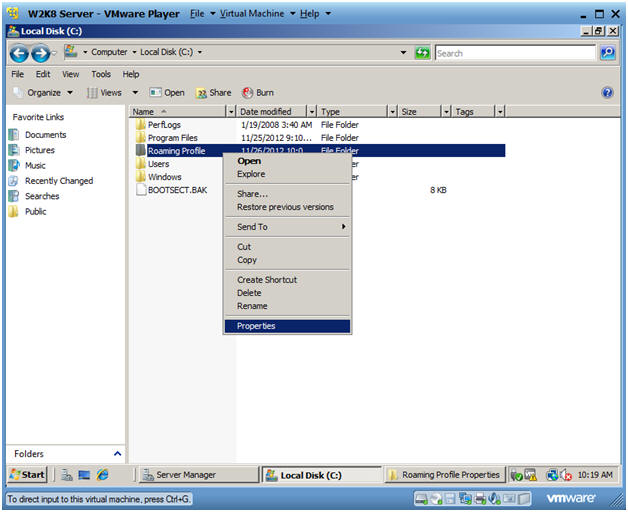
- Roaming Profile Properties
- Instructions:
- Right Click on the Roaming Profile folder
- Select Properties
- Instructions:
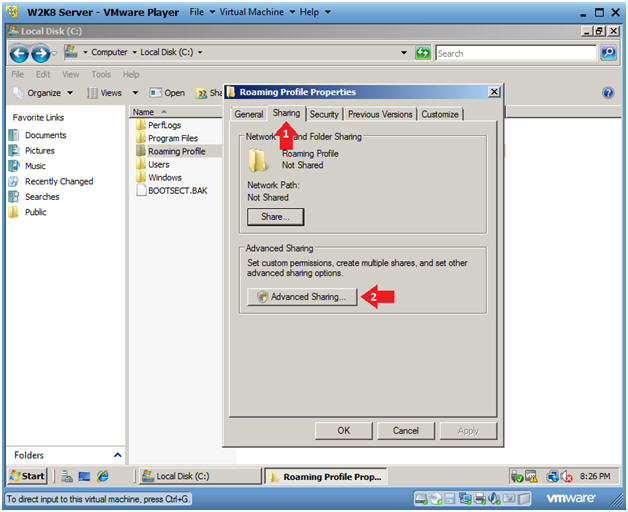
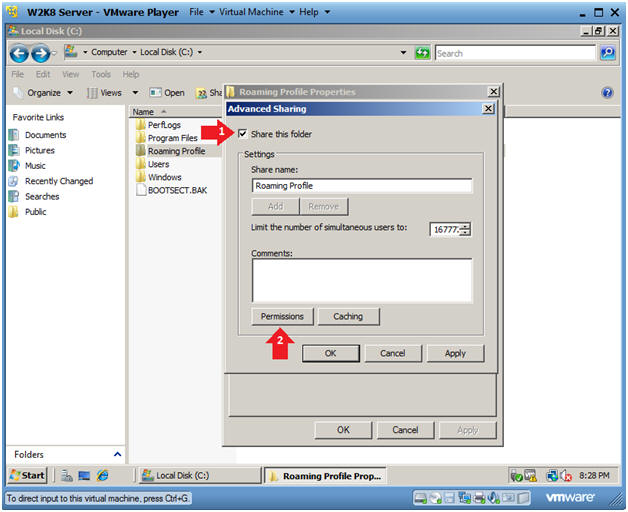
- Advanced Sharing...
- Instructions:
- Select the Sharing Tab
- Click on the Advanced Sharing... button
- Instructions:
- Share this folder
- Instructions:
- Check the "Share this folder" checkbox
- Check the Permissions Button
- Instructions:
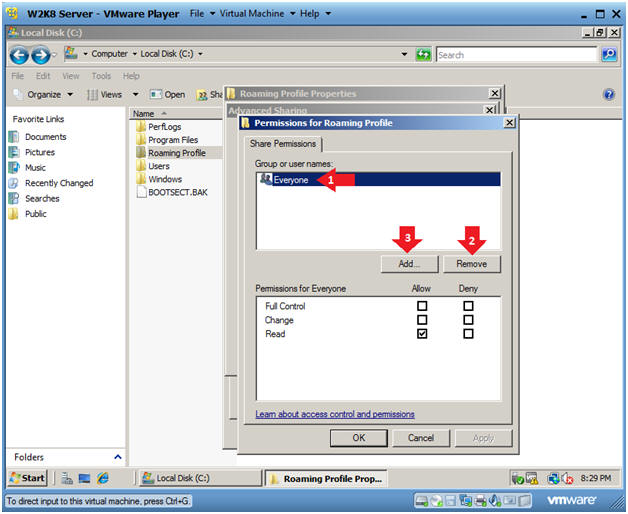
- Permissions for Roaming Profile
- Instructions:
- Click on Everyone to where it is highlighted
- Select the Remove Button
- Select the Add Button
- Instructions:
- Select Users, Computers, or Groups
- Instructions:
- Type "domain users" in the textbox
- Click the Check Names button
- Click the OK button
- Instructions:
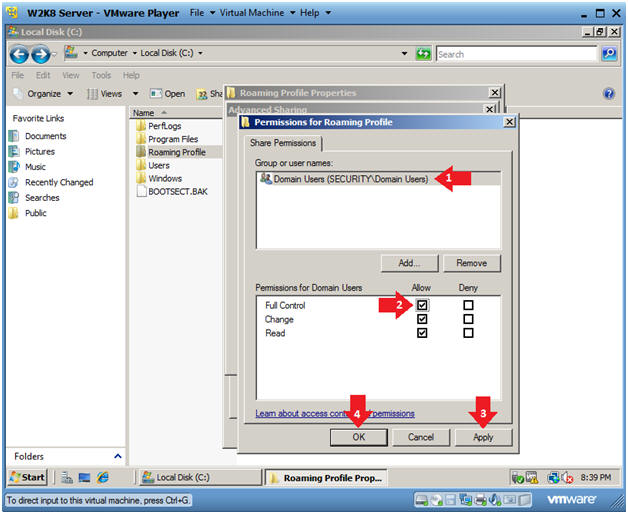
- Permissions for Roaming Profile
- Instructions:
- Click Domain Users to where it is highlighted
- Click on the Full Control textbox
- Click the Apply Button
- Click the OK Button
- Instructions:
- Advanced Sharing
- Instructions:
- Click the Apply Button
- Click the OK Button

- Instructions:
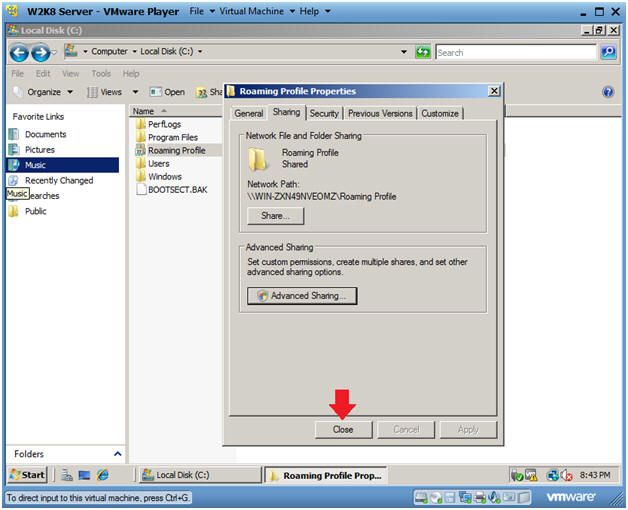
- Roaming Profile Properties
- Instructions:
- Click the Close Button
- Instructions:

| Section 6. Test the Network Share |
-
On W2K8 Server, Open Server Manager
- Instructions:
- Click the Start Button
- Type "Server Manager" in the search box
- Click on Server Manager

- Instructions:
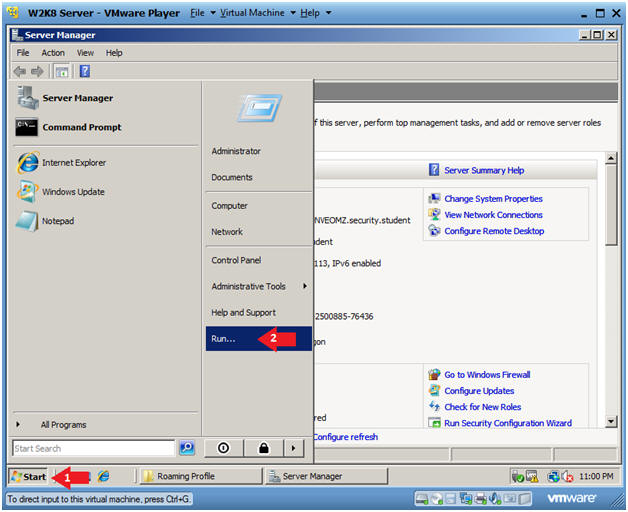
- Open Run Manager
- Instructions:
- Click the Start Button
- Click on Run...
- Instructions:
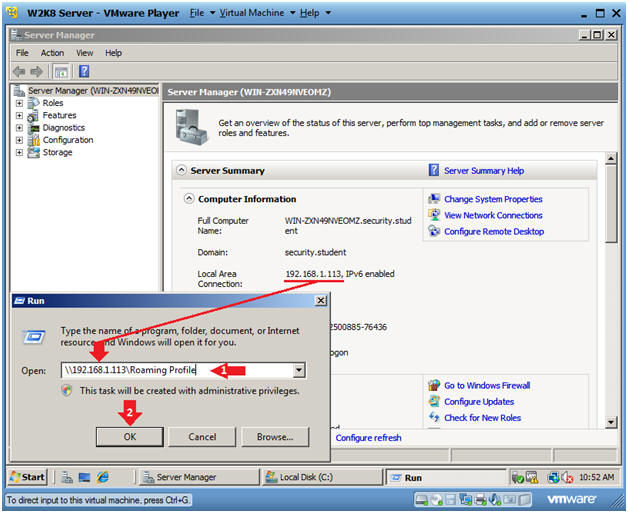
- Supply Path of the Network Share
- Instructions:
- Place "\\IPADDRESS\Roaming Profile" in the Open Textbox
- Click the OK Button
- Instructions:
- Copy Path of the Network Share
- Instructions:
- Right Click on the Roaming Profile Network Share
- Click Copy

- Instructions:
| Section 7. Set Up Roaming Profile |
-
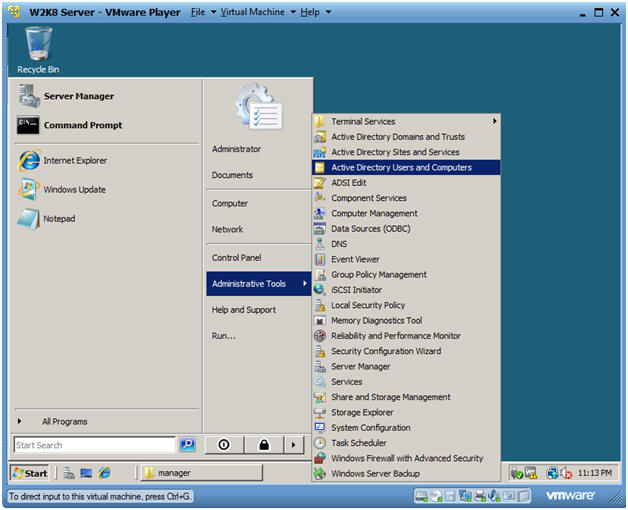
On W2K8 Server, Open Active Directory Users and Computers
- Instructions:
- Click the Start Button
- Administrative Tools --> Active Directory Users and Computers
- Instructions:
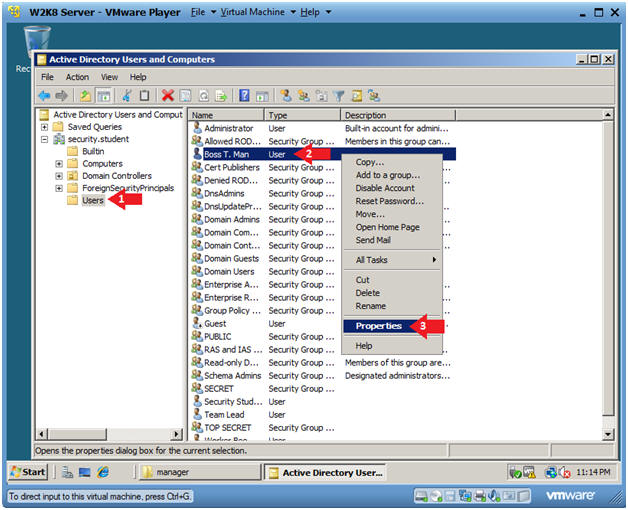
- Open the User's (Boss T. Man) Properties
- Instructions:
- Click on Users
- Right Click on Boss T. Man
- Click on Properties
- Instructions:
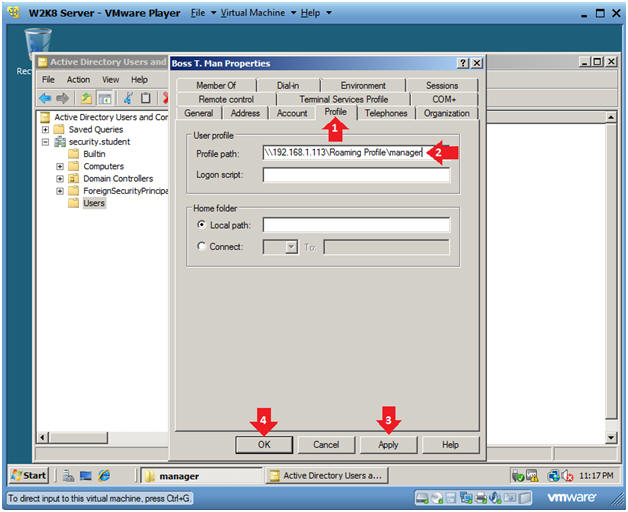
- Set Roaming Profile Folder
- Instructions:
- Click the Profile Tab
- Place "\\IPADDRESS\Roaming
Profile\manager" in the Profile path text box.
- "IPADDRESS" can be retrieved from (Section 2, Step 2).
- "Roaming Profile" is the name of the Network Share you created.
- "manager" is the username for user "Boss T. Man"
- Click the Apply Button
- Click the OK Button
- Instructions:
| Section 8. Log into the security.student domain as the user manager |
-
On W7P32B, Send Ctrl+Alt+Del
- Instructions:
- Virtual Machine
- Send Ctrl+Alt+Del
- Instructions:
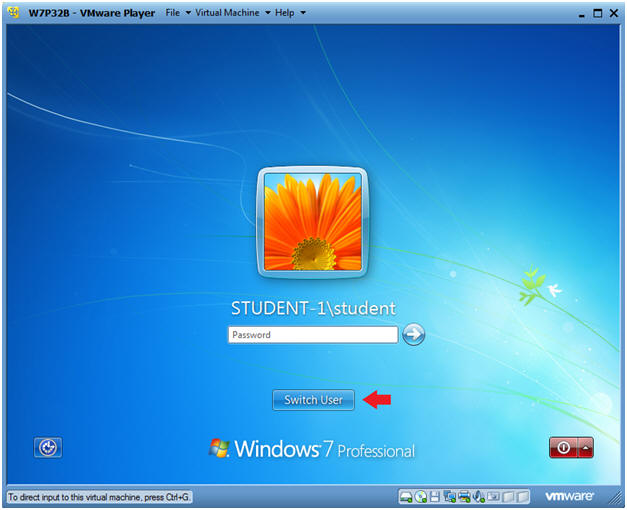
- Switch User
- Instructions:
- Click the Switch User Button
- Instructions:
- Other User
- Instructions:
- Click Other User
- Instructions:
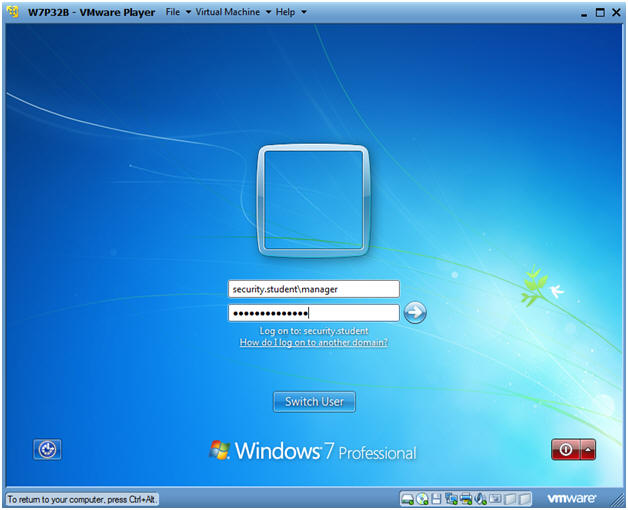
- Login as manager
- Instructions:
- Login: security.student\manager
- Password: Use the Active Directory Password for the user manager.
- Instructions:
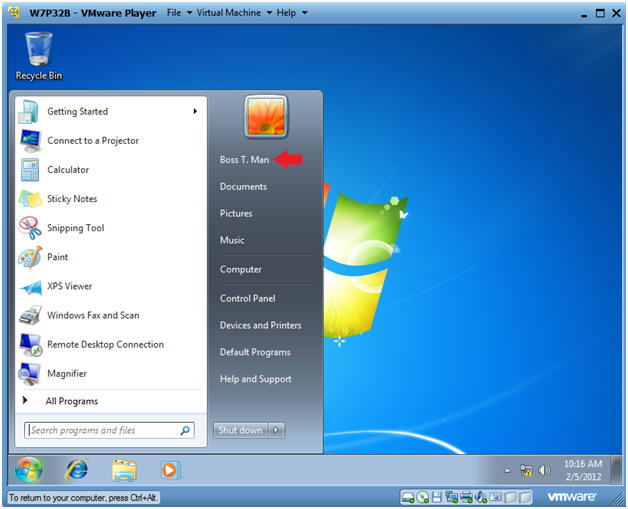
- Verifying Login
- Instructions:
- Click the Start Button
- Note:
- Notice you are logged in as "Boss T. Man"
- Instructions:

| Section 9. Create Internet Explorer Default Page and Favorites |
-
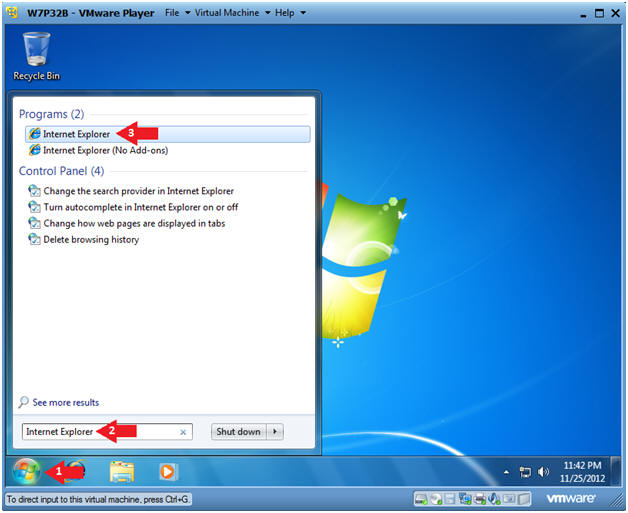
On W7P32B, Open Internet Explorer
- Instructions:
- Click the Start Button
- Type "Internet Explorer" in the search box.
- Click on "Internet Explorer" under Programs.
- Instructions:
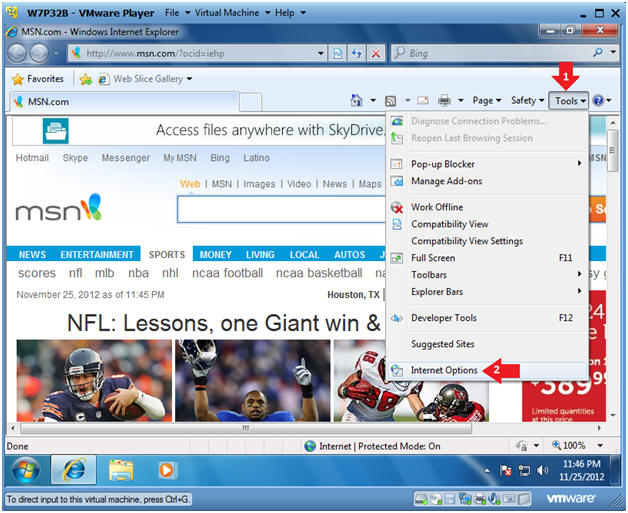
- Open Internet Options
- Instructions:
- Click on Tools
- Click on Internet Options
- Instructions:
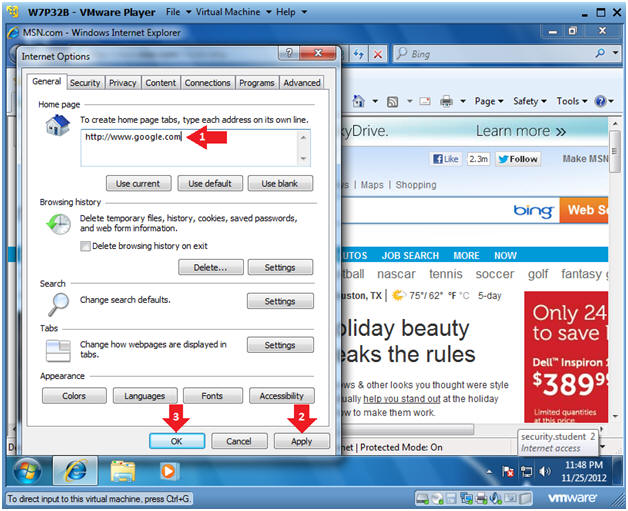
- Set Home page
- Instructions:
- Place "http://www.google.com" in the home page text box
- Click the Apply Button
- Click the OK Button
- Instructions:
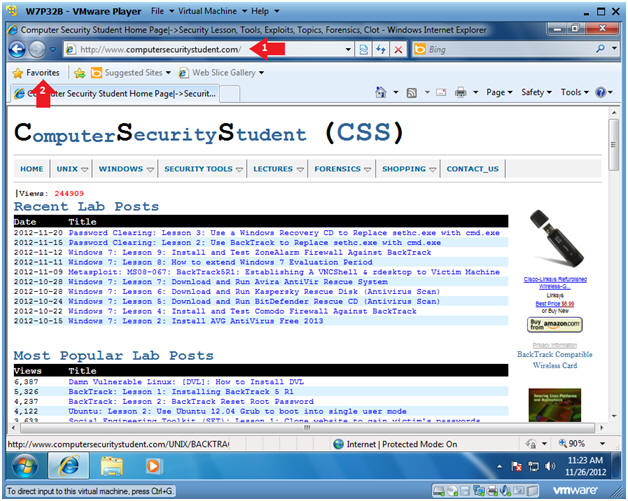
- Create a Favorite
- Instructions:
- Place "http://www.computersecuritystudent.com" in the URL Address Box.
- Click the Favorites Button
- Instructions:
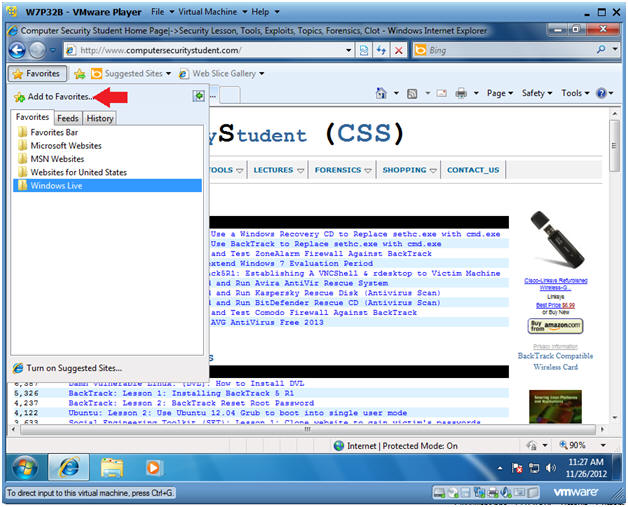
- Add to Favorites...
- Instructions:
- Click Add to Favorites...
- Instructions:
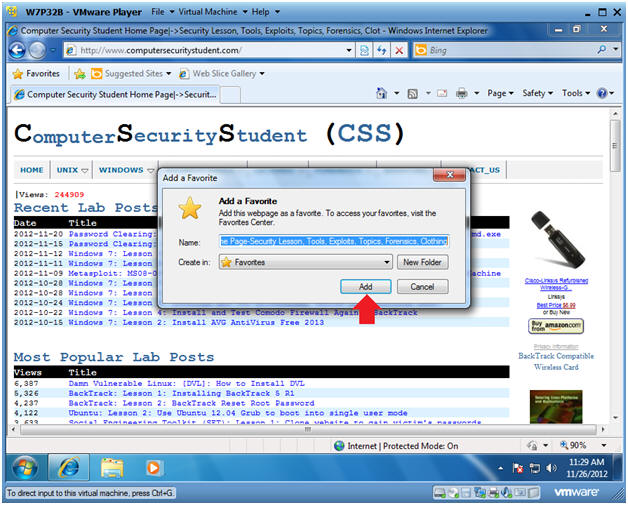
- Add to Favorites...
- Instructions:
- Click the Add Button
- Instructions:
| Section 10. Create a test document |
-
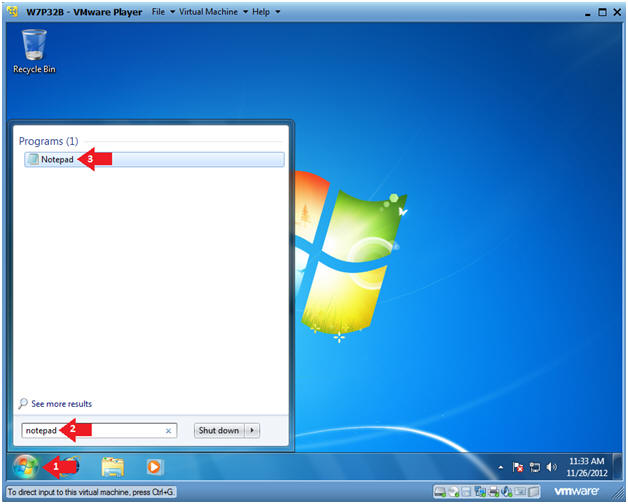
On W7P32B, Open Notepad
- Instructions:
- Click the Start Button
- Type "notepad" in the search box.
- Click on "Notepad" under Programs.
- Instructions:
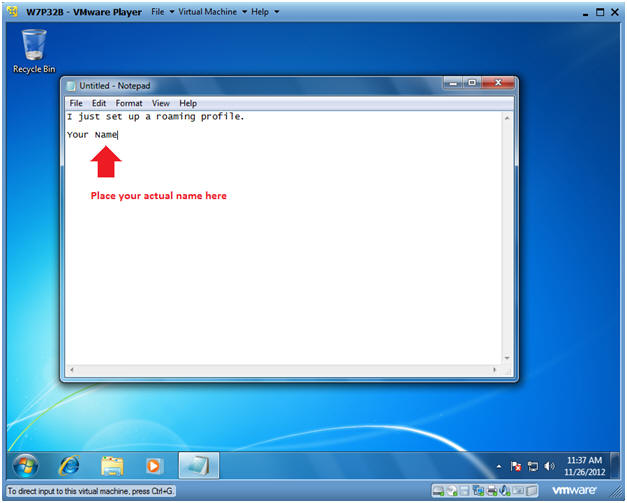
- Add Some Contents
- Instructions:
- Writing Something in the first line
- Sign your name in the second line.
- Instructions:
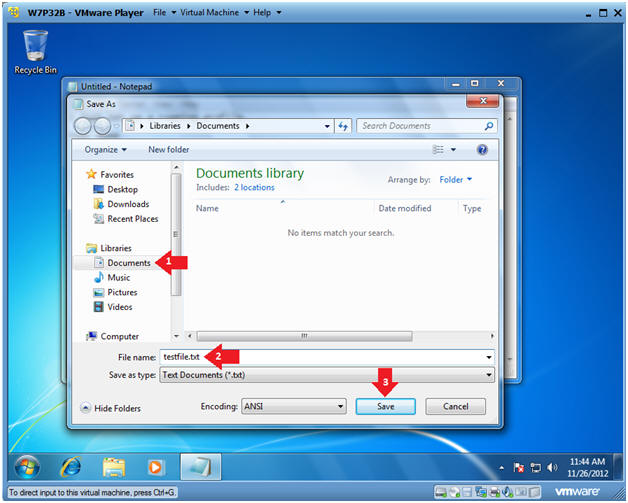
- Save File
- Instructions:
- File --> Save As...

- Instructions:
- Save As
- Instructions:
- Click on Documents
- Name File "testfile.txt"
- Click the Save Button
- Instructions:
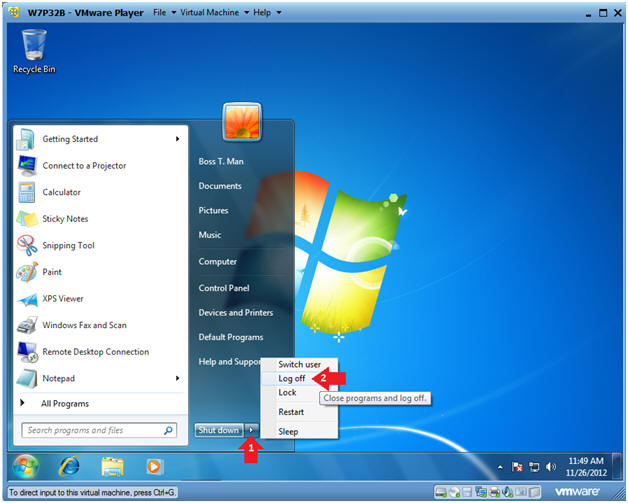
- Log Off
- Instructions:
- Click Arrow to the right of the Shut down button.
- Click Log off
- Instructions:
| Section 11. Verify the Roaming Profile Contents |
- On the
W2K8 Server,
Navigate to Computer
- Instructions:
- Start --> Computer
- Instructions:
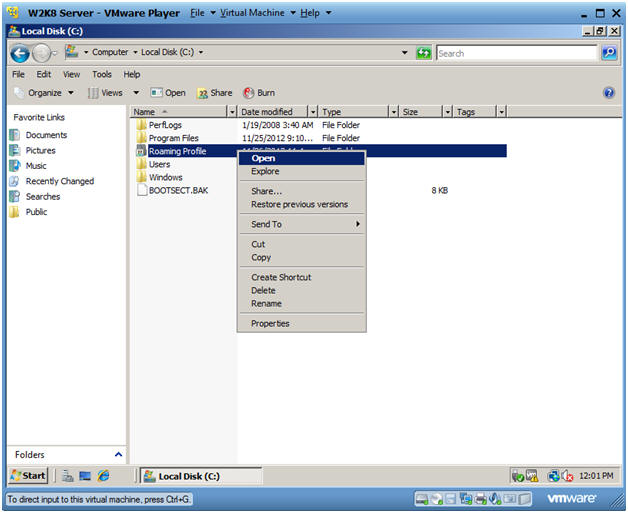
- Navigate to C: Drive
- Instructions:
- Right Click on Local Disk (C:)
- Click on Open
- Instructions:
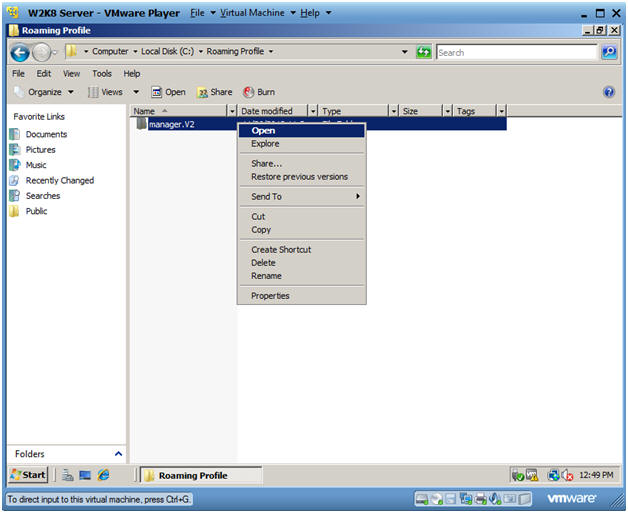
- Open the Roaming Profile Folder
- Instructions:
- Right Click on the Roaming Profile Folder
- Click Open
- Instructions:
- Open the manager.V2 Folder
- Instructions:
- Right Click on the manager.V2 Folder
- Click on Open
- Note:
- The manager.V2 Folder was created when manager logged into the domain.
- Instructions:
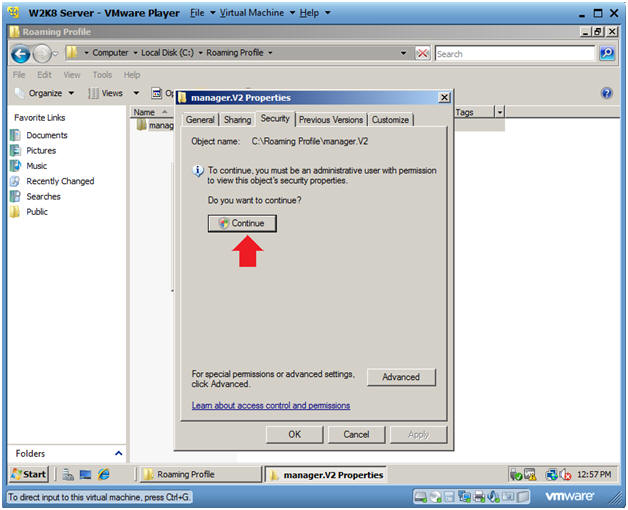
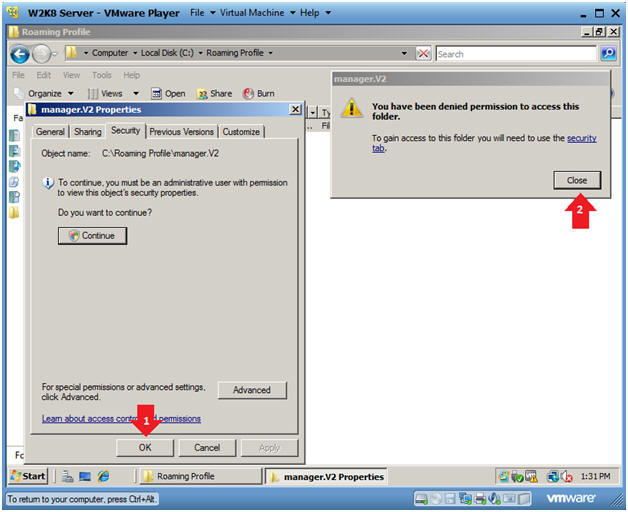
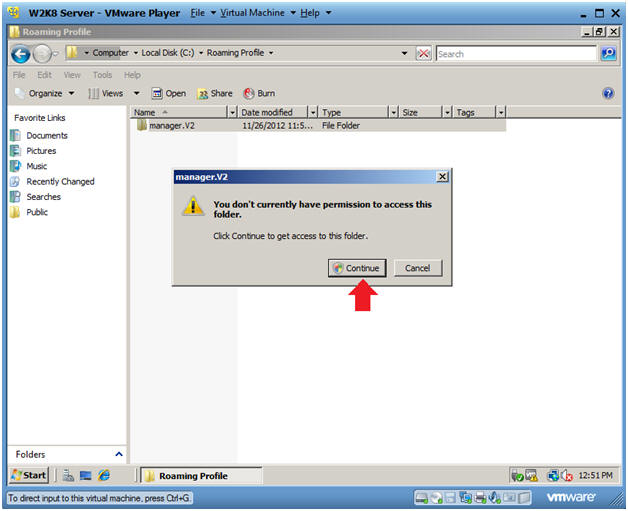
- Permission Message
- Instructions:
- Click the Continue Button
- Instructions:
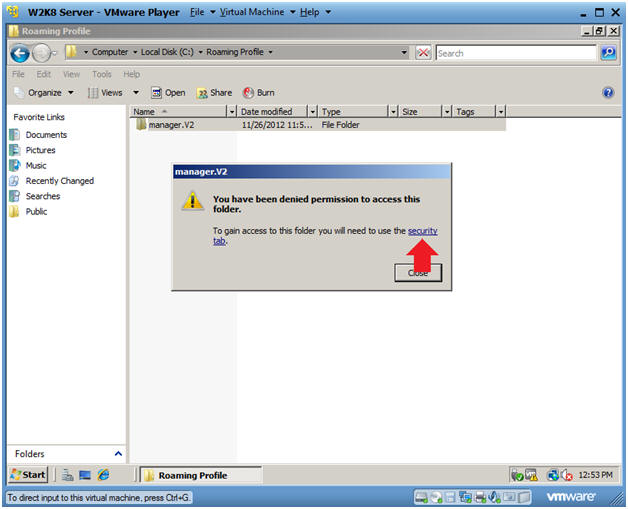
- Permission Denied Error
- Instructions:
- Click on the security tab link
- Instructions:
- Continue Message
- Instructions:
- Click the Continue Button
- Instructions:
- Advanced Security Setting for manager.V2
- Instructions:
- Click on Administrators (SECURITY\Administrators)
- Click Apply

- Instructions:
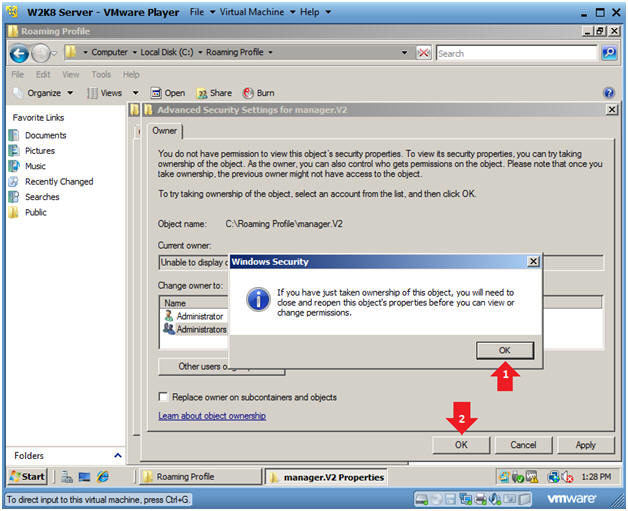
- Windows Security
- Instructions:
- Click the OK Button
- Click the OK Button
- Instructions:
- Close Remaining Security Windows
- Instructions:
- Click the OK Button
- Click the Close Button
- Instructions:
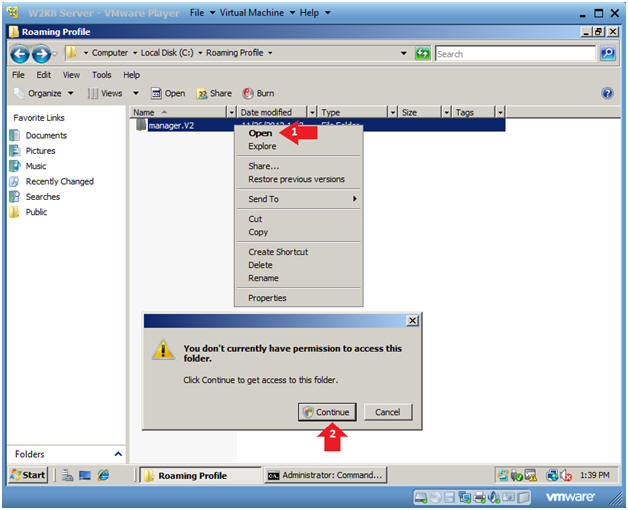
- Open the manager.V2 Folder
- Instructions:
- Right Click on the manager.V2 Folder, and Click Open
- Click the Continue Button
- Instructions:
- View the manager.V2 Folder
- Notes(FYI):
- Now you have verified that manager's username has a roaming profile.
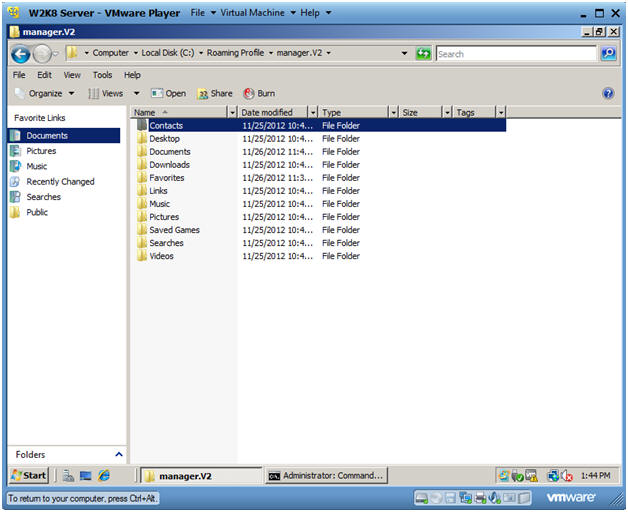
- Notes(FYI):
| Section 12. Proof of Lab |
-
On W2K8 Server, Open a Command Prompt
- Instructions:
- Type "cmd" in the search box.
- Click on "cmd" under Programs.
- Instructions:
-
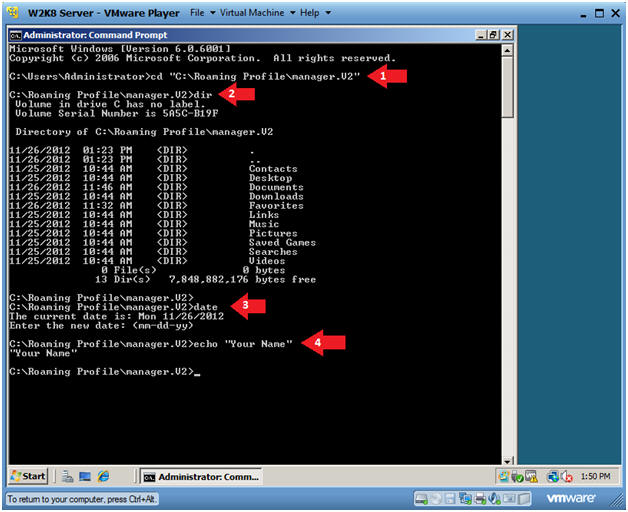
Proof of Lab Instructions
- Instructions:
- cd "C:\Roaming Profile\manager.V2"
- dir
- date
- Press <Enter>
- echo "Your Name"
- Replace the string "Your Name" with your actual name.
- e.g., echo "John Gray"
- Do a PrtScn
- Paste into a word document
- Upload to Moodle
- Instructions: