(Windows 2008 Server: Lesson 12)
{ How to add a computer to your domain }
| Section 0. Background Information |
- Overview
- In this lab, we will show you how to add a Windows 7 computer to a Windows 2008 Server Domain.
- This lab is useful, because it sets up the foundation in which all computers of a domain (1) use the same Active Directory for Authentication and (2) use the same Group Policies.
- Prerequisite
- Windows 2008 Server: Lesson 2: Configuring dcpromo
- Windows 2008 Server: Lesson 3: Configuring a Password GPO Policy
- Windows 2008 Server: Lesson 4: Creating Users and using dsquery
| Section 1. Login to your W2K8 server. |
- Edit Virtual Machine Settings
- Instructions:
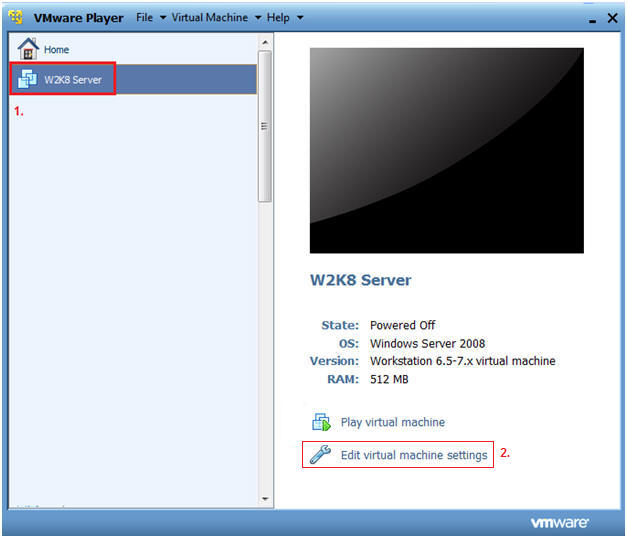
- Click on W2K8
- Click on Edit virtual machine settings
- Instructions:
- Edit Network Adapter Settings
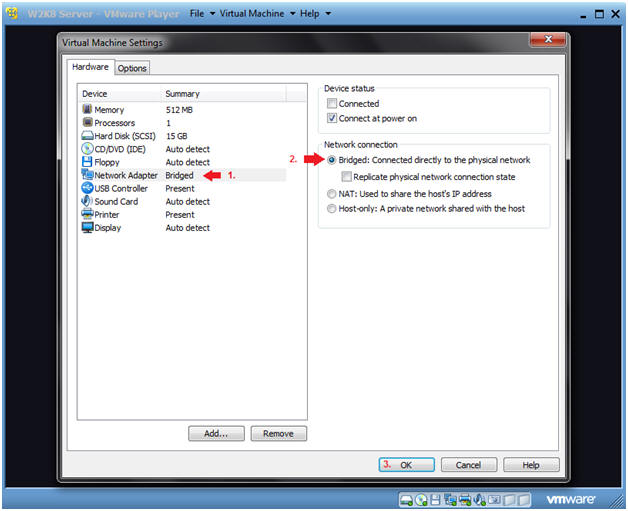
- Instructions:
- Click on Network Adapter
- Click on Bridged: Connected directly to the physical network.
- Click OK.
- Instructions:
- Start your Windows 2008 Server
- Instructions:
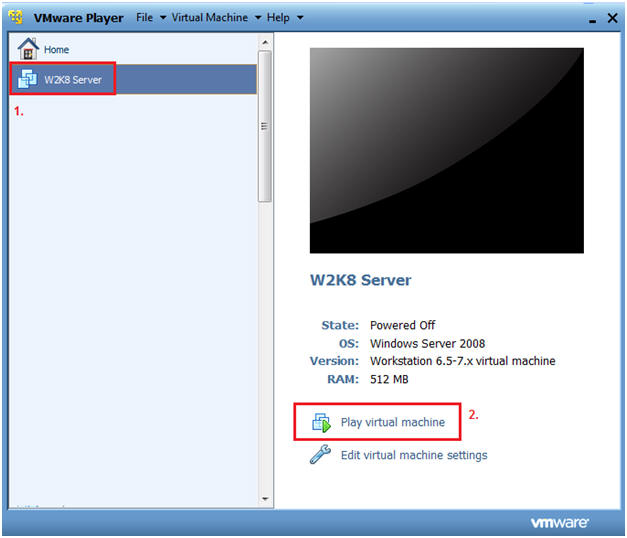
- Click on W2K8 Server
- Click on Play virtual machine
- Instructions:
- CRTL + ALT + DELETE
- Instructions
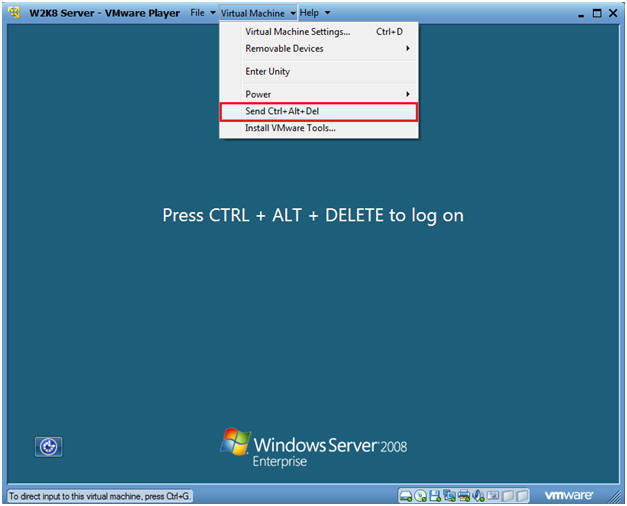
- Virtual Machine
- Send Ctrl+Alt+Del
- Instructions
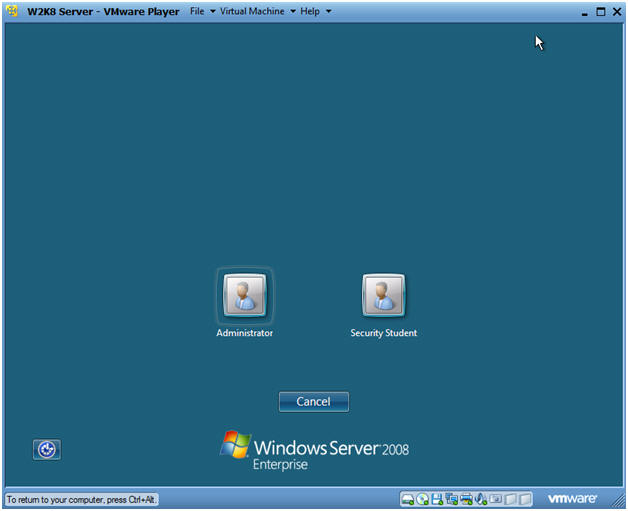
- Login as Administrator
- Click on the Administrator icon.
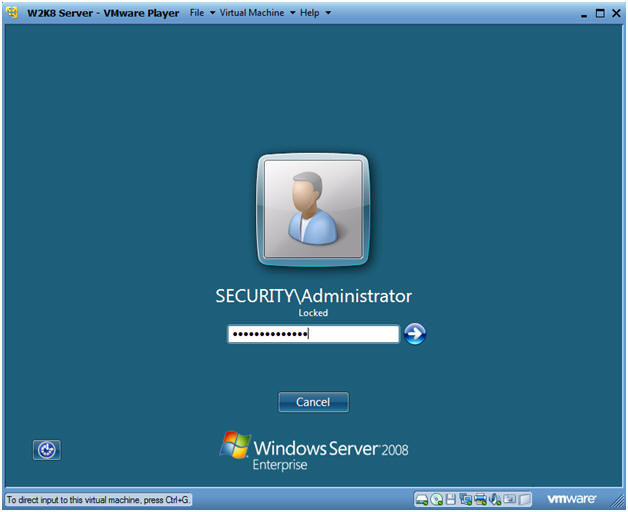
- Login
- Command: Provide the password for the Administrator account.
| Section 2. Determine the IP Address for the W2K8 server. |
- Open a Command Prompt
- Instructions:
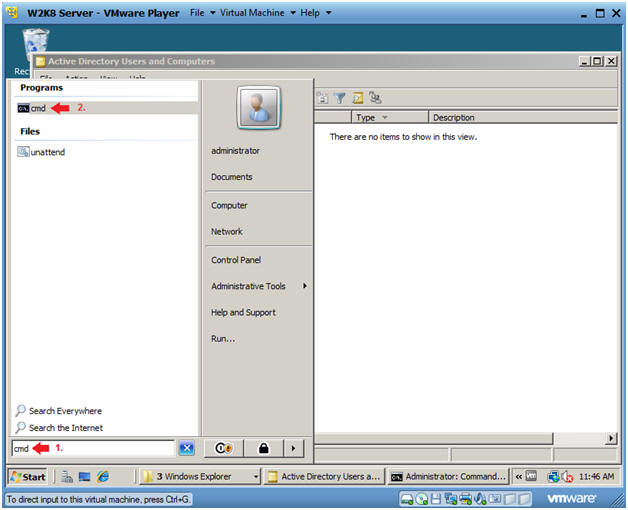
- Type "cmd" in the search box.
- Click on "cmd" under Programs.
- Instructions:
- Determine the IP Address for your W2K8 Server
- Instructions:
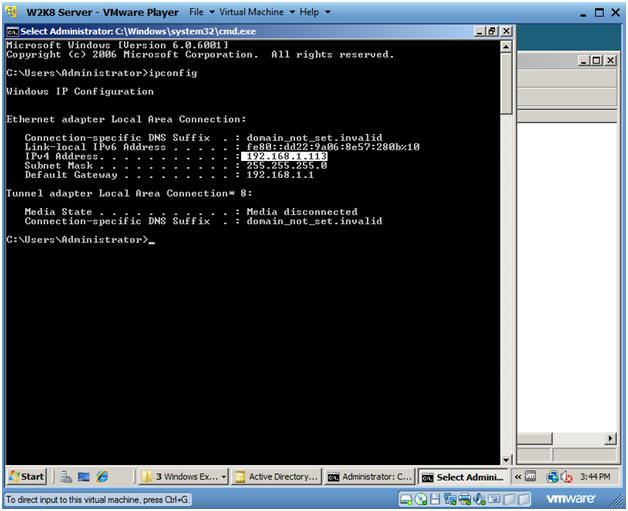
- ipconfig
- In my case, the IP Address is 192.168.1.113.
- In your case, it will probably be different.
- ipconfig
- Note:
- In a later step, this will be the IP address of the DNS server for the Windows 7 machine.
- Instructions:
| Section 3. Start up the Windows 7 machine. |
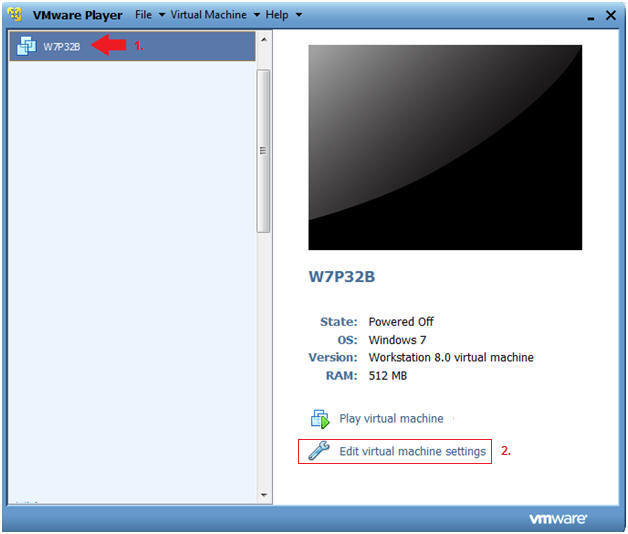
- Edit Virtual Machine Settings
-
Instructions:
- Select W7P32B
- Click on Edit virtual machine settings.
-
Instructions:
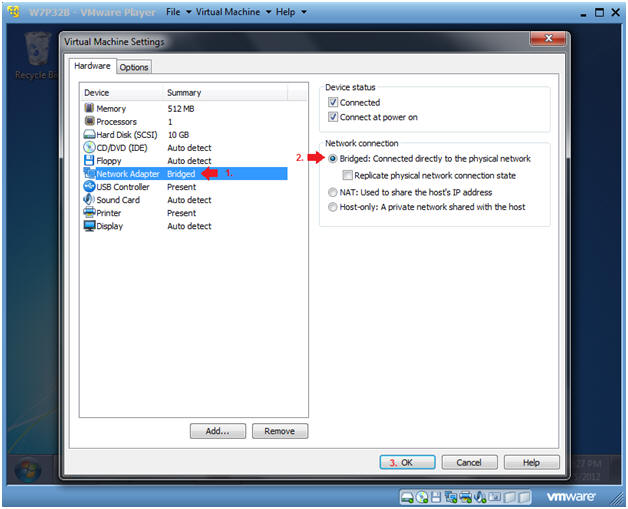
- Edit Network Adapter Settings
- Instructions:
- Click on Network Adapter
- Click on Bridged: Connected directly to the physical network.
- Click OK.
- Instructions:
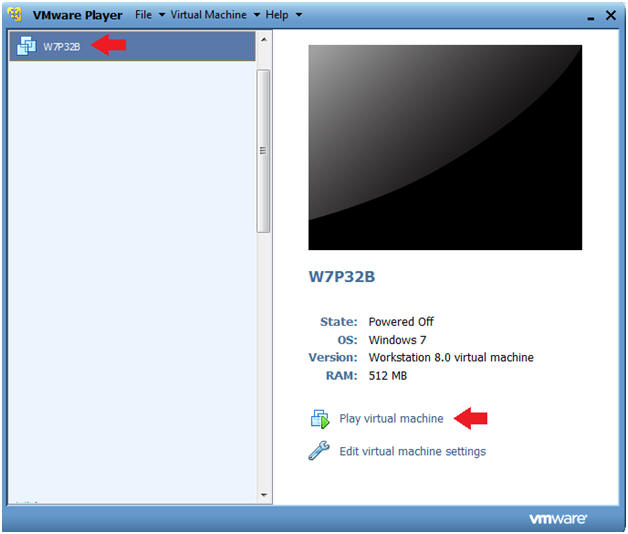
- Booting up W7P32B
-
Instructions:
- Start up VMware Player
- Select W7P32B
- Play Virtual Machine
- Note:
- For those of you that are not part of my class, W7P32Bis a Windows 7 32 Bit Operating System.
- Any version of Windows can be used.
- But you must have first completed the pre-requisite labs listed in the overview section
-
Instructions:
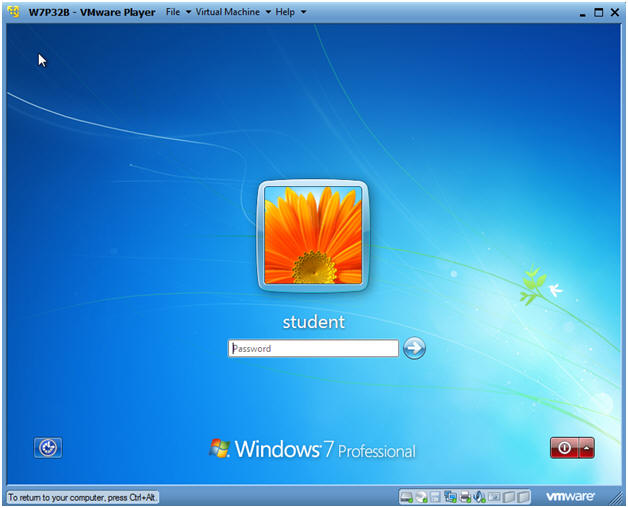
- W7P32B Authentication
-
Instructions:
- Login as student
-
Instructions:
| Section 4. Set DNS Server on Windows Client |
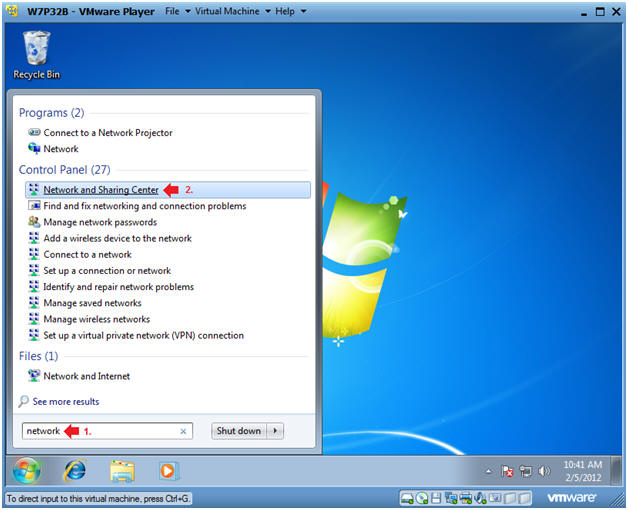
- On W7P32B, Launch Network and Sharing Center
- Instructions:
- In the search box, type "network", and press enter
- Next click on "Network and Sharing Center"
-
- Instructions:
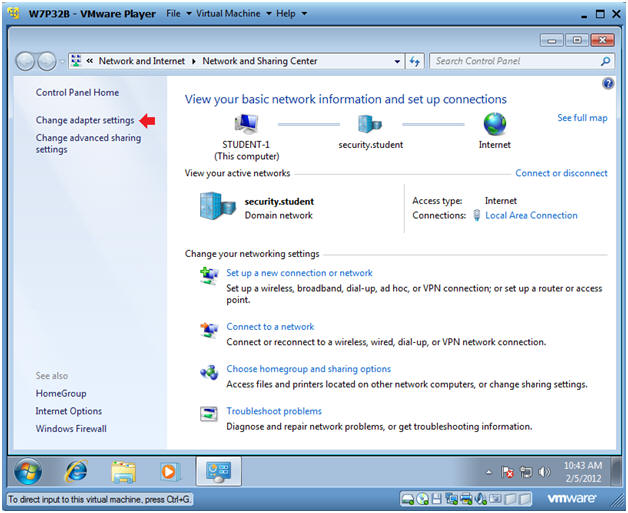
- Change adapter settings
- Instructions:
- Click on "Change adapter settings"
-
- Instructions:
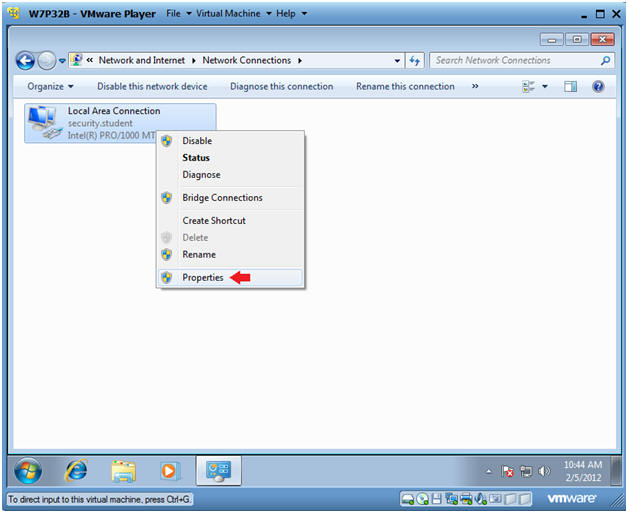
- Configure Local Area Connections
- Instructions:
- Right Click on Local Area Connection
- Click on Properties
- Instructions:
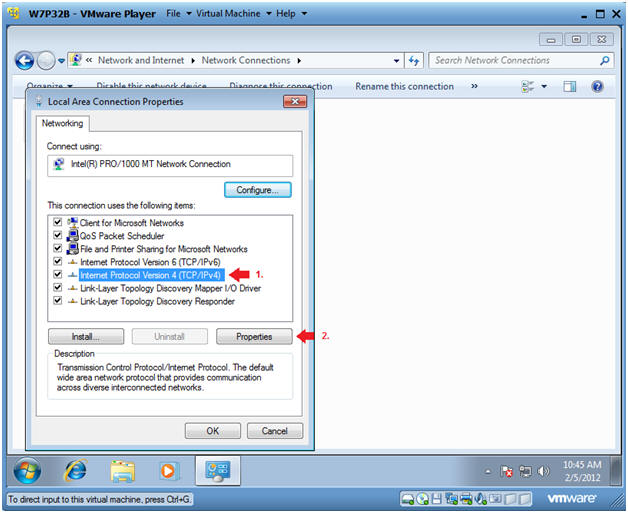
- Configure Internet Protocol Version 4(TCP/IPv4)
- Instructions:
- Click on Internet Protocol Version 4(TCP/IPv4)
- Click on Properties
- Instructions:
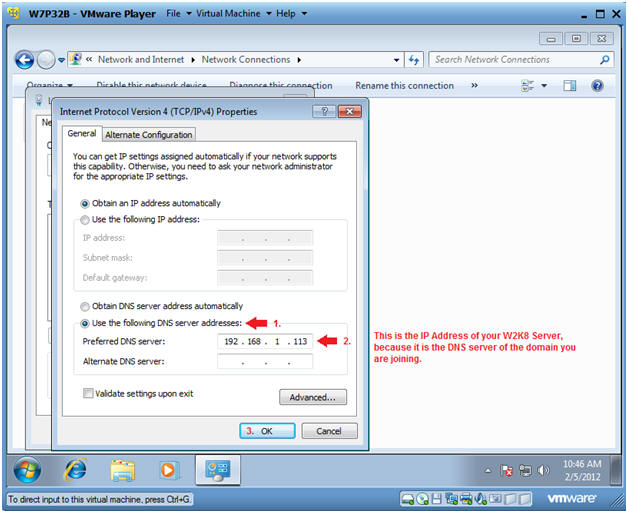
- Set DNS Server Address
- Instructions:
- Click on "Use the following DNS server addresses:" radio button.
- Preferred DNS server: E.g.,
192.168.1.113
- Note: Use the W2K8 Server IP Address you obtained in Section 2, Step 2.
- Click OK.
- Instructions:
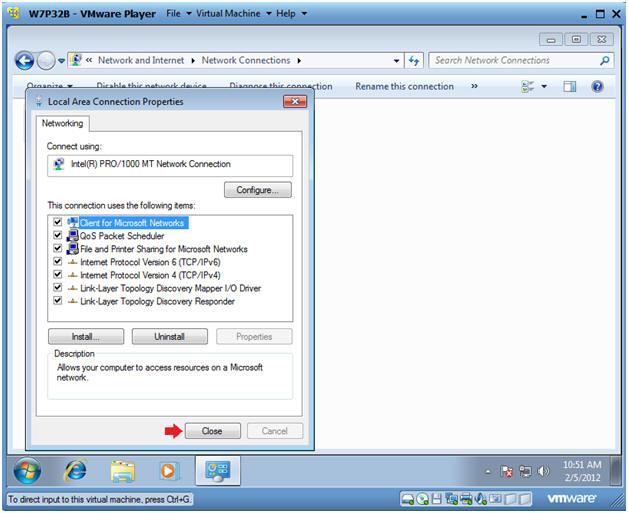
- Close Local Area Connection Properties
- Instructions:
- Click Close
- Instructions:
| Section 5. Add Windows 7 Client to the W2K8 Server Domain |
- Open Control Panel
- Instructions:
- Start --> Control Panel

- Instructions:
- Open System and Security
- Instructions:
- Click on System and Security
- Instructions:
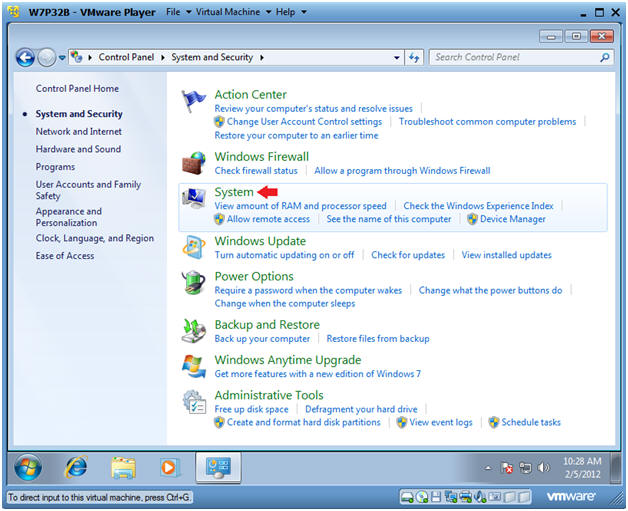
- Open System
- Instructions:
- Click on System
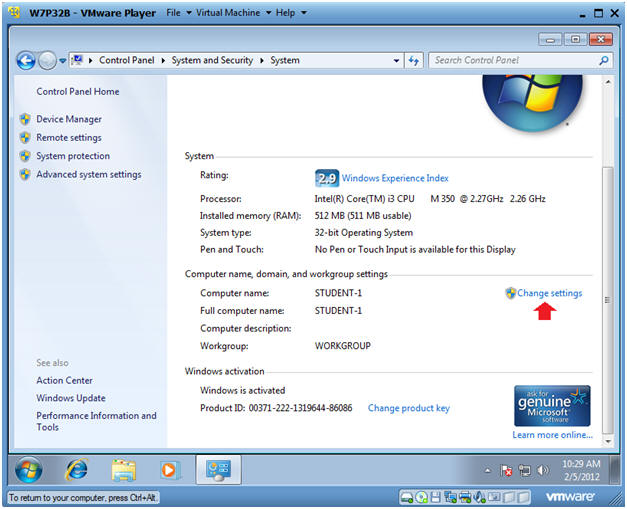
- Instructions:
- Change Settings
- Instructions:
- Click on Change settings
- Instructions:
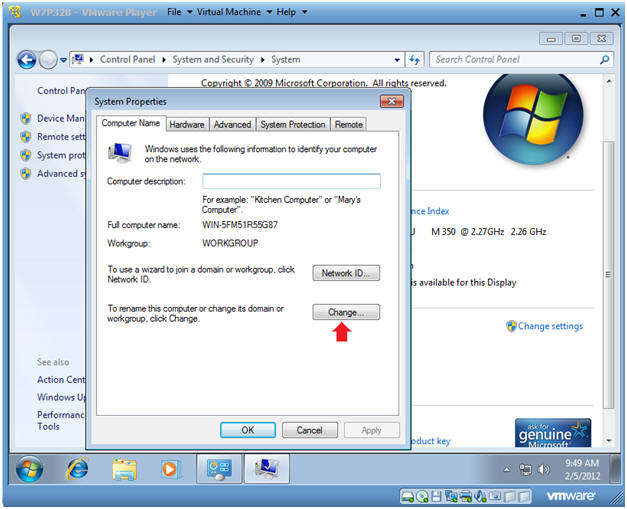
- Change System Properties
- Instructions:
- Click on the Change button.
- Instructions:
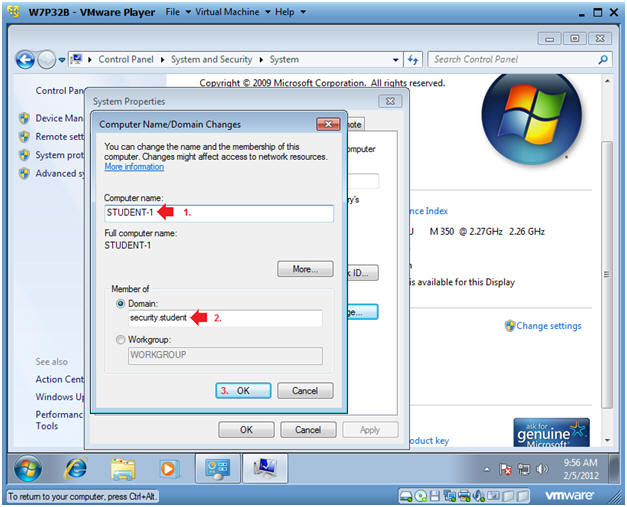
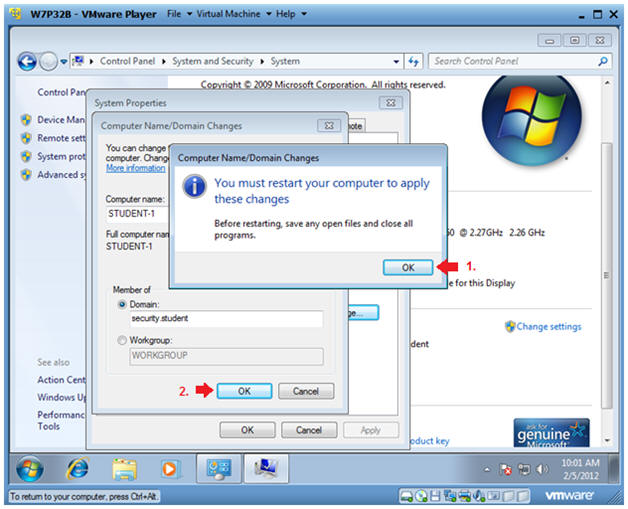
- Change Computer Name/Domain
- Instructions:
- Change Computer name to "STUDENT-1".
- Select the Domain radio button and put "security.student" in the textbox.
- Select OK.
- Instructions:
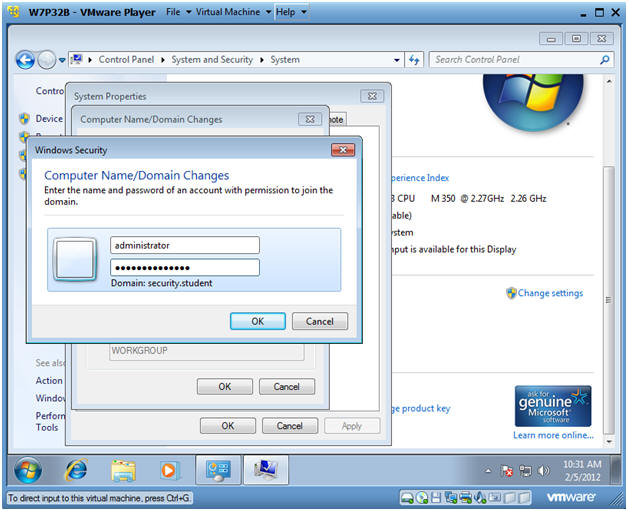
- Authenticate with the W2K8 security.student
Domain
- Instructions:
- Username: administrator
- Password: Use the Password for the W2K8 security.student domain.
- Instructions:
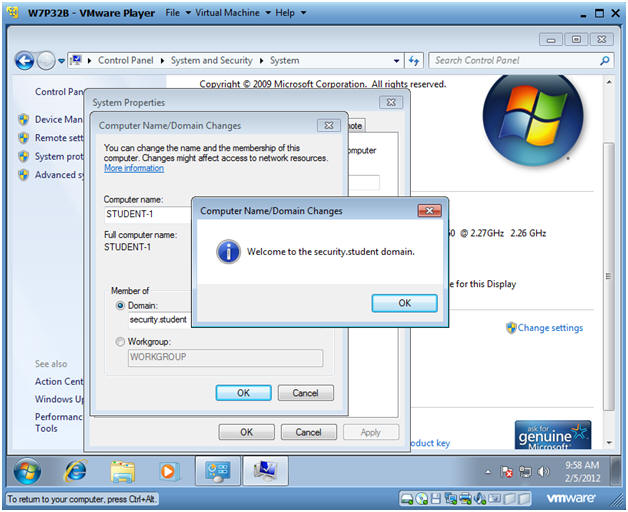
- Confirmation Message
- Instructions:
- Click OK
- Instructions:
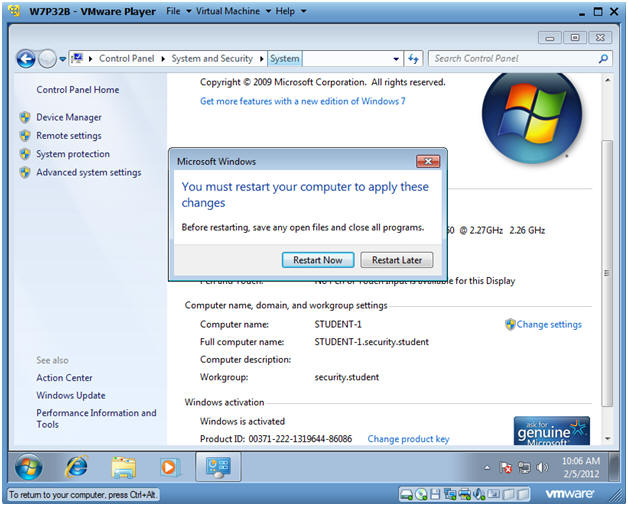
- Restart Message (Part 1)
- Instructions:
- Click OK
- Click OK
- Instructions:
- Restart Message (Part 2)
- Instructions:
- Click Restart Now
- Instructions:

| Section 6. Logging into the security.student domain |
- Send Ctrl+Alt+Del
- Instructions:
- Virtual Machine
- Send Ctrl+Alt+Del
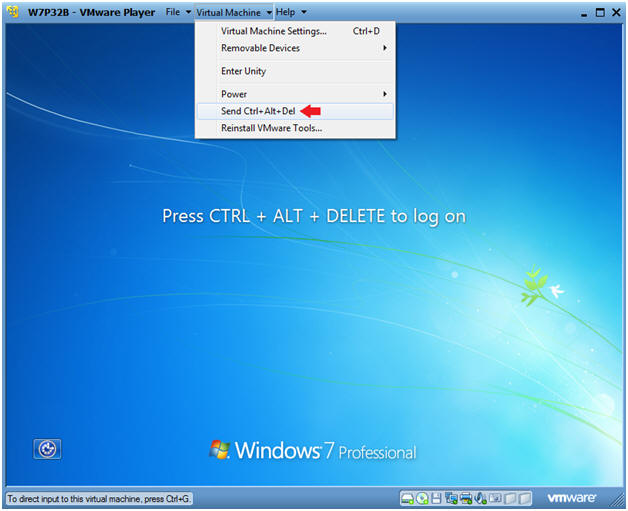
- Instructions:
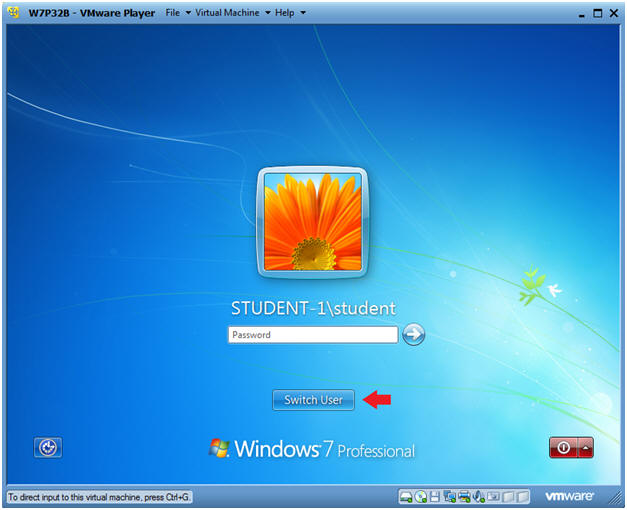
- Switch User
- Instructions:
- Click the Switch User Button
- Instructions:
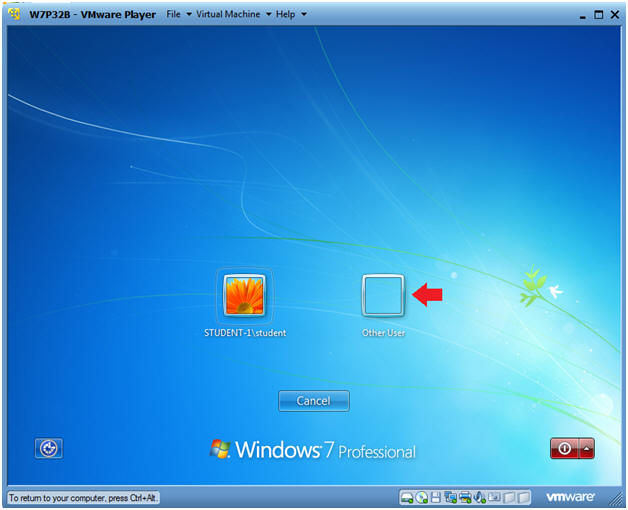
- Other User
- Instructions:
- Click Other User
- Instructions:
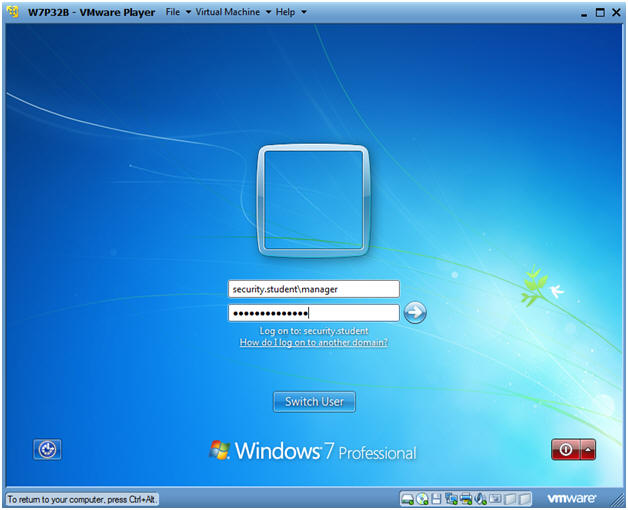
- Login as manager
- Instructions:
- Login: security.student\manager
- Password: Use the Active Directory Password for the user manager.
- Instructions:
- Verifying Login
- Instructions:
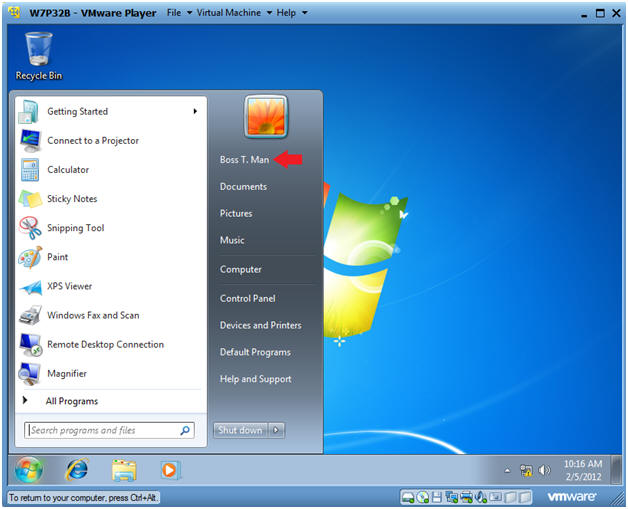
- Click the Start Button
- Note:
- Notice you are logged in as "Boss T. Man"
- Instructions:
| Section 7. Verify the Windows 7 Client's DNS |
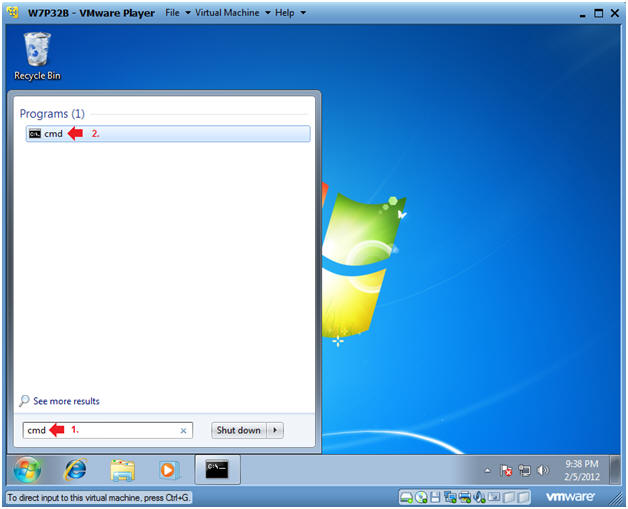
- Open a Command Prompt
- Instructions:
- Type "cmd" in the search box.
- Click on "cmd" under Programs.
- Instructions:
- Using nslookup
- Instructions:
- nslookup
- www.cnn.com
- quit
- date
- Press <Enter>
- echo "Your Name"
-
Proof of Lab Instructions (Part 1):
- Do a PrtScn
- Paste into a word document
- Instructions:

| Section 8. Verify the security.student domain computers |
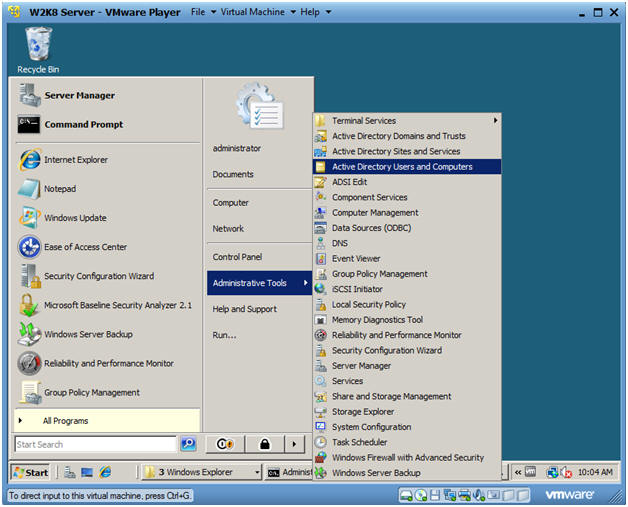
- Open Active Directory Users and Computers
- Instructions:
- Start --> Administrative Tools --> Active Directory Users and Computers.
- Instructions:
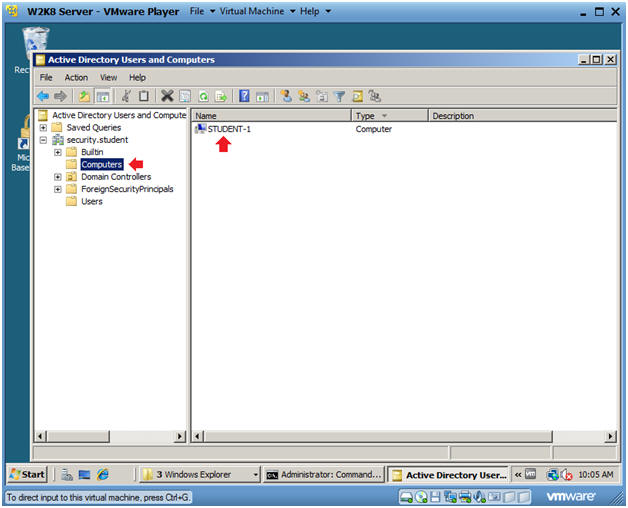
- View security.student Domain Computers
- Instructions:
- Click on Computers
- Note:
- You should see STUDENT-1.
- Instructions:
- Open a Command Prompt
- Instructions:
- Type "cmd" in the search box.
- Click on "cmd" under Programs.
- Instructions:
- Using dsquery
- Instructions:
- dsquery computer
- date
- Press <Enter>
- echo "Your Name"
- Replace the string "Your Name" with your actually name.
- E.g., echo "John Gray"
-
Proof of Lab Instructions
(Part 2):
- Do a PrtScn
- Paste into the same word document as used in Proof of Lab Part 1.
- Upload to Moodle.
- Instructions:

| Section 5. Proof of Lab |
- Proof of Lab Instructions
- Instructions:
- Complete Section 7, Step 2
- Complete Section 8, Step 4
-
Proof of Lab Instructions:
- Do PrtScn's for both Proof of Labs.
- Upload to Moodle
- Instructions: