(Damn Vulnerable Windows 7: Lesson 2)
{ How to Install BadBlue }
| Section 0. Background Information |
- What is BadBlue?
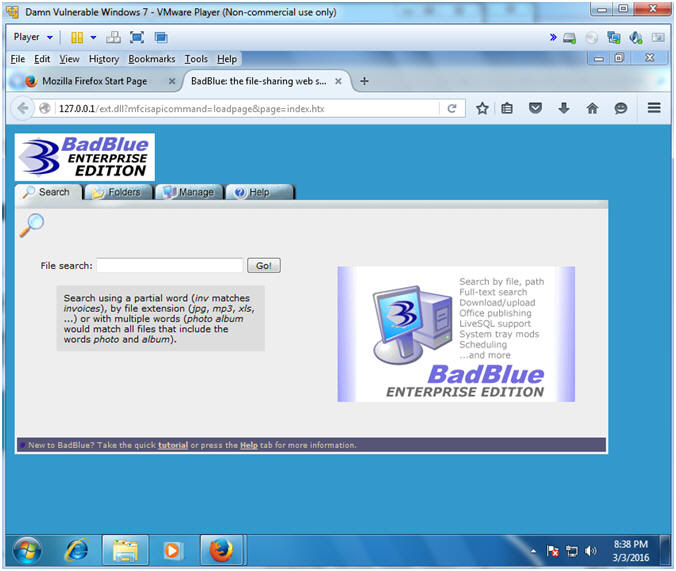
- BadBlue is the file-sharing web server that allows the sharing of photos, music, videos, and business files. BadBlue can also be integrated with PHP and Perl applications.
- Exploit Description
- Stack-based buffer overflow in the PassThru functionality in ext.dll in BadBlue 2.72b and earlier allows remote attackers to execute arbitrary code via a long query string.
- http://cve.mitre.org/cgi-bin/cvename.cgi?name=CVE-2007-6377
- Pre-Requisite Lab
-
Lab Notes
- In this lab we will do the following:
- Download BadBlue
- Install BadBlue
- Run BadBlue
- In this lab we will do the following:
- Legal Disclaimer
- As a condition of your use of this Web site, you warrant to computersecuritystudent.com that you will not use this Web site for any purpose that is unlawful or that is prohibited by these terms, conditions, and notices.
- In accordance with UCC § 2-316, this product is provided with "no warranties, either express or implied." The information contained is provided "as-is", with "no guarantee of merchantability."
- In addition, this is a teaching website that does not condone malicious behavior of any kind.
- You are on notice, that continuing and/or using this lab outside your "own" test environment is considered malicious and is against the law.
- © 2015 No content replication of any kind is allowed without express written permission.
| Section 1: Start your Windows 7 VM |
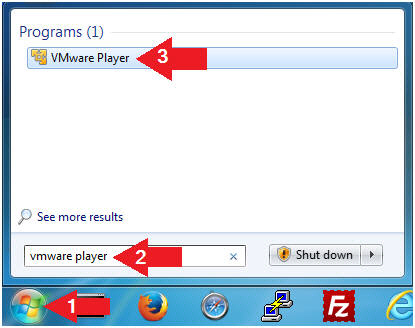
- Open VMware Player on your windows machine.
- Instructions:
- Click the Start Button
- Type "vmware player" in the search box
- Click on VMware Player
- Instructions:
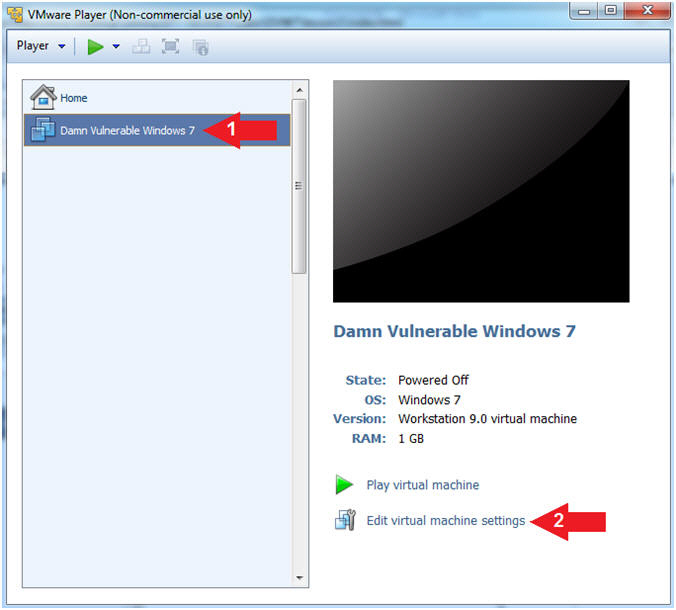
- Edit Virtual Machine Settings
- Instructions:
- Click on Damn Vulnerable Windows 7
- Click on Edit virtual machine settings
- Instructions:
- Configure CD/DVE(IDE)
- Instructions:
- Select CD/DVD (IDE)
- Click on the Use physical drive: radio button
- Select Auto detect
- Note(FYI):
- Do not click on the OK Button

- Instructions:
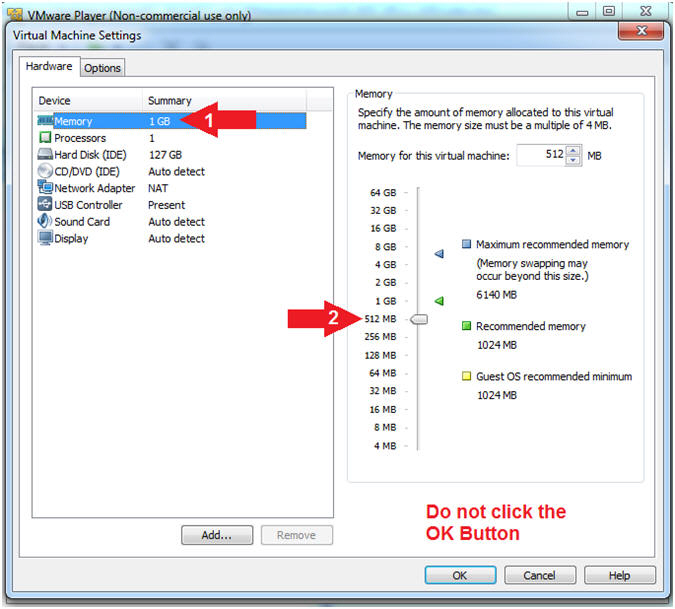
- Configure Memory
- Instructions:
- Select Memory
- Click on "512 MB"
- Note(FYI):
- Temporarily lower the amount of memory to 512 MB to limit the size of the crash dump file that we will later analyze in a proceeding lesson.
- Instructions:
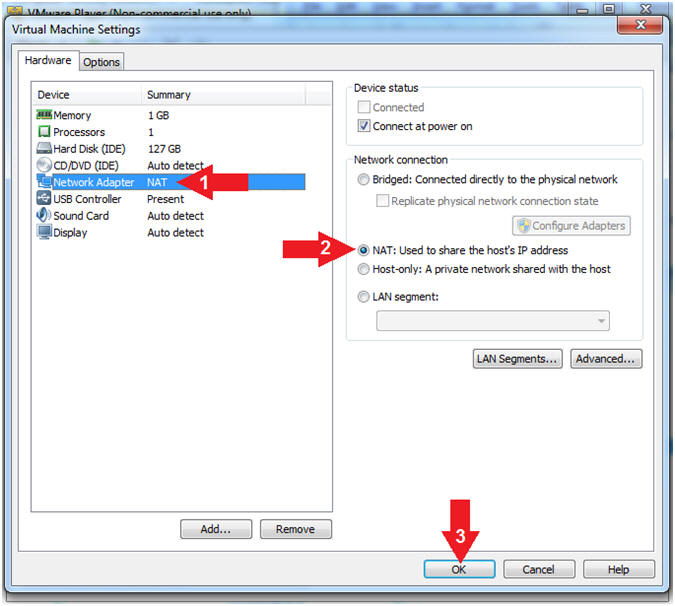
- Configure Network Adapter
- Instructions:
- Select Network Adapter
- Click the radio button "NAT: Used to share the host's IP address"
- Click the OK button
- Note(FYI):
- We will use NAT instead of bridged, because of multiple VMware Player issues with Windows 7 not acquiring an IP Address when using a Wireless connection.
- Instructions:
- Start Damn Vulnerable Windows 7
- Instructions:
- Click on Damn Vulnerable Windows 7
- Click on Play virtual machine
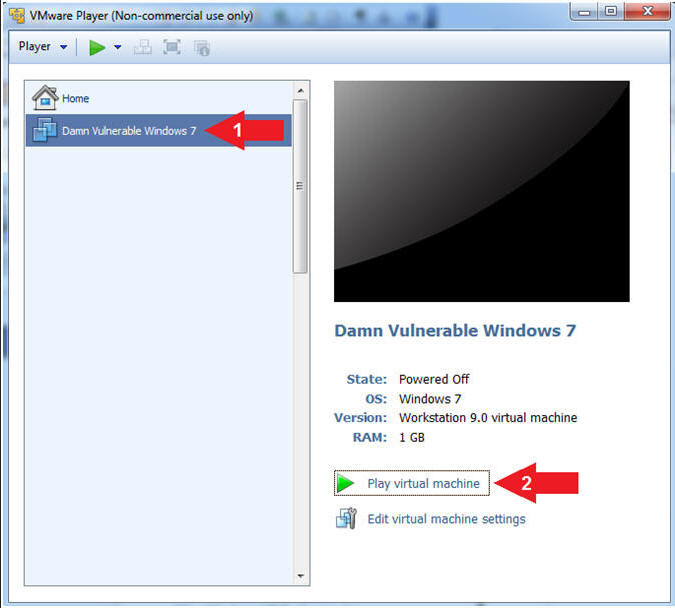
- Instructions:
| Section 2: Login to Windows 7 |
- Select Login User
- Instructions:
- Click on Administrator
- Instructions:
- Switch User
- Instructions:
- Supply the Administrator password (password).
- Click on the arrow

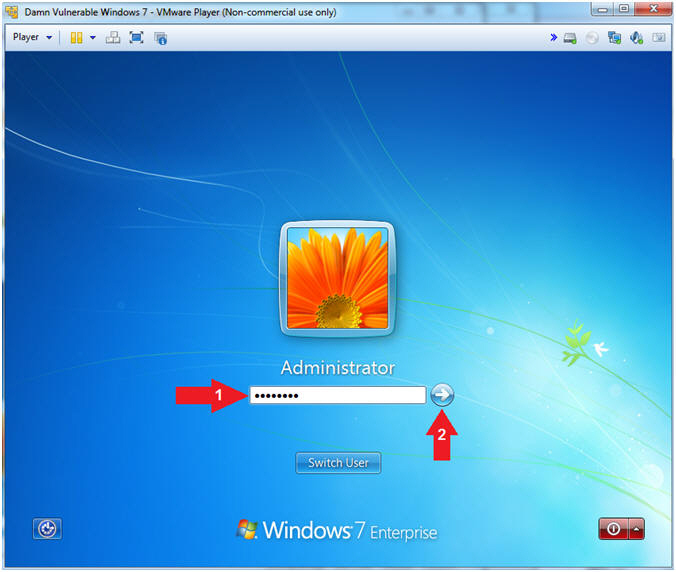
- Instructions:

| Section 3: Download and Install BadBlue |
- Open Firefox (On
Damn Vulnerable Windows 7)
- Instructions:
- Click the Windows Start Button
- Search for firefox
- Click on Mozilla Firefox
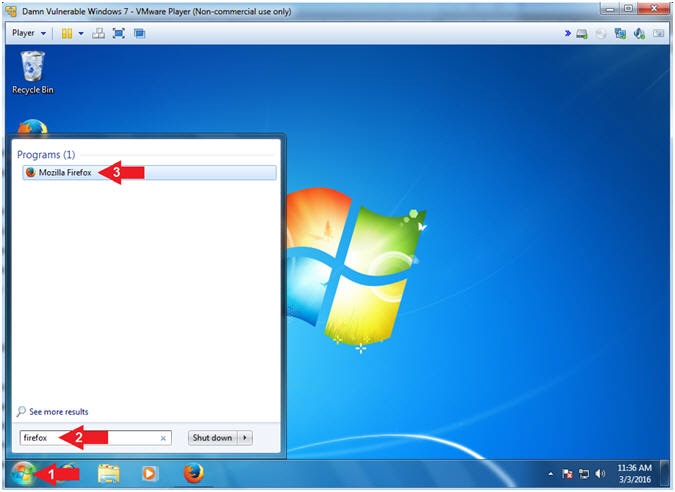
- Instructions:
- Download BadBlue
- Instructions:
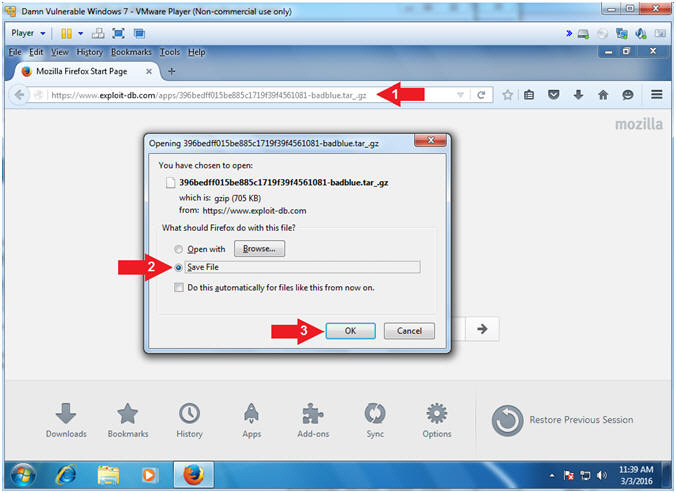
- Navigate to the following URL
- https://www.exploit-db.com/apps/396bedff015be885c1719f39f4561081-badblue.tar_.gz
- Click on the Save File Radio Button
- Click on OK Button
- Navigate to the following URL
- Instructions:
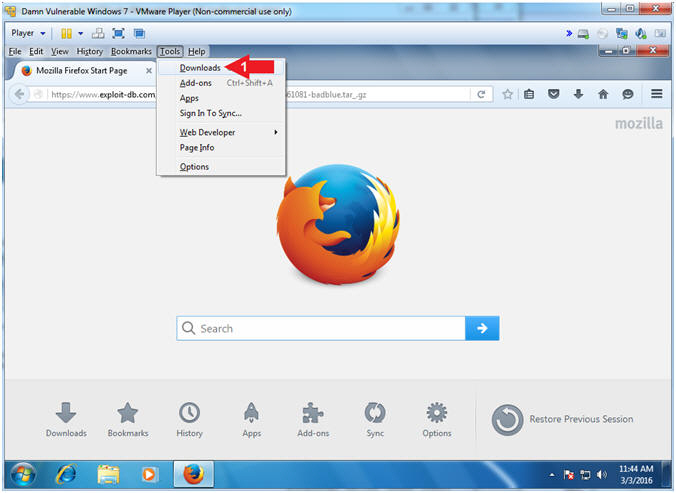
- Go To Downloads Folder
- Instructions:
- Tools --> Downloads
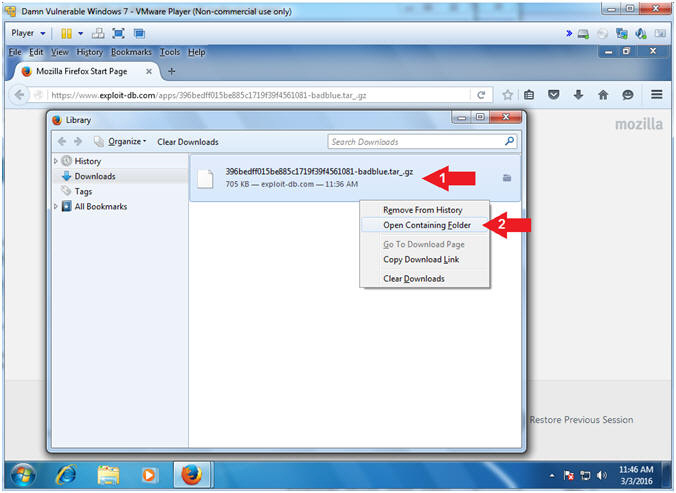
- Instructions:
- Open Containing Folder
- Instructions:
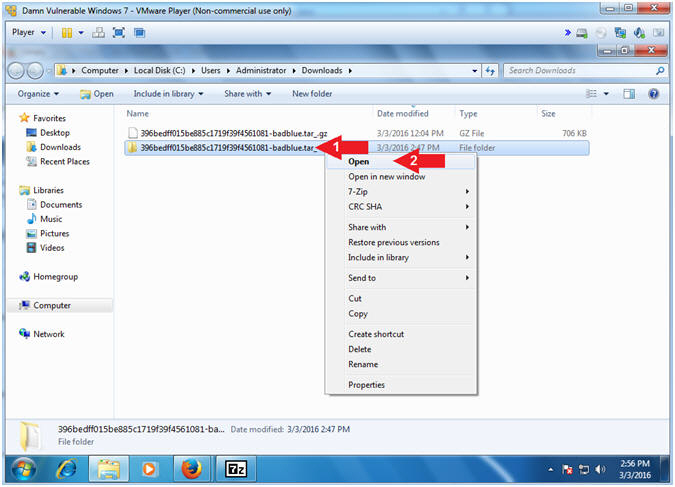
- Right Click on 396bedff015be885c1719f39f4561081-badblue.tar_.gz
- Click on Open Containing Folder
- Instructions:
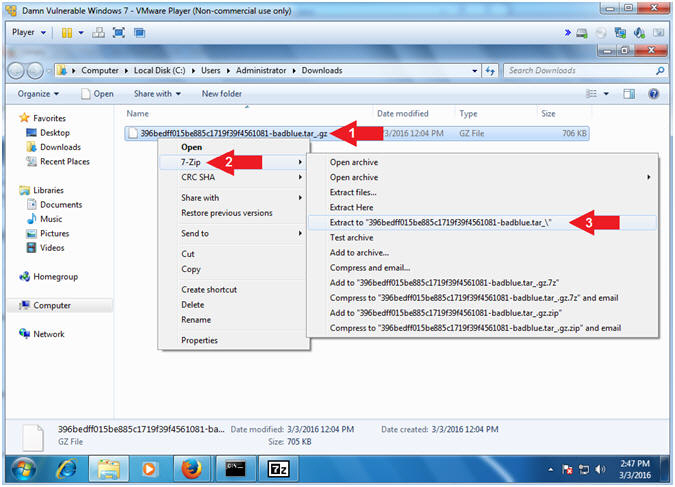
- Unzip
396bedff015be885c1719f39f4561081-badblue.tar_.gz
- Instructions:
- Right Click on 396bedff015be885c1719f39f4561081-badblue.tar_.gz
- Click on 7-Zip
- Click on 396bedff015be885c1719f39f4561081-badblue.tar_
- Instructions:
- Open
396bedff015be885c1719f39f4561081-badblue.tar_ Folder
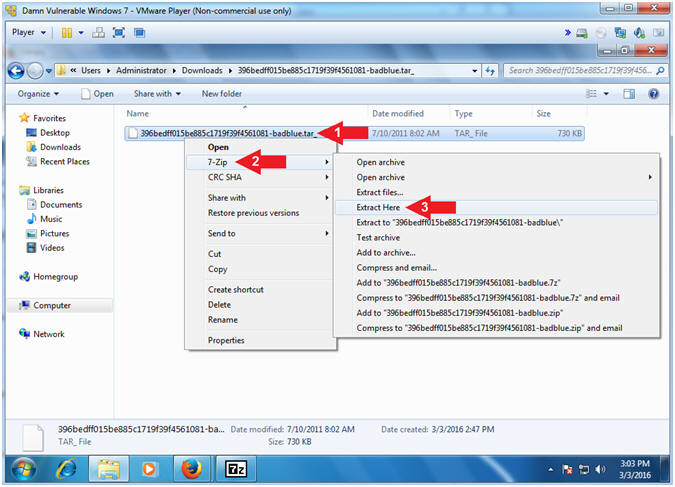
- Instructions:
- Right Click on 396bedff015be885c1719f39f4561081-badblue.tar_
- Click on Open
- Instructions:
- Extract Here
- Instructions:
- Right Click on 396bedff015be885c1719f39f4561081-badblue.tar_
- Click on 7-Zip
- Click on Extract Here
- Instructions:
- Begin BadBlue Installation
- Instructions:
- Right Click on bb98
- Click on Open
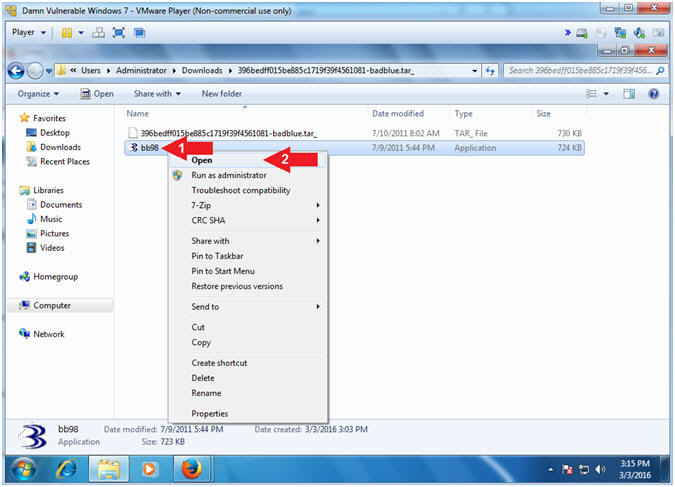
- Instructions:
- BadBlue Setup
- Instructions:
- Click on Next Button
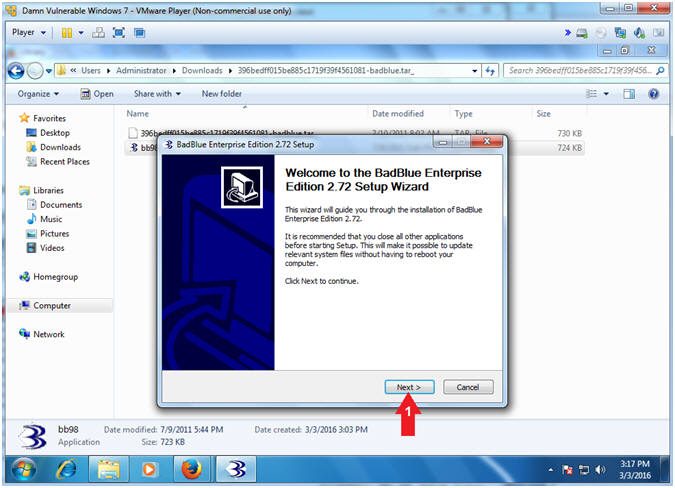
- Instructions:
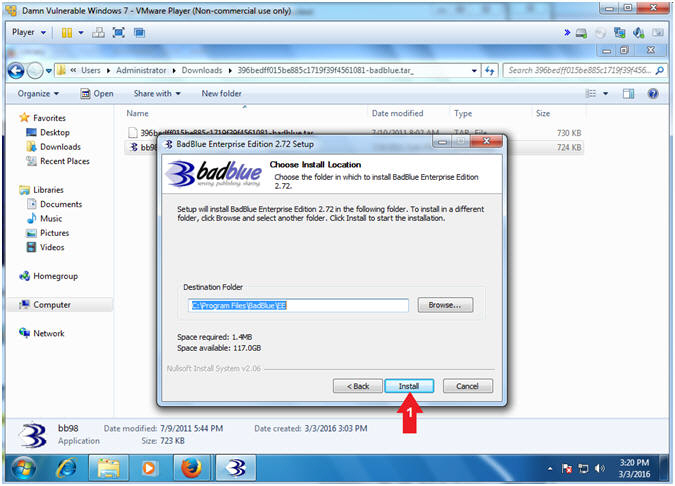
- Install BadBlue
- Instructions:
- Click on Install Button
- Instructions:
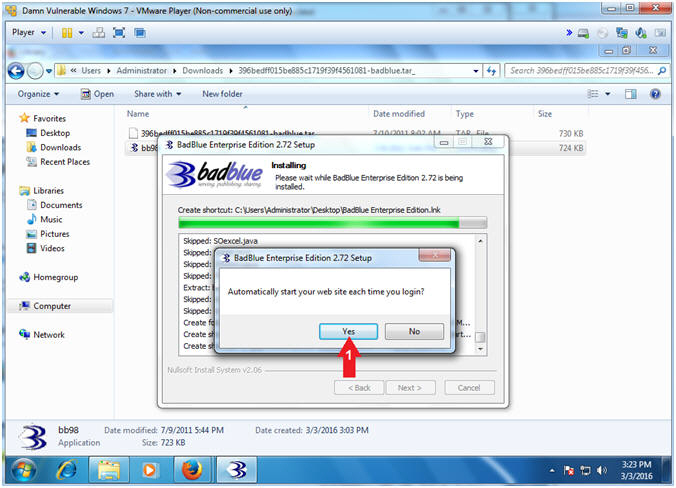
- BadBlue Automatic Startup
- Instructions:
- Click on Yes Button
- Instructions:
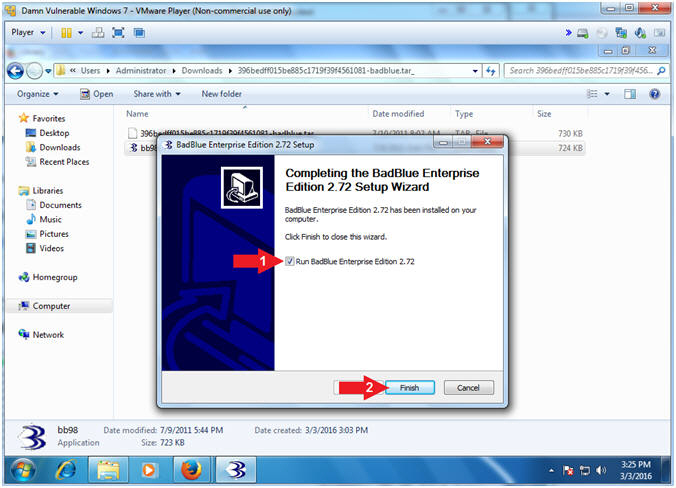
- Run BadBlue
- Instructions:
- Click on Finish Button
- Instructions:
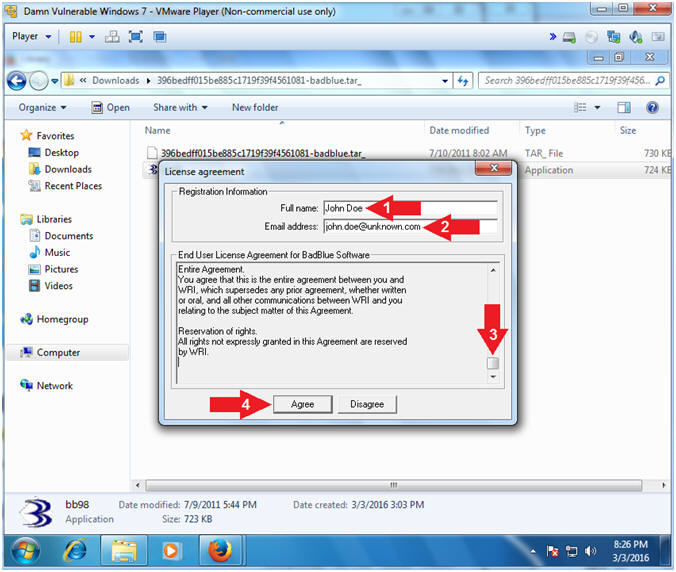
- License Agreement
- Instructions:
- Full name: Your Name
- Email address: name@email.com
- Scroll to the end of the EULA
- Click the Agree Button
- Instructions:
- View BadBlue Application
- Note(FYI):
- BadBlue will start After clicking the Agree button
- Note(FYI):
| Section 4: Proof of Lab |
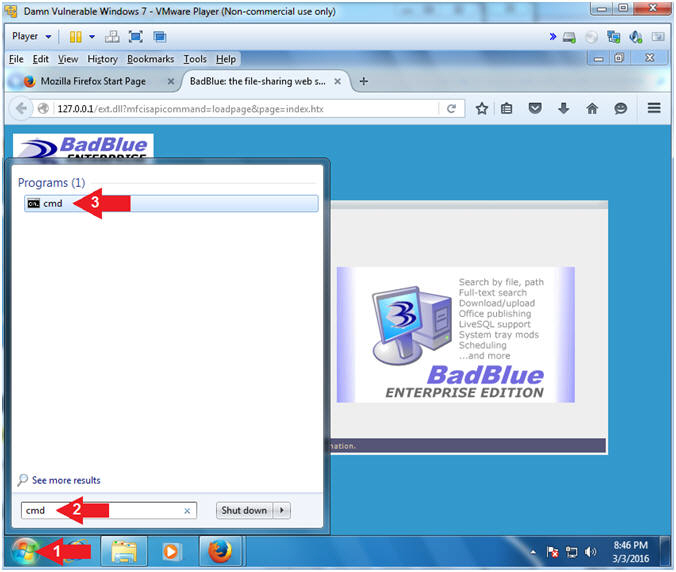
- Open Command Prompt
- Instructions:
- Click the Start Button
- Search for cmd
- Click on cmd
- Instructions:
- Proof of Lab (Basic Process Forensics)
- Instructions:
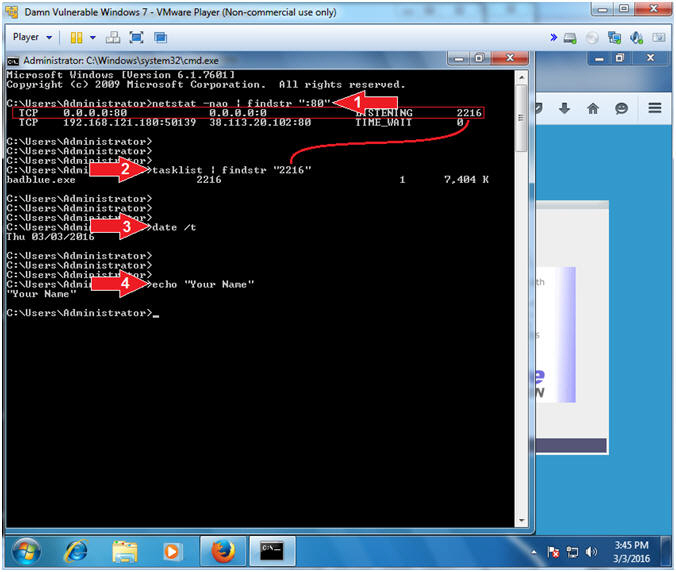
- netstat -nao | findstr ":80"
- Record the Process ID. Mine is 2216.
- tasklist | findstr "2216"
- Replace (2216) with your Process ID.
- date
- echo "Your Name"
- Replace the string "Your Name" with your actual name.
- e.g., echo "John Gray"
- netstat -nao | findstr ":80"
- Note(FYI):
- Command #1, Use (netstat) to list all(-a) the tcp (-n) network connections and their process IDs (-o). Use (findstr) to only display lines that contain the string ":80".
- Command #2, Use (tasklist) to display all system processes. Use (findstr) to only display lines that contain the Process ID string "2216". Your Process ID will probably be different.
-
Proof of Lab Instructions:
- Do a PrtScn
- Paste into a word document
- Upload to Moodle
- Instructions: