(Ubuntu: Lesson 15)
{ Installing and Configuring Samba }
| Section 0. Background Information |
- What is Samba
- The name Samba comes from SMB (Server Message Block), the name of the standard protocol used by the Microsoft Windows network file system. SMB is a protocol for sharing files, printers, serial ports, and communications abstractions such as named pipes and mail slots between computers.
- Samba provides file and print services for various Microsoft Windows clients and can integrate with a Windows Server domain, either as a Primary Domain Controller (PDC) or as a domain member.
- It can also be part of an Active Directory domain.
- Samba runs on most Unix and Unix-like systems, such as GNU/Linux, Solaris, AIX and the BSD variants, including Apple's Mac OS X Server (which was added to the Mac OS X client in version 10.2).
- Prerequisite
-
Lab Notes
- In this lab we will how to do the following:
- We will install Samba on Ubuntu.
- We will configure Samba to only allow a specific user to access the Samba Share.
- In this lab we will how to do the following:
- Legal Disclaimer
- As a condition of your use of this Web site, you warrant to computersecuritystudent.com that you will not use this Web site for any purpose that is unlawful or that is prohibited by these terms, conditions, and notices.
- In accordance with UCC § 2-316, this product is provided with "no warranties, either express or implied." The information contained is provided "as-is", with "no guarantee of merchantability."
- In addition, this is a teaching website that does not condone malicious behavior of any kind.
- You are on notice, that continuing and/or using this lab outside your "own" test environment is considered malicious and is against the law.
- © 2012 No content replication of any kind is allowed without express written permission.
| Section 1: Start Ubuntu 12.04 |
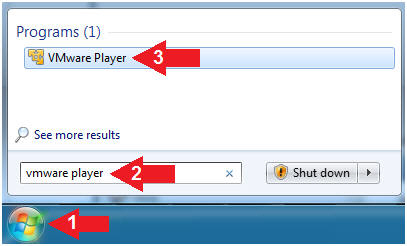
- Start VMware Player
- Instructions
- For Windows 7
- Click Start Button
- Search for "vmware player"
- Click VMware Player
- For Windows XP
- Starts --> Programs --> VMware Player
- For Windows 7
- Instructions
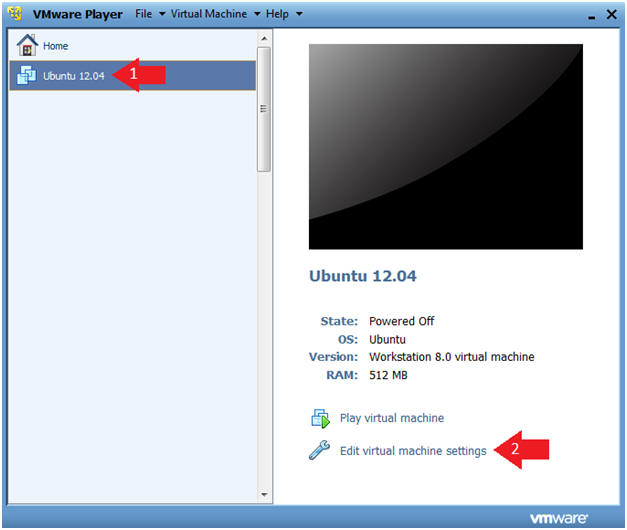
- Verify Virtual Machine Settings.
- Instructions
- Click on Ubuntu 12.04
- Click on Edit virtual machine settings
- Instructions
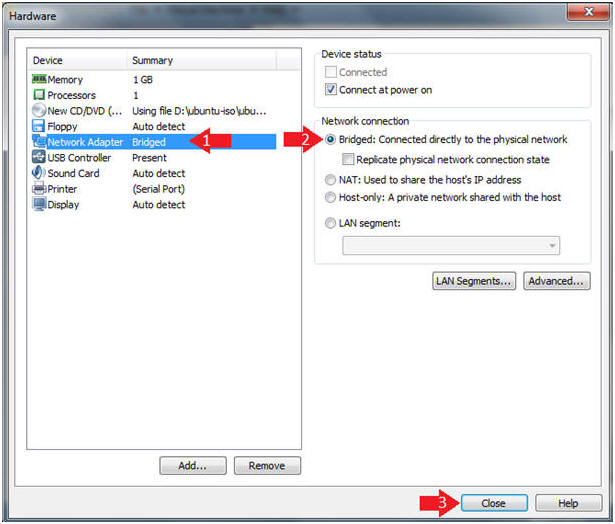
- Configure Network Adapter
- Instructions
- Click on Network Adapter
- Click on the Bridged Radio Button
- Click on the Close Button
- Instructions
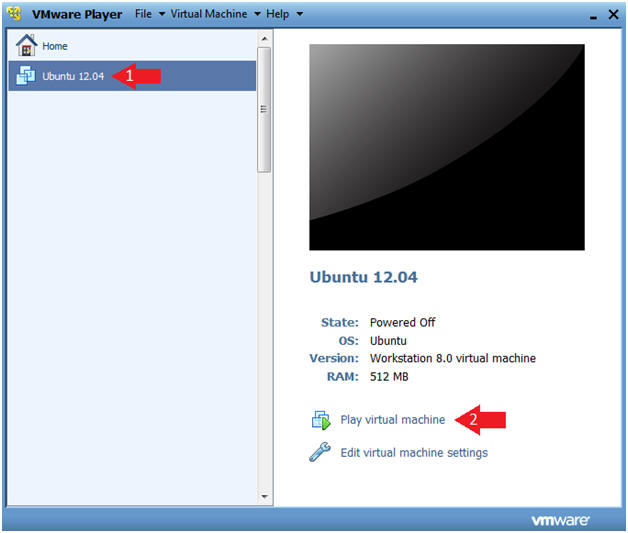
- Start the Ubuntu 12.04 VM
- Instructions
- Click on Ubuntu 12.04
- Click on Play virtual machine
- Instructions
| Section 2: Login to Ubuntu |
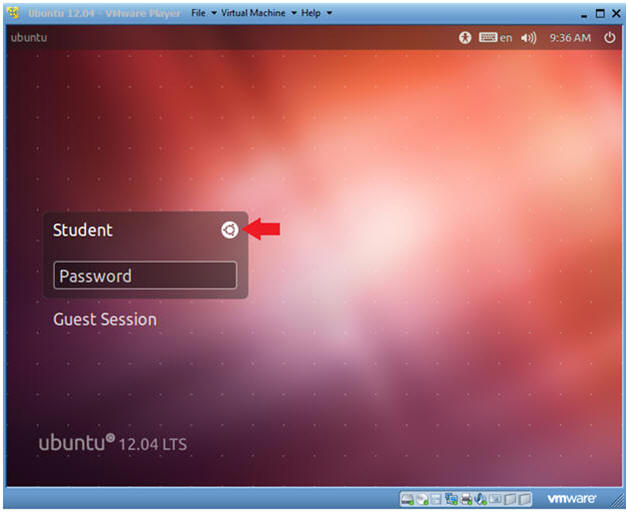
- Change to Gnome Classic
- Instructions:
- Click on the Circle
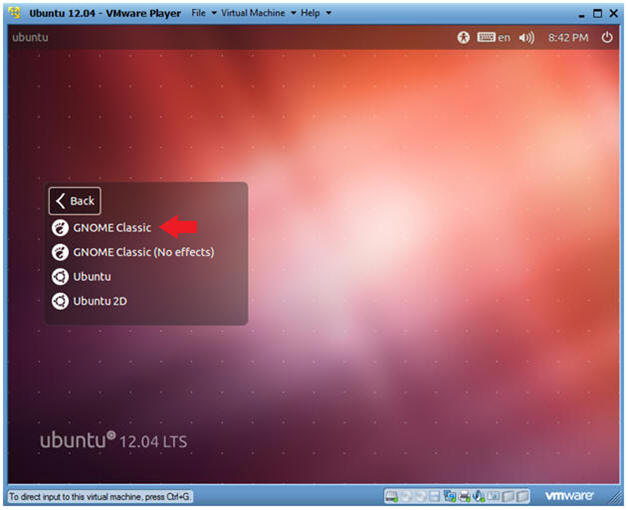
- Instructions:
- Select Gnome Classic
- Instructions:
- Double Click on GNOME Classic
- Instructions:
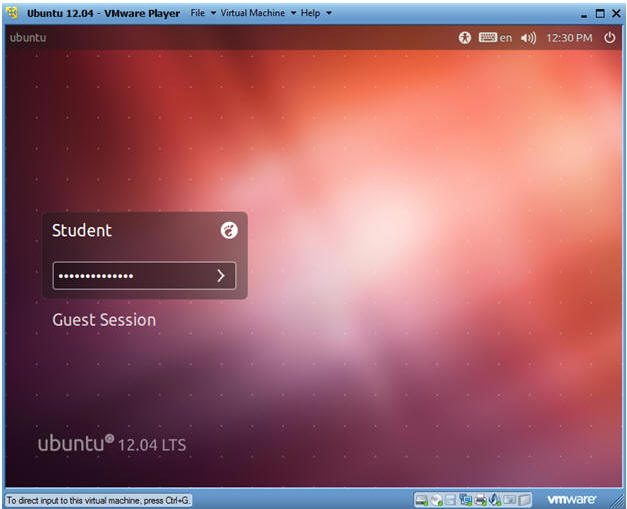
- Login to Server
- Instructions
- User: Student
- Password: Please supply the student password.
- Instructions
| Section 3: Become Root and Verify Network Connection |
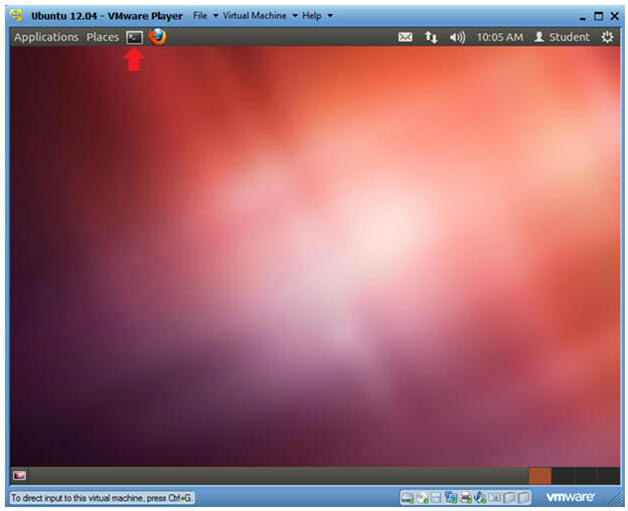
- Start up a Terminal
- Instructions
- Click on the Terminal
- Instructions
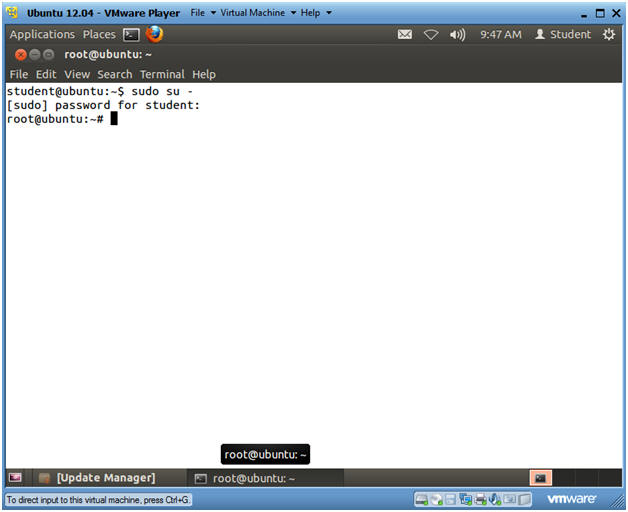
- Become Root
- Instructions
- sudo su -
- Supply the student password.
- Instructions
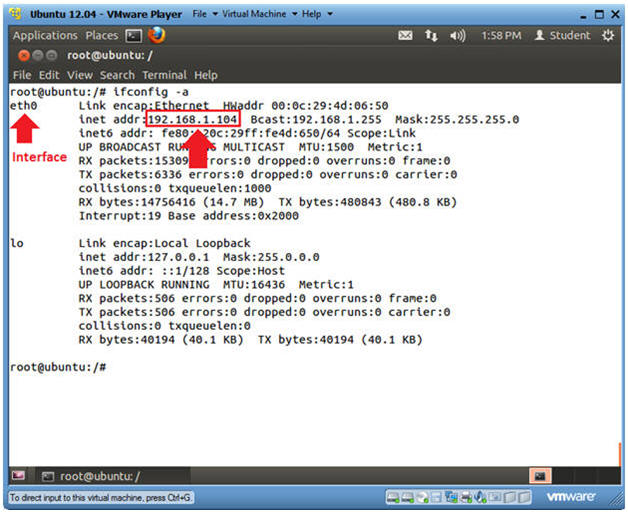
- Verify you have a network connection
- Instructions
- ifconfig -a
- eth0 is the name of my interface.
- 192.168.1.104 is my network IP address.
- ifconfig -a
- Note(FYI):
- If you do not have an DHCP IP Address
try the following:
- dhclient
- OR
- /etc/init.d/networking restart
- dhclient
- If you do not have an DHCP IP Address
try the following:
- Instructions
| Section 3: Update apt-get's package index |
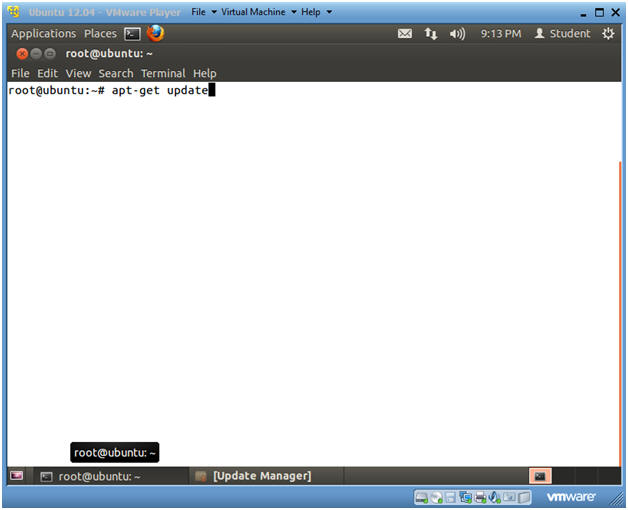
- Update apt-get's package index
- Instructions
- apt-get update
- Note(FYI):
- update is used to resynchronize the package index files from their sources. I.e., The "update" flag updates apt-get's local database with debian server's pkglist files. The indexes of available packages are fetched from the location(s) specified in /etc/apt/sources.list.
- Instructions
| Section 4: Search for Samba |
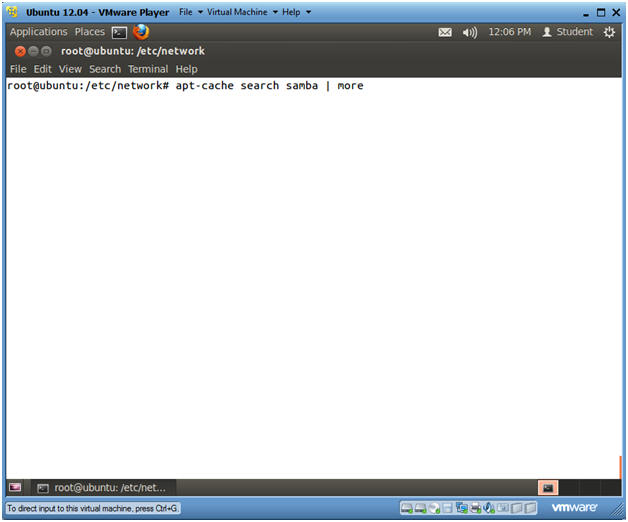
- Search for Samba
- Instructions
- apt-cache search samba | more
- apt-cache search samba
- Shows you every package that contains the name samba.
- | more
- Allows you see the results line by line by pressing <Enter>, or page by page by pressing the <Space Bar>.
- apt-cache search samba
- apt-cache search samba | more
- Note(FYI):
- apt-cache is a command to manipulate and obtain information from the ubuntu packages.
- Instructions
| Section 5: Install Samba |
- Install Samba
- Instructions
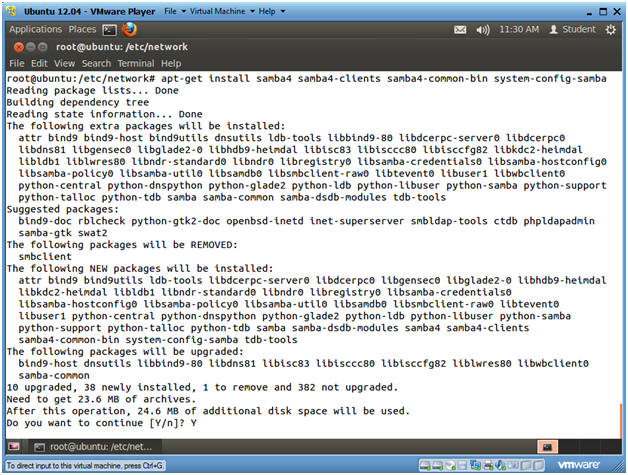
- apt-get install samba4 samba4-clients samba4-common-bin system-config-samba
- Do you want to continue [Y/n]? Y
- Instructions
- Verify Packages Are Installed
- Instructions
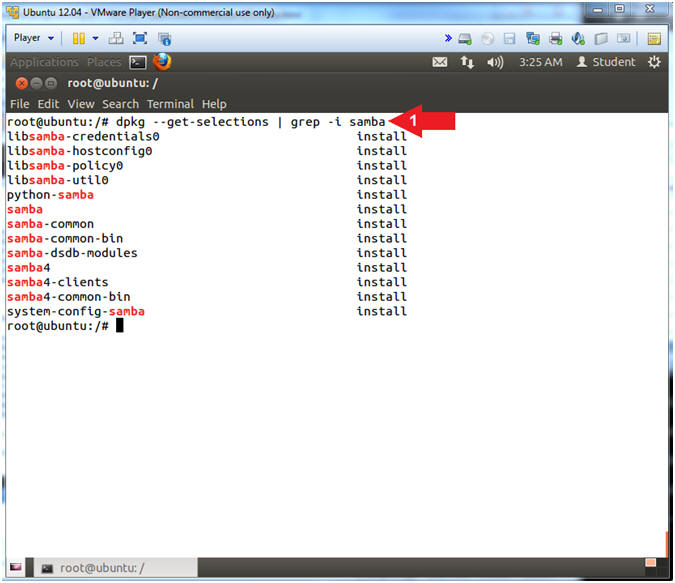
- dpkg --get-selections | grep -i samba
- Note(FYI):
- dpkg - package manager for Debian
- --get-selections - Displays all the packages install on the system.
- | grep -i samba - prints lines only displaying the string samba, while ignoring the case (-i).
- Instructions
- View Samba configuration files
- Instructions
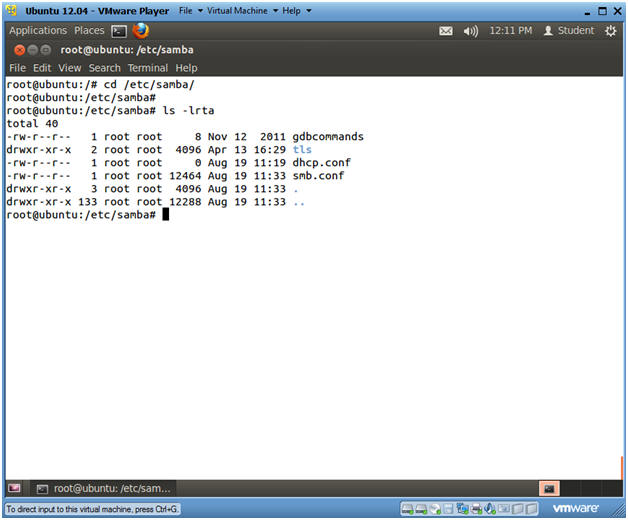
- cd /etc/samba
- ls -lrta
- Note(FYI):
- smb.conf
- This is the Samba configuration file.
- smb.conf
- Instructions
| Section 6: Startup Script for Samba |
- Startup Script for Samba
- Instructions
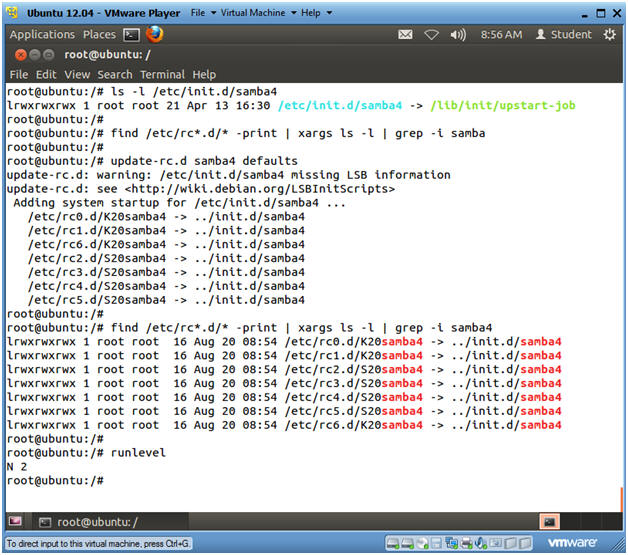
- ls -l /etc/init.d/samba4
- As part of the Samba installation, the samba startup script is placed in /etc/init.d/samba4.
- find /etc/rc*.d/* -print | xargs ls -l
| grep samba
- Notice there are no startup script present.
- update-rc.d samba4 defaults
- The update-rc.d command is used to create startup, enable, kill, and remove scripts for services listed in the /etc/init.d.
- If defaults is used then update-rc.d will make links to start the service in runlevels 2345 and to stop the service in runlevels 016. By default all the links will have sequence number 20
- find /etc/rc*.d/* -print | xargs ls -l
| grep samba
- Now the startup and kill scripts are present.
- runlevel
- Identifies the current run level.
- 0 System Halt
- 1 Single user
- 2 Full multi-user mode (Default)
- 3-5 Same as 2
- 6 System Reboot
- Identifies the current run level.
- ls -l /etc/init.d/samba4
- Instructions
- Stopping and Starting Samba with /etc/init.d/samba4
- Instructions
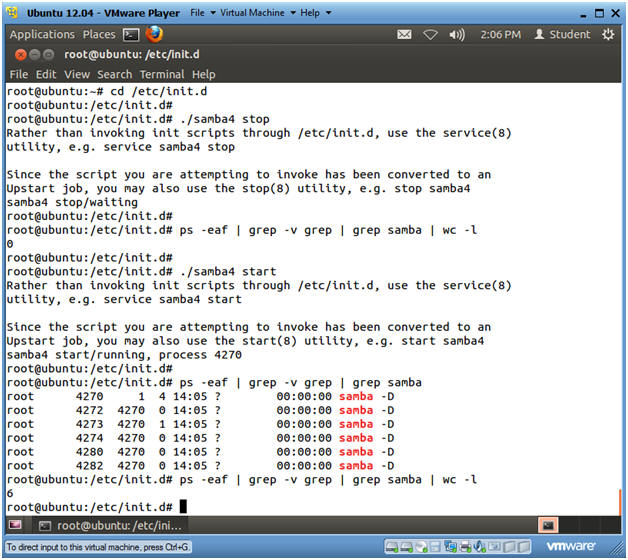
- cd /etc/init.d
- ./samba4 stop
- ps -eaf | grep -v grep | grep samba | wc -l
- Notice, that 0 is returned, because samba is not running.
- ./samba4 start
- ps -eaf | grep -v grep | grep samba
- Now two lines are returned, because samba is running.
- ps -eaf | grep -v grep | grep samba | wc -l
- Instructions
- Stopping and Starting Samba with the "service"
command
- Instructions
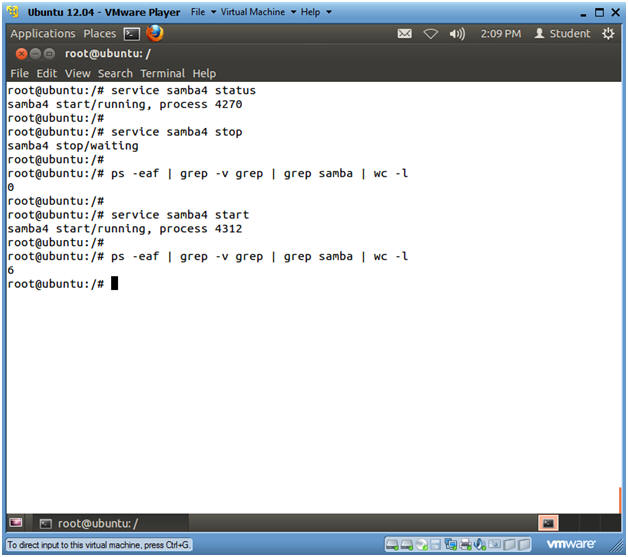
- service samba4 status
- Notice the Samba startup script does not have a status option.
- service samba4 stop
- This command will stop the samba daemon.
- ps -eaf | grep -v grep | grep samba | wc -l
- wc -l, returns 0 for the number of samba processes returned.
- service samba4 start
- This will start the samba daemon/service.
- ps -eaf | grep -v grep | grep samba | wc -l
- service samba4 status
- Instructions
| Section 7: Create a Samba User |
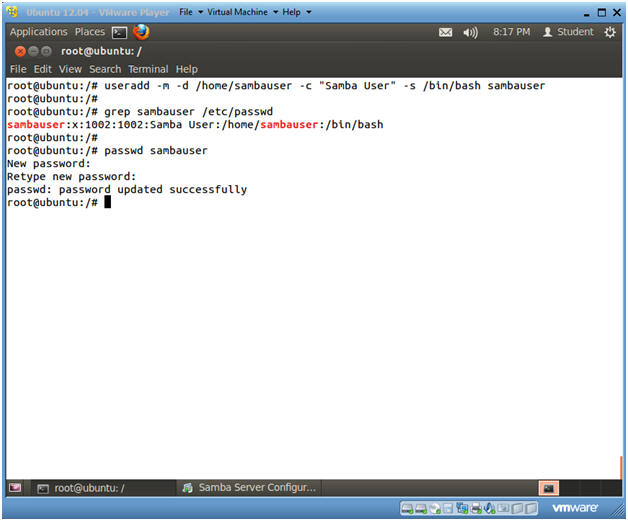
- Create a samba UNIX user account called
sambauser.
- Note(FYI):
- Your must be root.
- Instructions:
- useradd -m -d /home/sambauser -c "Samba User" -s /bin/bash sambauser
- grep sambauser /etc/passwd
- passwd
sambauser
- Remember
your password rules you created in
Lab 6.
- At least 8 characters
- Both Uppercase and Lowercase
- At least 1 number character
- At least 1 special character
- Remember
your password rules you created in
Lab 6.
- Note(FYI):
| Section 8: Configure Samba |
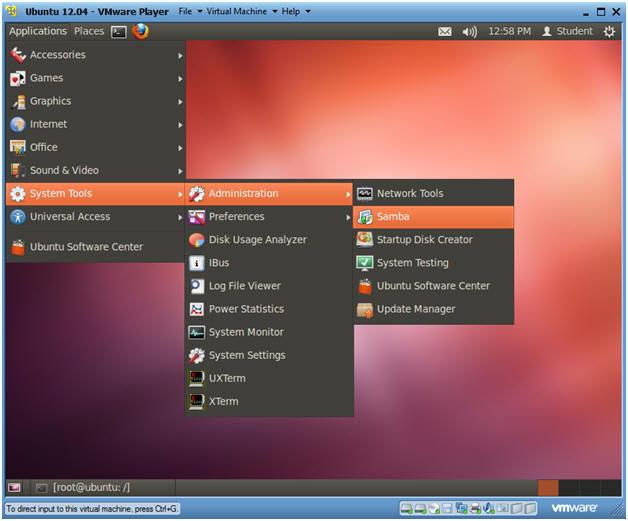
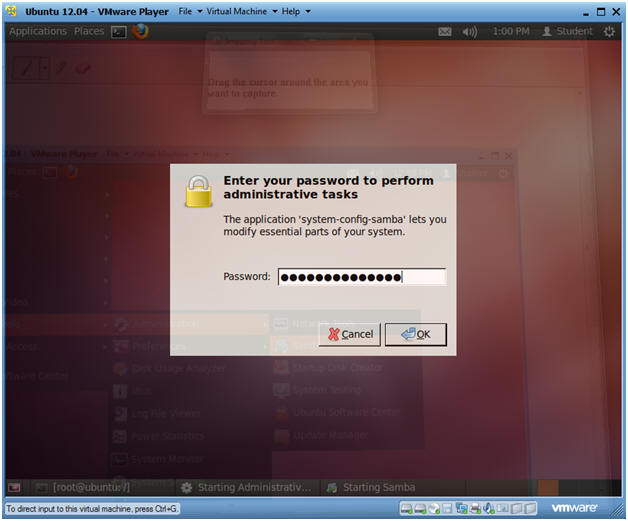
- Start Up the Samba GUI.
- Instructions:
- Applications --> System Tools --> Administration --> Samba
- Instructions:
- Start Up the Samba GUI.
- Instructions:
- Applications
- Instructions:
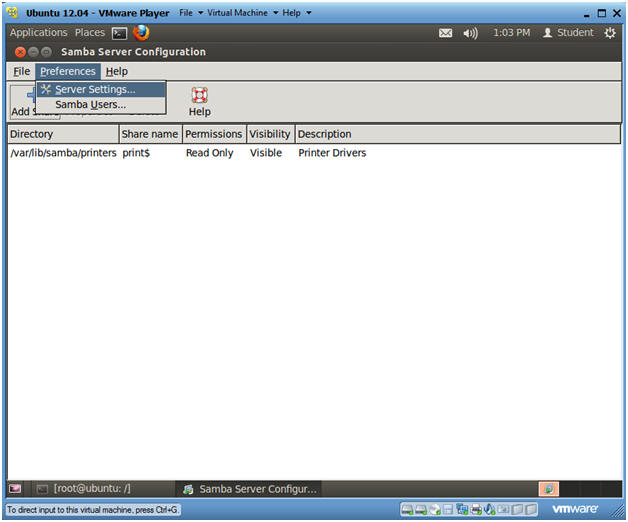
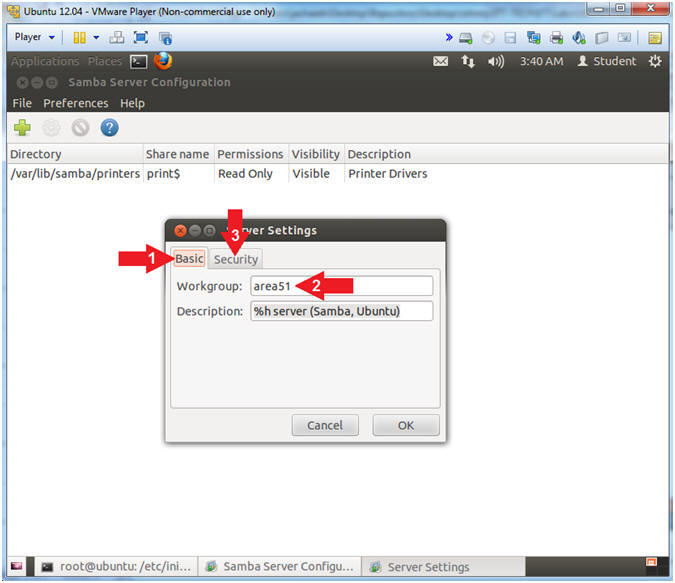
- Configure Workgroup Name
- Instructions:
- Preferences --> Server Settings
- Instructions:
- Name the Workgroup
- Instructions:
- Click the "Basic" tab
- Place "area51" in the Workgroup: text box.
- Click on the Security Tab
- Note(FYI):
- How to set these directives in the /etc/samba/smb.conf file.
- The samba configuration file is located at /etc/samba/smb.conf
- If you don't have access to this GUI,
then you can set the workgroup directive to
- workgroup = area51
- How to set these directives in the /etc/samba/smb.conf file.
- Instructions:
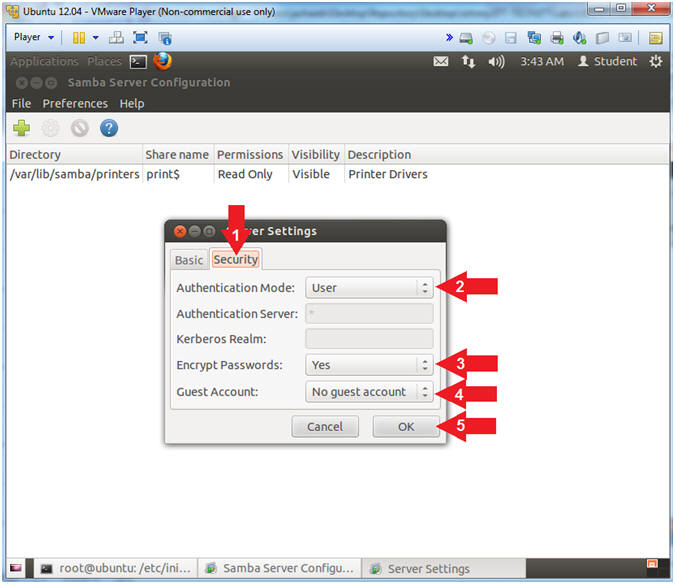
- Security Workgroup Configuration
- Instructions:
- Select the Security Tab
- Authentication Mode: User
- Encrypt Passwords: Yes
- Guest Account: No guest Account
- Click on OK.
- Note(FYI):
- How to set these directives in the
/etc/samba/smb.conf file.
- encrypt passwords = yes
- guest account = no
- How to set these directives in the
/etc/samba/smb.conf file.
- Instructions:
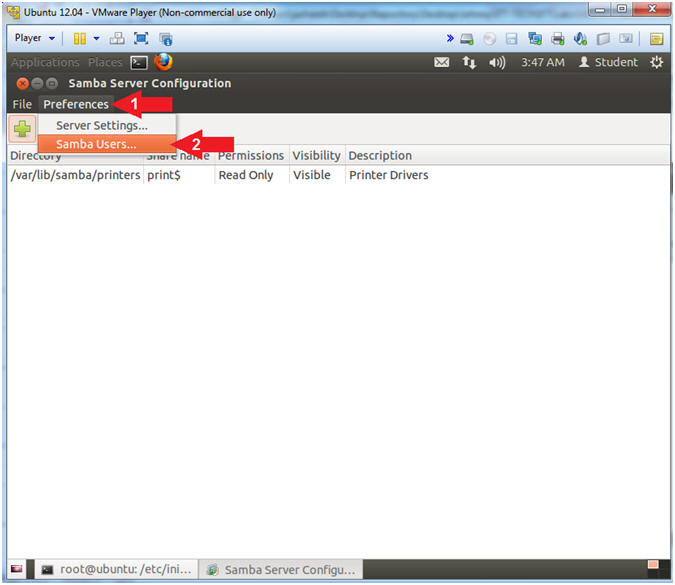
- Security Workgroup Configuration
- Instructions:
- Click Preferences
- Click Samba Users...
- Instructions:
- Delete Samba User Nobody
- Instructions:
- Select User "nobody"
- Click on the Delete User Button

- Instructions:
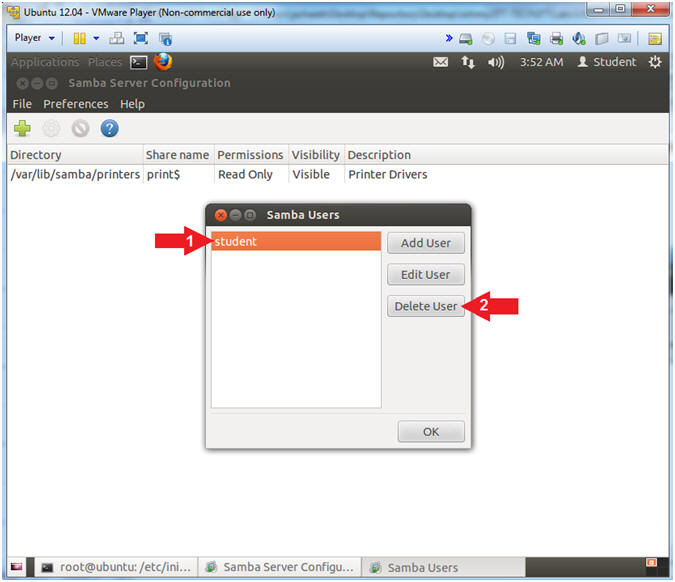
- Delete Samba User student
- Instructions:
- Select User "student"
- Click on the Delete User Button
- Instructions:
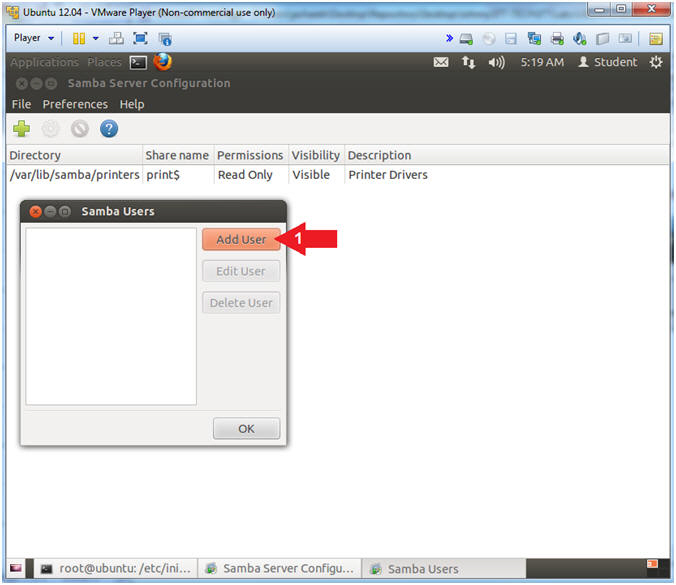
- Add a Samba User
- Instructions:
- Click the Add User Button
- Instructions:
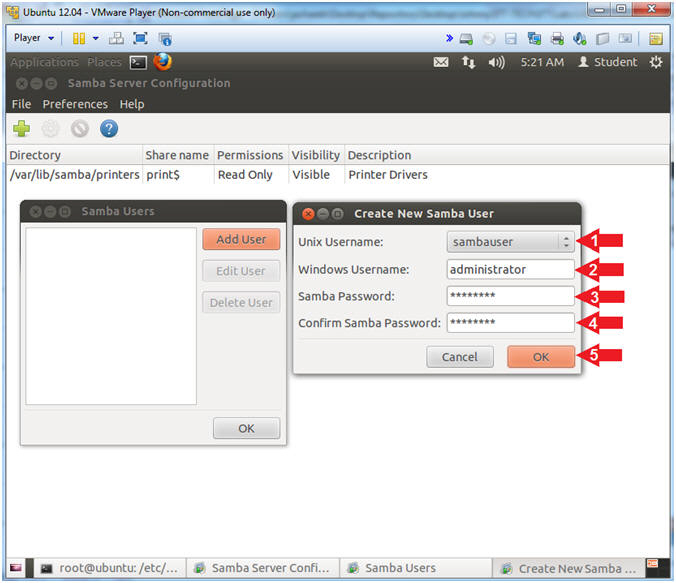
- Create New Samba User
- Instructions:
- Unix Username: Select sambauser
- Windows Username: administrator
- Samba Password:
- Does not have to be the same as the Unix sambauser password.
- Confirm Samba Password:
- Click the OK Button
- Instructions:
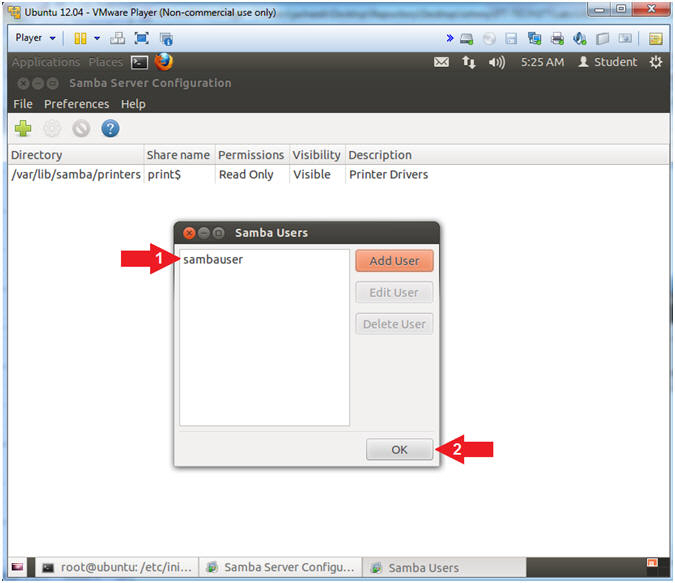
- Samba Users
- Note(FYI):
- You should now see the sambauser
- Instructions:
- Verify the sambauser was created
- Click the OK button
- Note(FYI):
- Add a Samba Share
- Instructions:
- File --> Add Share
- Instructions:
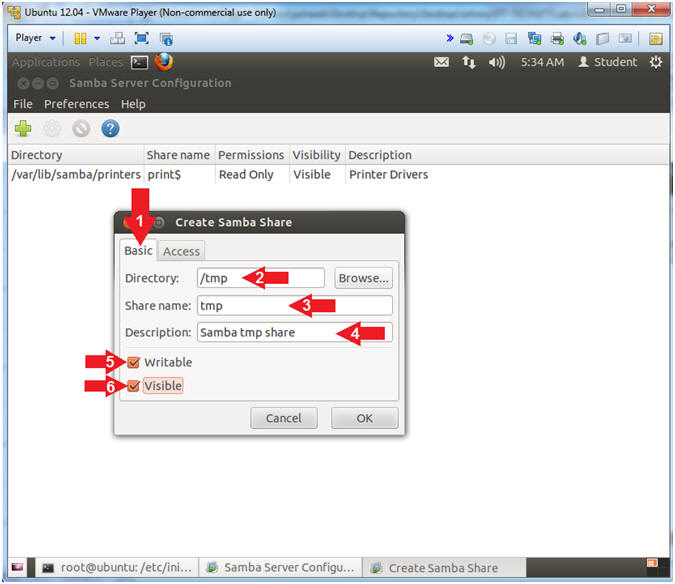
- Create Samba Share
- Instructions:
- Click the Basic Tab
- Directory: /tmp
- Share name: tmp
- Description: Samba tmp share
- Check the Writable Check Box
- Check the Visible Check Box
- Click the Access Tab
- Note(FYI):
- Do not click the OK button
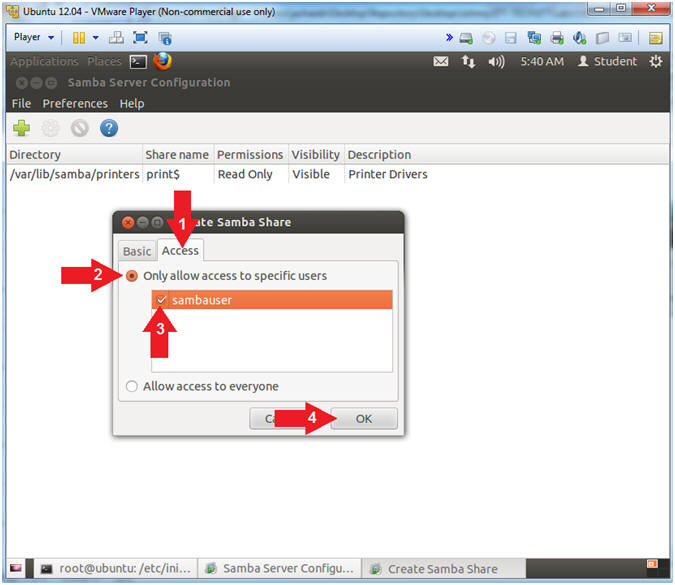
- Instructions:
- Give Access to the sambauser username
- Instructions:
- Select the Access Tab
- Check the Only allow access to specific users radio button
- Check the sambauser check box
- Click OK
- Instructions:
- Viewing your samba share
- Note(FYI):
- After you completed the above step, you should see the below tmp share name.
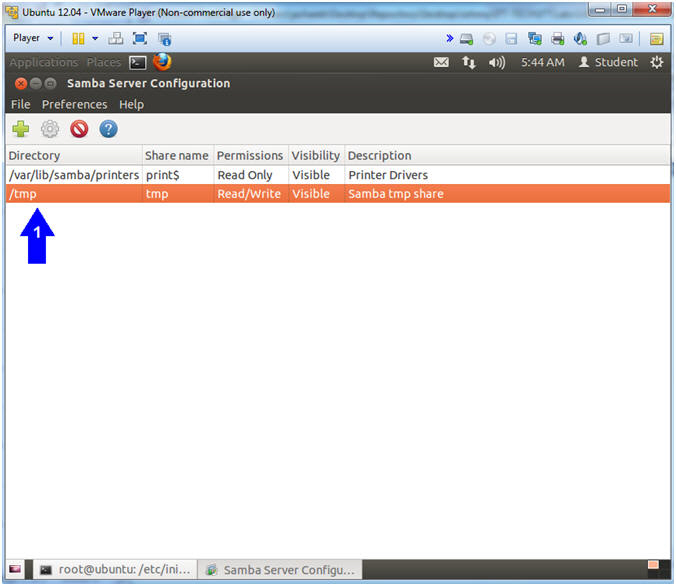
- Note(FYI):

| Section 9: Configure Damn Vulnerable WXP SP2 Virtual Machine Settings |
- Start VMware Player
- Instructions
- Click the Start Button
- Search for vmware player
- Click VMware Player
- Instructions
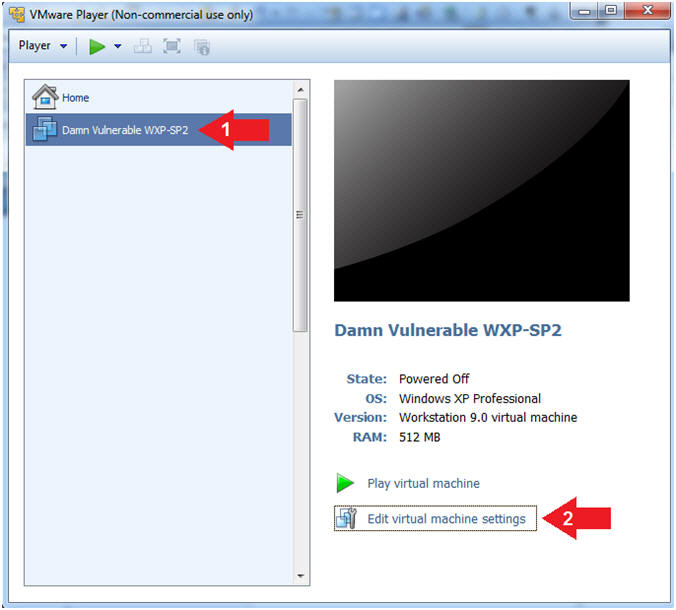
- Edit Virtual Machine Settings
- Instructions:
- Click on Damn Vulnerable WXP-SP2
- Edit Virtual Machine Settings
- Note:
- Before beginning a lesson it is necessary to check the following VM settings.
- Instructions:
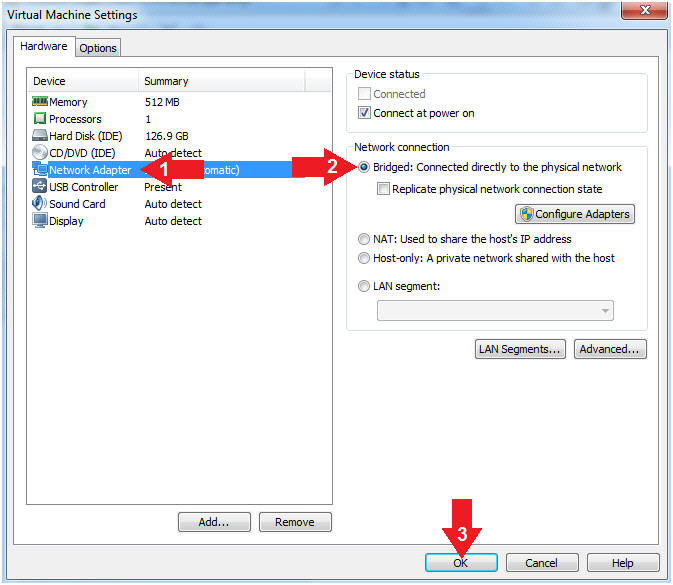
- Set Network Adapter
- Instructions:
- Click on Network Adapter
- Click on the radio button "Bridged: Connected directly to the physical network".
- Click the OK Button
- Instructions:
| Section 10: Login to Damn Vulnerable WXP SP2 |
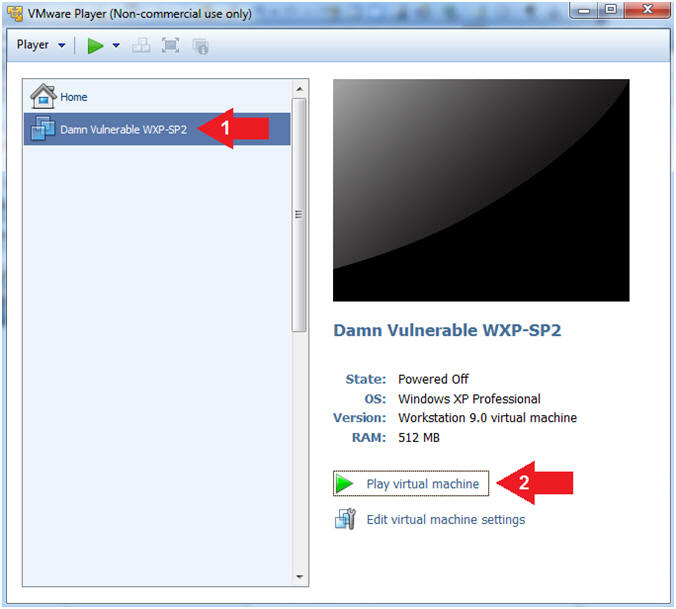
- Start Up Damn Vulnerable WXP-SP2.
- Instructions:
- Start Up your VMware Player
- Play virtual machine
- Instructions:
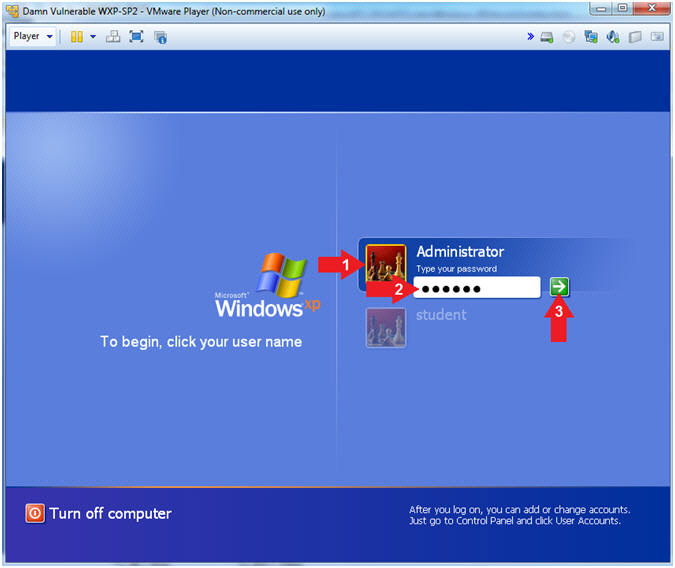
- Logging into Damn Vulnerable WXP-SP2.
- Instructions:
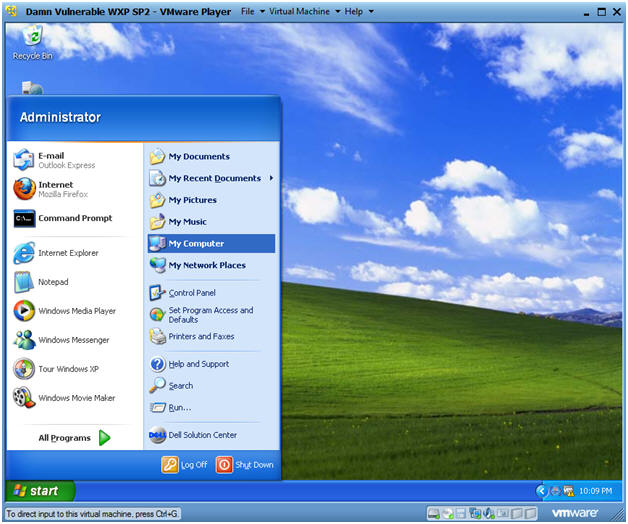
- Click on Administrator
- Password: Supply Password
- (See Note)
- Press <Enter> or Click the Arrow
- Instructions:
| Section 11: Connect Windows to Samba |
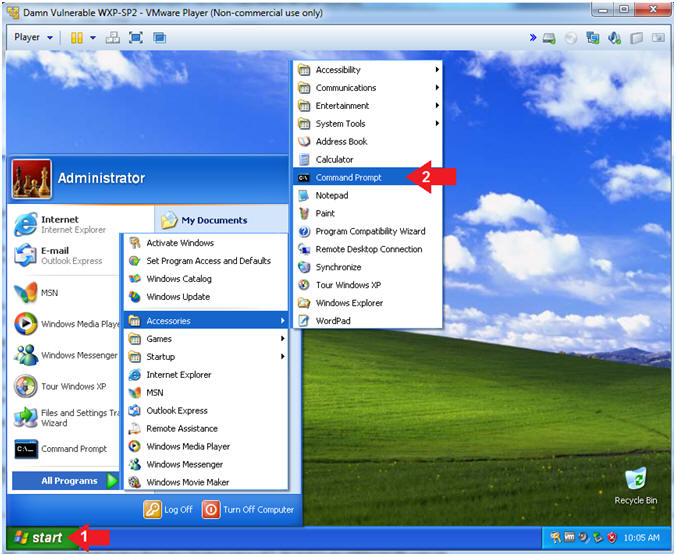
- Open the Command Prompt
- Instructions:
- Click the Start Button
- All Programs --> Accessories --> Command Prompt
- Instructions:
- Determine IP Address
- Instructions:
- ipconfig
- In my case, my IP address is 192.168.1.116.
- ipconfig

- Instructions:
- Open My Computer
- Instructions:
- Start --> My Computer
- Instructions:
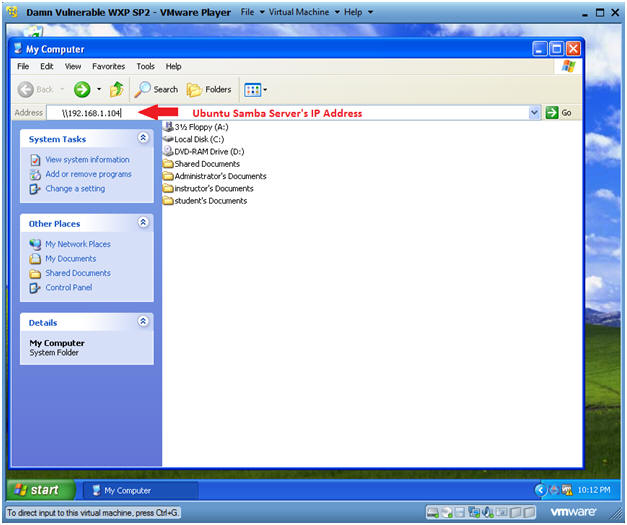
- Provide Samba Server's IP Address
- Instructions:
- \\192.168.1.104
- Replace 192.168.1.104 with your Ubuntu IP address obtained from (Section 3, Step 3).
- Press <Enter>
- \\192.168.1.104
- Instructions:
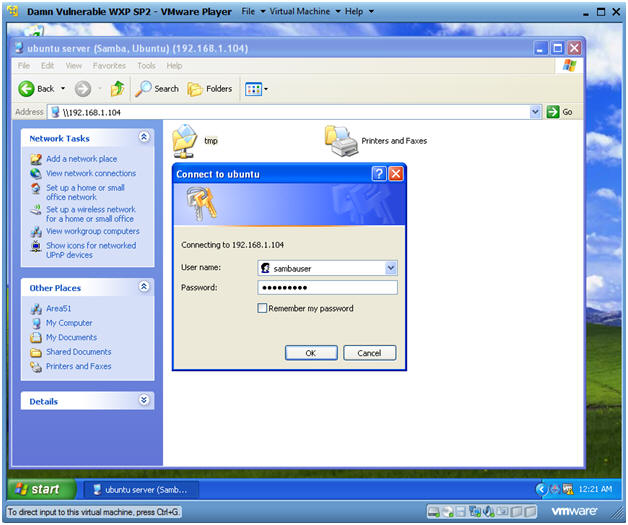
- Provide Samba Credentials
- Instructions:
- Double Click on the tmp folder
- User name: sambauser
- Password: This is password you created in (Section 8, Step 10)
- Click the OK Button
- Instructions:
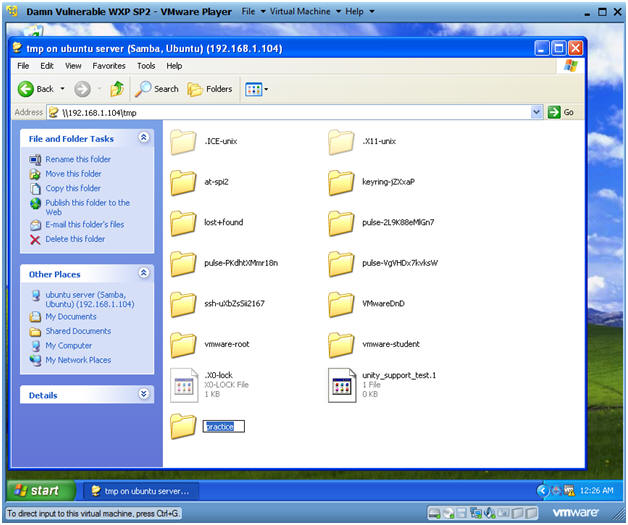
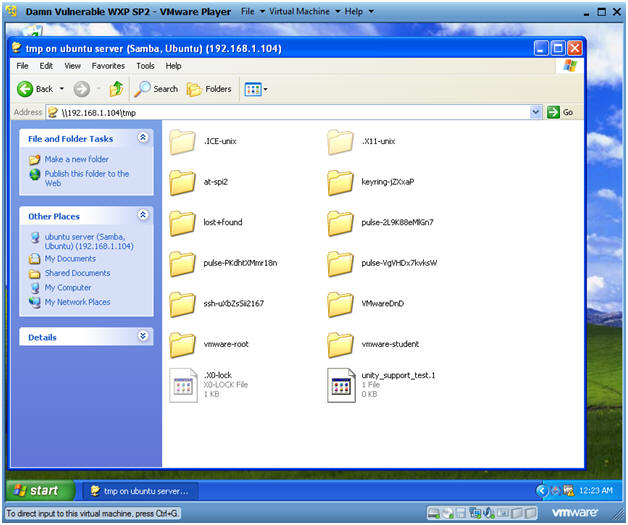
- Views Samba Share
- Note(FYI):
- Now from Windows you are connected to Ubuntu's Samba Share.
- Note(FYI):
- Create Directory
- Instructions:
- File --> Folder

- Instructions:
- Name Directory
- Instructions:
- Name is "practice"
- Note(FYI):
- You not only have the ability to create directories but you can also save files as well.
- Instructions:
| Section 12: Samba Network Connection |
- Name Directory
- Instructions:
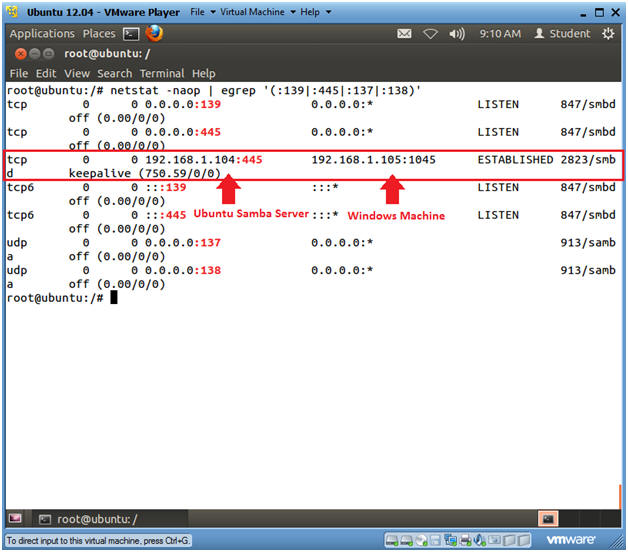
- netstat -naop | egrep
'(:139|:445|:137|:138)'
- Port 137/UDP - used by nmbd
- Port 138/UDP - used by nmbd
- Port 139/TCP - used by smbd
- Port 445/TCP - used by smbd
- netstat -naop | egrep
'(:139|:445|:137|:138)'
- Note(FYI):
- Notice the ESTABLISHED TCP/445 connection between the Ubuntu Samba Server (192.168.1.104) and the Windows machine (192.168.1.105).
- Samba services are implemented as two
daemons:
- smbd, which provides the file and printer sharing services, and
- nmbd, which provides the NetBIOS-to-IP-address name service. NetBIOS over TCP/IP requires some method for mapping NetBIOS computer names to the IP addresses of a TCP/IP network.
- Instructions:
| Section 13: Samba Log Directory |
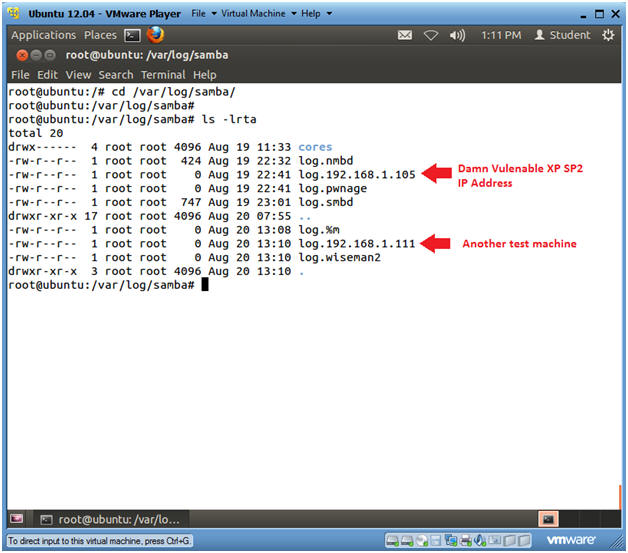
- Samba Log Directory
- Instructions:
- cd /var/log/samba/
- ls -lrta
- Note(FYI):
- Notice that Samba creates a log for each IP Address and each machine name.
- Instructions:
| Section 14: Samba Configuration Files |
- Samba Configuration Files
- Instructions:
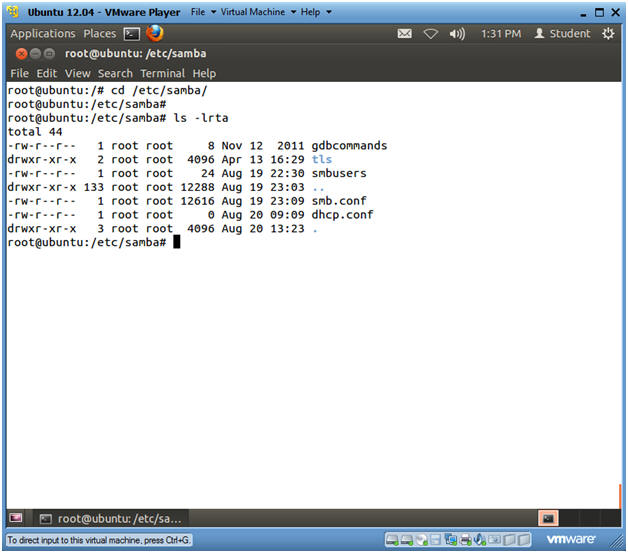
- cd /etc/samba/
- ls -lrta
- Note(FYI):
- smb.conf, is the Samba configuration file.
- smbusers, contains a list of Samba users.
- Instructions:
- View our Samba Share
- Instructions:
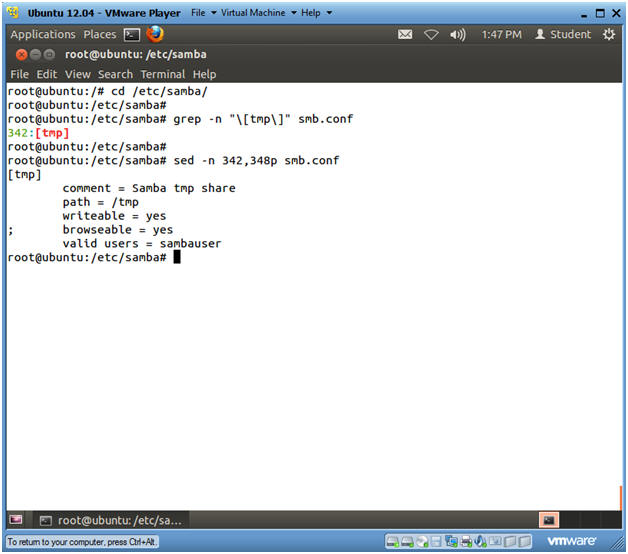
- cd /etc/samba/
- grep -n "\[tmp\]" smb.conf
- In my case, 342 is the line number where the [tmp] share directive starts.
- This directive has 6 lines, so 342 plus 6 is 348.
- sed -n 342,348p smb.conf
- In my case, 342 is the line that [tmp] begins and 348 is where the directive ends. (See above calculation).
- Instructions:
- View Valid Samba Users
- Instructions:
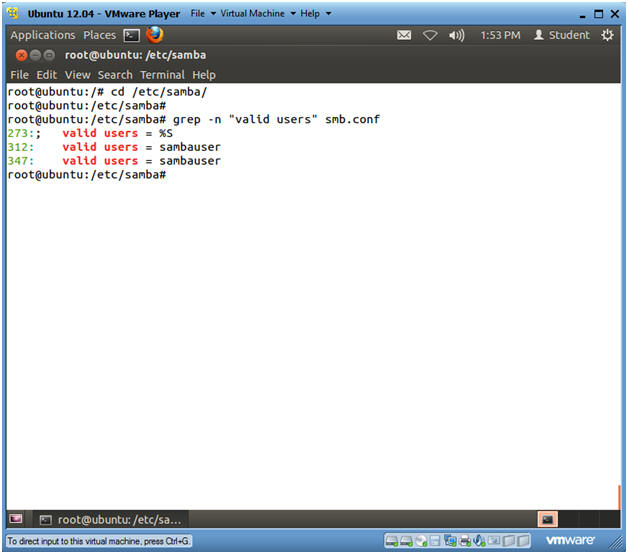
- cd /etc/samba/
- grep -n "valid users" smb.conf
- Instructions:
| Section 15: Proof of Lab |
- Proof of Lab
- Note(FYI):
- Issue the below commands from the Ubuntu Terminal.
- Instructions:
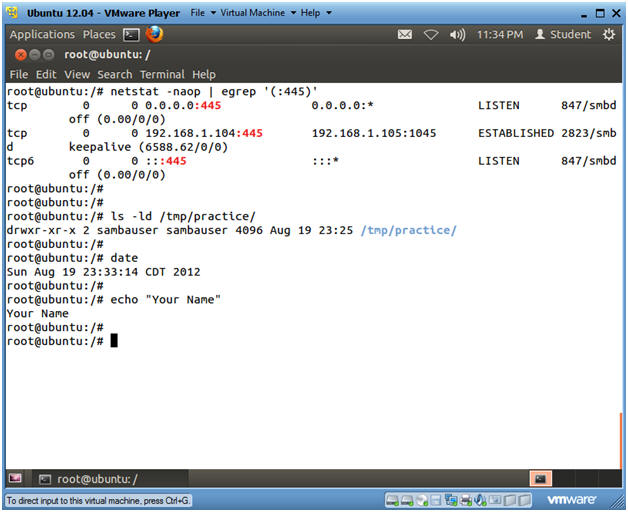
- netstat -naop | egrep '(:445)'
- ls -ld /tmp/practice/
- date
- echo "Your Name"
- Replace the string "Your Name" with your actual name.
- e.g., echo "John Gray"
-
Proof of Lab Instructions
- Press both the <Ctrl> and <Alt> keys at the same time.
- Do a <PrtScn>
- Paste into a word document
- Upload to Moodle
- Note(FYI):