(Fedora: Lesson 10)
{ Securing a directory with Apache's htpasswd }
| Section 0. Background Information |
- What is the Apache's htpasswd?
- htpasswd is used to create and update the flat-files used to store usernames and password for basic authentication of HTTP users.
- htpasswd encrypts passwords using either a version of MD5 modified for Apache, or the system's crypt() routine. Files managed by htpasswd may contain both types of passwords; some user records may have MD5-encrypted passwords while others in the same file may have passwords encrypted with crypt().
- For more information on htpaswd, please click here.
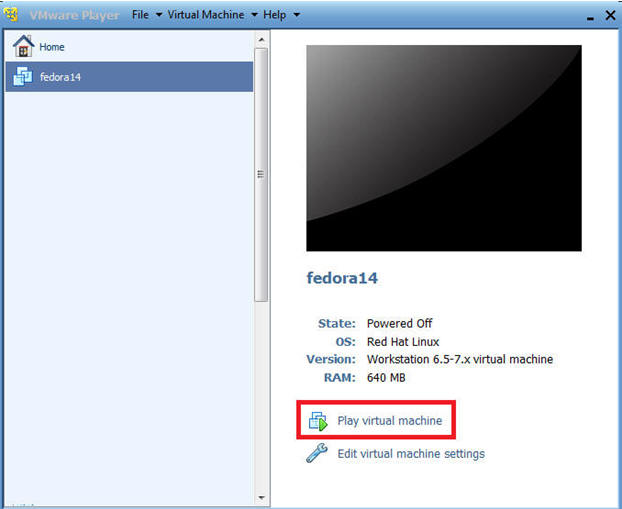
| Section 1. Play Virtual Machine |
- Play virtual machine. (See Below)
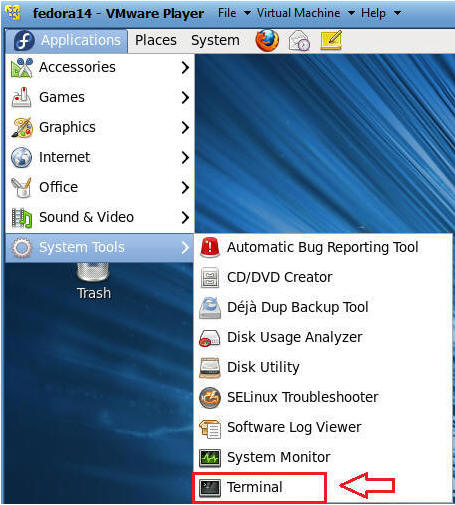
| Section 2. Login to your Fedora14 server. |
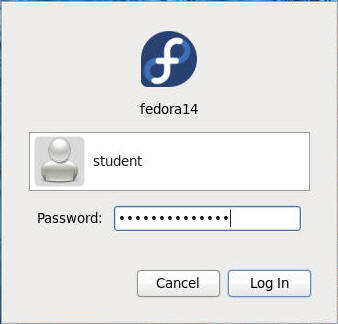
- Login As student
- Start Up A Terminal.
- Applications --> System Tools --> Terminal
- Switch User to root
- Command: su - root

| Section 3. Make a backup of the Apache Configuration File httpd.conf |
- Backup /etc/httpd/conf/httpd.conf
- Command: cp /etc/httpd/conf/httpd.conf /etc/httpd/conf/httpd.conf.BKP
- Command: ls -l /etc/httpd/conf/httpd.conf*
- Note: Before working on any configuration file, it is always a good idea to make a backup, just encase you screw things up.

| Section 4. Creating a secure directory |
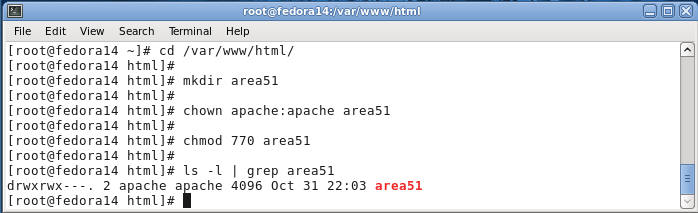
- Let's create a secure directory
- Command:
cd /var/www/html
- Change directory to /var/www/html, which is typically your base or root html path for Fedora.
- Command:
mkdir area51
- Make a directory called area51
- Command:
chown apache:apache area51
- Change the user and group ownerships to apache
- Command:
chmod 770 area51
- Change permission to where the user and group have full rights.
- Command: ls -l | grep area51
- Command:
cd /var/www/html
- Create a practice file
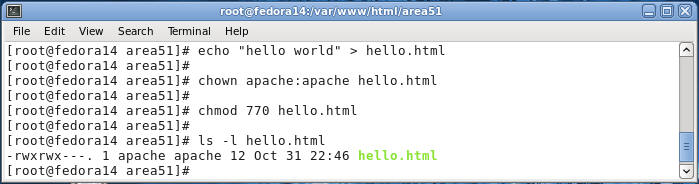
- Command: cd /var/www/html/area51
- Command: echo "hello world" > hello.html
- Command: chown apache:apache hello.html
- Command: chmod 770 hello.html
- Command: ls -l hello.html
| Section 5. Create htpasswd username and password |
- Setting up the .htpasswd file.
- Command:
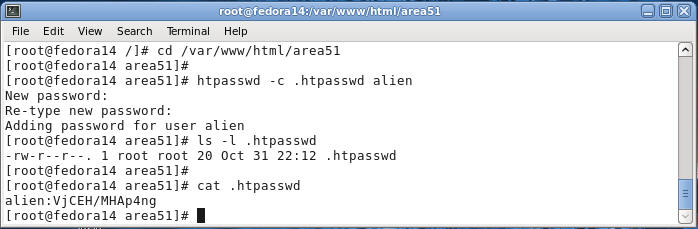
cd /var/www/html/area51
- Change directory to the area51
- Command:
htpasswd -c .htpasswd alien
- Create a password for alien
- Note: You will get prompted twice for a password.
- Command: ls -l .htpasswd
- Command: cat .htpasswd
- Proof of Lab: Do a screen print, cut in paste into a word document, and upload to Moodle.
- Command:
cd /var/www/html/area51
| Section 6. Configure the httpd.conf file |
- Let's configure the httpd.conf file.
- Command: vi /etc/httpd/conf/httpd.conf
- Search for "</Directory" in vi
- Command: Press the "/" key
- Command: Type "<Directory"
- Command: Press Enter
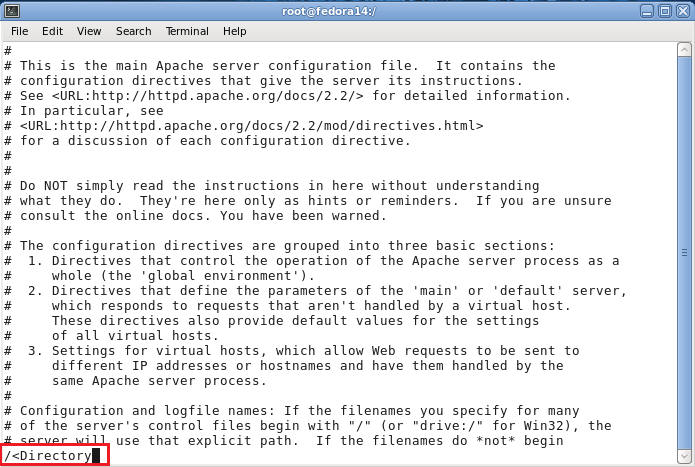
- The above vi search command will place the
cursor on the first instance of "<Directory".
- Command: Arrow Down to where your cursor is below the line that contains "</Directory>".
- Do the following
- Command: Press the "i" key to get into vi's INSERT Mode
- Command: Press the Enter key once to add a space
- Command:
Type in the below lines
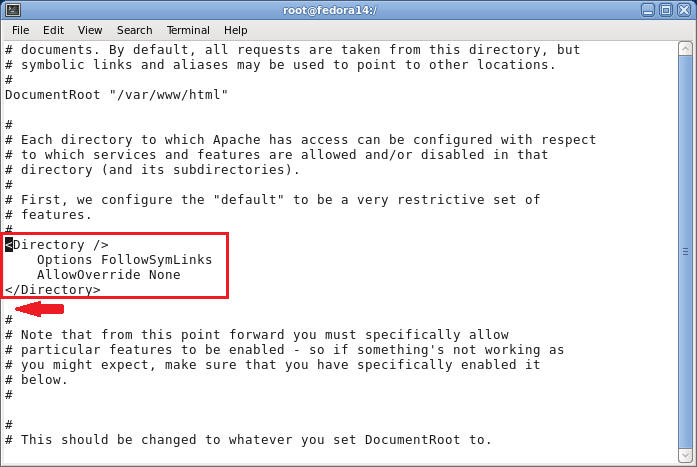
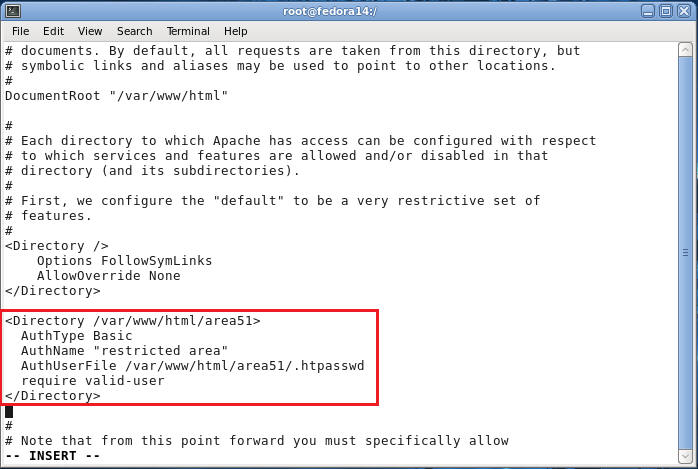
- <Directory /var/www/html/area51>
AuthType Basic
AuthName "restricted area"
AuthUserFile /var/www/html/area51/.htpasswd
require valid-user
</Directory>
- <Directory /var/www/html/area51>
- Command: Press the Enter key once to add a space
- Command: Press the Esc key
- Command: Type ":wq!" to save and quit vi.
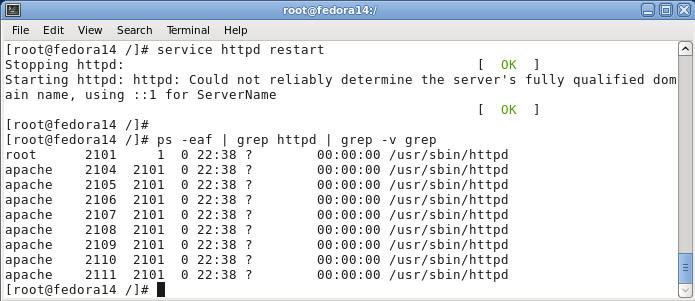
- Restart Apache
- Command:
service httpd restart
- This is how you restart the httpd daemon.
- We did this because we made change to the httpd.conf file.
- Command:
ps -eaf | grep httpd | grep -v grep
- This is the verify the httpd processes are running.
- Command:
service httpd restart

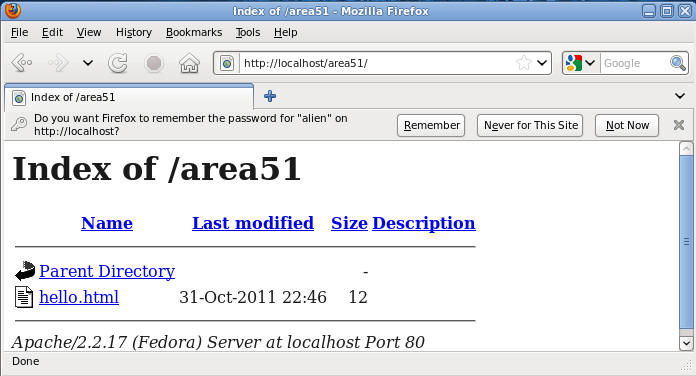
| Section 7. Test Your Secure Directory from you local host |
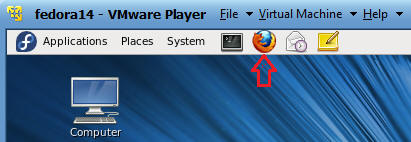
- Click on your Firefox web browser
- Navigate to area51
- Command: http://localhost/area51
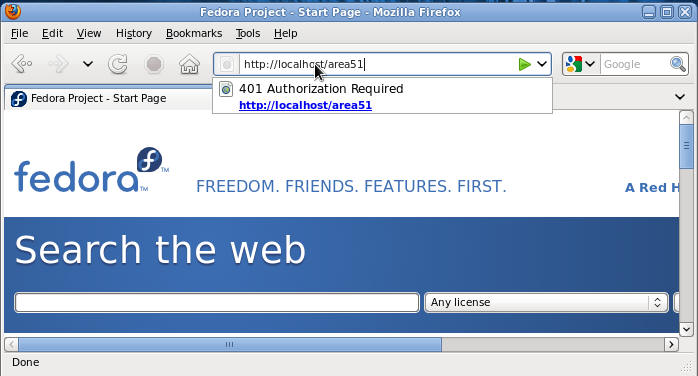
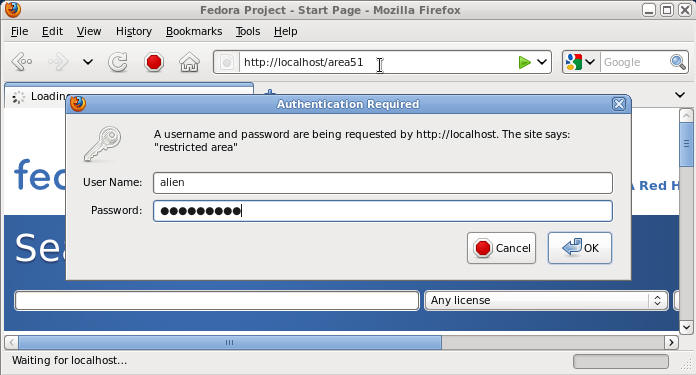
- You will be prompt for username and
password
- Command: The username is "alien" and the password is whatever you made it.
- Verify your the contents of your /area51
directory
- Note: You should see a file called hello.html
- Command: Click on hello.html
| Section 8. Test Your Secure Directory from you remote host |
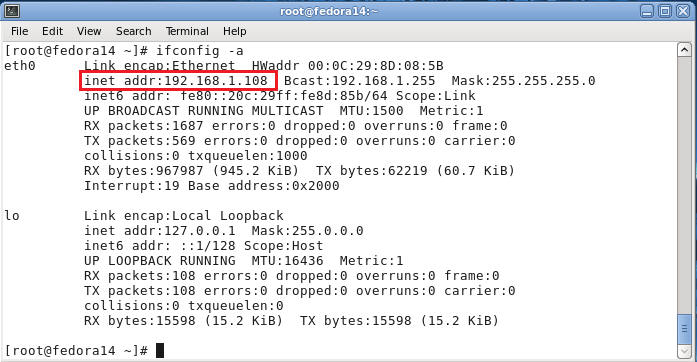
- Determine your IP Address
- Command: ifconfig -a
- Note: 192.168.1.108 is my IP address, and yours will probably be different.
-
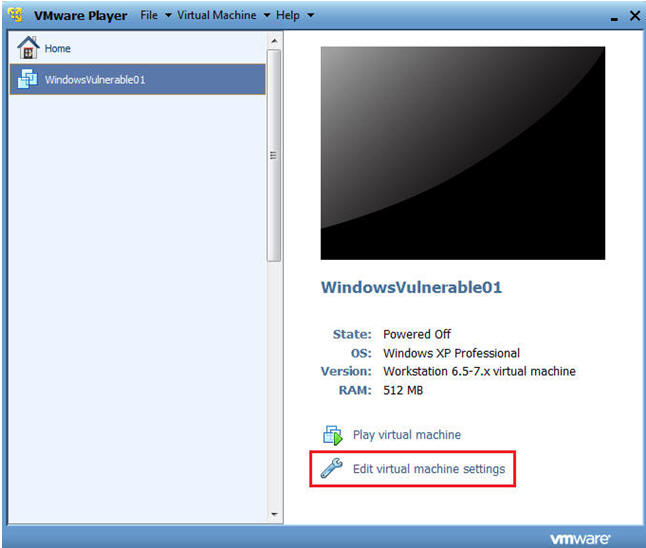
- Let's Prep your WindowsVulnerable01 VMware
Machine
- Note:
- For those of you not in my class, this is a Window XP machine.
- But for purposes of this lab, it would be any Windows Machine connected to the same network your fedora14 machine is also connected.
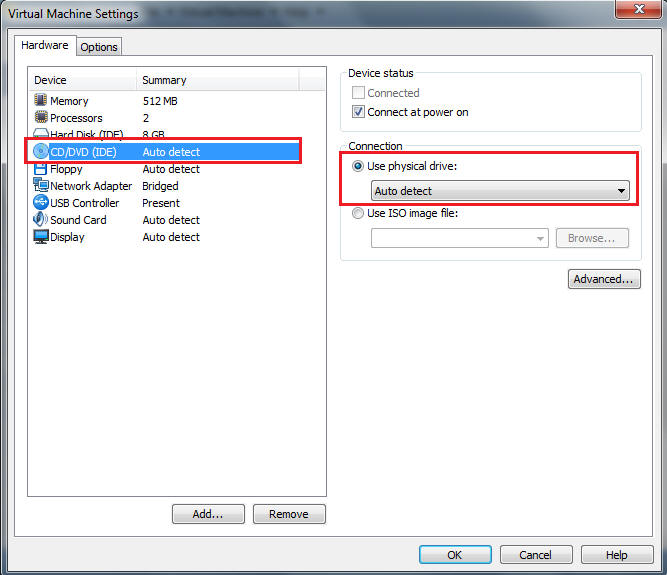
- Command: Edit Virtual Machine Settings
-
- Command:
- Click on CD/DVD (IDE)
- Make sure the "Use physical drive:" radio button is selected.
- Make sure Auto detect is selected.
-
- Command:
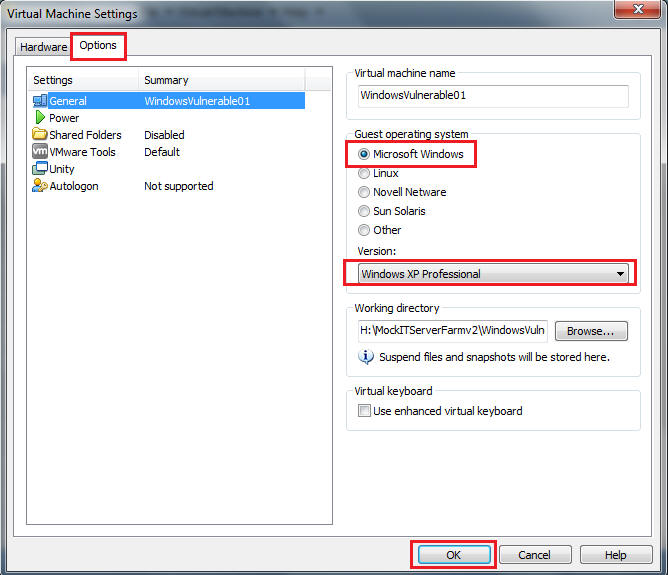
- Select the Options tab.
- Select the Microsoft Windows Radio button.
- Select Windows XP Professional Version
- Select OK.
-
- Note:
- Start up WindowsVulnerable01
-
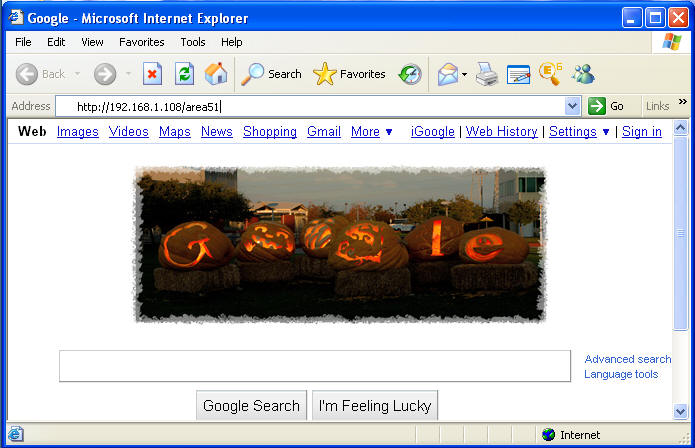
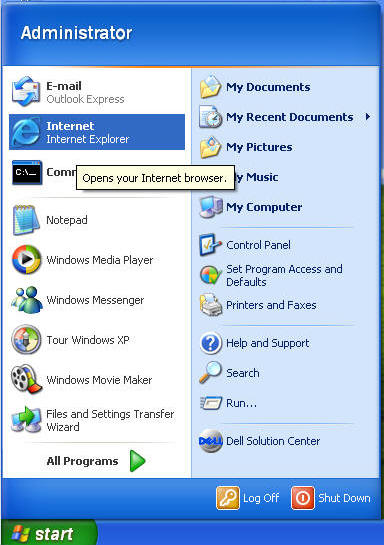
- Start up your Internet Explorer Web Browser
-
- Navigate to area51
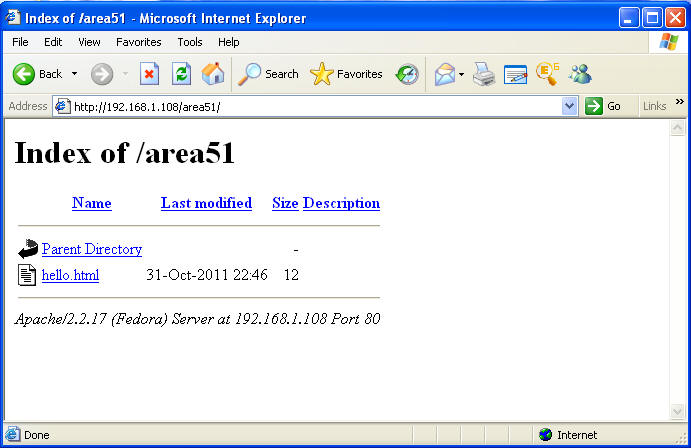
- Command: http://192.168.1.108/area51
- Command: The IP Address you will be using was discovered in Section 8, Step 1.
-
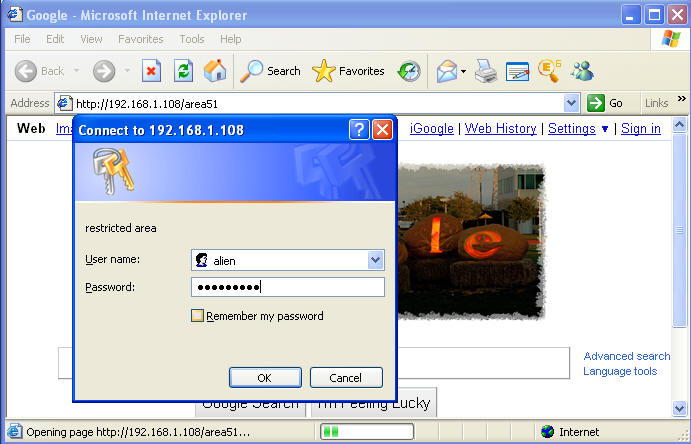
- Enter the alien username and password.
- Note: The password is whatever you set it to earlier.
-
- Verify your the contents of your /area51
directory
- Note: You should see a file called hello.html
- Command: Click on hello.html
-

| Section: Proof of Lab |
- Cut and Paste a screen shot of Section 5, Step 1 into a word document and upload to Moodle.