(BackTrack: Lesson 8)
{ Configuring the SSH Server }
| Section 0. Background Information |
- What is SSH?
- Secure Shell (SSH) is a cryptographic network protocol for secure data communication, remote shell services or command execution and other secure network services between two networked computers that connects, via a secure channel over an insecure network, a server and a client (running SSH server and SSH client programs, respectively).
- Pre-Requisite
-
Lab Notes
- In this lab we will do the following:
- Configure the SSH Server
- Start Up the SSH Server
- In this lab we will do the following:
- Legal Disclaimer
- As a condition of your use of this Web site, you warrant to computersecuritystudent.com that you will not use this Web site for any purpose that is unlawful or that is prohibited by these terms, conditions, and notices.
- In accordance with UCC § 2-316, this product is provided with "no warranties, either express or implied." The information contained is provided "as-is", with "no guarantee of merchantability."
- In addition, this is a teaching website that does not condone malicious behavior of any kind.
- Your are on notice, that continuing and/or using this lab outside your "own" test environment is considered malicious and is against the law.
- © 2013 No content replication of any kind is allowed without express written permission.
| Section 1: Log into BackTrack5 |
- Start Up VMWare Player
- Instructions:
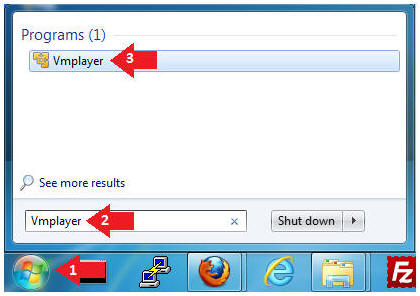
- Click the Start Button
- Type Vmplayer in the search box
- Click on Vmplayer
-
- Instructions:
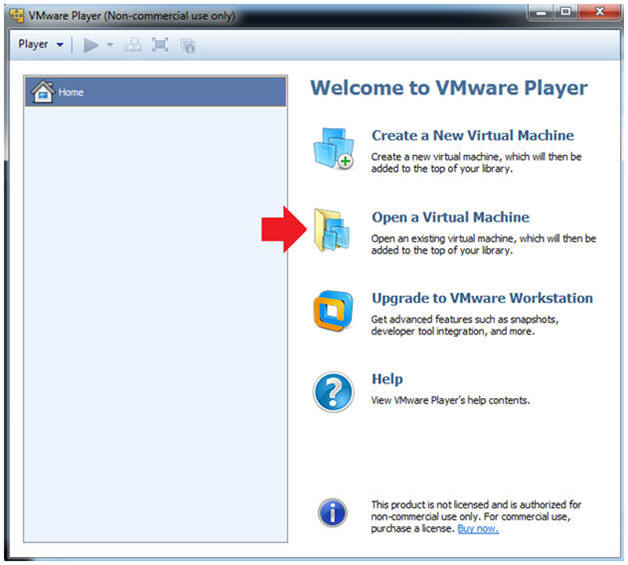
- Open a Virtual Machine
- Instructions:
- Click on Open a Virtual Machine
-
- Instructions:
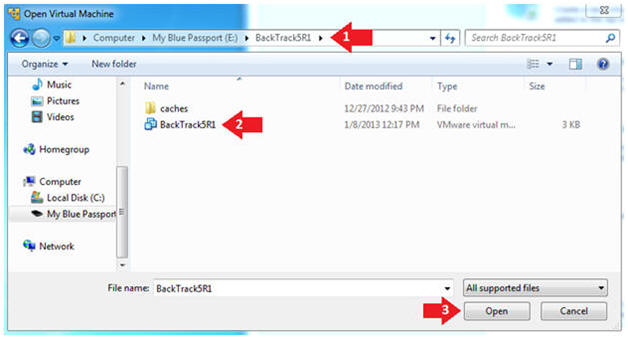
- Open the BackTrack5R1 VM
- Instructions:
- Navigate to where the BackTrack5R1 VM is located
- Click on on the BackTrack5R1 VM
- Click on the Open Button
-
- Instructions:
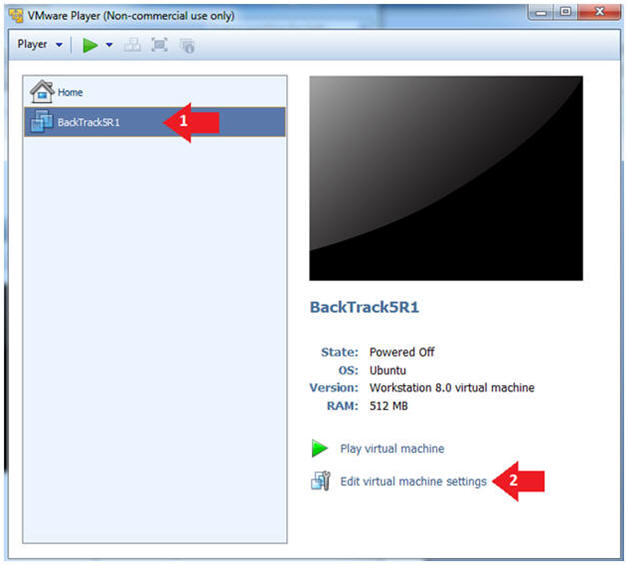
- Edit the BackTrack5R1 VM
- Instructions:
- Select BackTrack5R1 VM
- Click Edit virtual machine settings
-
- Instructions:
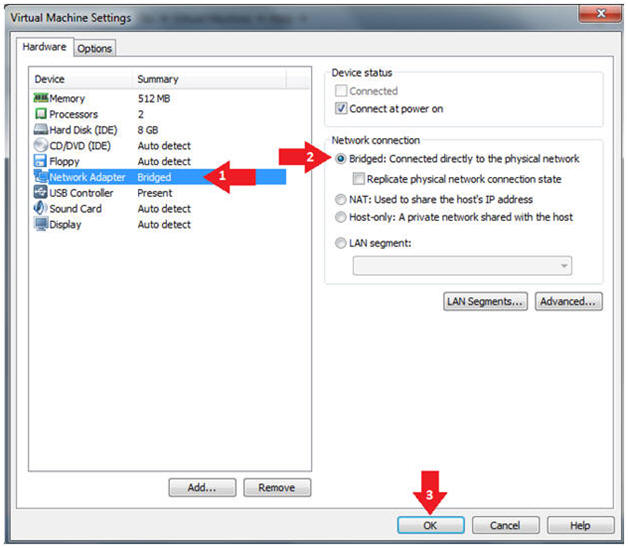
- Edit Virtual Machine Settings
- Instructions:
- Click on Network Adapter
- Click on the Bridged Radio button
- Click on the OK Button
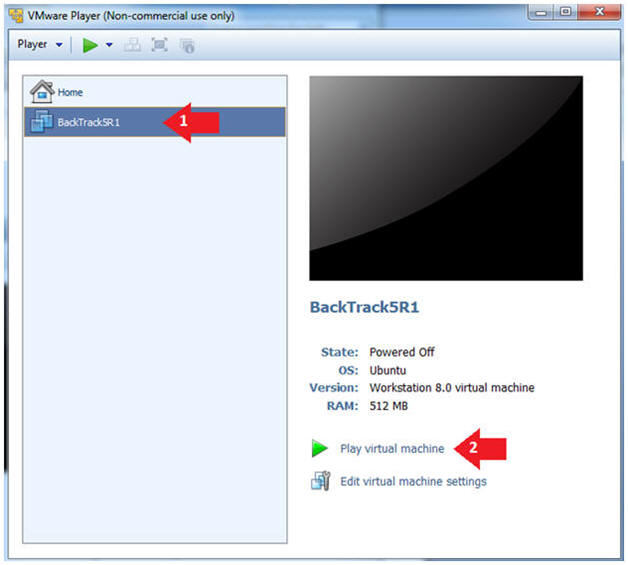
- Instructions:
- Play the BackTrack5R1 VM
- Instructions:
- Click on the BackTrack5R1 VM
- Click on Play virtual machine
-
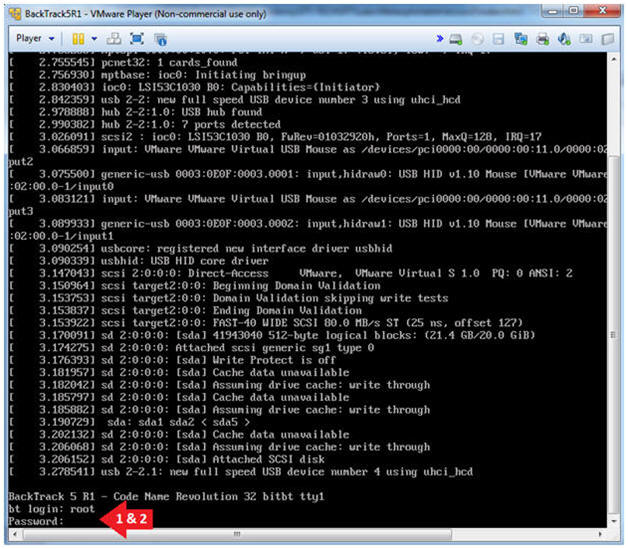
- Instructions:
- Login to BackTrack
- Instructions:
- Login: root
- Password: toor or <whatever you changed it to>.
-
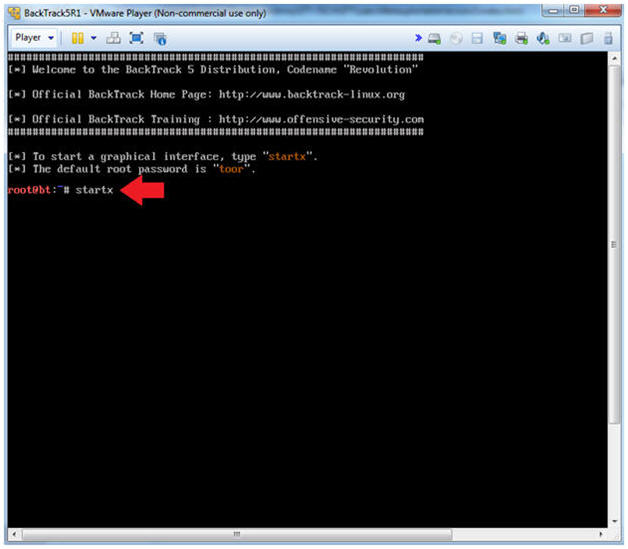
- Instructions:
- Bring up the GNOME
- Instructions:
- Type startx
-
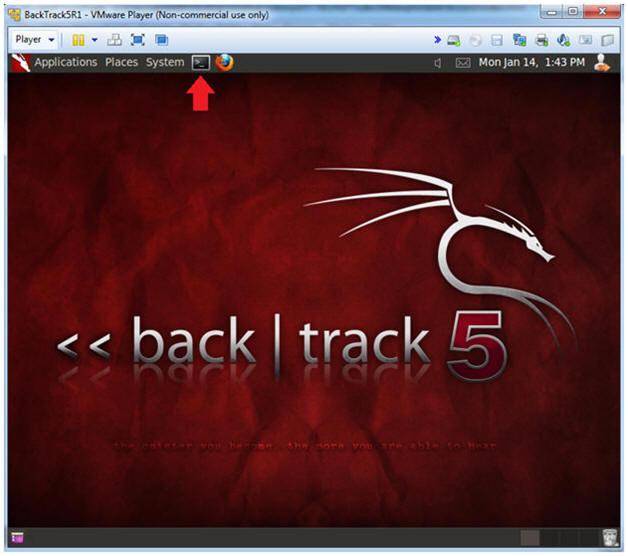
- Instructions:
- Start up a terminal window
- Instructions:
- Click on the Terminal Window
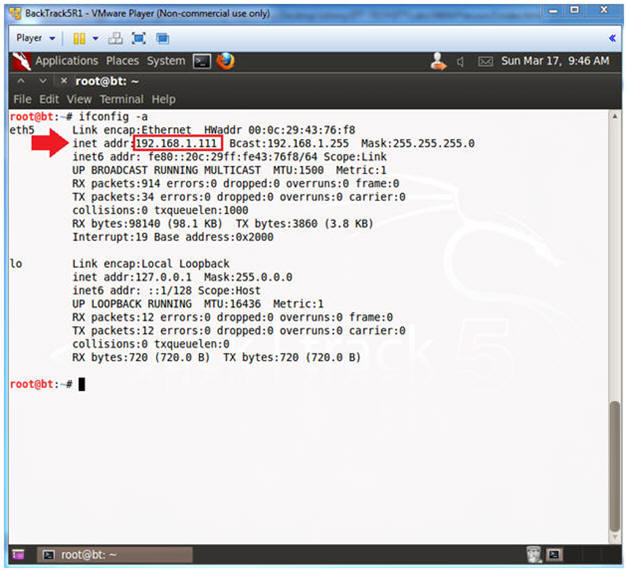
- Instructions:
- Obtain the IP Address
- Instructions:
- ifconfig -a
- Note(FYI):
- My IP address 192.168.1.111.
- In your case, it will probably be different.
-
- Instructions:
| Section 3: Try Starting the SSH Server |
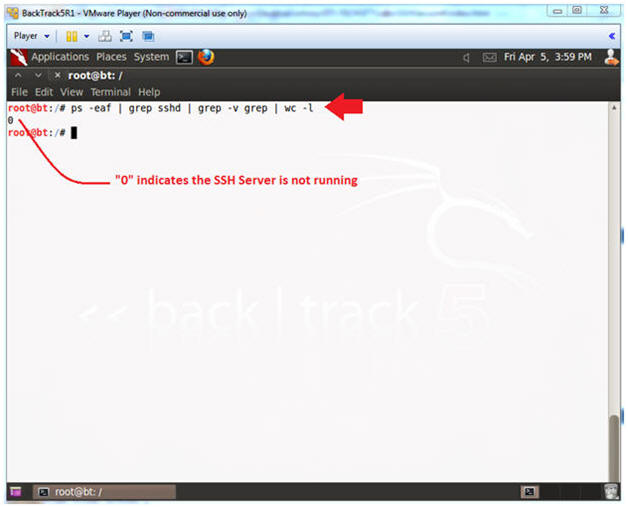
- Check for SSH Server Process
- Instructions:
- ps -eaf | grep sshd | grep -v grep | wc -l
- Note(FYI):
- ps -eaf: Show me all the processes.
- grep ssh: Show me only sshd process.
- grep -v grep: Don't show me my own grep process.
- wc -l: Count the number of lines (i.e., processes) returned.
- IF 0 is returned, THEN continue to next step.
- IF the number is greater than 0, THEN continue to next section.
- Instructions:
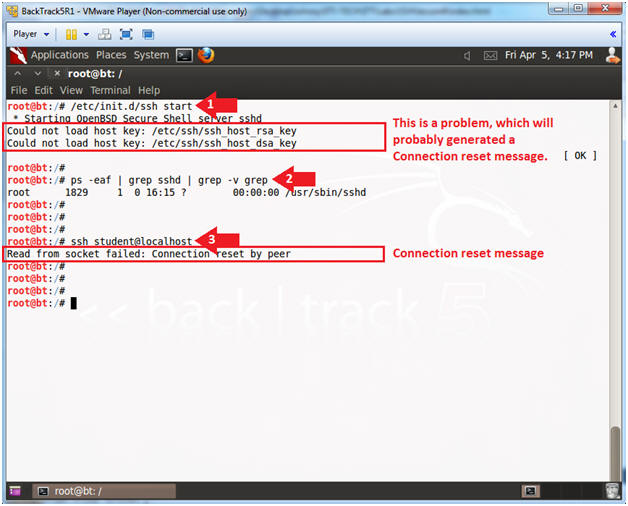
- Try Starting the SSH Server
- Instructions:
- /etc/init.d/ssh start
- ps -eaf | grep sshd | grep -v grep
- ssh student@localhost
- Note(FYI):
- For Step 2.1, the rsa and dsa host keys will probably not be generated.
- If Step 2.3, you will probably get a Connection reset by peer, since the host keys are not generated.
- If you did not receive the message from Step 2.1 and 2.3, then your ssh server is configured correctly and there is no reason to continue.
- Instructions:
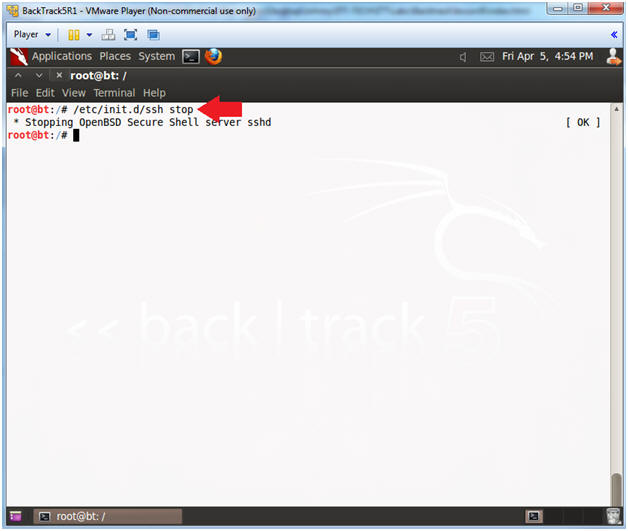
- Stop the SSH Server
- Instructions:
- /etc/init.d/ssh stop
- Instructions:
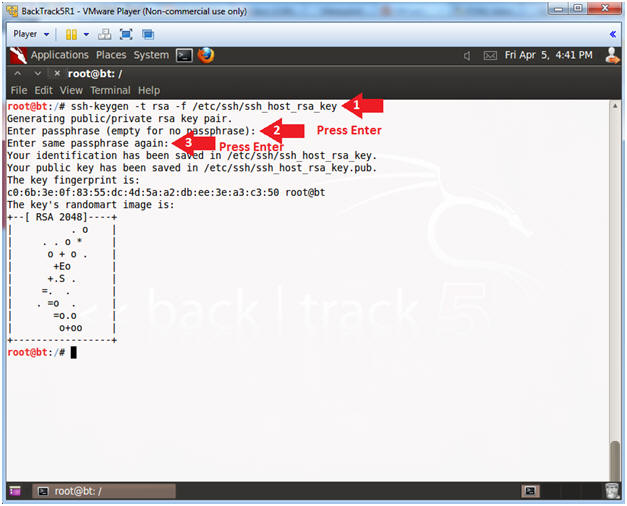
- Create RSA Host Key
- Instructions:
- ssh-keygen -t rsa -f /etc/ssh/ssh_host_rsa_key
- Press <Enter>
- Press <Enter>
- Instructions:
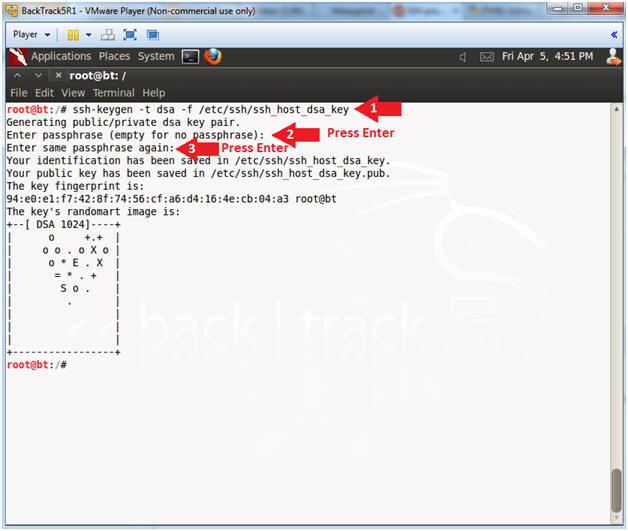
- Create DSA Host Key
- Instructions:
- ssh-keygen -t dsa -f /etc/ssh/ssh_host_dsa_key
- Press <Enter>
- Press <Enter>
- Instructions:
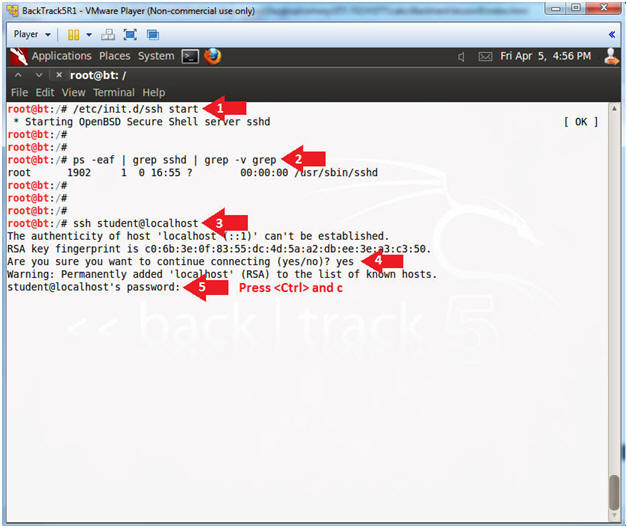
- Start the SSH Server
- Instructions:
- /etc/init.d/ssh start
- ps -eaf | grep sshd | grep -v grep
- ssh student@localhost
- yes
- Press <Ctrl> and c
- Instructions:
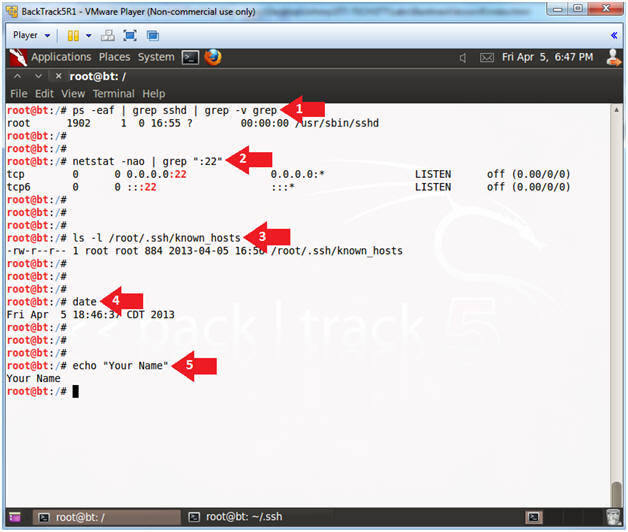
| Section 4: Proof of Lab |
-
Proof of Lab
- Instructions:
- ps -eaf | grep sshd | grep -v grep
- netstat -nao | grep ":22"
- ls -l /root/.ssh/known_hosts
- date
- echo "Your Name"
- This should be your actual name.
- e.g., echo "John Gray"
- Proof of Lab
Instructions:
- Do a PrtScn
- Paste into a word document
- Upload to Moodle.
- Instructions: