(NMAP: Lesson 3)
{ Use ZENMAP and NMAP on BackTrack 5 R1 }
| Section 0. Background Information |
- NMAP
- Nmap (Network Mapper) is a security scanner used to discover hosts and services on a computer network, thus creating a "map" of the network. To accomplish its goal, Nmap sends specially crafted packets to the target host and then analyzes the responses. Unlike many simple port scanners that just send packets at some predefined constant rate, Nmap accounts for the network conditions (latency fluctuations, network congestion, the target interference with the scan) during the run
- Pre-Requisite
-
Lab Notes
- In this lab we will do the following:
- Use Zenmap to conduct a quick, intense and network scan.
- Use Nmap to conduct a quick and intense scan.
- In this lab we will do the following:
- Legal Disclaimer
- As a condition of your use of this Web site, you warrant to computersecuritystudent.com that you will not use this Web site for any purpose that is unlawful or that is prohibited by these terms, conditions, and notices.
- In accordance with UCC § 2-316, this product is provided with "no warranties, either express or implied." The information contained is provided "as-is", with "no guarantee of merchantability."
- In addition, this is a teaching website that does not condone malicious behavior of any kind.
- Your are on notice, that continuing and/or using this lab outside your "own" test environment is considered malicious and is against the law.
- © 2013 No content replication of any kind is allowed without express written permission.
| Section 1: Login to BackTrack |
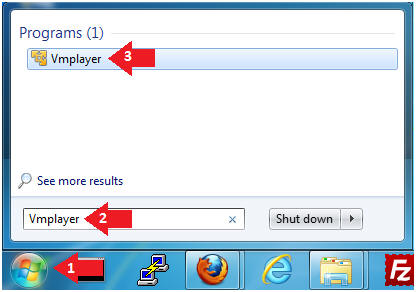
- Start Up VMWare Player
- Instructions:
- Click the Start Button
- Type Vmplayer in the search box
- Click on Vmplayer
- Instructions:
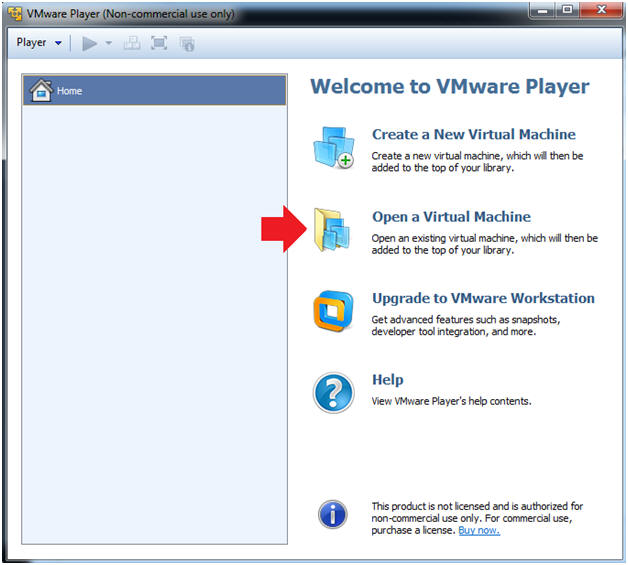
- Open a Virtual Machine
- Instructions:
- Click on Open a Virtual Machine
- Instructions:
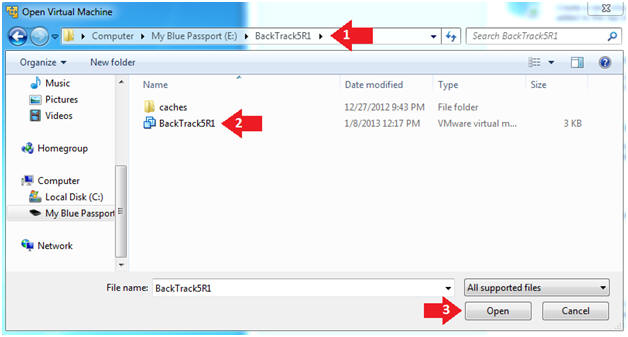
- Open the BackTrack5R1 VM
- Instructions:
- Navigate to where the BackTrack5R1 VM is located
- Click on on the BackTrack5R1 VM
- Click on the Open Button
- Instructions:
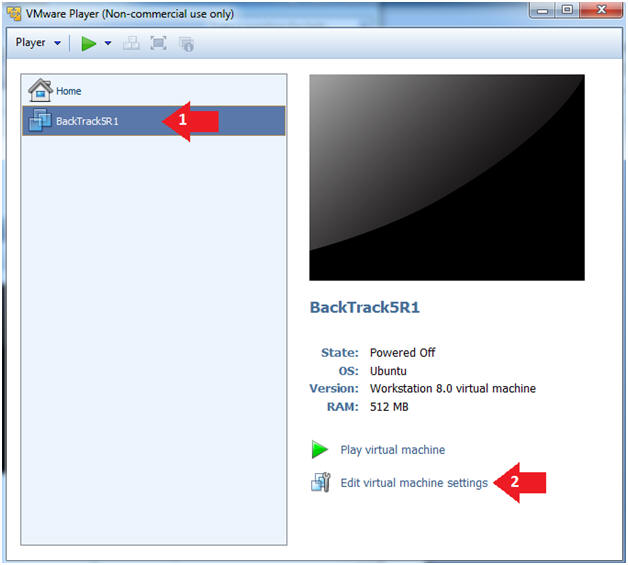
- Edit the BackTrack5R1 VM
- Instructions:
- Select BackTrack5R1 VM
- Click Edit virtual machine settings
- Instructions:
- Edit Virtual Machine Settings
- Instructions:
- Click on Network Adapter
- Click on the Bridged Radio button
- Click on the OK Button
- Instructions:
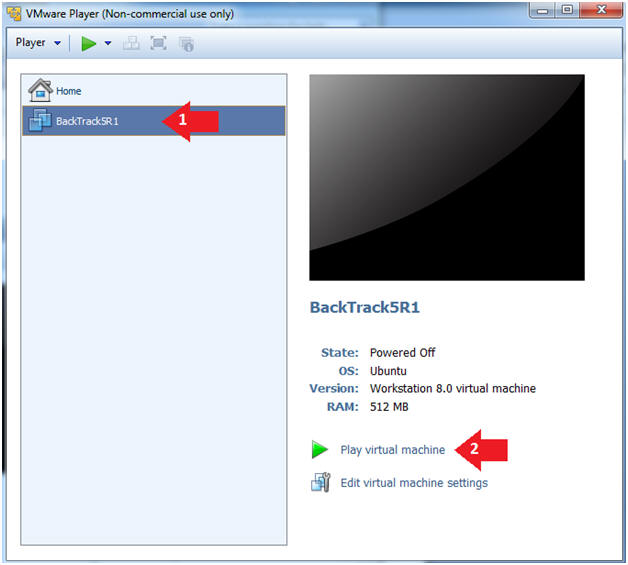
- Play the BackTrack5R1 VM
- Instructions:
- Click on the BackTrack5R1 VM
- Click on Play virtual machine
- Instructions:
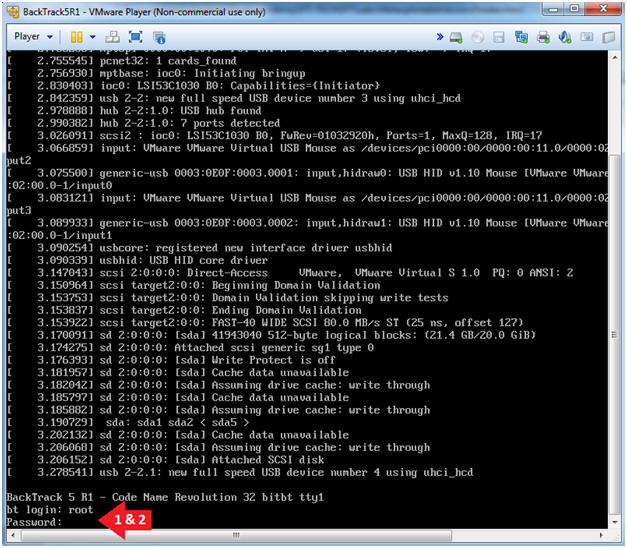
- Login to BackTrack
- Instructions:
- Login: root
- Password: toor or <whatever you changed it to>.
- Instructions:
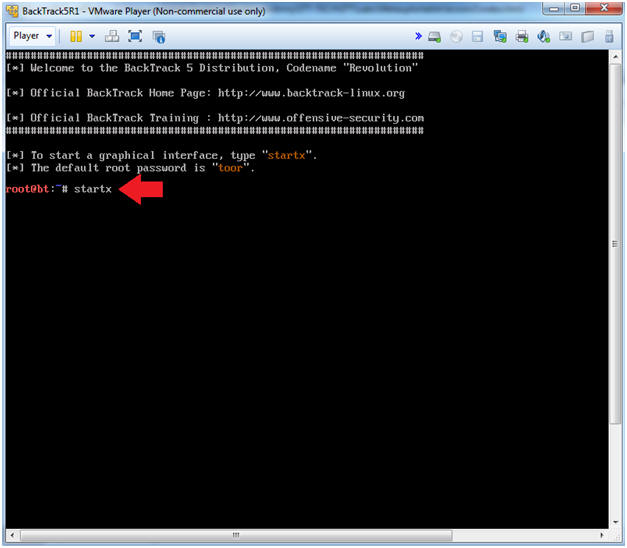
- Bring up the GNOME
- Instructions:
- Type startx
- Instructions:
| Section 2: Bring up a console terminal |
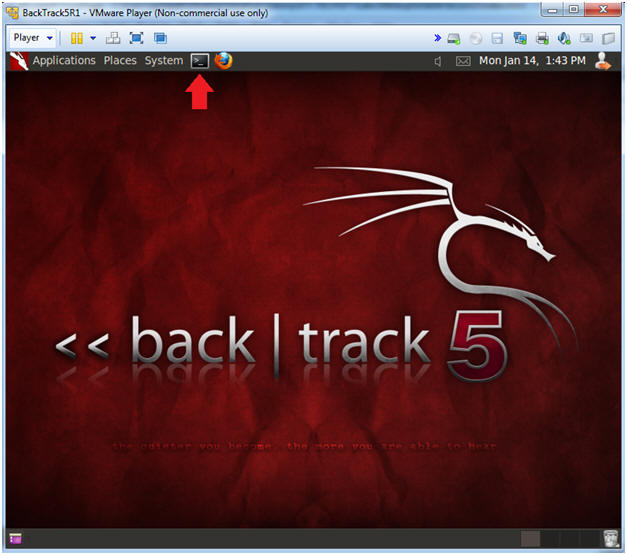
- Start up a terminal window
- Instructions:
- Click on the Terminal Window
- Instructions:
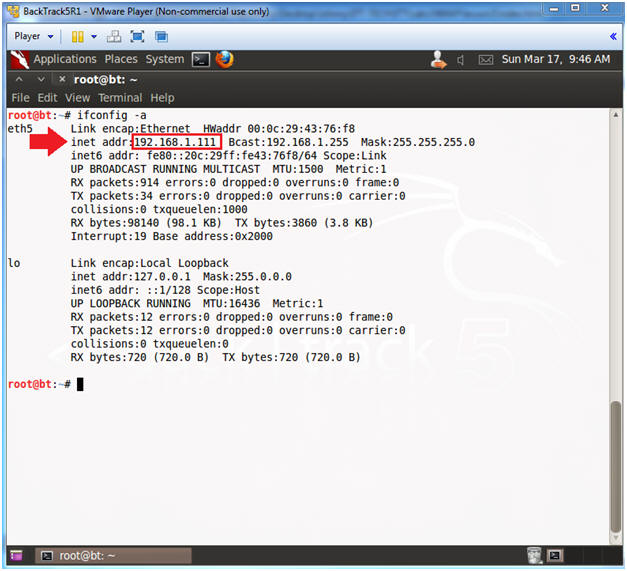
- Obtain the IP Address
- Instructions:
- ifconfig -a
- Note(FYI):
- My IP address 192.168.1.111.
- In your case, it will probably be different.
- Instructions:
| Section 3: Log into Damn Vulnerable WXP-SP2 |
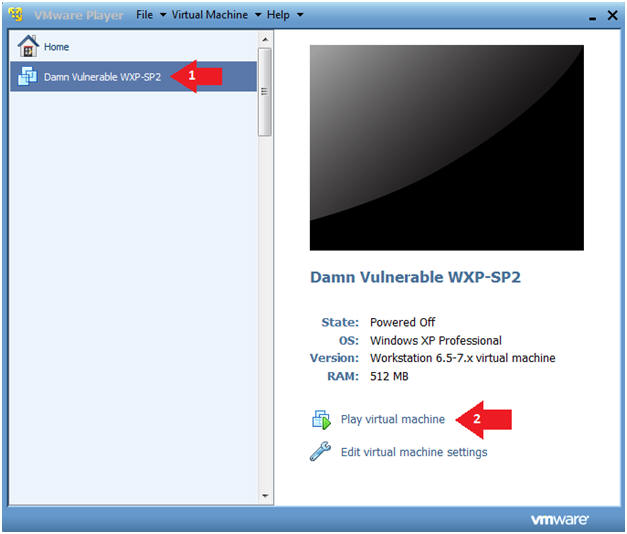
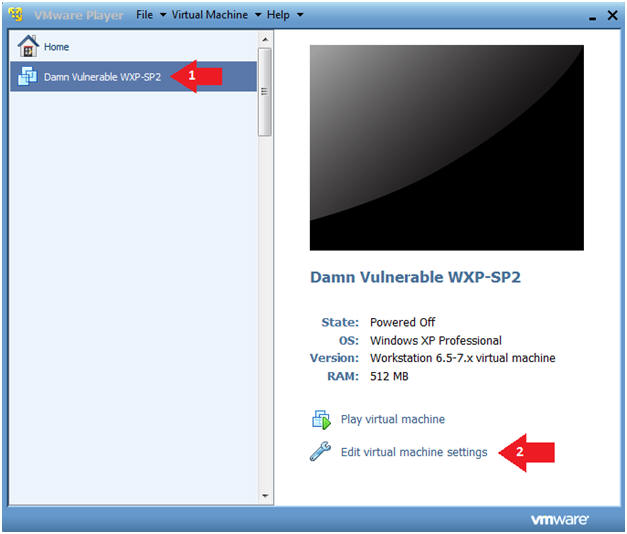
- Start Up Damn Vulnerable WXP-SP2.
- Instructions:
- Click on Damn Vulnerable WXP-SP2
- Click on Edit virtual machine Settings
- Note(FYI):
- For those of you not part of my class, this is a Windows XP machine running SP2.
- Instructions:
- Edit Virtual Machine Settings
- Instructions:
- Click on Network Adapter
- Click on the Bridged Radio button
- Click on the OK Button

- Instructions:
- Play Virtual Machine
- Instructions:
- Click on Damn Vulnerable WXP-SP2
- Click on Play virtual machine
- Instructions:
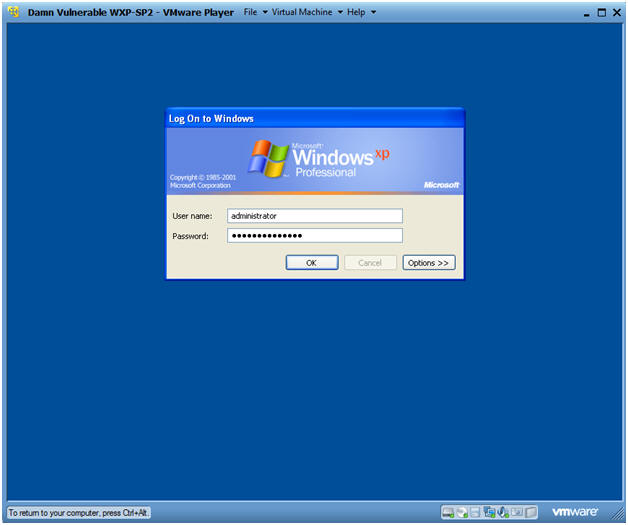
- Logging into Damn Vulnerable WXP-SP2.
- Instructions:
- Username: administrator
- Password: Use the Class Password or whatever you set it.
- Instructions:
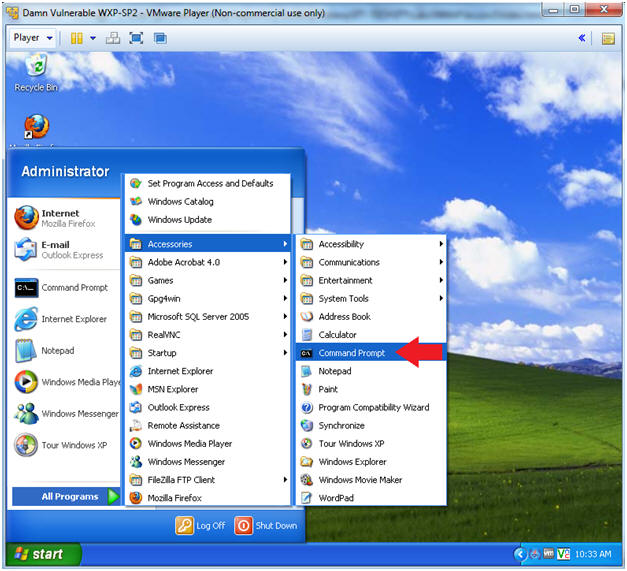
- Open a Command Prompt
- Instructions:
- Start --> All Programs --> Accessories --> Command Prompt
- Instructions:
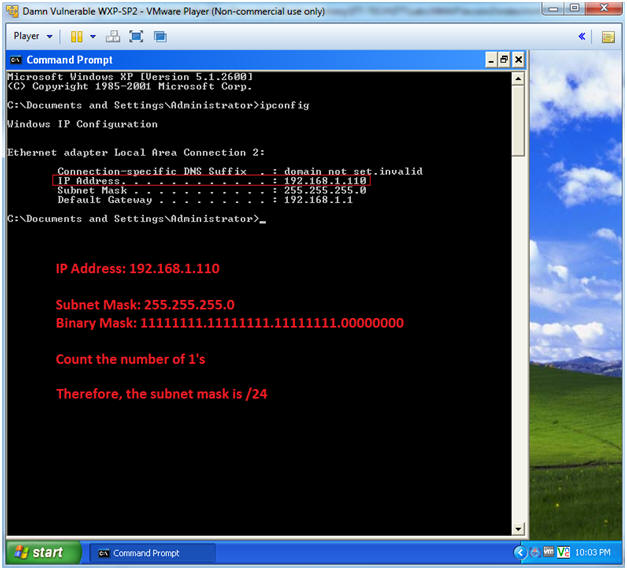
- Obtain Damn Vulnerable WXP-SP2's IP Address
- Instructions:
- ipconfig
- Note(FYI):
- In my case, Damn Vulnerable WXP-SP2's IP Address 192.168.1.110.
- This is the IP Address of the Victim Machine that will be scanned by NMAP.
- Record your Damn Vulnerable WXP-SP2's IP Address.
- See the below picture to calculate your subnet mask.
- Instructions:
| Section 4: Perform Zenmap Quick Scan |
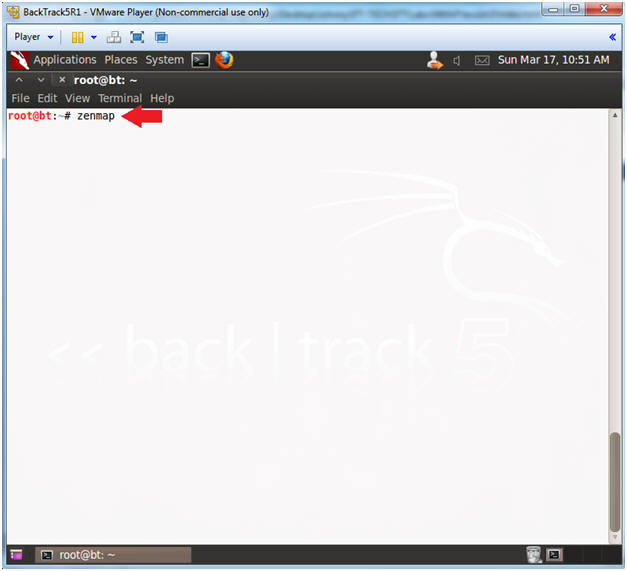
- Start Zenmap
- Note(FYI):
- Make sure you are on the BackTrack5R1 VM Machine
- Instructions:
- zenmap
- Note(FYI):
- Perform a quick scan by doing the following:
(See Below).
- Note(FYI):
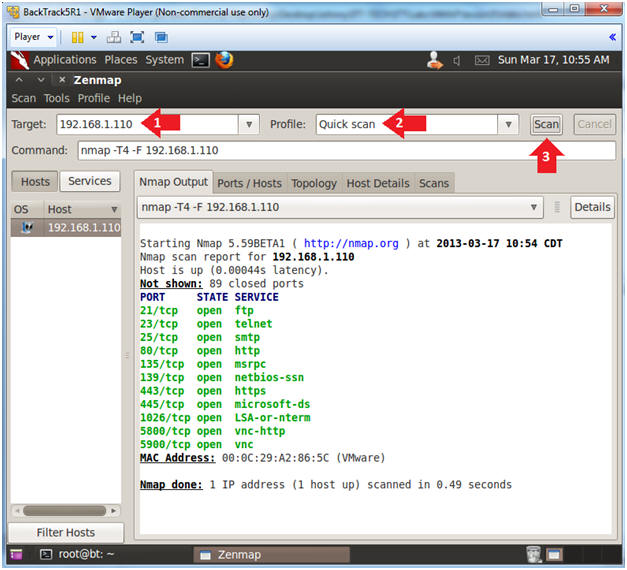
- Replace 192.168.1.110 with Damn Vulnerable WXP-SP2's IP Address obtained from (Section 3, Step 6).
- Instructions:
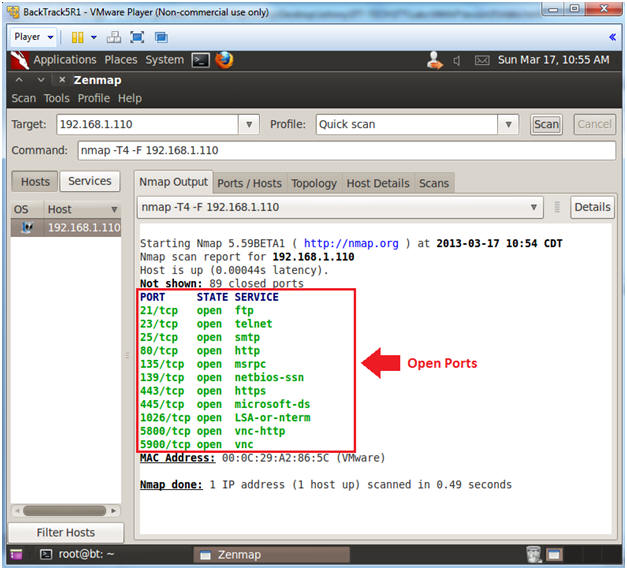
- Target: 192.168.1.110
- Profile: Select Quick Scan
- Click the Scan Button.
- Note(FYI):
- Output Analysis
- Notes(FYI):
- Nmap's quick scan displays the
following basic network metrics:
- If the host is up.
- How many ports are closed.
- Which ports are open and their
service name.
- e.g., 21 (ftp)
- Also, the MAC address is display with Nmap's guess of the OS being VMware.
- Nmap's quick scan displays the
following basic network metrics:
- Notes(FYI):
| Section 5: Zenmap Intense Scan |
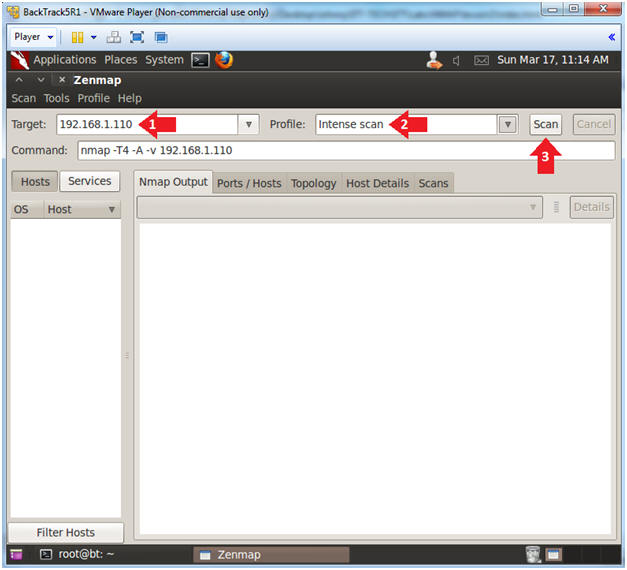
- Perform Intense Scan
- Note(FYI):
- Replace 192.168.1.110 with Damn Vulnerable WXP-SP2 IP Address obtained from (Section 3, Step 6).
- Instructions:
- Target: 192.168.1.110
- Profile: Select Intense Scan
- Click the Scan Button.
- Note(FYI):
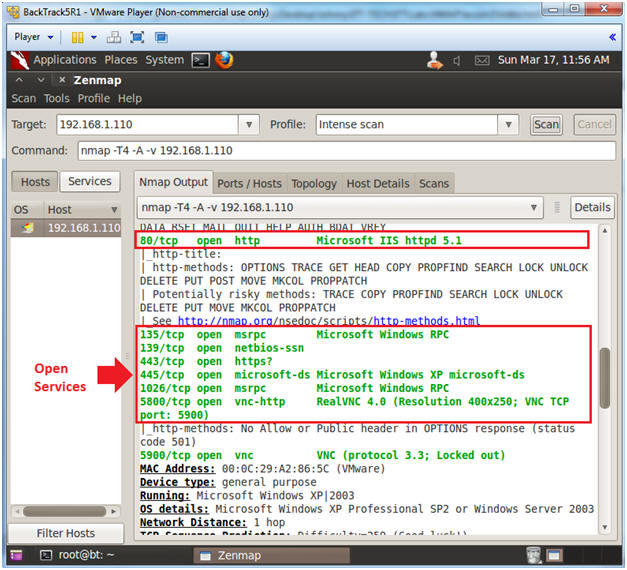
- Version Analysis
- Notes(FYI):
- Notice the results are more verbose.
- The actual version of the service was
added to service name.
- You can use this information to investigate possible exploits.
- For Example, Microsofts ISS http 5.1 webserver.
- Notes(FYI):
| Section 6: Nmap Network Scan |
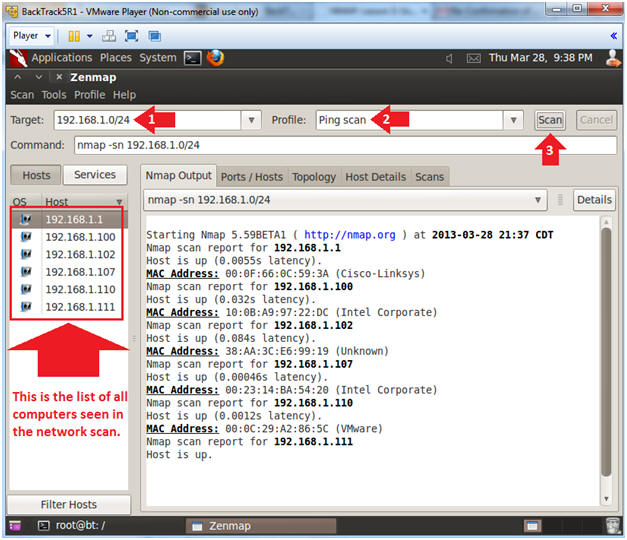
- Subnet Ping Scan
- Note(FYI):
- Obtained the subnet mask of your Damn Vulnerable WXP-SP2 from (Section 3, Step 6).
- Instructions:
- Change Target to the subnet address of
Damn Vulnerable WXP-SP2.
- In my case, 192.168.1.0/24
- Notice, that I replaced the last octet of my IP address with a 0.
- The /24 represents the subnet mask.
- Change Profile to: Ping Scan
- Click Scan
- Change Target to the subnet address of
Damn Vulnerable WXP-SP2.
- Note(FYI):
- Topology Analysis
- Instructions:
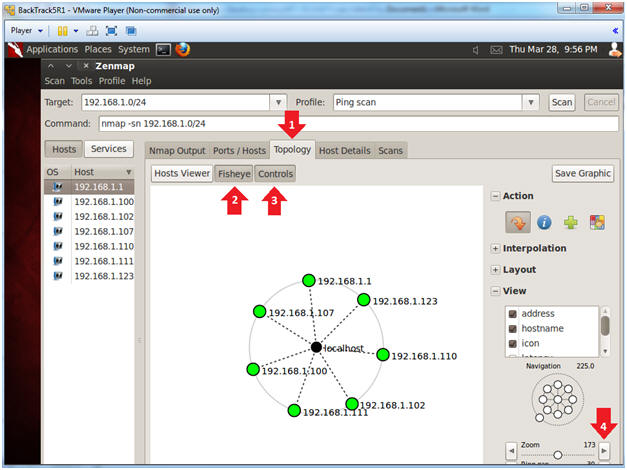
- Click on the Topology Tab.
- Click on Fisheye
- Click on Controls
- This will allow you to increase the size of the network rings.
- Click on the Zoom Arrow
- Note(FYI):
- This will give you a visual representation of how your network is laid out.
- When presenting a customer or management with a penetration testing analysis, this would be a good picture to throw into the report
- Instructions:
| Section 7: Performing NMAP Scans |
- Perform Quick NMAP Scan
- Instructions(FYI):
- Replace 192.168.1.110 with Damn Vulnerable WXP-SP2 IP Address obtained from (Section 3, Step 6)
- Instructions:
- nmap -T4-F 192.168.1.110 | tee /var/tmp/nmap.quick.txt
- nmap - is the NMAP scanner.
- | tee /var/tmp/nmap.quick.txt - View output and sent it to file nmap.quick.txt.
- nmap -T4-F 192.168.1.110 | tee /var/tmp/nmap.quick.txt

- Instructions(FYI):
- Perform Intense NMAP Scan
- Instructions(FYI):
- Replace 192.168.1.110 with Damn Vulnerable WXP-SP2 IP Address obtained from (Section 3, Step 6)
- Instructions:
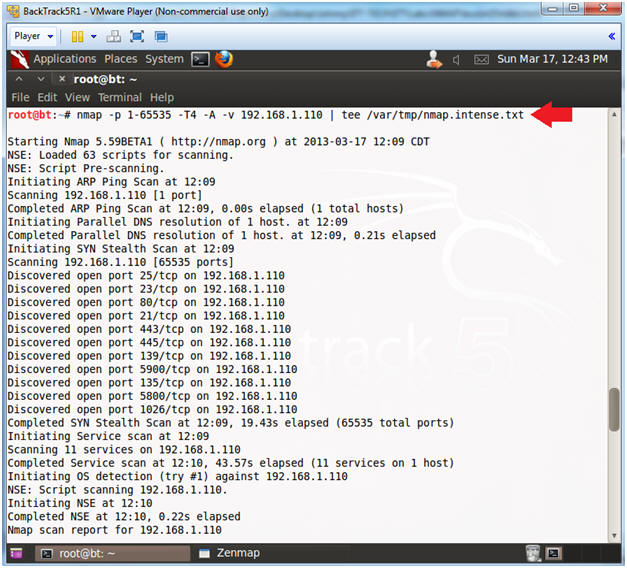
- nmap -p 1-65535 -T4 -A -v
192.168.1.110 | tee /var/tmp/nmap.intense.txt
- nmap - is the NMAP scanner.
- | tee /var/tmp/nmap.intense.txt - View output and sent it to file nmap.intense.txt.
- nmap -p 1-65535 -T4 -A -v
192.168.1.110 | tee /var/tmp/nmap.intense.txt
- Instructions(FYI):
| Section 8: Proof of Lab |
- Proof of Lab
- Instructions
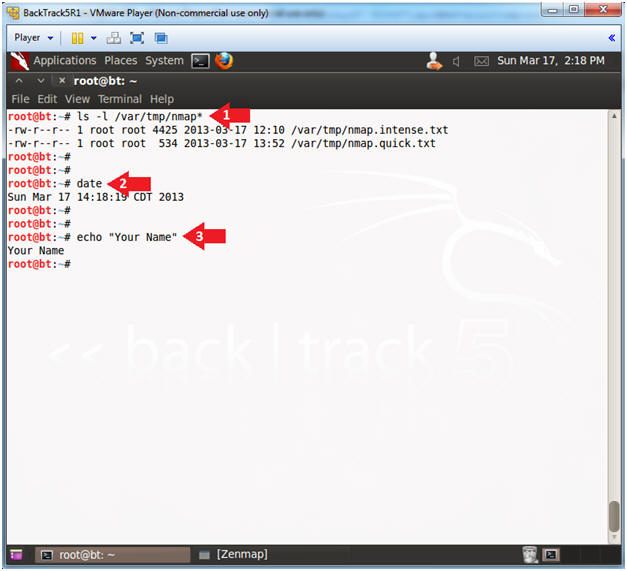
- ls -l /var/tmp/nmap*
- date
- echo "Your Name"
- Put in your actual name in place of "Your Name"
- e.g., echo "John Gray"
-
Proof Of Lab Instructions:
- Do a PrtScn
- Paste into a word document
- Upload to Moodle
- Instructions