(NESSUS: Lesson 2)
{ Install Nessus on BackTrack 5R1 }
| Section 0. Background Information |
- What is NESSUS?
- Tenable Network Security provides enterprise-class solutions for continuous monitoring and visibility of vulnerabilities, configurations, user activity and system events that impact security and compliance.
- Nessus features high-speed discovery, configuration auditing, asset profiling, sensitive data discovery and vulnerability analysis of your security posture
- Pre-Requisite
-
Lab Notes
- In this lab we will do the following:
- Install Nessus.
- Start the Nessus service
- Configure Nessus certificate
- Login Nessus
- In this lab we will do the following:
- Legal Disclaimer
- As a condition of your use of this Web site, you warrant to computersecuritystudent.com that you will not use this Web site for any purpose that is unlawful or that is prohibited by these terms, conditions, and notices.
- In accordance with UCC § 2-316, this product is provided with "no warranties, either express or implied." The information contained is provided "as-is", with "no guarantee of merchantability."
- In addition, this is a teaching website that does not condone malicious behavior of any kind.
- You are on notice, that continuing and/or using this lab outside your "own" test environment is considered malicious and is against the law.
- © 2013 No content replication of any kind is allowed without express written permission.
| Section 1: Login to BackTrack |
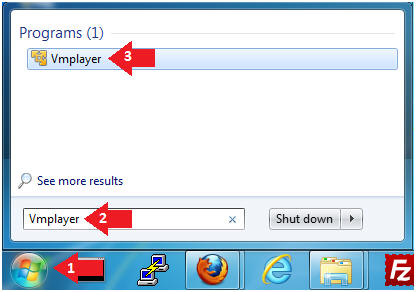
- Start Up VMWare Player
- Instructions:
- Click the Start Button
- Type Vmplayer in the search box
- Click on Vmplayer
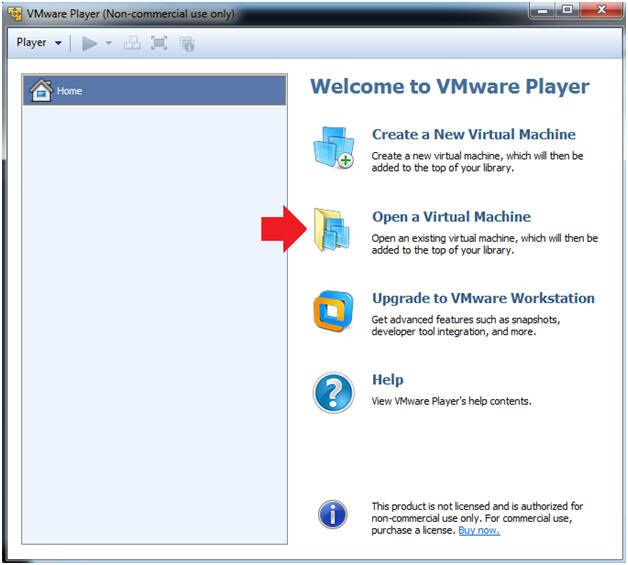
- Instructions:
- Open a Virtual Machine
- Instructions:
- Click on Open a Virtual Machine
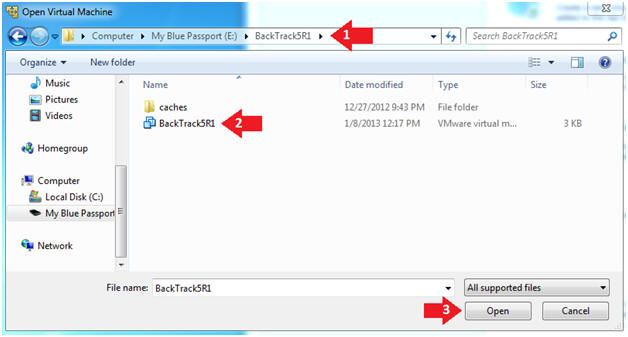
- Instructions:
- Open the BackTrack5R1 VM
- Instructions:
- Navigate to where the BackTrack5R1 VM is located
- Click on on the BackTrack5R1 VM
- Click on the Open Button
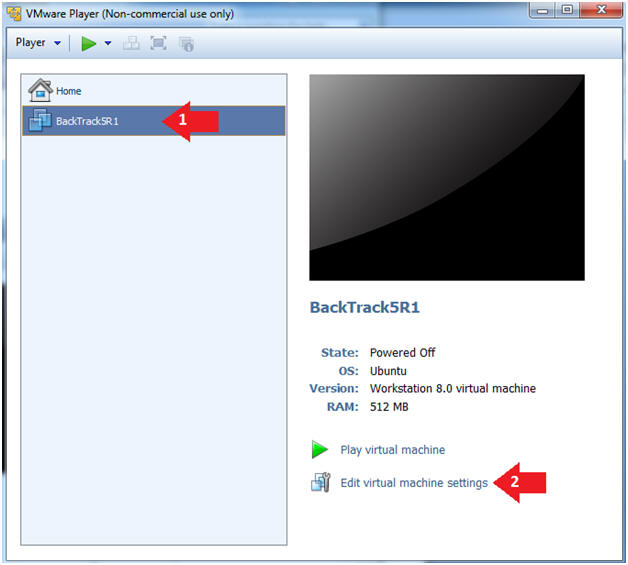
- Instructions:
- Edit the BackTrack5R1 VM
- Instructions:
- Select BackTrack5R1 VM
- Click Edit virtual machine settings
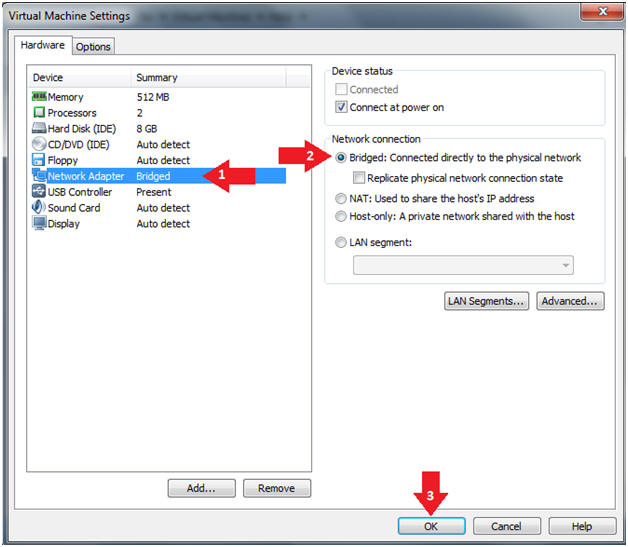
- Instructions:
- Edit Virtual Machine Settings
- Instructions:
- Click on Network Adapter
- Click on the Bridged Radio button
- Click on the OK Button
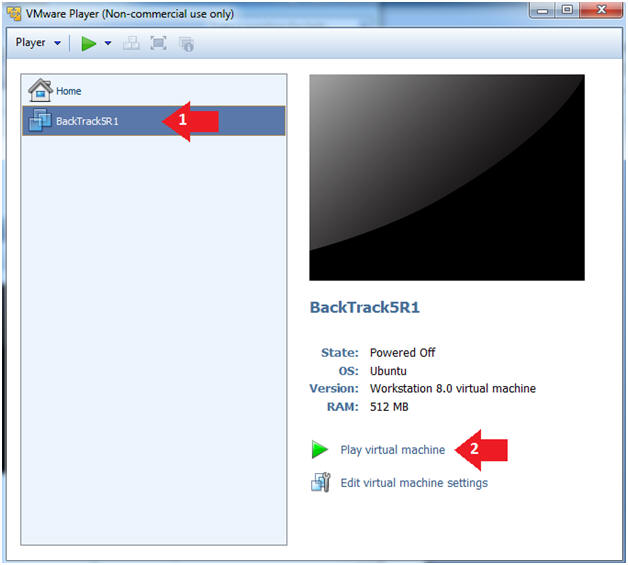
- Instructions:
- Play the BackTrack5R1 VM
- Instructions:
- Click on the BackTrack5R1 VM
- Click on Play virtual machine
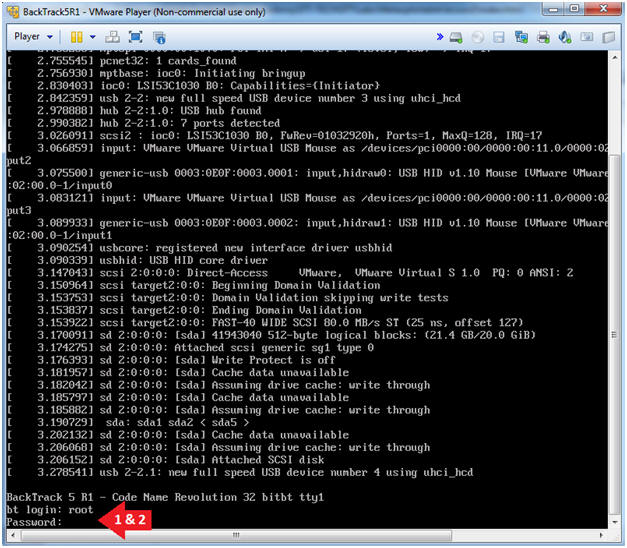
- Instructions:
- Login to BackTrack
- Instructions:
- Login: root
- Password: toor or <whatever you changed it to>.
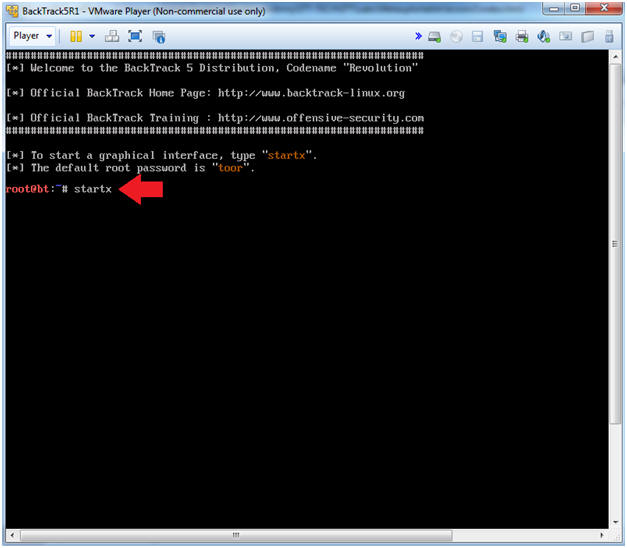
- Instructions:
- Bring up the GNOME
- Instructions:
- Type startx
- Instructions:
| Section 2: Bring up a console terminal |
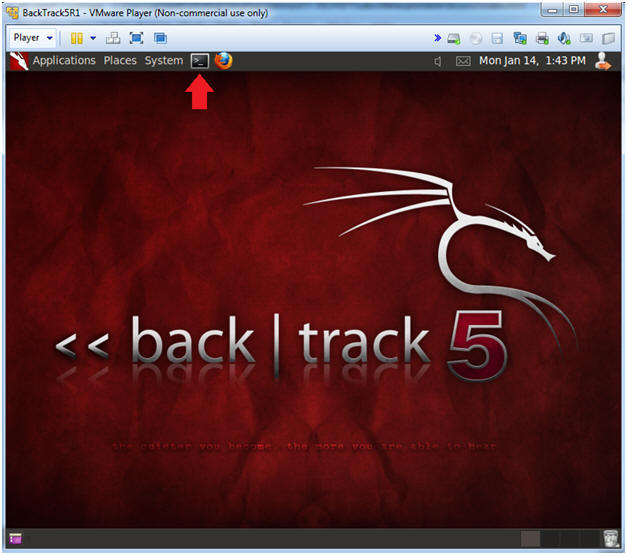
- Start up a terminal window
- Instructions:
- Click on the Terminal Window
- Instructions:
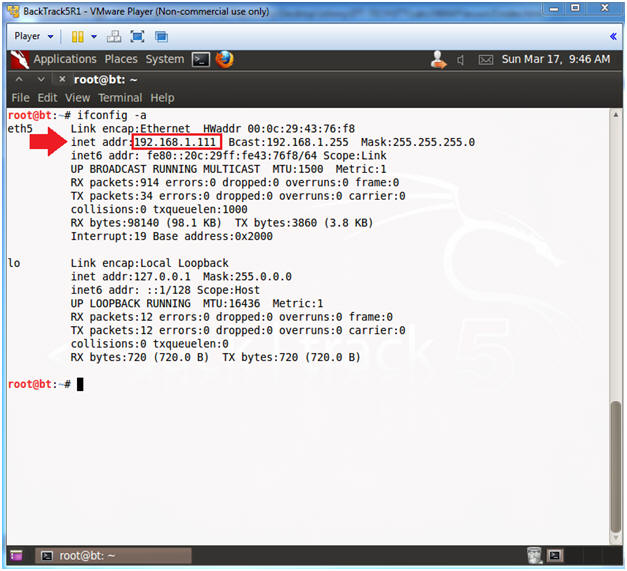
- Obtain the IP Address
- Instructions:
- ifconfig -a
- Note(FYI):
- My IP address 192.168.1.111.
- In your case, it will probably be different.
- Instructions:
| Section 3: Create Duplicate Firefox Instance |
- Create Duplicate Firefox Instance
- Note(FYI):
- Nessus 6.x.x and higher no longer runs on Firefox 5.0.1 that comes with BackTrack5R1.
- Since many subsequent lesson screenshots are taken with Firefox 5.0.1, we will create a duplicate instance of Firefox that will we upgrade to an compatible version for Nessus.
- Note(FYI):
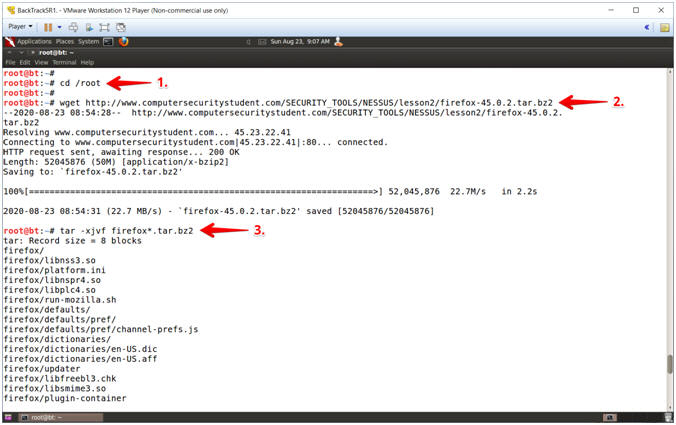
- Create Duplicate Firefox Instance
- Instructions:
- cd /root
- wget http://www.computersecuritystudent.com/SECURITY_TOOLS/NESSUS/lesson2/firefox-45.0.2.tar.bz2
- tar -xjvf firefox*.tar.bz2
- Note(FYI):
- Command #1, Use the (cd) to navigate to the (/root) directory.
- Command #2, Use wget download the (firefox-45.0.2.tar.bz2) zip file to the (/root) directory.
- Command #3, Use (tar) to unzip the (firefox-45.0.2.tar.bz2) zip, where (x) stands for extract, (j) stands for bzip2, (v) in verbose mode and (f) specifies the target zip file.
- Instructions:
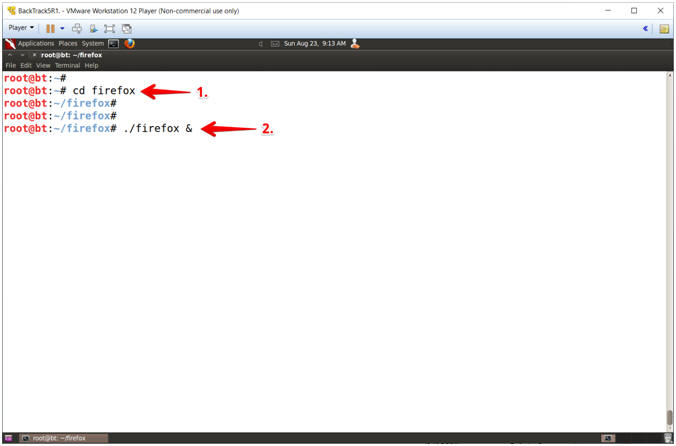
- Launch Firefox
- Instructions:
- cd firefox
- ./firefox &
- Note(FYI):
- Command #1, Navigate to the new firefox directory.
- Command #2, Launch firefox in background mode using (&).
- Instructions:
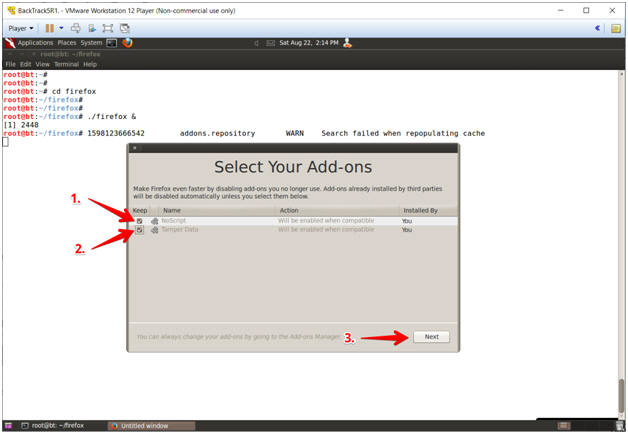
- Select Your Add-ons
(Part 1)
- Instructions:
- Check the NoScript Checkbox
- Check the Tamper Data Checkbox
- Click the Next Button
- Note(FYI):
- Command #1 &2, The Firefox detected pre-existing plugins in the (/root) user home directory, and therefore will try to add those plugins.
- Instructions:
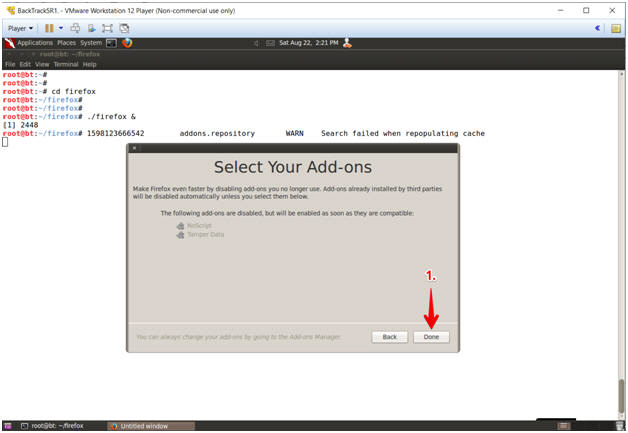
- Select Your Add-ons (Part 2)
- Instructions:
- Click the Done Button
- Instructions:
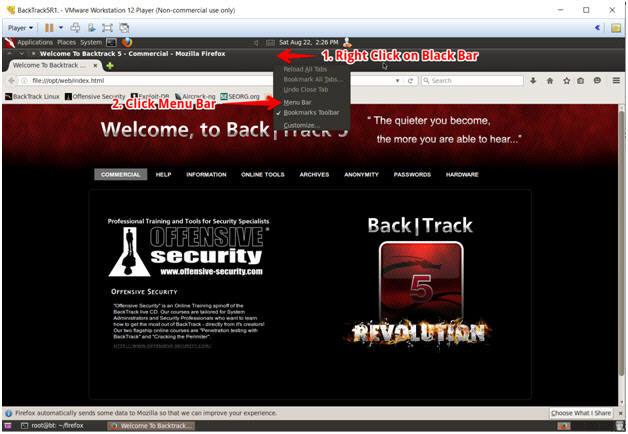
- Add Menu Bar
- Instructions:
- Right Click on Black Bar
- Click the Menu Bar
- Note(FYI):
- Command #2, This will add the menu bar to Firefox.
- Instructions:
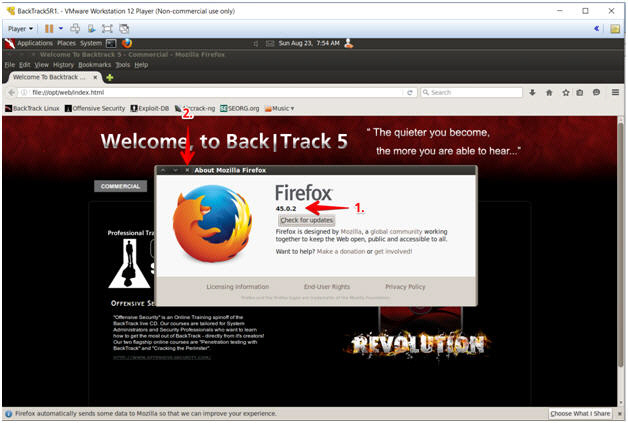
- Verify Firefox Version
- Instructions:
- Verify Firefox is at 45.0.2
- Click the X to close the "About Mozilla Firefox" window
- Instructions:
| Section 4: Download Nessus |
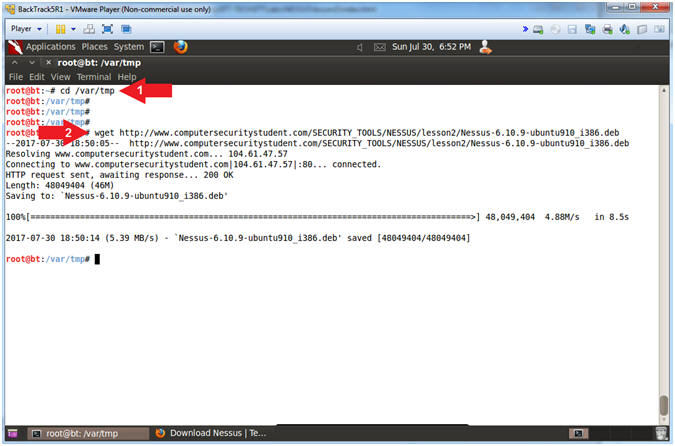
- Download Nessus
- Instructions:
- cd /var/tmp
- wget http://www.computersecuritystudent.com/SECURITY_TOOLS/NESSUS/lesson2/Nessus-6.10.9-ubuntu910_i386.deb
- Note(FYI):
- If (Nessus-6.10.9) is not the latest version,
you can retrieve the
latest Nessus version from the following website
- http://www.tenable.com/products/nessus/select-your-operating-system
- If (Nessus-6.10.9) is not the latest version,
you can retrieve the
latest Nessus version from the following website
- Instructions:
| Section 5: Install Nessus |
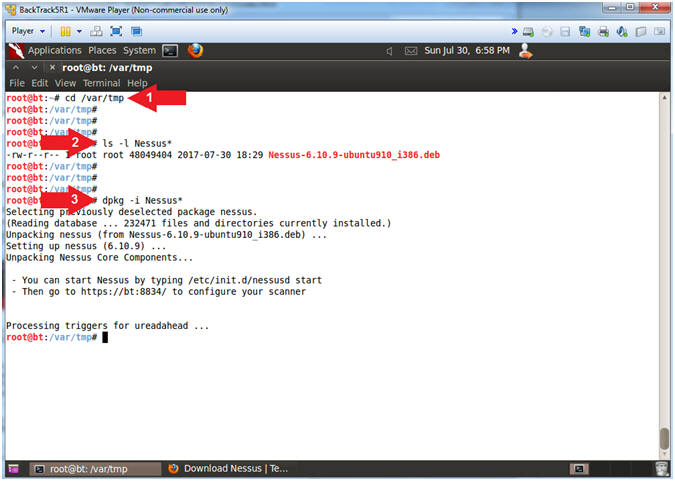
- Install Nessus
- Instructions
- cd /var/tmp
- ls -l Nessus*
- dpkg -i Nessus*
- Notes
- #1, Change Directory (cd) into the (/var/tmp) directory.
- #2, Use (ls -l) to long list the details of the Nessus package.
- #3, Use (dpkg -i) to install the Nessus package.
- For steps #2 and #3 I am using a the wildcard(*) just encase the version changes.
- Instructions
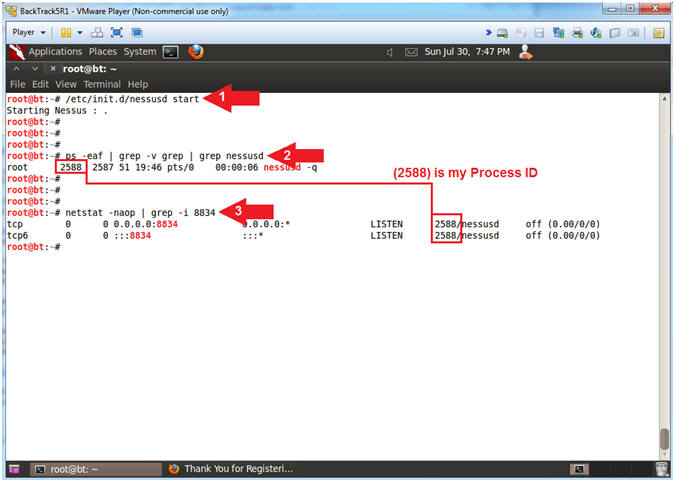
- Start Nessus
- Instructions
- /etc/init.d/nessusd start
- ps -eaf | grep -v grep | grep nessusd
- netstat -naop | grep -i 8834
- Notes
- #1, The script (/etc/init.d/nessusd) provides the ability to start, stop and restart the Nessus Application.
- #2, Use the process (ps) command to display all (-eaf) running processes. Use (grep -v grep) to ignore (-v) any lines that contain the actual grep process. Use (grep nessusd) to display only lines that contain the (nessusd) process.
- #3, Use (netstat) to display all (-a) numeric (-n) network connections and list timers (-o) and process IDs (-p).
- Instructions
| Section 6: Obtain Nessus Activation Code |
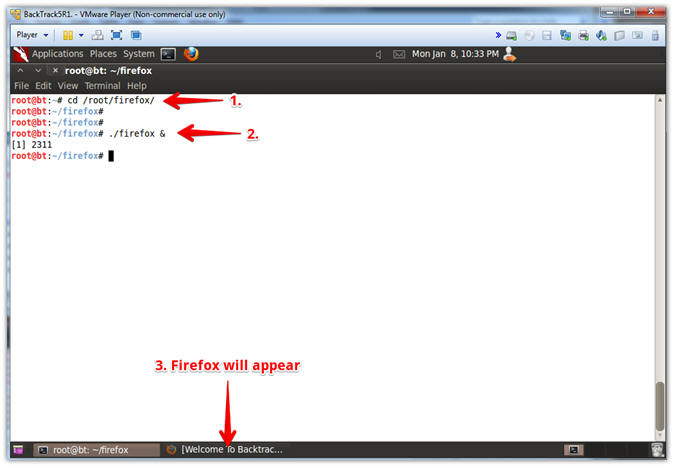
- Start Duplicate Firefox Instance
- Instructions:
- cd /root/firefox/
- ./firefox &
- Instructions:
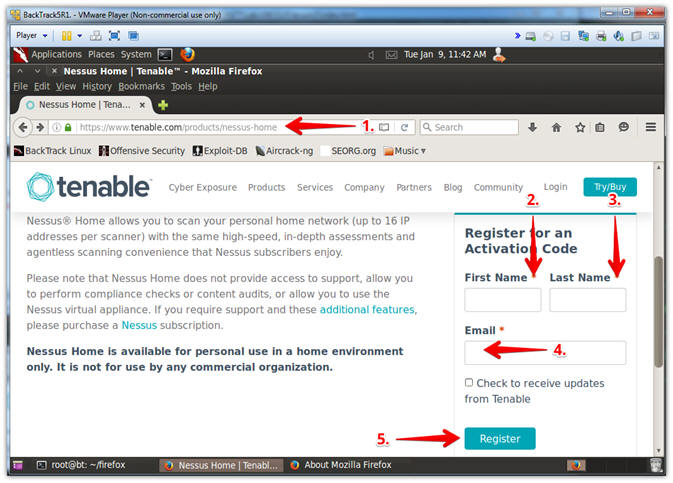
- Obtain Registration Code
- Instructions:
- Place the following URL into Firefox
- http://www.tenable.com/products/nessus-home
- Supply First Name
- Supply Last Name
- Supply Email
- Click the Register Button
- Place the following URL into Firefox
- Instructions:
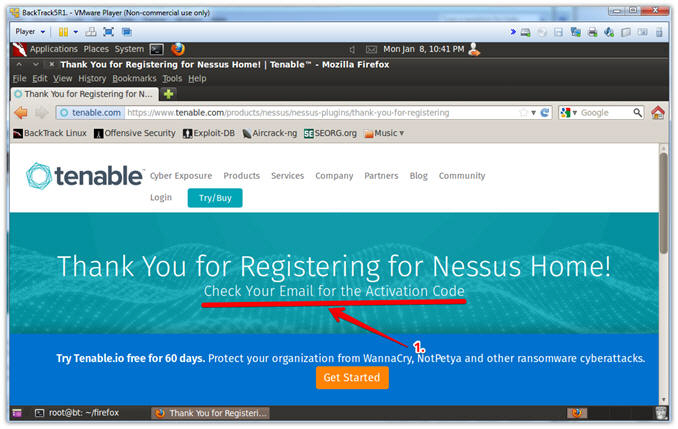
- Thank You For Registering
- Note(FYI):
- You will receive an email from Nessus containing your registration Key.
- Note(FYI):
| Section 7: Registered Nessus |
- Initial Access to the Nessus Application
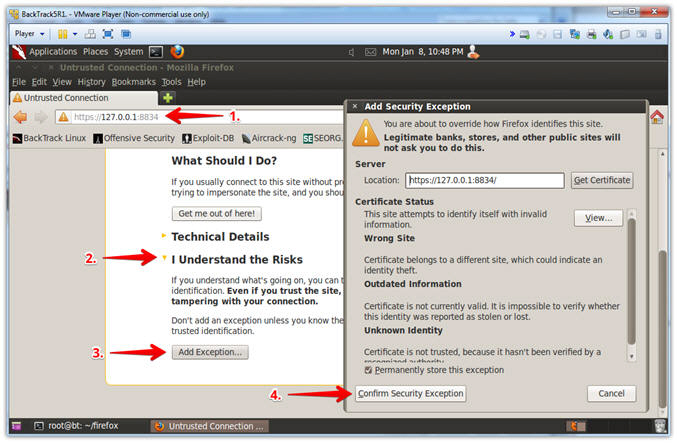
- Instructions:
- Place the following URL into Firefox
- https://127.0.0.1:8834
- Click on the I Understand the Risks twistie
- Click the Add Exception Button
- Click the Confirm Security Exception Button
- Place the following URL into Firefox
- Note(FYI):
- You are receiving this message because Nessus uses a self-signed certificate that is required for the HTTPS protocol.
- In other circumstance, it is would be in your best interest to not proceed.
- Instructions:
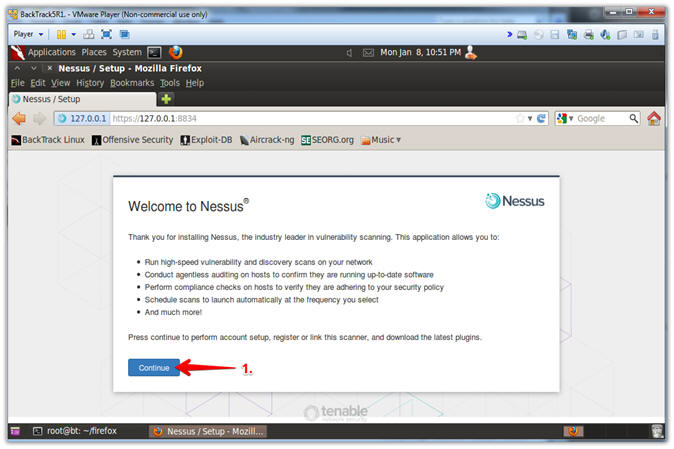
- Welcome to Nessus
- Instructions:
- Click the Continue Button
- Instructions:
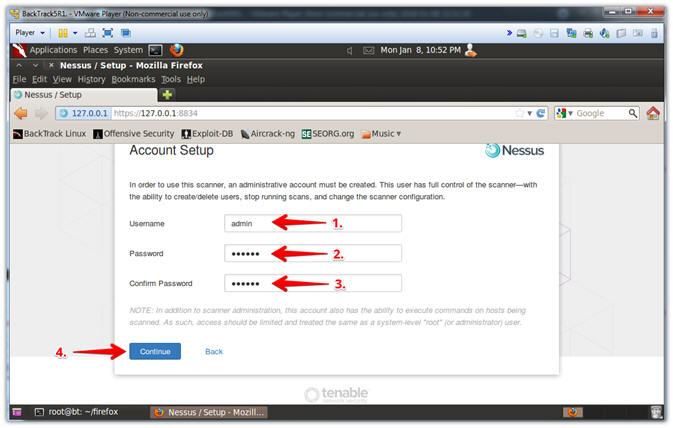
- Nessus Account Setup
- Instructions:
- Username: admin
- Password: Supply Password
- Confirm Password
- Click the Continue Button
- Instructions:
- Nessus Registration
- Instructions:
- Registration: Nessus (Home, Professional or Manager)
- Activation Code: Paste Activation Code
- Click the Continue Button
- Note(FYI):
- #2, The Activation Code should have been sent to your email address that you supplied earlier.

- Instructions:
- Nessus Downloading Updates
- Note(FYI):
- It will take between 30 to 60 minutes for the download to complete.

- Note(FYI):
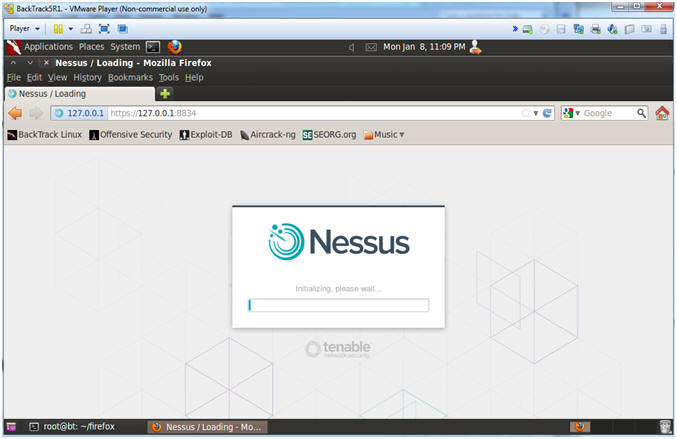
- Nessus Initialization
- Note(FYI):
- It will take between 60 to 120 minutes for the initialization to complete.
- Note(FYI):
| Section 8: Login to Nessus |
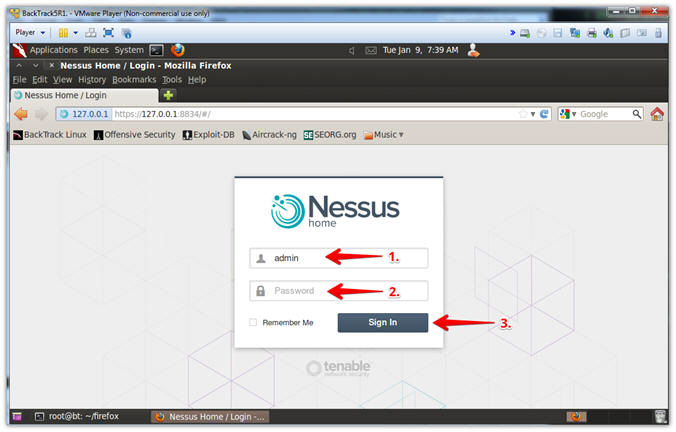
- Login To Nessus
- Instructions:
- Login: admin
- Password: Supply Password
- Click the Sign In Button
-
- Instructions:
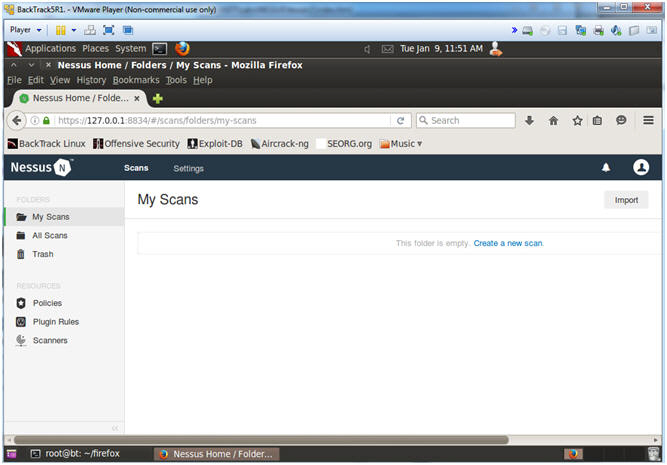
- Nessus Menu
- Note(FYI):
- Below is the Nessus Menu
- Do not click Sign Out -or- Close the Browser until you complete the Proof of Lab.
- Note(FYI):
| Section 9: Proof of Lab |
- Start up a terminal window
- Instructions:
- Click on the Terminal Window
- Instructions:
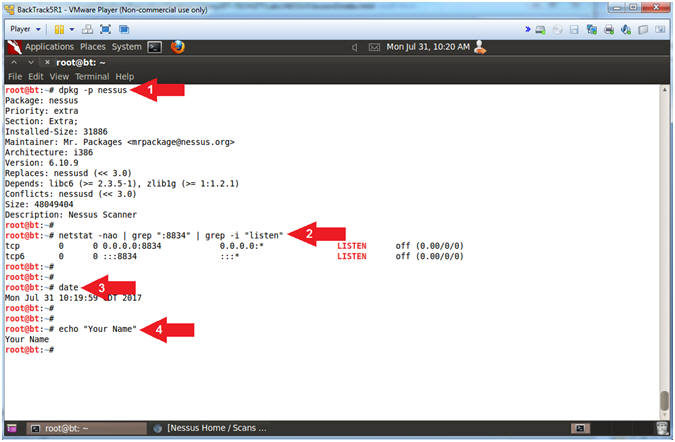
- Proof of Lab
- Instructions
- dpkg -p nessus
- netstat -nao | grep 8834 | grep -v grep
- date
- echo "Your Name"
- Put in your actual name in place of "Your Name"
- e.g., echo "John Gray"
- date
-
Proof Of Lab Instructions:
- Press the PrtScn key
- Paste into a word document
- Upload to Moodle
- Instructions
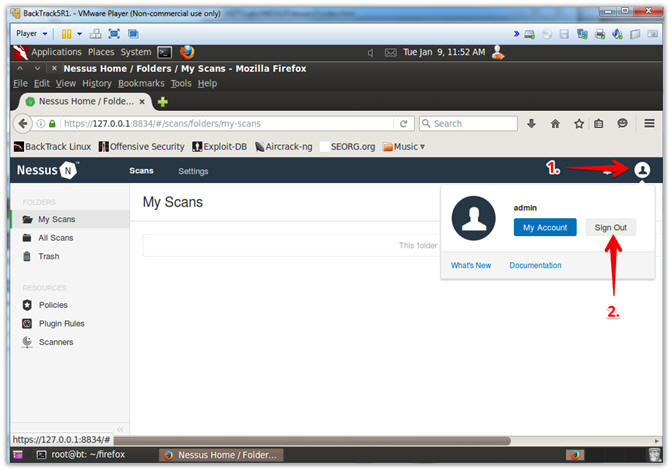
| Section 10: Log Out of Nessus |
- Logout of Nessus
- Instructions:
- Click on admin
- Click Sign Out
- Instructions: