(Mutillidae: Lesson 17)
{ Using nikto.pl }
| Section 0. Background Information |
- What is Mutillidae?
- OWASP Mutillidae II is a free, open source, deliberately vulnerable web-application providing a target for web-security enthusiast.
- What is Nikto?
- Nikto is an Open Source (GPL) web server scanner which performs comprehensive tests against web servers for multiple items, including over 6400 potentially dangerous files/CGIs, checks for outdated versions of over 1200 servers, and version specific problems on over 270 servers
- Pre-Requisite Lab
-
Mutillidae: Lesson 1: How to Install Mutillidae in Fedora 14
- Note: Remote database access has been turned on to provide an additional vulnerability.
-
BackTrack: Lesson 1: Installing BackTrack 5 R1
- Note: This is not absolutely necessary, but if you are a computer security student or professional, you should have a BackTrack VM.
-
Mutillidae: Lesson 1: How to Install Mutillidae in Fedora 14
-
Lab
Notes
- In this lab we will do the following:
- We will use nikto.pl to scan the Mutillidae website for vulnerabilities.
- We will conduct some server reconnaissance using the HTTP Methods HEAD.
- We will exploit the PHP-Nuke Rocket Vulnerability.
- We will investigate the OSVBD-3233: /phpinfo.php warning.
- We will investigate the OSVDB-3268: Directory Indexing warning.
- In this lab we will do the following:
- Legal Disclaimer
- As a condition of your use of this Web site, you warrant to computersecuritystudent.com that you will not use this Web site for any purpose that is unlawful or that is prohibited by these terms, conditions, and notices.
- In accordance with UCC § 2-316, this product is provided with "no warranties, either express or implied." The information contained is provided "as-is", with "no guarantee of merchantability."
- In addition, this is a teaching website that does not condone malicious behavior of any kind.
- You are on notice, that continuing and/or using this lab outside your "own" test environment is considered malicious and is against the law.
- © 2013 No content replication of any kind is allowed without express written permission.
| Section 1: Configure Fedora14 Virtual Machine Settings |
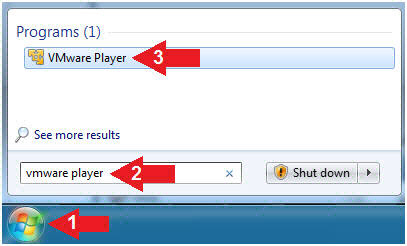
- Start VMware Player
- Instructions
- For Windows 7
- Click Start Button
- Search for "vmware player"
- Click VMware Player
- For Windows XP
- Starts --> Programs --> VMware Player
- For Windows 7
- Instructions
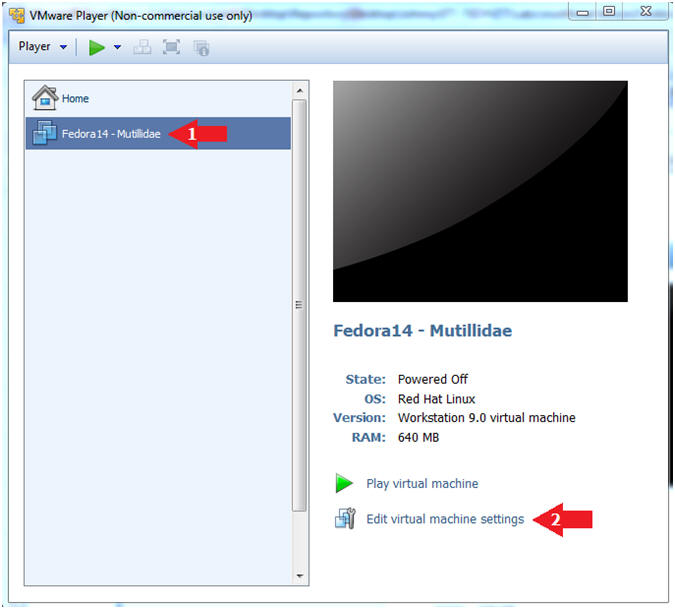
- Edit Fedora Mutillidae Virtual Machine Settings
- Instructions:
- Highlight fedora14
- Click Edit virtual machine settings
- Instructions:
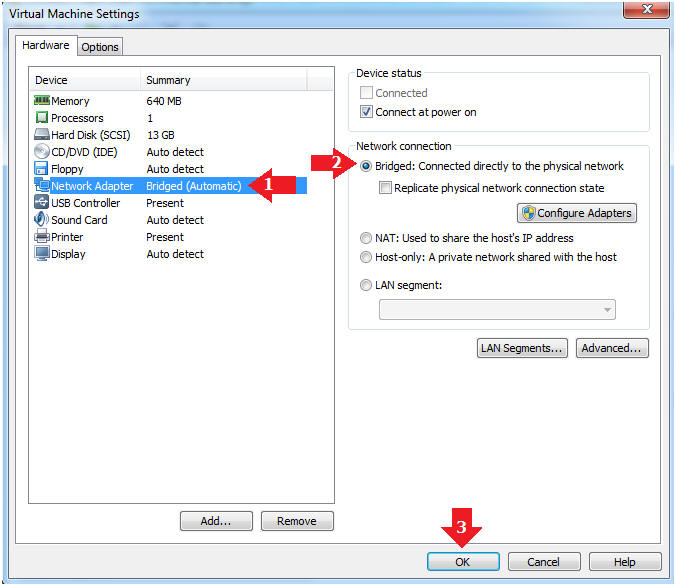
- Edit Network Adapter
- Instructions:
- Highlight Network Adapter
- Select Bridged
- Click the OK Button
| Section 2: Login to Fedora14 - Mutillidae |
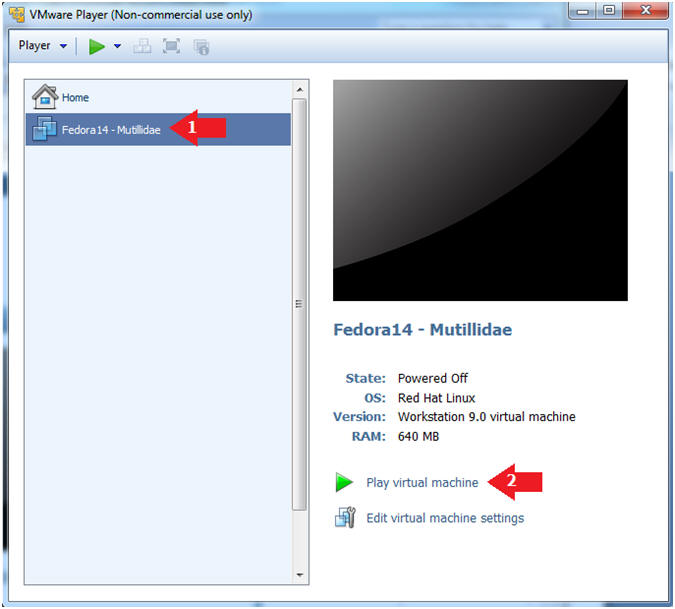
- Start Fedora14 VM Instance
- Instructions:
- Start Up VMWare Player
- Select Fedora14 - Mutillidae
- Play virtual machine
- Instructions:
- Login to Fedora14 - Mutillidae
- Instructions:
- Login: student
- Password: <whatever you set it to>.
-
- Instructions:
| Section 3: Open Console Terminal and Retrieve IP Address |
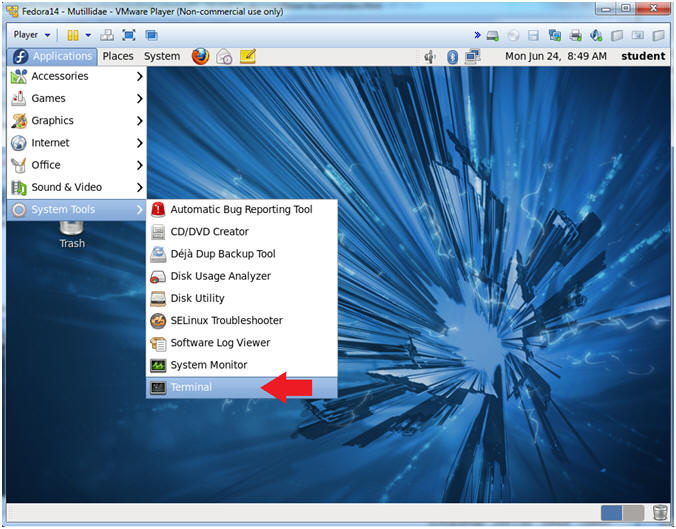
- Start a Terminal Console
- Instructions:
- Applications --> Terminal
- Instructions:
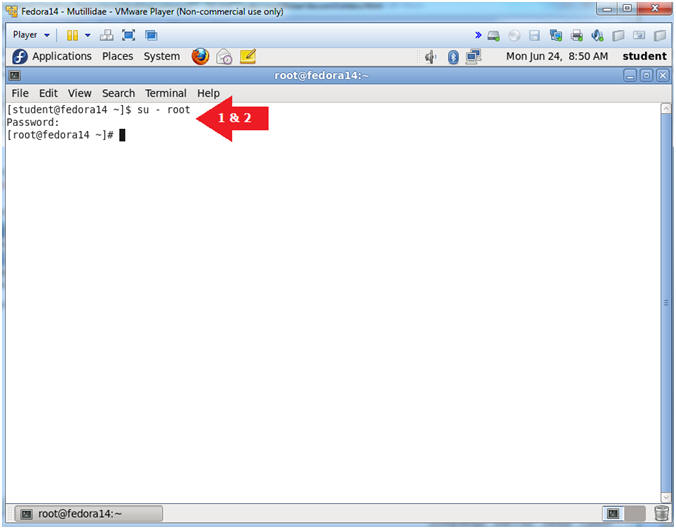
- Switch user to root
- Instructions:
- su - root
- <Whatever you set the root password to>
-
- Instructions:
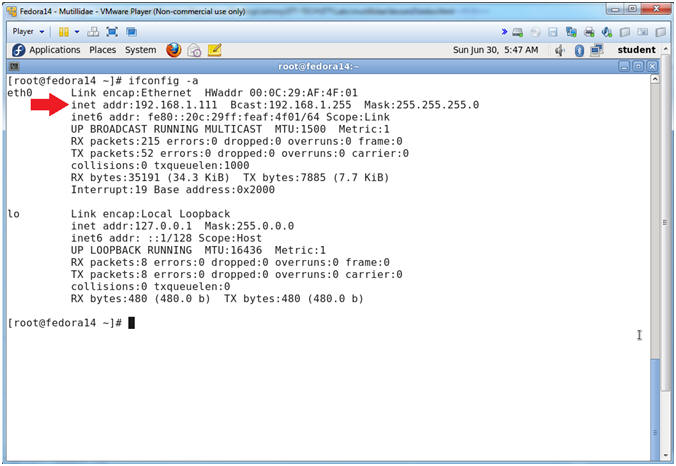
- Get IP Address
- Instructions:
- ifconfig -a
- Notes (FYI):
- As indicated below, my IP address is 192.168.1.111.
- Please record your IP address.
- Instructions:
| Section 4: Configure BackTrack Virtual Machine Settings |
- Start VMware Player
- Instructions
- For Windows 7
- Click Start Button
- Search for "vmware player"
- Click VMware Player
- For Windows XP
- Starts --> Programs --> VMware Player
- For Windows 7
- Instructions
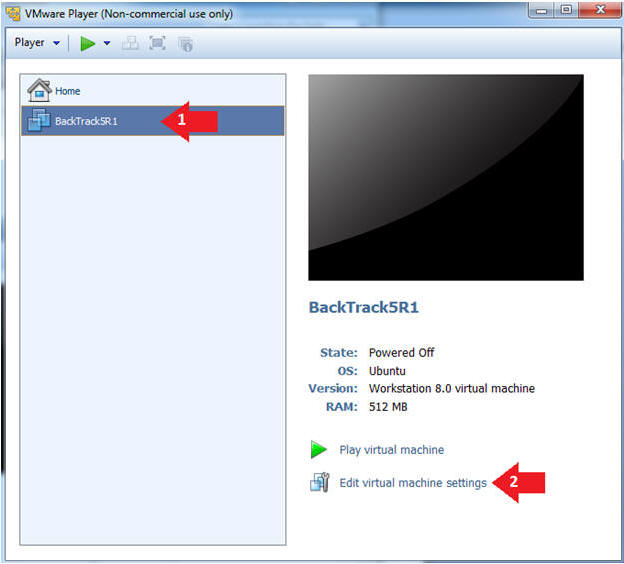
- Edit the BackTrack5R1 VM
- Instructions:
- Select BackTrack5R1 VM
- Click Edit virtual machine settings
- Instructions:
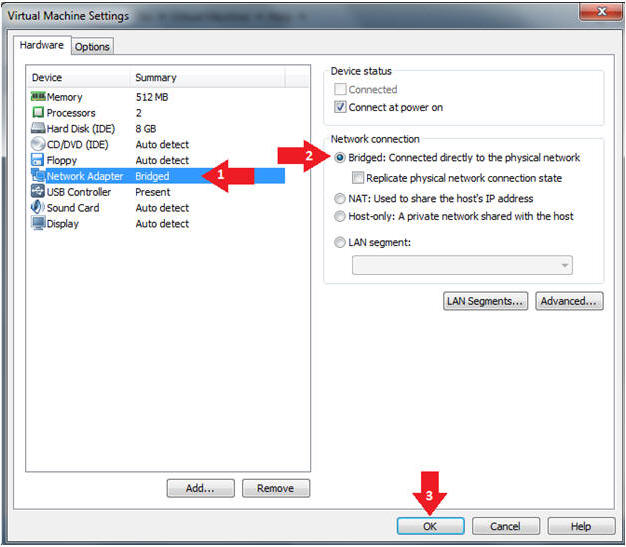
- Edit Virtual Machine Settings
- Instructions:
- Click on Network Adapter
- Click on the Bridged Radio button
- Click on the OK Button
- Instructions:
| Section 5: Play and Login to BackTrack |
- Play the BackTrack5R1 VM
- Instructions:
- Click on the BackTrack5R1 VM
- Click on Play virtual machine

- Instructions:
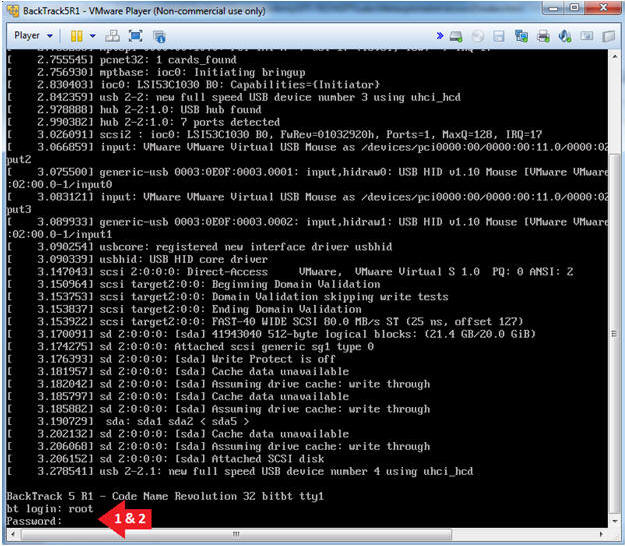
- Login to BackTrack
- Instructions:
- Login: root
- Password: toor or <whatever you changed it to>.
- Instructions:
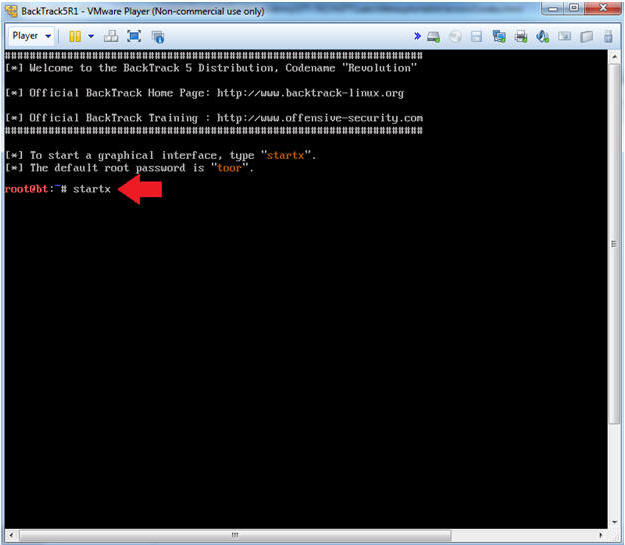
- Bring up the GNOME
- Instructions:
- Type startx
- Instructions:
| Section 6: Open Console Terminal and Retrieve IP Address |
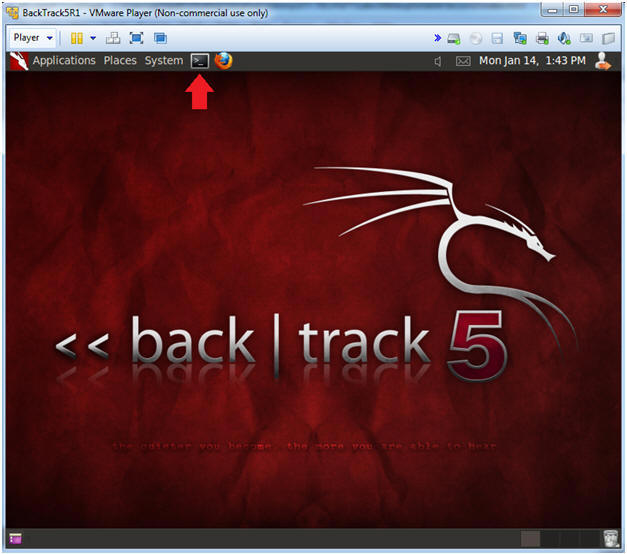
- On BackTrack, Start up a terminal window
- Instructions:
- Click on the Terminal Window
- Instructions:
- Obtain the IP Address
- Instructions:
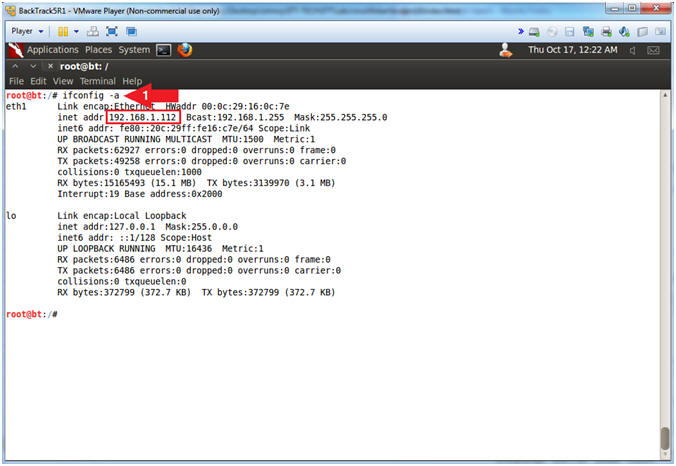
- ifconfig -a
- Note(FYI):
- My IP address 192.168.1.112.
- In your case, it will probably be different.
- This is the machine that will be use to attack the victim machine (Mutillidae).
- Instructions:
| Section 7: Open Mutillidae |
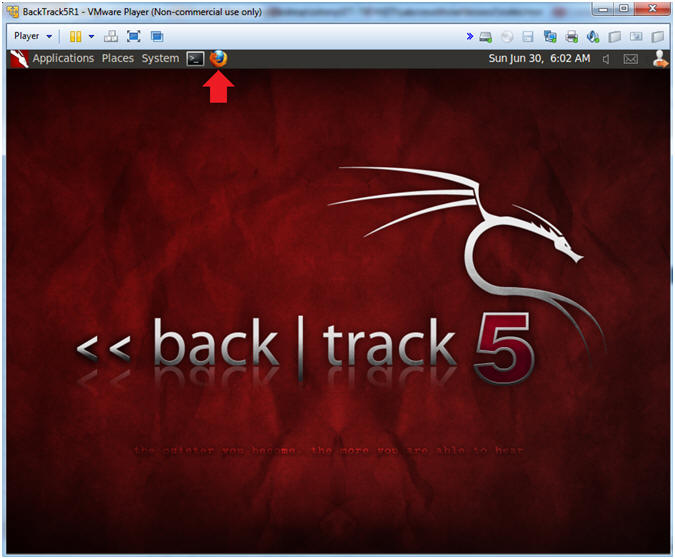
- On BackTrack, Open Firefox
- Instructions:
- Click on the Firefox Icon
- Notes (FYI):
- If FireFox Icon does not exist in the Menu Bar Tray, then go to Applications --> Internet --> Firefox Web Browser
- Instructions:
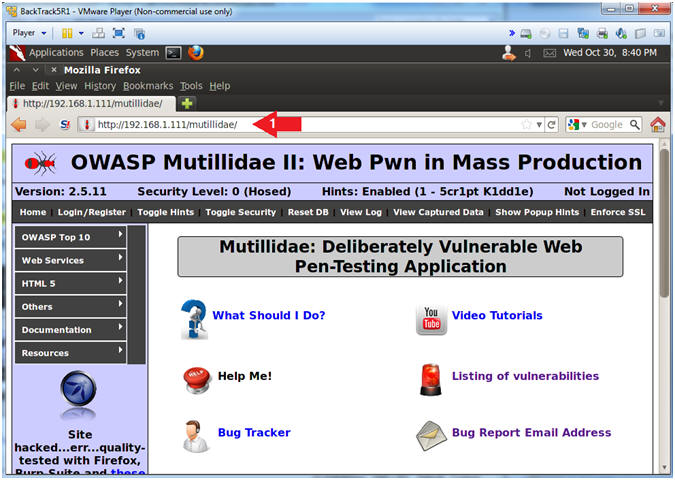
- Open Mutillidae
- Notes (FYI):
- Replace 192.168.1.111 in the following URL --> http://192.168.1.111/mutillidae, with your Mutillidae's IP Address obtained from (Section 3, Step 3)
- Instructions:
- Place the following URL in the Address
Bar
- http://192.168.1.111/mutillidae/
- Place the following URL in the Address
Bar
- Notes (FYI):
| Section 8: Use nikto.pl |
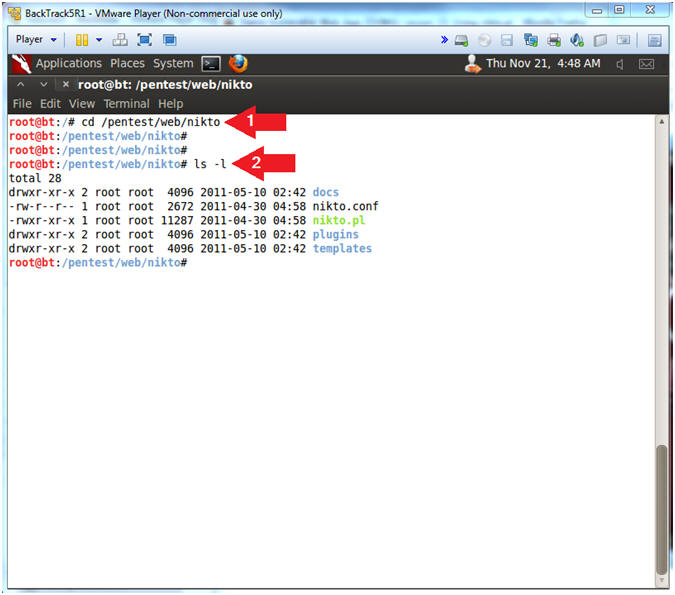
- Navigate to nikto.pl
- Instructions:
- cd /pentest/web/nikto
- ls -l
- Instructions:
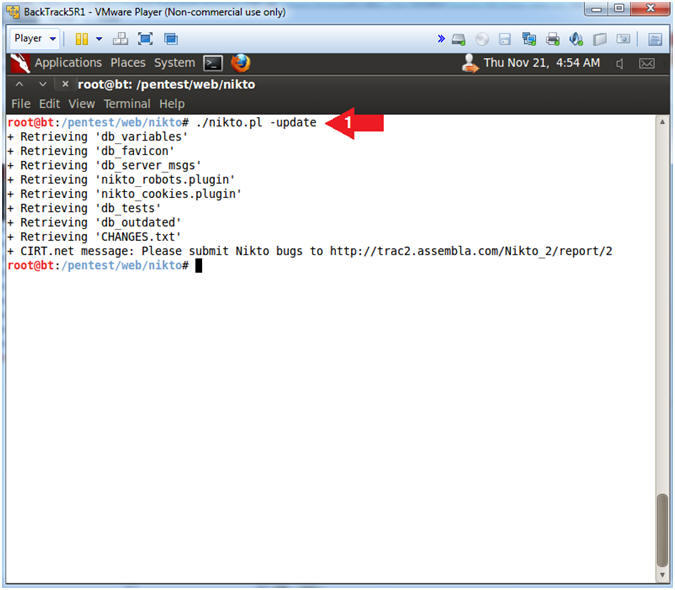
- Update nikto
- Instructions:
- ./nikto.pl -update
- Instructions:
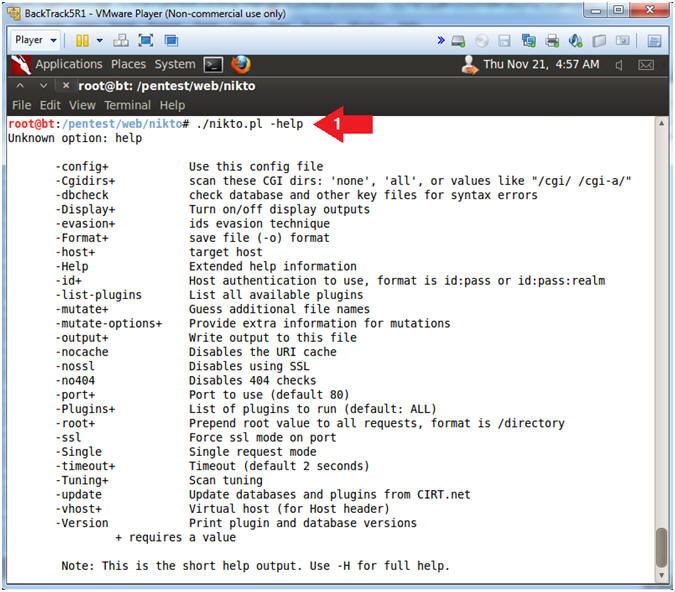
- Show Options
- Instructions:
- ./nikto.pl -help
- Instructions:
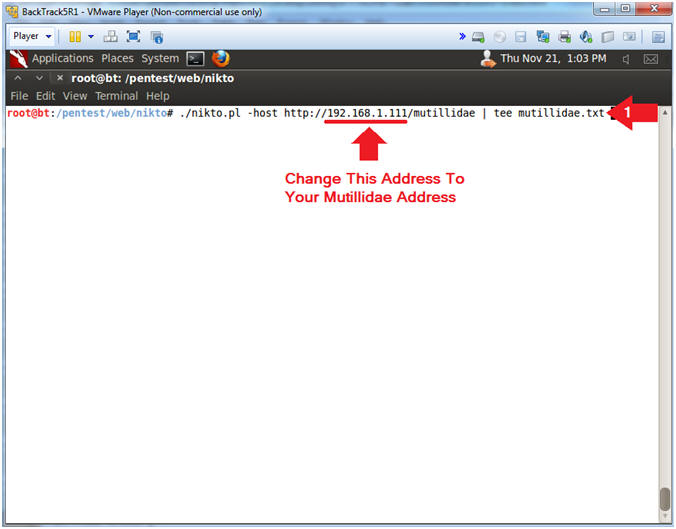
- Scan with nikto
- Note(FYI):
- Replace 192.168.1.111 with your mutilldae IP Address obtained from (Section 3, Step 3)
- Instructions:
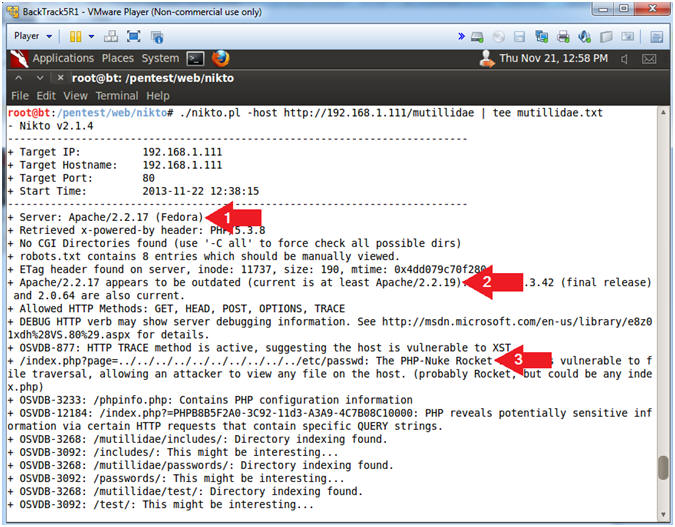
- ./nikto.pl -host http://192.168.1.111/mutillidae | tee mutillidae.txt
- Note(FYI):
- View nikto Scan Results
- Note(FYI):
- Right away Nikto identifies the Apache Web Server Version (2.2.17) and the Operating System (Fedora).
- In addition, Nikto indicates that the Apache Web Server is running an outdated version.
- Immediately, Nikto has uncovered a PHP-Nuke Vulnerability
- Note(FYI):
| Section 9: Allowed HTTP Methods: GET, HEAD, POST, OPTIONS, TRACE |
- Allowed HTTP Methods: GET, HEAD, POST, OPTIONS,
TRACE
- Note(FYI):
- Replace 192.168.1.111 with your mutilldae IP Address obtained from (Section 3, Step 3)
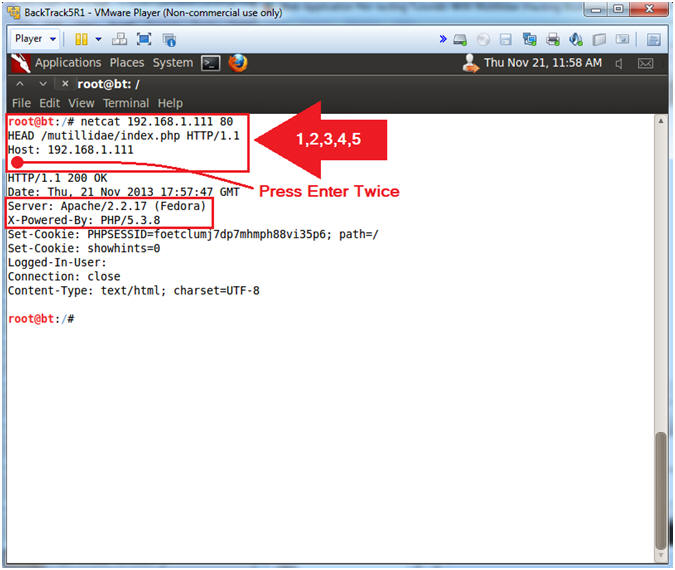
- Netcat is a computer networking service for reading from and writing to network connections using TCP or UDP.
- The HEAD method is identical to GET except that the server MUST NOT return a message-body in the response. This method is often used for testing hypertext links for validity, accessibility, and recent modification.
- Instructions:
- netcat 192.168.1.111 80
- HEAD /mutillidae/index.php HTTP/1.1
- Host: 192.168.1.111
- <Press Enter>
- <Press Enter>
- Note(FYI):
| Section 10: Allowed PHP-Nuke Rocket Vulnerability |
- Test PHP-Nuke Rocket Vulnerability
- Note(FYI):
- Replace 192.168.1.111 with your mutilldae IP Address obtained from (Section 3, Step 3)
- This attack is call a local file inclusion attack that can execute code -OR- in this case to view a sensitive file (e.g., /etc/passwd).
- Instructions:
- Place the following URL in the address
box
- http://192.168.1.111/mutillidae/index.php?page=../../../../../../../../../../etc/passwd
- Place the following URL in the address
box

- Note(FYI):
| Section 11: OSVBD-3233: /phpinfo.php: Contains PHP configuration information |
- OSVDB-3233: /phpinfo.php: Contains PHP
configuration information
- Note(FYI):
- Replace 192.168.1.111 with your mutilldae IP Address obtained from (Section 3, Step 3)
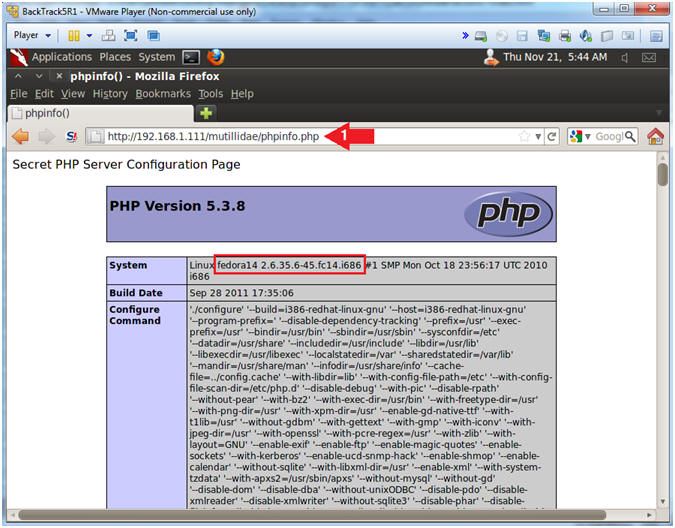
- While there is no known vulnerability or exploit associated with this, default files often reveal sensitive information or contain unknown or undisclosed vulnerabilities. The presence of such files may also reveal information about the web server version or operating system (e.g., fedora 14).
- Read More
- Instructions:
- Place the following URL in the address
box
- http://192.168.1.111/mutillidae/phpinfo.php
- Place the following URL in the address
box
- Note(FYI):
| Section 12: OSVBD-3092: Multiple Web Server Interesting Web Document Found |
- OSVDB-3092: /includes/
- Note(FYI):
- Replace 192.168.1.111 with your mutilldae IP Address obtained from (Section 3, Step 3)
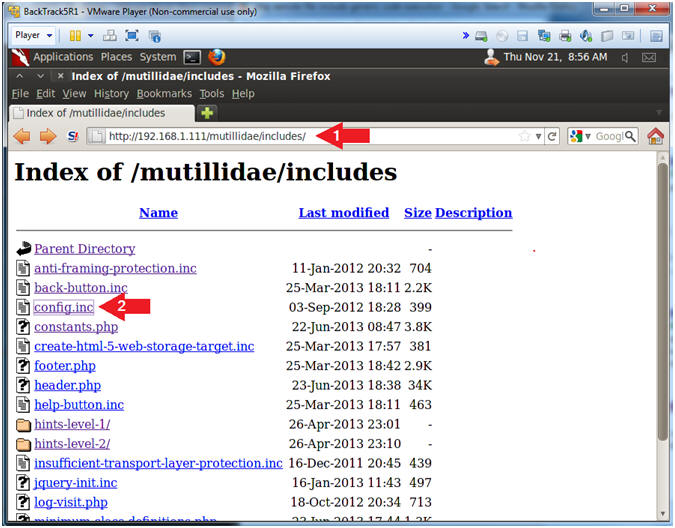
- A potentially interesting configuration directory was found on the web server. While there is no known vulnerability or exploit associated with this, it may contain sensitive information (i.e., authentication) which can be disclosed to unauthenticated remote users, or aid in more focused attacks.
- Read More
- Instructions:
- Place the following URL in the address
box
- http://192.168.1.111/mutillidae/includes/
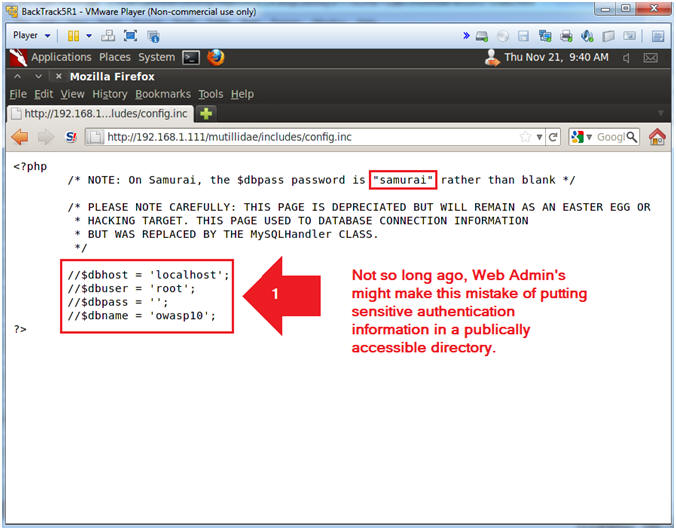
- Click the config.inc
- Place the following URL in the address
box
- Note(FYI):
- OSVDB-3092 Results
- Note(FYI):
- In the old days (i.e., Last 10 Years), Web Administrators would commonly make a mistake of placing sensitive authentication/connection information in include files, which were publically accessible.
- Image an automated Internet Bot that does nothing but search the web for include files!!!
- Note(FYI):
| Section 13: OSVDB-3268: Directory Indexing |
- OSVDB-3268: Directory Indexing
- Note(FYI):
- Replace 192.168.1.111 with your mutilldae IP Address obtained from (Section 3, Step 3)
- Directory indexing has been found to be enabled on the web server. While there is might not be vulnerability or exploit associated with this, it may reveal sensitive or "hidden" files or directories to remote users, or aid in more focused attacks. (e.g., a test file full of password information).
- Read More
- Instructions:
- Place the following URL in the address
box
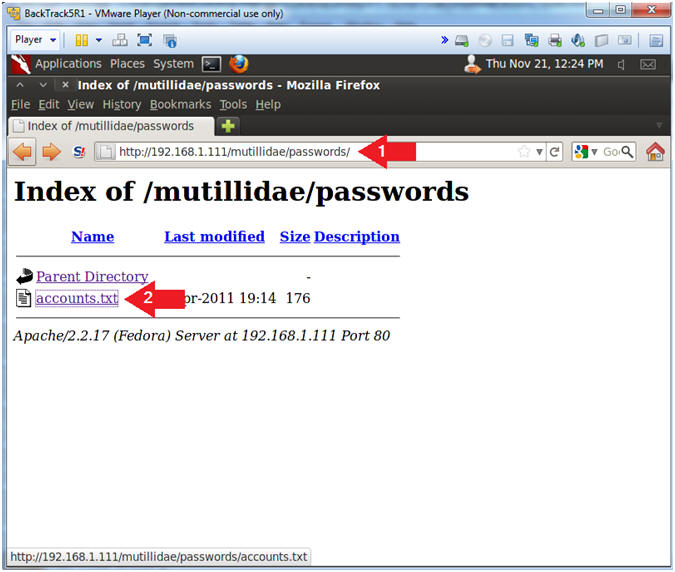
- http://192.168.1.111/mutillidae/passwords/
- Click the accounts.txt
- Place the following URL in the address
box
- Note(FYI):
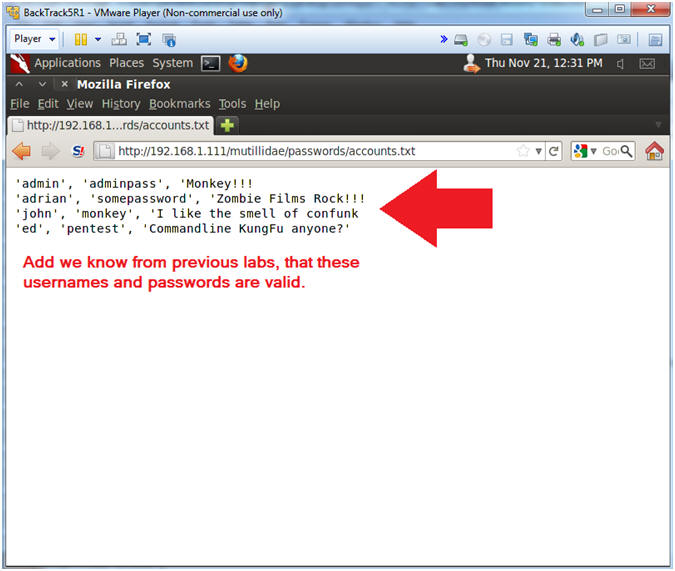
- OSVDB-3268: Directory Indexing Results
- Note(FYI):
- So, we know the author intentionally included this.
- But, this is a typical accident that might occur for many innocent reasons. (e.g., development).
- How about people's credit card (SOX) or Health Information (HIPAA) being exposed by accident.
- Note(FYI):
| Section 14: Proof of Lab |
- On BackTrack, Start up a terminal window
- Instructions:
- Click on the Terminal Window
- Instructions:
- Proof of Lab, (On a BackTrack Terminal)
- Instructions:
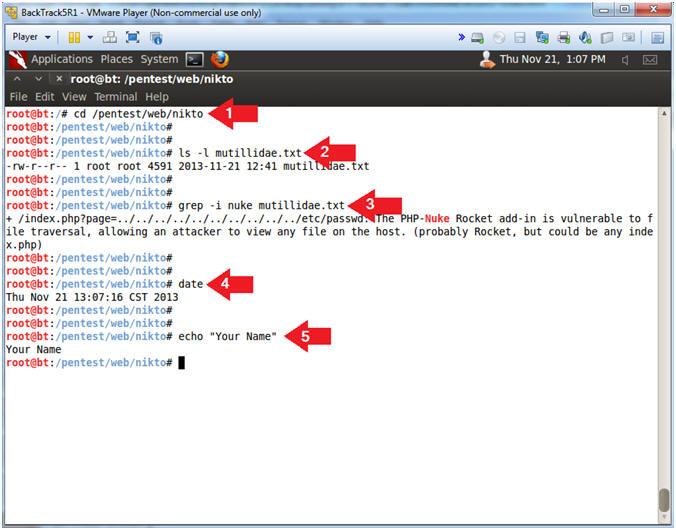
- cd /pentest/web/nikto
- ls -l mutillidae.txt
- grep -i nuke mutillidae.txt
- date
- echo "Your Name"
- Replace the string "Your Name" with your actual name.
- e.g., echo "John Gray"
-
Proof of Lab Instructions
- Press both the <Ctrl> and <Alt> keys at the same time.
- Do a <PrtScn>
- Paste into a word document
- Upload to Moodle
-
- Instructions: