(Helix:
Lesson 4)
{ Dump Window's Physical
Memory Using NetCat to BackTrack }
|
Section 0. Background
Information |
- Helix3 is a Live CD built on top of Ubuntu. It
focuses on incident response and computer forensics. According to Helix3
Support Forum, e-fense is no longer planning on updating the free version of
Helix.
- Pre-Requisite Lesson
-
Lab Notes
- In this lab we will do the following:
- Download Helix2008R1.iso
- Start Netcat Listener on BackTrack
- Open Notepad, Solitaire and Internet
Explorer
- Acquired a physical memory dump from
Damn Vulnerable WXP-SP2 using Helix.
- Use a Netcat Listener on BackTrack to Capture the Helix
Memory Dump
- Next Lesson
- Legal Disclaimer
- As a condition of your use of this Web
site, you warrant to computersecuritystudent.com that you will not use
this Web site for any purpose that is unlawful or
that is prohibited by these terms, conditions, and notices.
- In accordance with UCC § 2-316, this
product is provided with "no warranties, either express or implied." The
information contained is provided "as-is", with "no guarantee of
merchantability."
- In addition, this is a teaching website
that does not condone malicious behavior of
any kind.
- Your are on notice, that continuing
and/or using this lab outside your "own" test environment
is considered malicious and is against the law.
- © 2012 No content replication of any
kind is allowed without express written permission.
|
Section 1:
Download Helix |
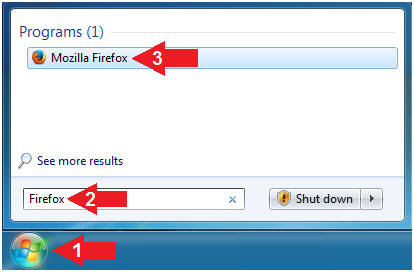
- Open Firefox on your (Host
Windows Machine).
- Instructions:
- Click the Start Button
- Type "Firefox"
in the search box
- Click on Mozilla Firefox
- Download Helix2008R1.iso
- Instructions:
- Navigate to the following Link
- http://helix.onofri.org/Helix2008R1.iso
- Click the Save File radio button
- Click the OK button
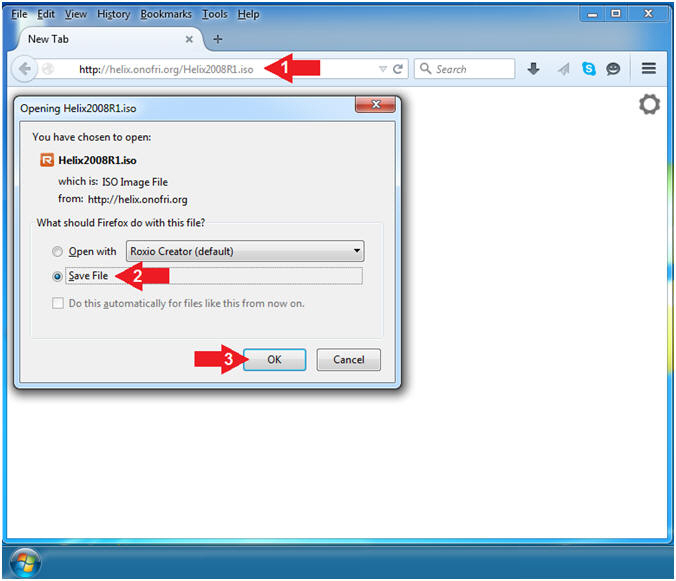
- Save Helix2008R1.iso
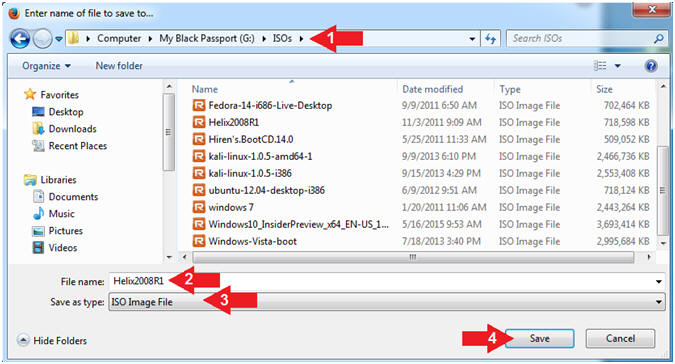
- Instructions:
- Navigate the following Download
Location
- C:\ISOs
or USB:\ISOs
- Note:
In my case, I am using a USB Drive (G:)
- File name: Helix2008R1
- Save as types: ISO Image File
- Click the Save button
|
Section 2: Start Up
BackTrack Machine |
- Open VMware Player on your (Host
Windows Machine).
- Instructions:
- Click the Start Button
- Type "vmware player" in the search box
- Click on VMware Player

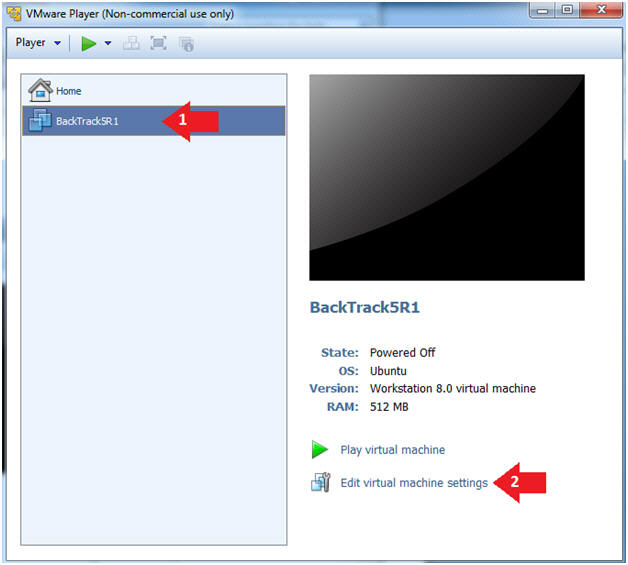
- Edit the BackTrack5R1 VM
- Instructions:
- Select BackTrack5R1 VM
- Click Edit virtual machine settings
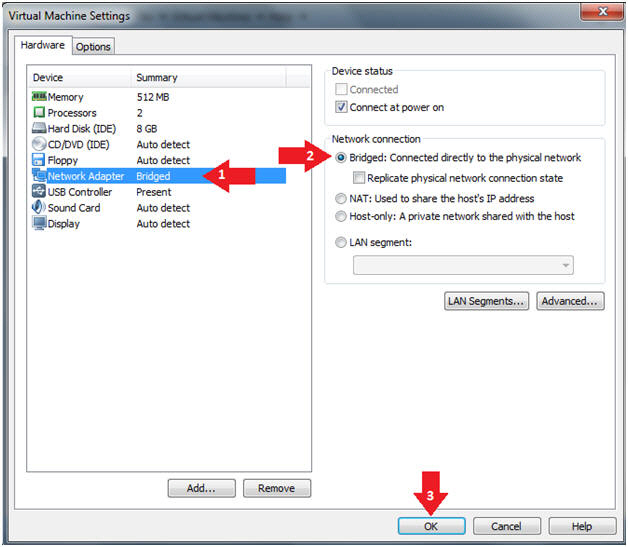
- Edit Virtual Machine Settings
- Instructions:
- Click on Network Adapter
- Click on the Bridged Radio button
- Click on the OK Button
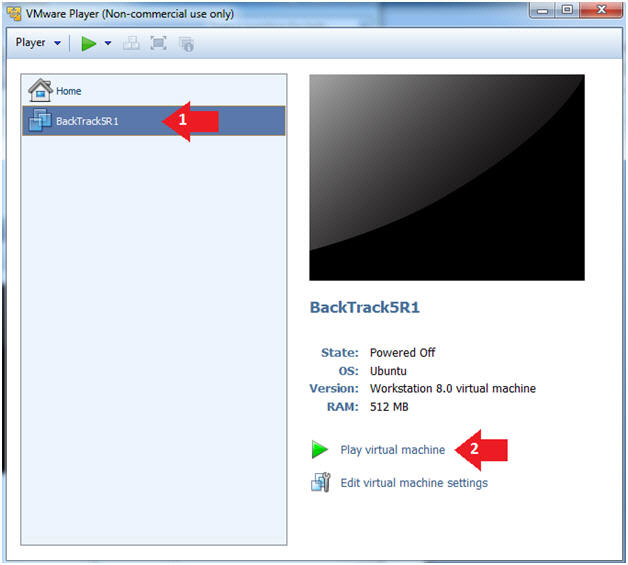
- Play the BackTrack5R1 VM
- Instructions:
- Click on the BackTrack5R1 VM
- Click on Play virtual machine
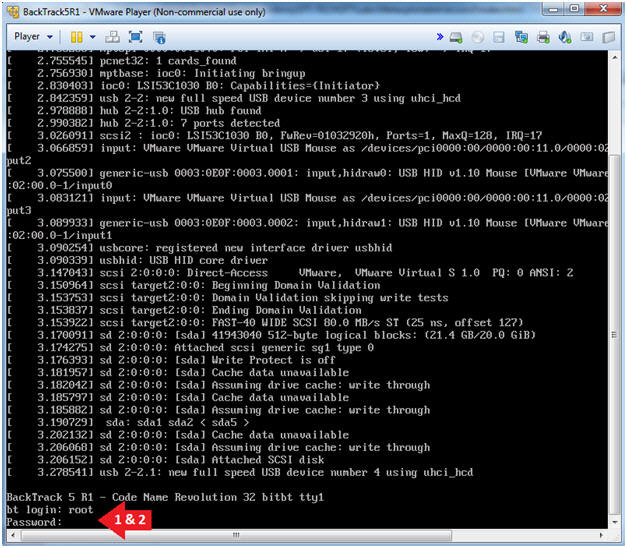
- Login to BackTrack
- Instructions:
- Login: root
- Password: toor or <whatever you changed
it to>.
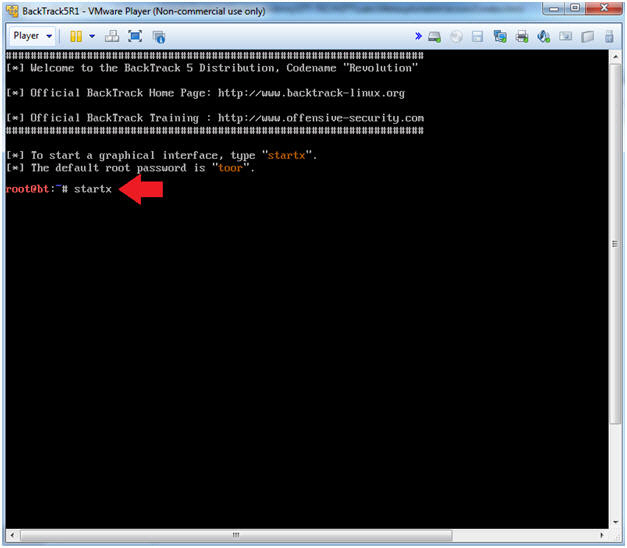
- Bring up the GNOME
- Instructions:
- Type startx
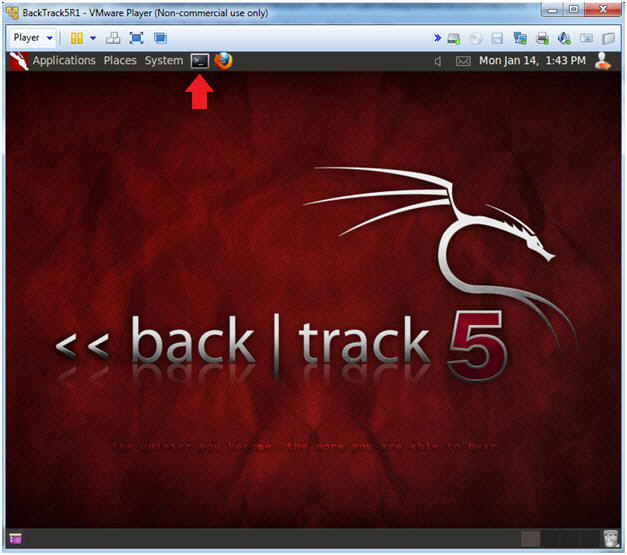
- Start up a terminal window
- Instructions:
- Click on the Terminal Window
- Obtain the IP Address
- Instructions:
- ifconfig -a
- Note(FYI):
- My IP address
192.168.1.112.
- In your case, it will probably be
different.
- This is the machine that will be use to
attack the victim machine (Metasploitable).

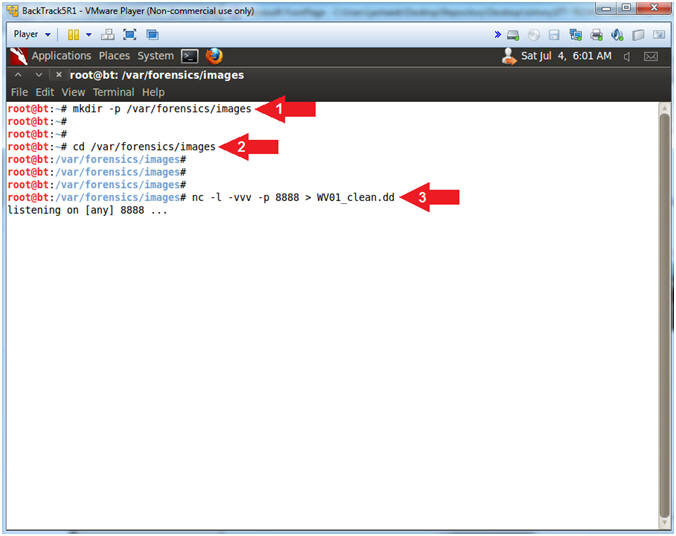
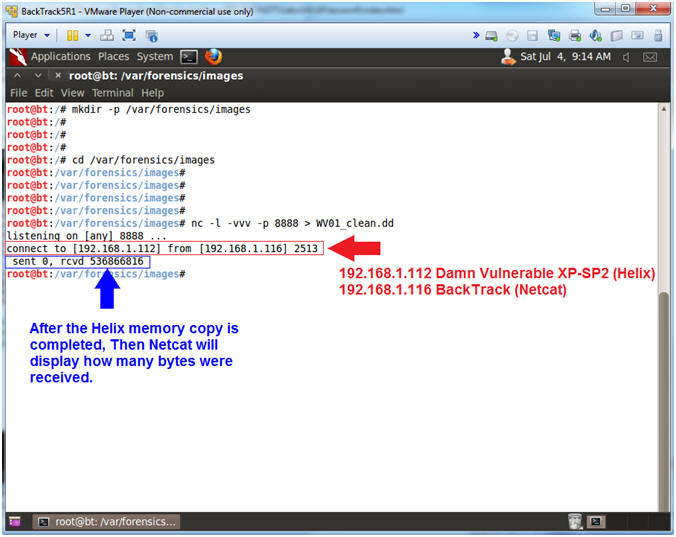
- Start Up Netcat on BackTrack
- Instructions:
- mkdir -p /var/forensics/images
- If you have already Completed
Autopsy Lesson 1, then this directory should already exist.
- cd /var/forensics/images
- nc -l -vvv -p 8888 > WV01_clean.dd
- Netcat will listen for Helix to
send the Memory Image.
|
Section 3: Start Up
Damn Vulnerable WXP-SP2 |
- Open VMware Player on your (Host
Windows Machine).
- Instructions:
- Click the Start Button
- Type "vmware player" in the search box
- Click on VMware Player
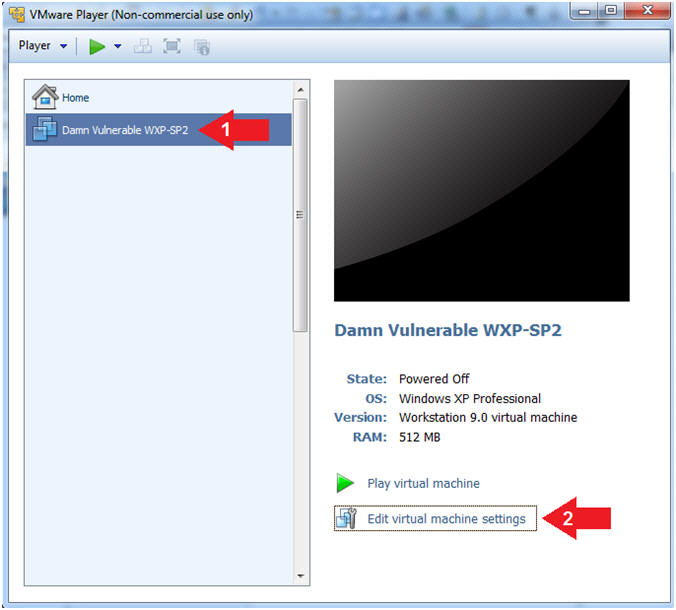
- Edit Virtual Machine Settings
- Instructions:
- Click on Damn Vulnerable WXP-SP2
- Edit Virtual Machine Settings
- Note:
- Before beginning a lesson it is
necessary to check the following VM settings.
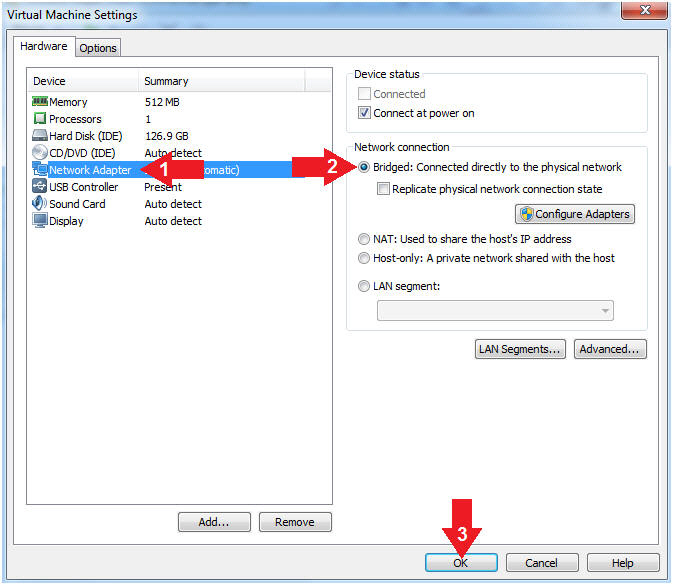
- Set Network Adapter
- Instructions:
- Click on Network Adapter
- Click on the radio button "Bridged:
Connected directly to the physical network".
- Click the OK Button
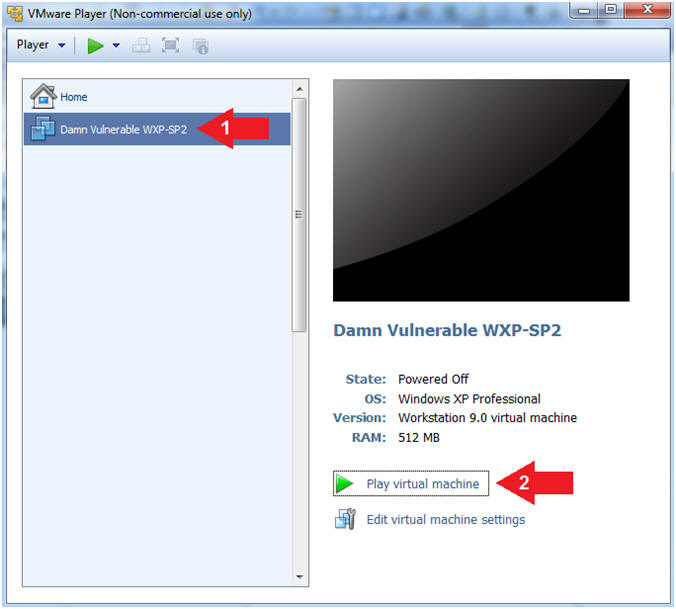
- Start Up Damn Vulnerable WXP-SP2.
- Instructions:
- Start Up your VMware Player
- Play virtual machine
- Logging into Damn Vulnerable WXP-SP2.
- Instructions:
- Click on Administrator
- Password: Supply Password
- Press <Enter> or Click the Arrow
- Note(FYI):
- Password was created in (Lab
1, Section 1, Step 8)
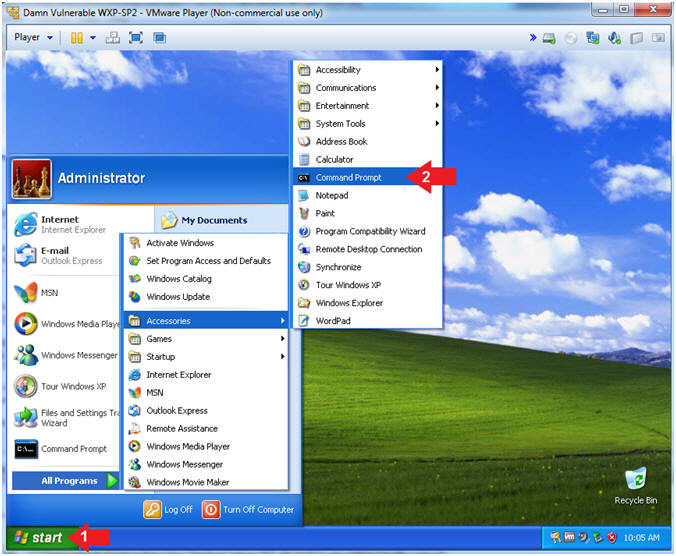
- Open the Command Prompt
- Instructions:
- Click the Start Button
- All Programs --> Accessories -->
Command Prompt
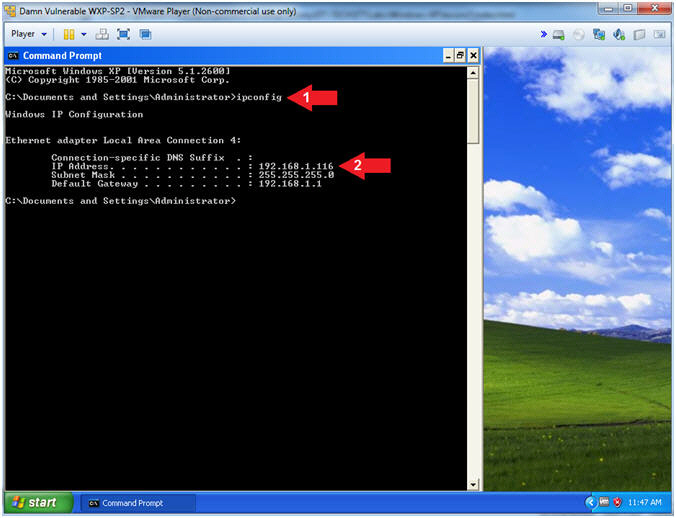
- Obtain Damn Vulnerable WXP-SP2's IP Address
- Instructions:
- ipconfig
- Record Your IP Address
- Note(FYI):
- In my case, Damn Vulnerable WXP-SP2's
IP Address 192.168.1.116.
- This is the IP Address of the
Virtual
Machine from which we will use Helix to capture a memory
dump.
- Do not close the command prompt.
-
|
Section 4: Start Up
Notepad, Command Prompt, Solitaire & Internet Explorer |
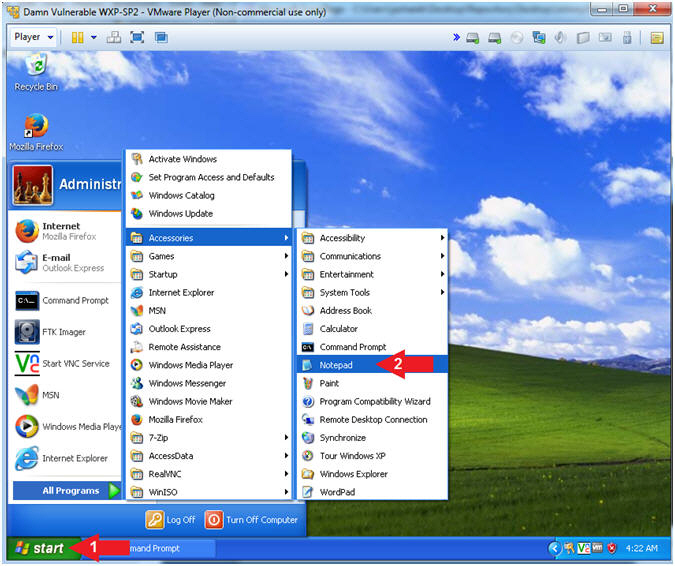
- Start Up NotePad
- Instructions:
- Click the Start Button
- All Programs --> Accessories
--> Notepad
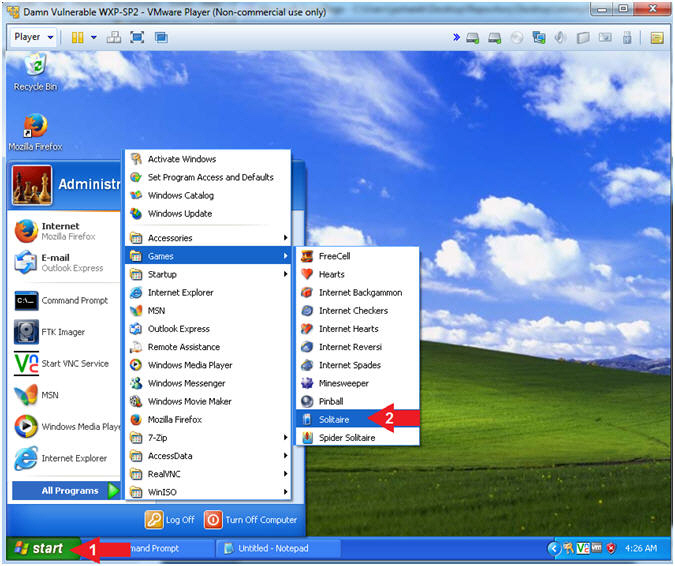
- Start Up Solitaire
- Instructions:
- Click the Start Button
- All Programs --> Games -->
Solitaire
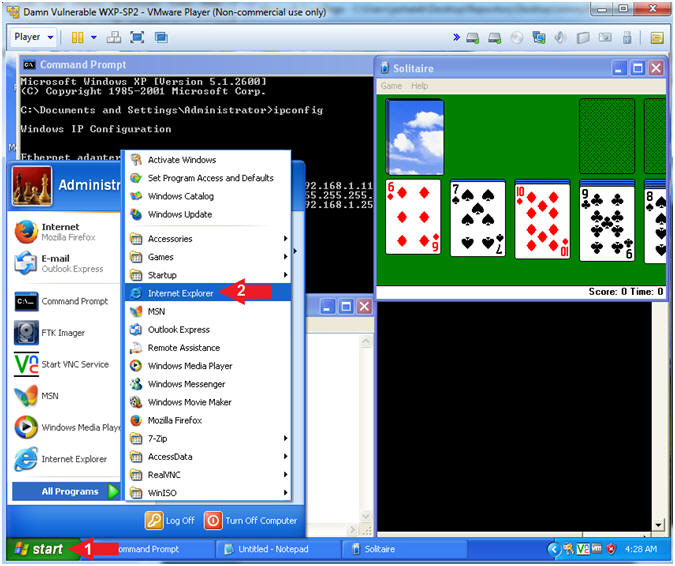
- Start Up Internet Explorer
- Instructions:
- Click the Start Button
- All Programs --> Internet Explorer
- Navigate to http://www.cnn.com
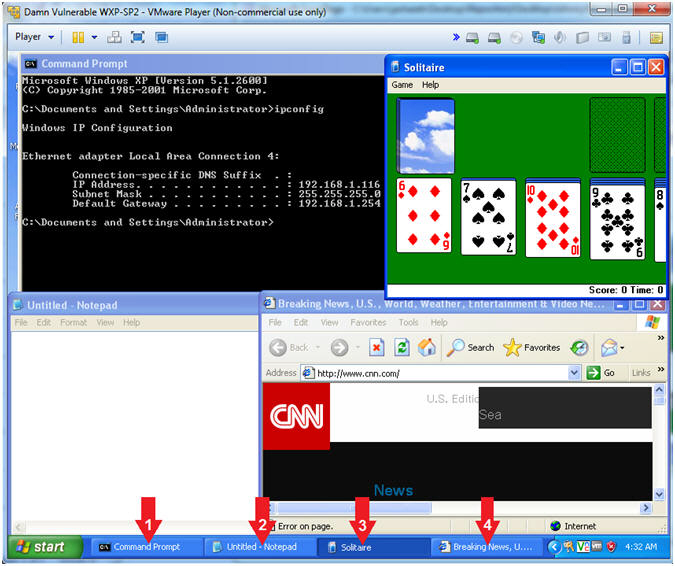
- Verifying Applications
- Note(FYI):
- The following applications should be
running:
- Command Prompt
- Notepad
- Solitaire
- Internet Explorer
|
Section 5: Loading Helix2008R1 |
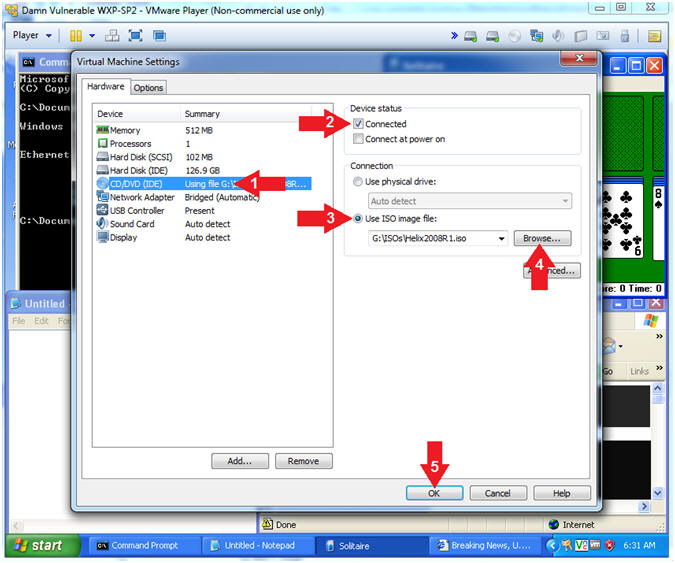
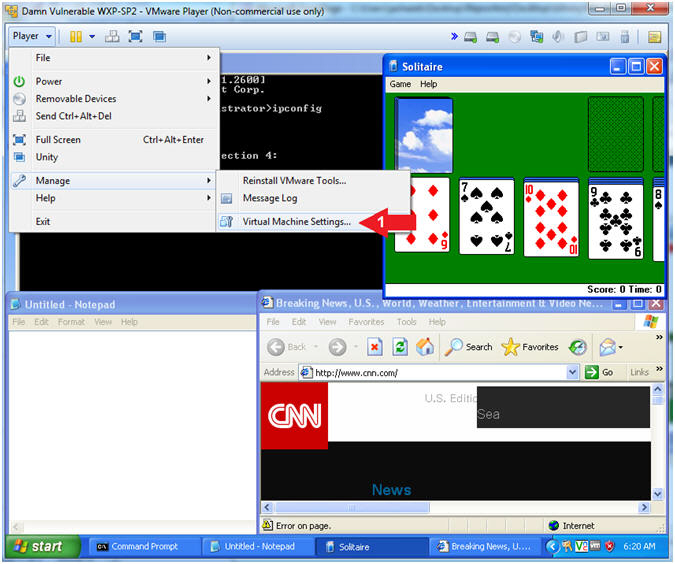
- Edit Virtual Machine Settings
- Instructions:
- Player --> Manage --> Virtual Machine
Settings...
- Configure Windows to load the Helix iso as a
CD/DVD
- Instructions:
- Select CD/DVD (IDE)
- Device status: Check Connected
- Select the Use ISO image file
- Browse to where you saved the Helix
iso.
- Note: In my case, I save it in the
following location:
- G:\ISOs\Helix2008R1.iso
- Click the OK Button
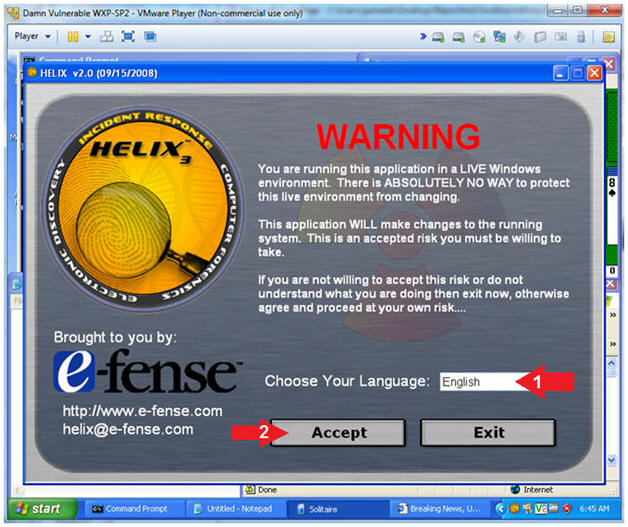
- Choose Language
- Command:
- Select English or desired language
- Click the Accept Button
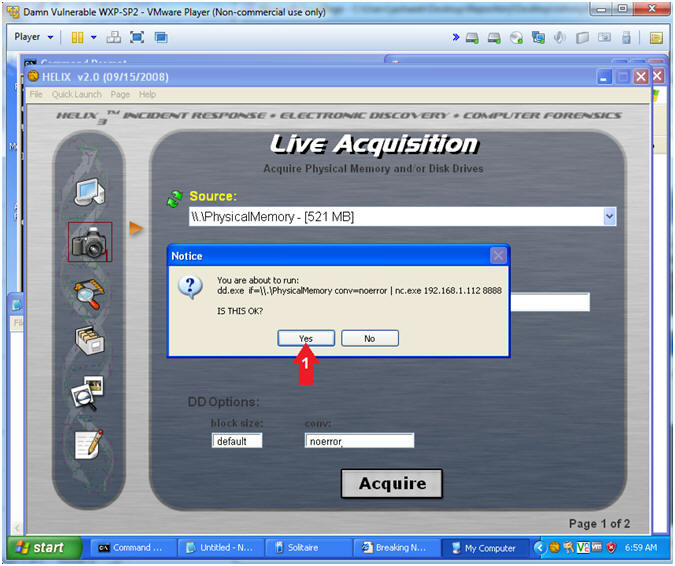
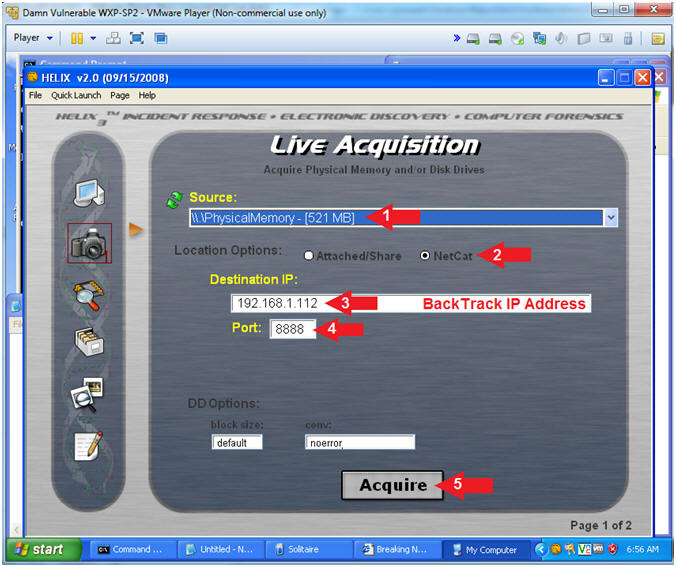
- Acquire Live Image (Part 1)
- Instructions:
- Click on the Camera

- Acquire Live Image (Part 2)
- Instructions:
- Source: Select Physical Memory
- Location Options: Select NetCat
- Destination IP:
- Replace
192.168.1.112 with the BackTrack IP Address you
obtained in (Section 2, Step 8).
- Port: 8888
- Click the Acquire Button
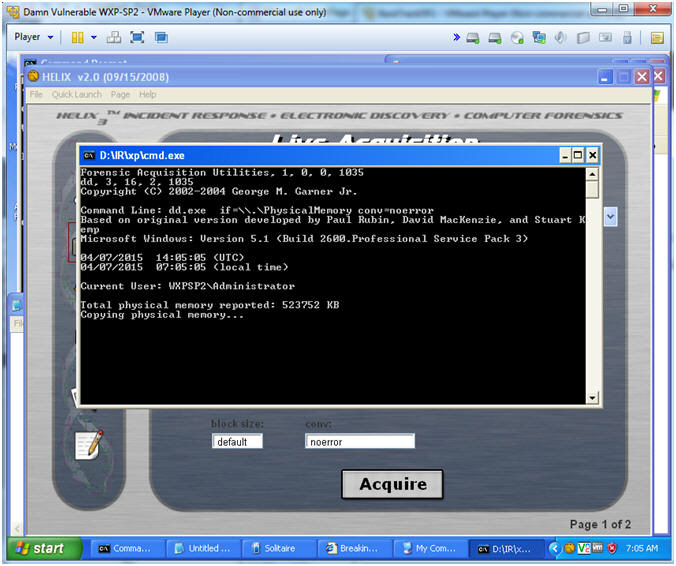
- Acquire Live Image (Part 3)
- Acquire Live Image (Part 4)
- Note(FYI):
- You will see a message that physical
memory is being copied.
- The Black Screen is close once the copy
process if finished.
|
Section 5: Verify
Image was copied to BackTrack |
- Explaining NetCat Messages
- Notes(FYI):
- The Red Arrow points to the message
that occurs when the Helix Application connects to BackTrack's Netcat
Listener.
- The Blue Arrow points to BackTrack's
NetCat Session that display how many bytes were received from
Helix's Memory Dump.
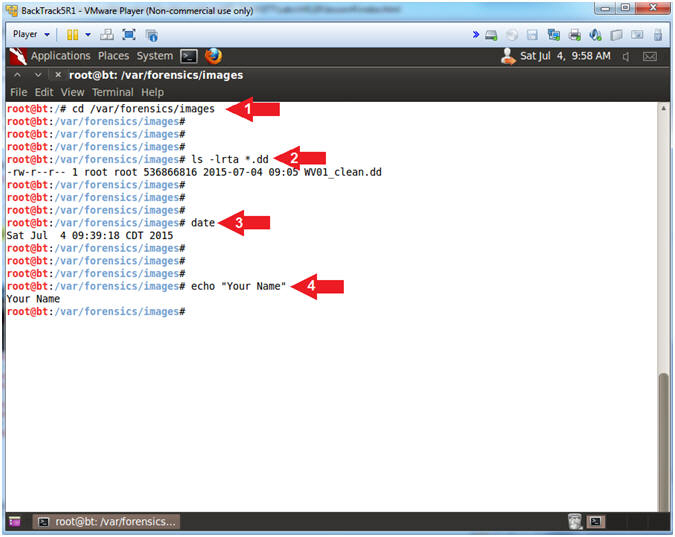
- Proof of Lab
- Instructions:
- cd /var/forensics/images
- ls -l *.dd
- date
- echo "Your Name"
-
Proof of Lab Instructions
- Press the <Ctrl> and <Alt> key at the
same time.
- Press the <PrtScn> key.
- Paste into a word document
- Upload to Moodle
|
 
|